

A finished page can still need a few small changes. Service descriptions may use different text colors, or an imported section may bring spacing that doesn’t fit the layout. Finding the right settings can take longer than fixing them.
The Divi 5 Inspector connects that overview to the settings you can save. Review a repeated color, choose the part of the page it should affect, and edit its matching uses from the same panel. Content and preset assignments sit alongside those styles, keeping the audit close to the correction.
We’ll use an architecture studio page to explore four workflows: auditing styles, making contextual bulk edits, managing presets, and reviewing content. Its numbered service rows give us repeated settings to compare while the large project image provides a separate content check.
- 1 What Makes The Divi 5 Inspector Useful?
- 2 Divi Inspector And Chrome Inspector: Both Inspect And Edit
- 3 Start With A Page-Level Style Audit
- 4 Make Contextual Bulk Edits Without Losing The Design
- 5 Manage Module And Option Group Presets
- 6 Audit And Edit Content In The Same Panel
- 7 Avoid Three Common Inspector Mistakes
- 8 A Faster Way To Refine A Finished Page
What Makes The Divi 5 Inspector Useful?
The Inspector lets you approach a design through the values it uses. Click the Inspector icon in the Visual Builder‘s left sidebar to open the panel. Use Styles to review design values and Content to inspect copy and media. Preset information appears when the inspected elements use presets, so the available information depends on the selected scope.
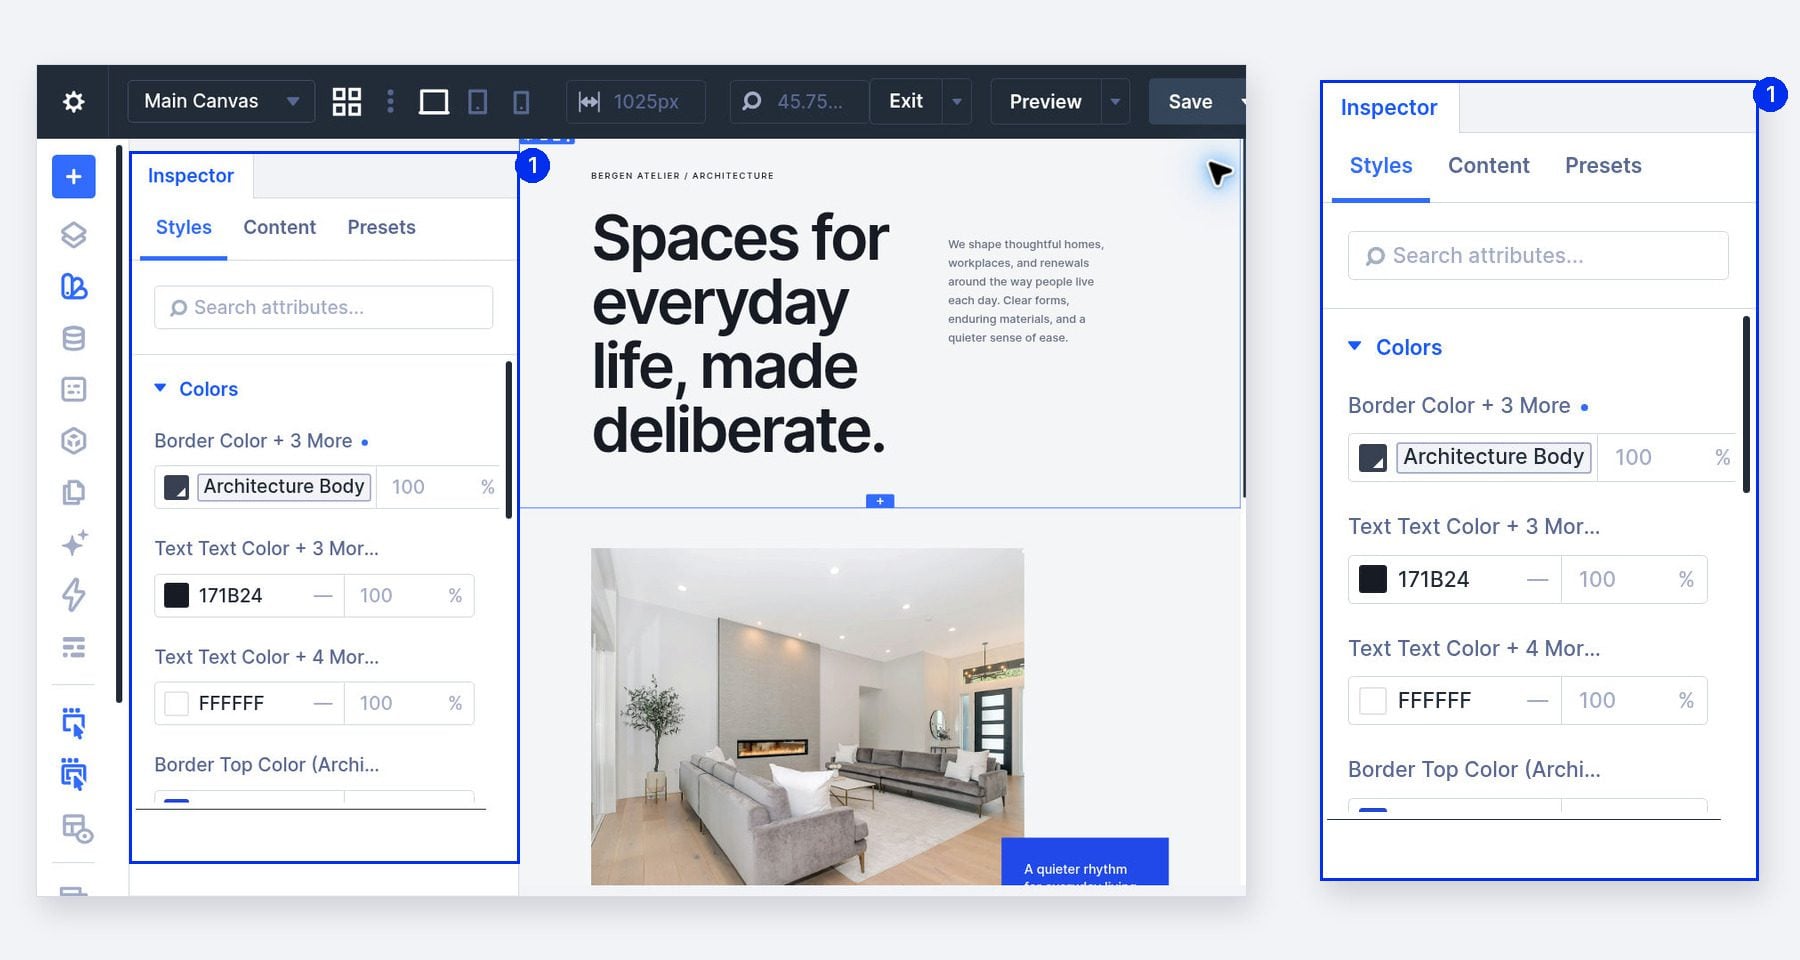
Our services section contains three horizontal rows with separate description modules and matching service links. We can inspect the parent section to bring those children’s settings together, then correct a repeated value without opening each module in turn.
Keep the Inspector docked as you move between sections, rows, columns, and the page. You can review the next part of the layout without closing the panel. The same view supports the audit and the correction.
Divi Inspector And Chrome Inspector: Both Inspect And Edit
Chrome’s DevTools lets you inspect rendered elements, examine CSS rules, and edit those rules to test a change. A selector can match several elements, so one CSS edit can affect several descriptions at once. Both inspectors support editing; their connection to the design is different.
Divi’s Inspector works with the builder’s elements and their saved attributes. A repeated color leads to an editable Divi field, and a preset assignment leads to a reusable Divi style. You can work through a design correction without translating a browser experiment into module settings afterward.
Ordinary live DevTools changes generally disappear on reload, although Local Overrides and Workspaces support persistence or local source editing. Save your Divi changes through the builder to keep them on the website. Chrome remains useful for investigating the cascade and browser behavior; the Divi Inspector gives everyday design refinements a direct route back to the builder.
Start With A Page-Level Style Audit
Start with a page-level style audit before focusing on individual elements. Open Page Menu and choose Page Settings, then open the Inspector and select Styles. This returns the inspection to the whole page. Its groups include colors, numbers, fonts, and weights, depending on the values used in the layout.
The architecture layout uses near-white surfaces, dark text, and cobalt accents. Expand Colors and compare the listed values with that palette. Look for a color you cannot explain from the design before deciding to replace it.
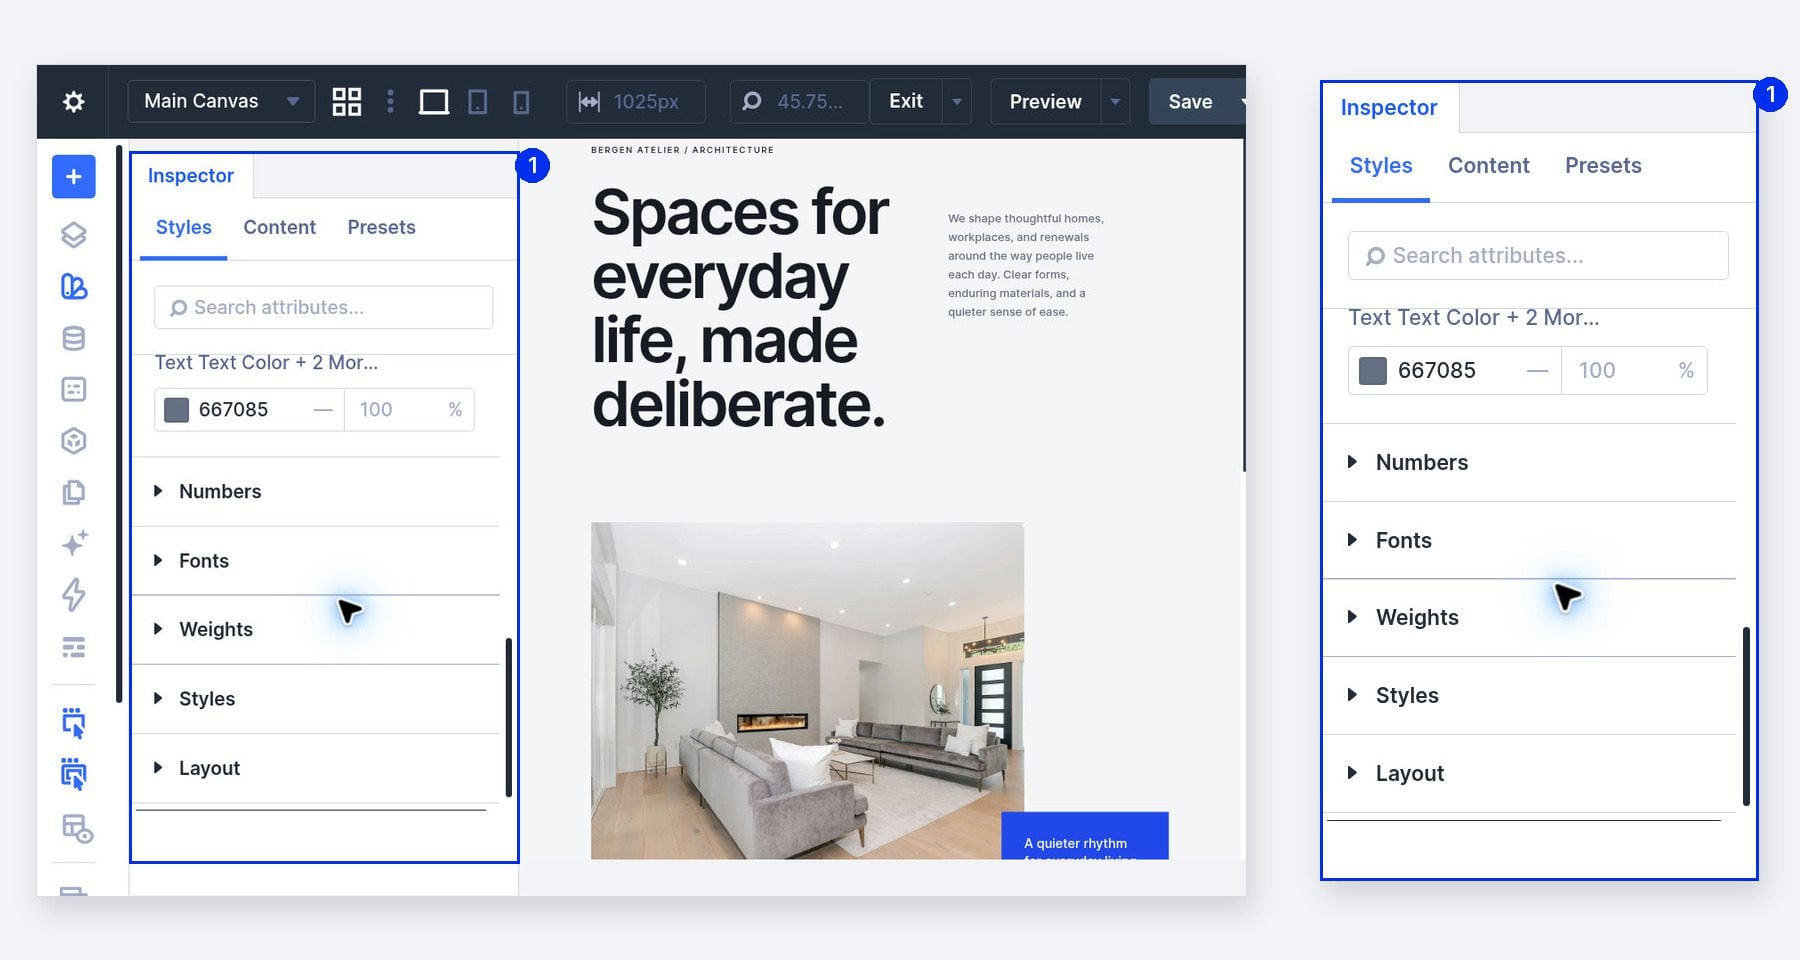
Several near-identical grays can reveal inconsistencies in a layout. Distinct colors remain distinct entries, even when they look similar enough that you decide to replace them with one color. The Inspector groups matching values; you choose which differences to keep.
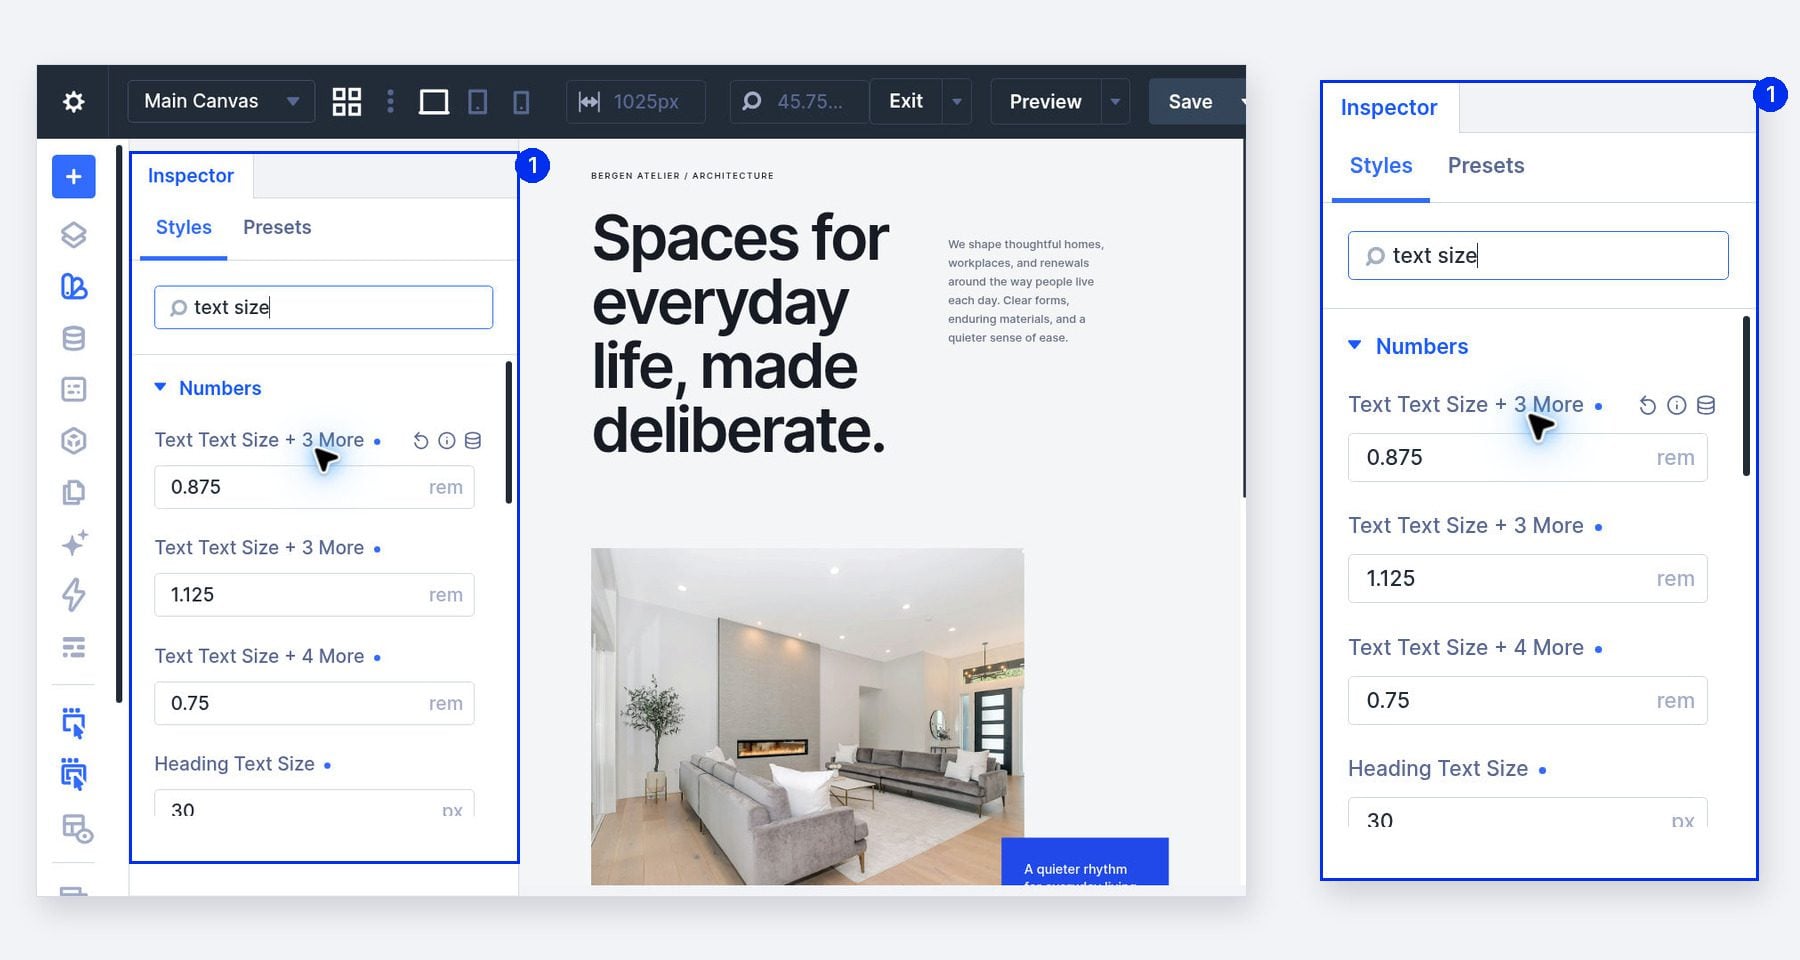
Expand Numbers to review sizes and spacing, using Search attributes… to narrow the list when needed. Read each field label and unit before editing: a repeated number can belong to different kinds of settings. Heading sizes establish hierarchy, while padding gives content room. Keep the differences that serve those purposes.
Make Contextual Bulk Edits Without Losing The Design
Once you’ve found a problem, choose the scope that matches the correction. A page-level edit is useful for a page-wide cleanup. A section-level edit is useful when the same value needs a different treatment in one part of the design.
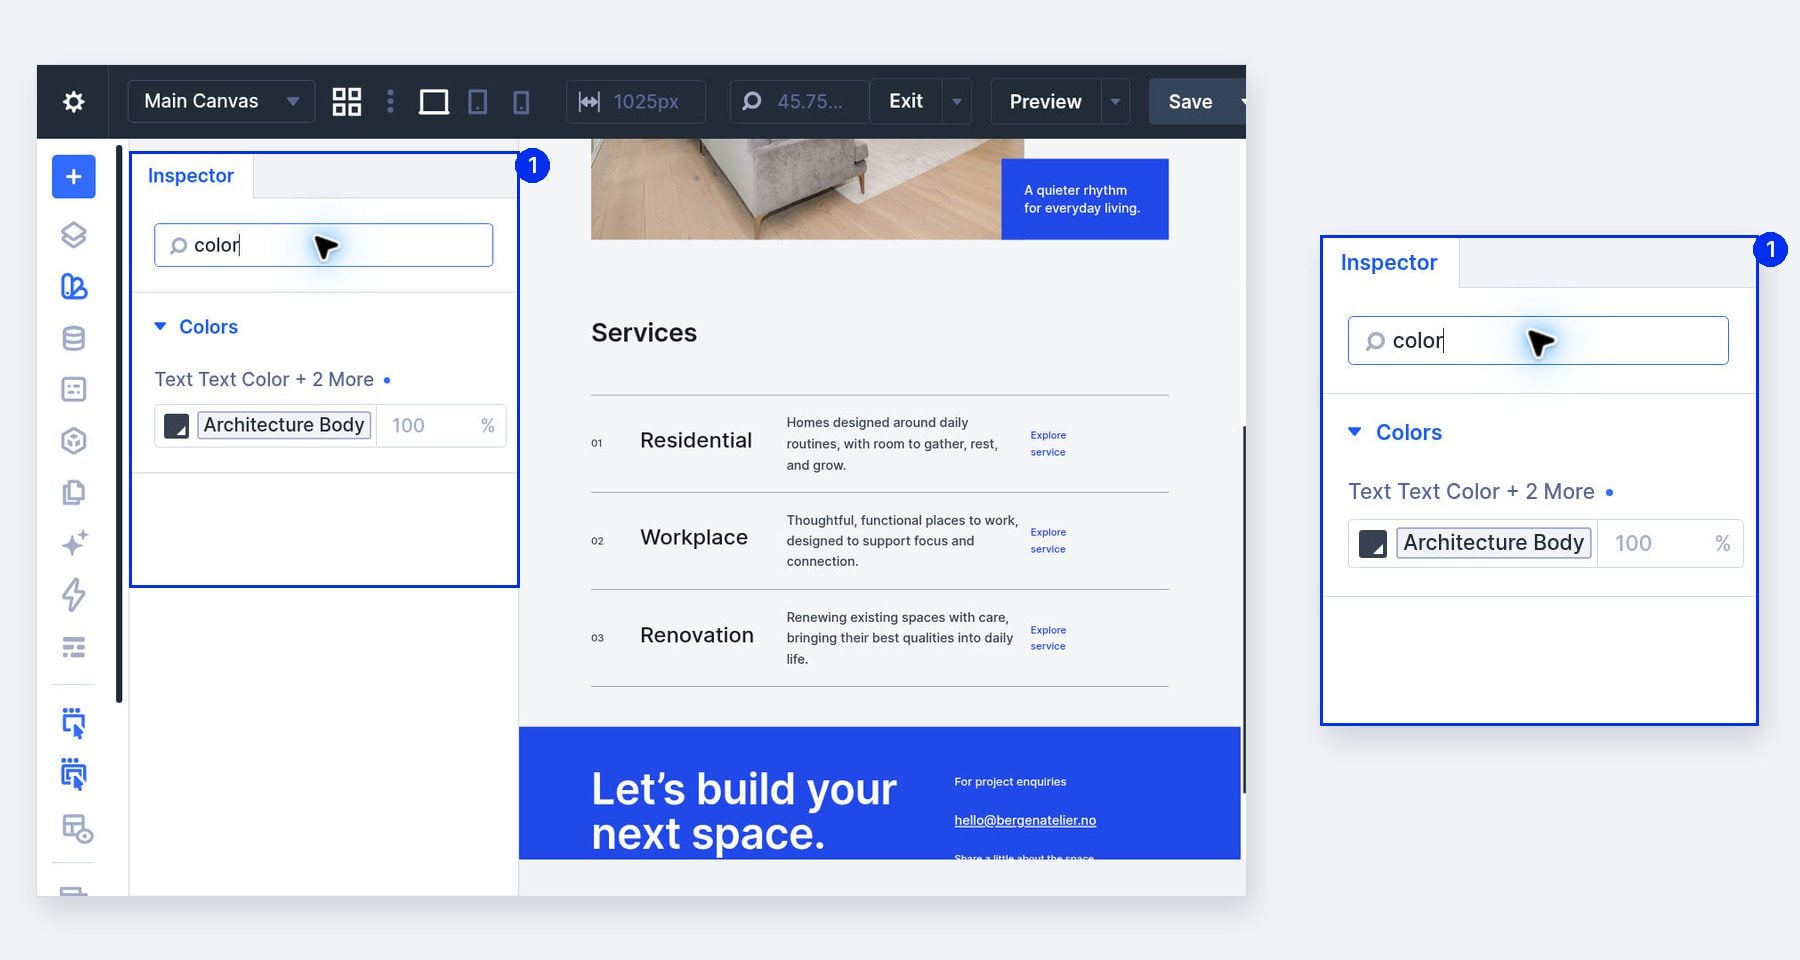
Open Layers and double-click the Services section to open its settings. Keep the Inspector visible and check that it now reflects this section and its children. Our three description modules belong to that scope; the introductory text and closing contact section do not.
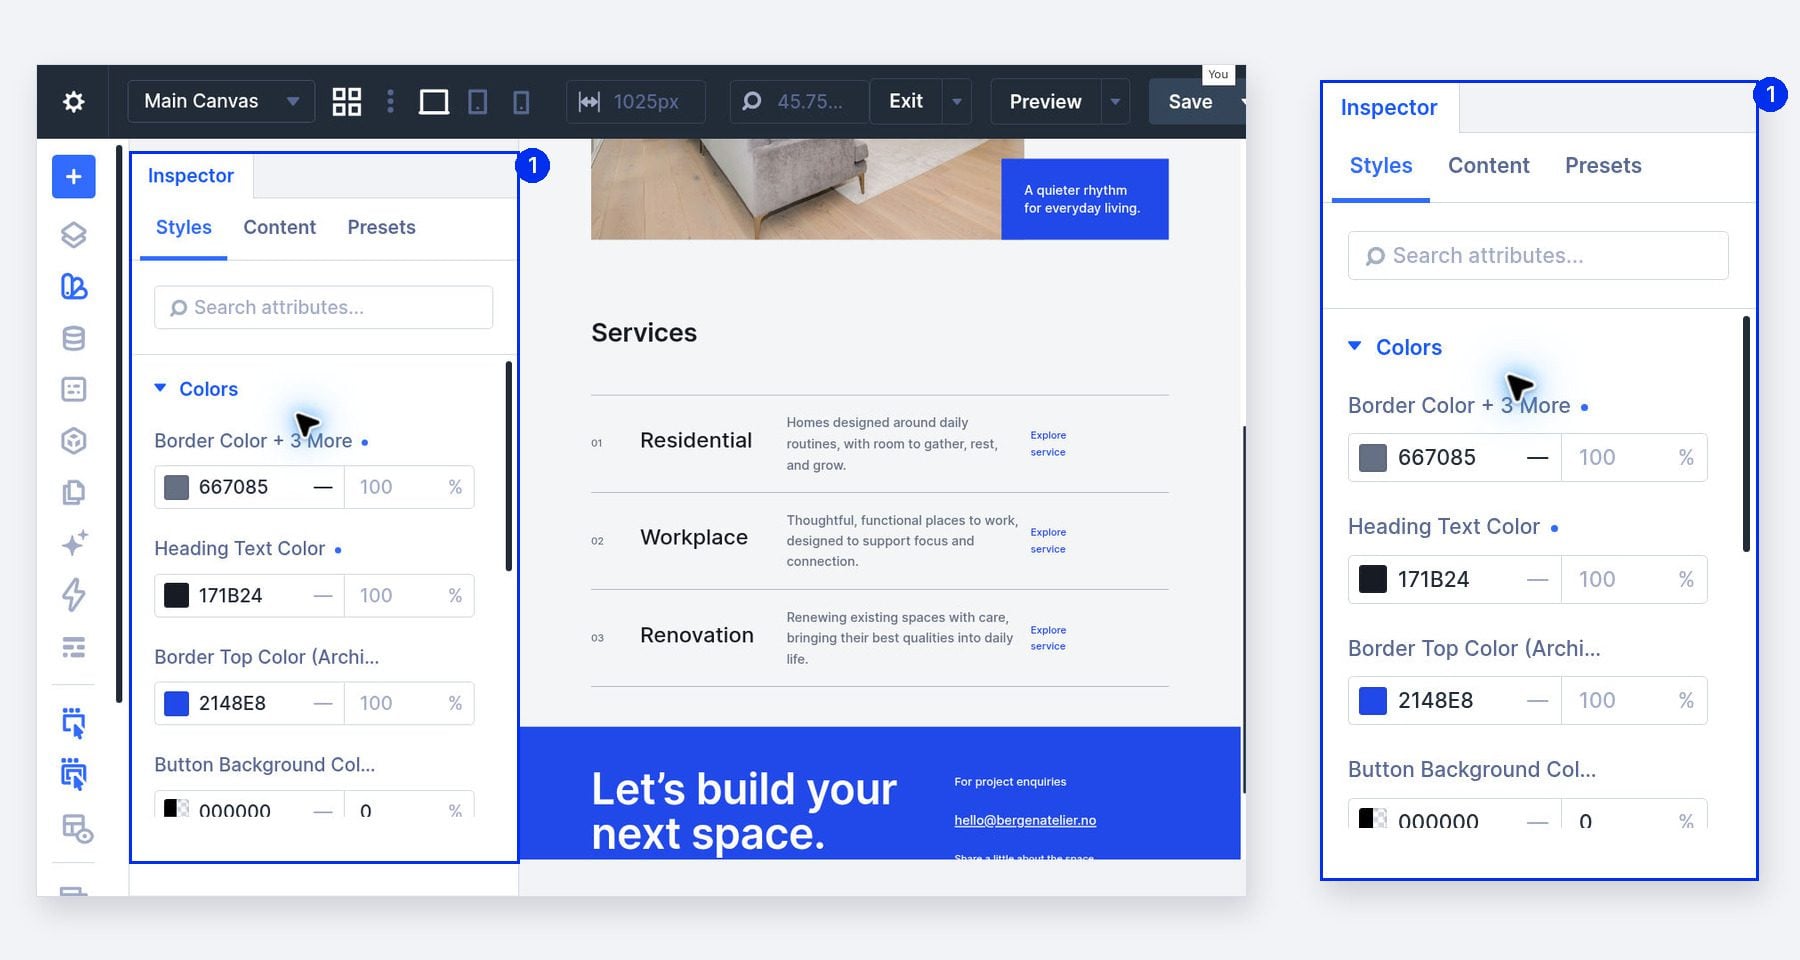
Edit A Repeated Value Once
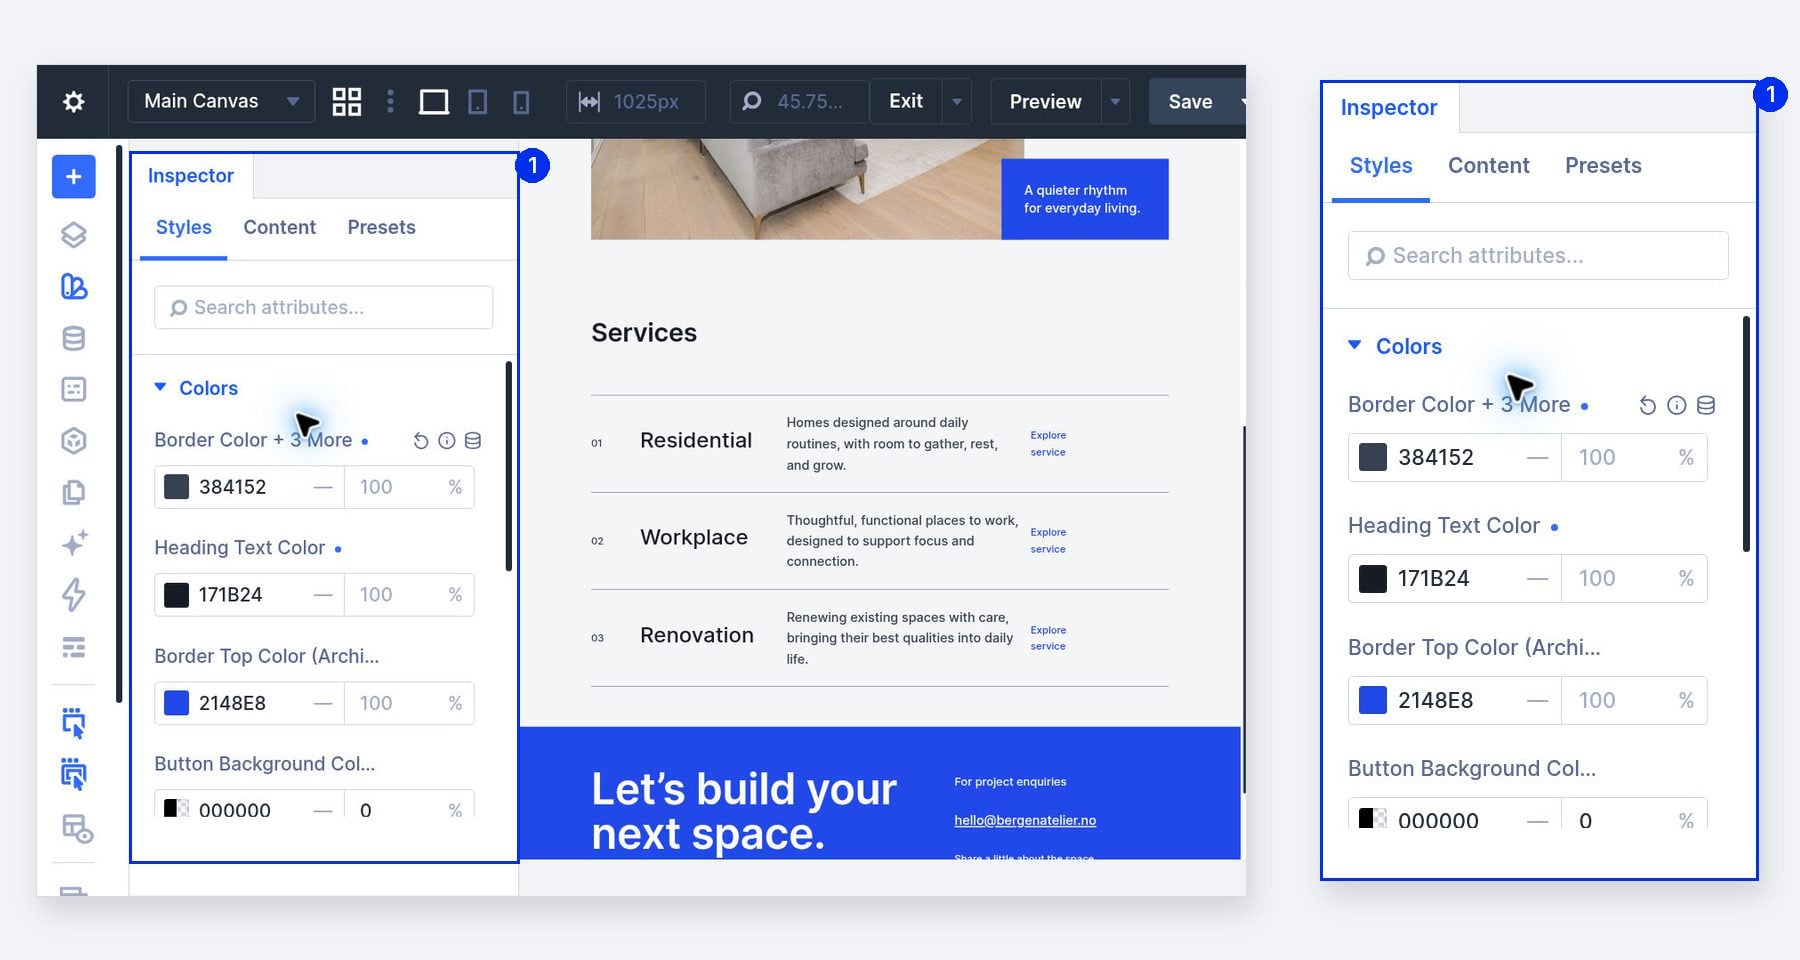
In Styles, expand Colors and locate the repeated gray. Review its field label, then enter the replacement color, including the initial #, and click outside the field to apply it. In our example, we replace #667085 with #384152. Matching uses within the Services scope update together.
Editing the grouped value saves you from opening three text modules to repeat the same correction. If the descriptions use three different grays, you’ll still need to reconcile those entries, because grouping identical values doesn’t merge different colors automatically.
Our gray also appears on the service numbers and separator borders. Those change along with the descriptions, while the introduction outside this section keeps its original color. A grouped entry can cover different fields. Use a smaller scope when other uses should keep their color, and review the canvas before saving.
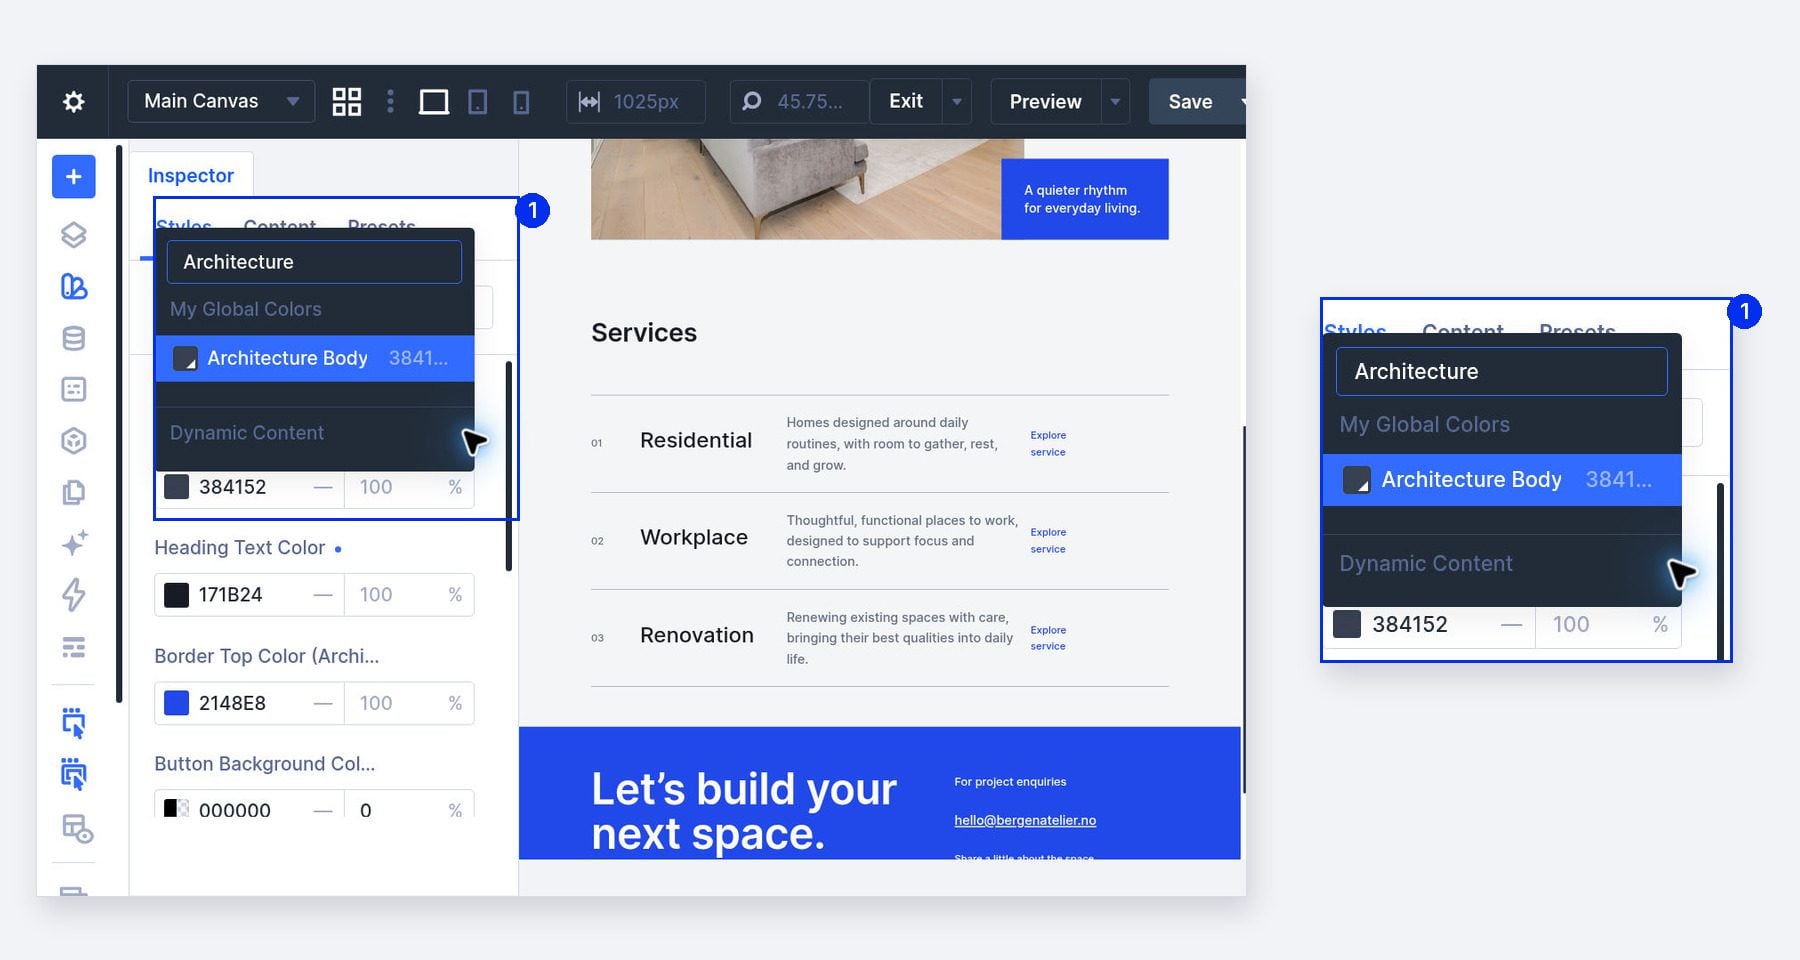
Connect The Edit To A Global Color
A repeated brand color is a good candidate for a saved Design Variable or global color. Give palette colors descriptive names so another editor can recognize the intended text or accent color without memorizing its code.
If you have already saved a palette color, click the field’s Dynamic Content button and choose it under My Global Colors. Search by name to narrow the choices. The reference replaces the static code in the field. Assigning that reference connects these uses to the resource; editing the global color itself can affect other designs that use it.
Manage Module And Option Group Presets
Open Presets while inspecting the Services section. Expand Module Presets to check the assignments for its buttons. Our three service links share one module preset, so the Inspector groups that assignment as Button (3 modules). Use its picker when you want to choose another module preset for those matching elements.
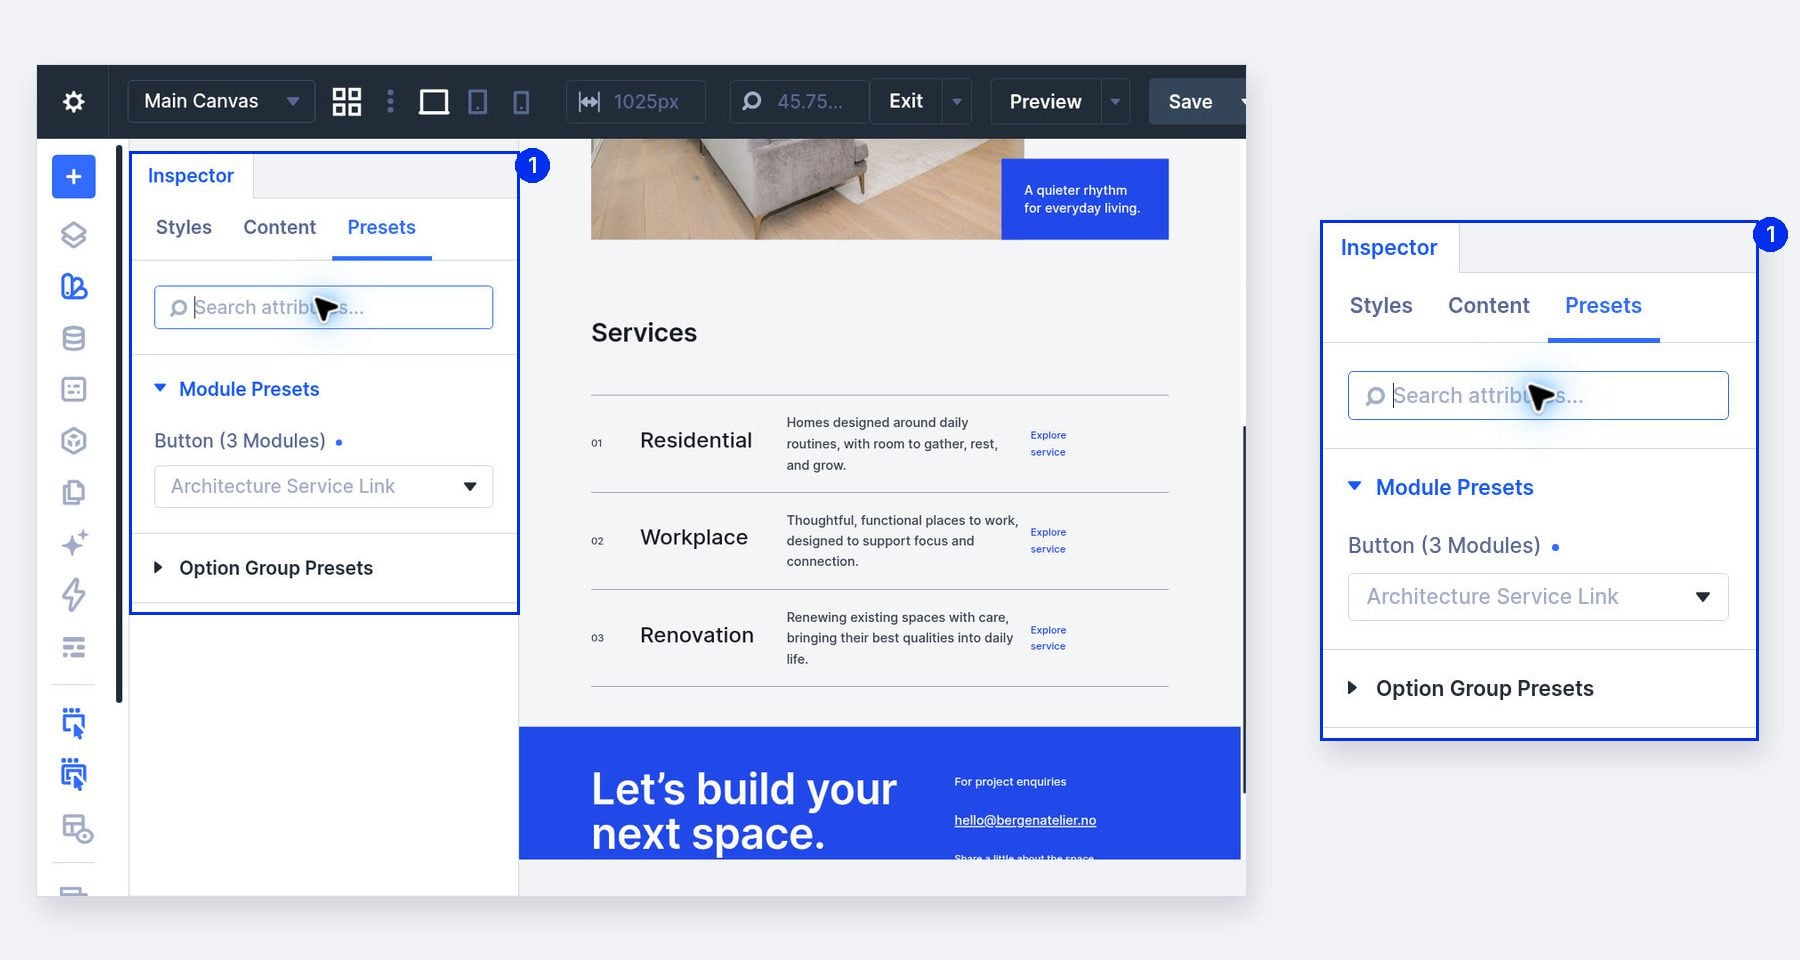
Switch to Option Group Presets to review resources that share a narrower set of settings. Our section uses a background preset for its near-white surface. This keeps the background separate from the typography and layout. Option Group Presets let you choose which part of a design should remain connected.
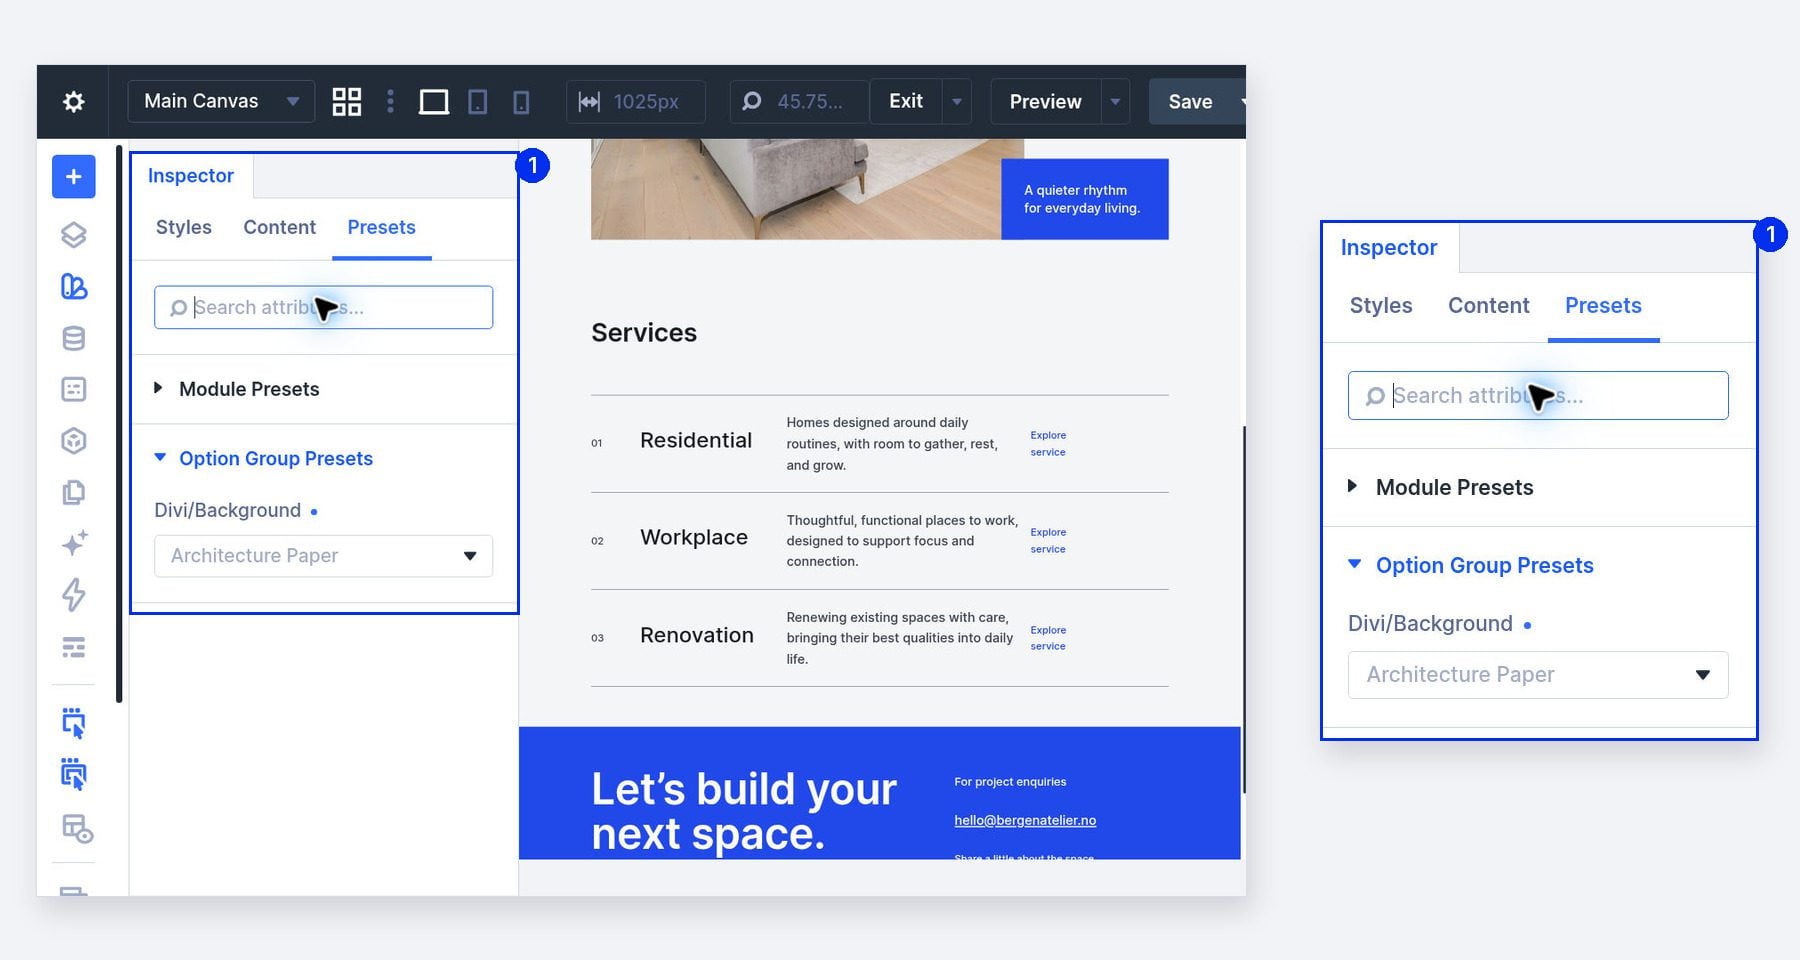
Check assignments as well as appearance. A button can look right because of local overrides even when it uses another preset. Choosing a preset changes the assignment; editing that preset changes a shared resource. Inspecting one section does not make its presets exclusive to that section.
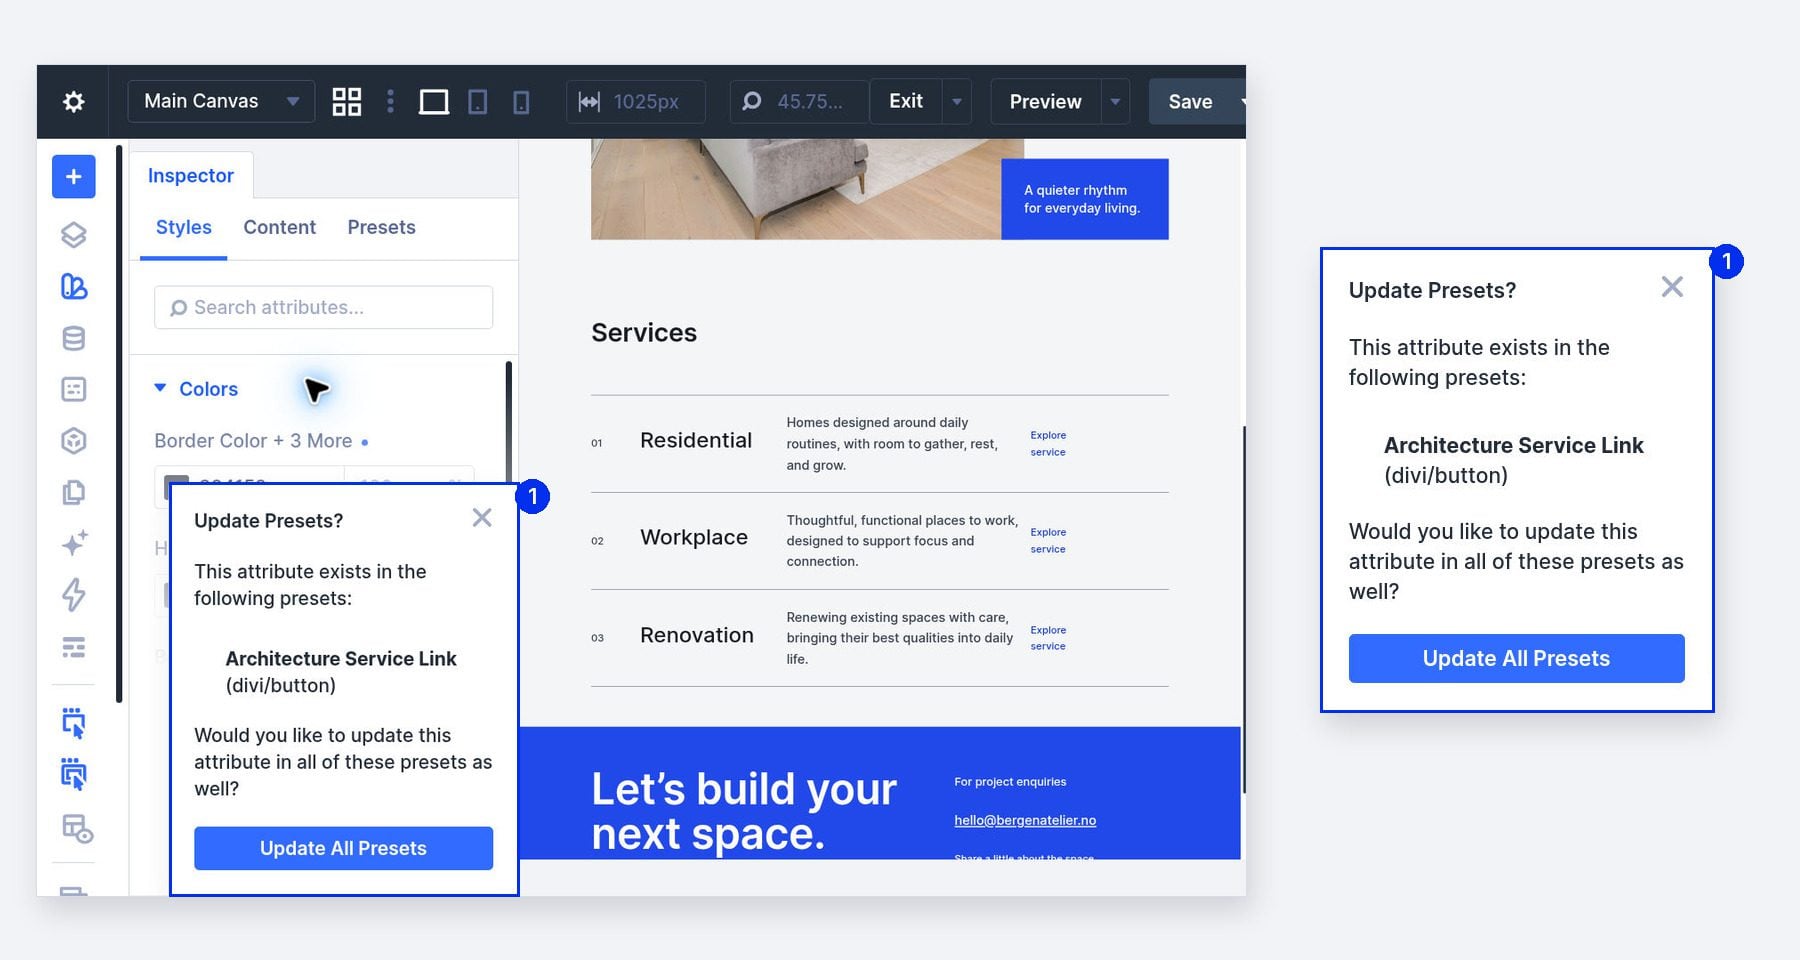
If an attribute change opens Update Presets?, read the named resources before choosing Update All Presets. Our example identifies the shared service-link preset. Confirm that update when its other uses should inherit the change too. Closing the prompt leaves the local edit in place without updating those preset definitions. Use Undo if you want to abandon the local change as well.
Audit And Edit Content In The Same Panel
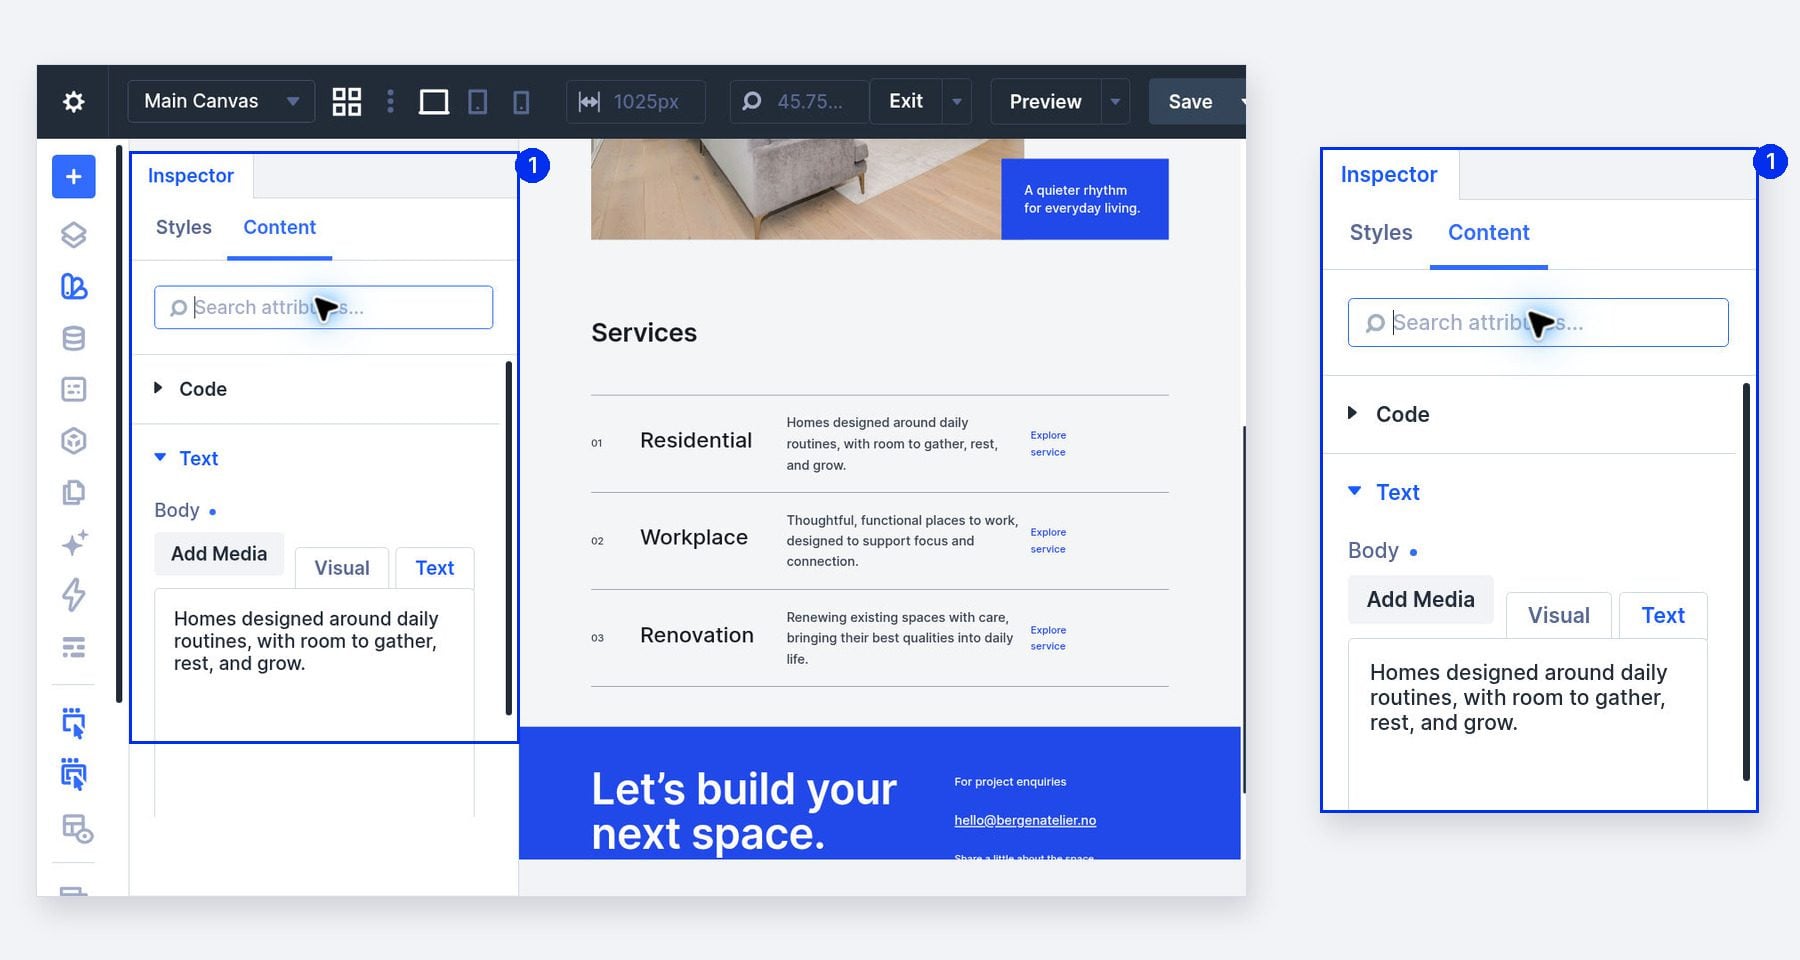
The Content tab gives you another way to review a finished layout. It groups content such as text, media, code, and attributes. You can inspect the content within your chosen scope and edit supported fields without returning to each module’s settings.
Select a description module through Layers, then choose Content in the Inspector and expand Text. Review its Body field and revise the wording there. Click outside the editor to apply the change and check the corresponding text on the canvas. Selecting one module makes the target clear before you edit its copy.
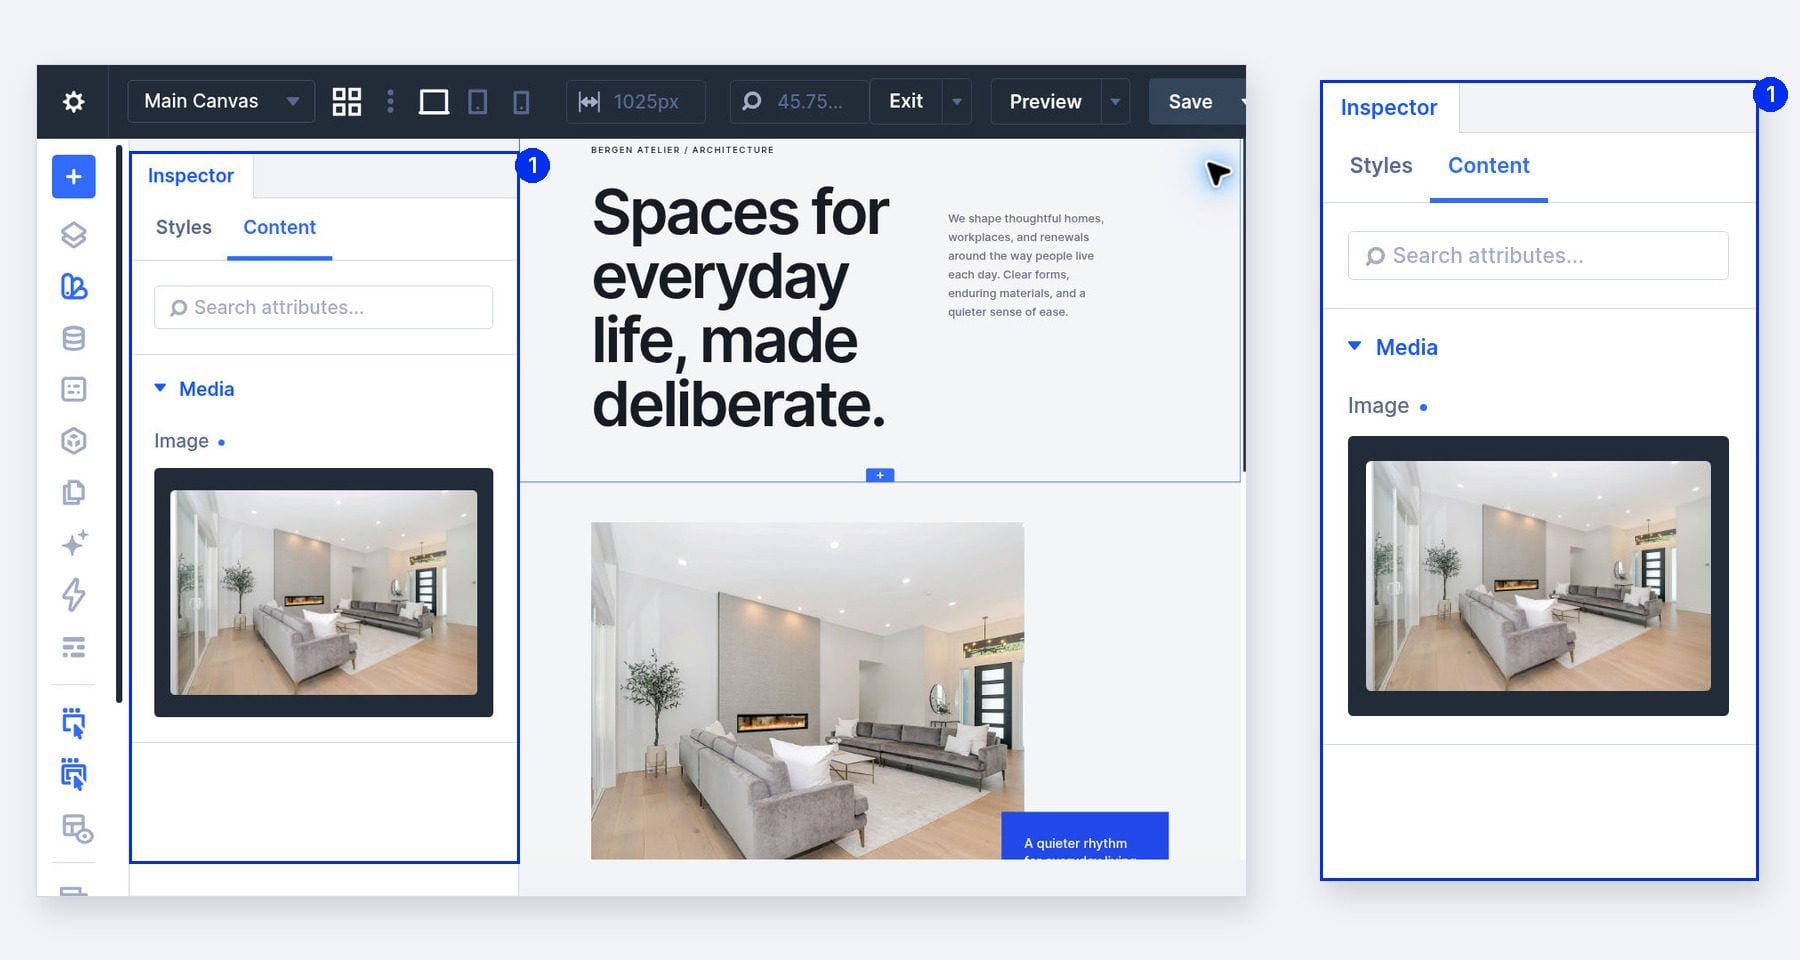
For the project photograph, select its Image module and open Content > Media in the Inspector. The preview helps you identify the selected image. Use Edit to open the image picker when it needs replacing, then check the chosen photograph against the caption and surrounding layout.
Keep the audit specific. Changing a project caption is a different decision from swapping its photograph. Review one type of content, make the correction, and check the rendered result. The overview helps you find things; the page shows whether they work together. Save the page when the review is complete.
Avoid Three Common Inspector Mistakes
The Inspector makes small changes convenient. A little care with filters, presets, and shared resources keeps those changes predictable.
Check Filters When Styles Seem To Be Missing
A heavily styled element can still show few direct modifications. Some of its appearance may come from defaults or presets. A modified-settings view answers a narrower question than a complete audit of the design.
If the list feels unexpectedly sparse, confirm the selected element, active tab, and any text in Search attributes… before assuming a setting has disappeared. A search narrows the visible attributes; clear it to inspect the whole scope. Then check the preset relationships involved. The Modified Filter and the Inspector serve related but different purposes when reading a layout.
Separate A Preset Assignment From A Preset Edit
Before changing a preset, decide whether you’re choosing another style for these elements or rewriting the preset itself. Inspecting one section doesn’t make that preset exclusive to it. Read the confirmation and review the affected design before saving.
Quick corrections are useful for finishing a layout. When the same choice keeps recurring, consider whether it belongs in a variable or preset. A saved brand color and a reusable service-link style make the next revision easier to understand.
Use the Inspector to spot those opportunities. Let your shared resources carry the relationships you want to maintain across future pages.
A Faster Way To Refine A Finished Page
Divi 5‘s Inspector connects a useful overview with direct editing. Start with the page, choose the section or element that needs attention, and correct the relevant styles or content while the design remains in view.
Chrome’s inspection tools remain useful for understanding browser behavior. For everyday Divi refinements, the Inspector keeps your audit close to the settings you’ll save. Try it on one repeated value in an existing layout, review the result, and build from there.









Leave A Reply