
Post Navigation is a set of links, usually at the bottom of a blog post, that can take you to the previous or next post. Fortunately, post navigation is easy to add to your blog post templates in the Divi Theme Builder. In this article, we’ll see how and where to include post navigation in your Divi blog post template. We’ll also look at three different ways to style them.
Let’s get started.
Preview
First, here’s a preview of the three different designs we’ll make.
Desktop Previous and Next Text Links

Phone Previous and Next Text Links

Post navigation is a great way to optimize your website’s navigation. Its placement works as a call to action. This draws attention to your content and keeps your readers on your website longer. It simplifies the process of finding another post to read.
Divi’s Post Navigation module allows the user to navigate to the previous or next post. You have several options of how they work. They can link to the posts in all categories or specific categories. They can display text that we enter or the names of the posts. We can even disable the previous and next links independently.
Navigation links shouldn’t look or feel like random links. They should be placed in such as way that readers intuitively understand what they are. The best location for this is under the blog post content.
As soon as the reader has finished the blog post, they’re presented with an easy way to see the previous or next post. This is the placement that makes the most since to them and it’s the most useful location for increased traffic.
Subscribe To Our Youtube Channel
Upload or Create a Blog Post Template
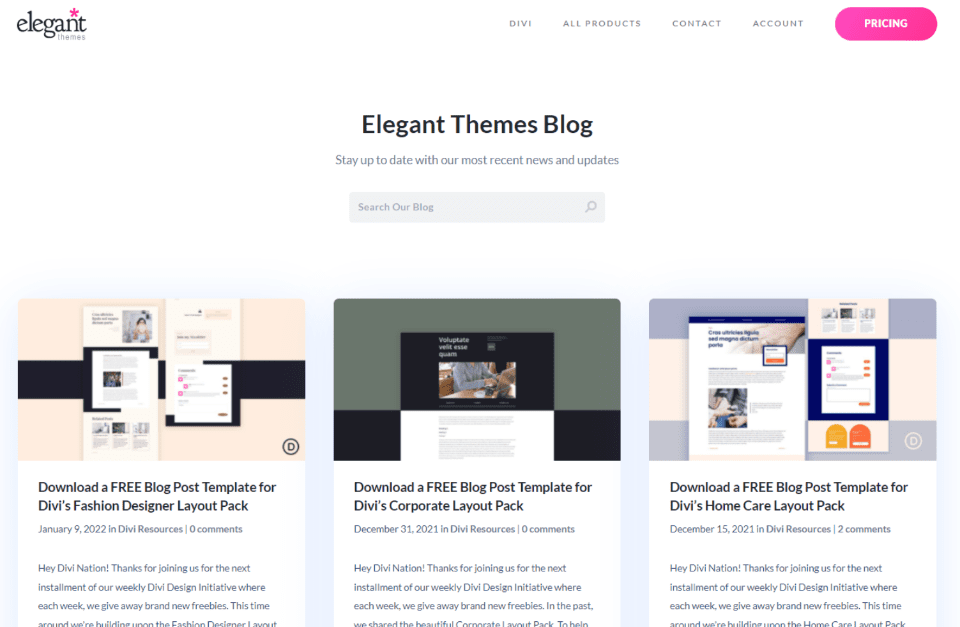
For your blog post template, you can create one from scratch or download one from the Elegant Themes blog. There are lots of free blog post templates in the ET blog that are designed to match the free Divi Layout Packs. Just search for “free blog post template”. Download and unzip your template.
For my example screenshots, I’m using the free Corporate Blog Post Template. I’ll style the Post Navigation module to fit this blog post template.
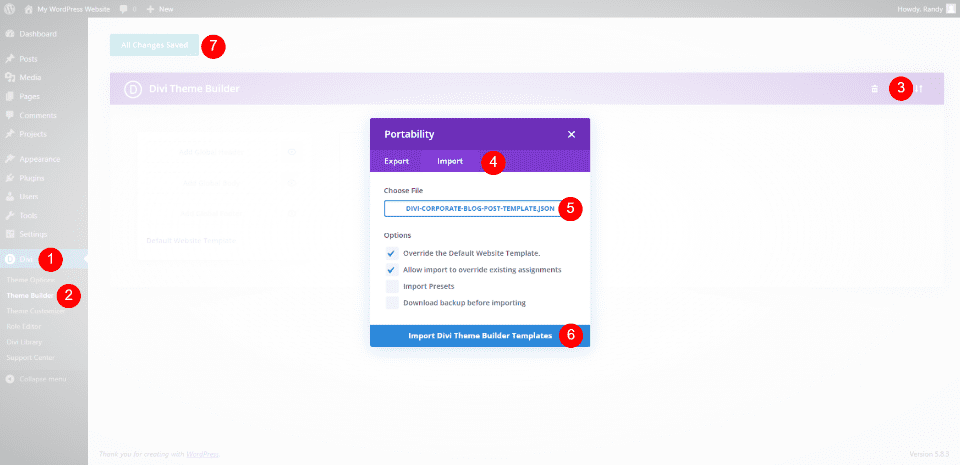
To upload or create your template, go to Divi >Theme Builder in the WordPress dashboard. To upload, select Portability and click Import in the modal that opens. Click to choose your file and navigate to and select the JSON file on your computer. Click Import Divi Theme Builder Templates and wait for the upload to complete. Save your settings.
- Divi
- Theme Builder
- Portability
- Import
- Choose File
- Import Divi Theme Builder Templates
- Save
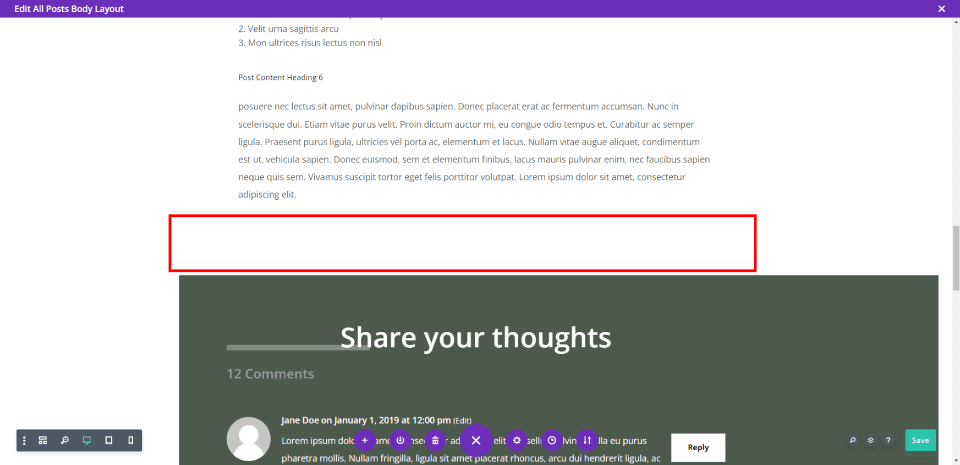
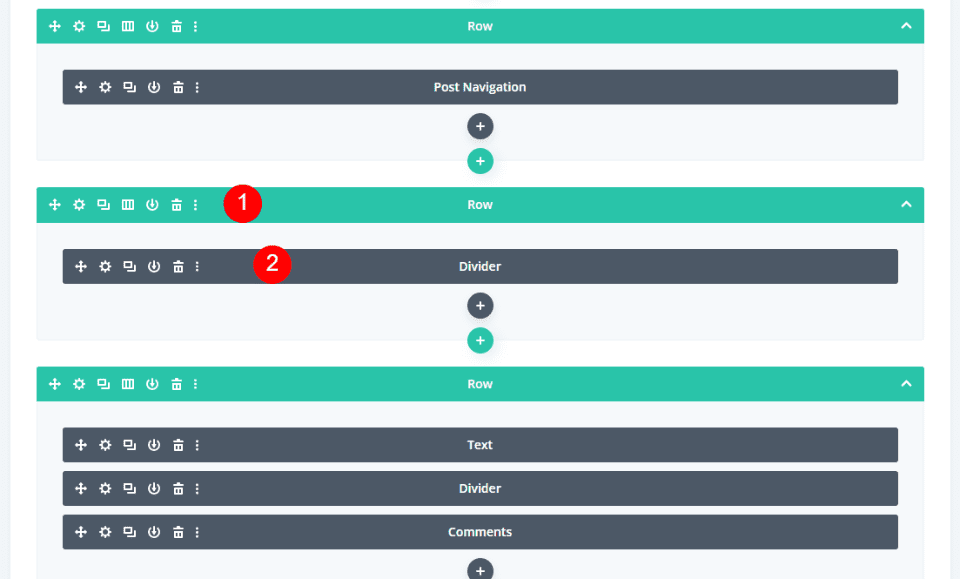
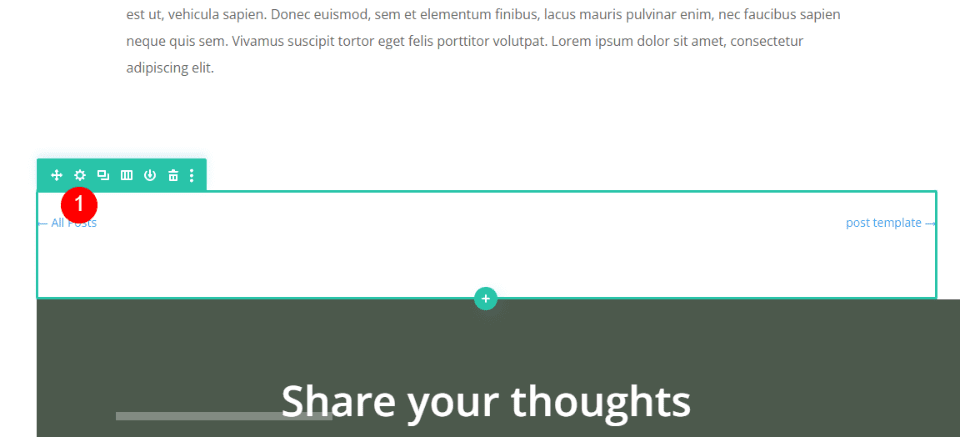
We will add the post navigation to its own row under the post content. This layout uses background colors within the rows, so we’ll add space with a divider. We’ll use this same row for all three designs.
I’ve changed to the wireframe view to make it easier to see. Add a new single-column row under the row with the post content.
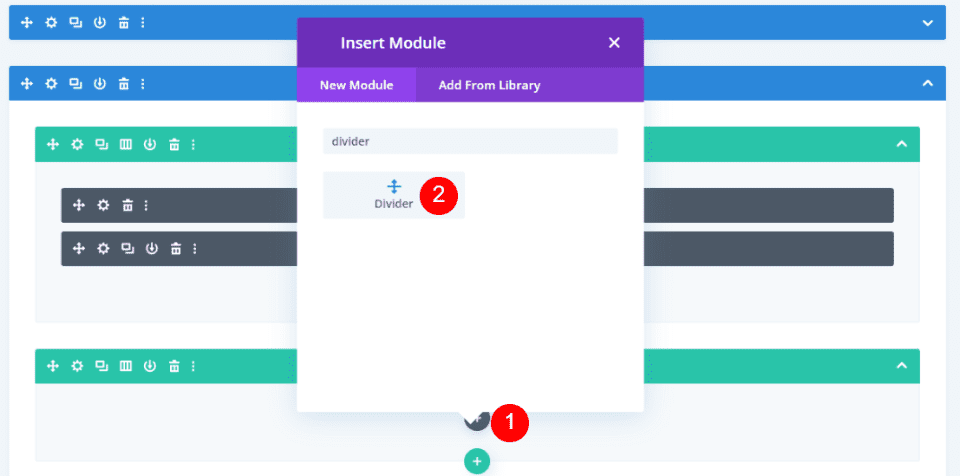
Add a Divider module to the row.
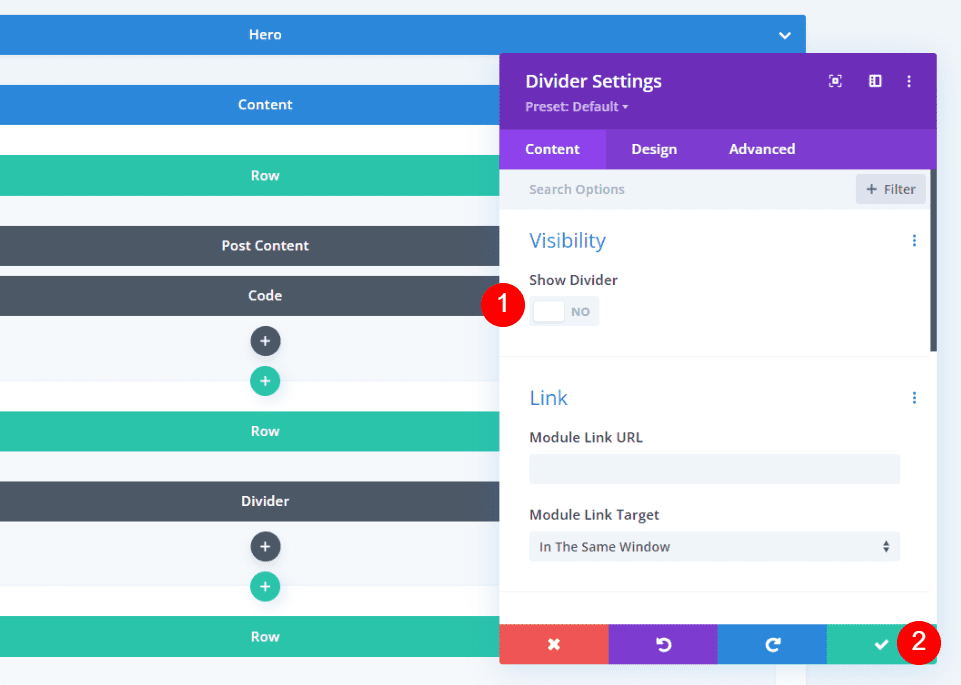
In the Divider’s settings, set the visibility to not show the divider. Close the Divider’s settings.
- Show Divider: No
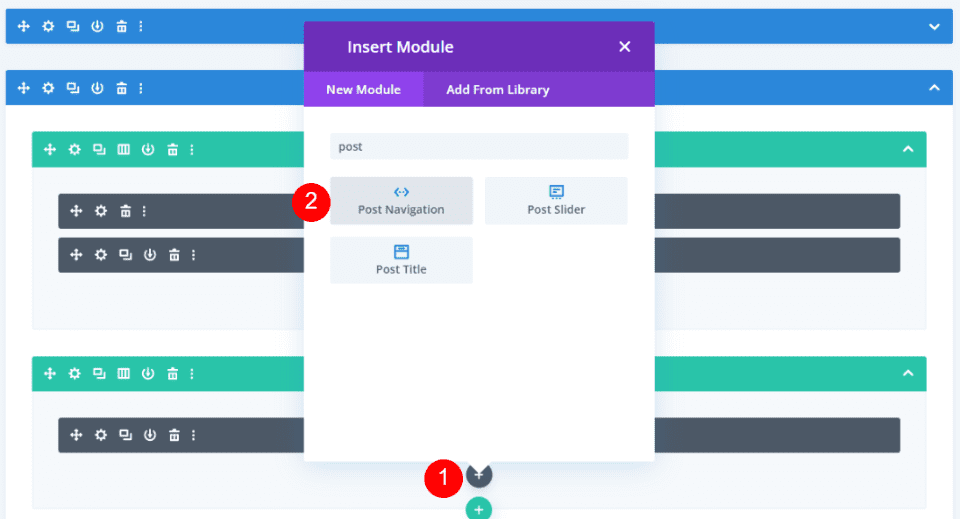
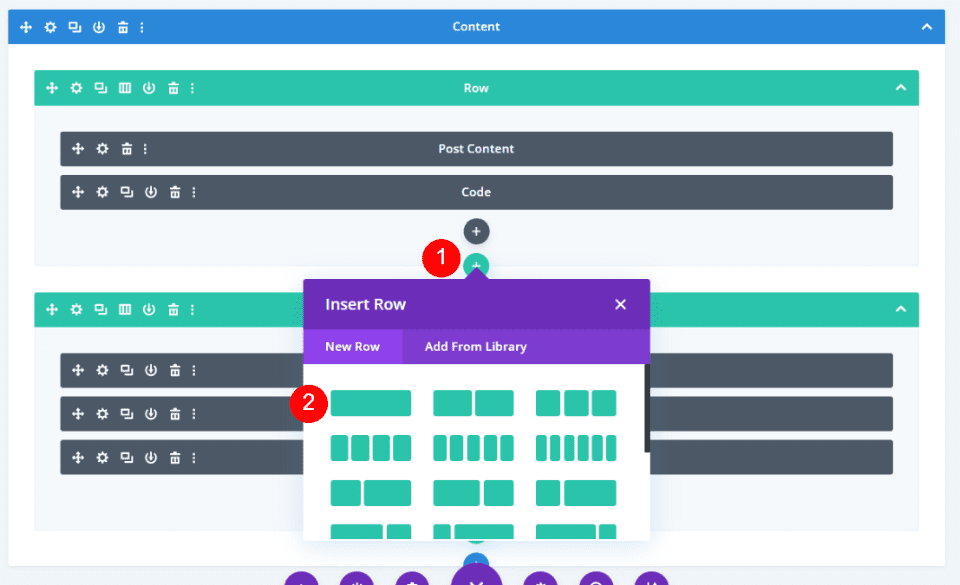
Next, add a Post navigation module.
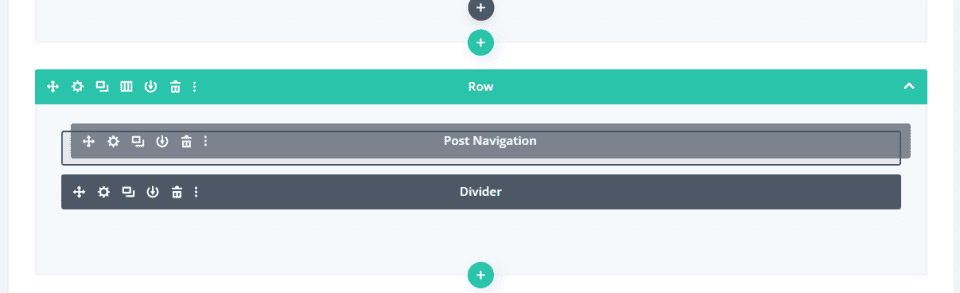
Finally, drag the module above the Divider within the same row. We’ll use this for our first two designs. We’ll make a small modification for the third design. Next, we’ll style the Post Navigation module to create three different designs.
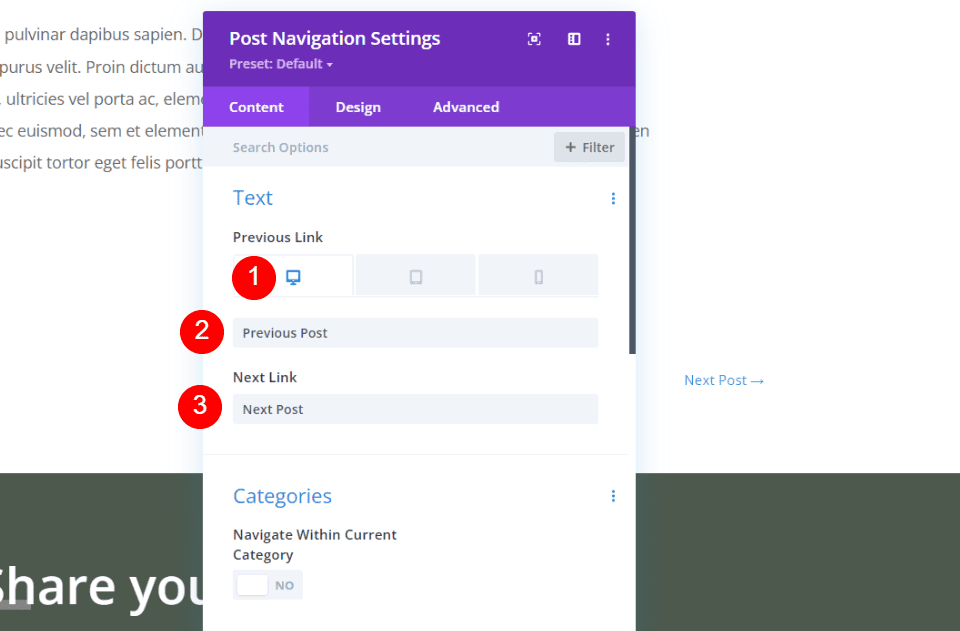
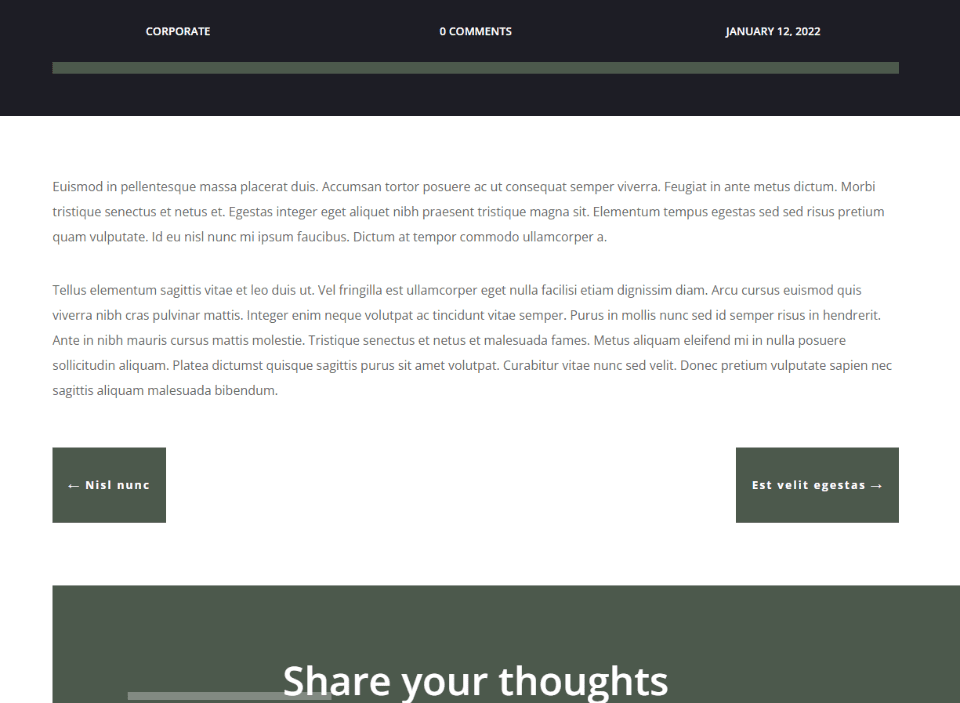
The simplest post navigation option is text links. This is the default setting of the Post Navigation module. We’ll keep the text but change the names of the links. By default, they’ll display the names of the posts.
Select Desktop and enter Previous Post in the Previous Link field, and Next Post in the Next Link field. We’ll leave the rest of the settings at their defaults for this one.
- Previous Link: Previous Post
- Next Link: Next Post
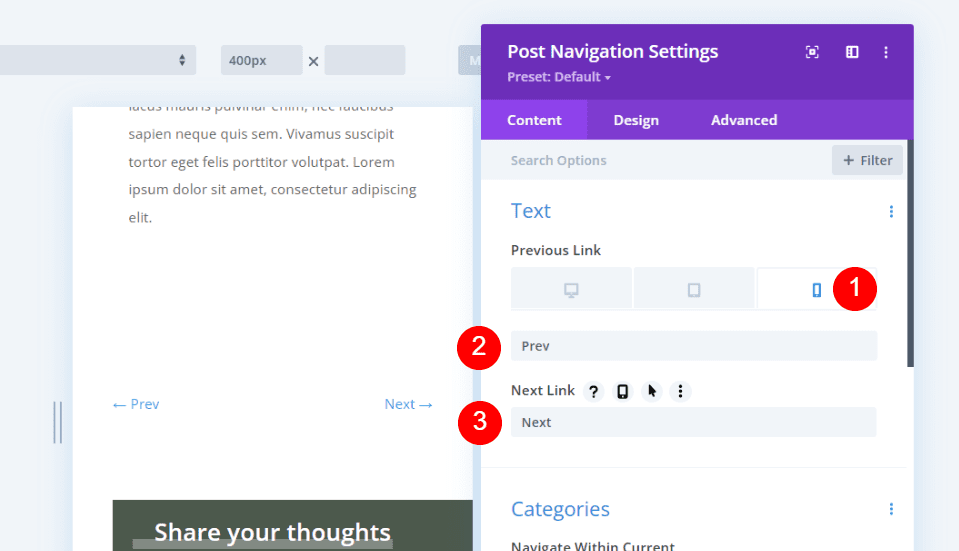
Select the Phone icon under Previous Link and enter Prev and Next into the fields.
- Previous Link: Prev
- Next Link: Next
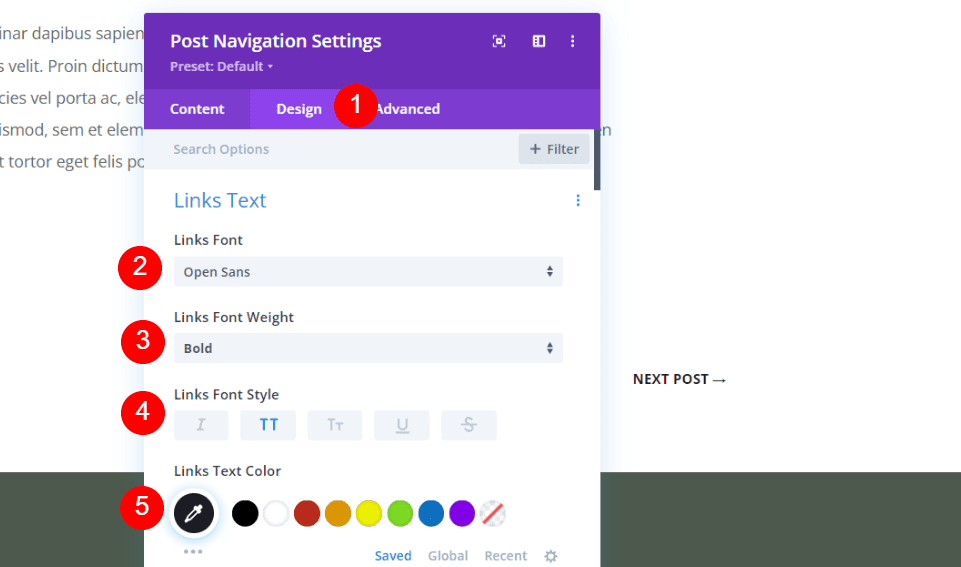
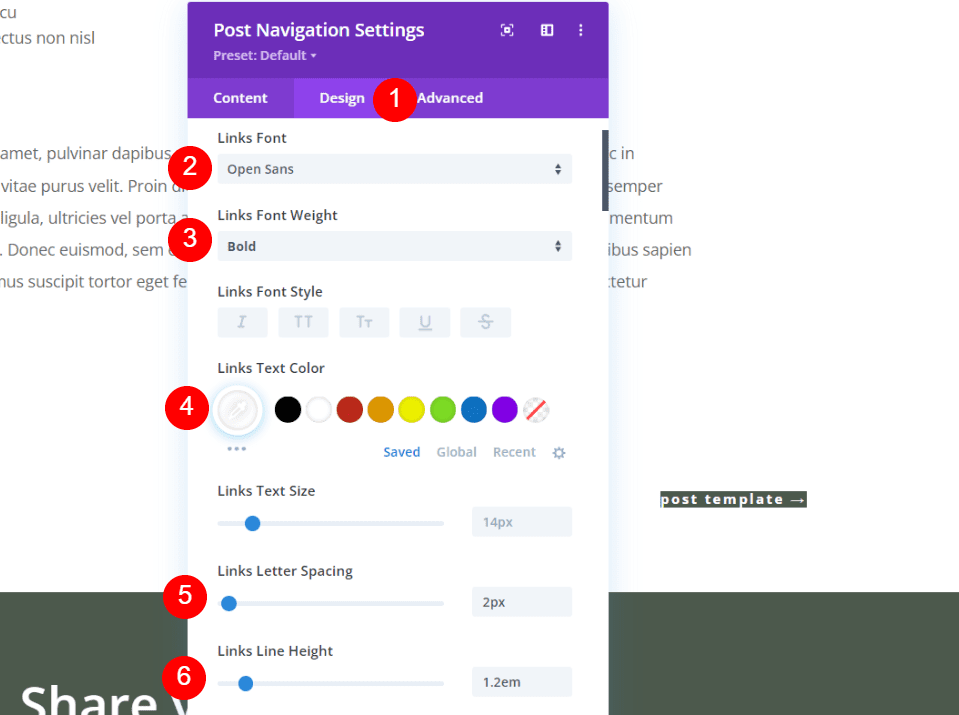
Next, go to the Design tab. Change the Font to Open Sans, make it bold, all caps, and change the color to #1d1d25.
- Links Font: Open Sans
- Font weight: Bold
- Font Style: All Caps
- Color: #1d1d25
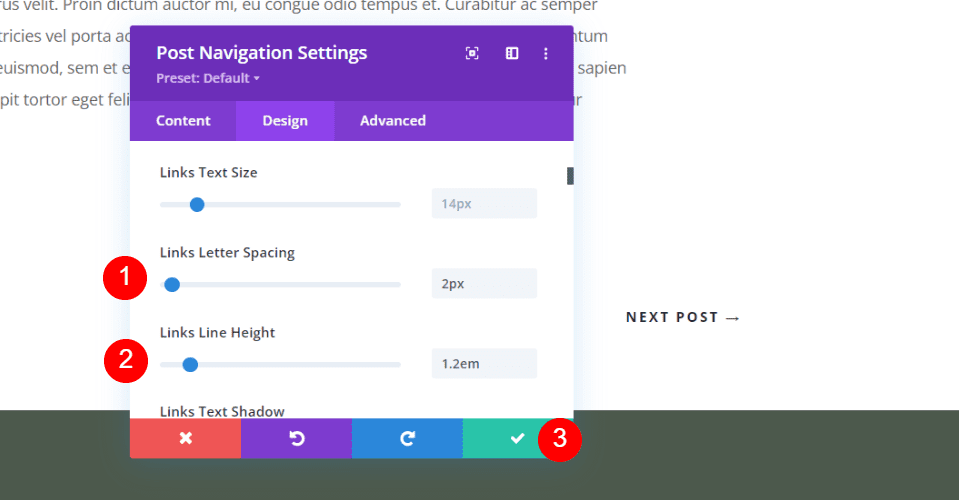
Change the Letter Spacing to 2px and the Line Height to 1.2em. Close the modal and save your settings.
- Letter Spacing: 2px
- Line Height: 1.2em
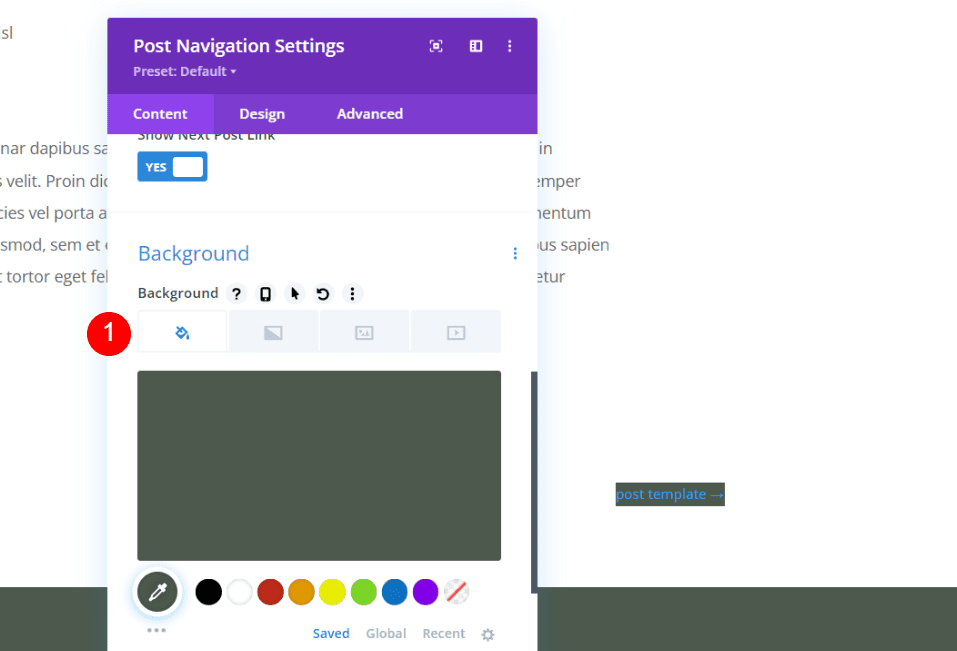
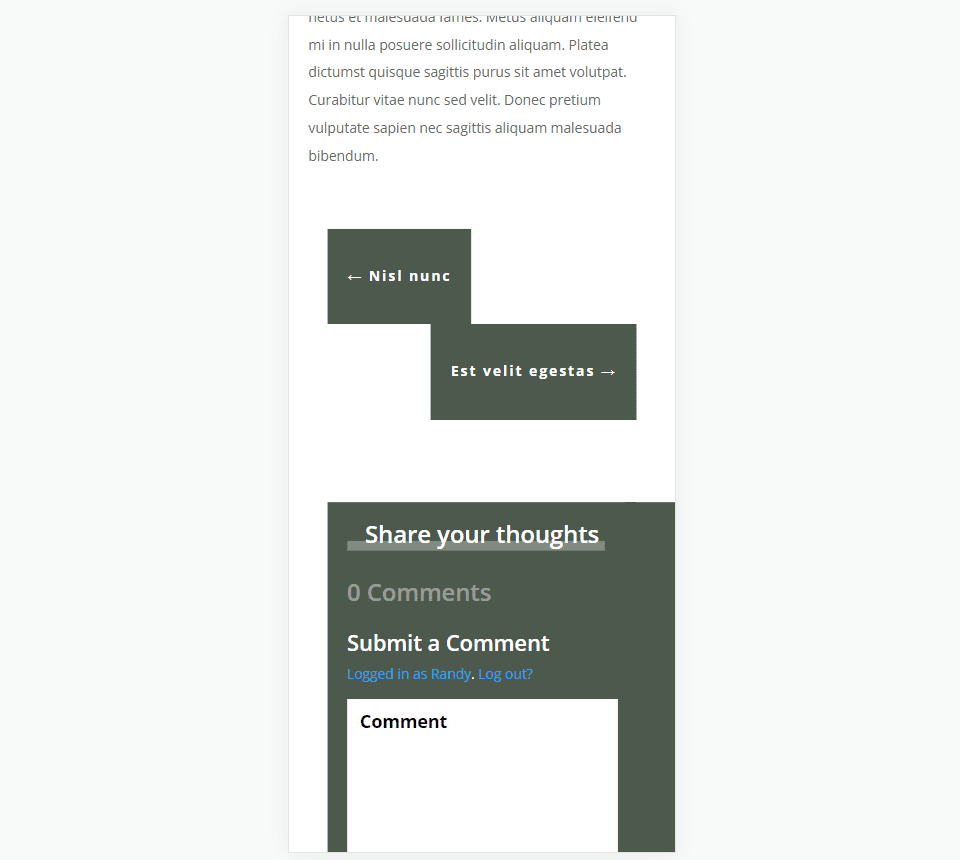
In the Post Navigation Content settings, scroll down to the Background and set it to #4c594c (or another color from your layout). We’ll leave the other settings in the Content tab at their defaults. This will allow the module to display the post names.
- Background Color: #4c594c
Select the Design tab. For the Links Font, choose Open Sans, Bold, and change the color to white. Set the Letter Spacing to 2px and the Line Height to 1.2em.
- Links Font: Open Sans
- Font weight: Bold
- Color: #ffffff
- Letter Spacing: 2px
- Line Height: 1.2em
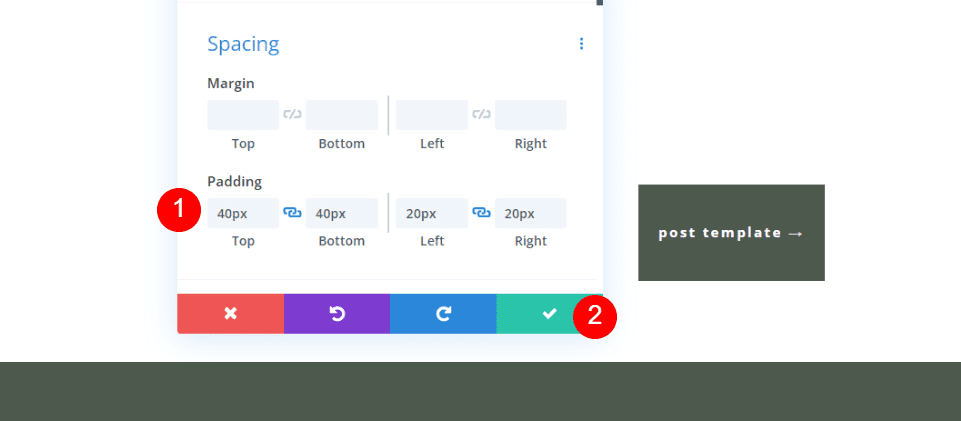
Scroll down to Spacing. Add 40px of padding to the Top and Bottom, and 20px Padding to the Left and Right. Close the Settings and save it.
- Padding: 40px (Top, Bottom), 20px (Left, Right)
First, create a new Row under the Row that contains the Post Navigation Module and drag the Divider to it.
Now, open the settings for the Row with the Post Navigation module.
Row Settings
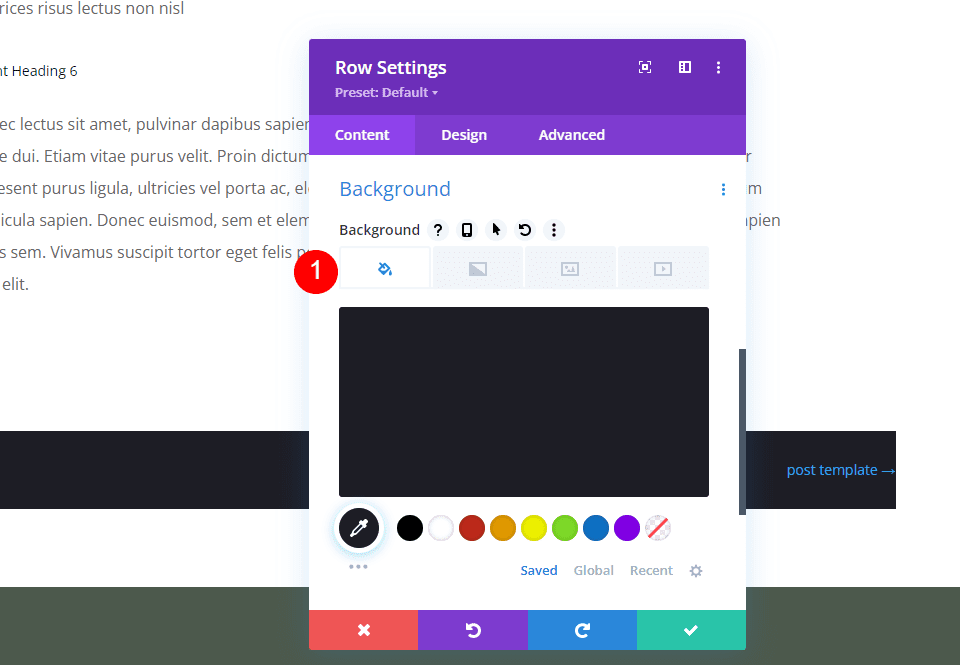
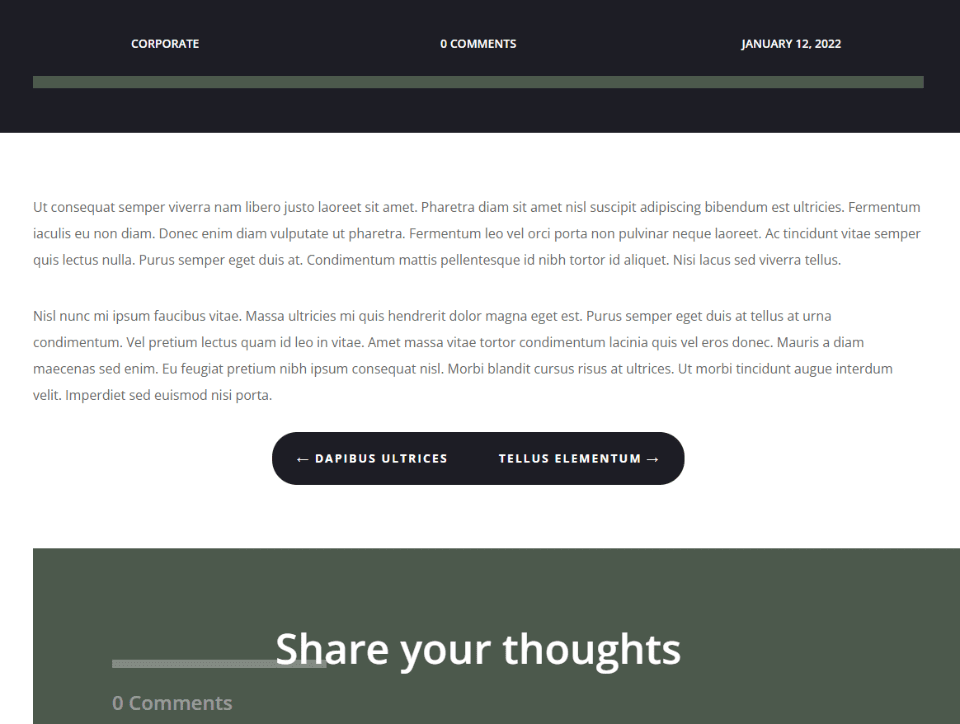
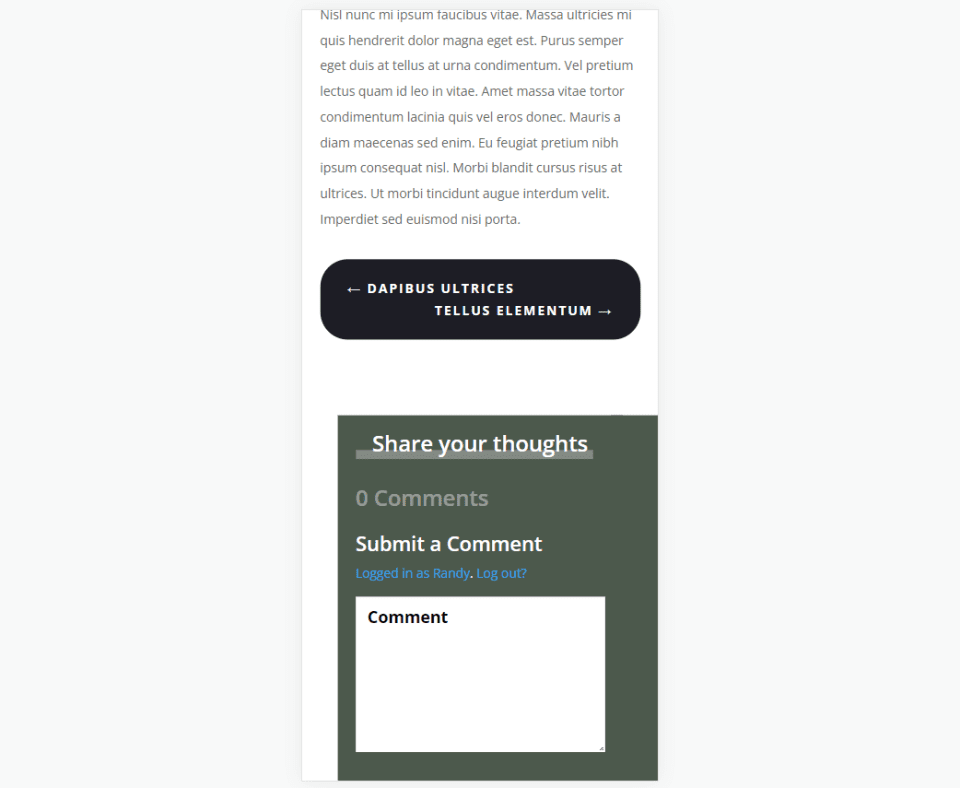
Scroll down to the Background settings and set the color to #1d1d25 (or any other color from your layout).
- Background Color: #1d1d25
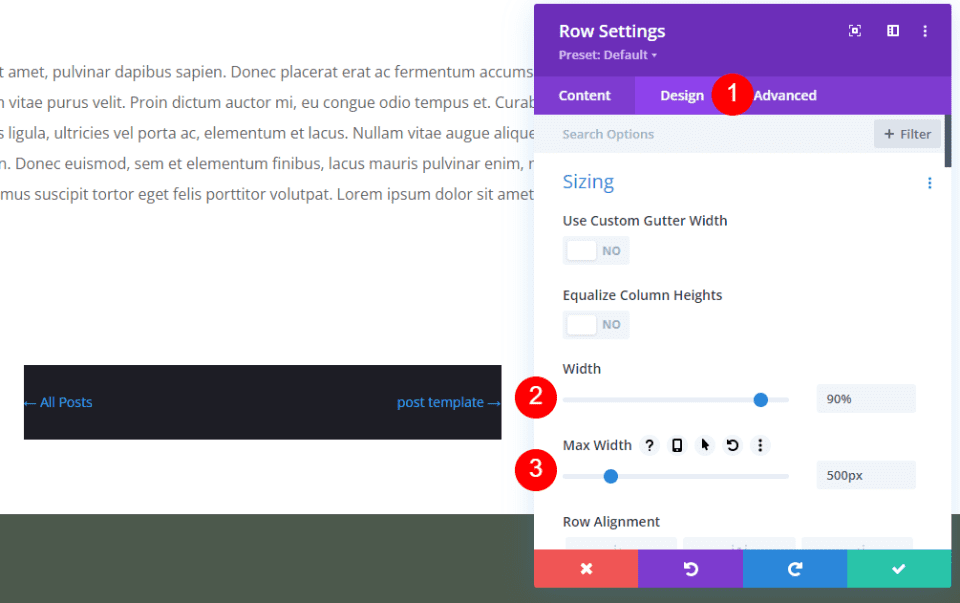
Go to the Design tab. Under Sizing, change the Width to 90% and the Max Width to 500px.
- Width: 90%
- Max Width: 500px
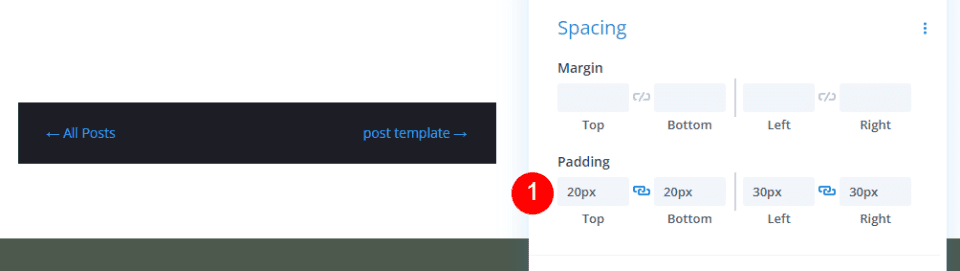
Scroll to Spacing and add 20px padding to the Top and Bottom, and 30px Padding to the Left and Right.
- Padding: 20px (Top, Bottom), 30px (Left, Right)
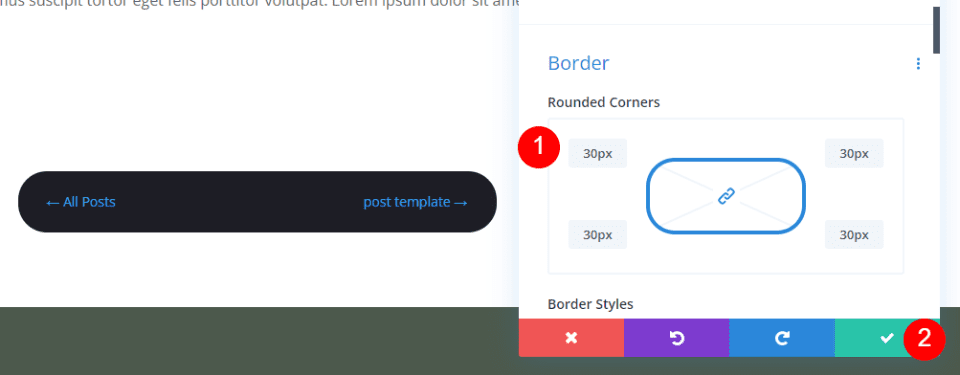
Scroll to the Border settings and add px to all four sides of the Rounded Corners. Close the Row settings.
- Rounded Corners: 30px
Post Navigation Module Settings
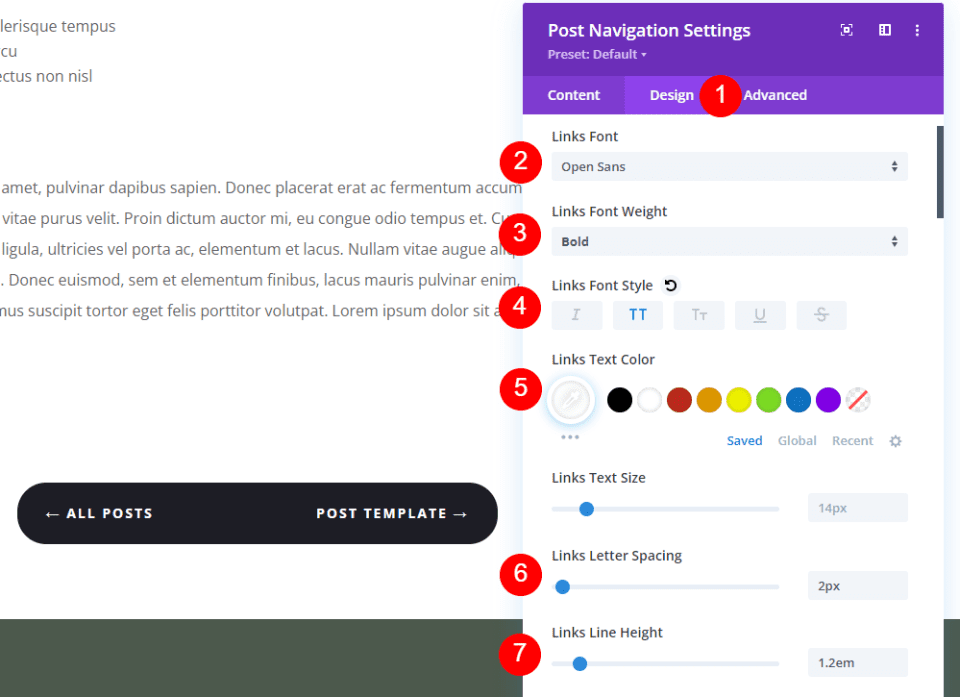
Open the Post Navigation module and select the Design tab. We’ll do the Content setting last this time. Set the Font to Open Sans, the Weight to Bold, the Style to All Caps, and the Color to White. Change the Letter Spacing to 2px and the Line Height to 1.2em.
- Links Font: Open Sans
- Font weight: Bold
- Font Style: All Caps
- Color: #ffffff
- Letter Spacing: 2px
- Line Height: 1.2em
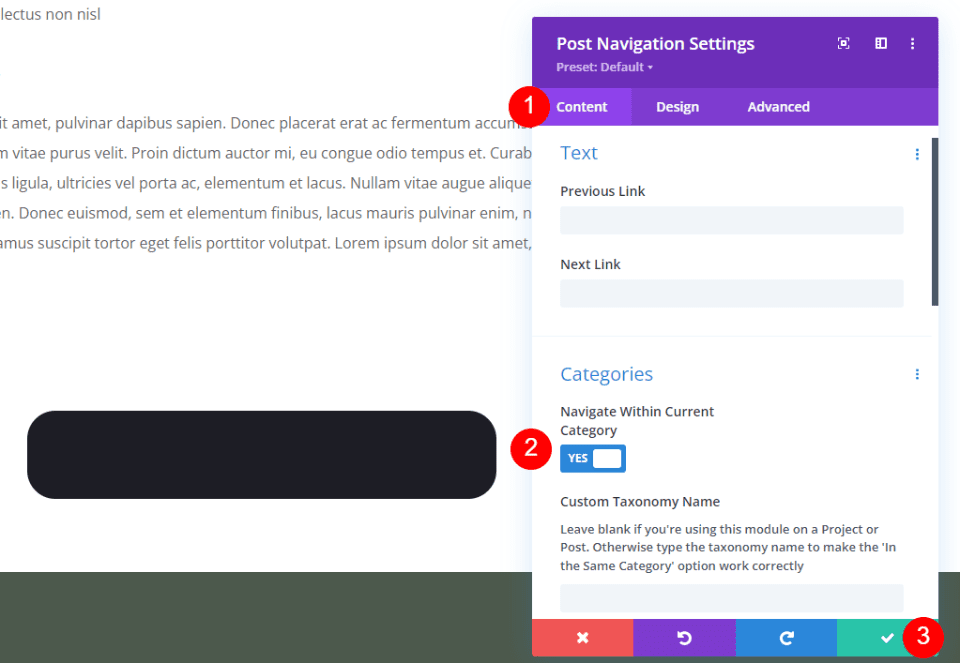
Go to the Content tab. Scroll to Categories and enable Navigate within Current Category. This will only display posts within the same category. We’ll leave the field empty, but you can add the taxonomy name if you want. We’ll also leave the Text fields empty to use the post names. Close the settings and save it.
- Navigate within Current Category: YES
Here are the results for all three designs.
Desktop Previous and Next Text Links
Phone Previous and Next Text Links
Ending Thoughts
That’s our look at how and where to add post navigation in your Divi blog post template. This type of navigation works great under the post content to draw attention to similar content. This helps keep readers on your website longer, which can get you more shares, more readers, etc. Post navigation is easy to add and style using the Divi Theme Builder.
We want to hear from you. Have you added post navigation to your Divi blog post template? Let us know about it in the comments.


Leave A Reply