
The comments section of any blog can be a place of great discussion. However, there may come a time when you want to build your community online. With the Divi Condition Options feature, we can prevent users not part of your blog from commenting on posts. This could work for a members-only community or as a perk of a membership site.
In this tutorial, we’ll show you how to display Divi’s Comments Module to logged-in users only, this will allow you to directly interact with your community! We’ll use the Film Lab Blog Post Template for the base of this Divi tutorial.
How to Create a Members-Only Comment Section
Divi’s Condition feature allows us to choose a set of parameters with which modules, rows, columns, and sections can interact. For our case, we’ll want to set the display conditions based on a user’s logged-in status. Here’s a summary of the steps we’ll take in this tutorial to achieve our members-only comment section:
- Upload your blog post template to the Divi Theme Builder (or create your blog template!)
- Create your members-only comment section containing a Login Module
- Activate Display Conditions for the row containing the Login Module
- Activate Display Conditions for the row containing the Comment Module
- Save and test the template in an incognito window
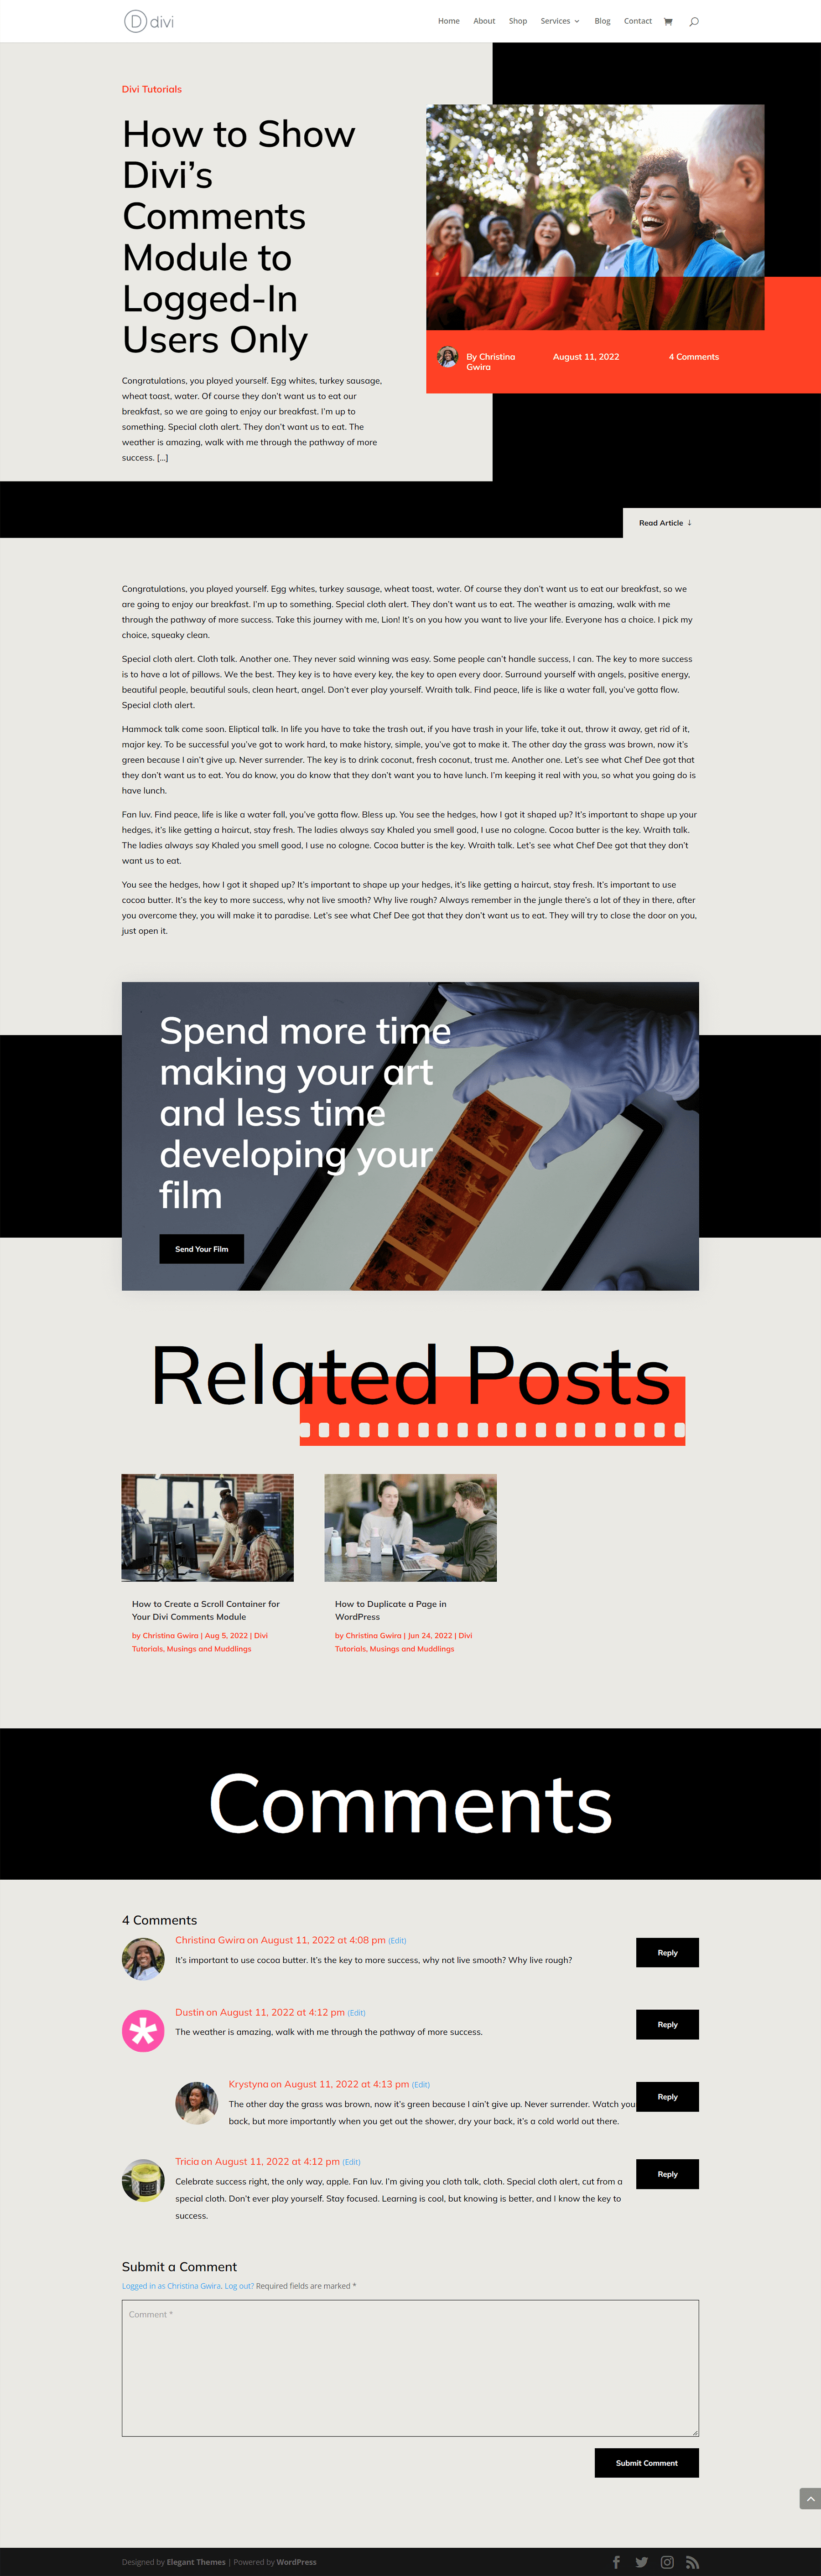
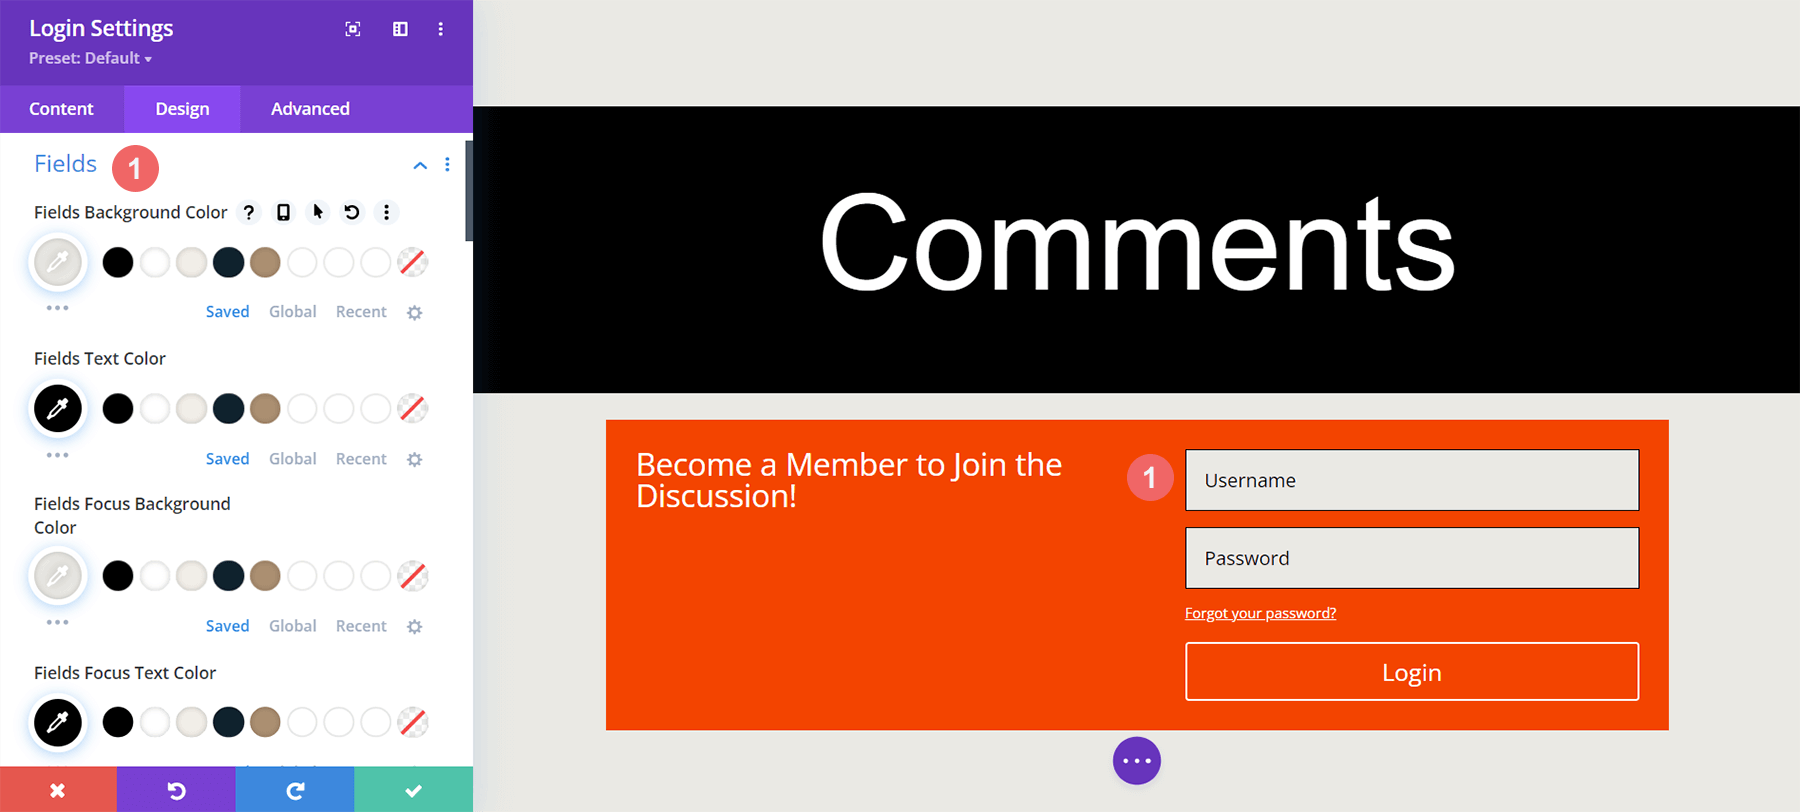
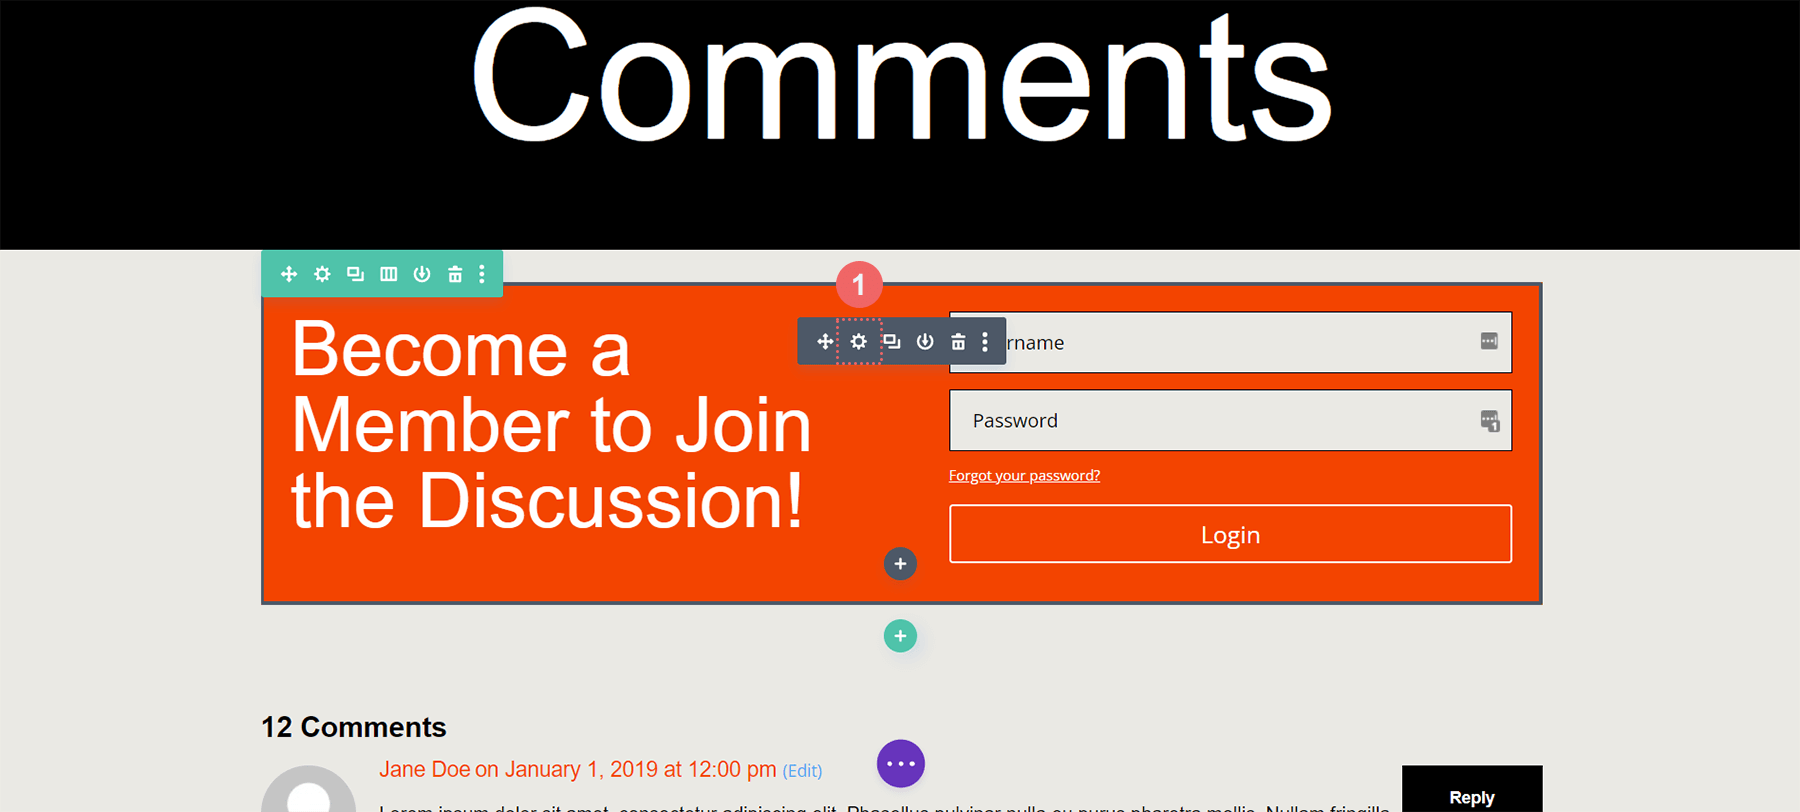
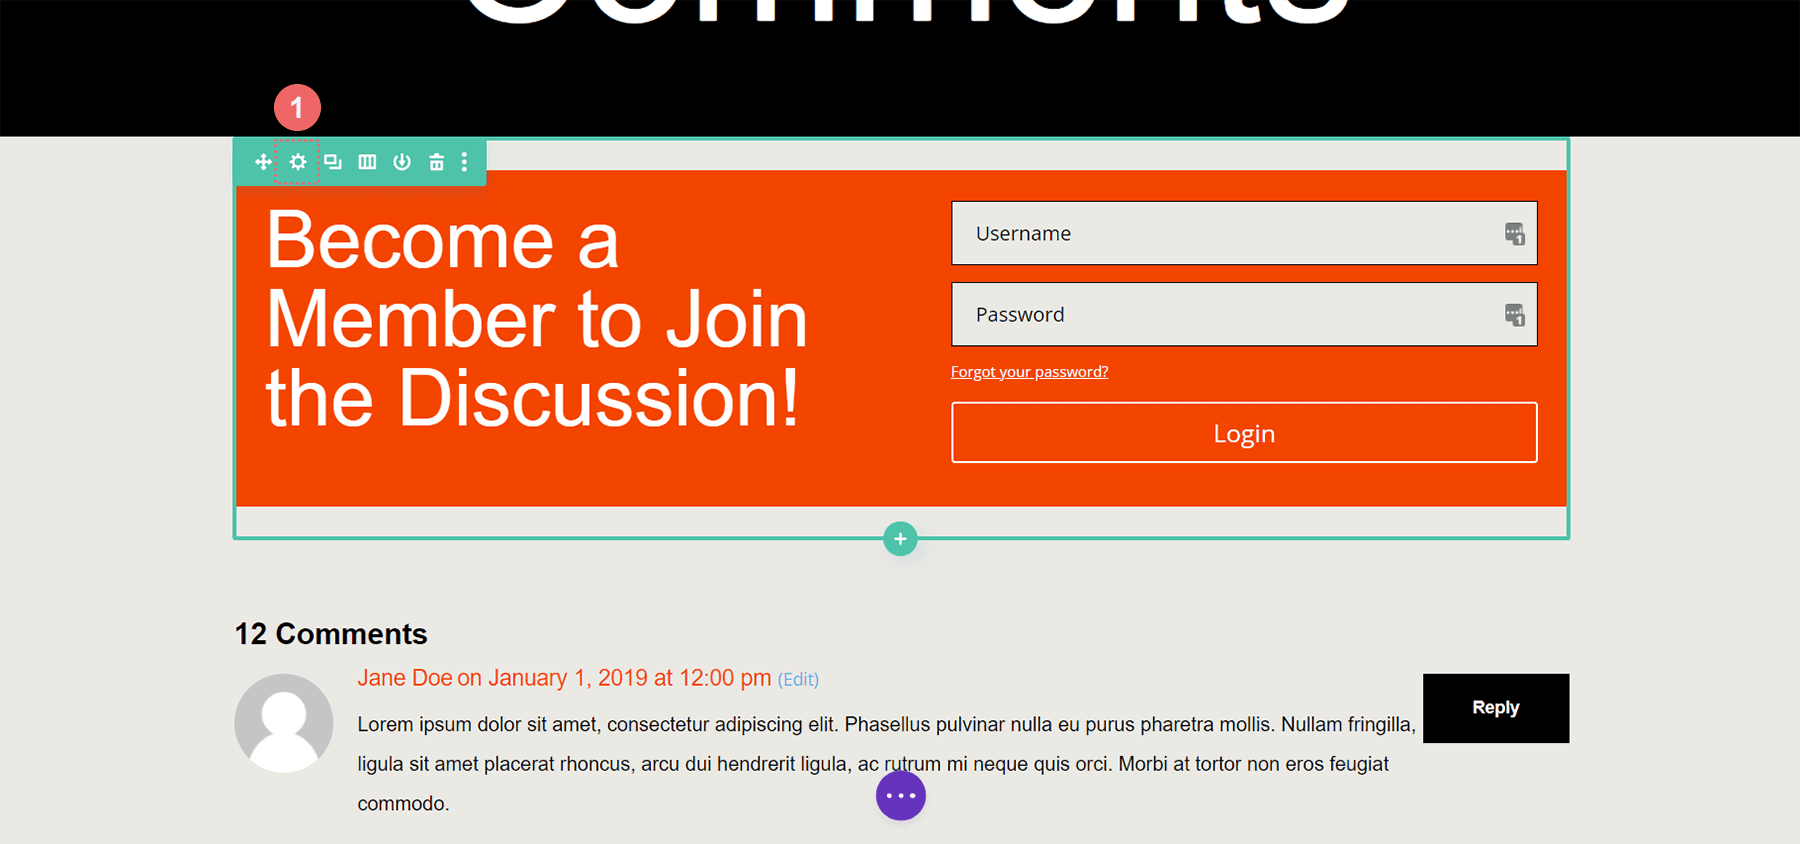
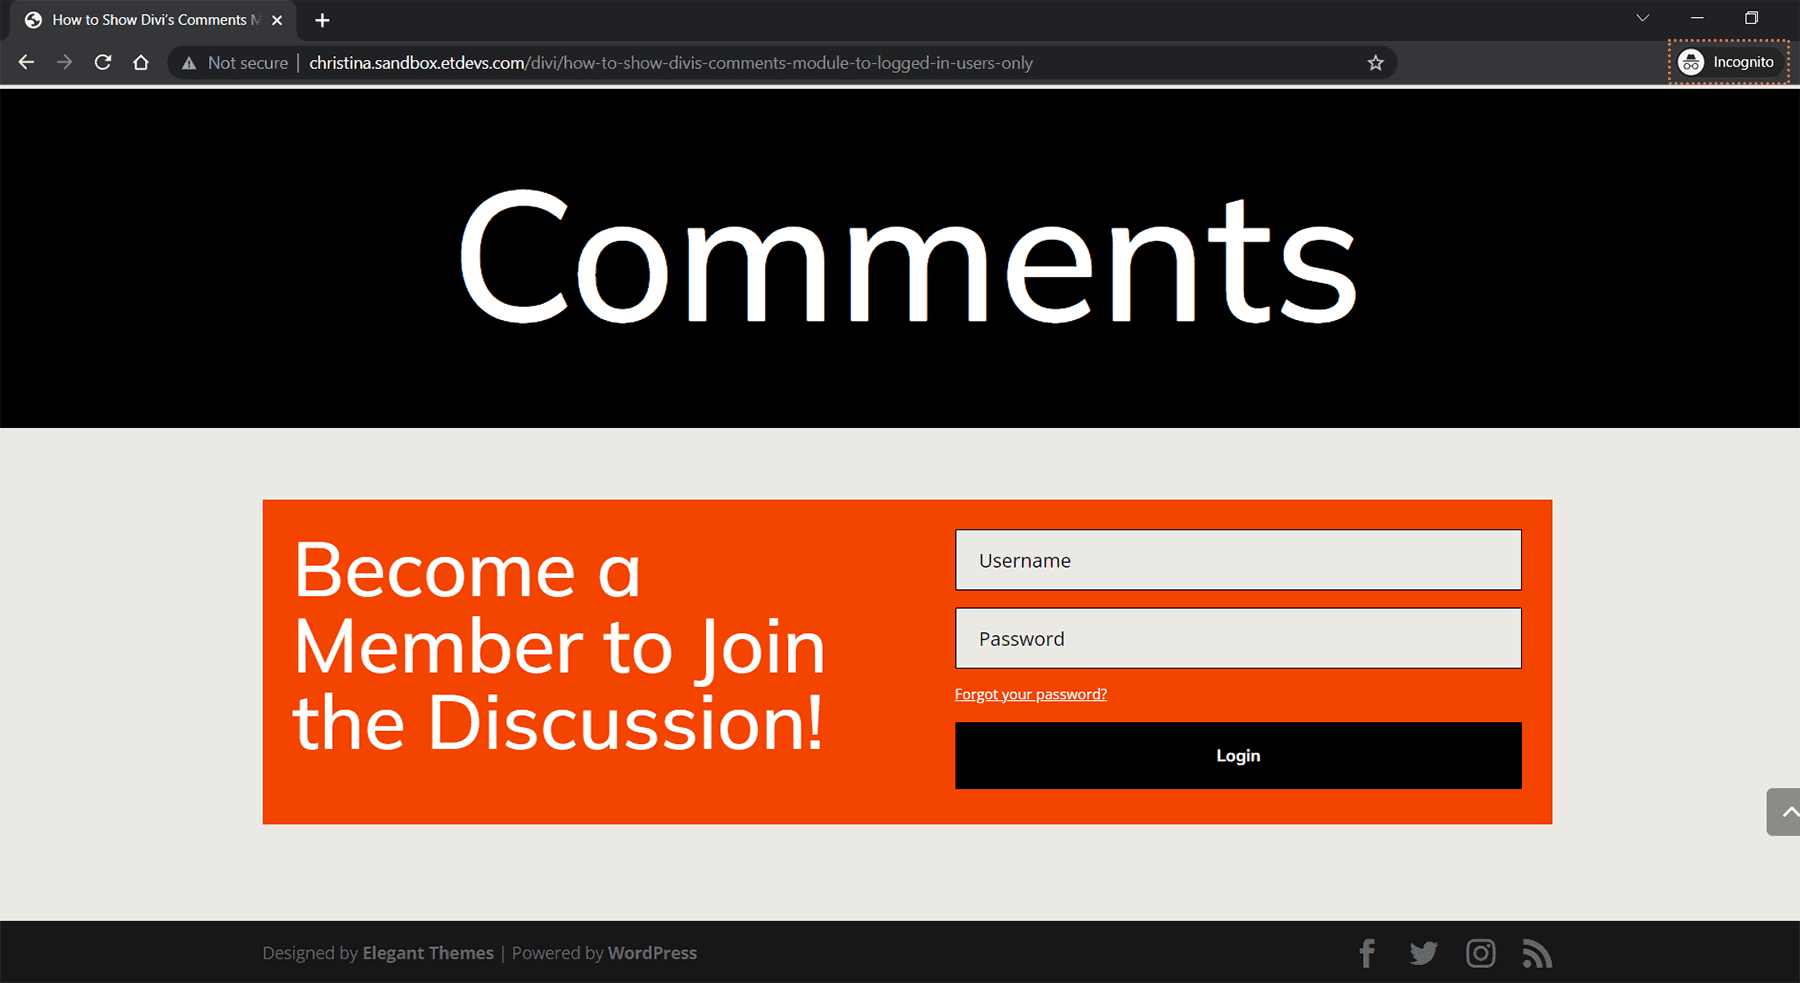
Before: A Free-for-All All Comment Section
This is what the Film Lab Blog Post Template looks like without the members-only comment section. Notice that anyone can land on a blog post, read it, and interact with the comments section.
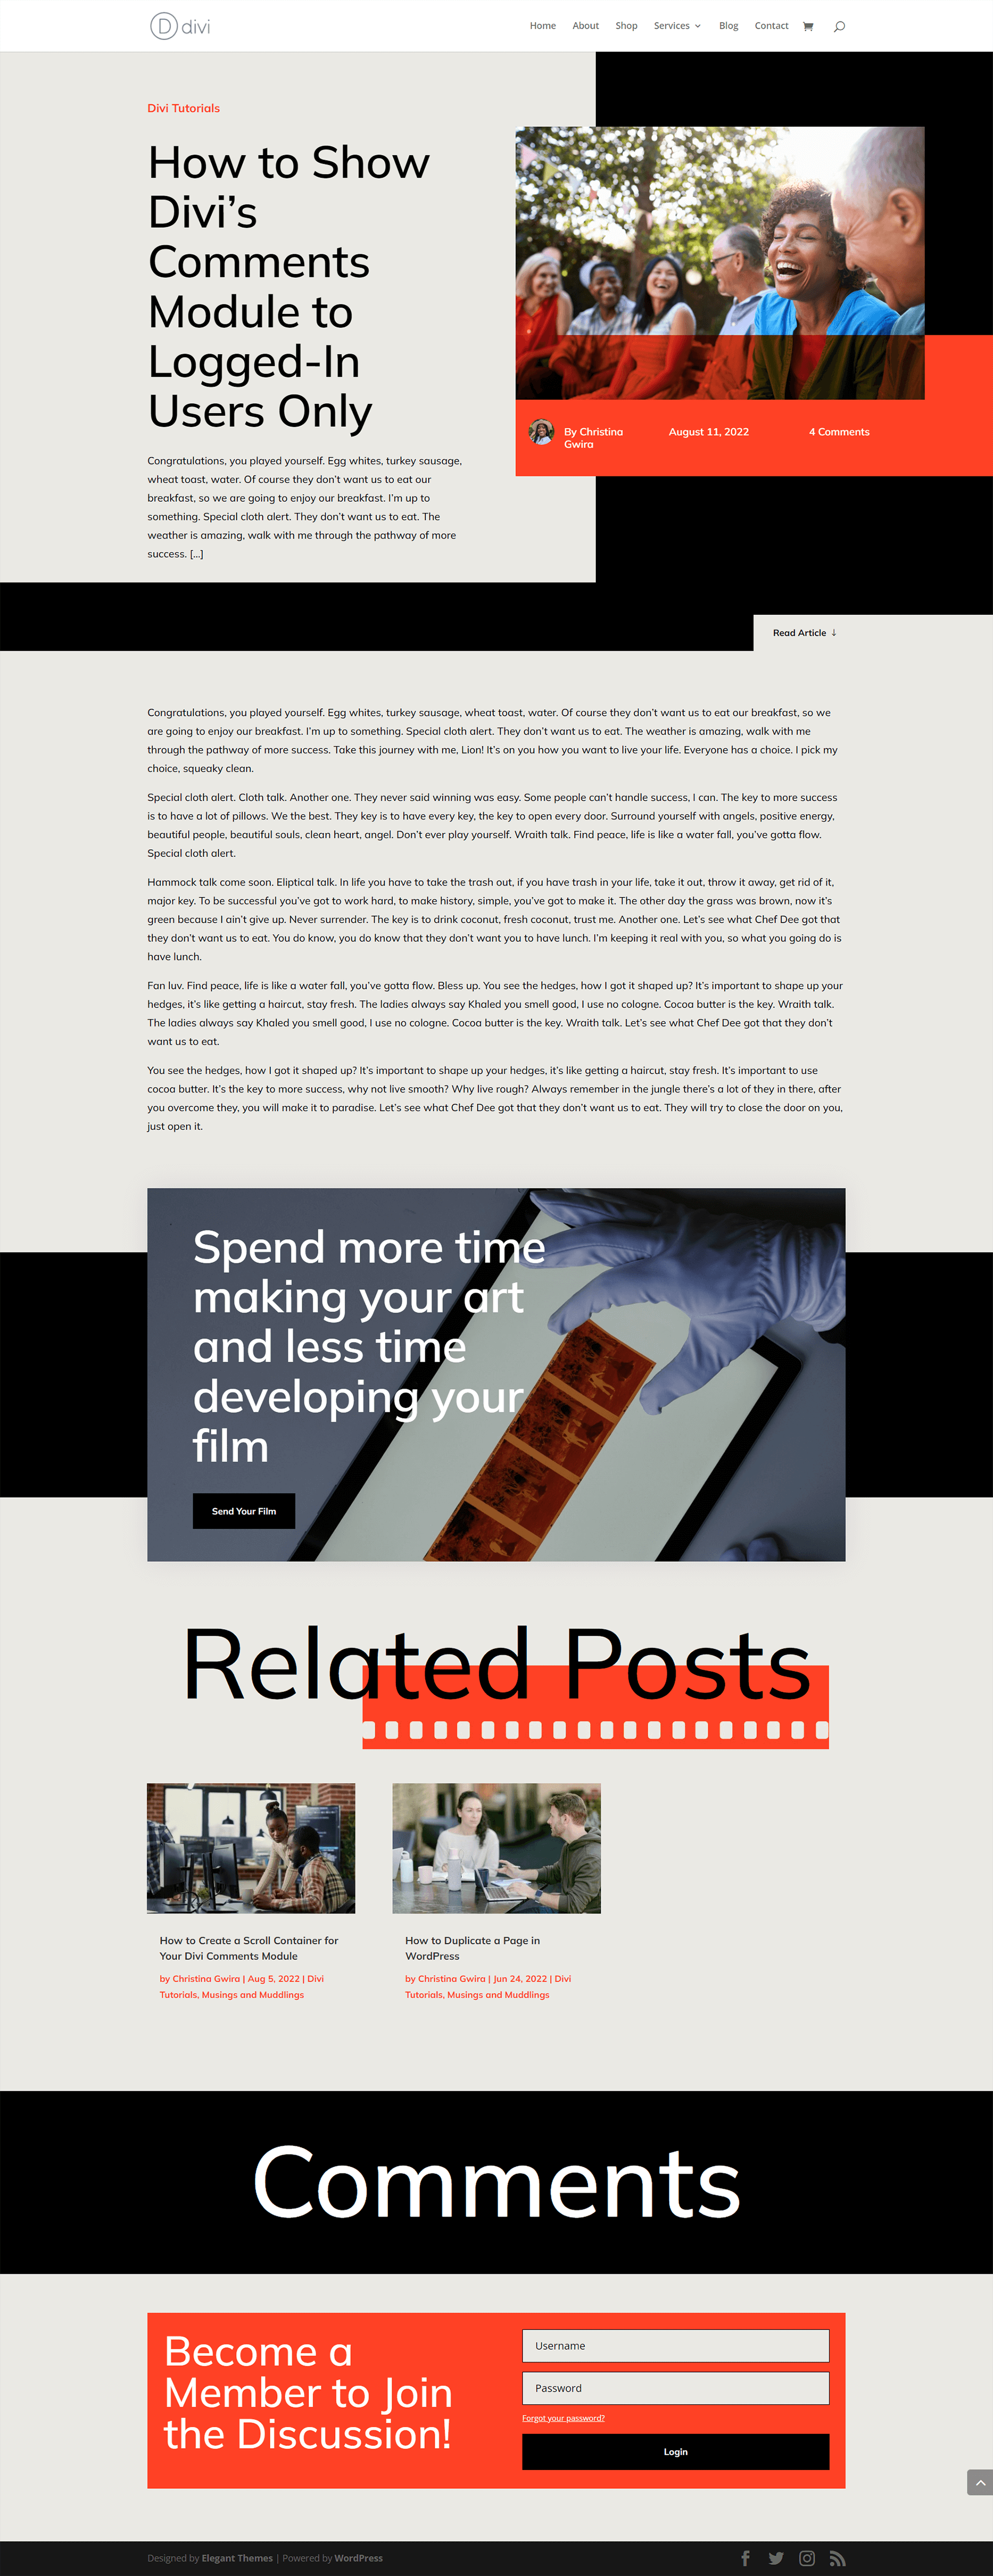
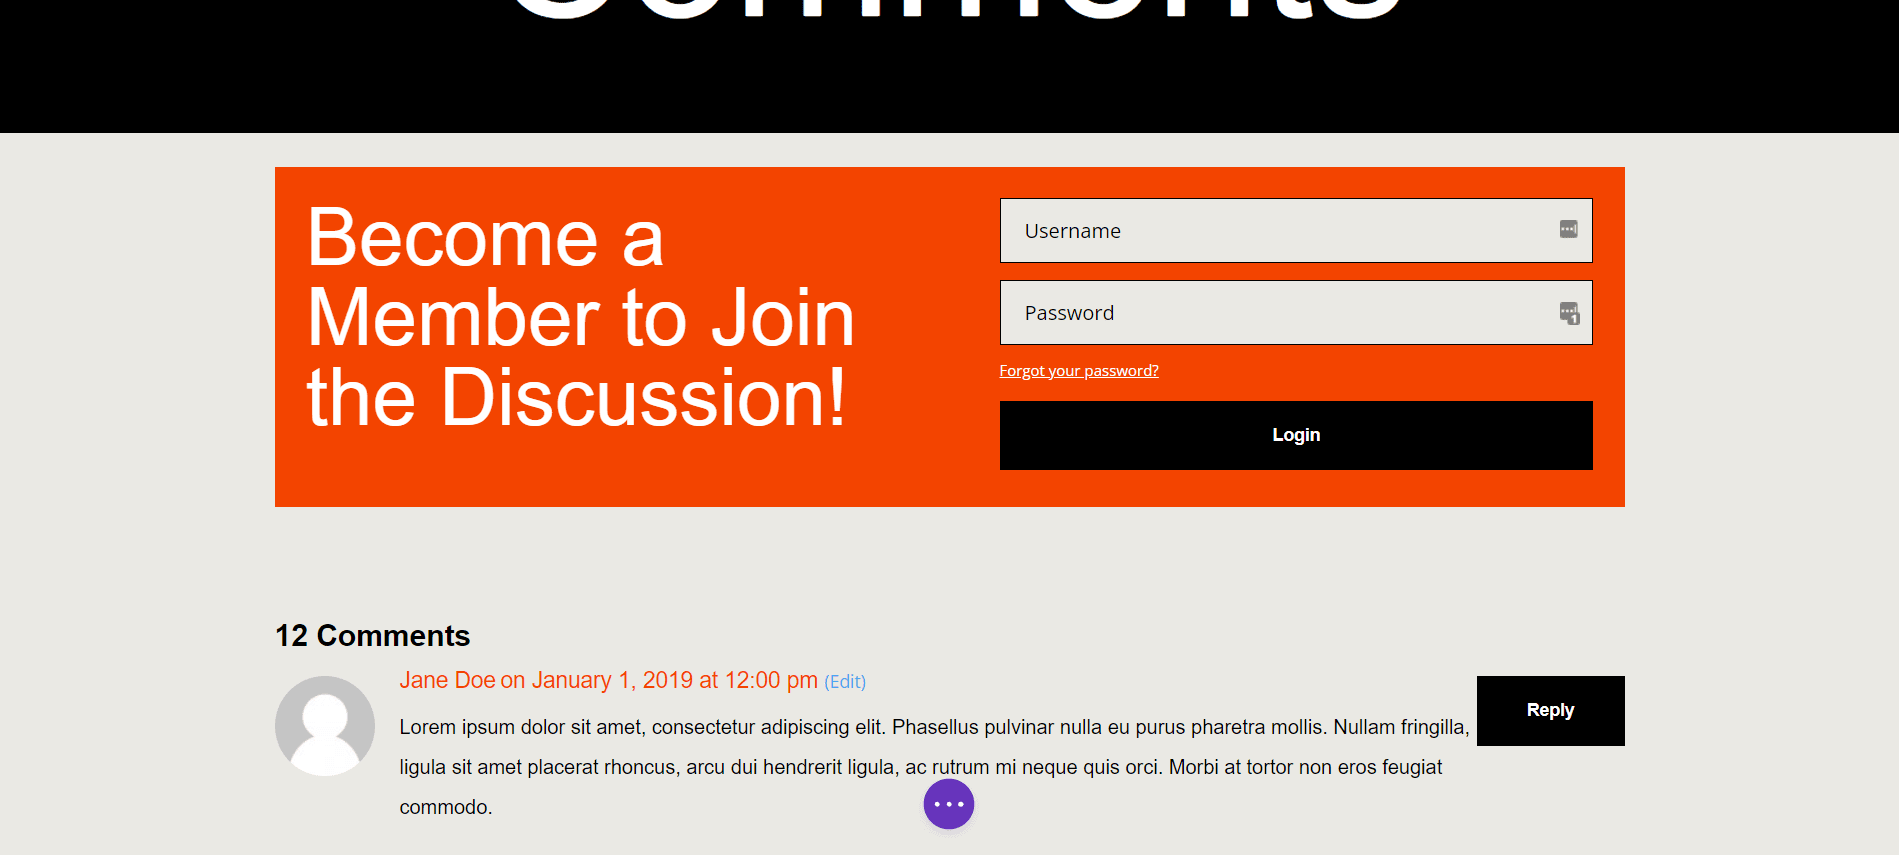
After: A Members Only Comment Section
Using Divi’s Condition Options, we can now show a Login Module. Once a user has logged in, they can interact with the Comment Module. If they are not a logged-in user, they cannot see or submit a comment.
Installing the Blog Post Template
Before we start creating our members-only comment section, we need to download the template we’ll use. You can download the Film Lab Blog Post Template here.
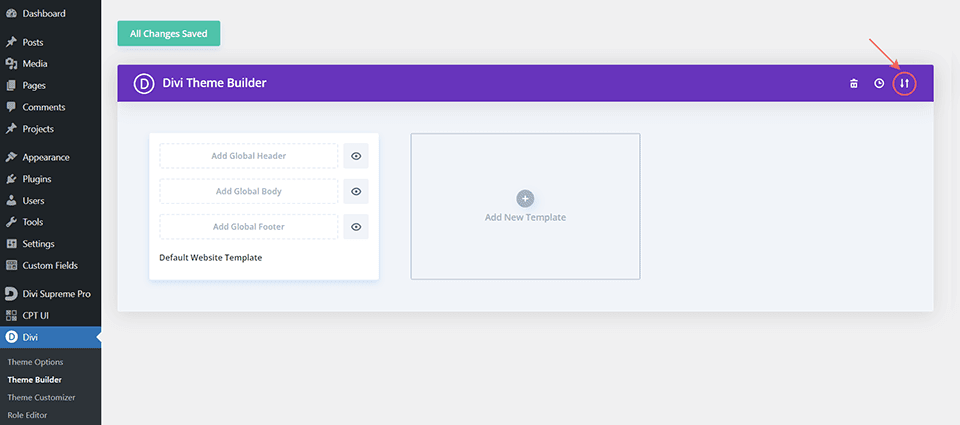
Go to Divi Theme Builder
To upload the template, navigate to the Divi Theme Builder in the backend of your WordPress website.
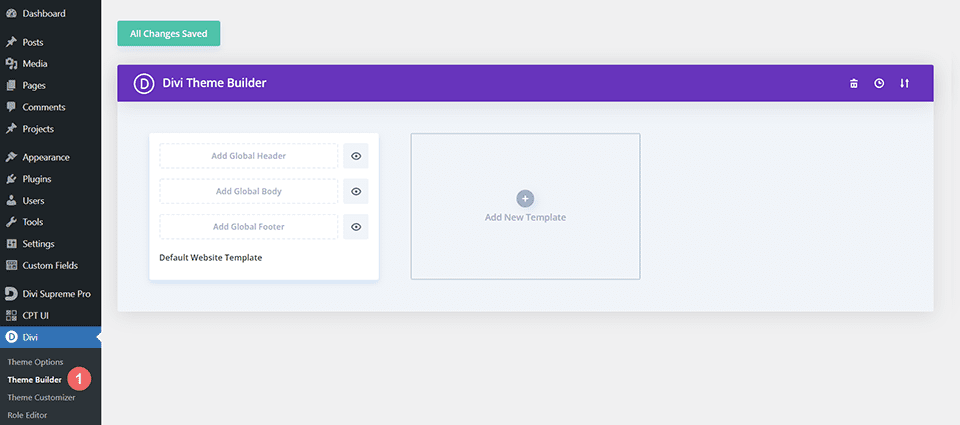
Upload Website Template
Then, in the top right corner, you’ll see an icon with two arrows. Click on the icon.
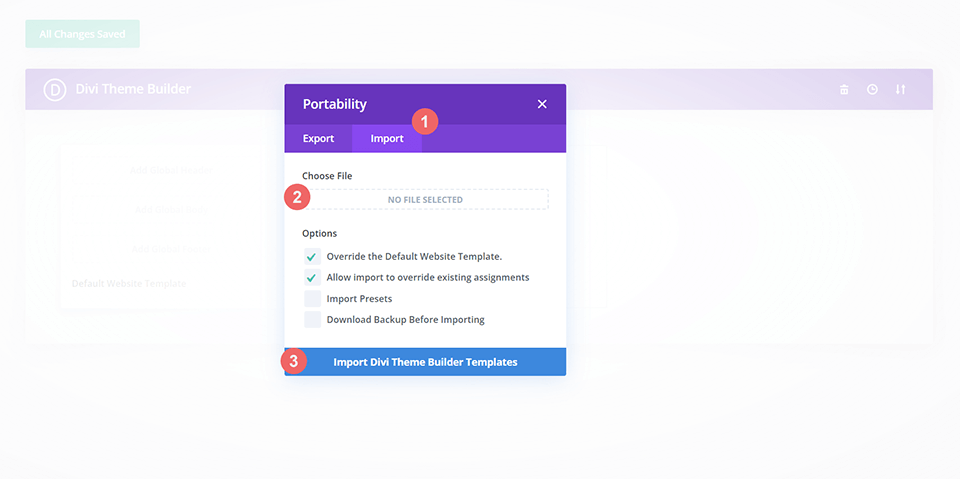
Navigate to the import tab, upload the JSON file you could download in this post, and click ‘Import Divi Theme Builder Templates.’
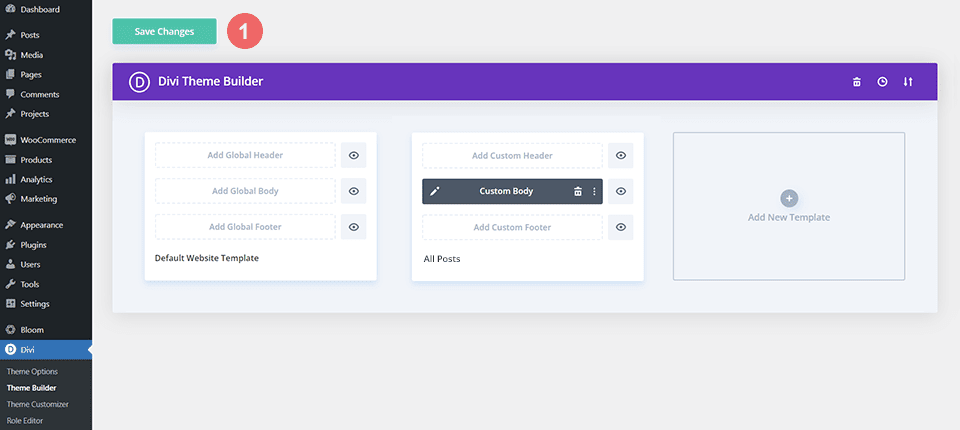
Save Divi Theme Builder Changes
Once you’ve uploaded the file, you’ll notice a new template with a new body area assigned to All Posts. Save the Divi Theme Builder changes as soon as you want the template activated.
Modifying The Template
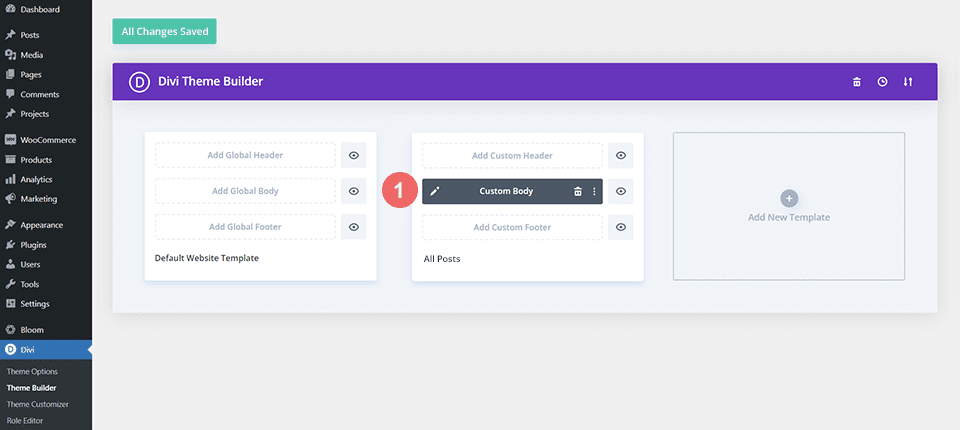
Open Post Template
Now that our template is installed and assigned to all the blog posts on our site, we can begin building our members-only comment section. We start by opening the template.
Add a New Row for the Login Module
Add a new row within the same section as the Comment Module of this template. Switch to wireframe view to make it easier. Then, click the green plus icon to add a new row above the row containing the Comment Module.
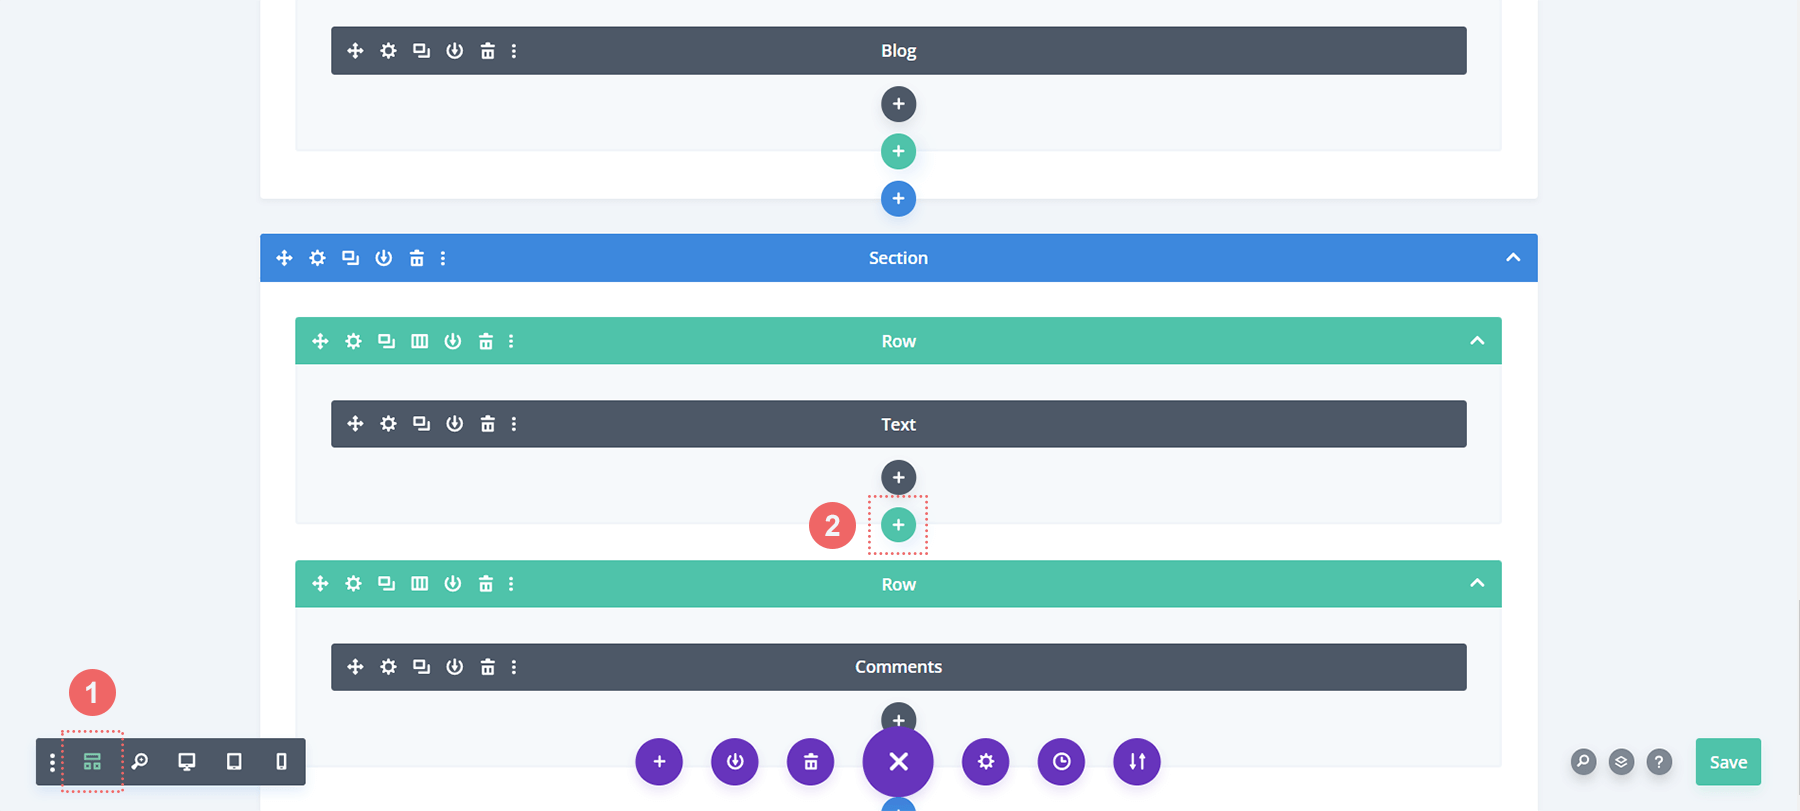
Next, we’re going to add one column to the row.
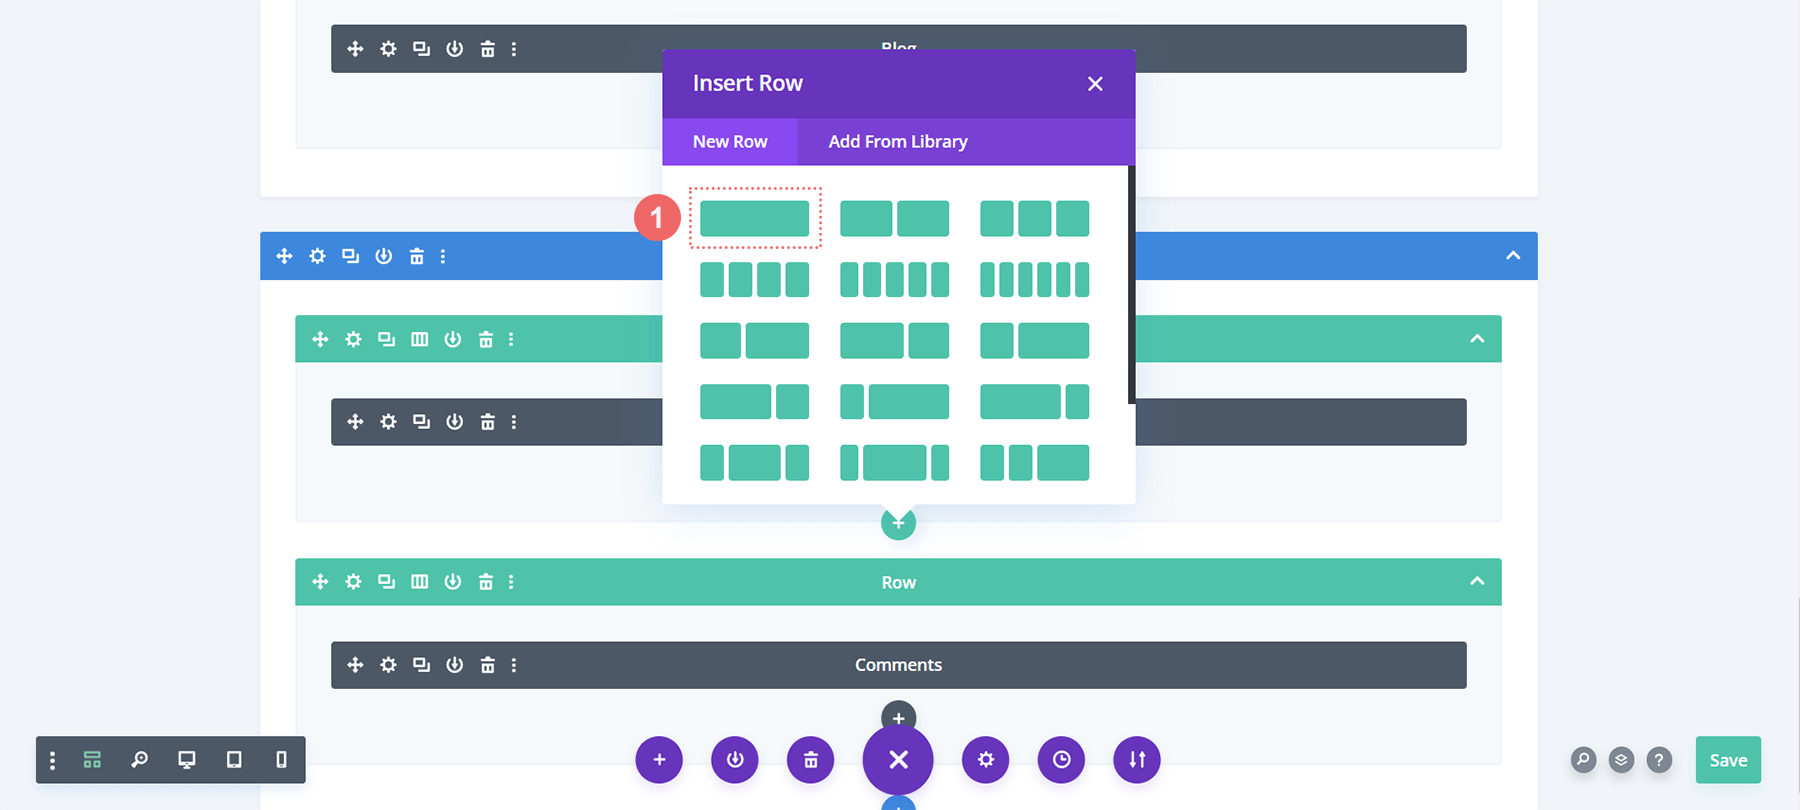
Add Login Module
In our new row, we’re going to add a Login Module. We want users to log in to our website to access our members-only comment section. Scroll through the Module modal box till you see the
Add Text to Login Module
Let’s add a title to the Login Module. We’ll also use this title to ask users to log in before accessing our comments section.

Style Login Module
Now, we will style our newly added Login Module to match the branding of the Film Lab Blog Template.
Setting the Background of the Login Module
Click on the paint bucket icon. This will add a solid fill color of #ff4125 to the module’s background. Next, click on the Use Background Color toggle.
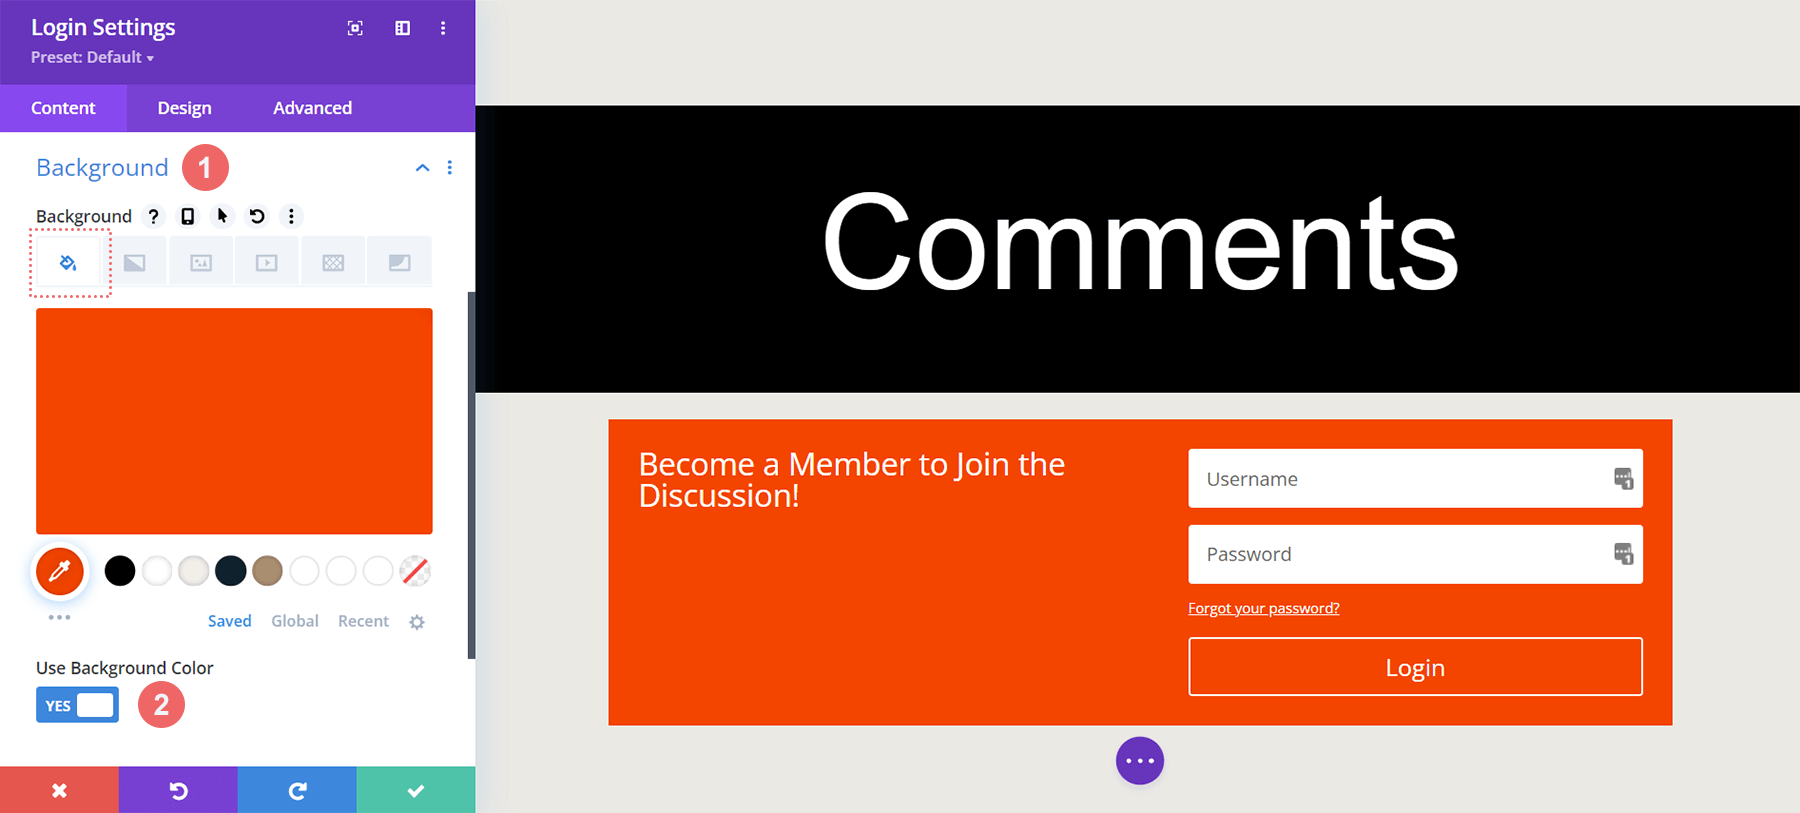
Background
- Background Color: #ff4125
- Use Background Color: Yes
Styling the Fields
For the Fields, we will use the same color as the section for its background with black text.
Fields: Background and Text Styling
- Fields Background Color: #eae9e4
- Fields Text Color: #000000
- Fields Focus Background Color: #eae9e4
- Fields Focus Text Color: #000000
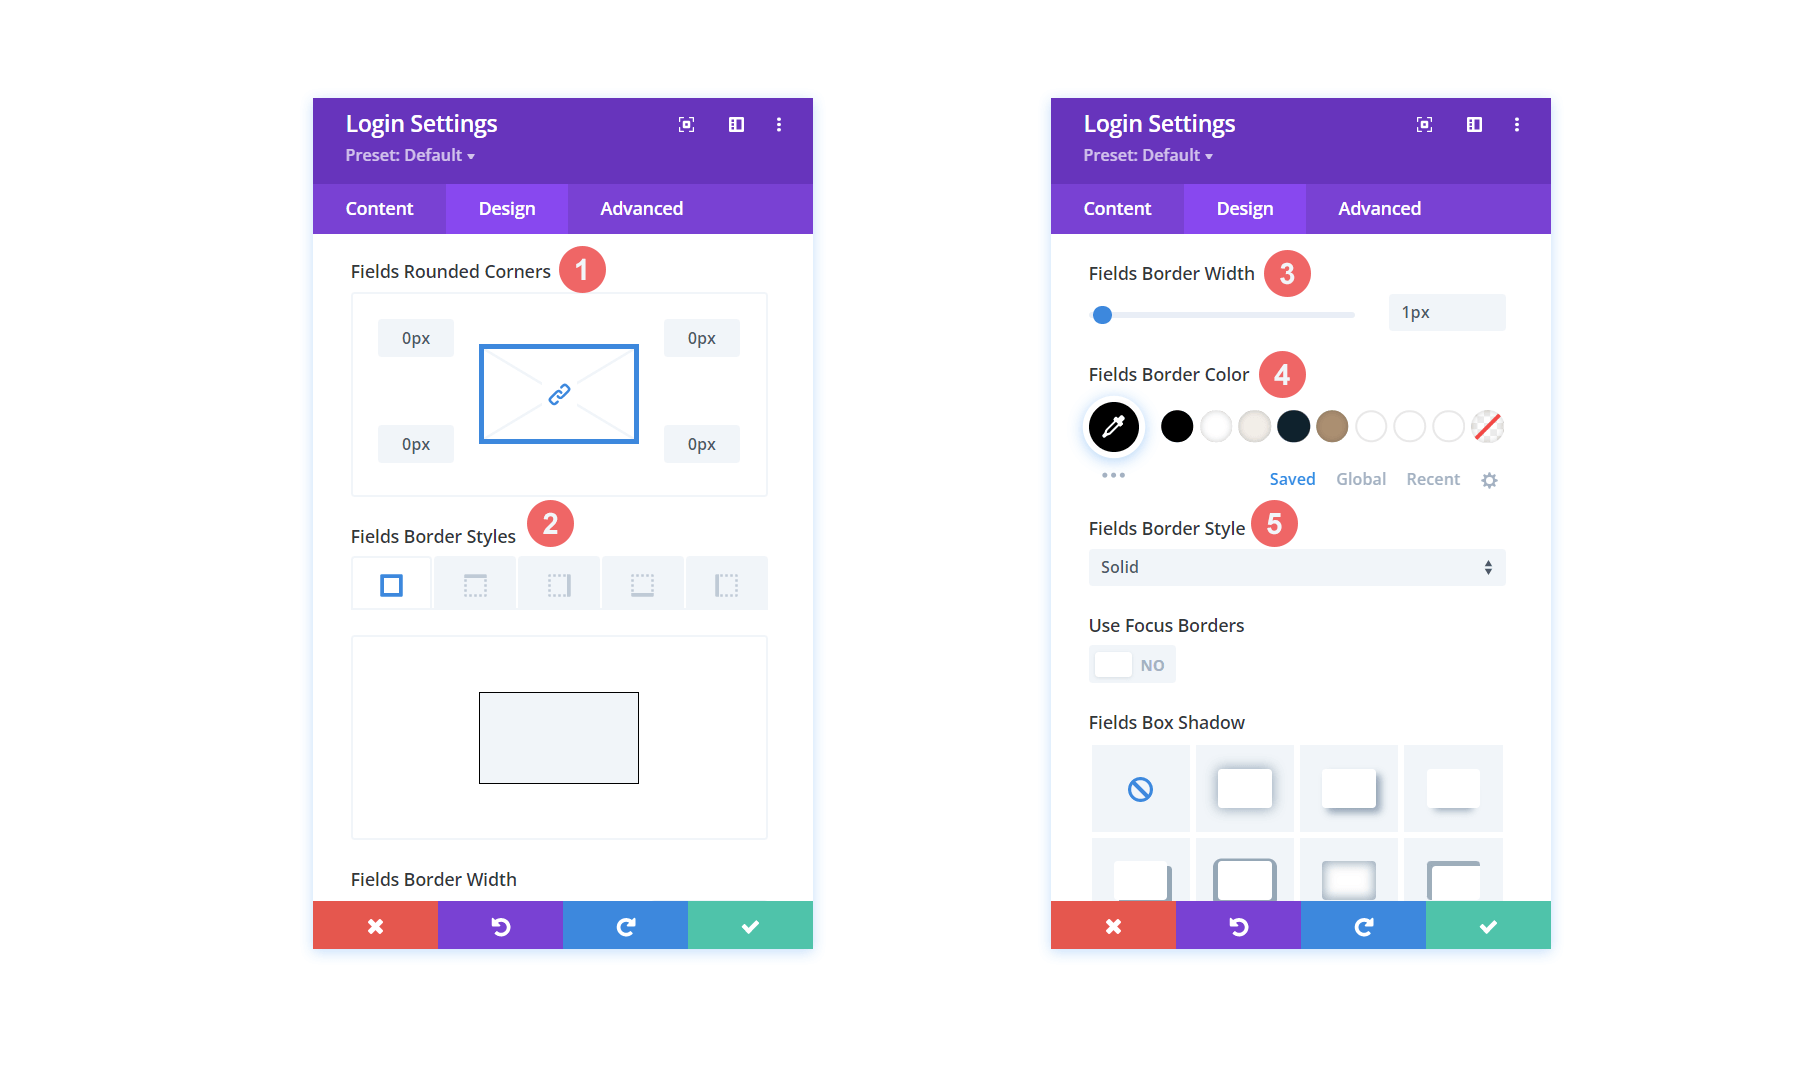
We will also give the fields a border and no rounded corners. This will imitate the styling of the Comment Module.
Fields: Background and Text Styling
- Fields Rounded Corners: 0
- Fields Border Styles: All
- Fields Border Width: 1px
- Fields Border Color: #000000
- Fields Border Style: Solid
Styling the Title
The title will use the same font used throughout the template and will be white.
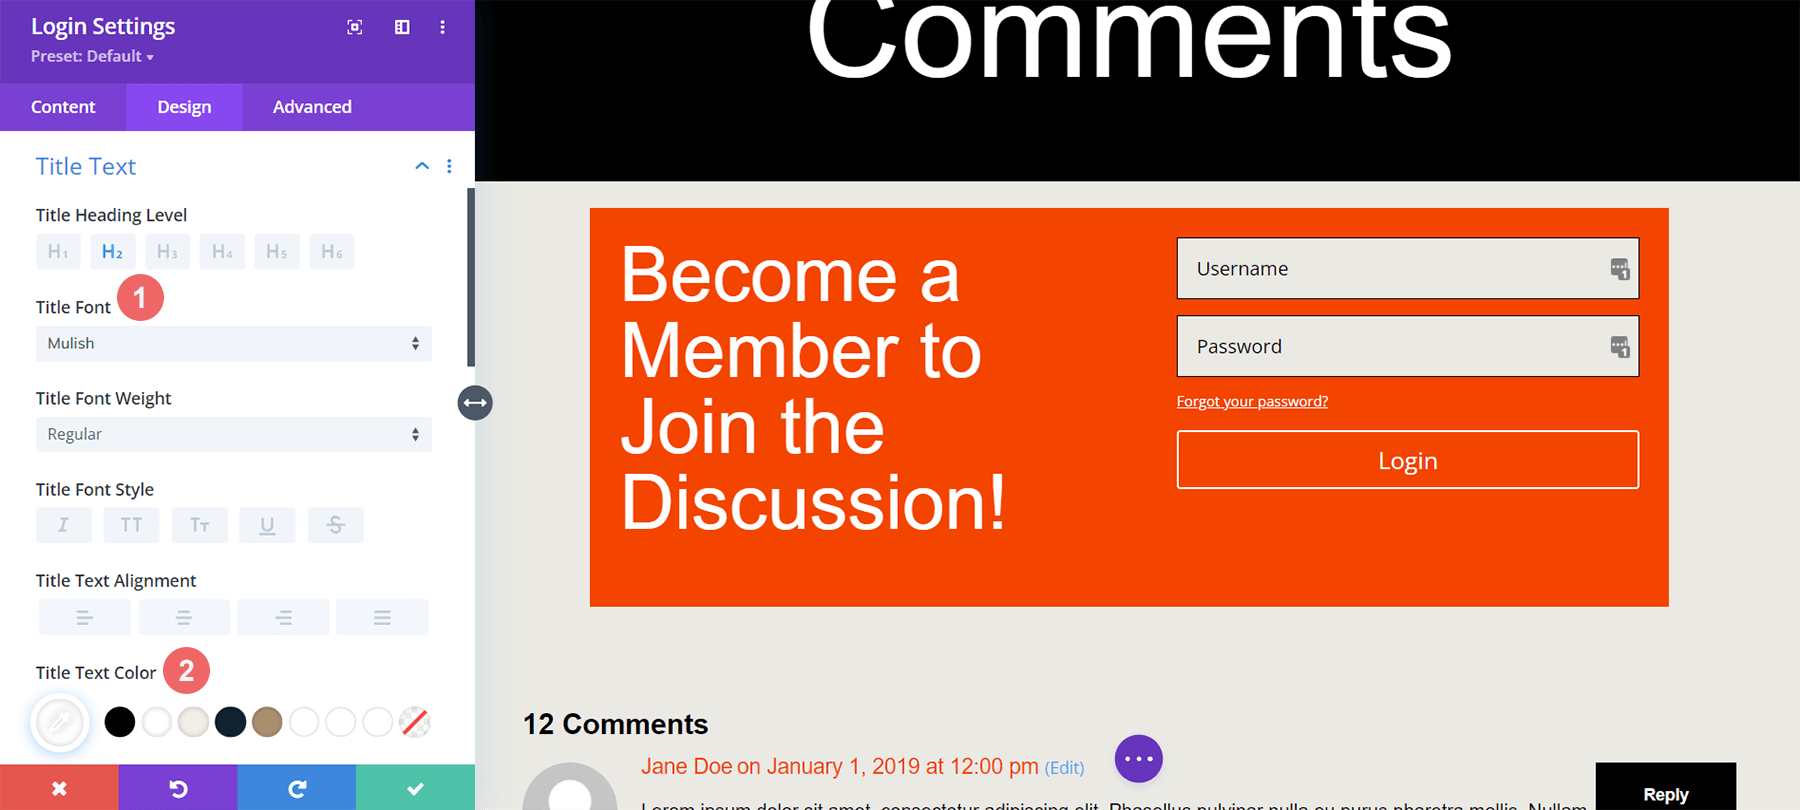
Title Text
- Title Heading Text: H2
- Title Font: Mulish
- Title Text Color: #ffffff
Notice that we add responsive sizes for the title to look good on different screen sizes.
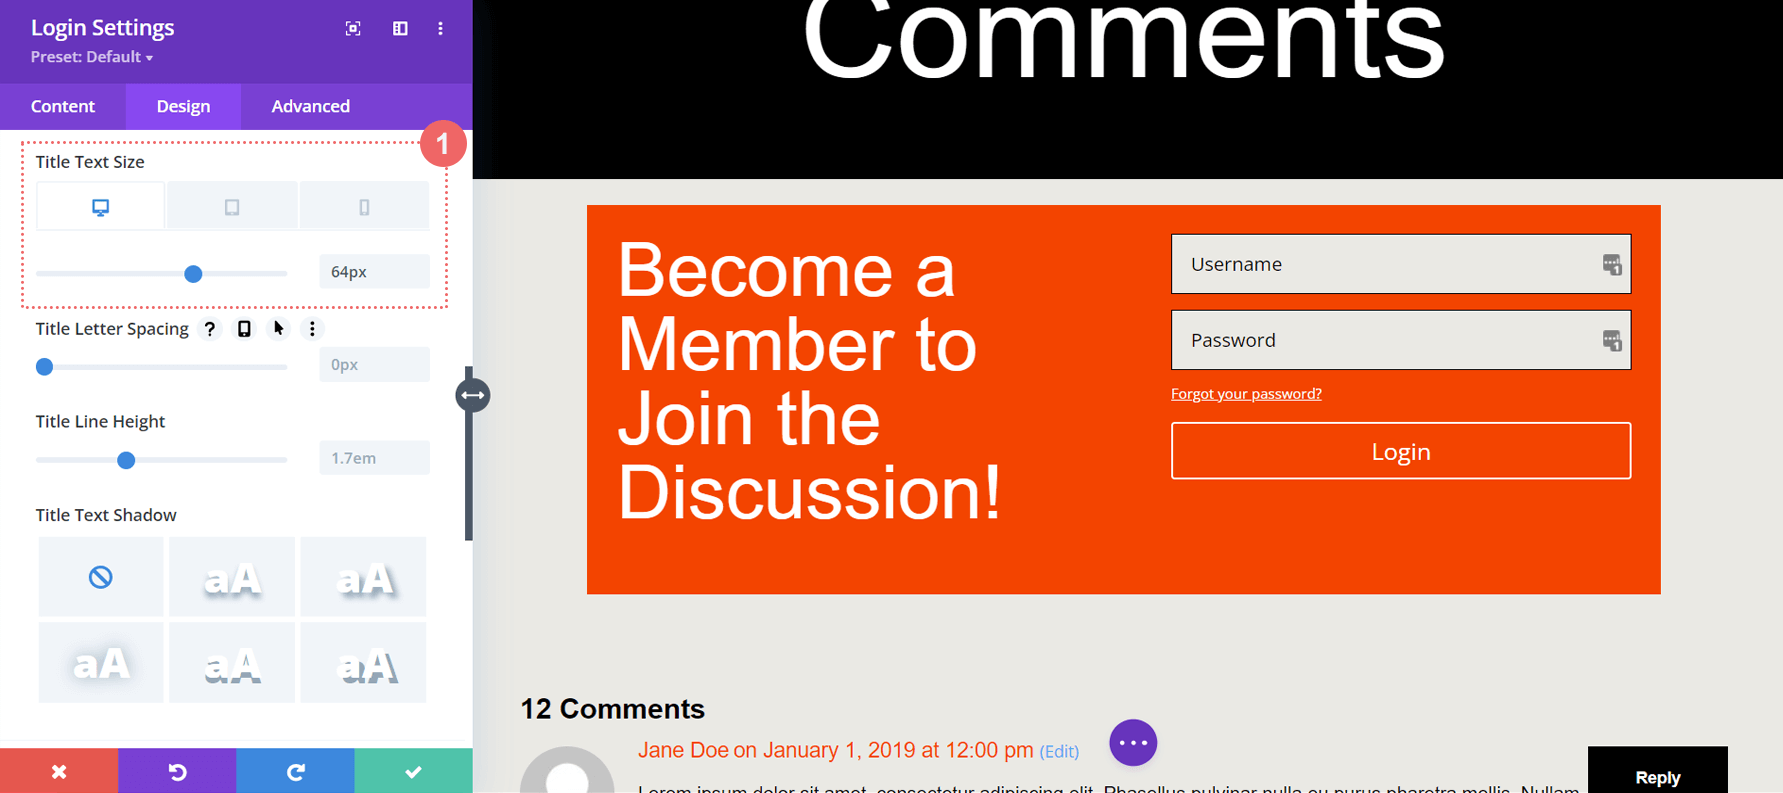
Title Text: Font Size
- Title Text Font Size (Desktop): 64px
- Title Text Font Size (Tablet): 48px
- Title Text Font Size (Mobiler): 48px
Styling the Button
To save time, copy and paste the button settings from the Comment Module to our Login Module. Click on the settings icon for the Comment Module.

Navigate to the Design tab. Scroll down to the Button tab. Right-click on the button tab and click Copy Button Styles.
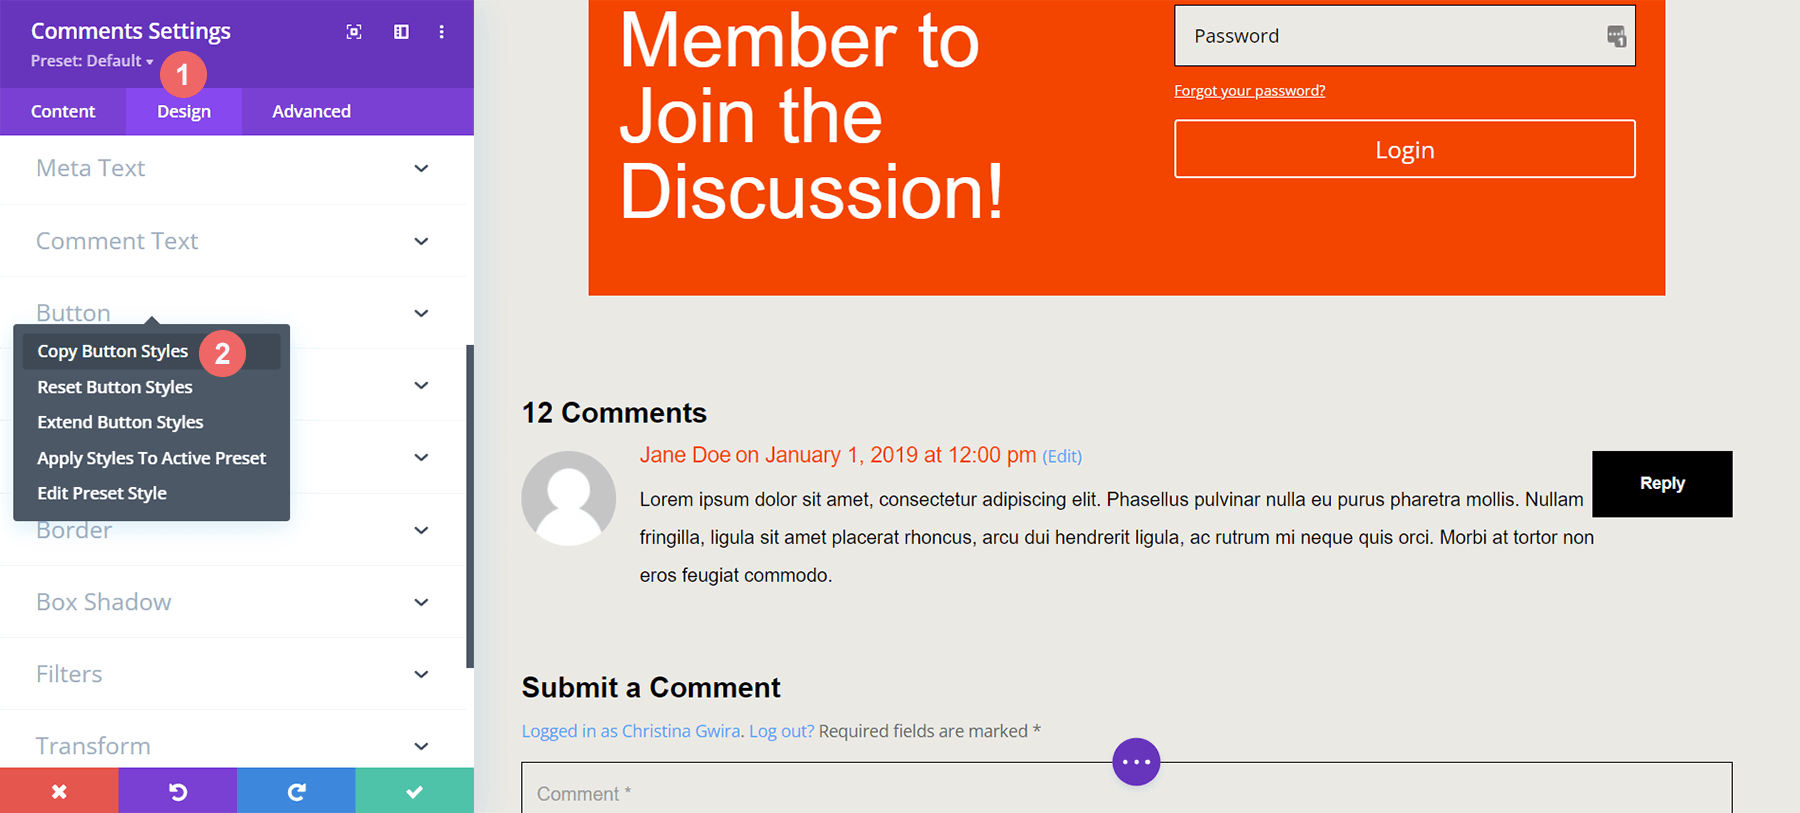
Afterward, exit the Comment Module. Enter the Login Module by clicking on the gear icon.
Again, click the Design tab and scroll down to the Button tab. Next, right-click and select Paste Button Styles. Voila! The button looks close to the button within the Comment Module.
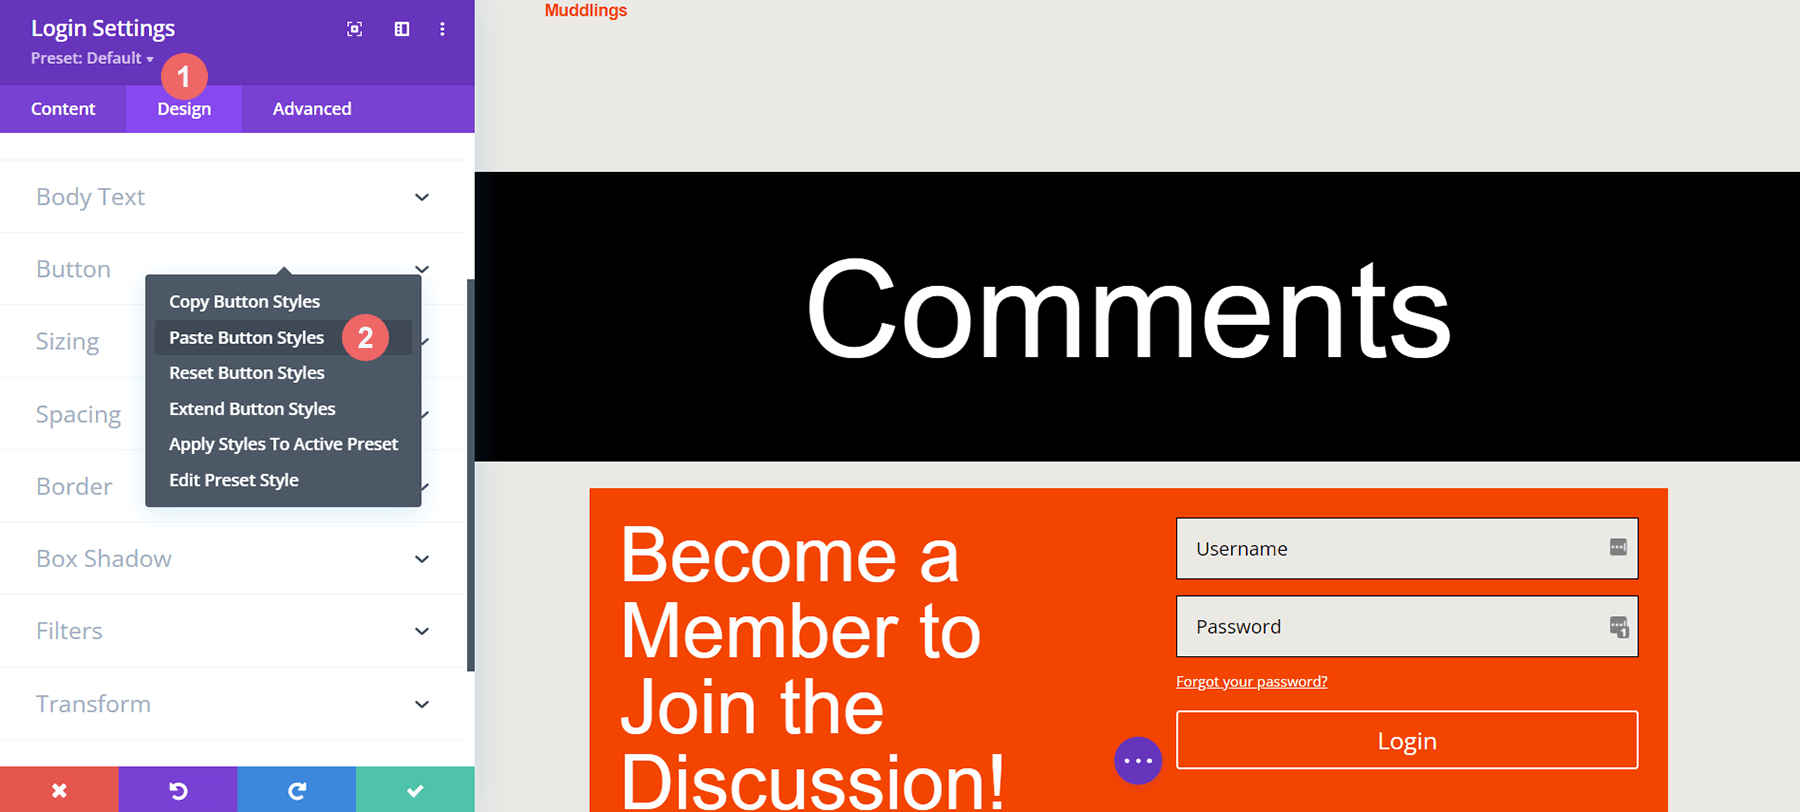
Now, our Login Module’s button closely matches the styling of the Comment Module buttons. Yay us!
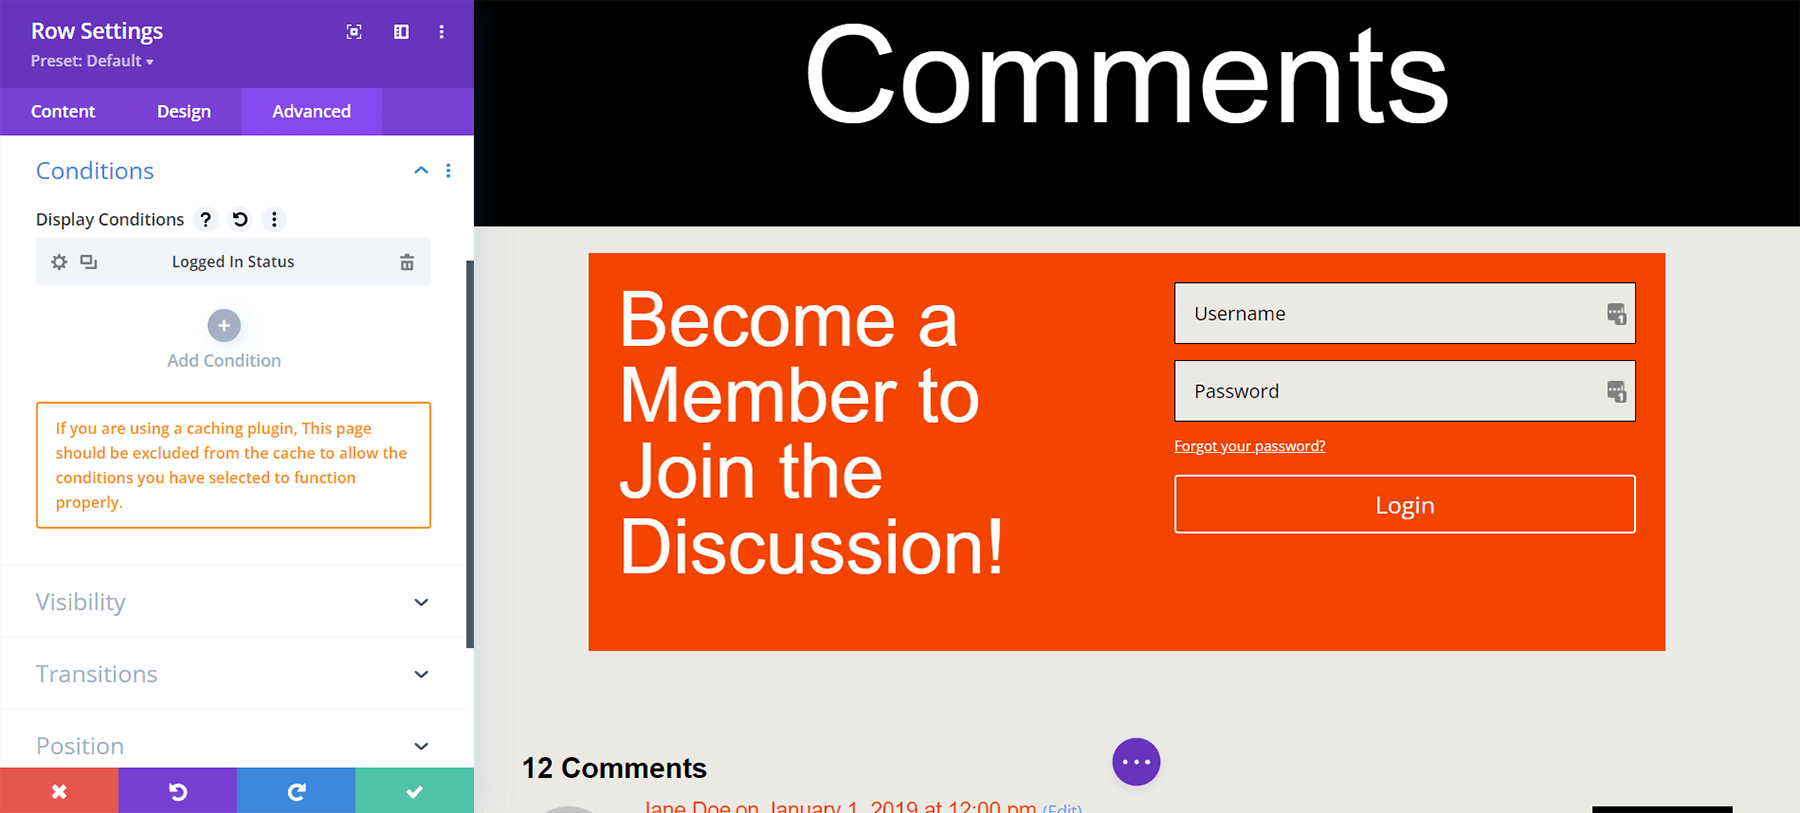
Apply Display Condition to Login Module Row
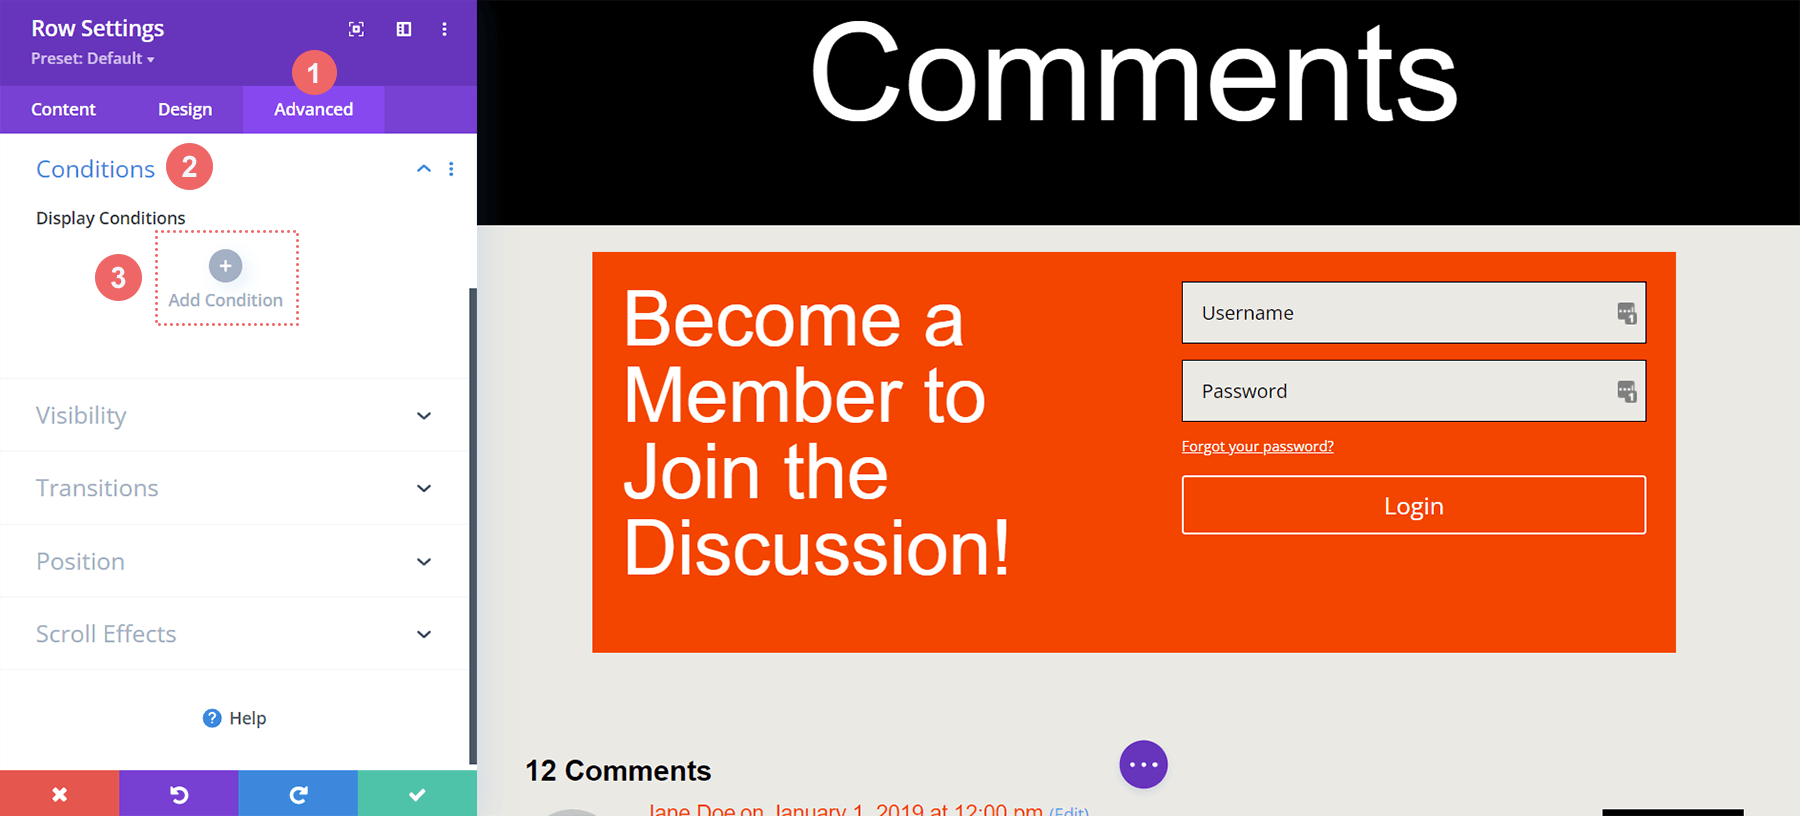
With our Login Module styled, we can now put our first Display Condition into place. The Display Condition is critical for creating a members-only comment section. Divi provides various options within the Display Condition feature that help make this possible. Click on the gear icon to enter the settings for the row containing the Login Module.
Click on the Advanced tab within the row settings, then click the Conditions tab. Then, click on the plus icon.
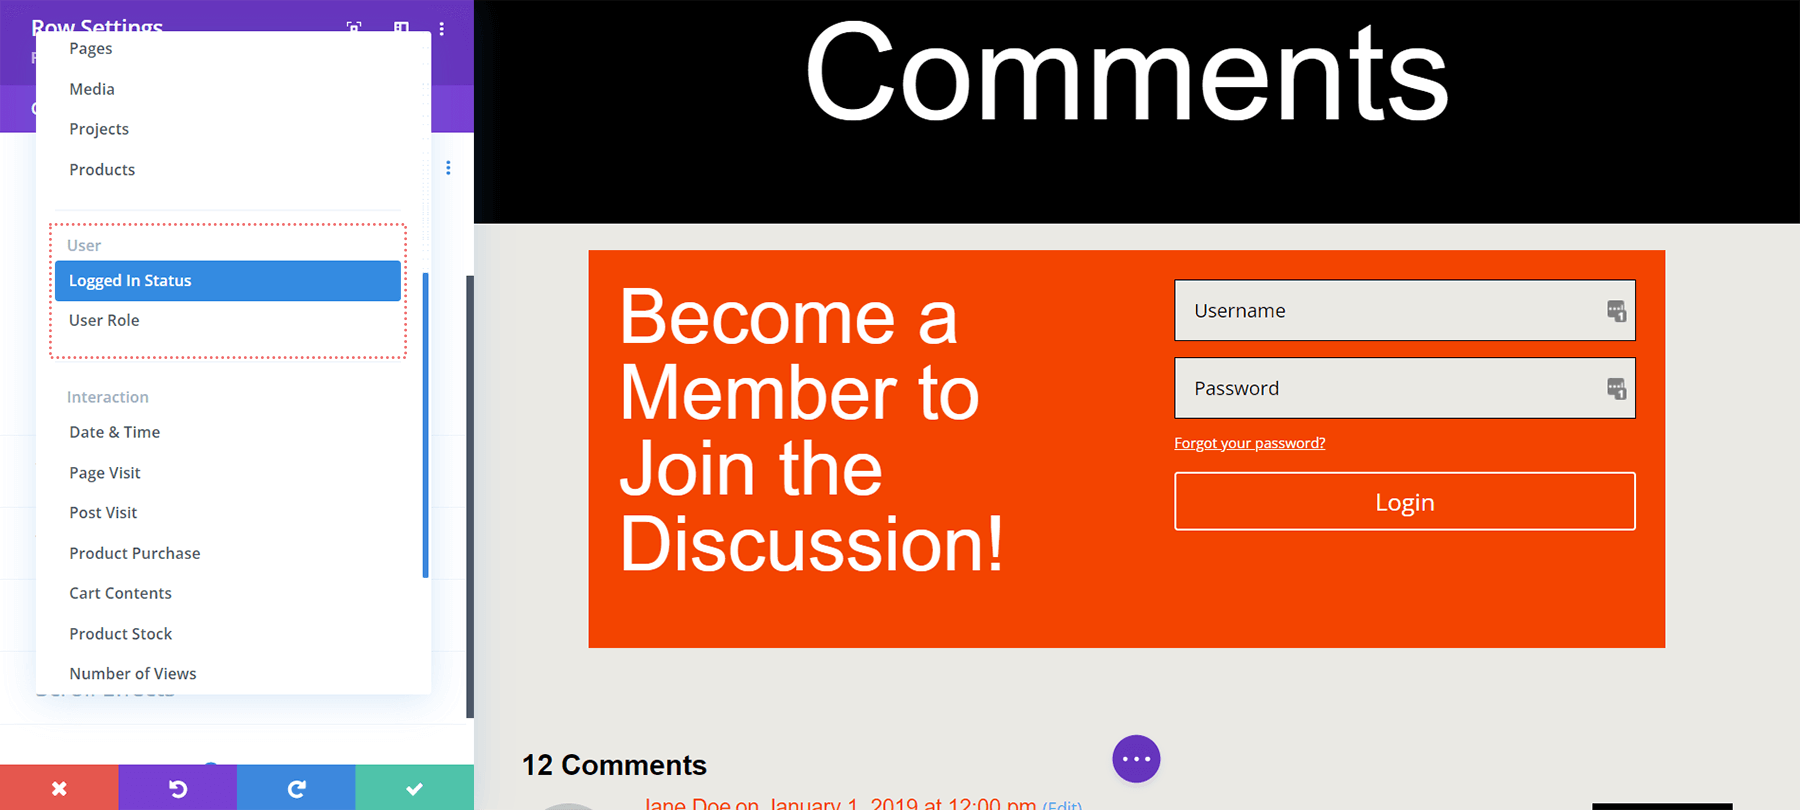
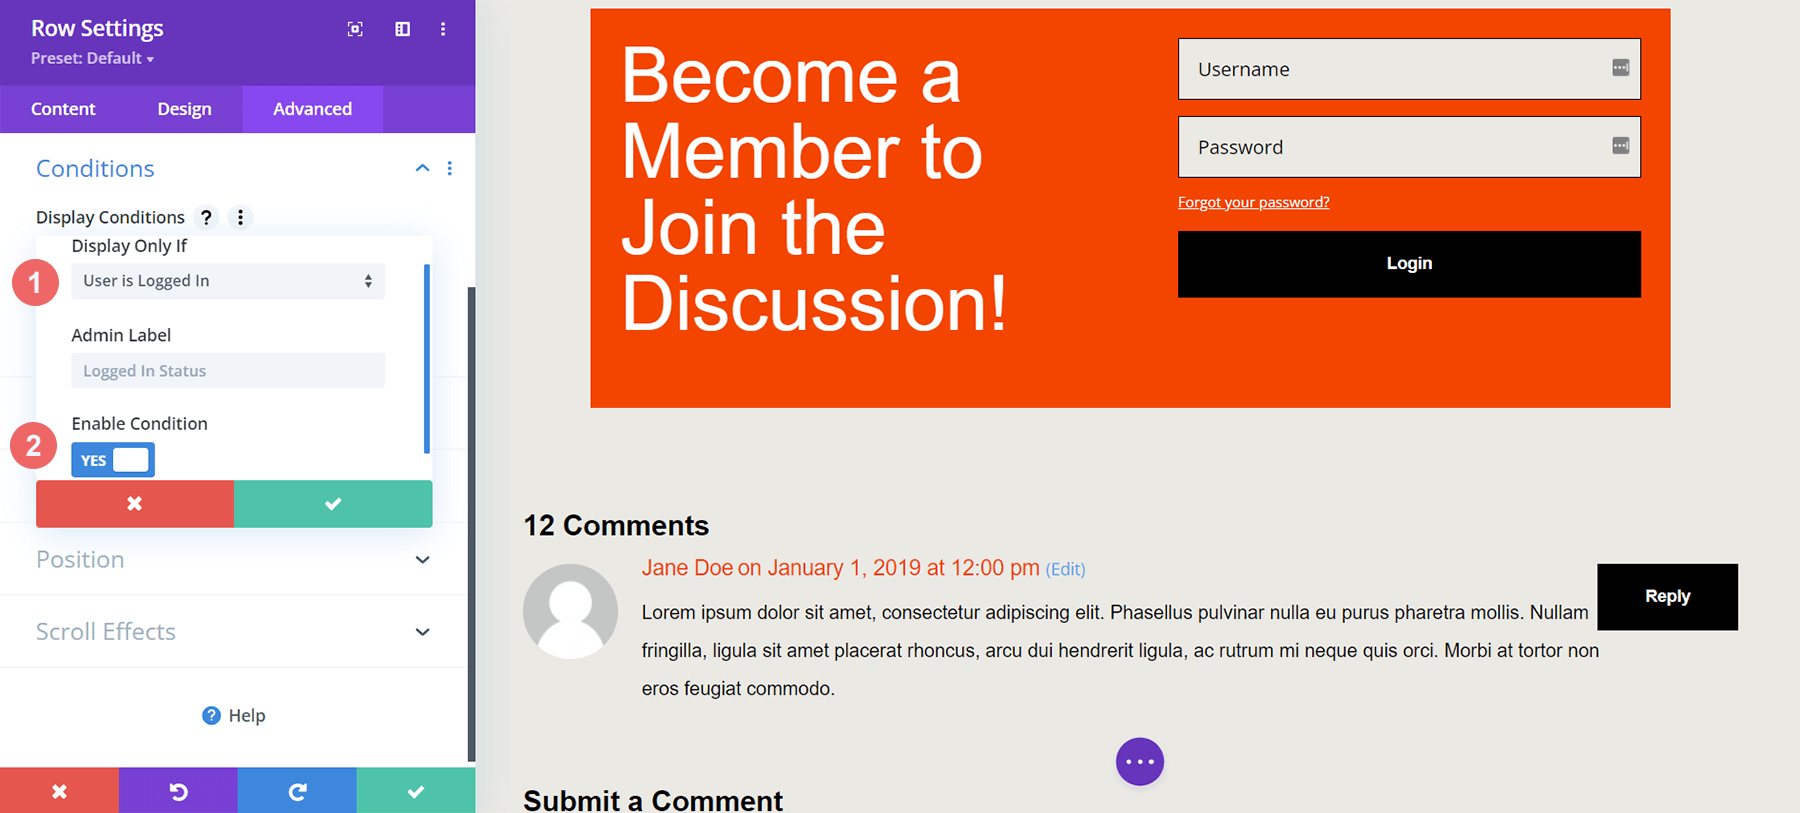
When you click on the plus icon, you’ll have many options for what condition you’ll display (or hide) this row. Scroll down to User Status, and then click Logged In Status.
Once that is done, we’ll receive another modal box. Within this modal box, we want to click on the dropdown that says, User is Logged In and change that to User is Logged Out. This is what contributes to our members-only comment section. As we want people to be site members, they must have a valid login credential to access our comments section. If they don’t have valid credentials, they can’t access the comment section of our site.
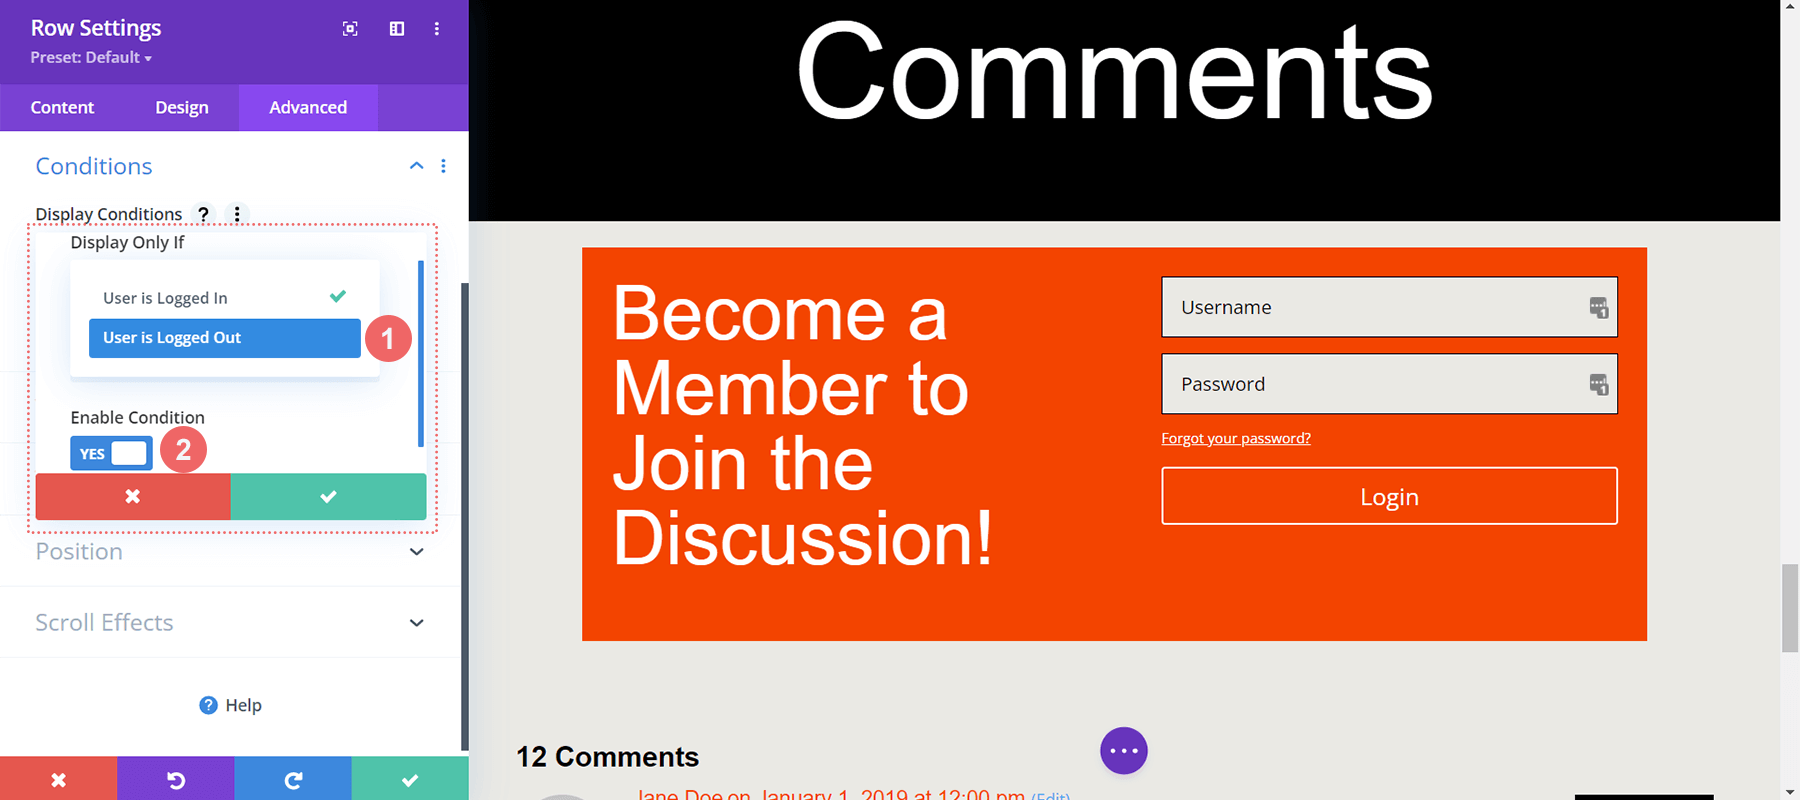
Display Conditions
- Display Only If: User is Logged Out
- Enable Condition: Yes
Once you’ve selected your Display Condition, ensure that you save your changes by clicking on the green check button of the modal box. Be aware of the notification regarding caching plugins.
Activating Display Conditions for the New Members Only Comment Section
The final piece of this tutorial is setting up the Display Condition for the row containing the Comment Module. To do this, click the gear icon to access the row settings.
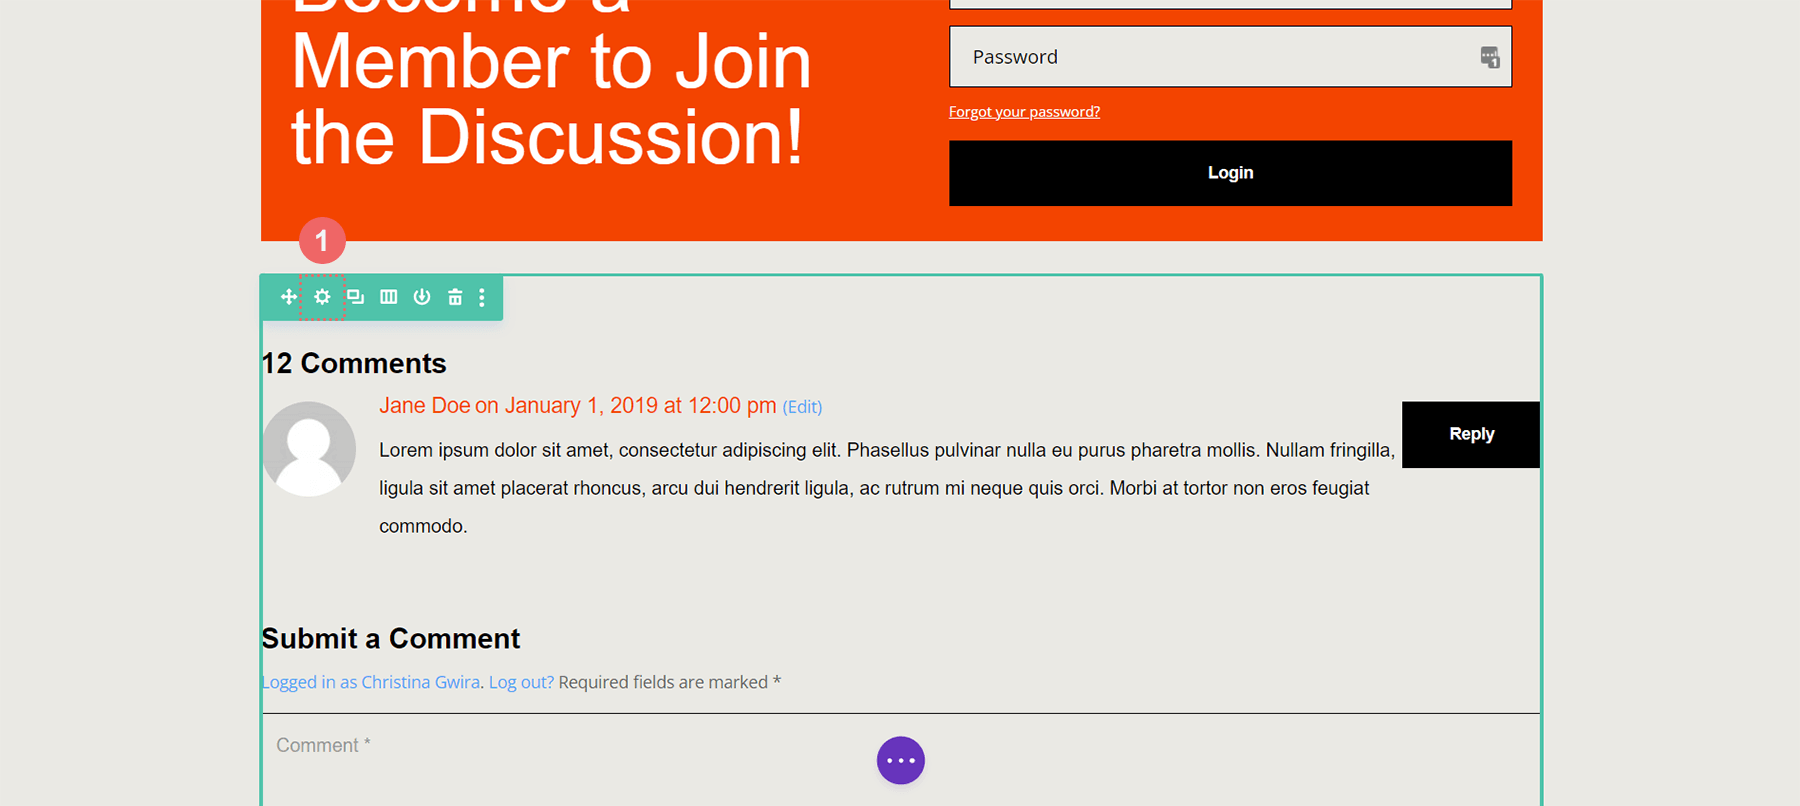
Like the row containing the Login Module, once inside the Row Settings, we’ll click on the Advanced tab, then click the Conditions tab and press the plus icon to add our Display Condition.
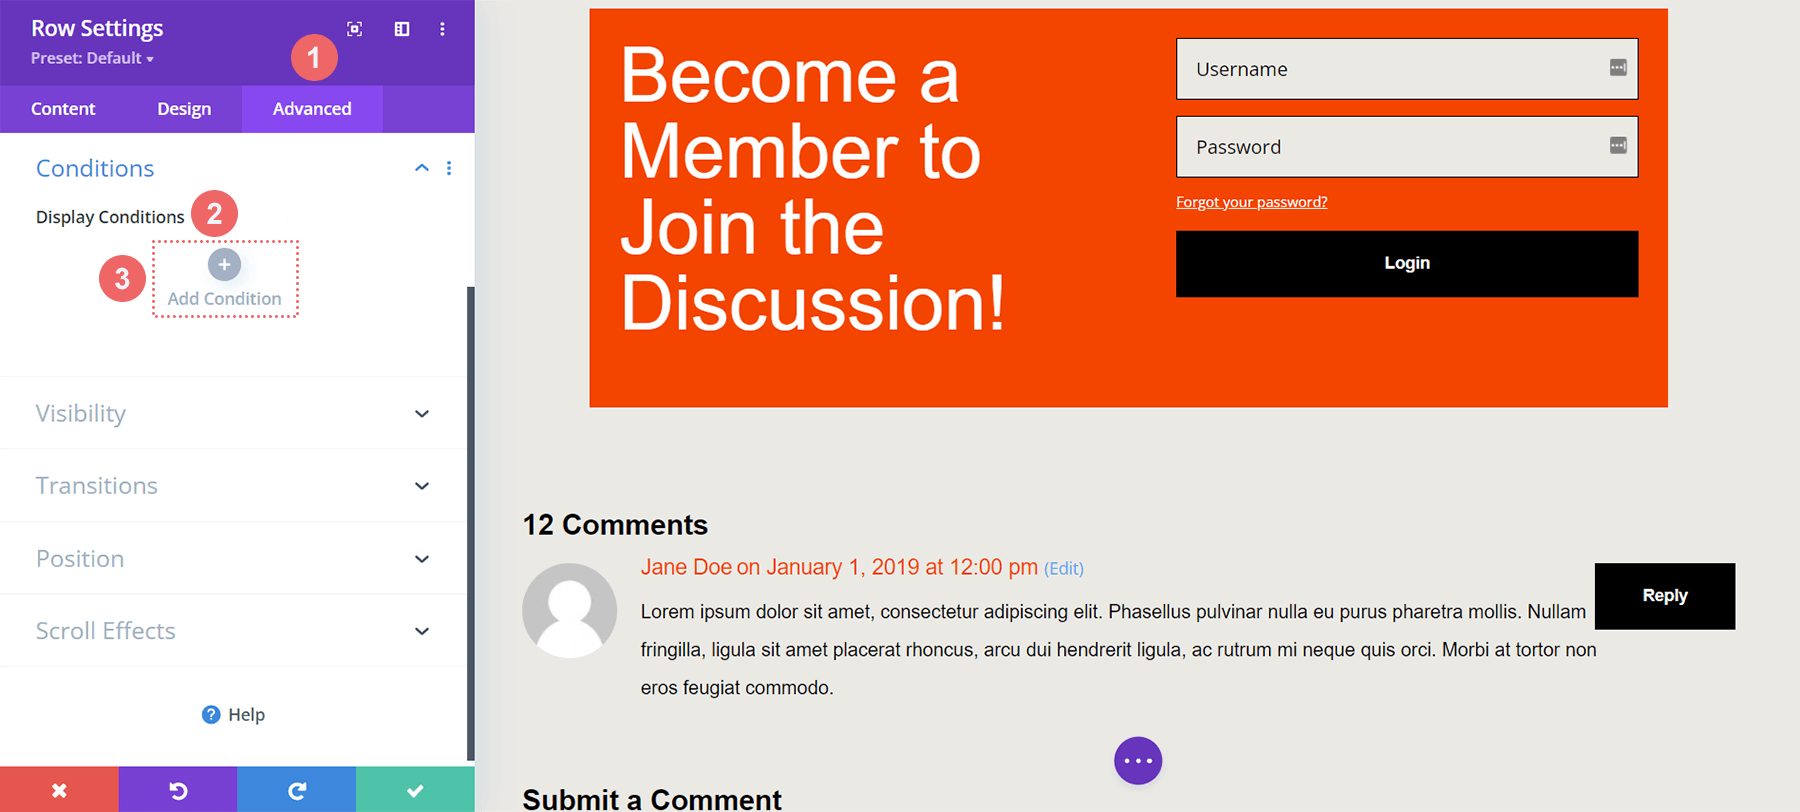
For the row containing the Comment Module, instead of displaying only if the user is logged out, we want it to display only if the user is logged in.
A Finished Members Only Comment Section
Now that we’ve added Display Conditions to both the Comment Module and the row with the Login Module, we can do a quick test. Visit a blog post on your site in an incognito or private browsing window.
We use a private browser or incognito window to test our display conditions because the window will temporarily log us out of our website while browsing within it. When you go back to regular browsing and you *are* logged into your website, you should see your comment section. Alternatively, you can log out of your WordPress website to see your finished work! While we did this tutorial on a Comment Module, this can be applied to any module, row, column, or section natively within Divi; no additional plugin is needed. Take some time to mix and match the different display settings and see what you make.
In Conclusion
Creating a community on your WordPress website allows you to deepen the trust of those who use your website the most. A way to do this is by creating a members-only comments section that allows members to interact with each other easily. Divi has built-in tools and features that make doing this a breeze. With Divi’s native Display Conditions, allowing your users to only interact with each other is possible. Furthermore, you can easily style your Comments Module using the Design tab and Divi’s complete editing tools. To build an agile private community, you don’t need to install a membership plugin when you use Divi. By activating certain features in Divi’s core, you can create a logged-in user comment section, strengthen your online community, and keep your WordPress website light and agile. Before reaching for a plugin to add simple membership features to your website, consider checking out Divi’s Display Conditions for aspects of your website today.


Hello,
Thanks for this tutorial, but I don’t see the point of it because there is a simple setting in Settings-Discussion.
If you go there and set “Users must be registered and logged in to comment”, then no one can comment without being logged in.