
In today’s Divi tutorial, we’re going to show you how you can create simple textured backgrounds and use them as backgrounds for your sections to make your website look just a little bit more authentic. If you check out our recent free Learning Management Layout, you’ll see that we’ve used a textured background throughout all the pages as well.
Now, we’re going to start off by showing you two types of textures which we’ll recreate with Photoshop; textures made with shapes and textures made with brushes. Once you know how to do it, you can be as creative as you want and create authentic textured backgrounds. After that, we’ll show you how you can create stunning results by combining the textured backgrounds and Divi’s design options.
Image Result Made with Shapes
The first image we’ll show you how to create with Photoshop looks like this:
Result with Divi’s Design Options
And once integrated into Divi, you can obtain stunning results such as this:

Image Result Made with Brushes
The second image we’ll be making looks like this:

Result with Divi’s Design Options
And can deliver the following beautiful result when using it on your website:

How to Create & Use Textured Backgrounds with Divi’s Design Options
Subscribe To Our Youtube Channel
Create Textured Background with Photoshop
Made With Shapes
The first textured background we’ll show you how to recreate has mostly shapes on it that are created with the Polygonal Lasso Tool and Eraser Tool. We’ll guide you step by step on how to create the following result:

New File
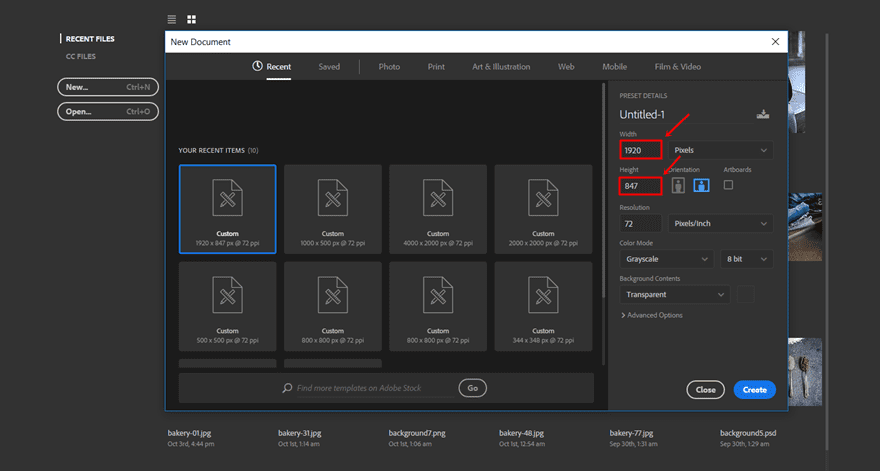
Open Photoshop and start by adding a new file. This file will need a width of 1920px and a height of 847px.
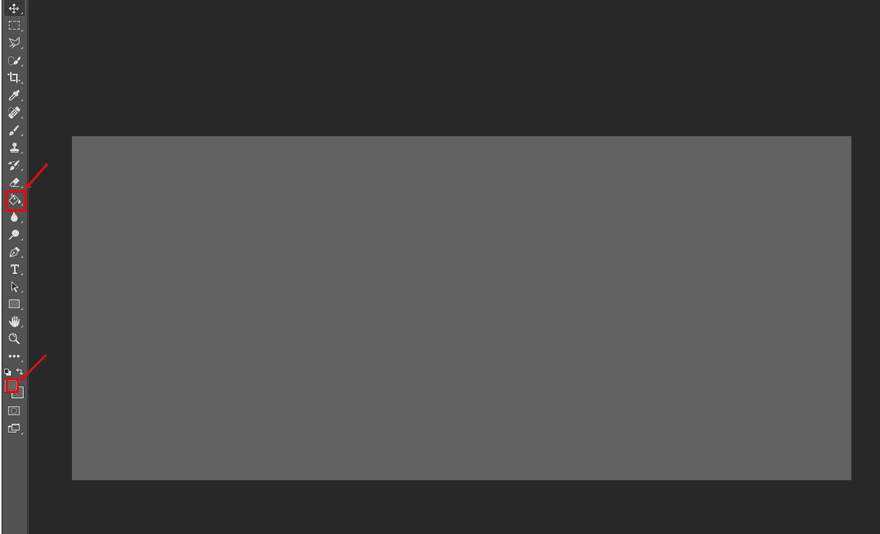
Add Background Color
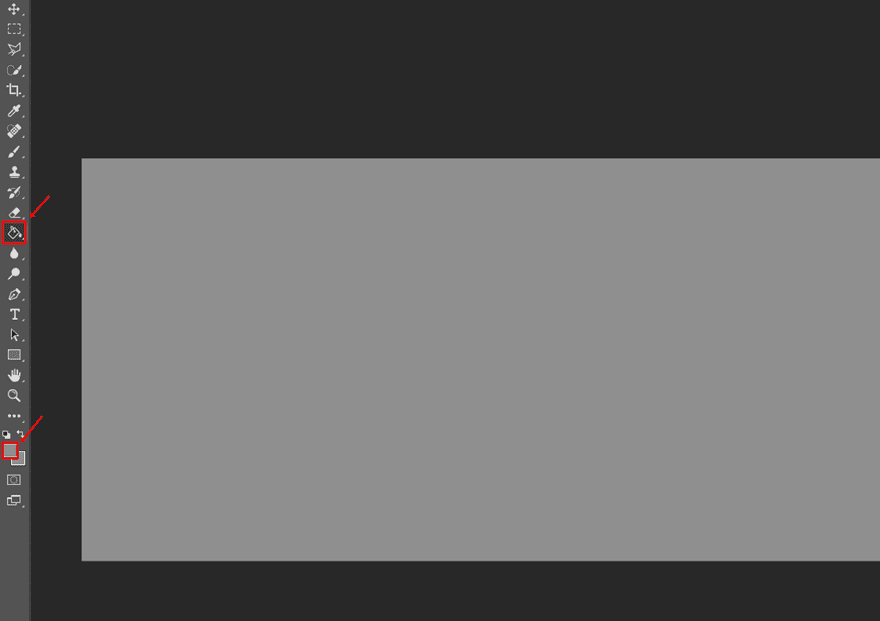
Then, add a background color to the file you’ve just created. Make sure you’re using slightly darker gray colors throughout the whole process. It’s essential to use a color that’s a bit darker since it’ll help you later on this post when adding Divi design options as well. In this example, we’ve used ‘#626262’ as the background color and we’ve used the Paint Bucket Tool to add the color to the layer.
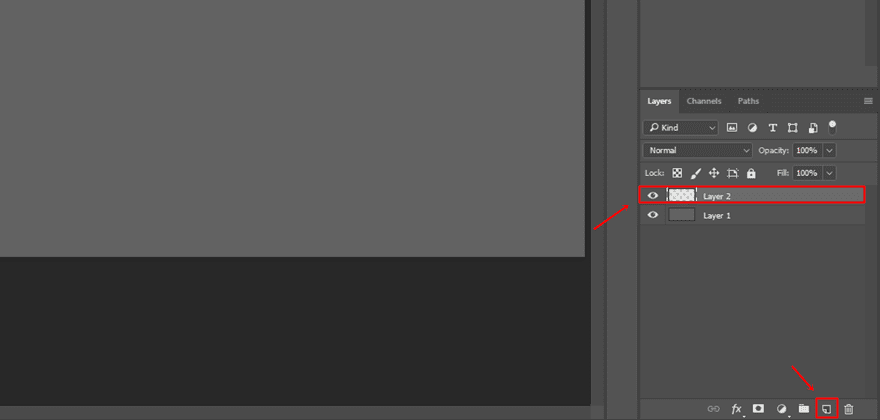
Add Layer 2
Continue by adding a new layer right above the first layer.
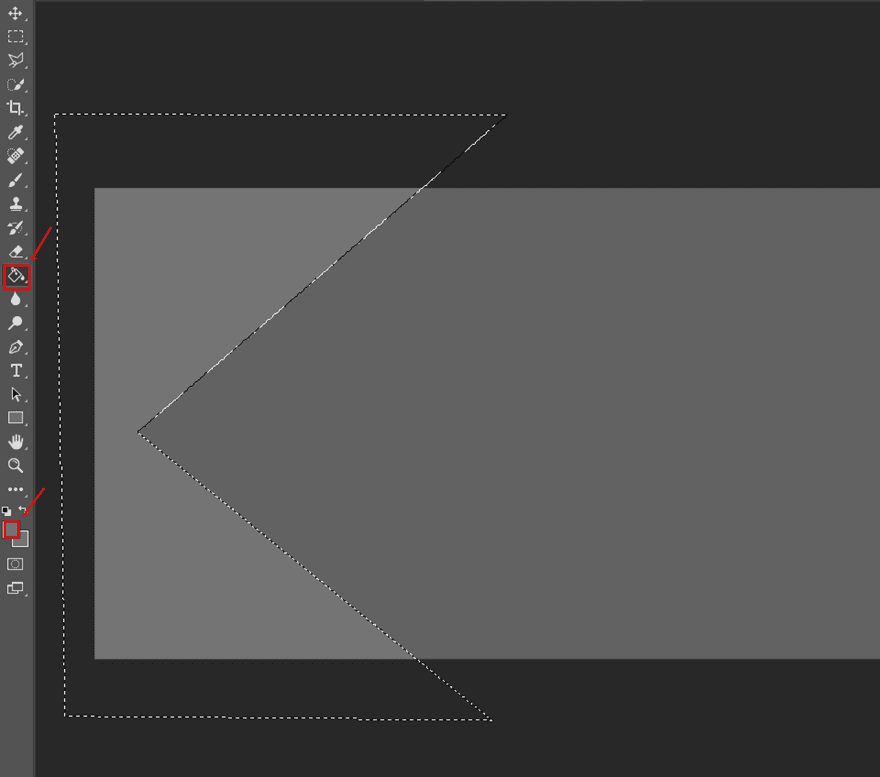
Add the First Shape to Layer 2
Then, select the Polygonal Lasso Tool and start making a shape while having Layer 2 selected.

Once done, select the Paint Bucket Tool and use ‘#747474’ to color the selected part.
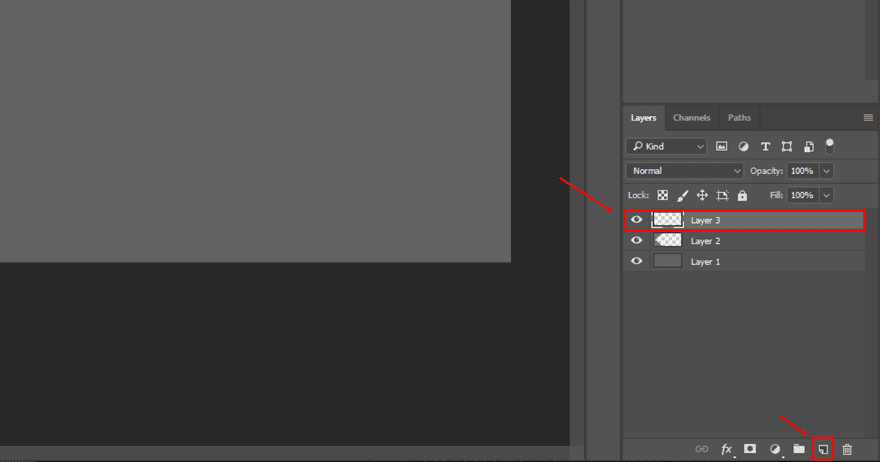
Add Layer 3
Then, add another layer right above Layer 2.
Add the Second Shape Layer 3
Continue by making another shape, like the one in the print screen below, by using the Polygonal Lasso Tool.
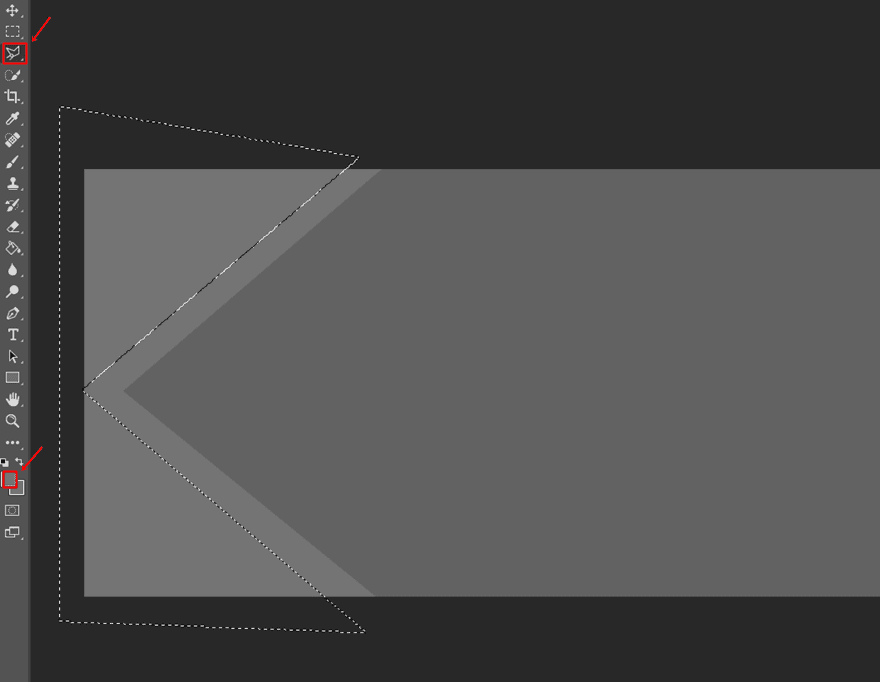
Select the Paint Bucket Tool and use ‘#6a6a6a’ this time.
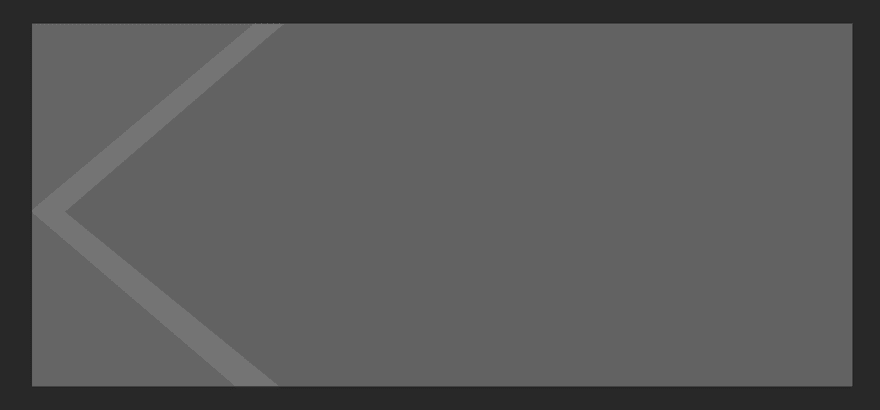
So far, your image should be looking like this:
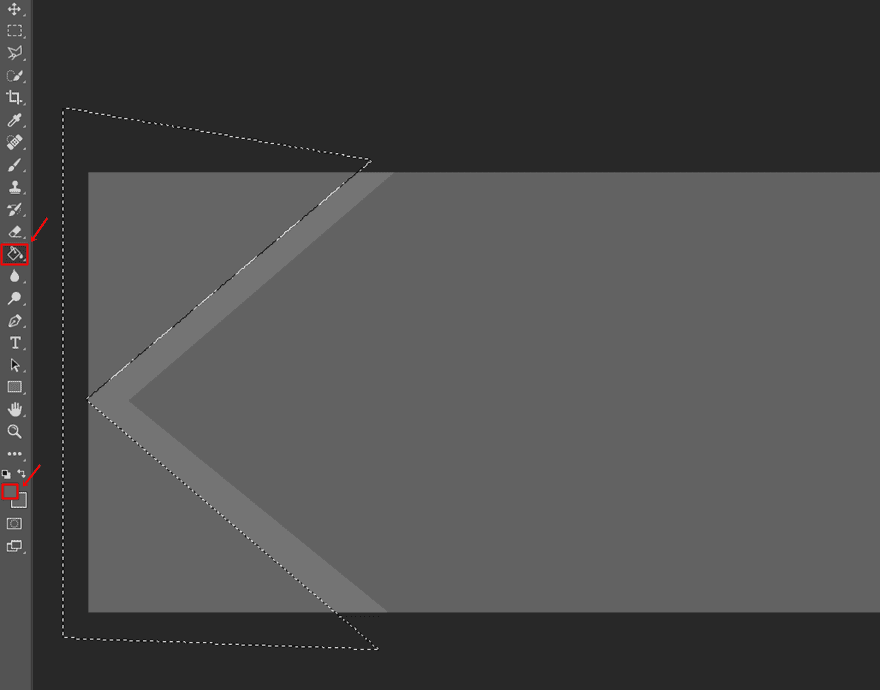
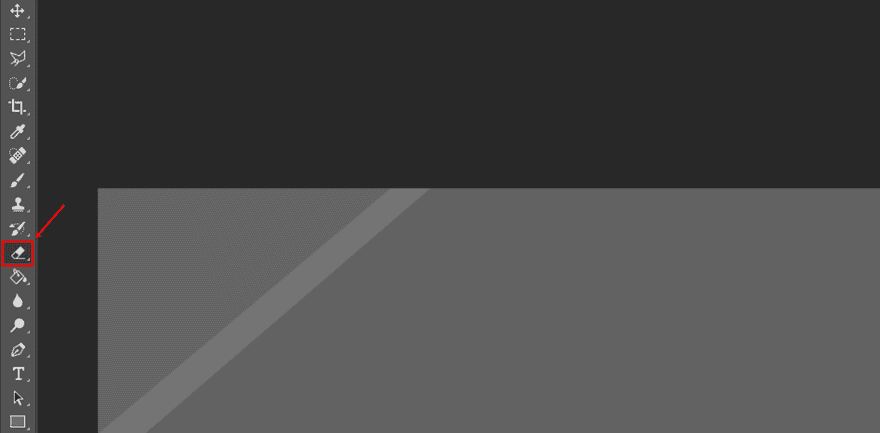
Use Eraser Tool on Layer 3
Moving on, select the Eraser Tool while having Layer 3 selected.
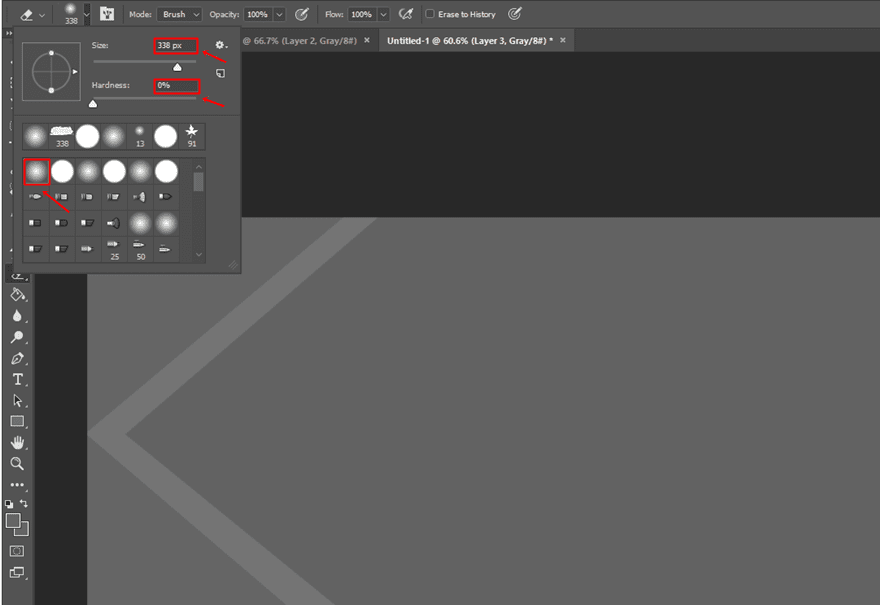
Use the Eraser Tool along with a brush that has 0% hardness and a size of 338px.
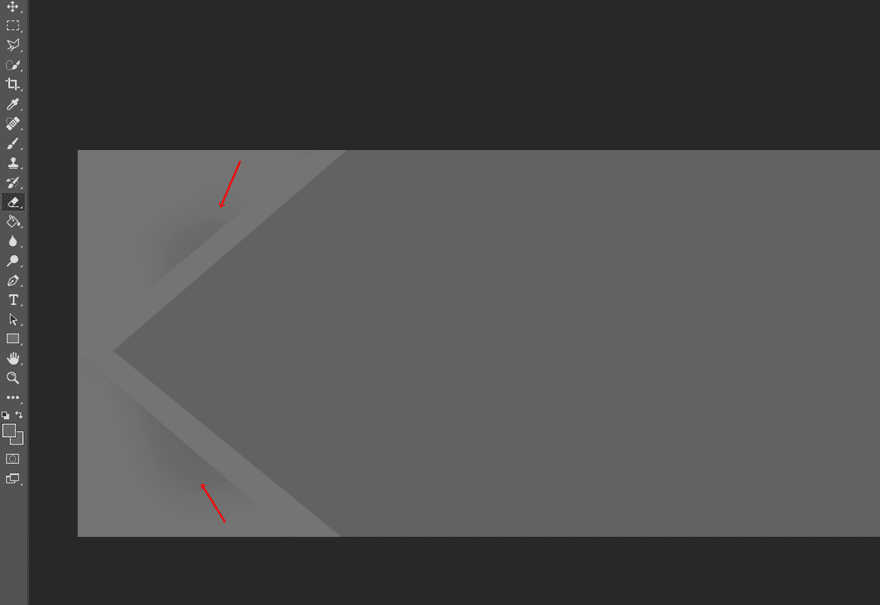
Then, go ahead and erase the area you want to be gone. We’ve deliberately only left a small part of Layer 3 where you can see a transition between Layer 2 and Layer 3.
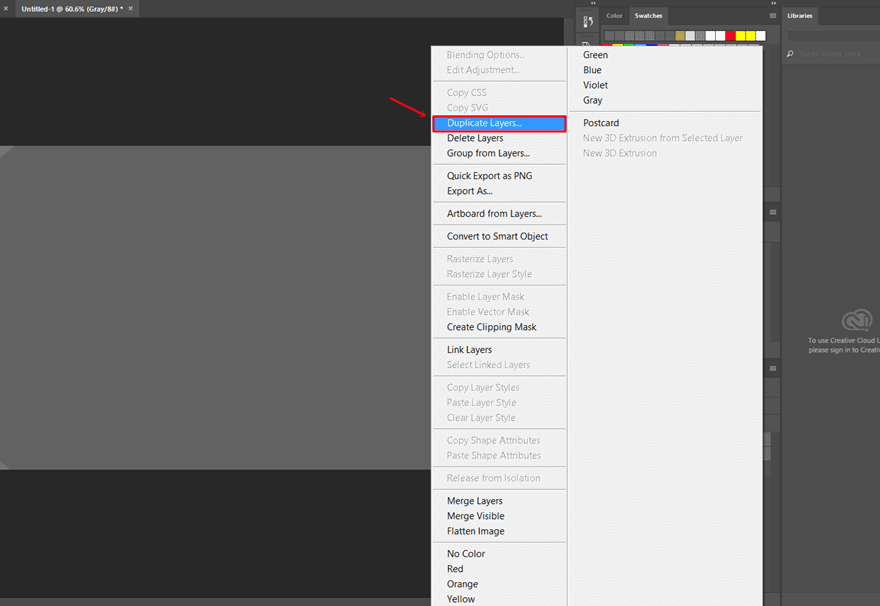
Duplicate, Transform, Rotate & Place Layers on The Opposite Side
Now that we’ve created the left side, the other side will go a lot quicker. We want it to be the exact same, that’s why we’re going to select both Layer 2 and Layer 3. Then, we’re going to duplicate the layers.
Once duplicated, you’ll see them appear in your list of layers.
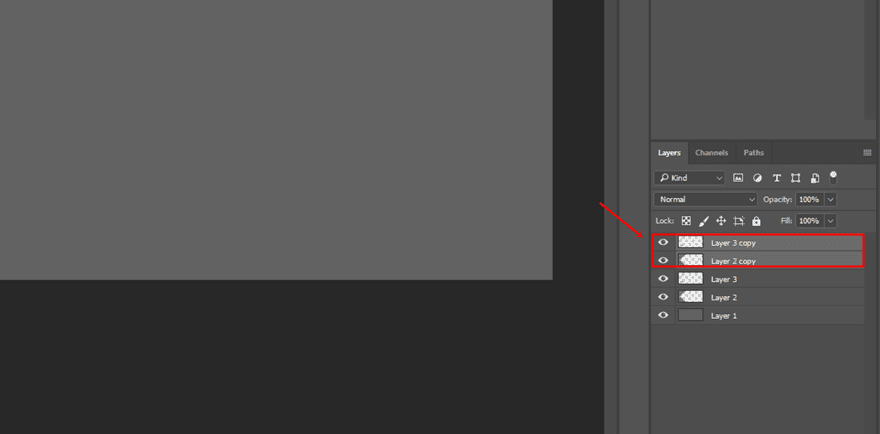
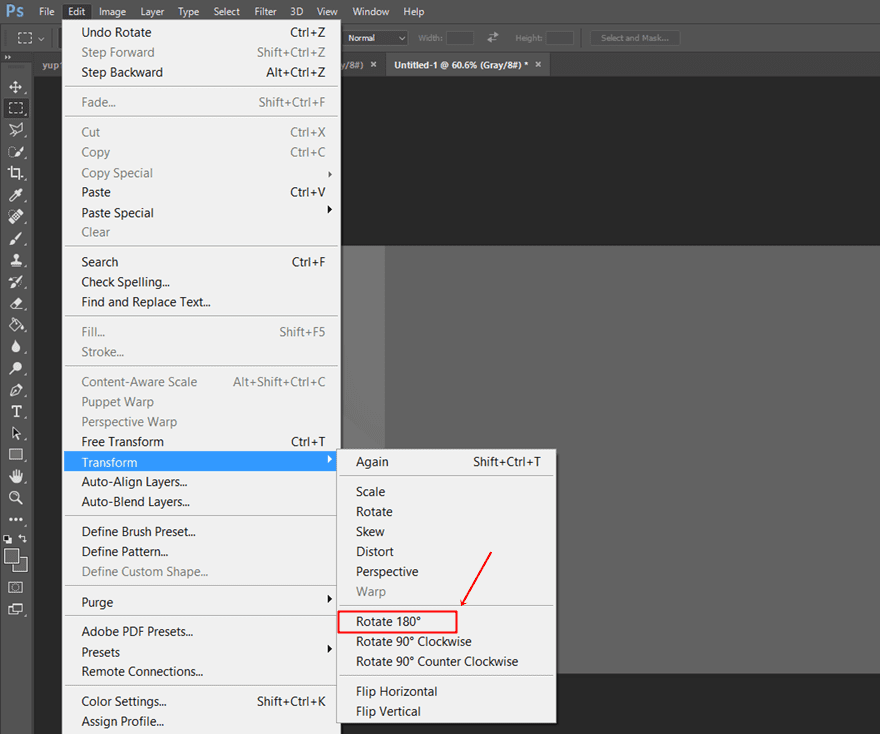
While having both duplicated layers selected, go to Edit > Transform > Rotate 180° and drag the layers to the other side of the image.
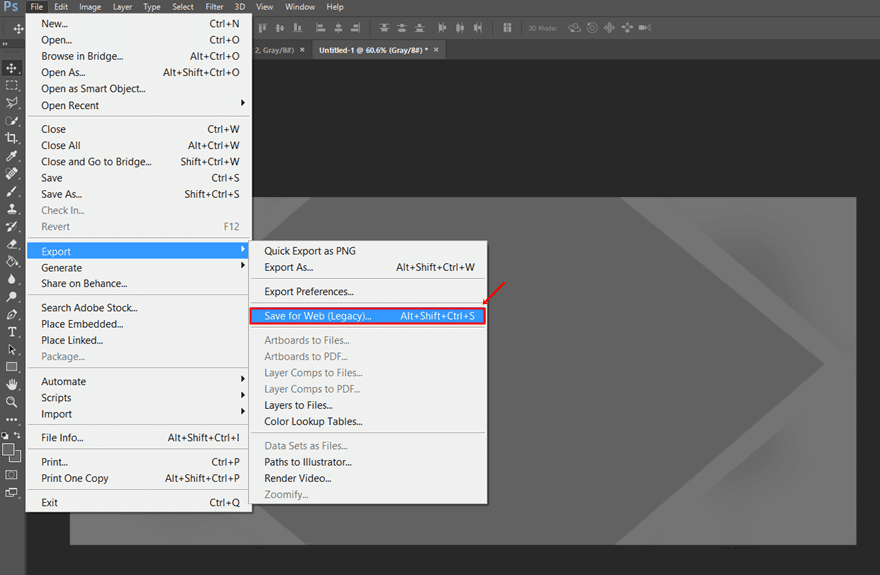
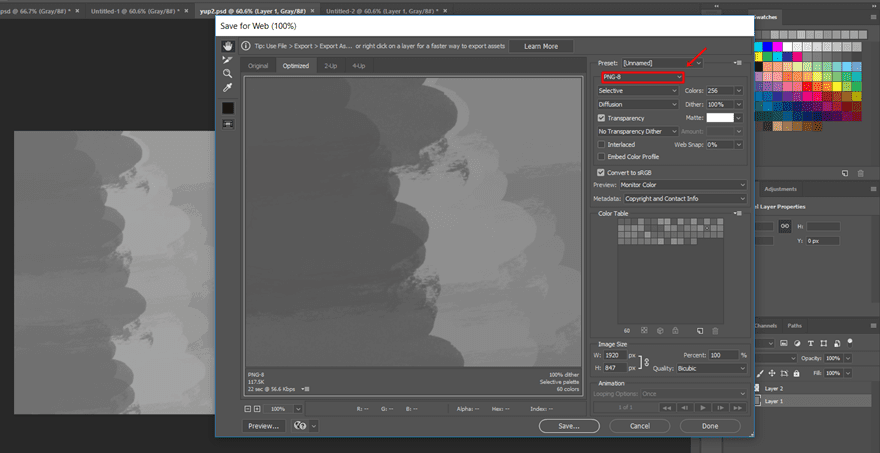
Save for Web
The only thing left to do is saving the image. To do that, click on File > Export > Save for Web.
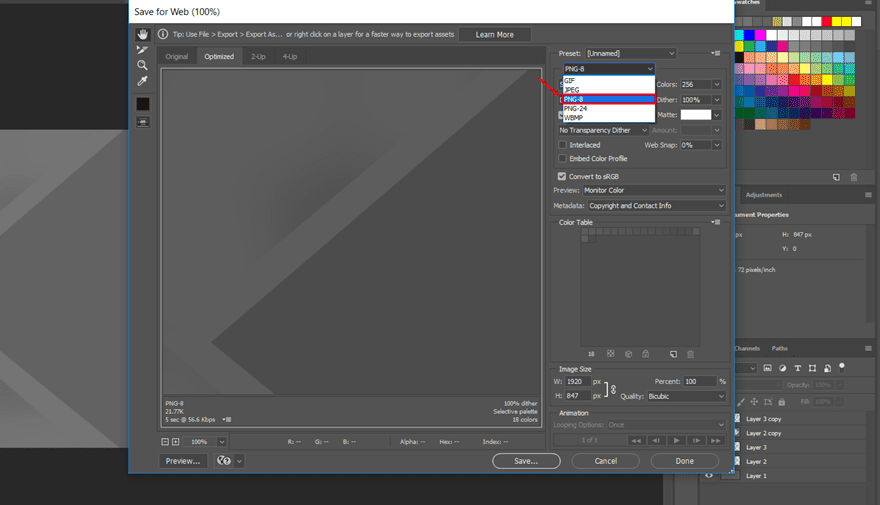
Lastly, make sure the file is a JPG or PNG file and save it.
Made With Brushes
Next, we’re going to show you how to create textured backgrounds using brushes. The textured background which we’ll show you how to recreate looks in this case like this:
New File
Start again by creating a new document using a width of 1920px and a height of 847px.
Add Background Color
Once that’s done, add a background to the first layer with the ‘#8f8f8f’ color code.
Search for Matching Brush Online
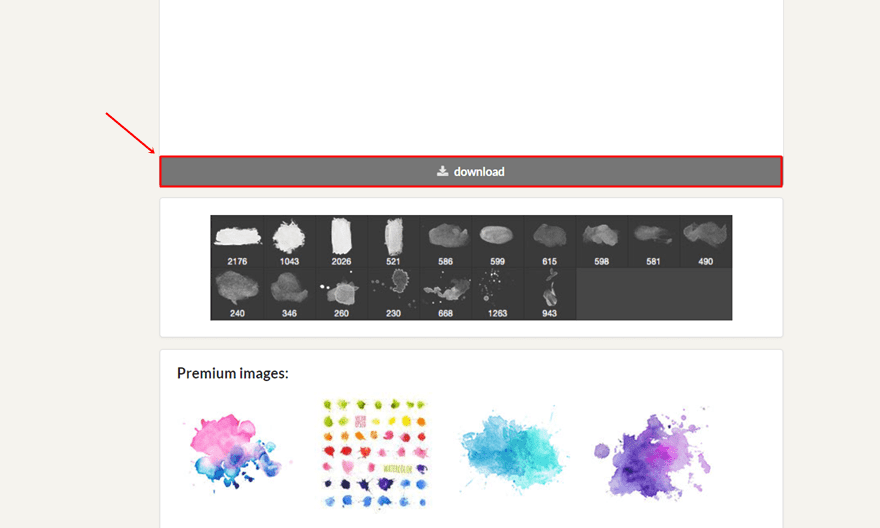
The next step is finding a brush that matches the style of your hero section. There are plenty of free Photoshop brushes out there that are stunning and for free as well. You can find and download the one we’ll be using in this tutorial by going to the following page.
Upload Brush
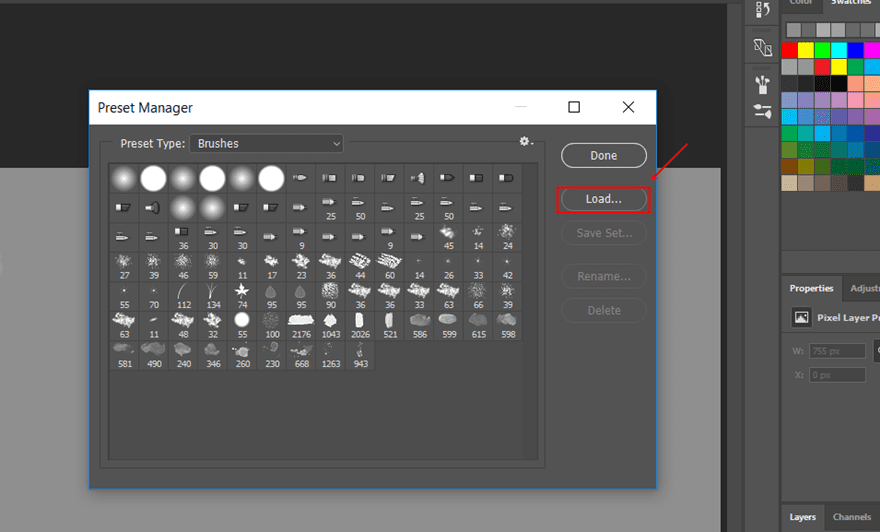
Locate the ABR file on your computer and go to Photoshop to load the brushes. Select Edit > Presets > Preset Manager > Brushes > Load and select the ABR file you’ve saved on your computer.
Add Layer 2
Once done, add another layer right above Layer 1.
Use Brush with the Lightest Color
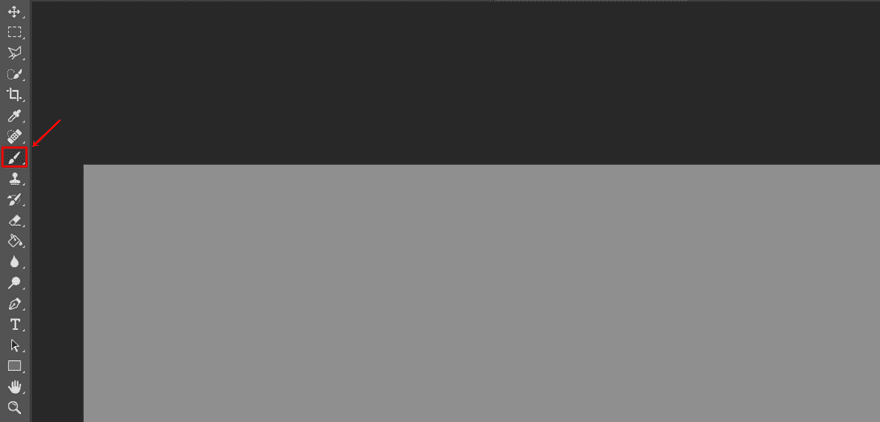
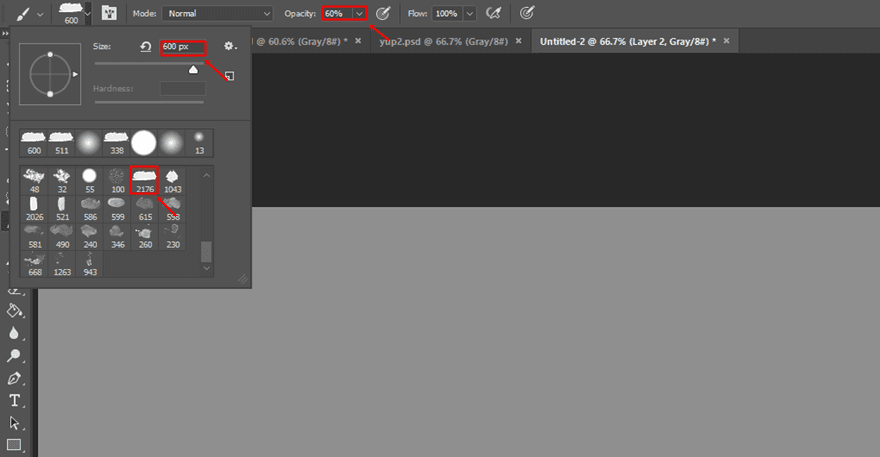
Then, you can start using your brush to create the textured background you wish by selecting the Brush Tool.
Choose the brush you want with a size of 600px and use an opacity of 60%.
 ‘
‘
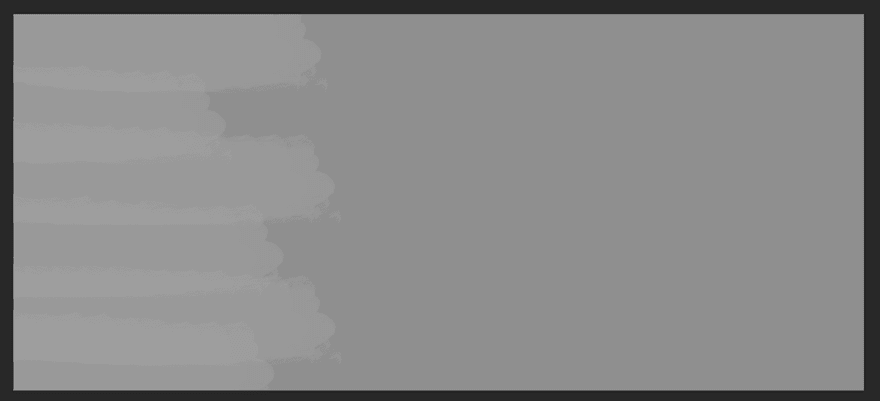
The first color we’ll be using is ‘#a0a0a0’. Go ahead and make the first brush layer on your image.
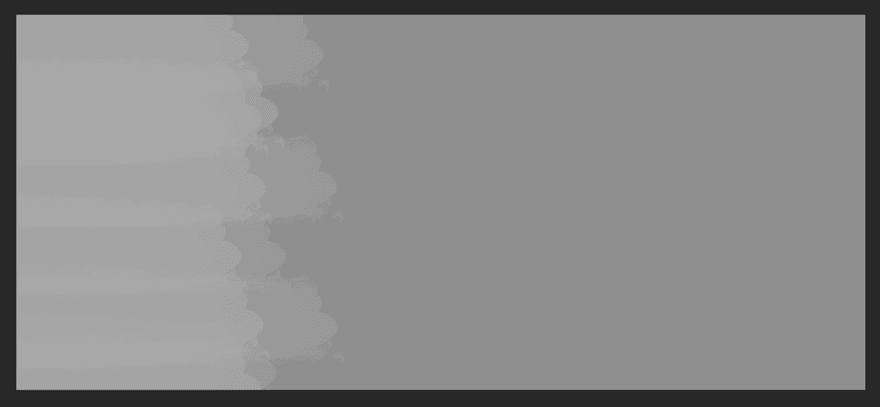
Use Same Brush with a Darker Color
Then, replace the previous color with ‘#ababab’ and do the same thing.
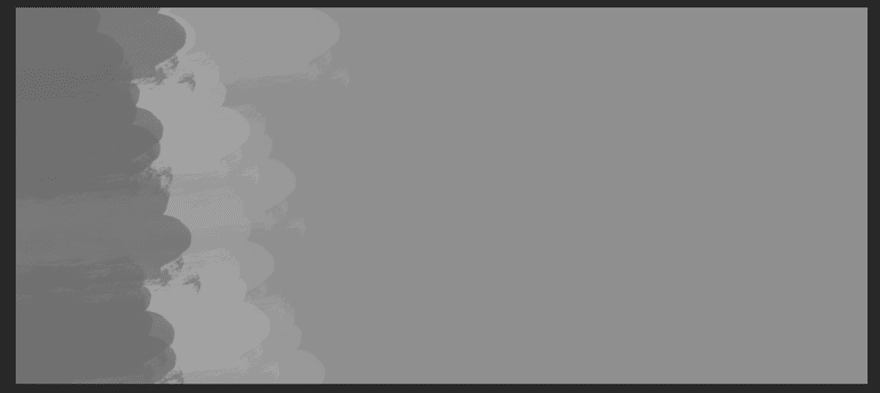
Use Same Brush with the Darkest Color
Lastly, you’ll need to use the ‘#686868’ color to finish your textured background.
Save for Web
Now that your textured background is done, the only thing that’s left to do is save the image. To do that, select File > Export > Save for Web.

Once again, choose if you want to save your image as a JPG or PNG file.
Add Textured Backgrounds to Sections
Textured Background Made with Shapes
You can play around with Divi’s background settings to achieve the exact result you want once you’ve created the images. For the textured background made with shapes, we’re going to choose a radial gradient type to have one of the gradient colors in the middle and the other one in harmony with our background image.
Gradient Background
Use the following gradient background for your section:
- First Color: #474ab6
- Second Color: #9271f6
- Gradient Type: Radial
- Radial Direction: Center
- Start Position: 41%
- End Position: 100%

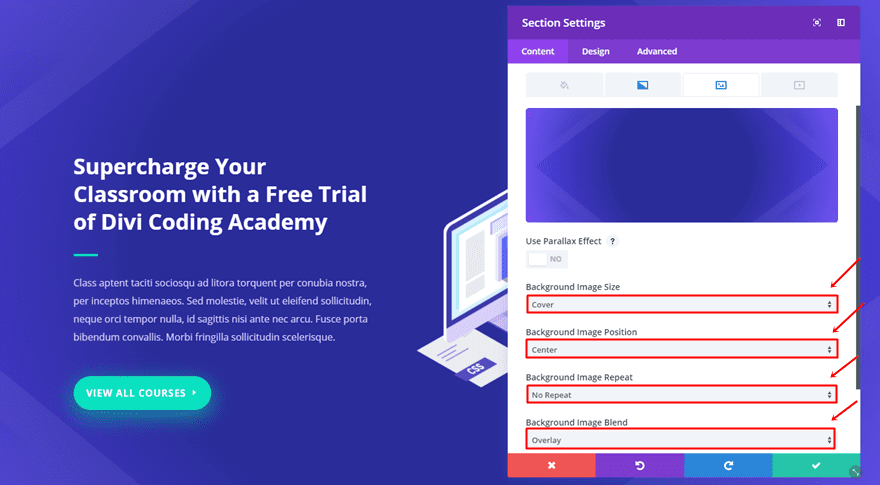
Image Blend Options
Then, upload the image and use the following settings:
- Background Image Size: Cover
- Background Image Position: Center
- Background Image Repeat: No Repeat
- Background Image Blend: Overlay
Textured Background Made with Brushes
The gradient background that we’re going to use for the textured background made with brushes is linear. We’ll make a subtle transition that’ll still slightly separate the color that is being used in harmony with the background image.
Gradient Background
Open the section settings and use the following settings for the Background subcategory:
- First Color: #474ab6
- Second Color: #9271f6
- Gradient Type: Linear
- Gradient Direction: 270deg
- Start Position: 70%
- End Position: 100%
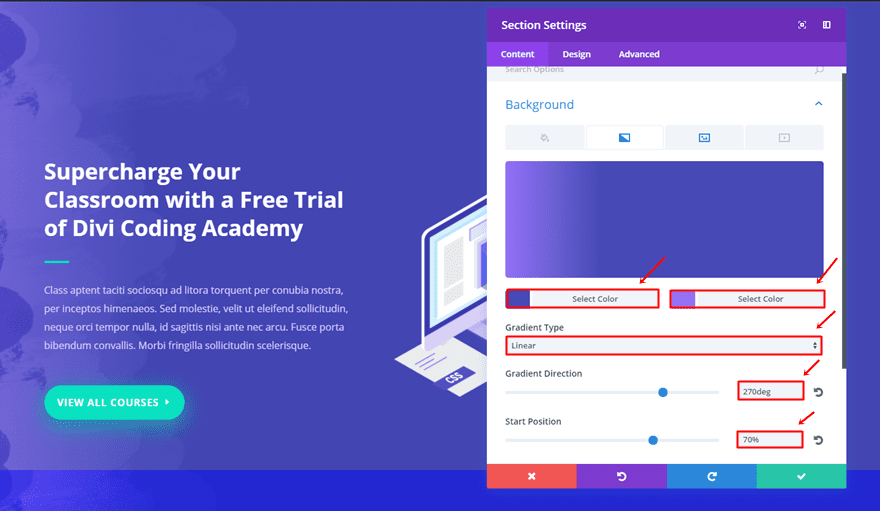
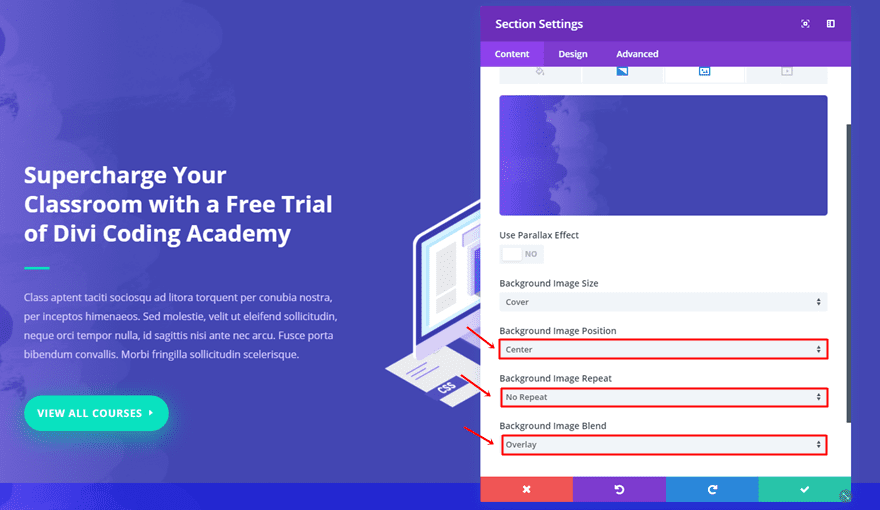
Image Blend Options
Then, upload the background image and use the following settings along with it:
- Background Image Position: Center
- Background Image Repeat: No Repeat
- Background Image Blend: Overlay
Result
Now that we’ve gone through all the steps let’s, once again, take a look at the end result.
Image Result Made with Shapes
Result with Divi’s Design Options
Image Result Made with Brushes
Result with Divi’s Design Options
Final Thoughts
In this post, we’ve shown you how you can use textured backgrounds to make your website feel more authentic. We’ve shown you how you can create two types of textures with Photoshop and followed it up by showing you how you can use them within your sections along with Divi’s design options. If you have any questions or suggestions; make sure you leave a comment in the comment section below!
Be sure to subscribe to our email newsletter and YouTube channel so that you never miss a big announcement, useful tip, or Divi freebie!
Featured Image by WEB-DESIGN / shutterstock.com


Fantastic work. I however have a project and am convinced that only you will be able to help.
My client wants to show rainbow (with its 7 colors) as background and should be responsive.
Any suggestions.
The problem is that the gradient effect doesn’t work in IE (doesn’t support background-blend-mode: overlay;). So it’s better do it directly in Photoshop instead of Divi.
Great Tip… keep it coming! Please…
I think “Donjetë is a freelance content writer who is fascinated by deceptive content marketing” would be more appropriate. The heading of the article is “How to Create & Use Textured Backgrounds with Divi’s Design Options”. So, since I wasted some time starting to read it, I may as well waste some more commenting on it. You can not create these designs with Divi alone. Apparently Elegant Themes needs to apply more stringent oversight of its writers. The headline should have read “How to Create & Use Textured Backgrounds with Divi’s Design Options and Photoshop”, and I wouldn’t have bothered.
Great design tutorial as always!
Great stuff, very useful for those of us who want to go past basic designs. I look forward to your emails with this kind of content!
Love creative things one can do with Divi and Photoshop.
The only issue with that is that Blending Mode are note available with Parallax. So Sad.
Thank you for this exciting and insightful tutorial. I love the varied information and help for Divi.
Some of you might use Divi blend modes to make text legible over images. This will fail spectacularly on the Edge browser. I would wait to rely on CSS blends and wait for MS Edge to supports this feature. More of my clients are using Edge and I think a good web designer should consider this.
Here is a tip: When you are all done with your texture layer, add one more layer, place it at the bottom of your texture layer. Turn off the texture layer, select the new layer you created and fill it with a gradient or color you want to blend. Then turn on your texture layer, select it, use the layers blend drop down to accomplish the same thing as Divi. Then save for web and you are good to go.
Photoshop again!
Hi
it’s true that this is a good idea to have original backgrounds.
Thank you
Really like this type of content, keep it up! 😀
Thanks for the tut, does this method work across all major browsers? I had to back out of using the gradient to tint photos because it didn’t work on iphone and some androids.