
Divi works well with dynamic content. Dynamic content can be used to display text, titles, and lots more. It can even be used in Divi’s testimonial module by combining it with a plugin called Advanced Custom Fields—a custom approach to using a testimonial plugin. In this post, we’ll see how to create dynamic testimonial modules with Divi and ACF. Divi & ACF work together really well, and this post will help you understand how!
Let’s get to it.
Advanced Custom Fields Setup
First, we’ll need to install the free version of the Advanced Custom Fields plugin.
Install Advanced Custom Fields
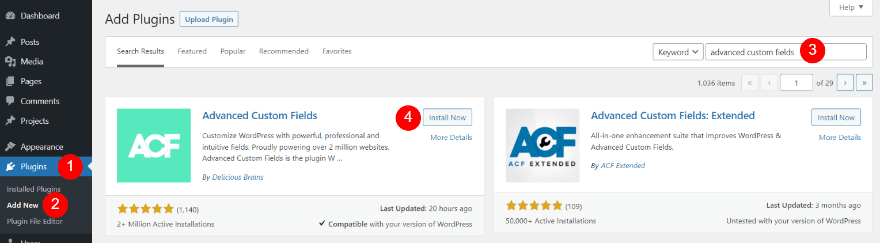
To install it within WordPress, go to Plugins > Add New in the WordPress dashboard. Search for Advanced Custom Fields and click Install Now.
- Plugins
- Add New
- Search
- Install Now
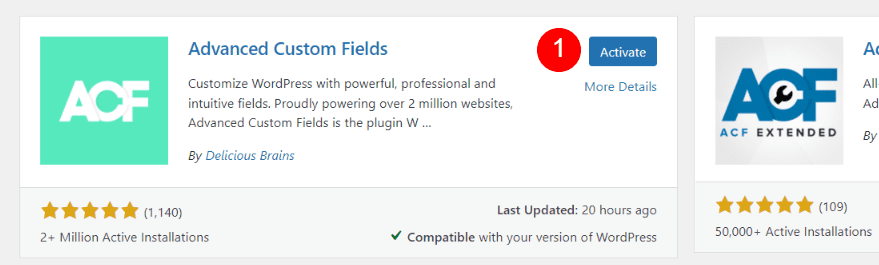
Once the installation is complete, click Activate.
- Activate
We’re now ready to set up the custom fields for our Divi testimonial.
Create a New Field Group
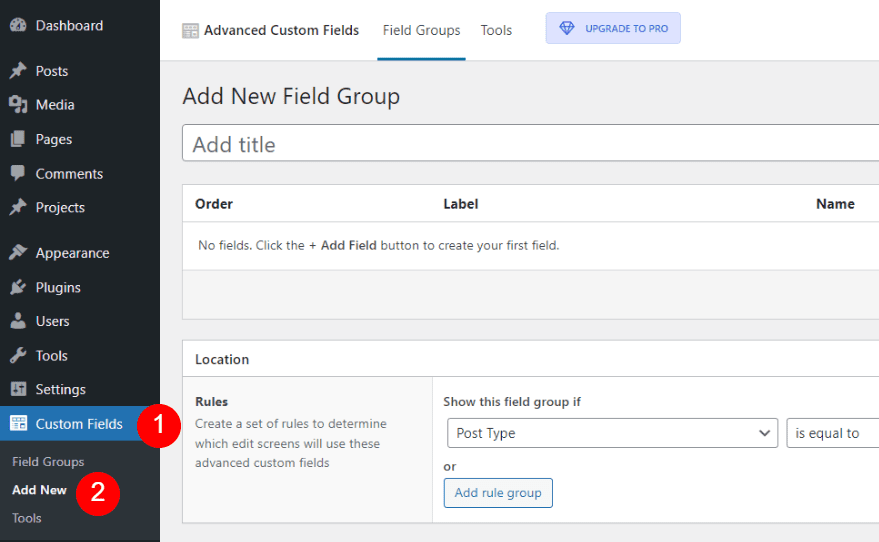
Next, create a Field Group. This field group will contain all the fields needed for one testimonial. We can then clone this field group to create as many testimonials as we want.
To create the field group, go to Custom Fields > Add New in the WordPress dashboard.
- Custom Fields
- Add New
Create the Field Group for Testimonial 1
First, add a title and click Add Field.
- Add title
- Click Add Field
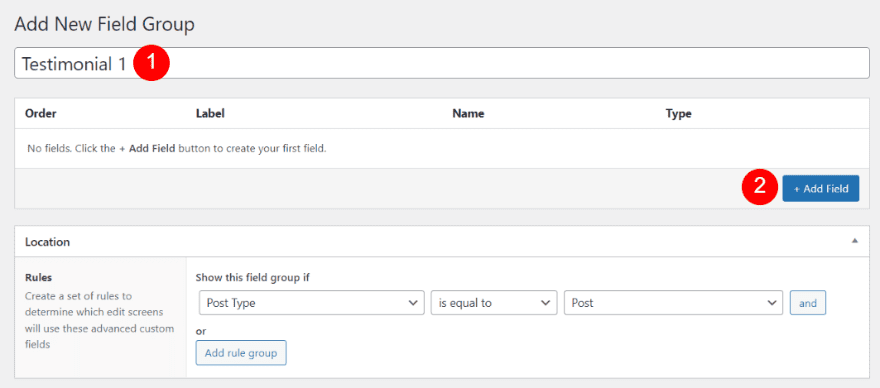
This opens the editor where we’ll create the fields. We’ll need to add one field at a time. Each field will include the label, name, and field type. The name and label can match.
Testimonial 1 Description
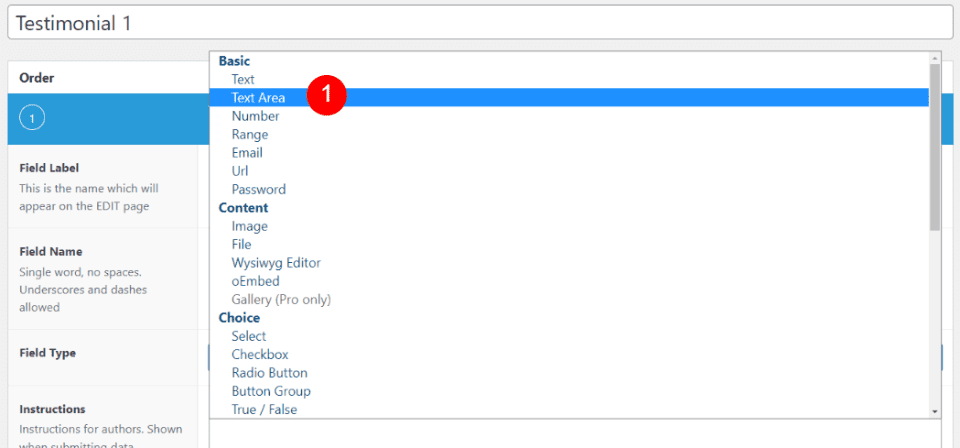
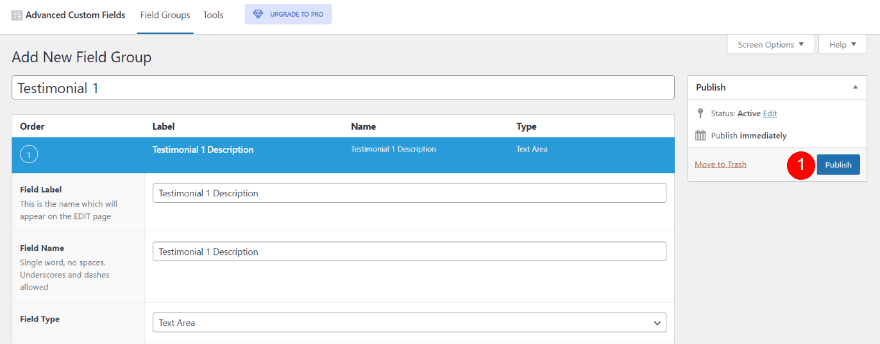
Enter the Field Label and Field Name. Click on the Field Type dropdown box to see the options. This field uses a different Field Type than the other three fields.
- Field Label: Testimonial 1 Description
- Field Name: Testimonial 1 Description
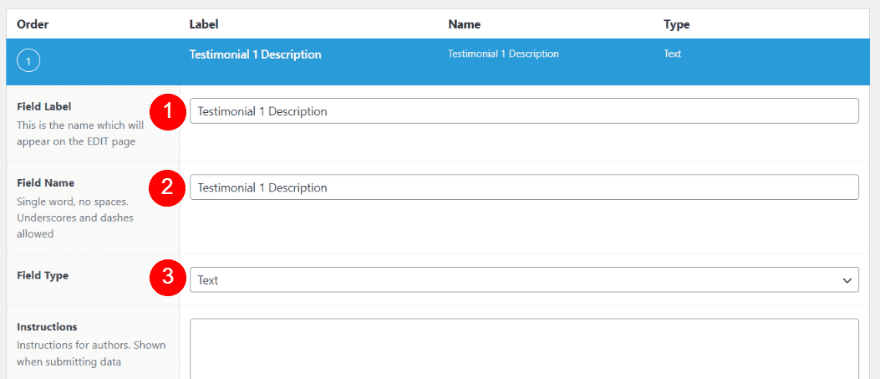
Select Text Area from the list.
- Field Type: Text Area
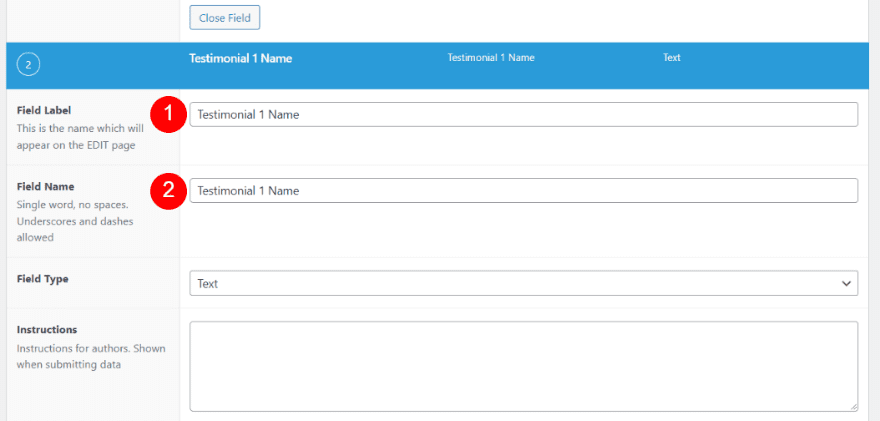
Testimonial 1 Name
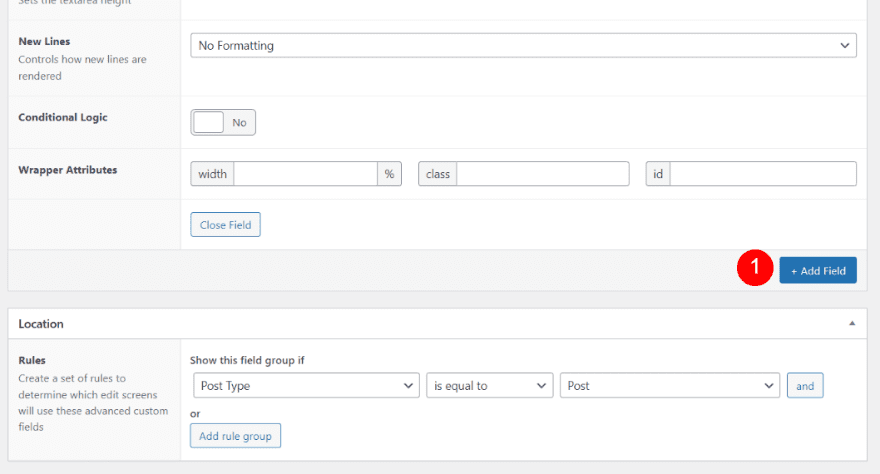
Next, scroll down and click Add Field.
Next, enter Testimonial 1 Name for the Field Name and Field Label. Leave the Field Type at its default (Text).
- Field Name: Testimonial 1 Name
- Field Label: Testimonial 1 Name
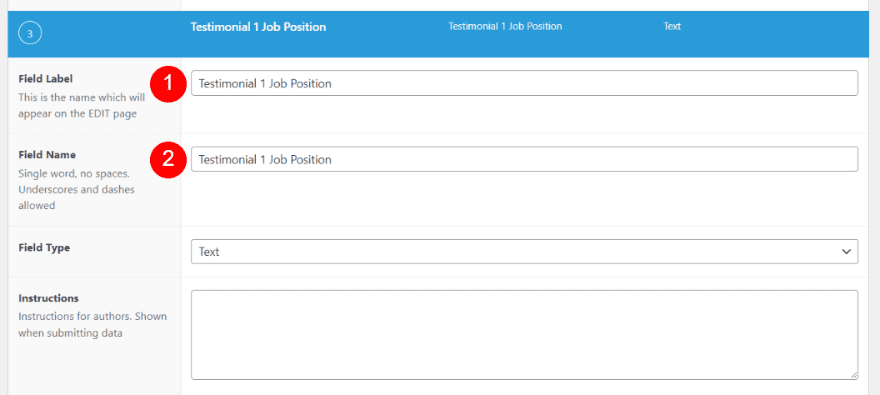
Testimonial 1 Job Position
Next, click Add Field and enter Testimonial 1 Job Position for the Field Name and Field Label.
- Field Name: Testimonial 1 Job Position
- Field Label: Testimonial 1 Job Position
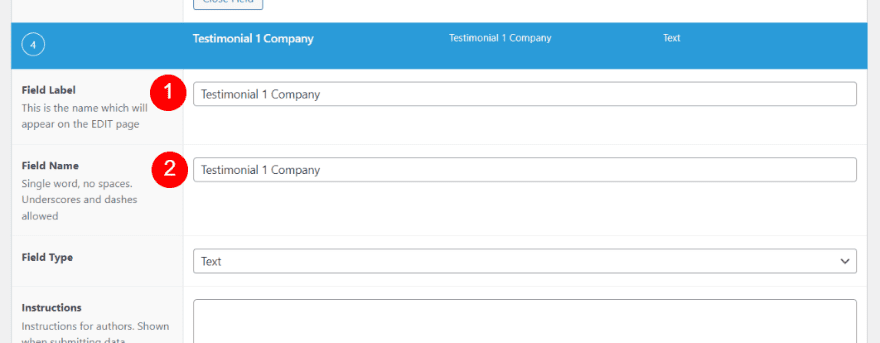
Testimonial 1 Company
Next, click Add Field and enter Testimonial 1 Company for the Field Name and Field Label.
- Field Name: Testimonial 1 Company
- Field Label: Testimonial 1 Company
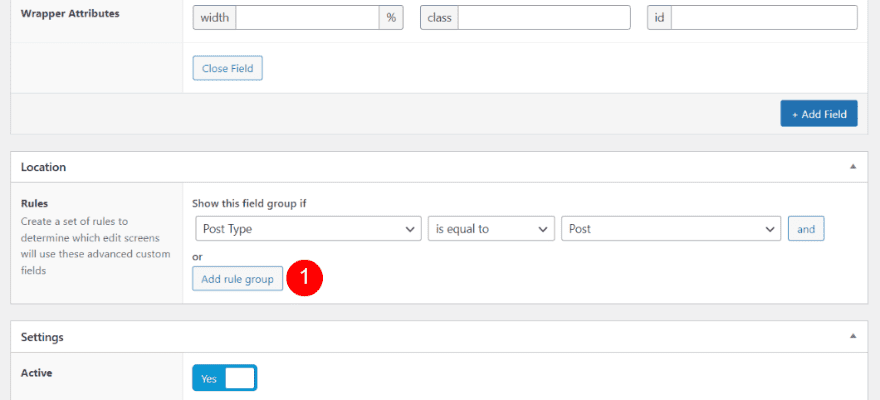
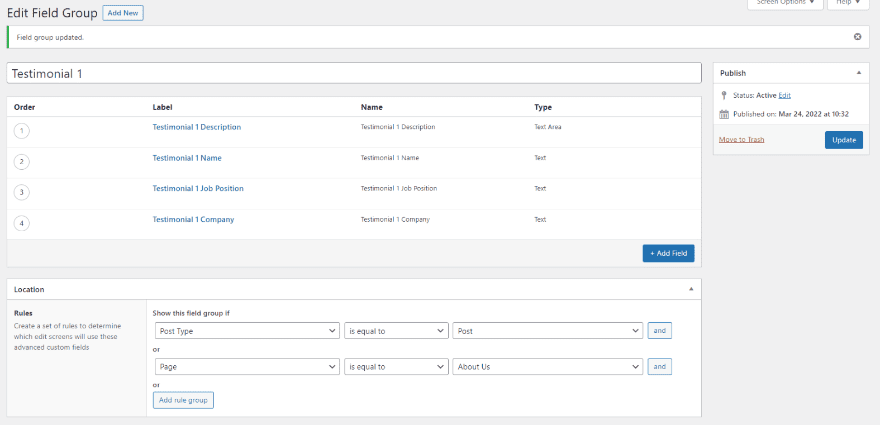
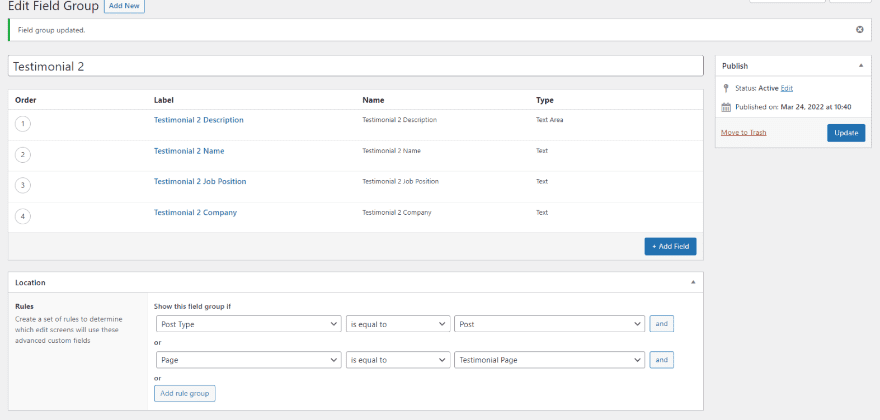
Location
Next, we’ll set the Location Rules. We’ll choose the page or pages where we want to use the testimonial. It has the rule Post Type is equal to Page by default. We’ll keep this rule and add one more. Click Add rule group.
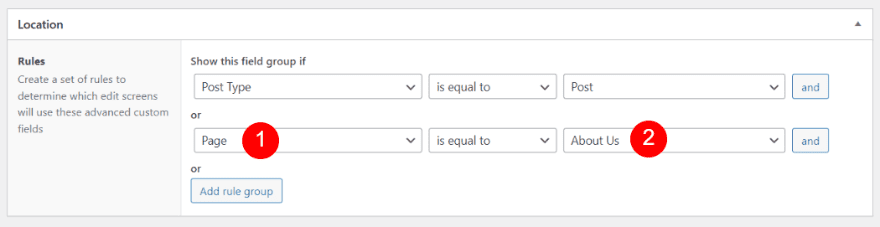
Select the Post Type dropdown box for the new rule and choose Page. Select the Post dropdown box for the new rule and select the page you want to use. If you want to use multiple pages, add a new rule for each page.
- First Field: Page
- Second Field: your page name
Publish the New Field Group
Finally, click the Publish button in the upper right corner of the editor to publish the new field group.
Once the field group is published, you’ll see the list of fields and rules.
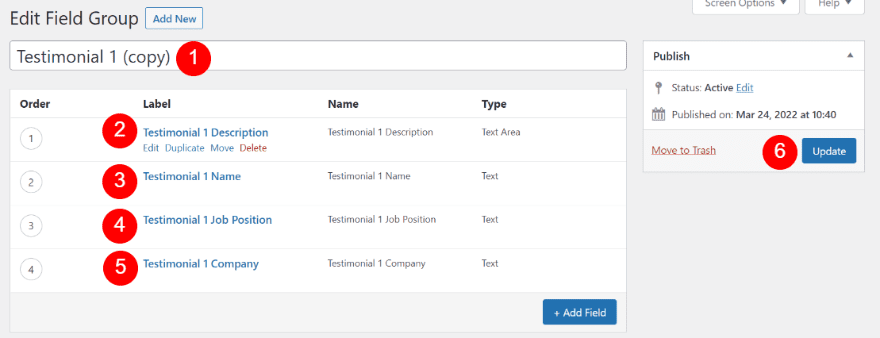
Clone the Testimonial Field Group
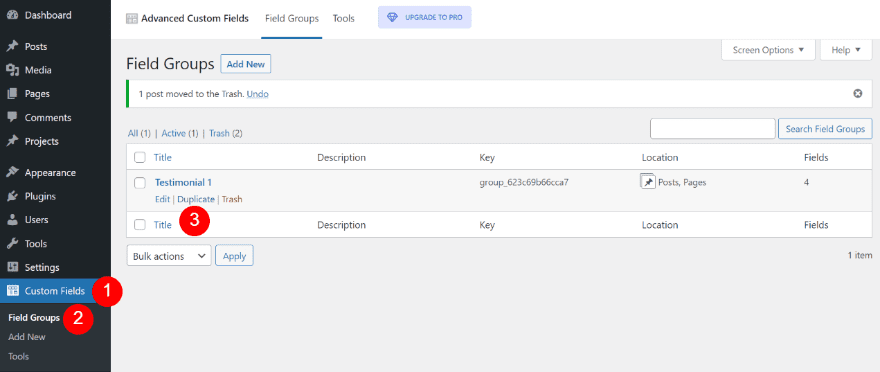
Next, we’ll clone the testimonial field group. This will allow us to create another testimonial. We’ll need to repeat this for every testimonial we want to create. In the WordPress dashboard, go to Custom Field > Field Groups. Hover over the field group you want to clone and click Duplicate.
- Custom Fields
- Field Groups
- Duplicate
Next, click Edit to open the new field group and change the names of the group and each field inside the group.
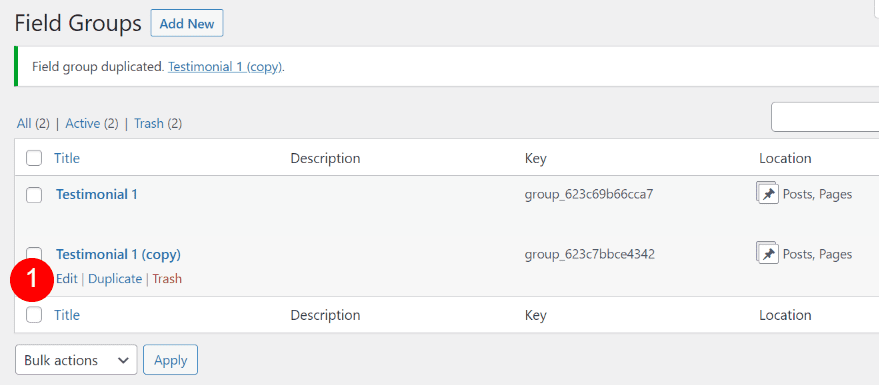
Change the title and select each field and change the 1 to a 2. Click Update when you’re ready.
Next, choose the page where you’d like this testimonial to be available.

You now have the field group for your second testimonial.
Create the Testimonial
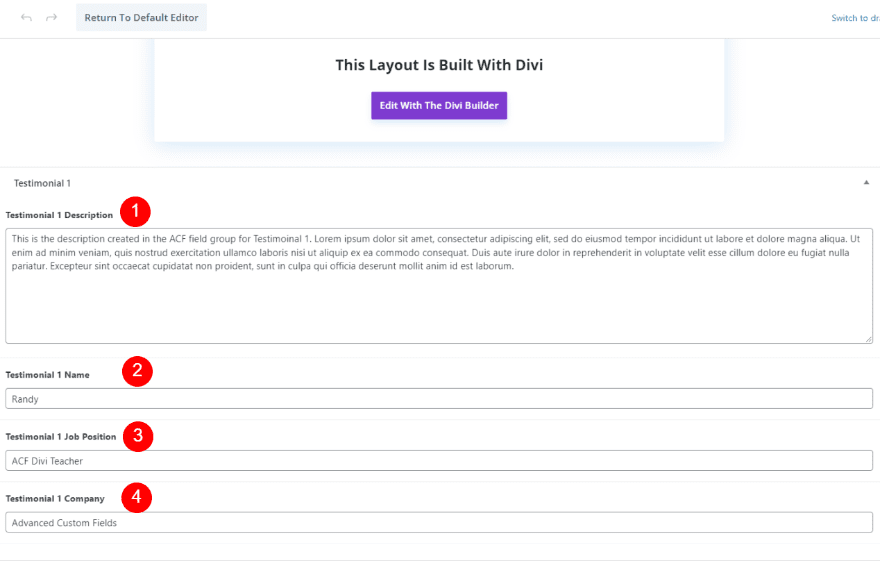
The fields for the testimonial appear at the bottom of the page editor for the page you selected as the testimonial’s location. This example only has the fields for Testimonial 1. I selected a different page for Testimonial 2’s location, so it doesn’t appear here.
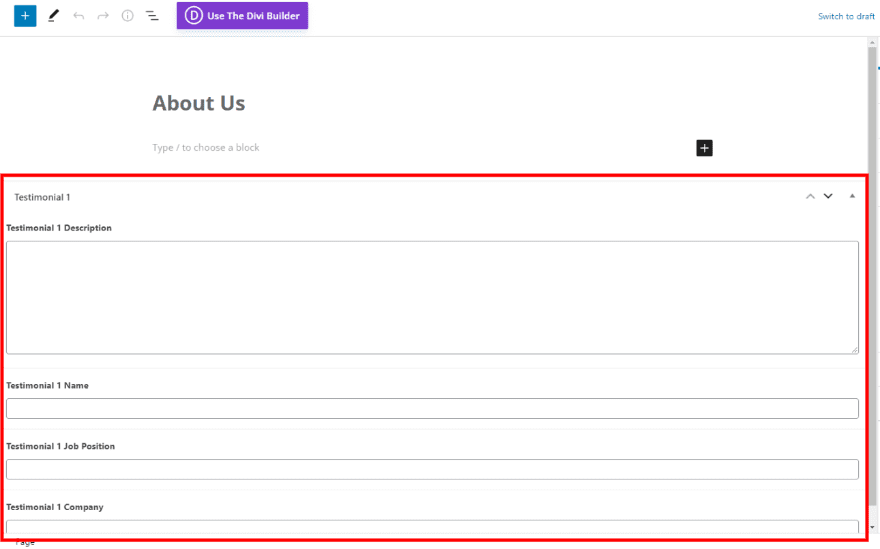
Fill out the fields as normal. Then, you’ll be ready to use the fields within the Divi layout for this page.
Create the Dynamic Divi Testimonial Module
One advantage to his is anyone can enter the information or edit the fields without having to open the Divi modules. The fields will need to be mapped within Divi’s testimonial module. Click to use the Divi Builder for this page.
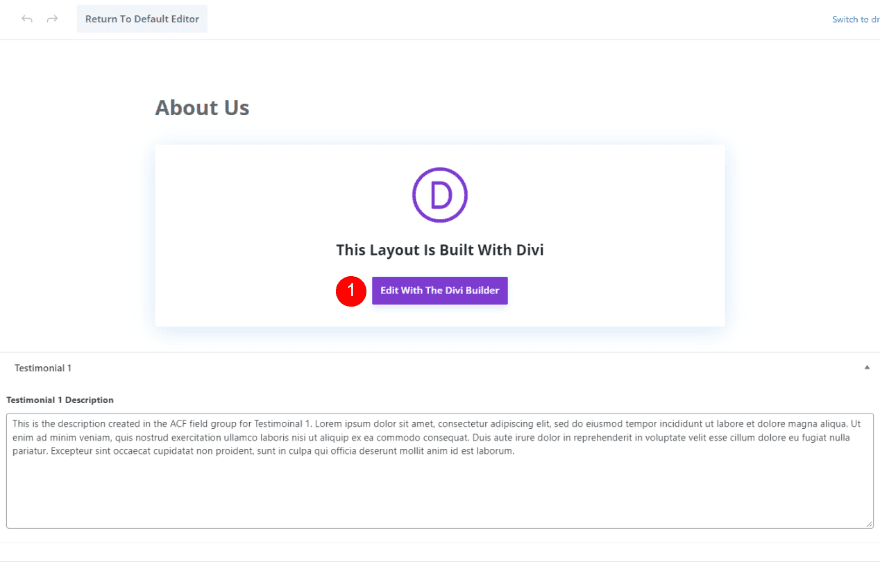
You can add the custom field group to any page, but I’ll create a new page. Since I’ve named this page About Us, I’ll use the About page from the free Camera Product Layout Pack that’s available within Divi. I’ll add a new testimonial module and style it based on the page. First, I’ll step through the process of adding the testimonial to the page.
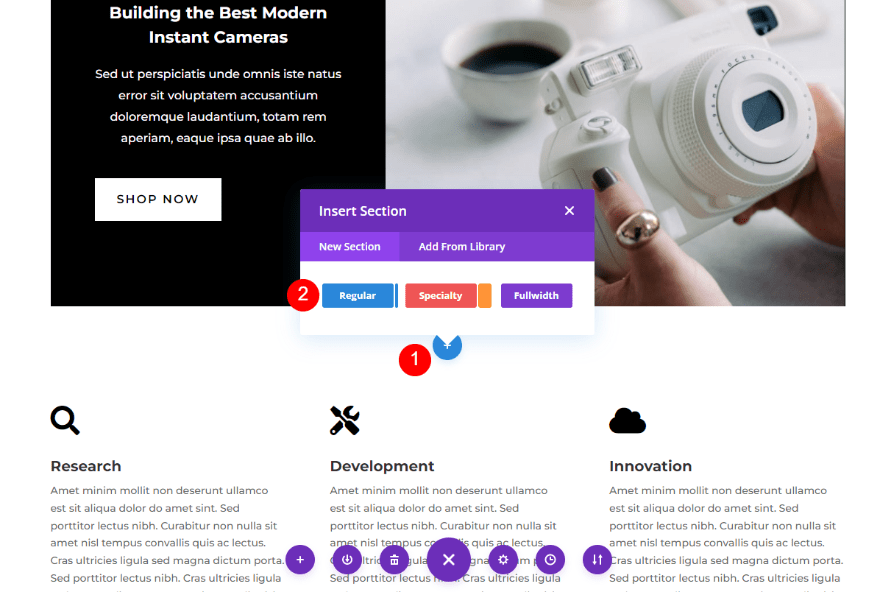
Add a New Divi Testimonial Section and Row
Add a new regular section under the second section of the layout.
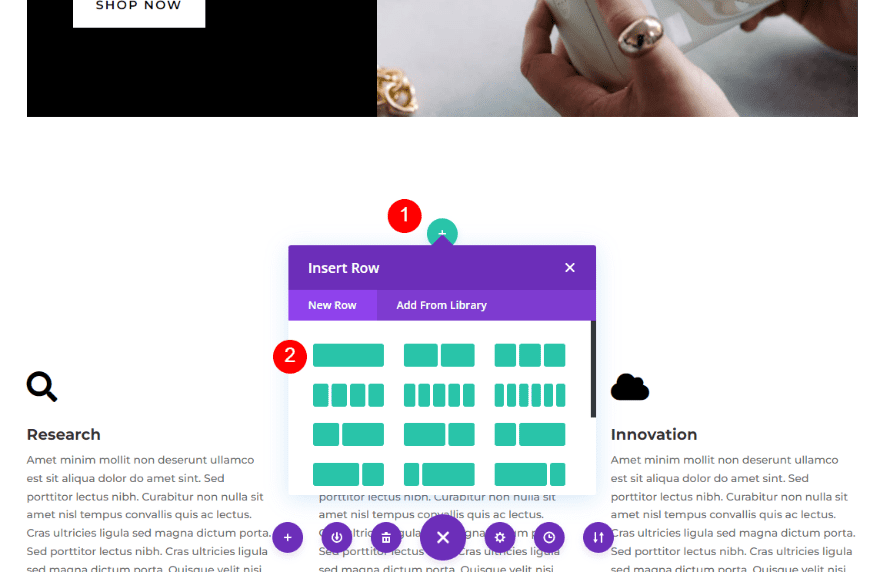
Next, add a single-column row.
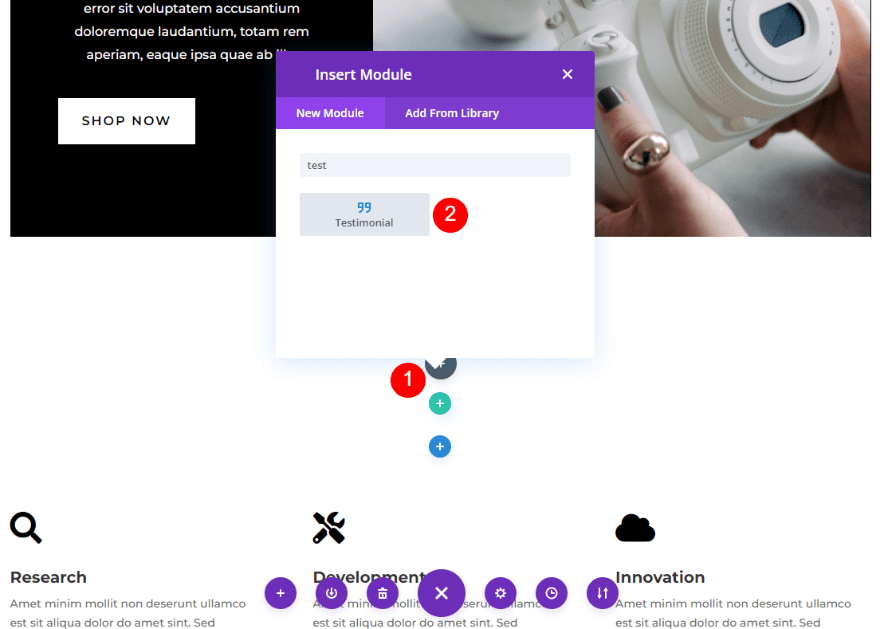
Add the Divi Testimonial Module
Next, add a testimonial module to the row.
Create the Dynamic Testimonial Content
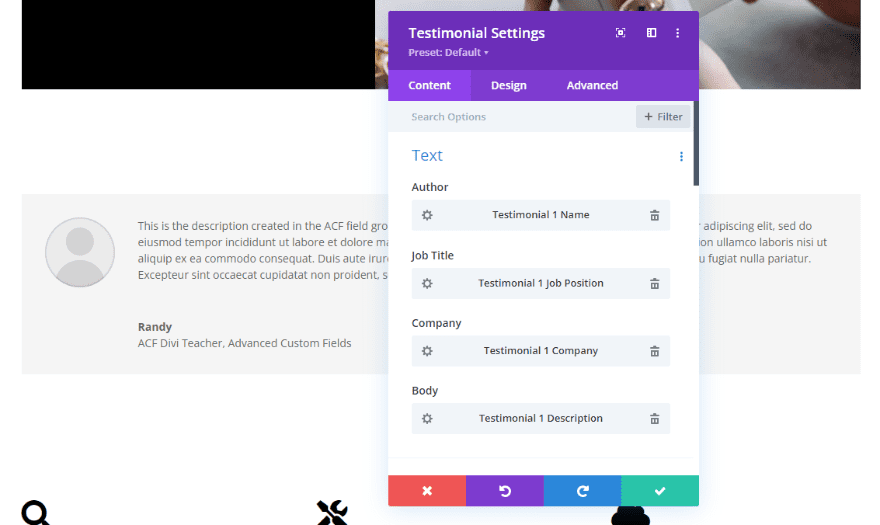
Next, we’ll add the Advanced Custom Fields’ data to the testimonial module. We’ll accomplish this by adding the data from the field group as dynamic content to each field. Open the module’s settings as normal. You’ll see the dynamic option when you hover over each field as seen in the image below.
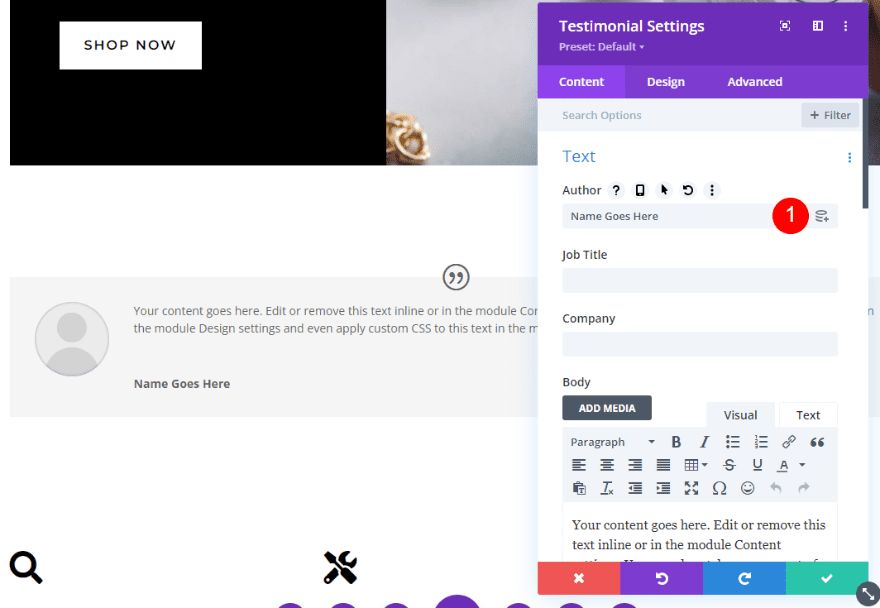
Dynamic Author Name
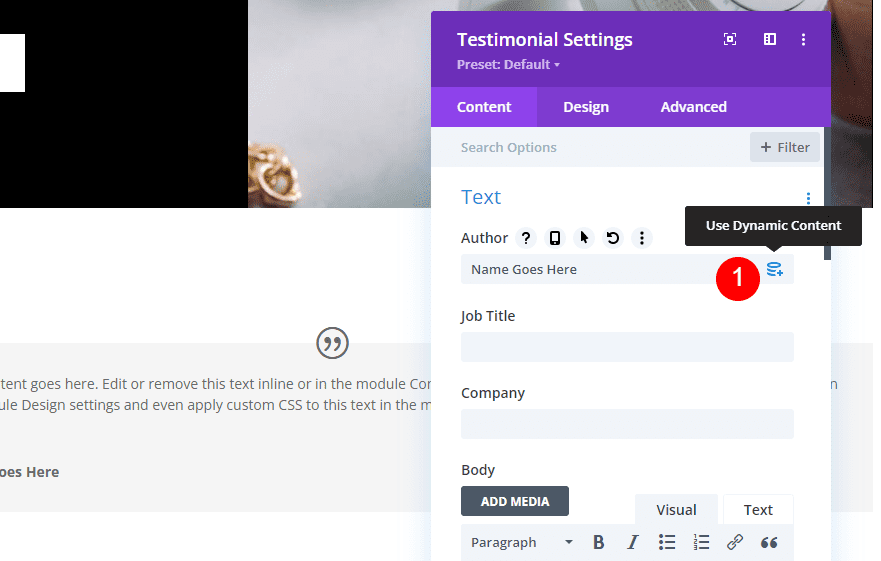
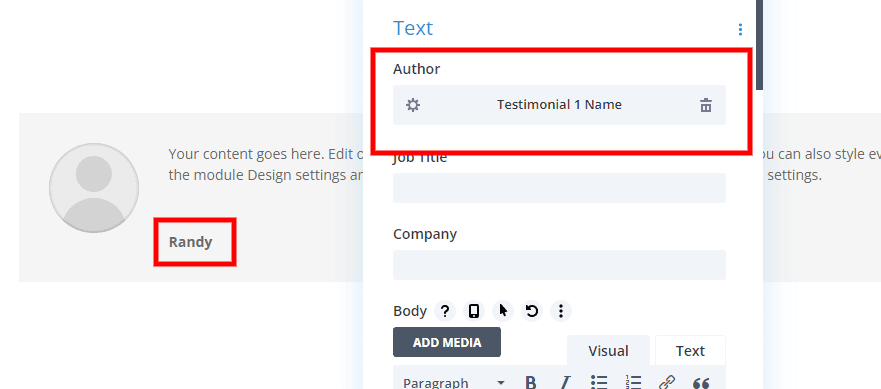
First, hover over the Author field and click the dynamic content icon.
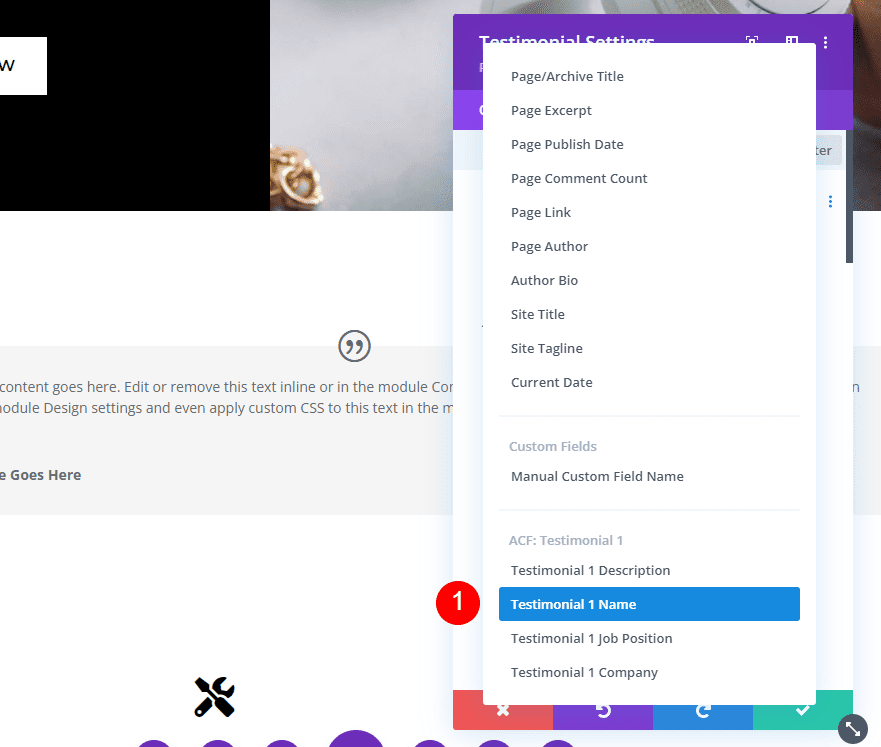
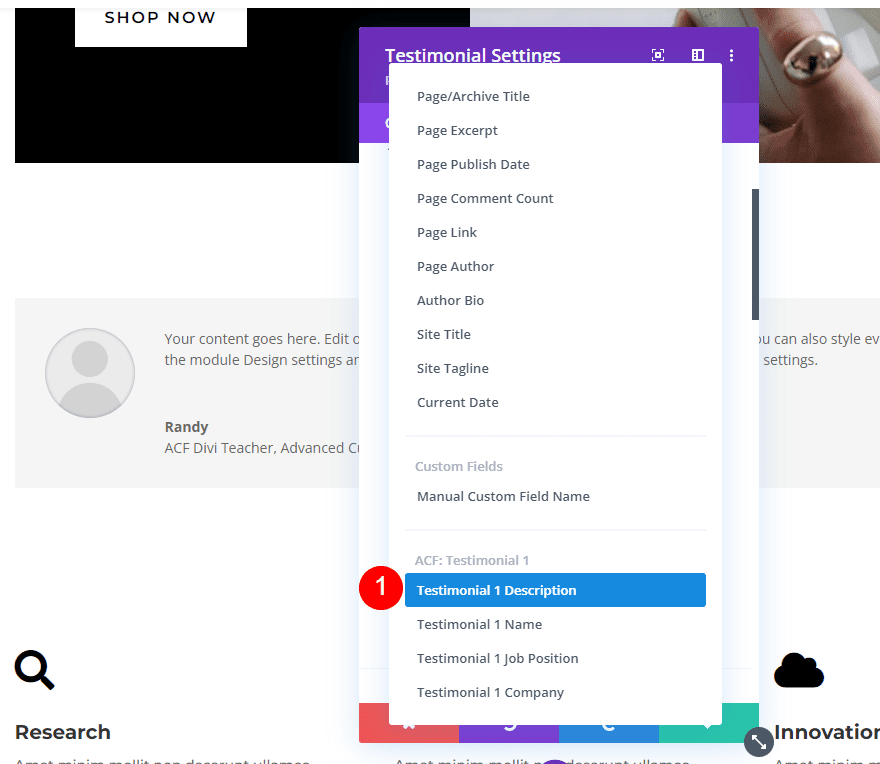
You’ll see the ACF options at the bottom of the list. These are the labels we gave the fields when we created the field group. Select Testimonial 1 Name.
If you want text before or after the name, add it to the Before or After fields. You can also add HTML if you want to enable it. Click the green check when you’re done.
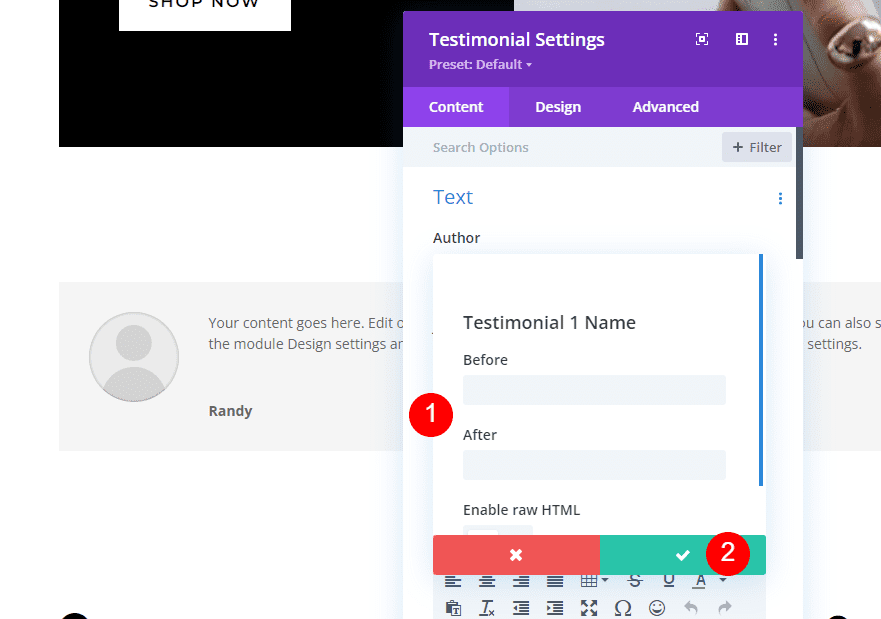
The Author field now shows the name of its dynamic content. The text you entered into the field now appears as the author’s name.
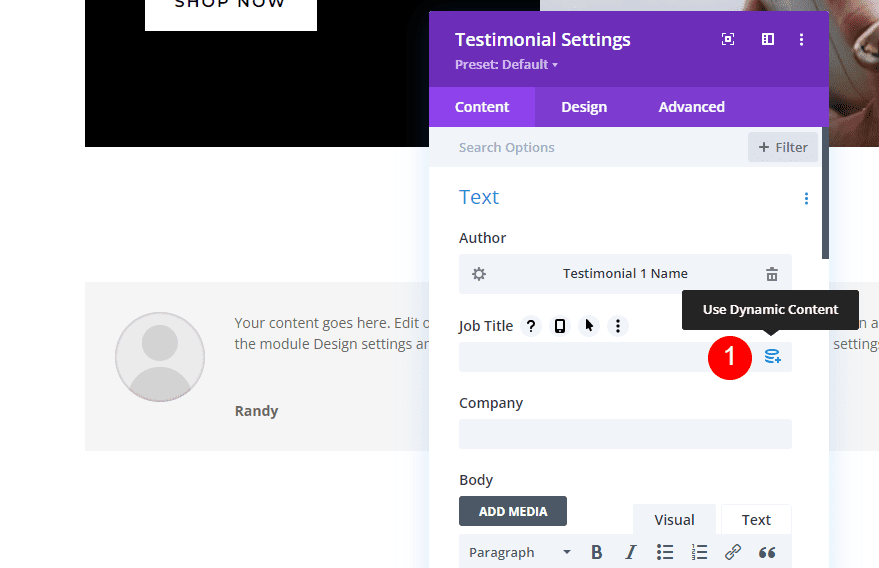
Dynamic Job Title
Next, hover over the field for Job Title and click the dynamic content icon.
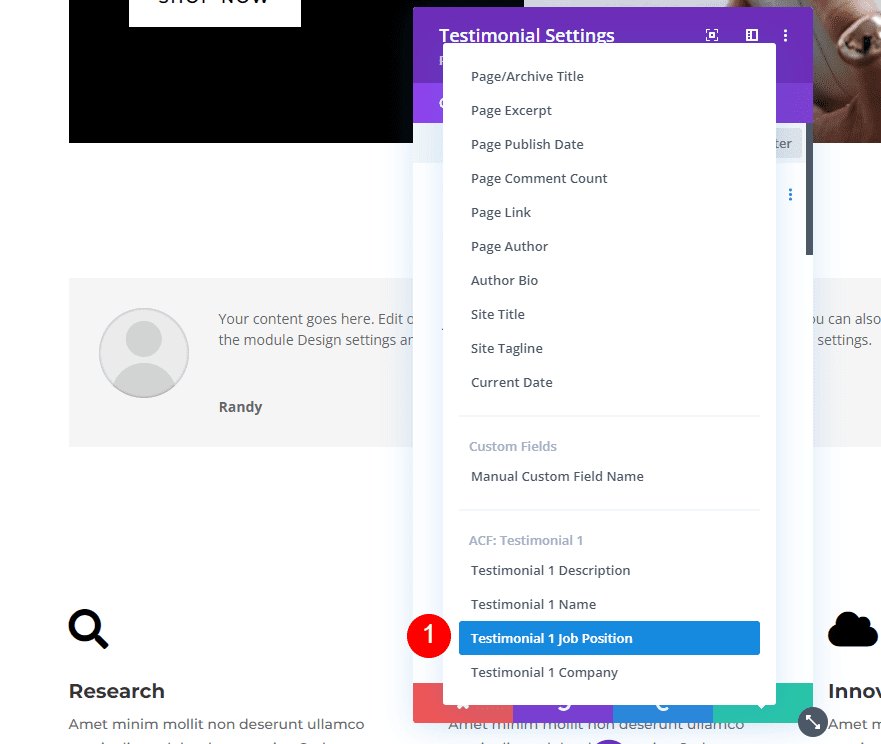
Choose Testimonial 1 Job Position from the list.
Add any Before or After text you want to the fields and select the green check.

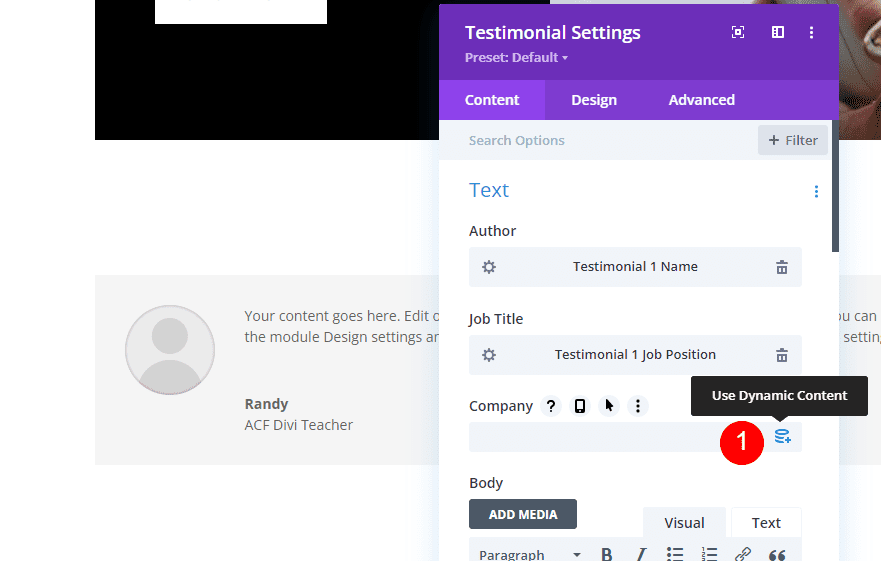
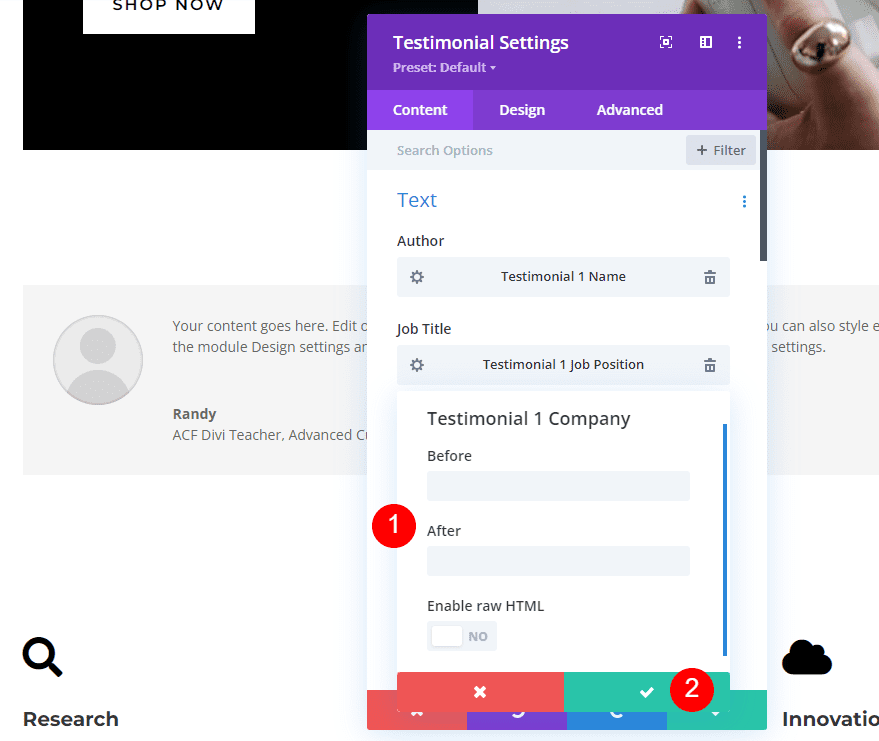
Dynamic Company Name
Next, hover over the Company field and select its dynamic icon.
Choose Testimonial 1 Company from the list.

Add Before and After text if you want and click the green check.
Dynamic Description
Finally, hover over the content area for the Body and select the dynamic icon.
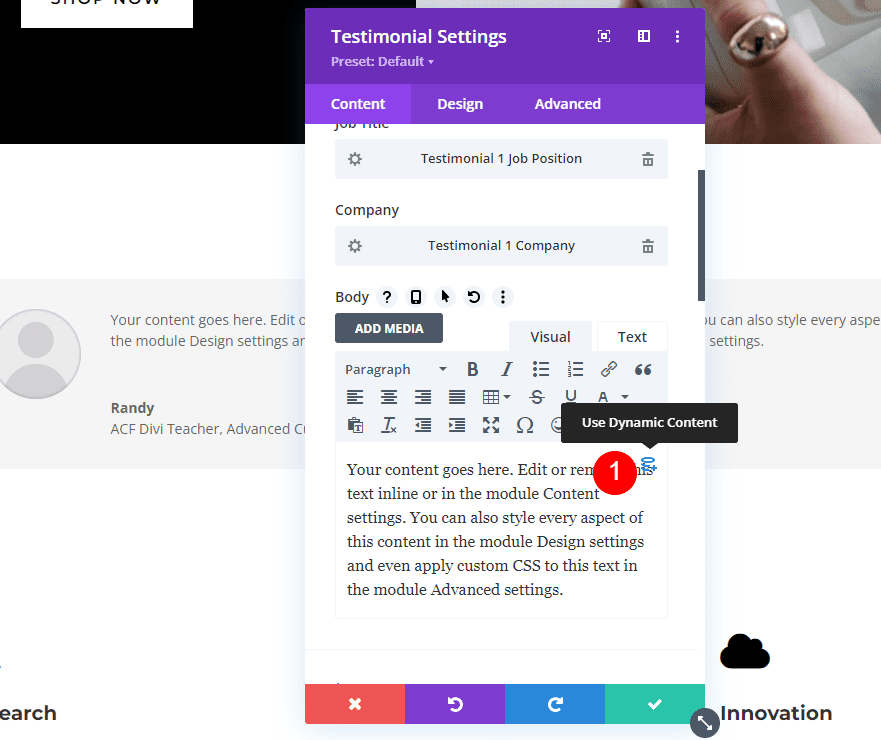
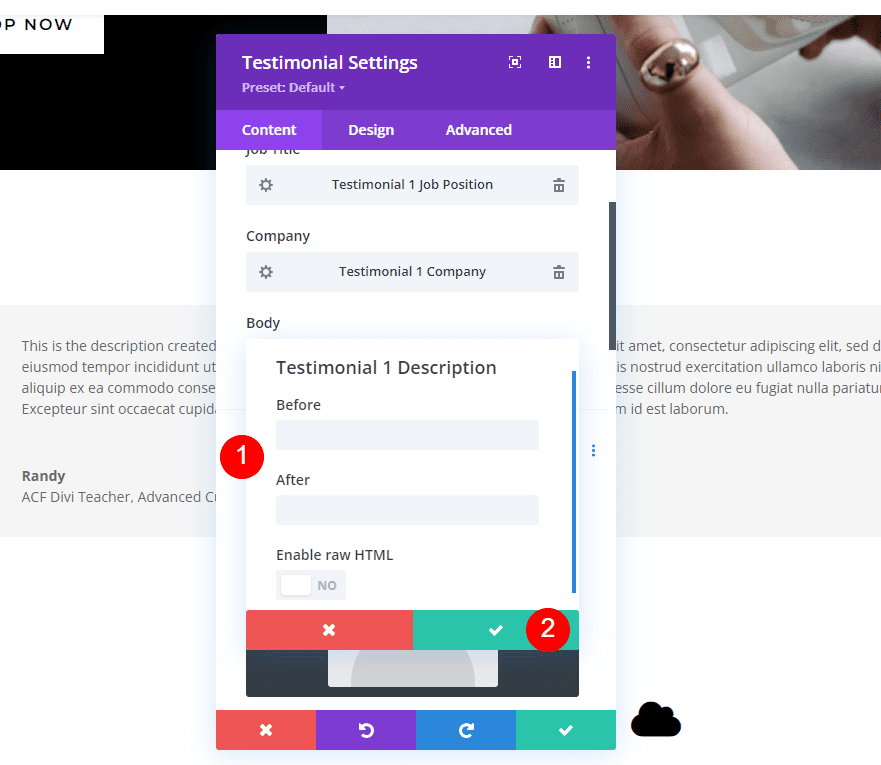
Choose Testimonial 1 Description from the list.
Next, add the Before and After text if you want and click the green check. Exit the module and save your page.
We now have a testimonial module that uses dynamic content for the fields.
Editing the Dynamic Testimonial Content
Any of the testimonial fields can be updated without having to open the Divi builder. To edit the dynamic content, simply go to the page editor and change the content in the fields at the bottom of the page. In this example, I add my last name to the Testimonial 1 Name field.
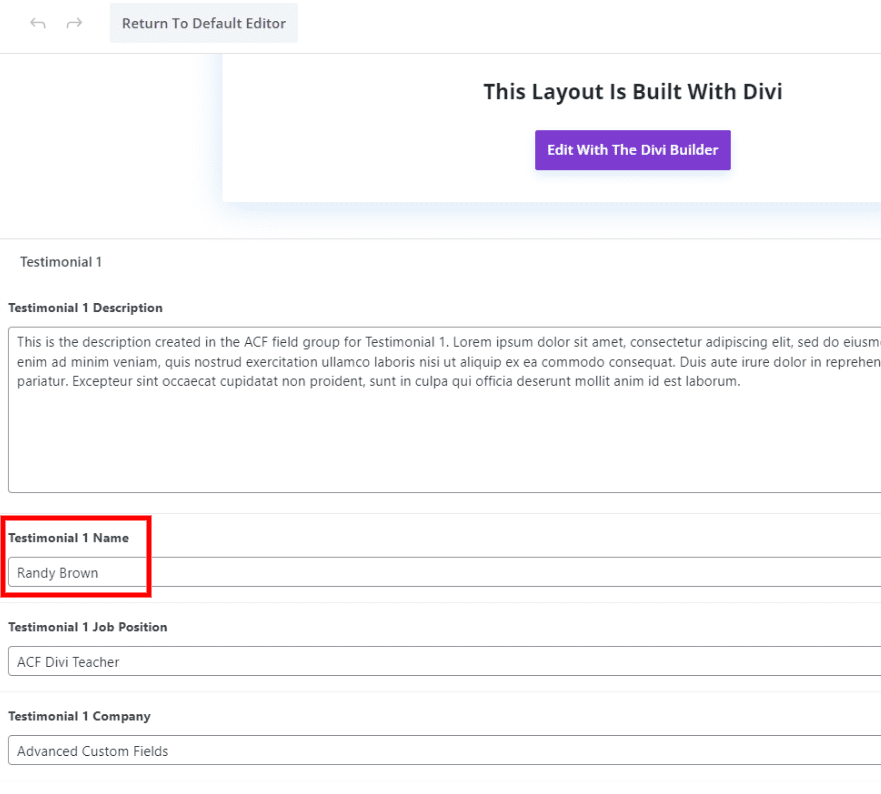
The name is automatically updated in the module.
Style the Dynamic Testimonial Module
Next, let’s style the testimonial module to match the page template.
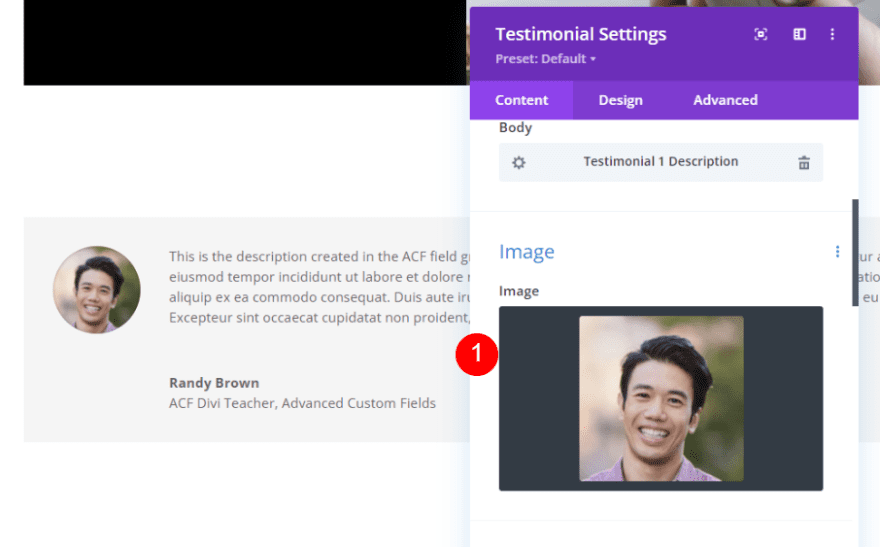
Content Image
In the content tab, scroll down to Image and add the person’s image from your media library.
- Image: person’s photo
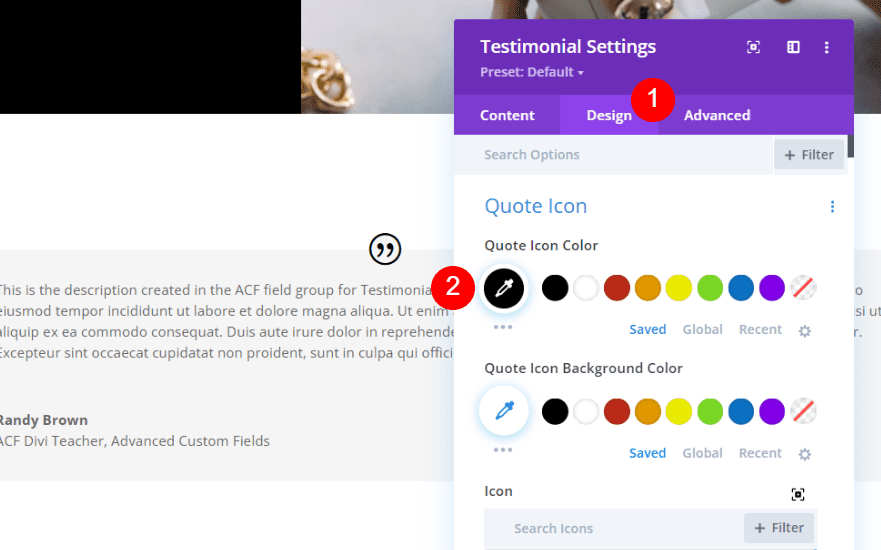
Quote Icon
Next, go to the design tab. Choose black for the Quote Icon Color.
- Color: #000000
Image
Next, scroll down to Image. Set the Width and Height to 150px. Change the Rounded Corners to 0px.
- Width: 150px
- Height: 150px
- Rounded Corners: 0px

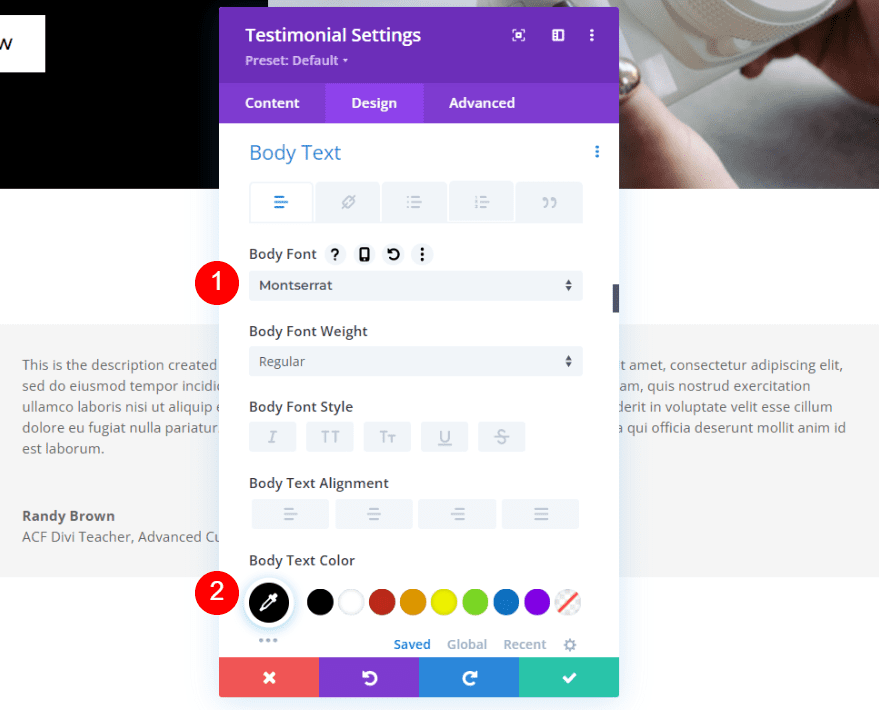
Body Text
Scroll down to Body Text. Choose Montserrat for the Font. Change the Color to black.
- Font: Montserrat
- Color: #000000
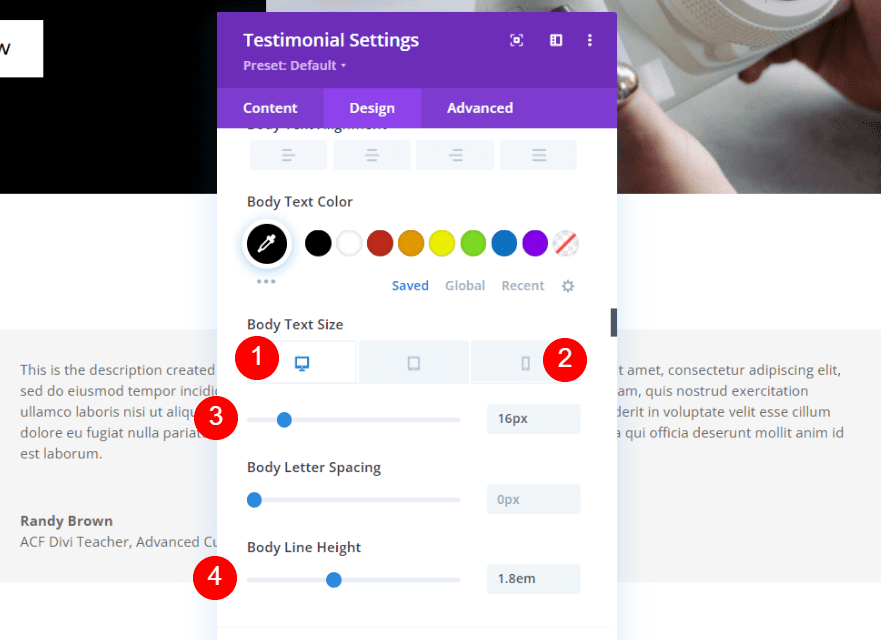
Set the Desktop Size to 16px, the Phone Size to 14px, and the line Height to 1.8em.
- Size: 16px, 14px
- Line Height: 1.8em
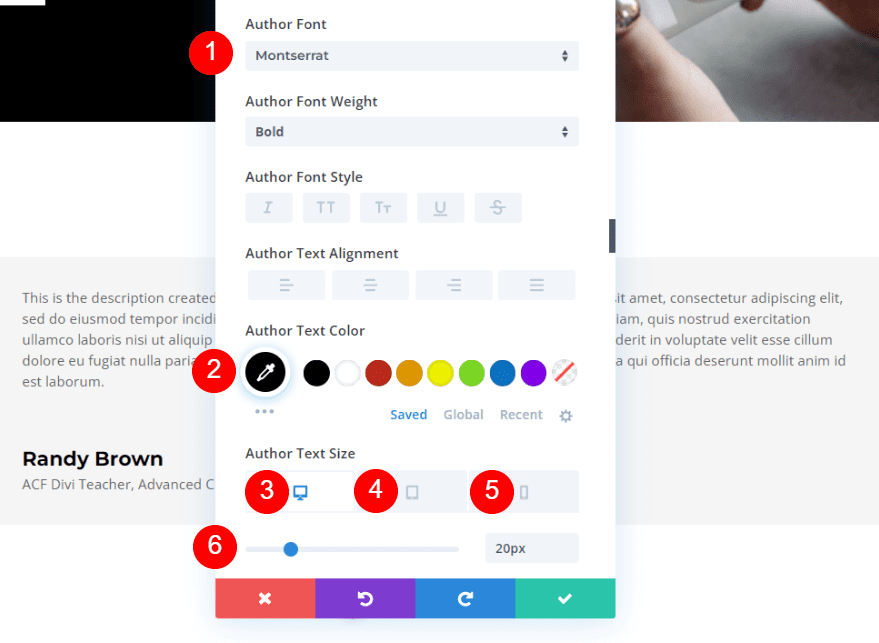
Author Text
Scroll down to the Author Text. Change the font to Montserrat and change the Color to black. Set the Desktop Size to 20px, the Tablet Size to 18px, and the Phone Size to 16px.
- Font: Montserrat
- Color: #000000
- Size: 20px, 18px, 16px
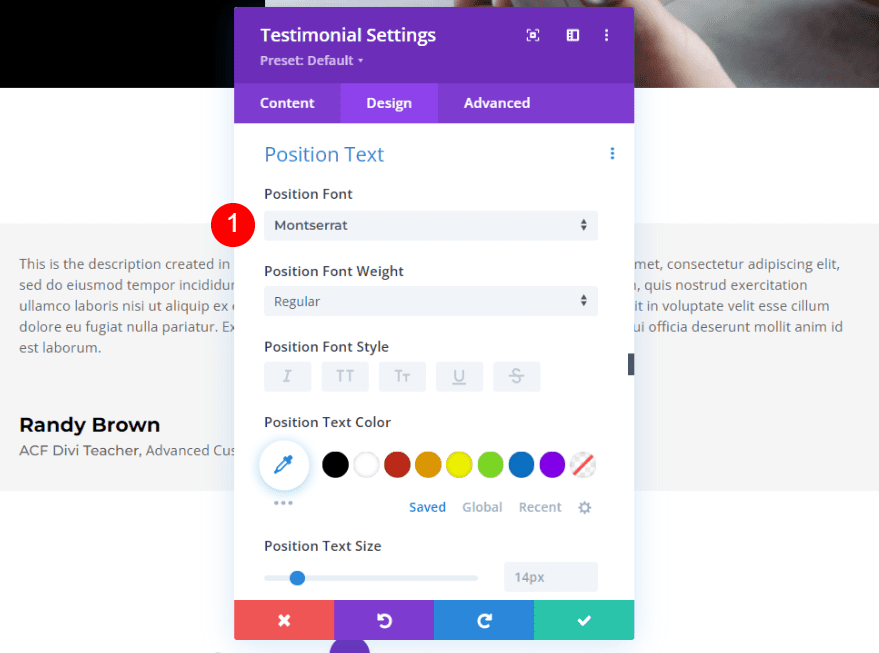
Position Text
Next, scroll down to Position Text and change the font to Montserrat.
- Font: Montserrat
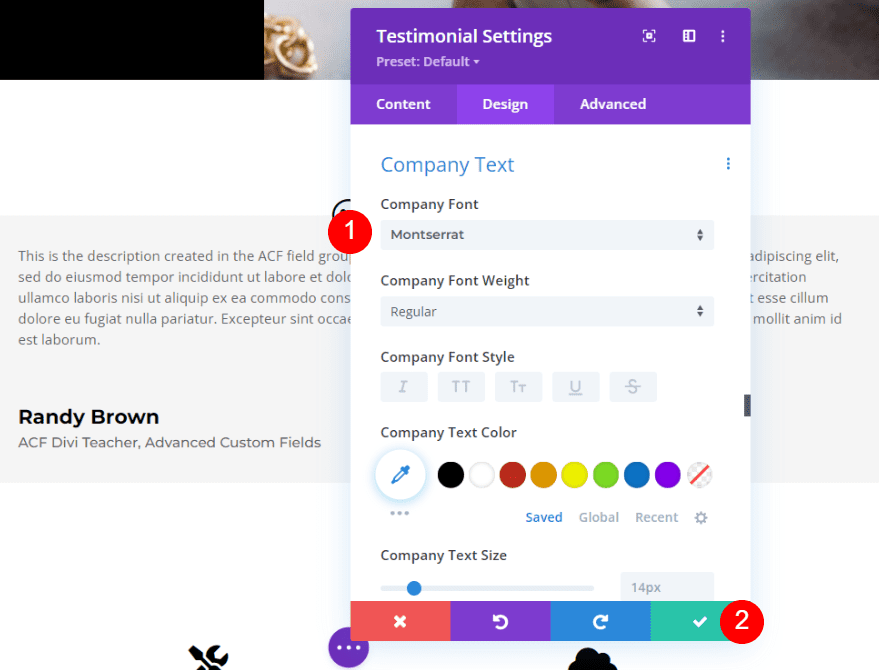
Company Text
Finally, scroll down to Company Text and set the font to Montserrat. Close the module and save your page.
- Font: Montserrat
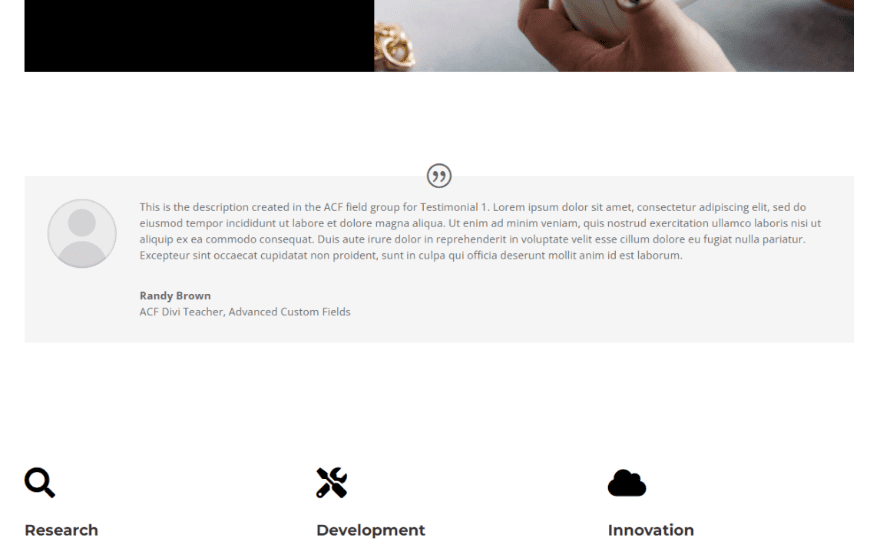
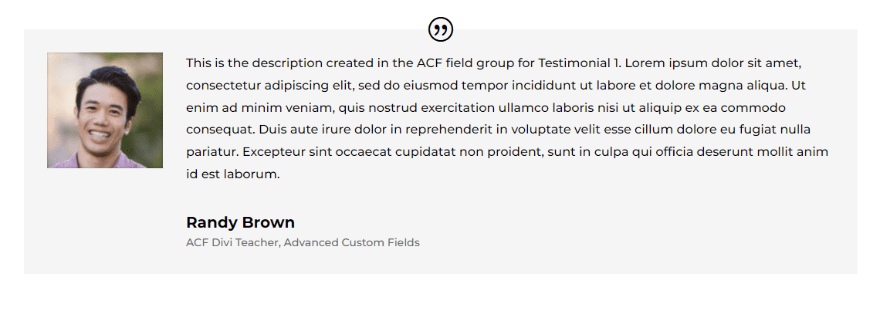
Dynamic Testimonial Module Result
Here’s the finished look of the dynamic Divi testimonial module.
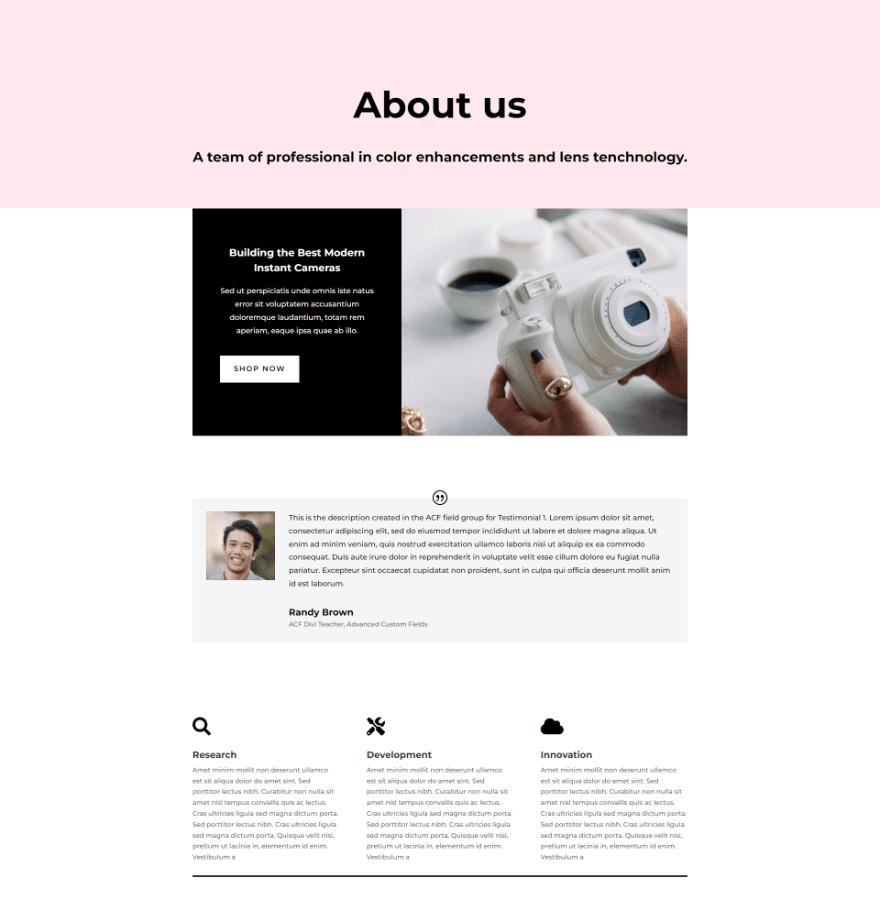
Here’s how it looks within the page layout.
Ending Thoughts
That’s our look at how to create dynamic testimonial modules with Divi & ACF. Adding the custom fields to the Divi testimonial module is simple with Divi’s dynamic content. It’s as easy as creating the fields as a field group and then choosing the fields with Divi’s dynamic content.
We want to hear from you. Do you use dynamic testimonial content with Divi and ACF? Let us know about it in the comments.


I think I’m running into the same issue as Ravindra S Dhande.
This would work if every Custom Post Type has the same number of testimonials to display.
Imagine this scenario:
You want to have a slider full of testimonials for each individual Trainer (custom post type).
A page builder template can be used for only Trainers.
You can pull dynamic testimonial and author (custom fields) from each Trainer and add them to the slider.
In the page builder template, you’d have to add every possible testimonial (custom field group) to the slider template. This is the case for a trainer who has, say, 5 testimonials.
But what about a Trainer who only has 3 reviews? Their page is still using the page builder template, which uses 5 testimonials (custom field groups). So there will be two blank slides on their page because the “dynamic” content still loads a blank slide.
I presume, like Hamzah Ali suggested, that this doesn’t support the “loop” or being able to continuously add an ongoing number of testimonials.
I think this would be a good idea, since it would be easier to obtain testimony.
How is it dynamic, the content though picked up from ACF fields, what if I want to have a second person’s testimonial. then third, then fourth… etc… how to display that on-page is what dynamic testimonial must do right? Or am I getting confused about this? Please guide.
I am on the verge of switching from another WP theme to Divi. However, I have read a bunch of blogs and reviews that complain about Divi’s incompatibility with other WP plugins. Are these complaints true or just rumors??? Someone, please help me clarify… Thanks in advance.
I have used DIVI for many years and developed 50+ websites with it. The only time I came across a problem was integration was with LearnDash. But now there is a plugin for DIVI with Learndash which I didn’t have a chance to test yet. So hopefully that problem is resolved as well.
If the plugins are coded well and follow the Standards For Good Coding(https://make.wordpress.org/core/handbook/coding-standards/) as defined by the makers of WordPress then there should be no conflicts arise.
I wish there was a way in Divi of having customers be able to submit their testimonials and then we just approve them and it is automatically added without us having to manually copy and paste etc.
Agree 100%
Yes, i have used acf with divi, and custom post type, but it doesn’t support loop, in blog list page if i want to have custom designed list.
Like classified listings.
This would be a very nice idea, it would be easier to get testimonies.
Agree