
For many websites, the contact section of the page is the ideal destination for visitors. To state the obvious, most people/companies want their visitors to contact them for more business. That’s why it is important to optimize that section for better conversion. One way we can do that is to create a fullscreen contact form layout which gives the user a distraction-free view of the contact information.
In this tutorial, we are going to build a fullscreen contact form section layout that you can use on any page of your Divi site. We will also customize the layout with helpful responsive design settings that will keep that fullscreen layout looking great even on small phones.
Let’s get started!
- 1 Sneak Peek
- 2 Download the Layout for FREE
- 3 Download For Free
- 4 What You Need to Get Started
- 5 Building the Contact Section Layout
- 6 Customizing the Section Elements for Fullscreen Responsive Design
- 7 Adding the Scroll Effects
- 8 Using the Fullscreen Contact Form Section on Your Website
- 9 Final Result
- 10 Final Thoughts
Sneak Peek
Here is a quick look at the responsive fullscreen contact form section we are going to build.
Download the Layout for FREE
To lay your hands on the designs from this tutorial, you will first need to download it using the button below. To gain access to the download you will need to subscribe to our newsletter by using the form below. As a new subscriber, you will receive even more Divi goodness and a free Divi Layout pack every Monday! If you’re already on the list, simply enter your email address below and click download. You will not be “resubscribed” or receive extra emails.

Subscribe To Our Youtube Channel
To import the section layout to your Divi Library, navigate to the Divi Library.
Click the Import button.
In the portability popup, select the import tab and choose the download file from your computer.
Then click the import button.

Once done, the section layout will be available in the Divi Builder. Remember this is a section layout so you will need to add this layout to a page, post, or template when creating a new section in the builder.
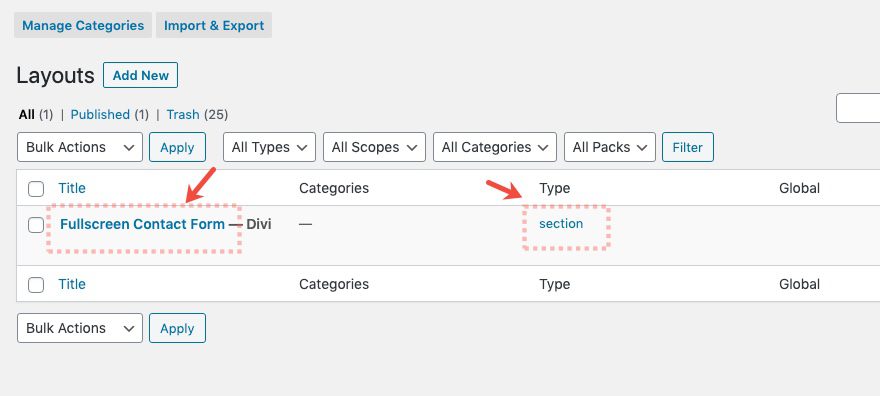
See the bottom of the post for how to add the section layout to a page.
Let’s get to the tutorial, shall we?
What You Need to Get Started
To get started, you will need to do the following:
- If you haven’t yet, install and activate the Divi Theme.
- Create a new page in WordPress and use the Divi Builder to edit the page on the front end (visual builder).
Building the Contact Section Layout
To kick things off, we are going to add a premade layout to a new page using the Divi Builder. This will speed up the design so that we can focus on what it takes to make a section (with a contact form) fullscreen and responsive. Then we will add the scroll effect to pull it all together in the end.
Adding Premade Layout
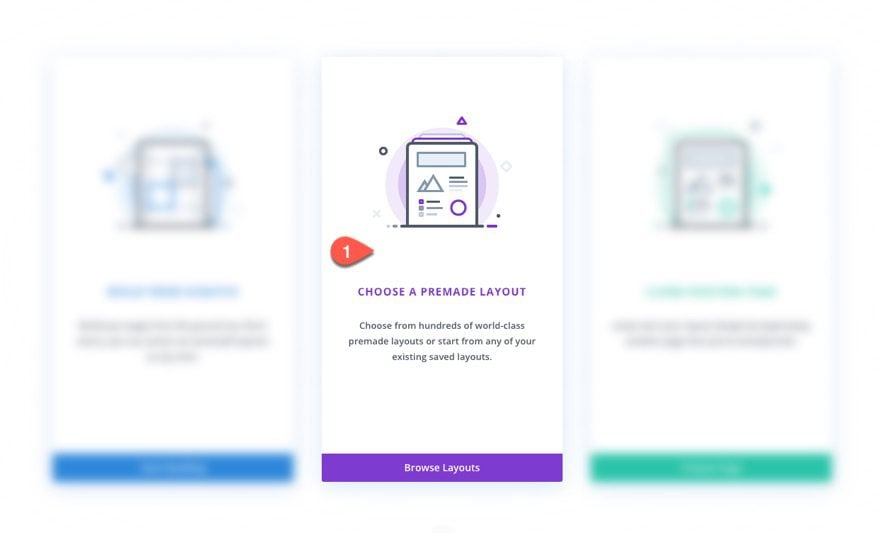
Once you click to edit the page using the Divi builder, select the option “Choose a Premade Layout”.
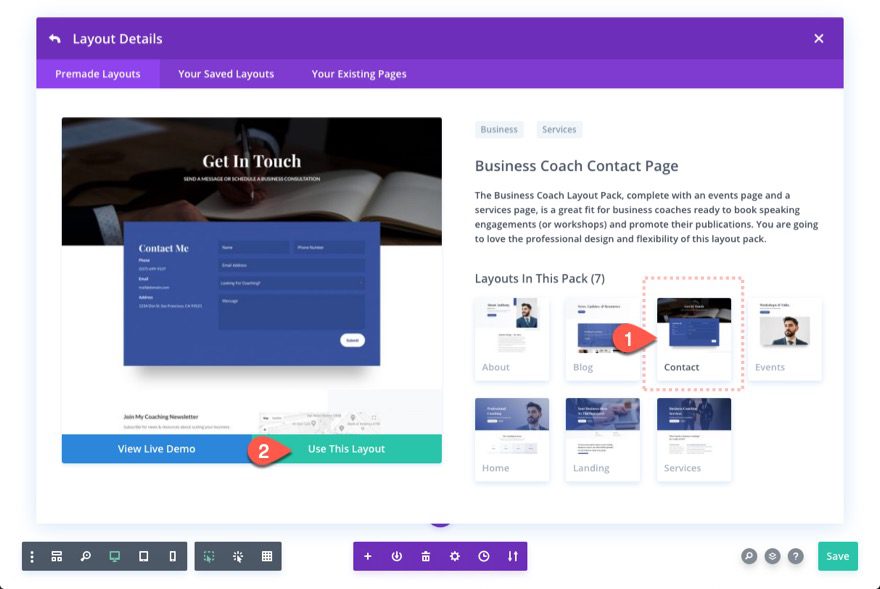
Then find the Business Coach Contact Page layout and click the “Use This Layout” button.
Section Settings
Once the layout has been loaded to the page, open the settings of the section at the very top of the layout, and update the following:
Background
- Background Color: #3550a0

Section Height and Padding
- Min Height: 600px
- Height: 104vh
- Padding: top 0px, bottom 0px
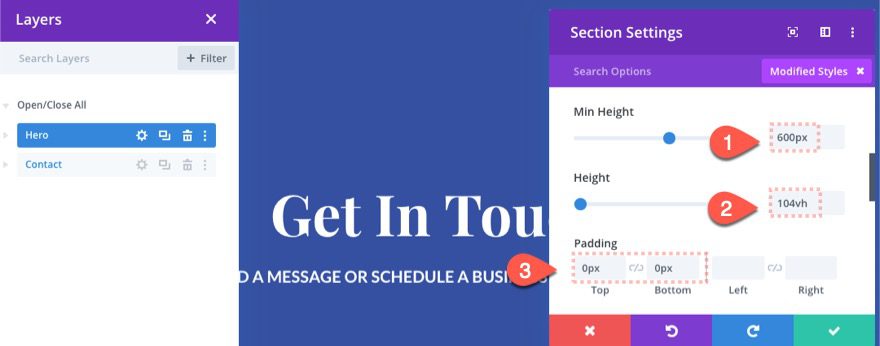
One of the keys to this design is to set the height to at least 100vh (100% of the viewport height). This will make sure the section will span the full height of the browser window. We are adding 104vh height so that we have a little extra space for when the user scrolls to the section.
Setting the min-height to 600px is a fallback height so that none of the elements within the section are hidden if ever the browser height is too small. This will need to be adjusted according to the amount of content we have within the section.
Custom CSS
In order to vertically center the rows within the section (great for fullscreen sections), add the following custom CSS the main element.
display:flex;flex-direction: column;

Adding Contact Form
To add the contact form to the section, drag it below the existing text module from the premade section below.
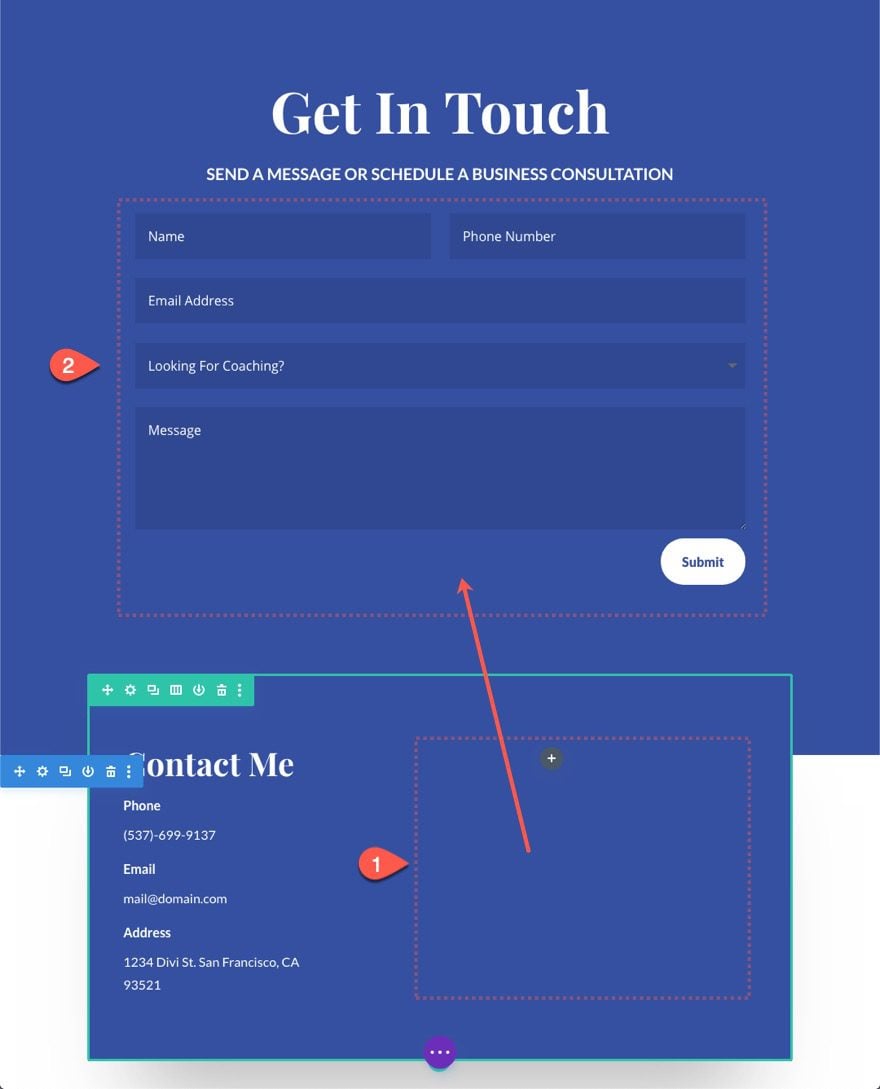
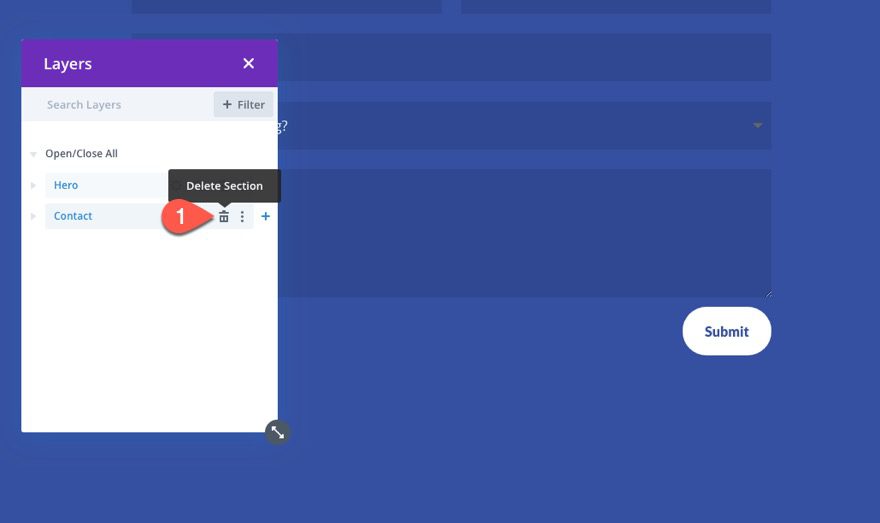
Delete Extra Section(s) from Premade Layout
Then delete the bottom section so that only the one section we are building remains.
Customizing the Section Elements for Fullscreen Responsive Design
Now that the section layout has been completed, we are ready to start customizing the content ( or child elements) of the section with a responsive design that will scale nicely for a fullscreen section on all devices.
We will be using the vh length unit for most of the text size and spacing for each of the elements. This will help to keep the elements in view with the fullscreen layout even on short phone displays.
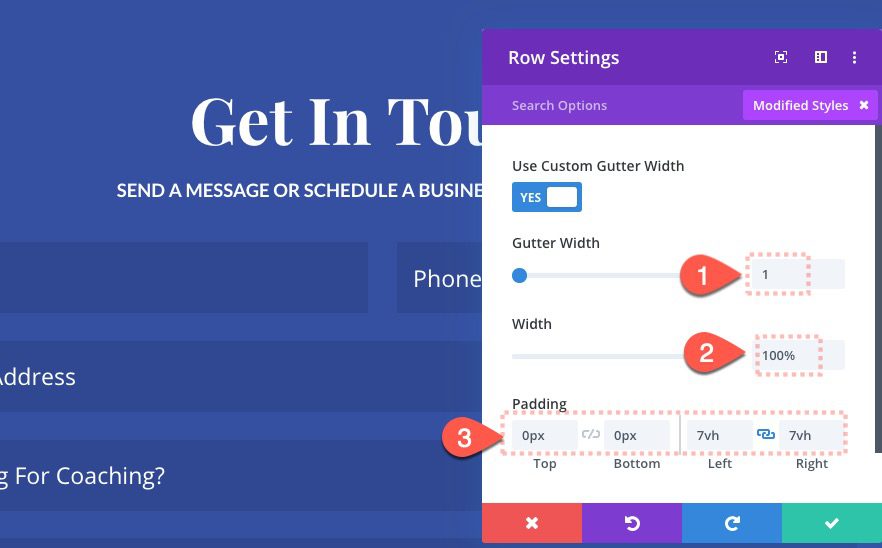
Row Settings
Open the row settings and update the following:
- Gutter Width: 1
- Width: 100%
- Padding: 0px top, 0px bottom, 7vh left, 7vh right
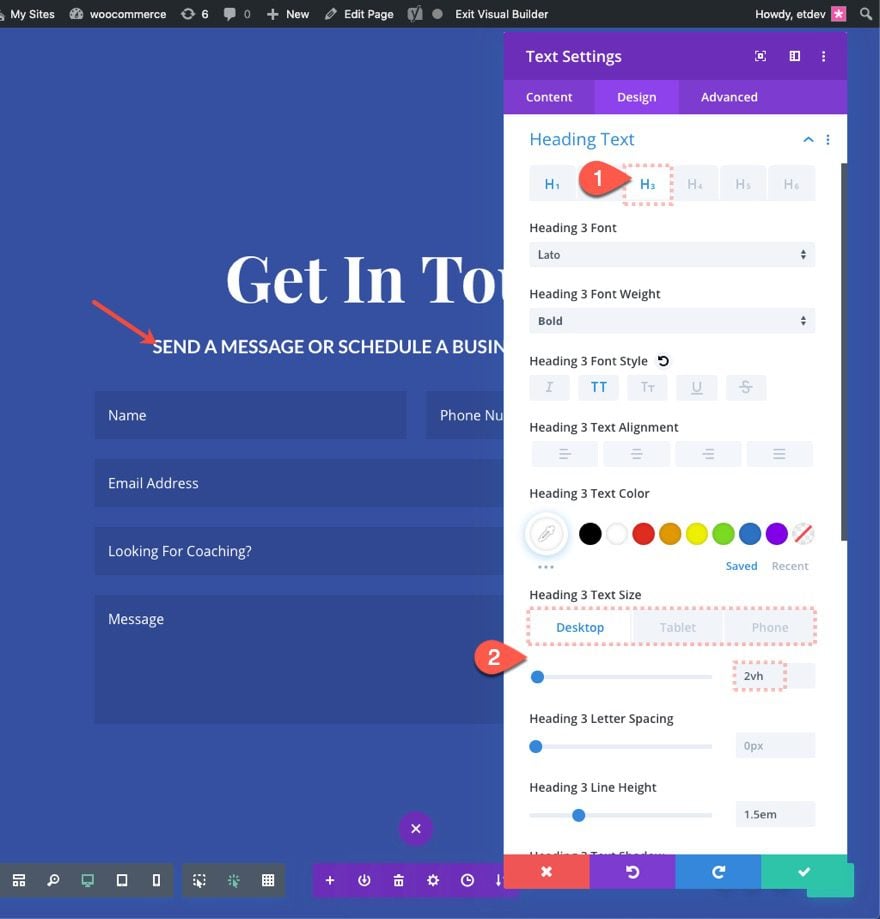
Text Module Settings
Open the text module settings and update the following:
Heading Text Size
- Heading Text Size: 7vh (desktop), 5vh (tablet and phone)
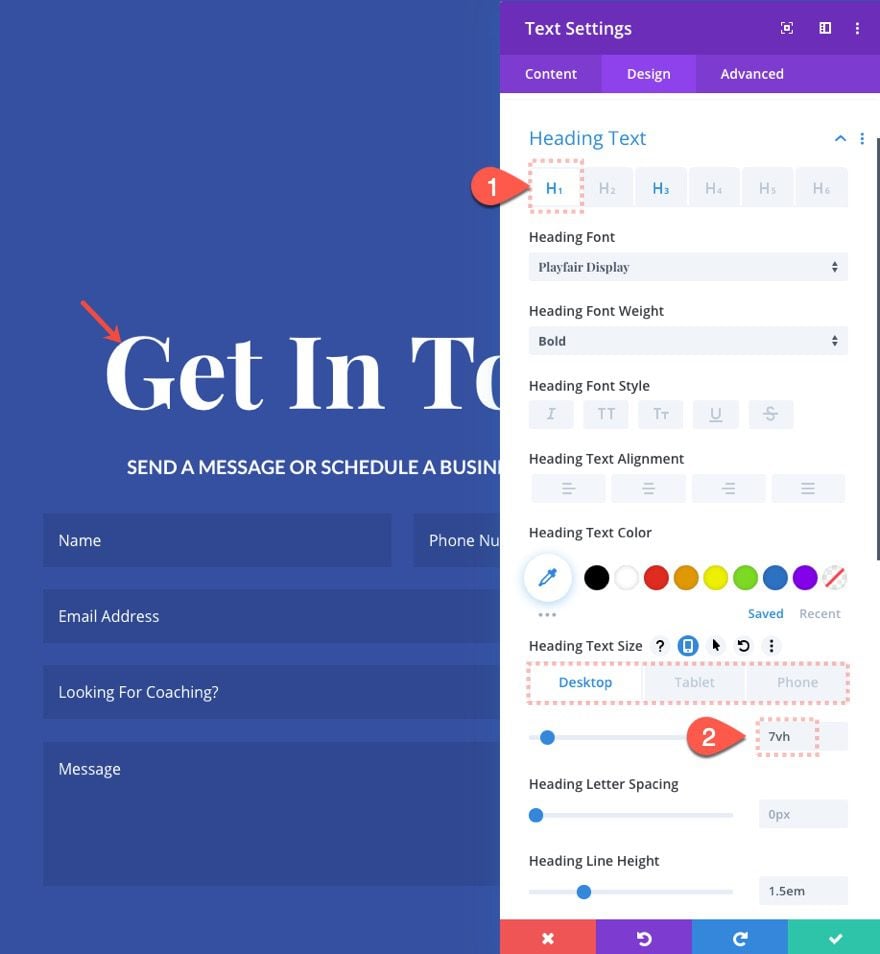
- Heading 3 Text Size: 2vh (desktop), 3vh (tablet), 12px (phone)
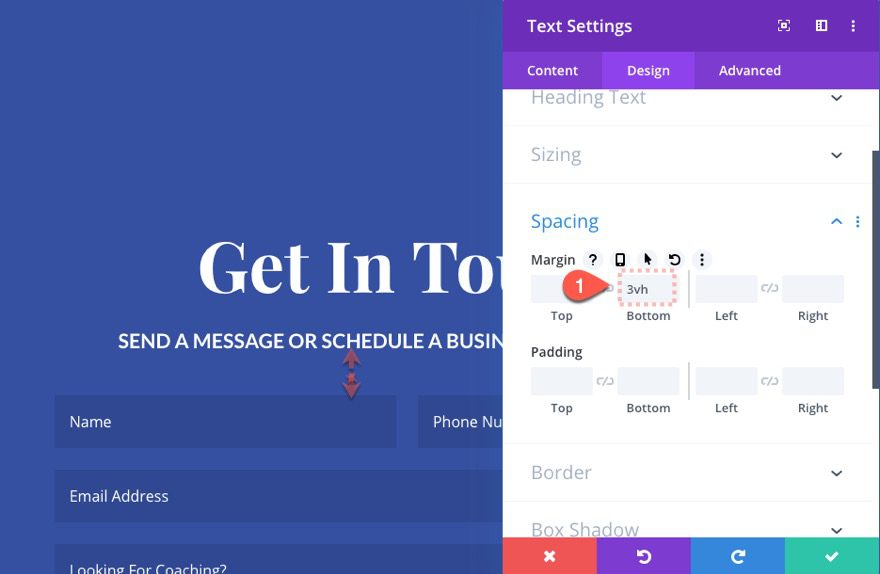
Margin
- Margin: 3vh bottom
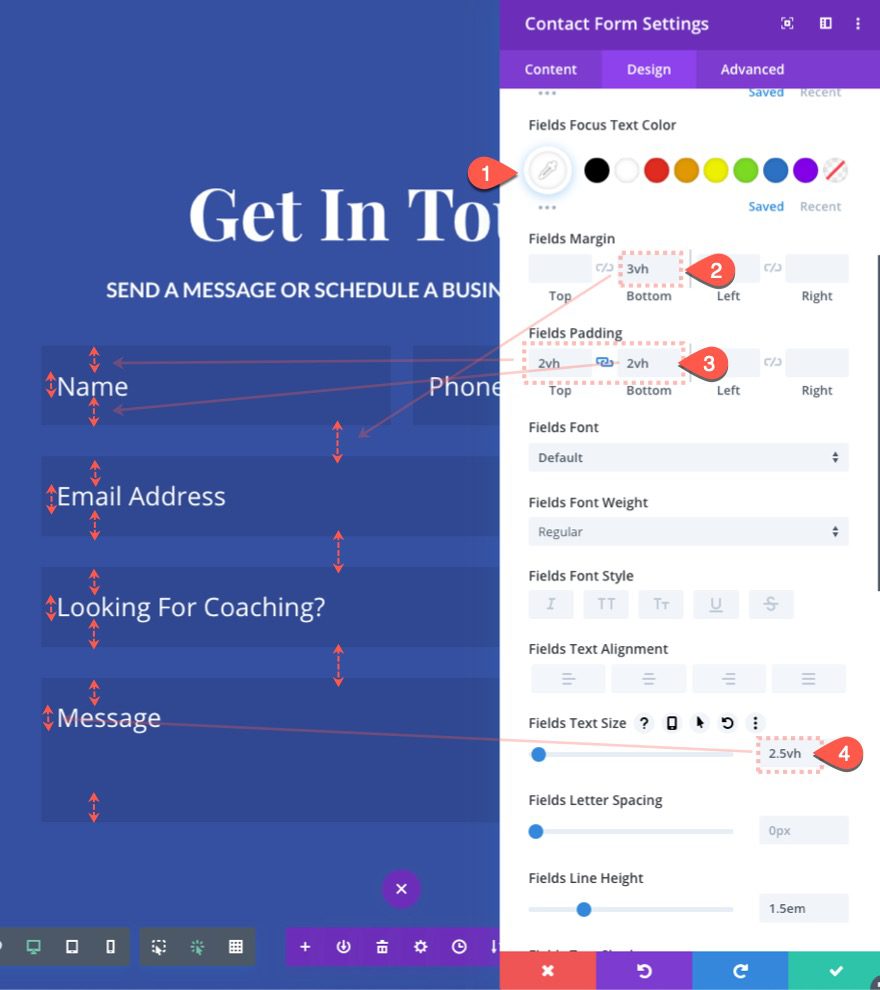
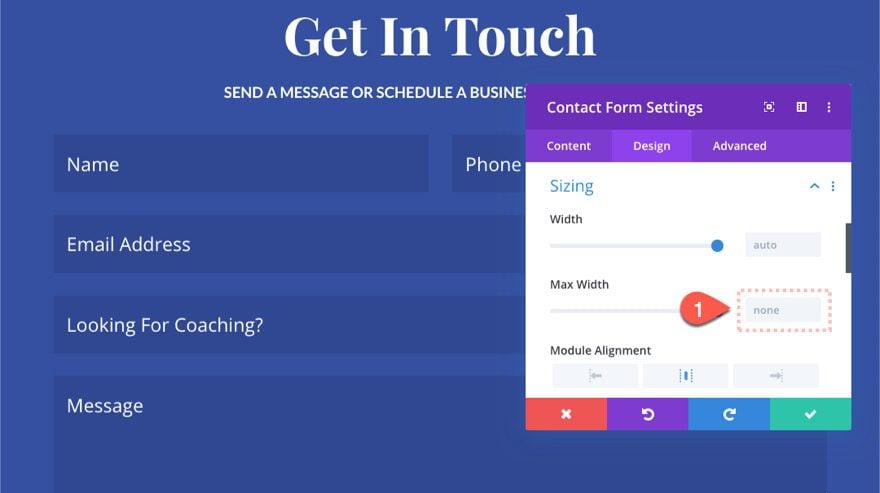
Contact Form Settings
Now we will continue our responsive design adjustment on the contact form using the vh length unit. Open the Contact Form Settings and update the following:
Field Settings
- Fields Margin: 3vh
- Fleids Padding: 2vh top, 2vh bottom
- Fields Text Size: 2.5vh
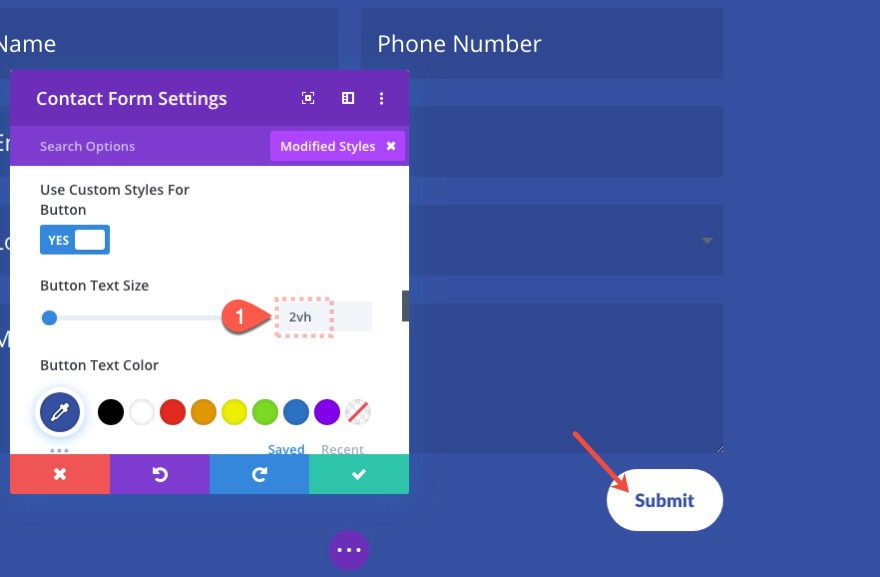
Button Text Size
- Button Text Size: 2vh
Width
- Max Width: none
Adding the Scroll Effects
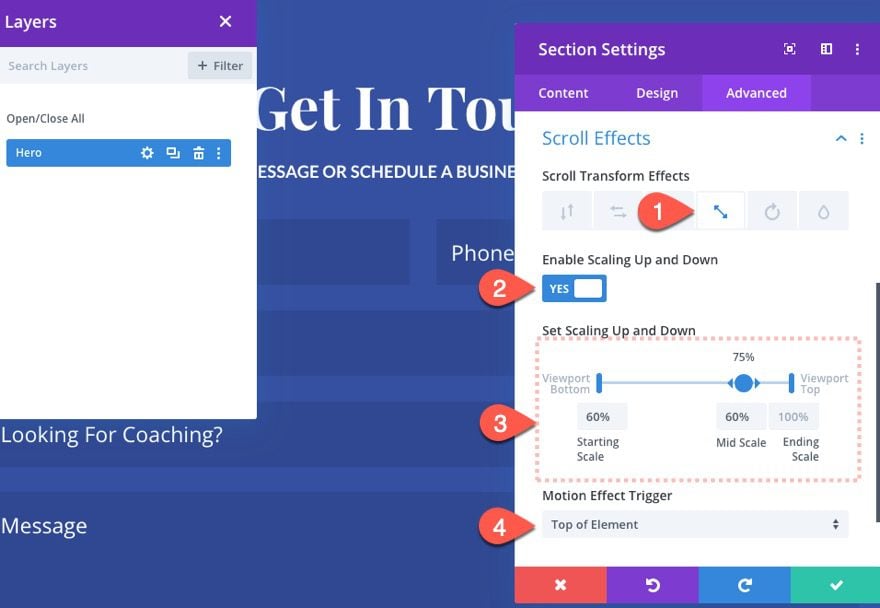
The last step to the design is the scroll effect that will transition the contact form section into a fullscreen view when scrolling down the page. To do this, open the section settings one more time and update the following:
Under the Scaling Up and Down Tab…
- Enable Scaling Up and Down: YES
- Starting Scale: 60% (at 0%)
- Mid Scale: 60% (at 70%)
- Ending Scale: 100% (at 100%)
That completes the design of the fullscreen contact form section. But before we can view the final result, let’s first add it to one of the pages on the website.
Using the Fullscreen Contact Form Section on Your Website
Save Section Layout to Divi Library
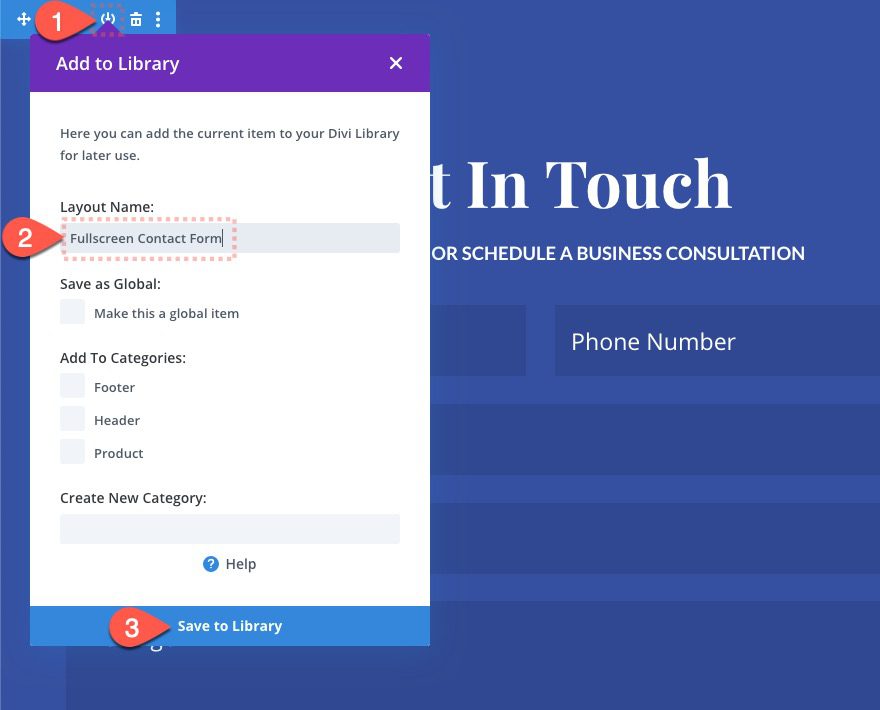
Before we can add this section to another page on our website, we first need to save the section layout to the Divi Library.
To do this, click the “Add to Library” icon in the section menu. Then give the layout a name and click the “Save to Library” button.
Now the section layout will be available within the Divi Library for future use.

Add Section Layout to Page from Divi Library
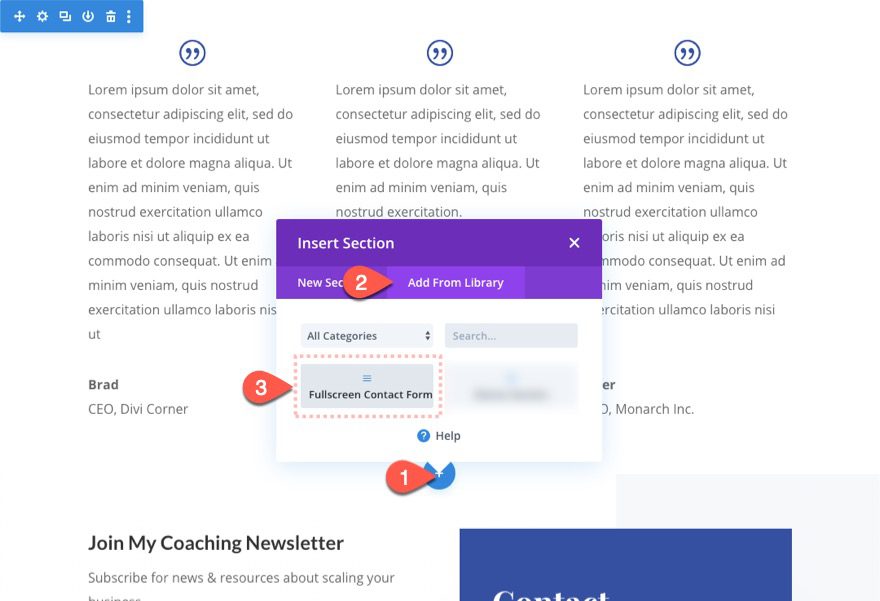
To add the fullscreen contact form section layout to a page (or post) in Divi, open to edit the page using the Divi Builder.
Then click to add a new section somewhere on the page.
In the Insert Section popup, click the Add From Library tab and select the saved section layout from the list (mine is called “Fullscreen Contact Form”).
Final Result
Now Let’s check out the final result.
Here it is on desktop.
Here it is on tablet (iPad Pro actually).
Here it is on phone (iPhone 5 actually). Notice that even though the screen is really short, the content still fits inside the fullscreen view.
Final Thoughts
I hope the fullscreen contact form section will help you create a high-converting contact form/section for your own website. The important thing to keep in mind is to always make sure and keep the content concise enough that it will also display nicely on small phones as well. Some of the key responsive design techniques used in this layout will also come in handy when making adjustments to any design throughout your website.
For more on this topic, check out our post on how to use vw and vh length units to design a responsive contact form in Divi.
I look forward to hearing from you in the comments.
Cheers!


We need attach file fileds to contact form module, please!
Really nice effects you can do with this one. This is definetly something I would consider using.
It adds so much niceness to the contact form – forms that normally are not the most exiting thing on a website. And agreed, could improve the convertion rate.
the full and final method and explanation with amazing way quality post to me really