
Comments are an important part of any blog post template. However, for some visitors, a lengthy comments section can become a problem whenever they are trying to scroll through the rest of the content on the post. Creating a comments toggle is a great solution to this problem. By giving users the ability to toggle (show or hide) the comments, you can improve the user experience by delivering a more concise version of your post initially and providing them with the ability to show or hide the comments whenever they wish.
In this tutorial, we are going to show you how to create a comments toggle for your Divi blog post template comments. Once we build the comments toggle bar using the Divi Builder, we will add the necessary code to show/hide the comment area when clicking the toggle bar.
Let’s get started!
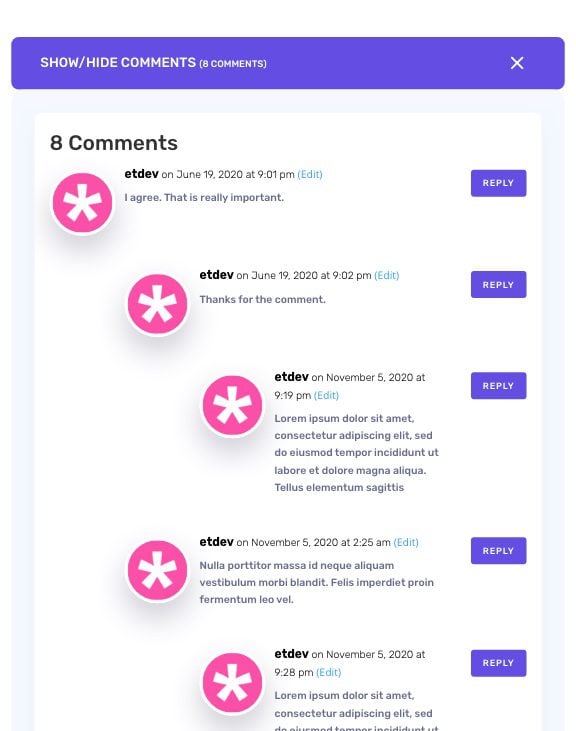
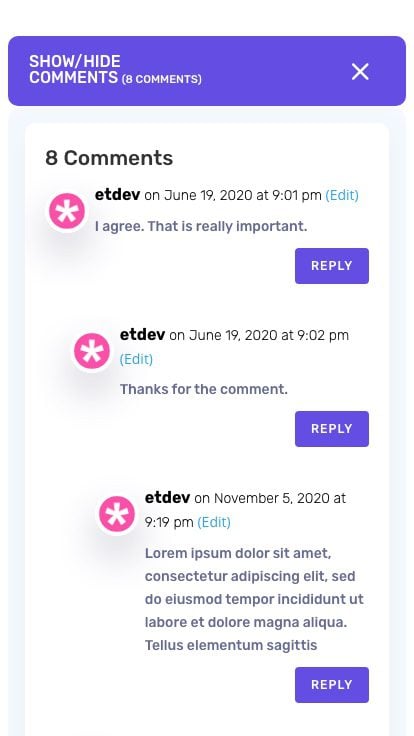
Sneak Peek
Here is a quick look at the design we’ll build in this tutorial.
Download the Template for FREE
To lay your hands on the comments toggle post template from this tutorial, you will first need to download it using the button below. To gain access to the download you will need to subscribe to our newsletter by using the form below. As a new subscriber, you will receive even more Divi goodness and a free Divi Layout pack every Monday! If you’re already on the list, simply enter your email address below and click download. You will not be “resubscribed” or receive extra emails.

How to Upload The Free Download Template
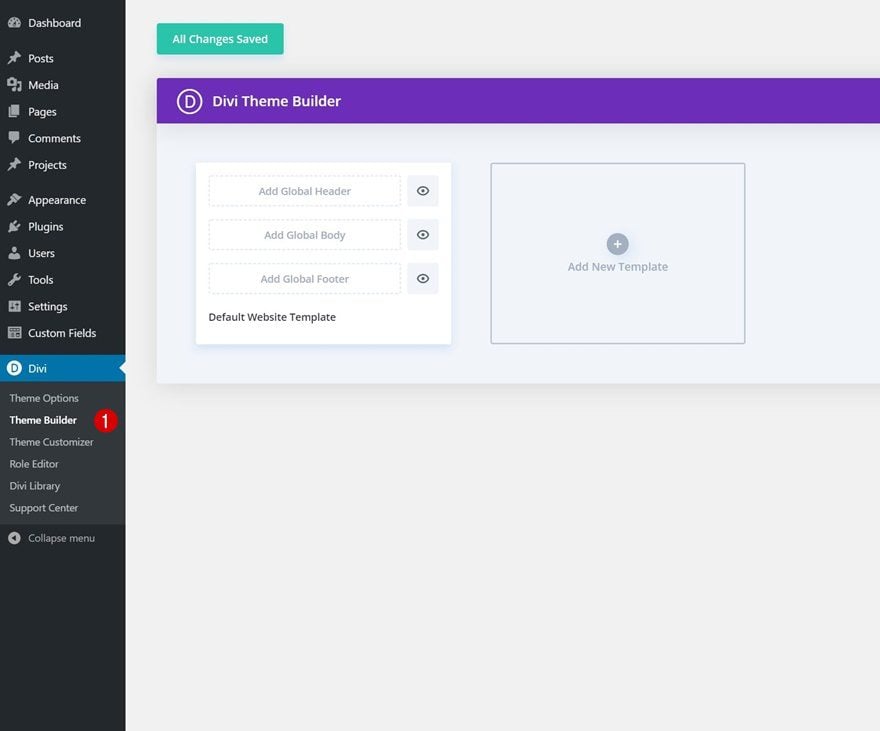
Go to Divi Theme Builder
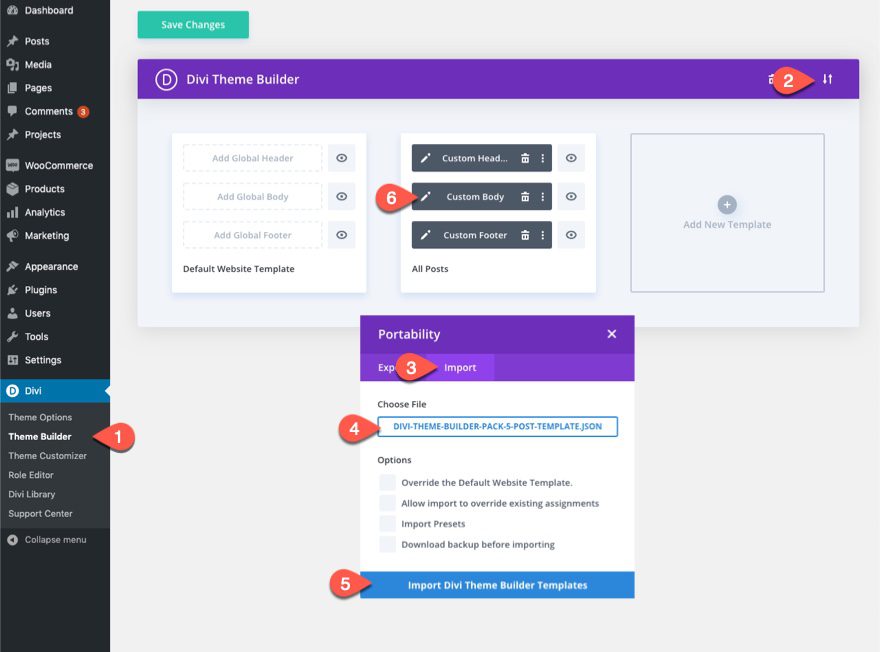
To upload the template, navigate to the Divi Theme Builder in the backend of your WordPress website.
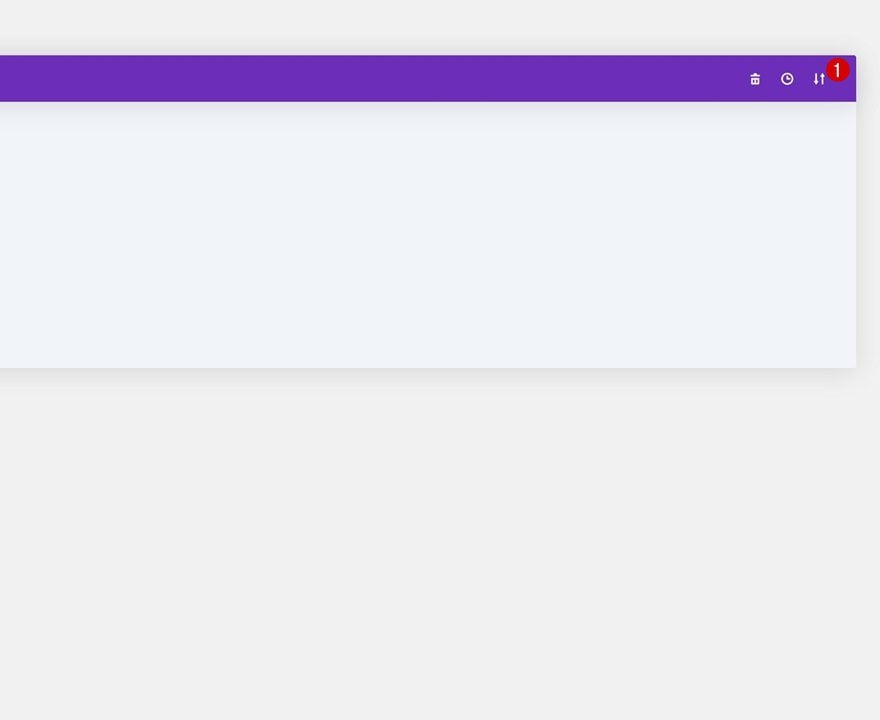
Upload Website Template
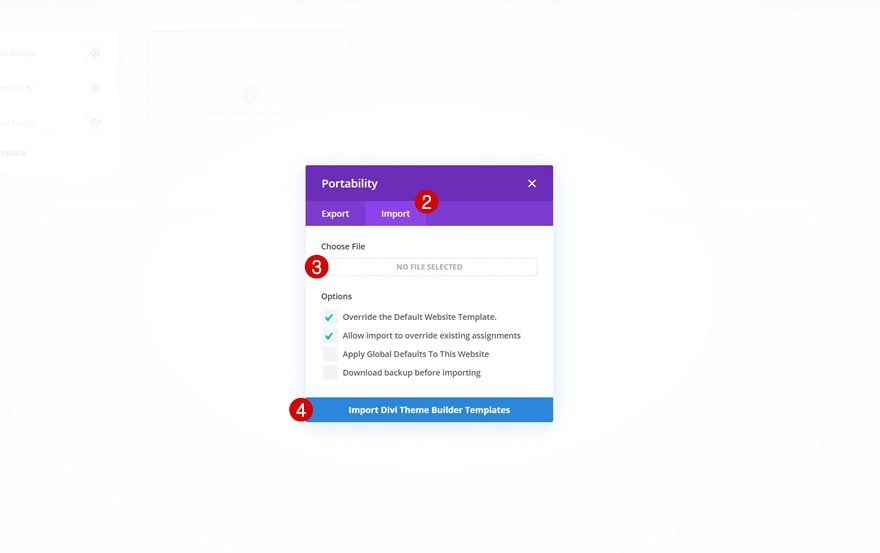
Then, in the top right corner, you’ll see an icon with two arrows. Click on the icon.
Navigate to the import tab, upload the JSON file which you were able to download in this post, and click on ‘Import Divi Theme Builder Templates‘.
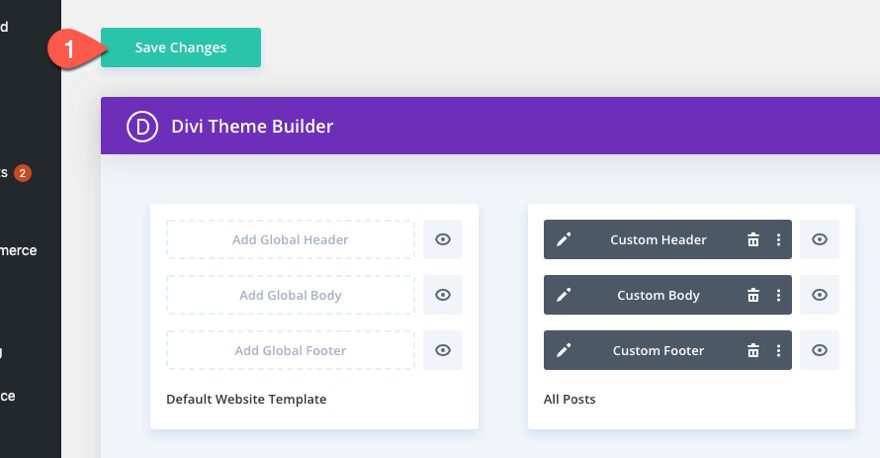
Save Divi Theme Builder Changes
Once you’ve uploaded the file, you’ll notice a new template with a new body area that has been assigned to All Posts. Save the Divi Theme Builder changes as soon as you want the template to be activated.

Let’s get to the tutorial so we can learn to build this thing from scratch, shall we?
How to Create a Comments Toggle for Your Divi Blog Post Template
Uploading the Theme Builder Pack 5 Blog Post Template
To get started, we are going to get a jumpstart on the design by add one of our premade blog post templates. To import the template the Theme Builder, you will need to do the following:
- Navigate to the Divi Theme Builder
- Click the portability icon at the top right of the page.
- Select the Import tab in the Portability popup.
- Download and Import the Divi Divi Theme Builder 5 Product Template File. Once you download the pack here, unzip the file and you will find the “divi-theme-builder-pack-5-post-template.json” file you will need to import.
- Click the Import Button
- Once the template has been imported, click the edit icon on the template’s custom body area to edit the template layout.
Creating the Comments Toggle Bar
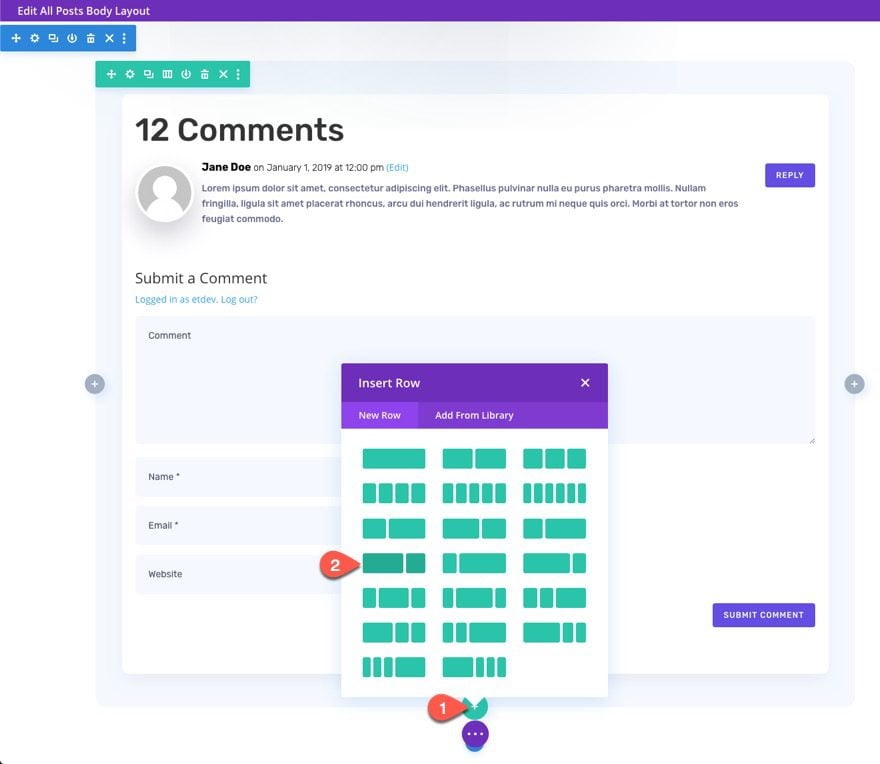
Our first step is to create the comments toggle bar that will eventually show/hide the comments. To do this, we are going to create a new row above the row that holds the comments module/content. Then we will fill the row with the toggle title and icon to complete the design.
Add Row
Go ahead and scroll to the bottom of the premade layout and add a new row directly under the row containing the comments module.
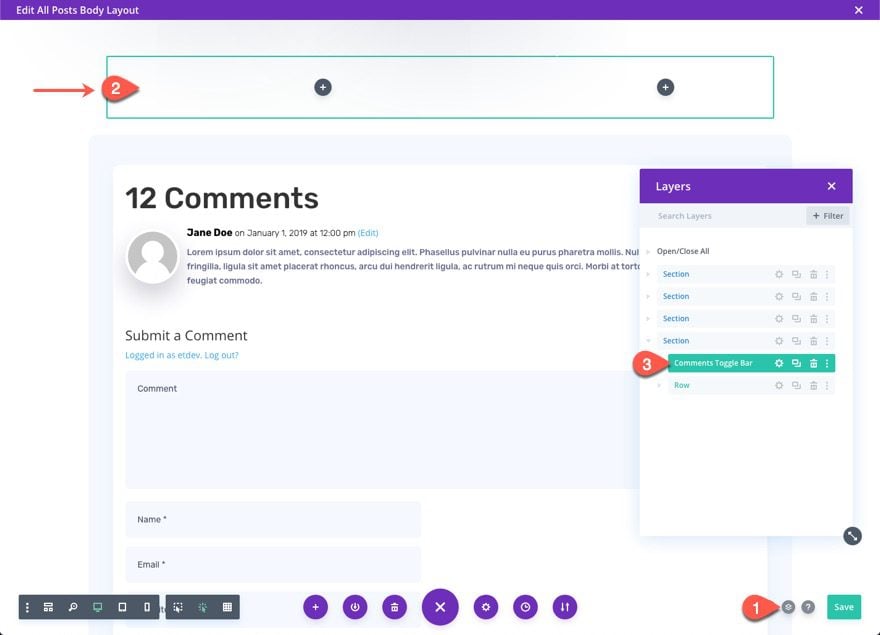
Drag the new row above the row of comments.
Then add the label, “Comments Toggle Bar”, to the row inside the layers view for easy identification later on.
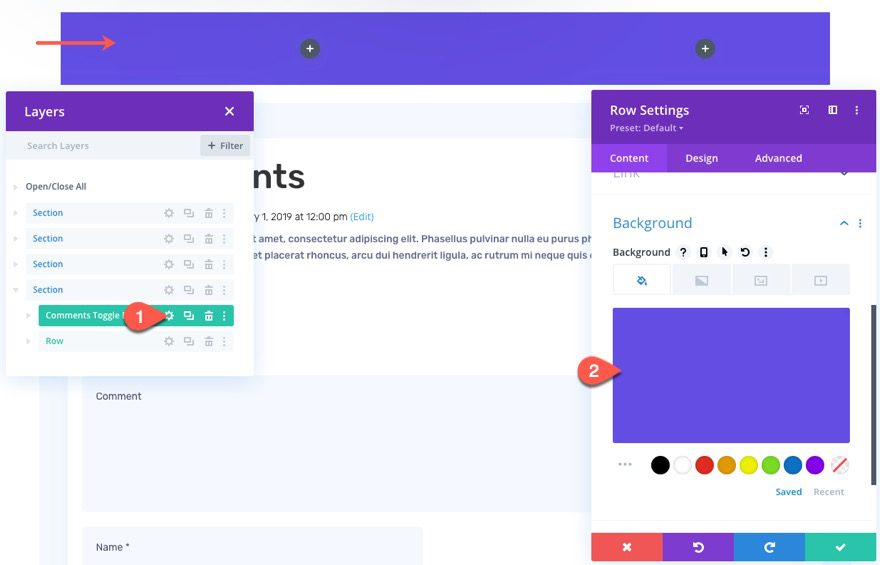
Row Settings
Open the settings for the new row and add the following background:
- Background Color: #624de3
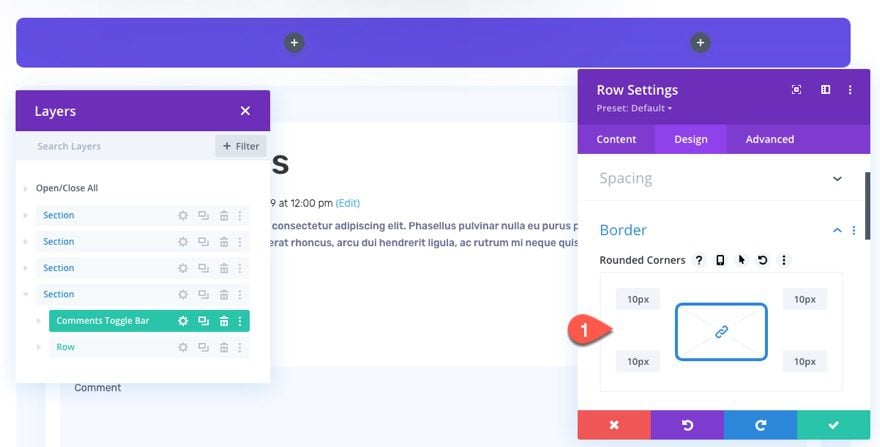
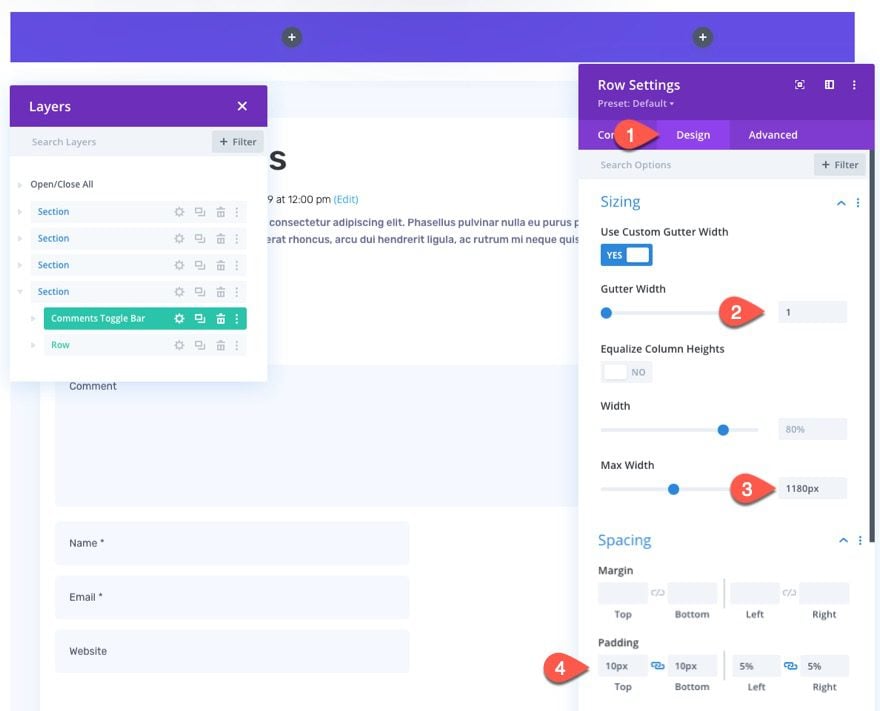
Under the design tab, update the following:
- Rounded Corners: 10px
- Gutter Width: 1
- Max Width: 1180px
- Padding: 10px top, 10px bottom, 5% left, 5% right
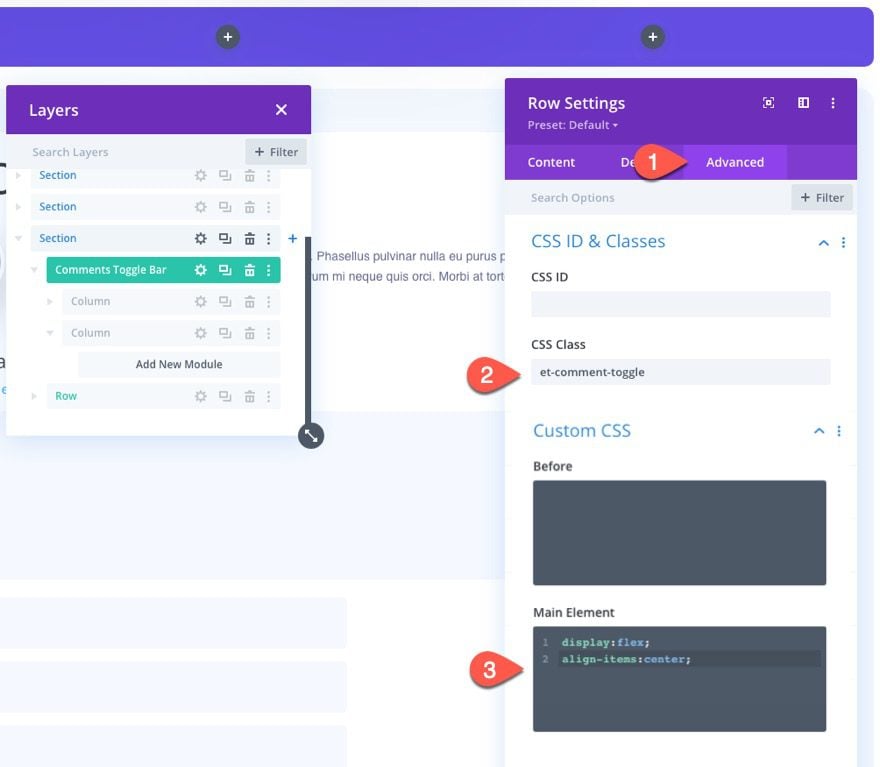
Under the advanced tab, add the following CSS Class to the row:
- CSS Class: et-comment-toggle
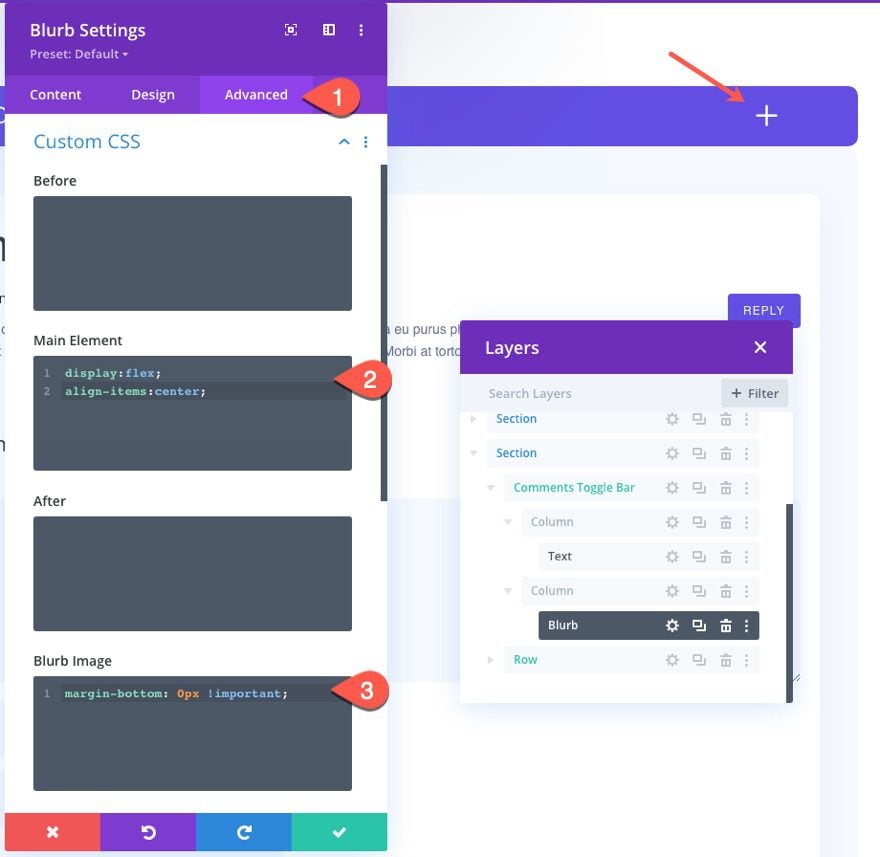
Then add the following Custom CSS to the Main Element:
display:flex;
align-items:center;
The Comments Toggle Title
To add the comments toggle title, add a new text module to the left column.
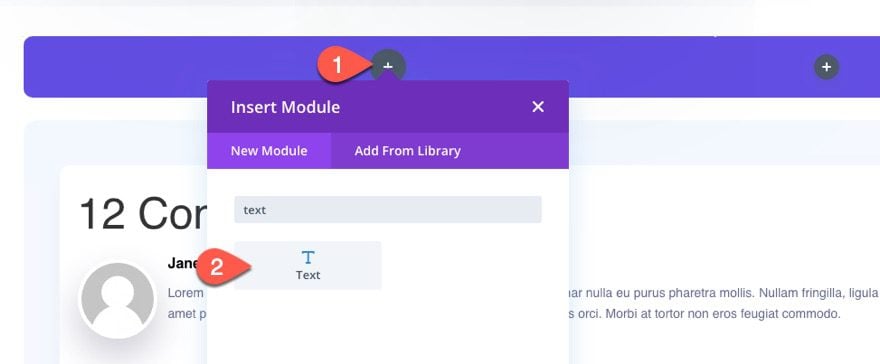
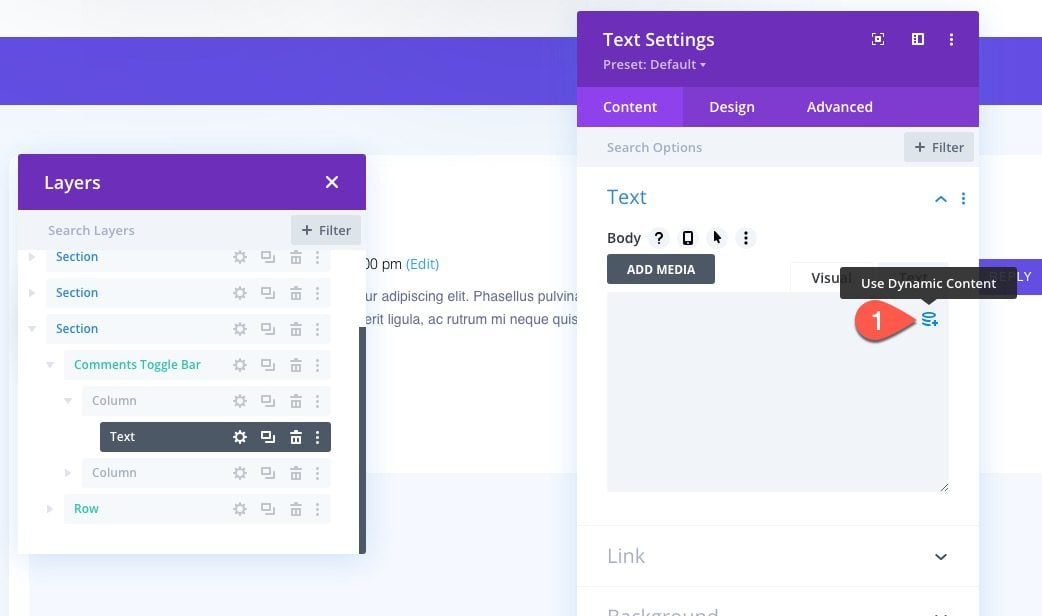
Delete the mock body content and select the “Use Dynamic Content” icon when hovering over the body content box.
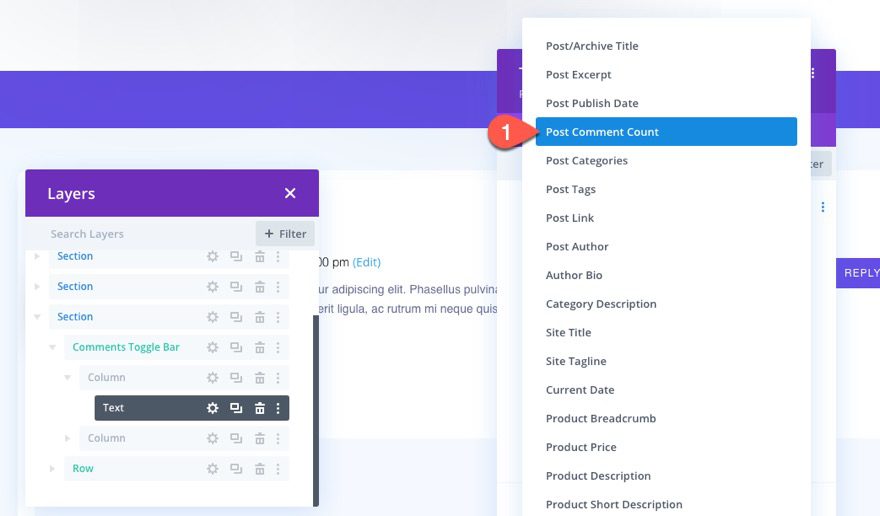
From the dropdown list, select “Post Comment Count”.
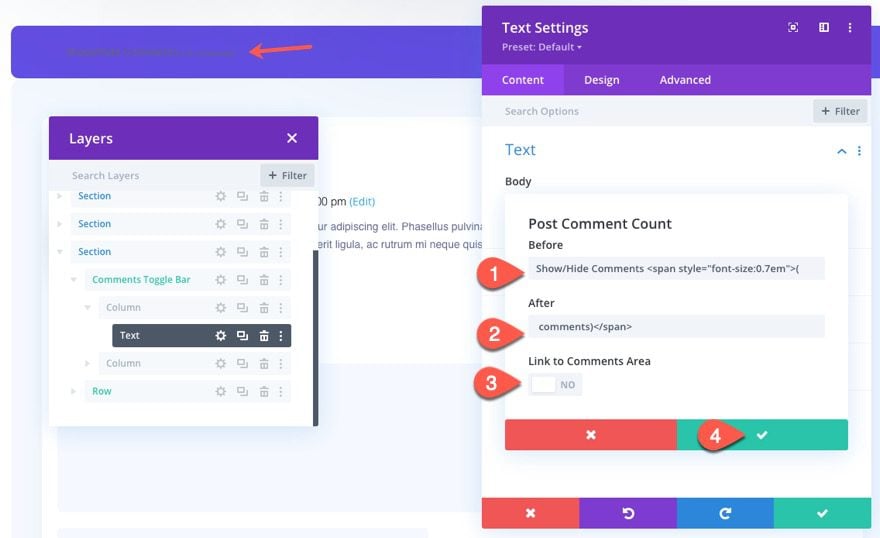
In the Post Comment Count settings, update the following:
In the Before input box paste the following HTML:
Show/Hide Comments <span style="font-size:0.7em">(
In the After input box, paste the following HTML:
comments)</span>
Select NO under the Link to Comments Area option.
Then save the settings.
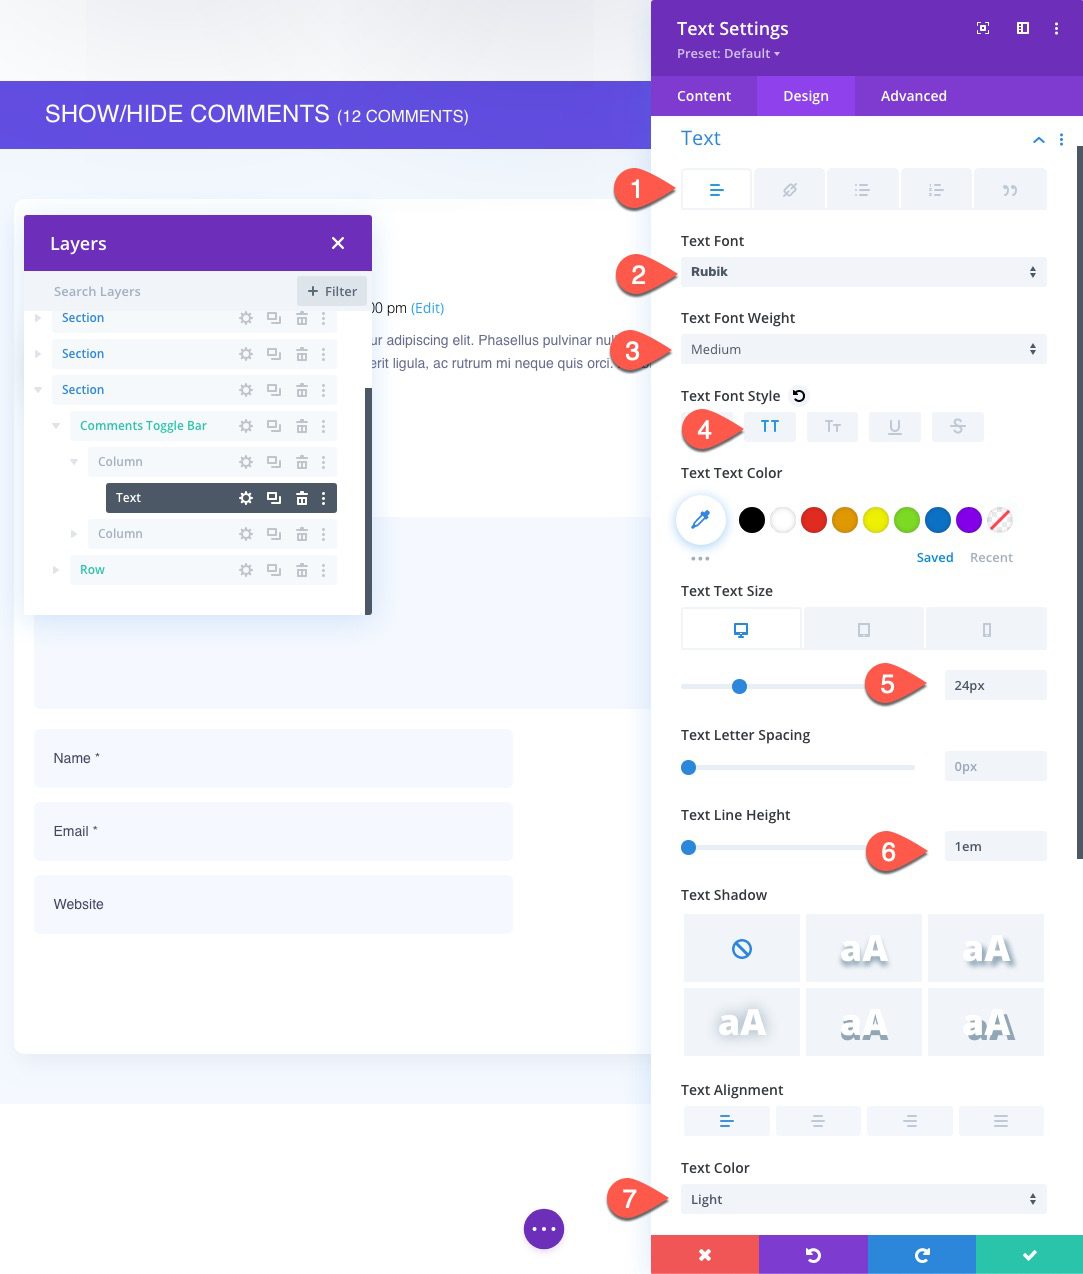
Under the design tab, update the following:
- Text Font: Rubik
- Text Font Weight: Medium
- Text Font Style: TT
- Text Text Size: 24px (desktop), 18px (tablet), 16px (phone)
- Text Line Height: 1em
- Text Alignment: Left
- Text Color: Light
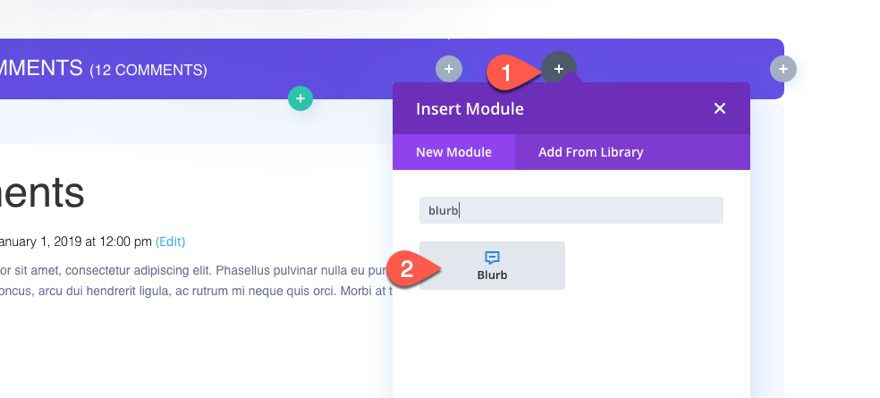
The Comments Toggle Bar Icon
To create the comments toggle bar icon, we are going to use a blurb module that displays only the icon we want to use.
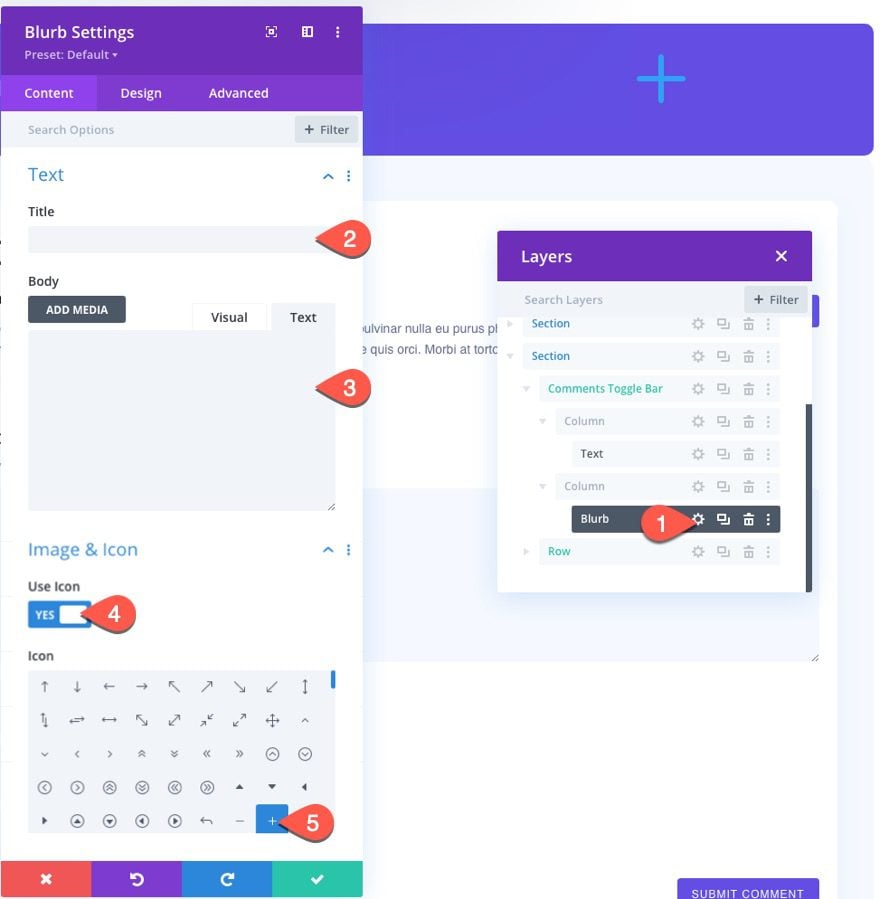
Add a new blurb module to the right column of the row.
Take out the mock title and body content and then select to use the plus icon.
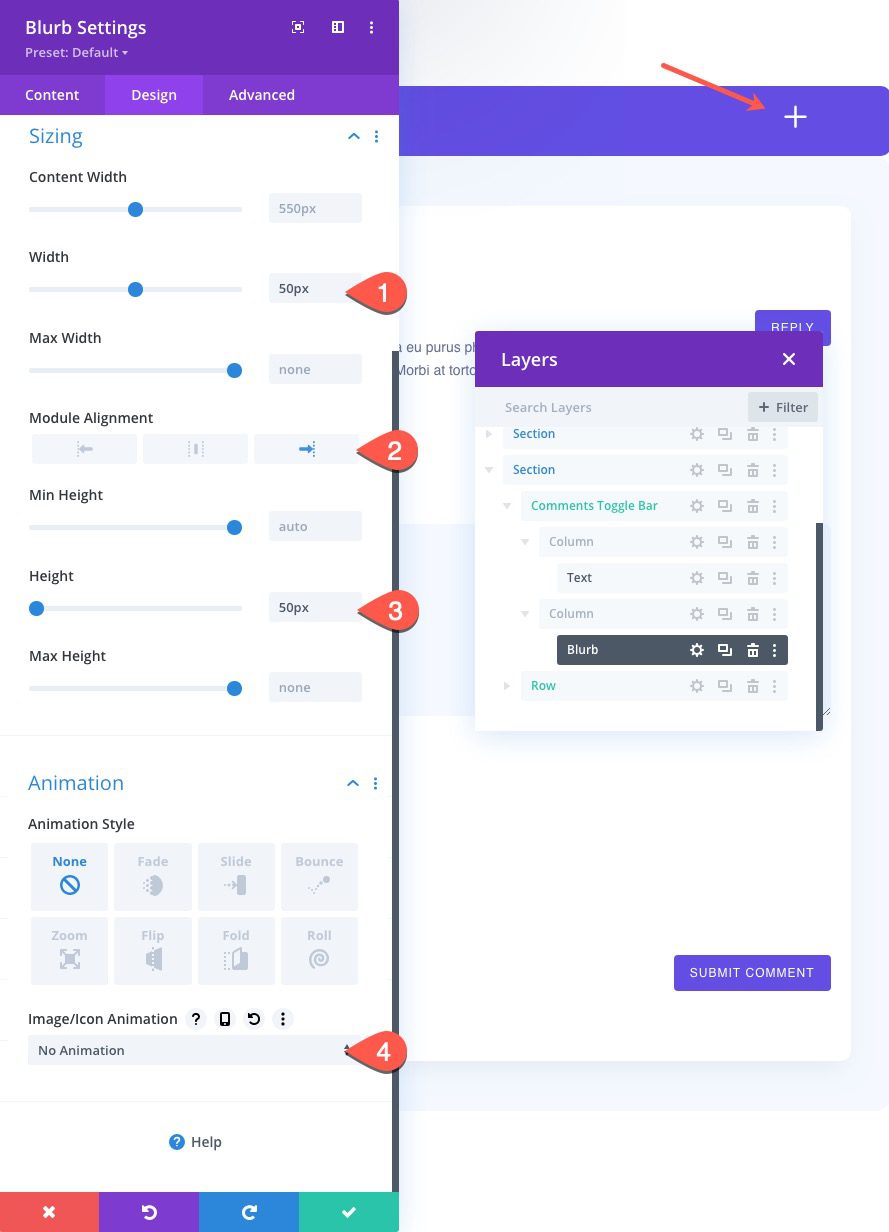
Under the design tab, update the following:
- Icon Color: #ffffff
- Icon Font Size: 40px

- Width: 50px
- Module Alignment: Right
- Height: 50px
- Image/Icon Animation: No Animation
Under the Advanced Tab, add the following custom CSS to the Main Element:
display:flex;
align-items:center;
Then add one more CSS snippet to the Blurb Image:
margin-bottom: 0px !important;
Optimizing the Row with the Comments Module/Content
Now that the comments toggle bar is complete, we need to optimize the existing row containing the comments module/content so that it will have the necessary CSS Class and spacing.
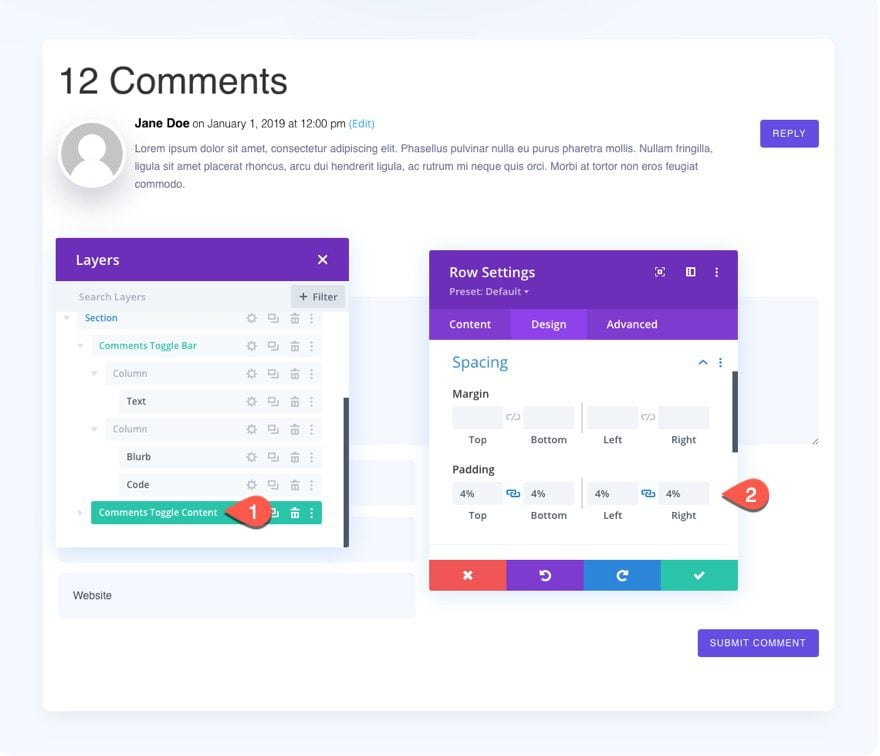
First, you can add the label, “Comments Toggle Content”, to the row. Then open the row settings and update the padding as follows:
- Padding 4% top, 4% bottom, 4% left, 4% right
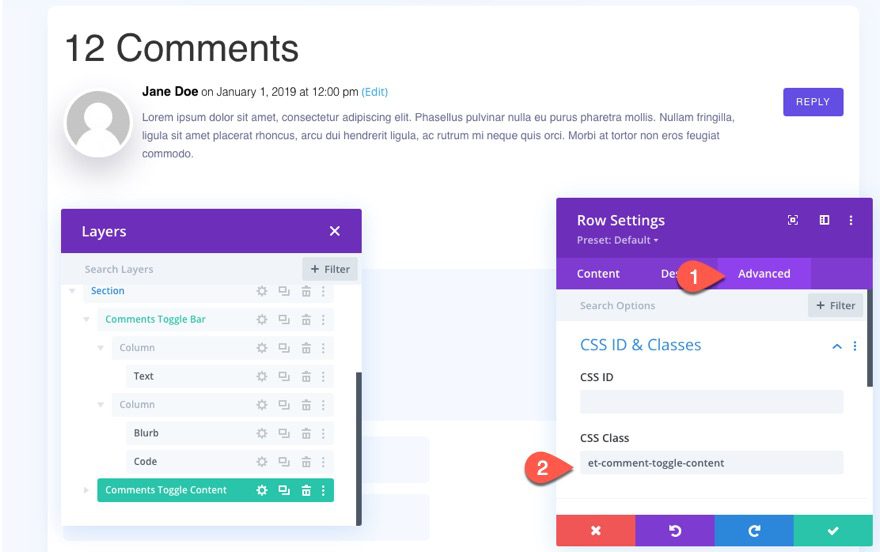
Under the advanced tab, add the following CSS Class to the row:
- CSS Class: et-comment-toggle-content
Then save and exit the layout editor.
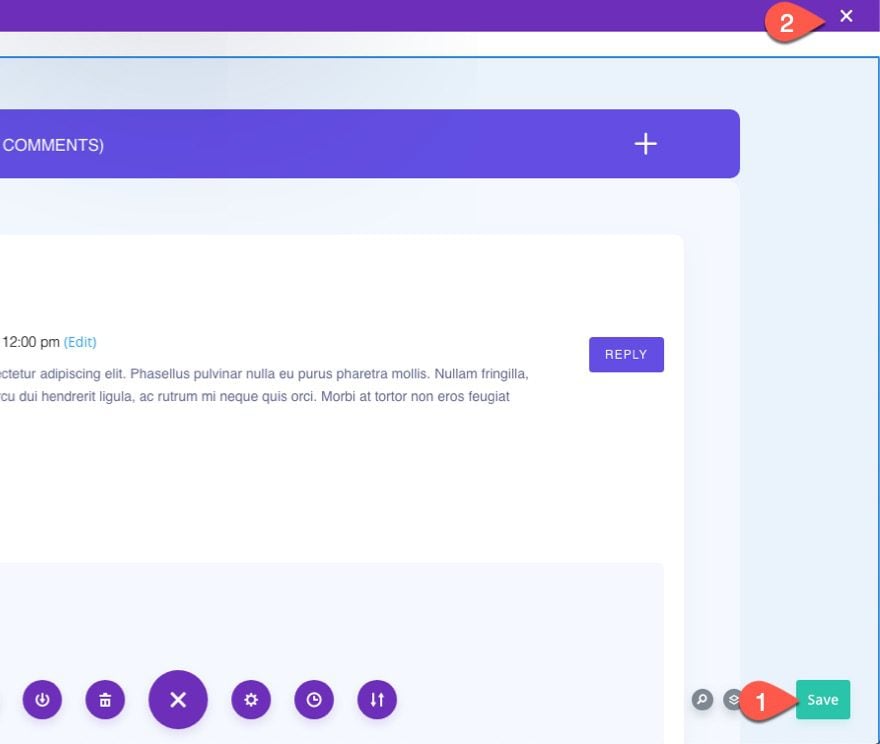
And save the changes to the theme builder as well.
Adding the Custom Code
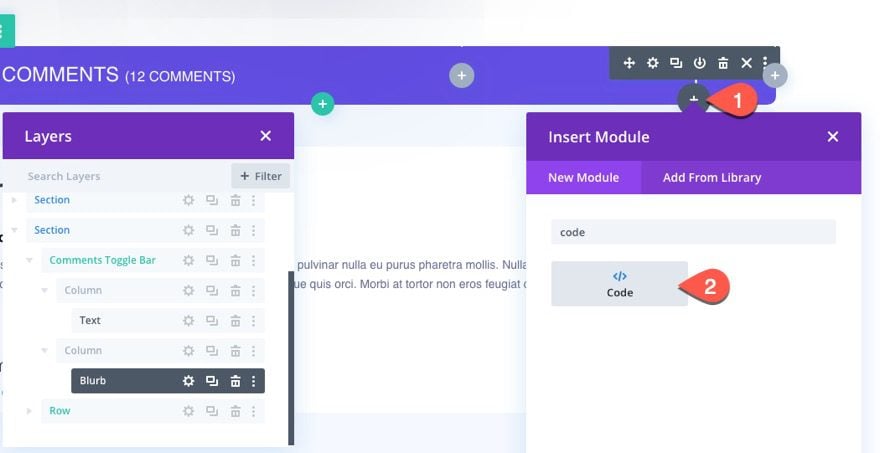
The code we need to add the toggle functionality for the comments can be added to a code module.
Add a new code module under the blurb module in the comments toggle bar row we created earlier.
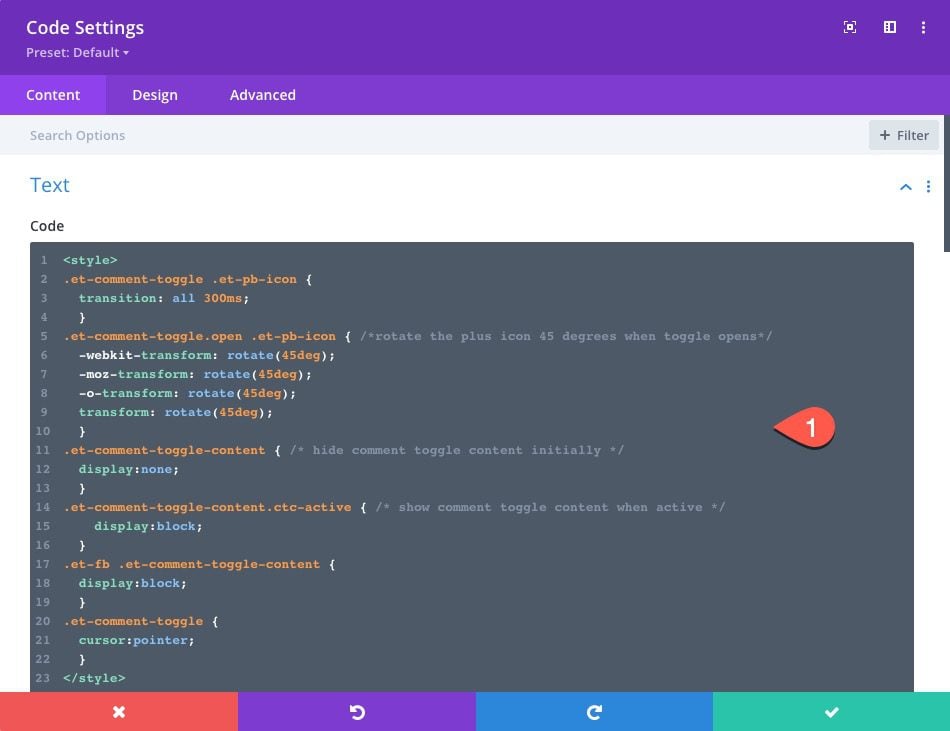
Then paste in the following CSS making sure to wrap the code in the style tags.
.et-comment-toggle .et-pb-icon {
  transition: all 300ms;
  }
.et-comment-toggle.open .et-pb-icon { /*rotate the plus icon 45 degrees when toggle opens*/
  -webkit-transform: rotate(45deg);
  -moz-transform: rotate(45deg);
  -o-transform: rotate(45deg);
  transform: rotate(45deg);
  }
.et-comment-toggle-content { /* hide comment toggle content initially */
  display:none;
  }
.et-comment-toggle-content.ctc-active { /* show comment toggle content when active */
    display:block;
  }
.et-fb .et-comment-toggle-content {
  display:block;
  }
.et-comment-toggle {
  cursor:pointer;
  }
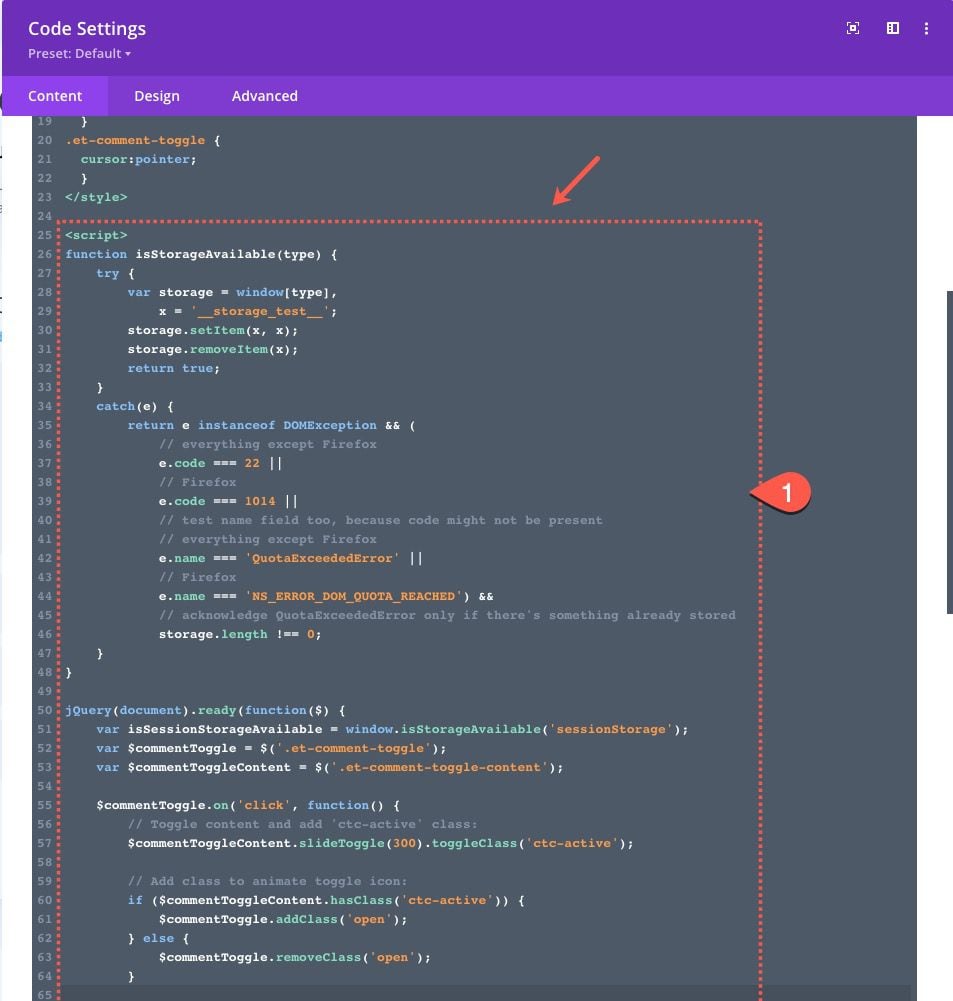
Under the CSS wrapped in the Then paste in the following CSS making sure to wrap the code in the style tags, add the following JQuery code making sure to wrap it in the Then paste in the following CSS making sure to wrap the code in the script tags.
function isStorageAvailable(type) {
    try {
        var storage = window[type],
            x = '__storage_test__';
        storage.setItem(x, x);
        storage.removeItem(x);
        return true;
    }
    catch(e) {
        return e instanceof DOMException && (
            // everything except Firefox
            e.code === 22 ||
            // Firefox
            e.code === 1014 ||
            // test name field too, because code might not be present
            // everything except Firefox
            e.name === 'QuotaExceededError' ||
            // Firefox
            e.name === 'NS_ERROR_DOM_QUOTA_REACHED') &&
            // acknowledge QuotaExceededError only if there's something already stored
            storage.length !== 0;
    }
}

jQuery(document).ready(function($) {
    var isSessionStorageAvailable = window.isStorageAvailable('sessionStorage');
    var $commentToggle = $('.et-comment-toggle');
    var $commentToggleContent = $('.et-comment-toggle-content');

    $commentToggle.on('click', function() {
        // Toggle content and add 'ctc-active' class:
        $commentToggleContent.slideToggle(300).toggleClass('ctc-active');

        // Add class to animate toggle icon:
        if ($commentToggleContent.hasClass('ctc-active')) {
            $commentToggle.addClass('open');
        } else {
            $commentToggle.removeClass('open');
        }

        // If storage is available, set item in browser session storage
        // (so we can know to open the toggle automatically
        // when user reloads the page).
        if (isSessionStorageAvailable) {
            $commentToggleContent.hasClass('ctc-active') ?
            sessionStorage.setItem('etCommentToggleEnabled','1'):
            sessionStorage.removeItem('etCommentToggleEnabled');
        }
    });

    // If storage is available, open toggle automatically
    // on page load if item is in browser session storage.
    // This allows the anchor links to work after adding
    // a comment or reply in the comment form.
    if (isSessionStorageAvailable) {
        '1' == sessionStorage.getItem('etCommentToggleEnabled') ?
        $commentToggleContent.addClass('ctc-active'):
        $commentToggleContent.removeClass('ctc-active');
    }

    // Open toggle if url has hash tag and no session storage.
    // This is will make sure the toggle is open for incoming
    // anchor links (from another page) to specific comments.
    if (window.location.hash) {
        $commentToggleContent.addClass('ctc-active');
        if (isSessionStorageAvailable) {
            sessionStorage.setItem('etCommentToggleEnabled','1');
        } else {
            sessionStorage.removeItem('etCommentToggleEnabled');
        }
    }

    // Add class to animate toggle icon if needed on page reload:
    if ($commentToggleContent.hasClass('ctc-active')) {
        $commentToggle.addClass('open');
    } else {
        $commentToggle.removeClass('open');
    }
});
About the Comments Toggle Functionality
This comments toggle has jQuery that will remember the state of the toggle (open or closed) throughout the user’s browser session. So if the user chooses to show the comments and refreshes the page, the comments will stay open. Also, the comments will automatically open/show whenever a user submits a comment or reply on the comment form. This is important because every time a user submits a comment, the page will reload a scroll to their submission. In fact, the comments toggle will automatically open/show whenever an anchor link is being used on the page just in case you want to link to a certain comment from another page.
Final Result
To check out the final result, simply open any live blog post on your site.
Final Thoughts
Hopefully, this comments toggle will come in handy for streamlining the design of your Divi blog posts so that users can enjoy a more concise layout of the post if they choose. And, since the code provided gives you added functionality to keep the comments visible when needed, you have a nice option for adding comment toggles to any Divi blog post template without having to use a plugin.
I look forward to hearing from you in the comments.
Cheers!


thats great… thankyou for usefull informathion but does this effect on SEO?
Nice tutorial and most important … great function! For example I usually write a lot in comments sections and I understand that many users may find it annoying! Very good!
Awesome! Thanks, AleRonchi
Great tutorial. I have a short question, is it possible to put the comment-area over the comments? Now the comment-area is under the comments and if there are many comments, the user had to scroll a lot. Thanks…
Thanks! Not sure I understand. Are you wanting to put the toggle bar below the comment content instead of above?
Nice tutorial, I am planning on kicking out the commment section on my blog before, I guess I will give this a trail until I get bored of it and throw it out if I need to.
Thanks, Justin. Hope it helps.