
Sticky Sidebar CTAs are extremely effective at grabbing the attention of visitors without being overbearing or distracting. The trick is to include one or two elements in the sidebar that “stick” or stay fixed on the side of the post content as the user scrolls down the page. This is a refreshing alternative to a traditional sidebar layout because it provides the feel of a modern fullwidth (no sidebar) layout with the benefit of showcasing important CTAs on the side of the page when necessary.
In this tutorial, we are going to show you how to add sticky sidebar CTAs to a blog post template using the Divi Theme Builder. The application of this layout is far reaching. It will work for almost any page or post template. Plus, you don’t have to limit yourself to CTAs; you can choose to add any Divi module(s) you like.
Let’s get started!
To lay your hands on the sticky sidebar cta post template from this tutorial, you will first need to download it using the button below. To gain access to the download you will need to subscribe to our newsletter by using the form below. As a new subscriber, you will receive even more Divi goodness and a free Divi Layout pack every Monday! If youíre already on the list, simply enter your email address below and click download. You will not be “resubscribed” or receive extra emails.

To import the layout to your page, simply extract the zip file and add one of the json files into the Divi Theme Builder using the Theme Builder Portability option.
Let’s get to the tutorial shall we?
What You Need to Get Started
To get started, you will need to install and activate the Divi Theme. Make sure you have the latest version of Divi.
You will also need at least one post created with the Divi Builder for testing purposes in order to show the intended result.
After that, you are ready to go.
Sneak Peek
Here is a quick look at the sticky sidebar CTAs that have been added to a blog post template in Divi.

Adding the Theme Builder Template
The first step includes getting our premade template imported to our site. We are going to use the post template from the Divi Theme Builder Pack #1.
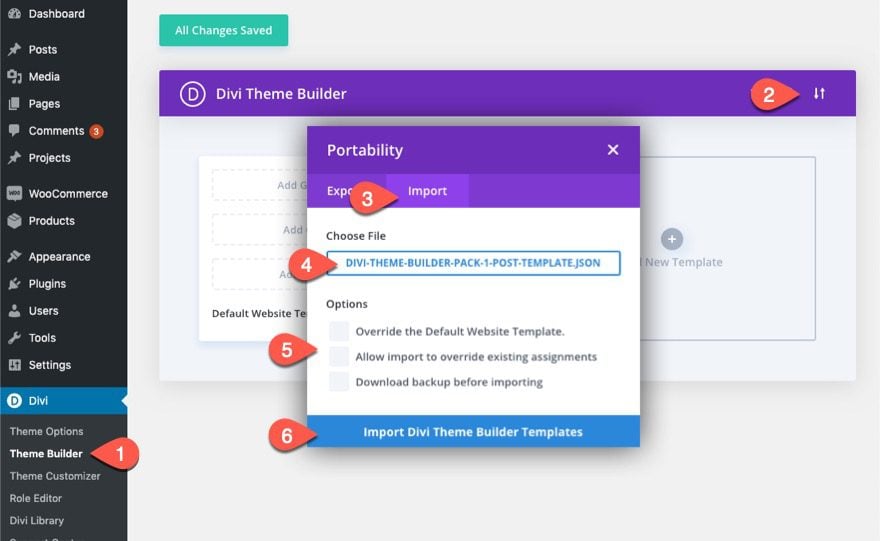
To get started, navigate to Divi > Theme Builder. Click the portability icon at the top right of the page. In the portability modal, select the import tab and choose the divi-theme-builder-pack-1-post-template.json file from folder. In case you have any templates currently installed on your site, make sure to uncheck any options that may override your current templates. Then click the import button.
Building the Blog Post Template
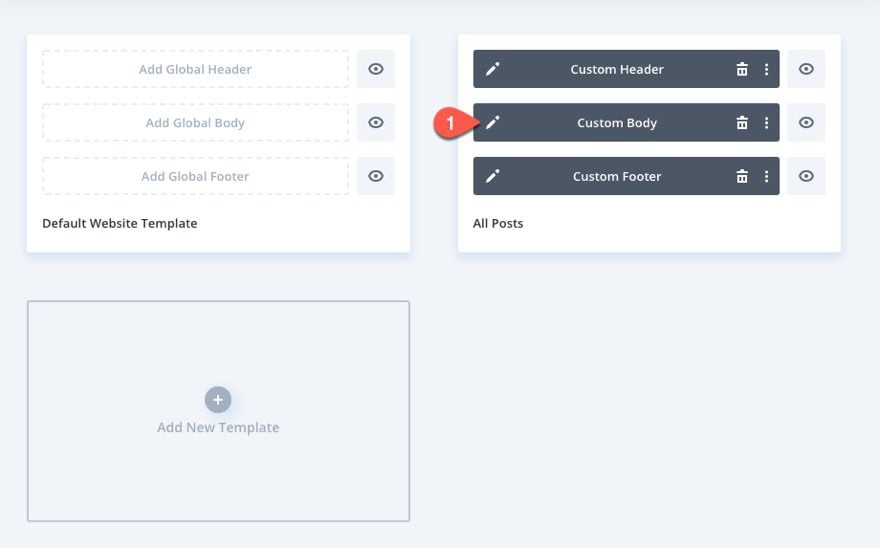
One the template has been imported, we are ready to start adding our new sticky sidebar CTAs to the template layout. To do this, click the edit icon of the custom body area.
Adding a Dual Sidebar Layout to Hold the Sidebar CTAs
In the Template Layout Editor, find the row that contains the post content module and change the column layout to a one-fifth three-fifths one-fifth (1/5 3/5 1/5) column structure. This will allow us to keep the centered column for the post content while providing two sections on either side for our sticky sidebar CTAs.
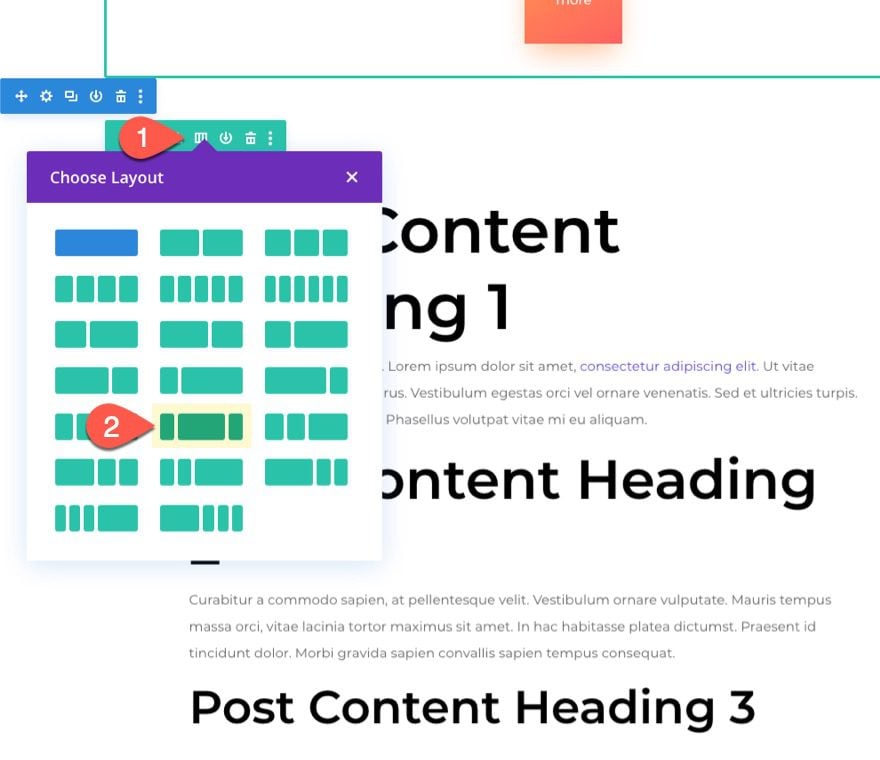
After the column structure is changed, drag the post content module to the center column.
Updating the Row Settings
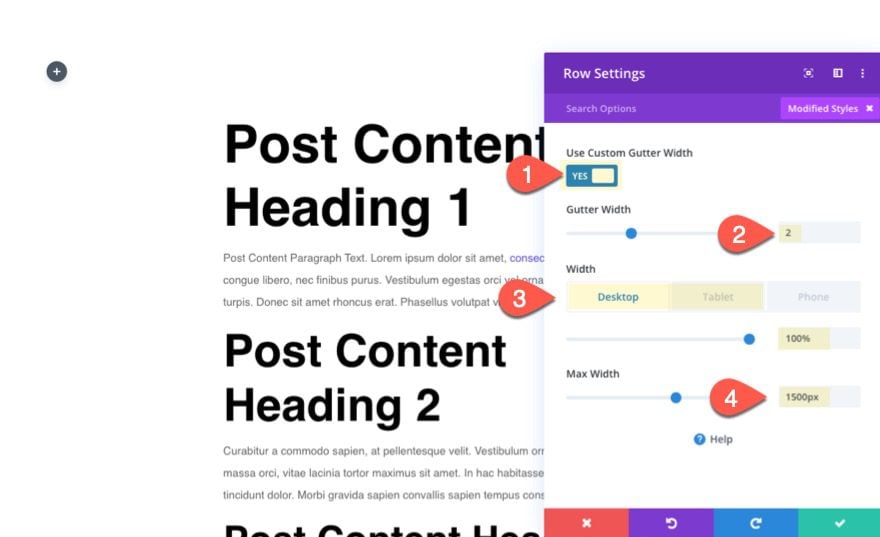
Open the row settings and update the following design options:
- Use Custom Gutter Width: YES
- Gutter Width: 2
- Width: 100% (desktop), 90% (tablet)
- Max Width: 1500px
This will give us the room we need for our dual sidebar setup.
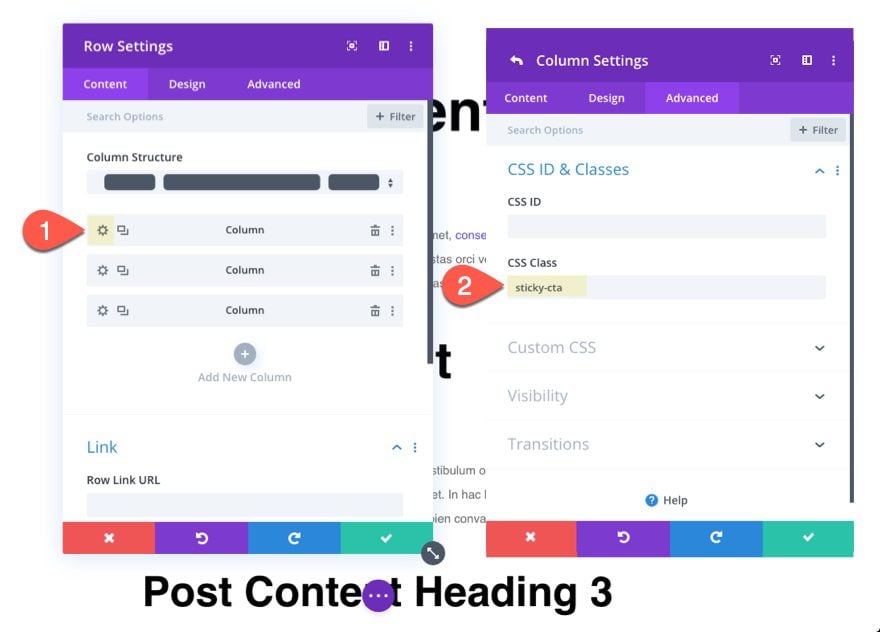
Updating the Column 1 Settings
Next, open the settings for column 1 and give the column a custom CSS Class:
- CSS Class: sticky-cta
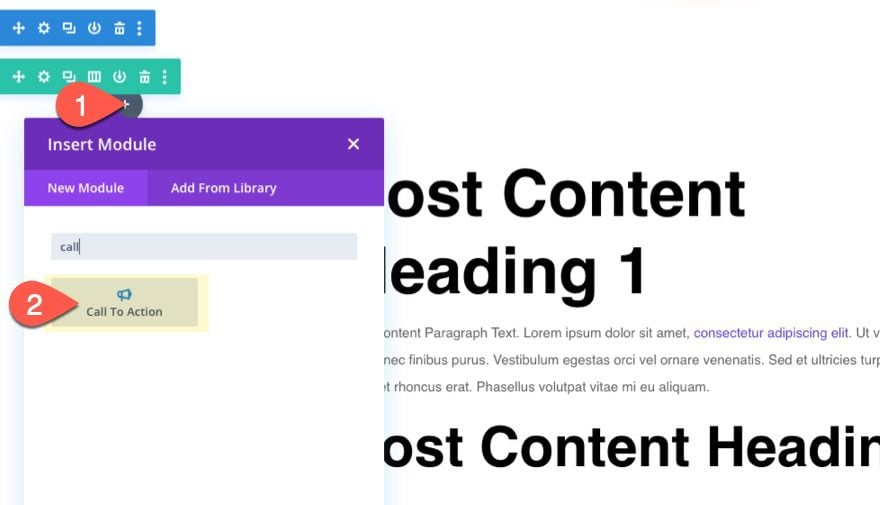
Adding a Sidebar CTA to the Left Column
Now we are ready for the first call to action. Add a call to action module to the far left column.
Styling the Sidebar CTA
Update the settings as follows:
Content
- Button: “Click Here”
- Body: “Your content goes here. Edit or remove this text inline or in the module Content settings.”
- Button Link URL: #

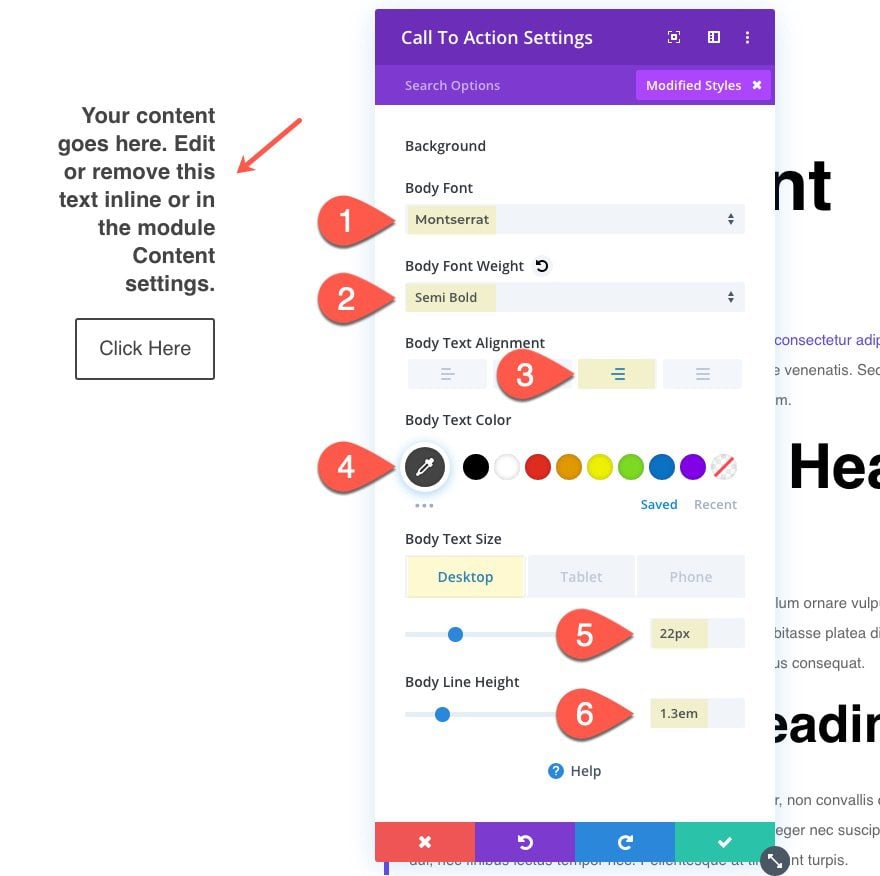
Body Text Design
- Body Font: Montserrat
- Body Font Weight: Semi Bold
- Body Text Alignment: right
- Body Text Color: #444444
- Body Text Size: 22px (desktop), 18px (tablet)
- Body Line Height: 1.3em
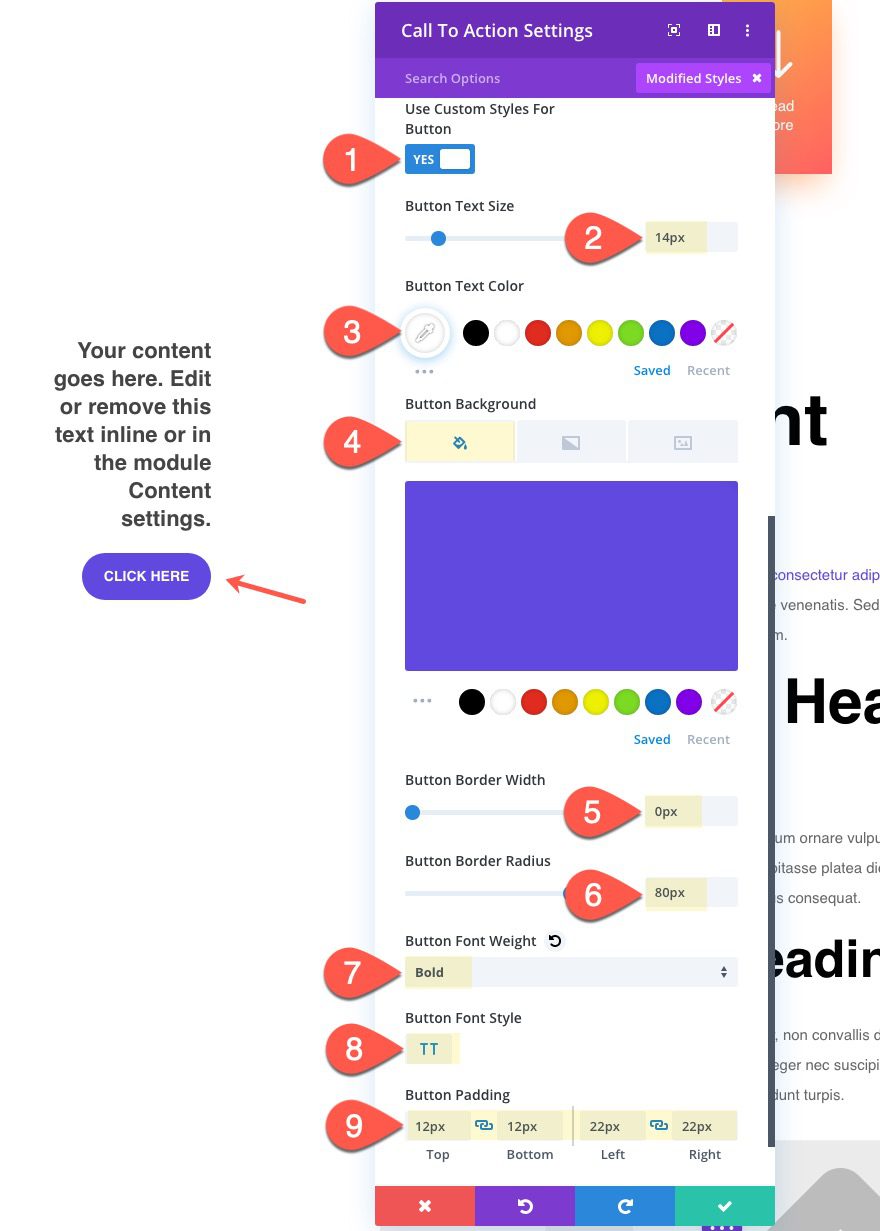
Button
- Button Text Size: 14px
- Button Text Color: #ffffff
- Button Background Color: #6148df
- Button Border Width: 0px
- Button Border Radius: 80px
- Button Font Weight: Bold
- Button Font Style: TT
- Button Padding: 12px top, 12px bottom, 22px left, 22px right
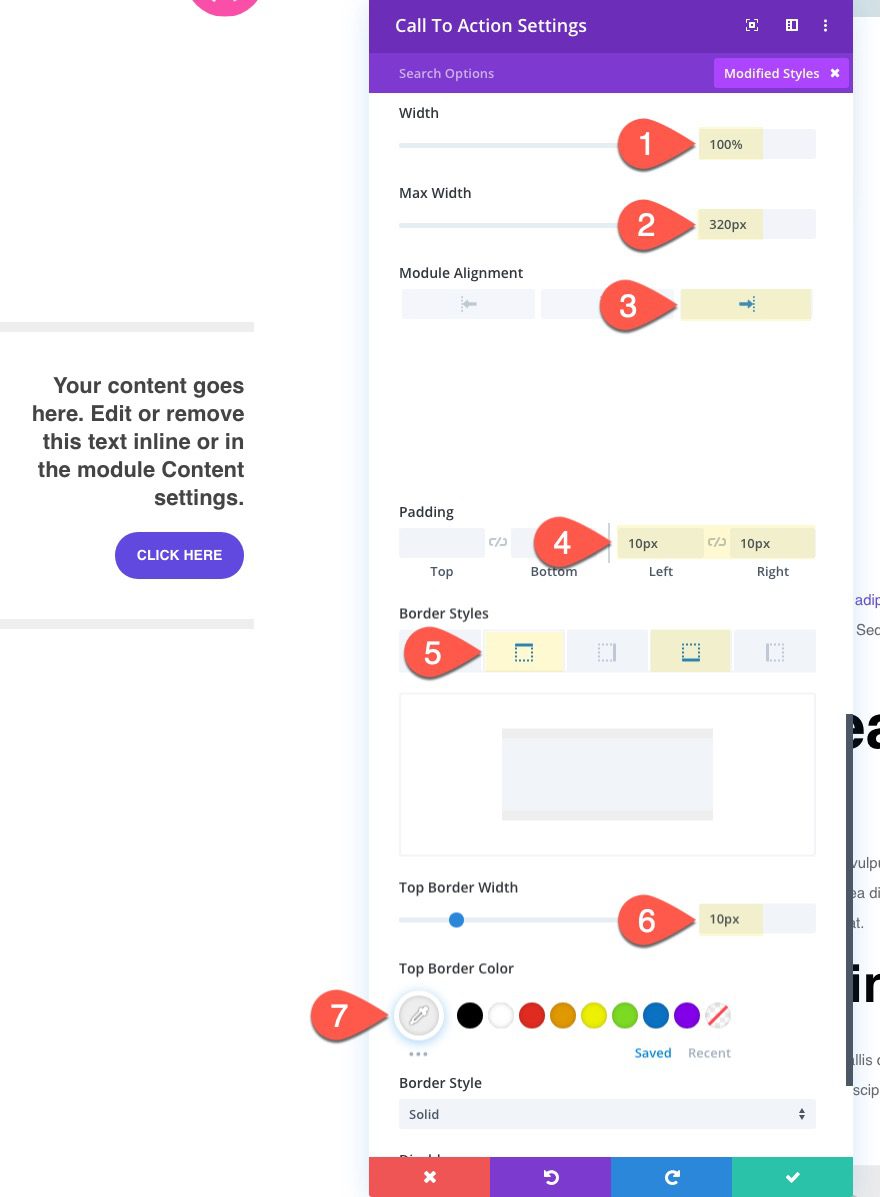
Width, Alignment, Padding, and Borders
- Width: 100%
- Max Width: 320px
- Module Alignment: right
- Padding: 10px left, 10px right
- Top Border Width: 10px
- Top Border Color: #eeeeee
- Bottom Border Width: 10px
- Bottom Border Color: #eeeeee
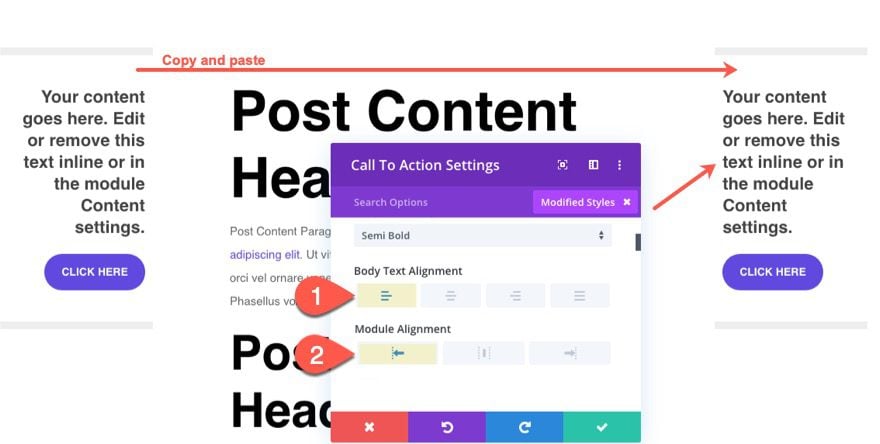
Adding the Sidebar CTA to the Right Column
To create the CTA for the right column, copy the one we just created and paste it into the far right column. Then update the settings for the duplicate as follows:
- Body Text Alignment: left
- Module Alignment: left
Update Column 3 Settings
For this CTA in the right column, we are going to add some top margin to the column in order to establish a starting position of the sidebar CTA at a point farther down the page.
First, open the settings for Column 3 and add the same CSS Class that we added to Column 1:
- CSS Class: sticky-cta
Then add the following Custom CSS to the Main Element:
Desktop
margin-top: 50%
Tablet
margin-top: 0%

This will give us a different starting point for the sticky CTA on the right column which is equal to 50% of the row width. Feel free to adjust this value as needed for your own blog post.

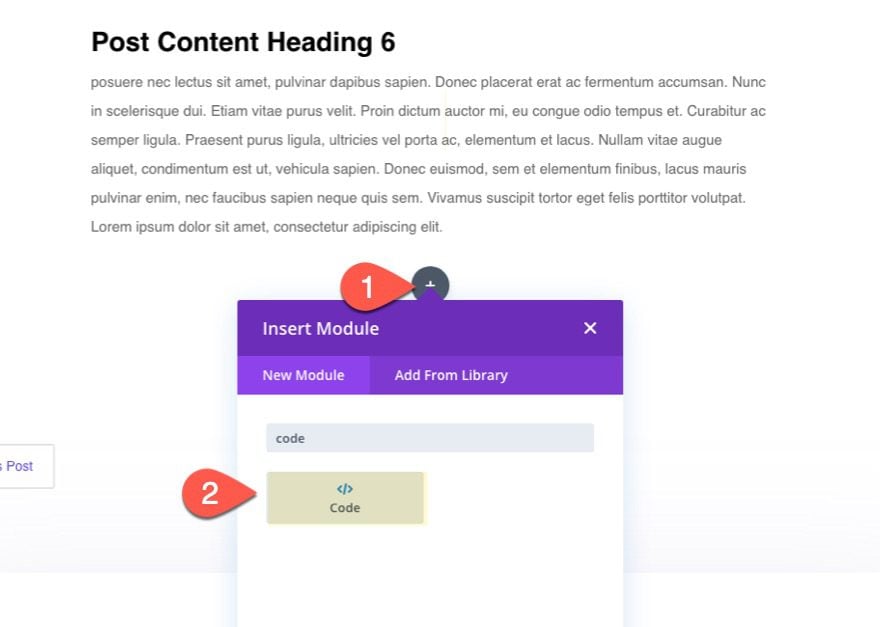
Adding the Custom CSS to Template with a Code Module
In order to get our “sticky” positioning for our sidebar CTAs, we need to add some custom CSS. To do this, create a new code module under the post content module (or anywhere on the page).
Then paste the following CSS into the code box:
<style>
@media only screen and (min-width: 980px) {
  #page-container {
    overflow-y:visible !important; }
  .sticky-cta {
    position: sticky !important;
    position: -webkit-sticky !important;
    top: calc(50vh - 130px) !important;
  }
  }
</style>
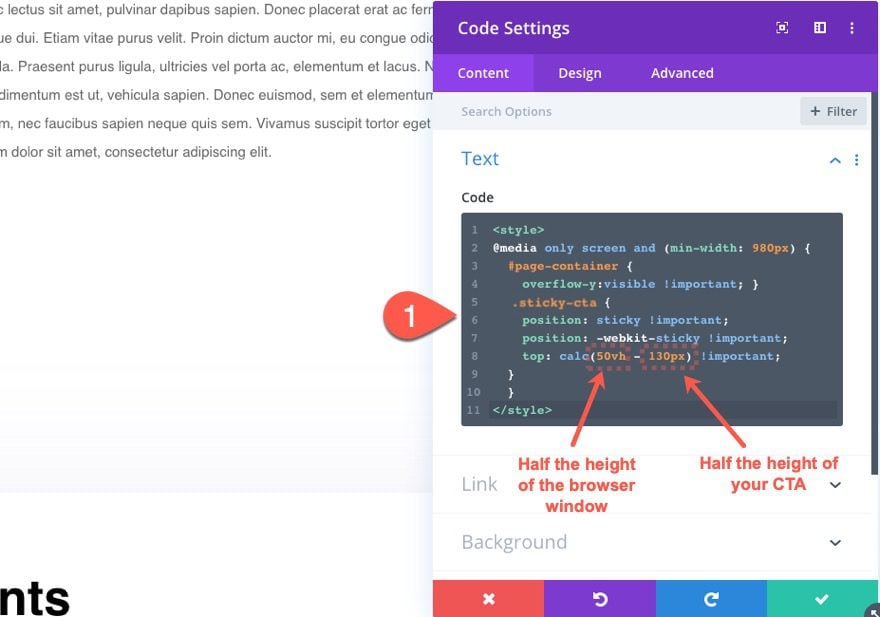
The top offset in this code is a calculation that positions the CTA vertically centered on the page while scrolling. The 50vh is basically half the height of the browser window and the 130px is roughly half the height of the CTA. If you have a CTA that has greater/less height, you will need to adjust the 130px up or down.
Save Settings
Once you are done, save the template layout.
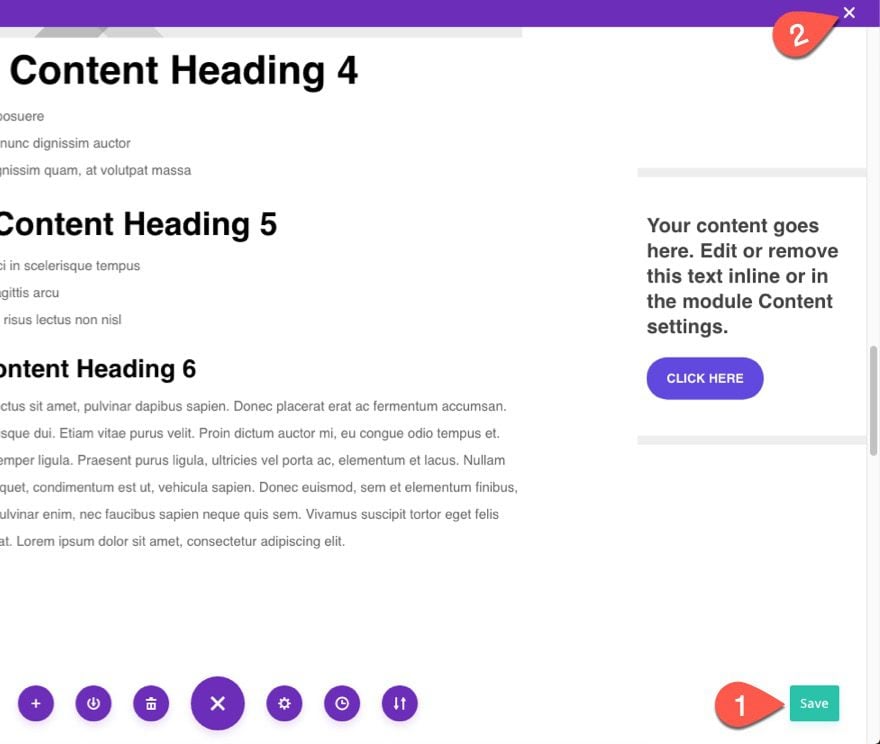
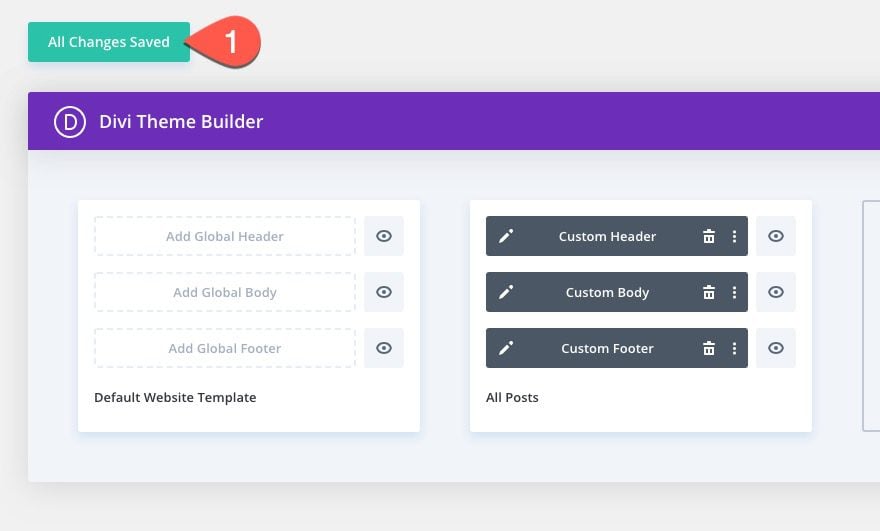
And then save the theme builder settings
Final Result
To view the final result, visit a blog post that uses the template.

And this is how the sticky sidebar CTAs will stick on scroll. You can see how this would work best for longer post content.
And here it is on mobile display.

Final Thoughts
These sticky sidebar CTAs are a refreshing alternative to the traditional sidebar. They fit well for minimalist design because they are less intrusive and don’t give the post a cluttered feel. Plus, you can position the CTA farther down the page so that it gradually appears and sticks on scroll, making it stand out a bit more to visitors. And don’t forget. You can replace the CTA with any Divi module or combination of modules to create pretty much anything you want. You can also choose to keep only one CTA on one side. It seems to have a lot of applications.
I hope this will help improve how you display CTAs on your post templates going forward.
For more inspiration, check out our similar posts on sticky elements.
I look forward to hearing from you in the comments.
Cheers!


Thanks Jason!
What a solution.
I will definitely try this out on my website.
Great Post.Thanks for Sharing
Thanks and You’re welcome!
Great idea! Having so much fun with all of the new templates and ideas!
Thanks For Sharing
At last I found a way to customize my thema. Thank you !
This is very helpful, thanks.
Great!
So grateful for this post. I really need it, thanks!
Awesome!
Finally I have seen where I can learn How to Add Sticky Sidebar CTAs to a Blog Post Template in Divi. Thanks alot