
Related posts are a great way to increase your blog’s traffic. Users on your blog will see posts that they’re already interested in. This keeps them on your site longer and increases their interaction with you and your website. Fortunately, related posts are easy to add to your Divi blog post templates in the Divi Theme Builder. In this article, we’ll show you how.
Preview
Here’s a look at what we’re making in this tutorial.

Here’s a look at how the related posts will look on a desktop. The title and top of the posts overlap the section above it. Post navigation matches the styling of the layout.
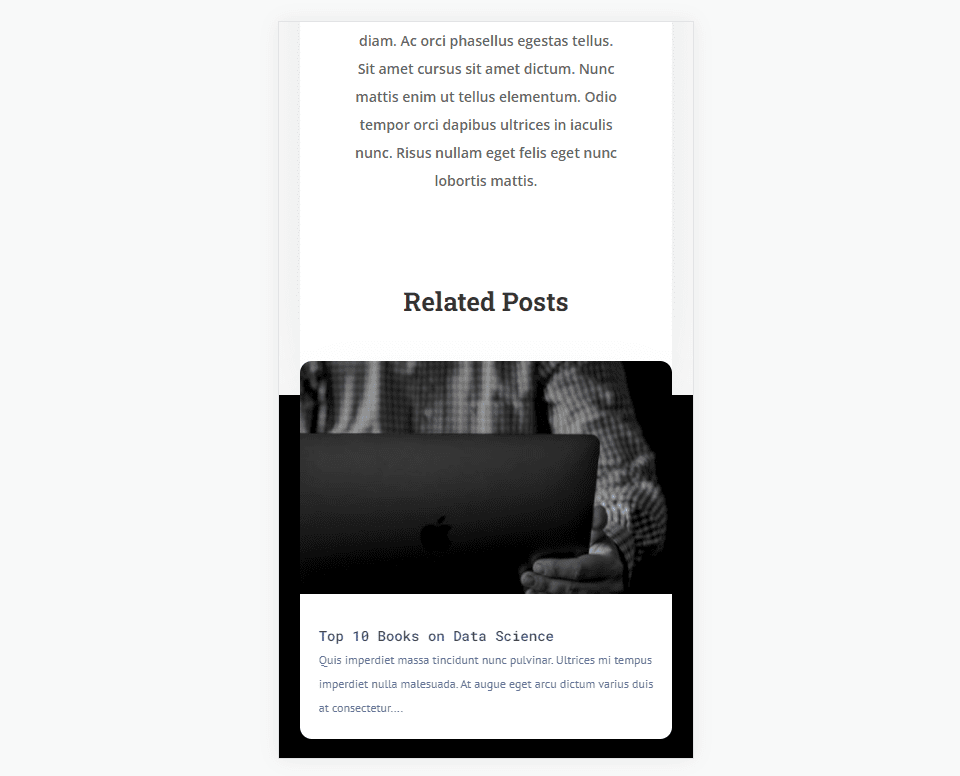
Here’s how our related posts will look on a phone. It includes the overlap for the title and first post.
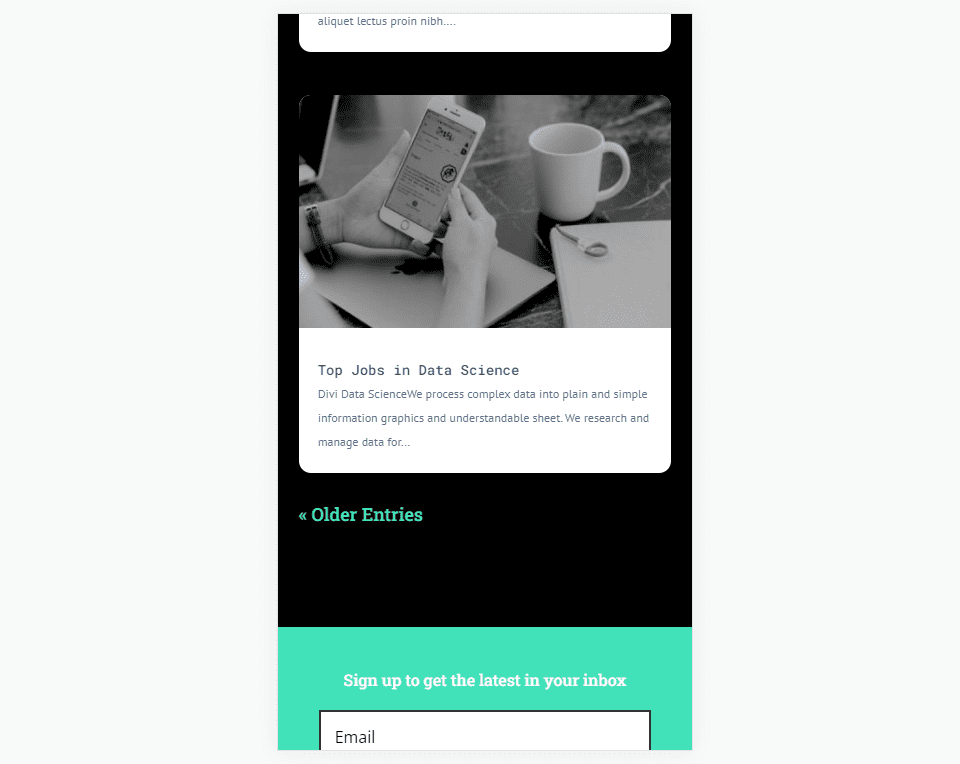
This will also include the navigation, as seen at the bottom of the related posts.
Subscribe To Our Youtube Channel
What a Blog Post Template Needs
Several elements are considered crucial to a well-functioning blog post template. The blog post needs a title, a featured image, metadata, and body content. Without them, it won’t work well as a blog post. Users will be confused or turned away from the user experience.
Other Blog Post Elements
Several elements aren’t essential to the functionality of a blog post template, but they add a lot of extra functionality to improve the user’s experience. These elements are good to consider.
For example, you could include comments so readers can interact with you and other readers. CTAs draw attention to your products, services, and your newsletter. Another option is related posts, as we’ll see in this tutorial. Related posts make it easier for users to find content their interested in.
Build or Download Your Blog Post Template
You can either build your blog post template from scratch or download one from the Elegant Themes blog.
To build it from scratch, be sure to include the list of essentials that we discussed above. Add Divi modules such as a post title, featured image, metadata, and post content. Next, consider the extras you want to include, such as comments and email optin modules.
Elegant Themes provides lots of free blog post templates designed to match the free layout packs that are available within Divi. To download one from the ET blog, simply search the blog for “free blog post template”.
For my examples, I’m using the free blog post template for the Data Science Layout Pack.
Upload Your Blog Post Template
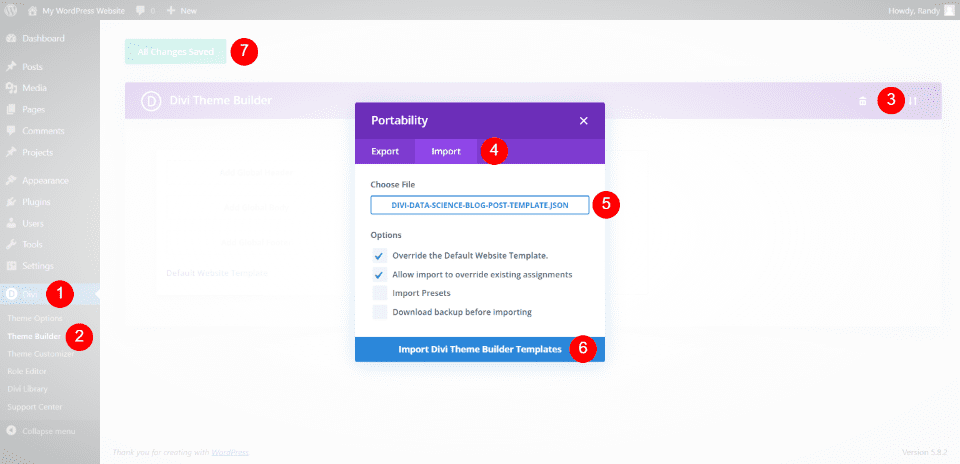
If you’re downloading a template from the ET blog, unzip it so you can upload the JSON file. To upload it, go to Divi > Theme Builder in the WordPress dashboard. Select Portability and choose Import in the modal that opens. Click Choose File and navigate to your JSON file and select it. Click Import Divi Theme Builder Templates and wait for the import to complete. Save your changes.
- Go to Divi in the WordPress dashboard.
- Select Theme Builder.
- Select Portability.
- Choose Import in the modal that opens.
- Click Choose file and navigate to your JSON file and select it.
- Click Import Divi Theme Builder Templates and wait for the import to complete.
- Save your changes.
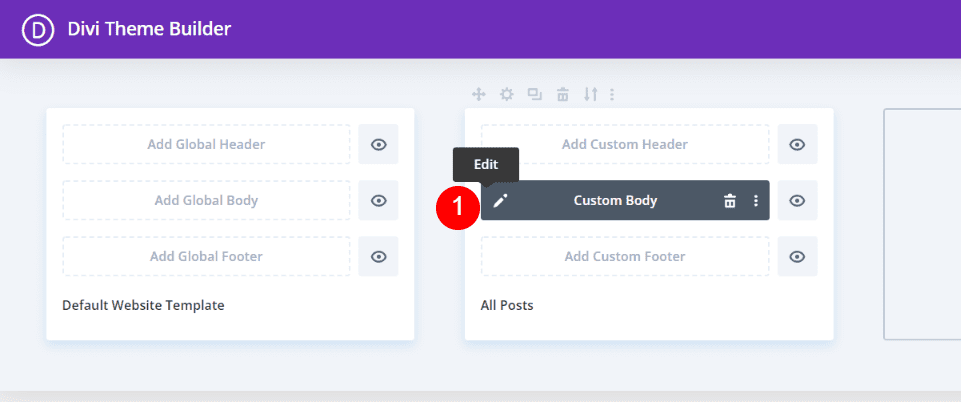
First, click the Edit icon to open the blog post template.
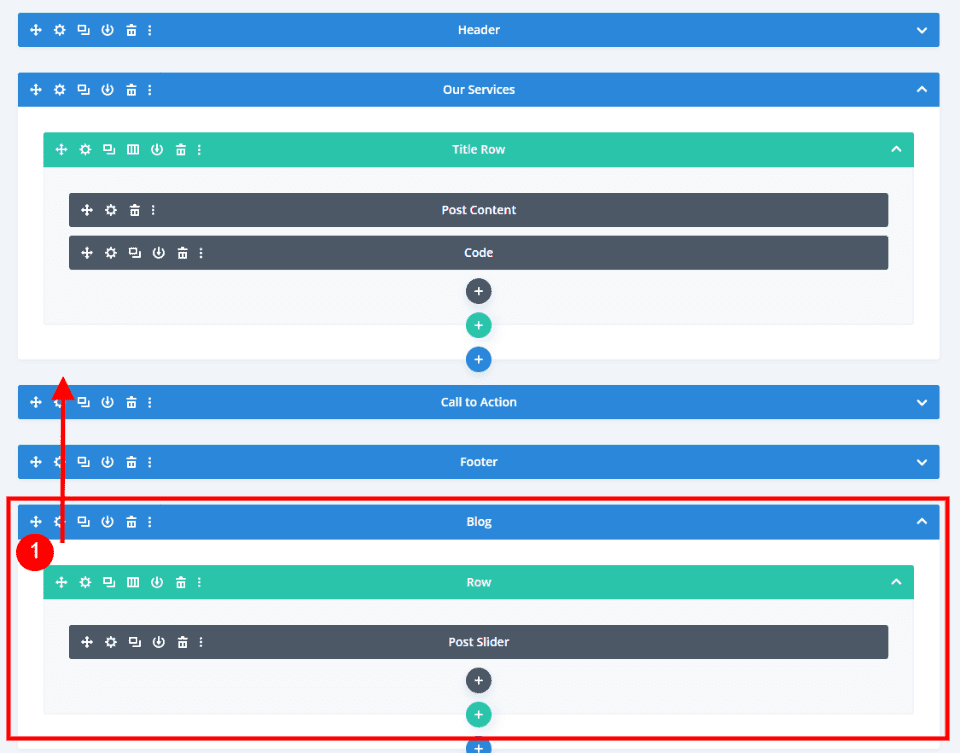
Next, we need to add a new Section and single-column Row for our new blog module. Looking at the template in the wireframe view, we see that this one does include a Post Slider module at the bottom. We’ll delete this slider and use this Row, but first, drag the Section above the Call to Action.
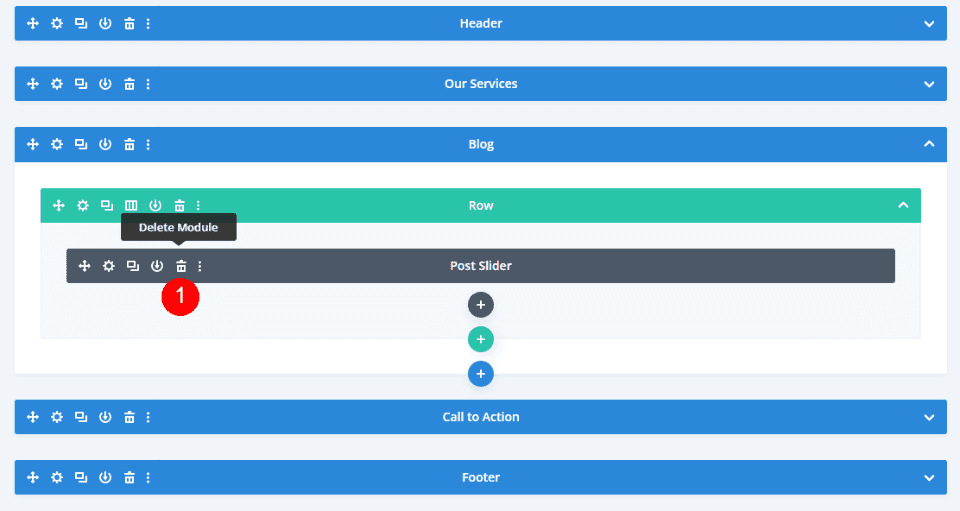
Once you’ve moved the Section, delete the Post Slider.
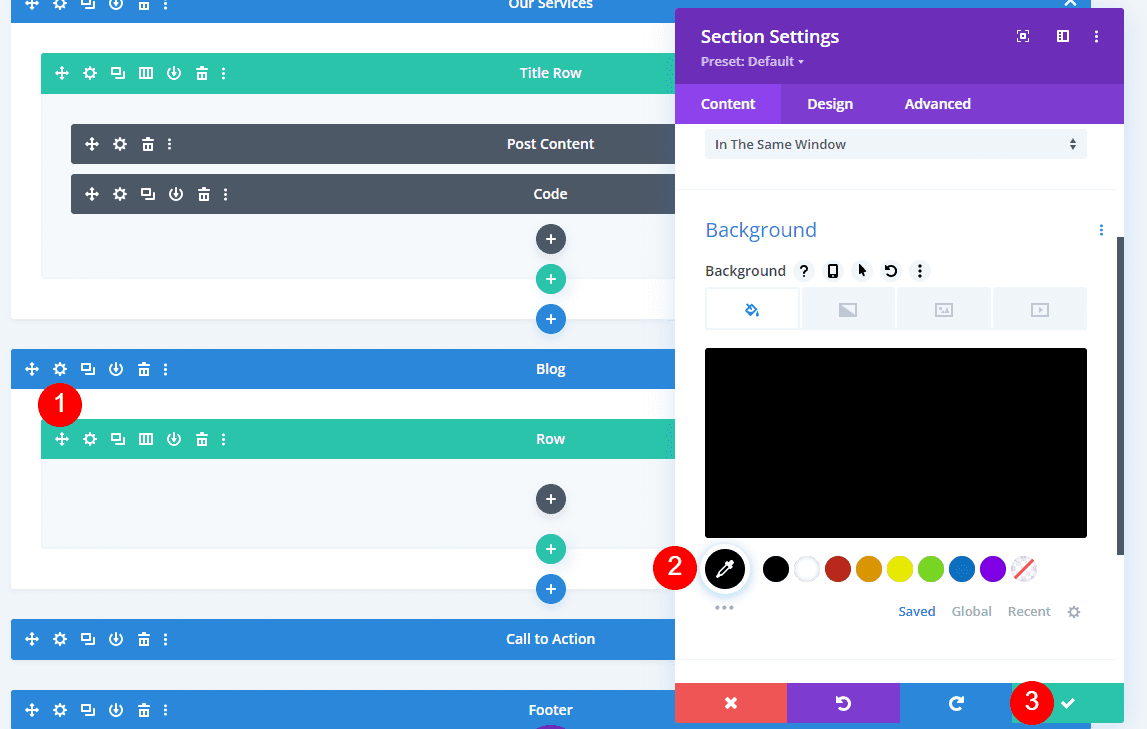
This Section is already styled with a black background. If you’re adding the background yourself, open the section’s settings and set the background to black.
- Background Color: #000000
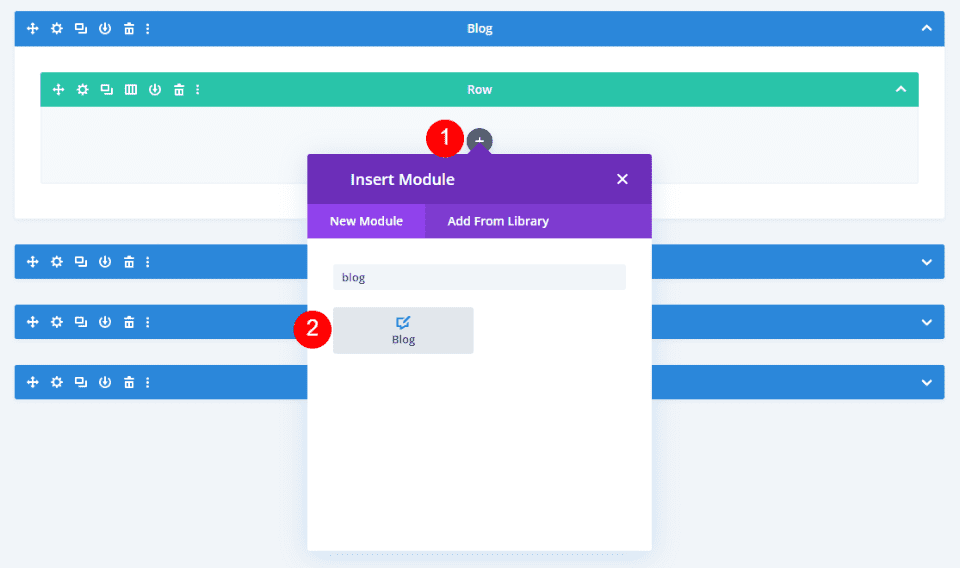
Next, select the gray plus icon and add a Blog module.
The settings will automatically open, where you can make your selections. I’ve switched to the live desktop view to see how the module looks within the layout.
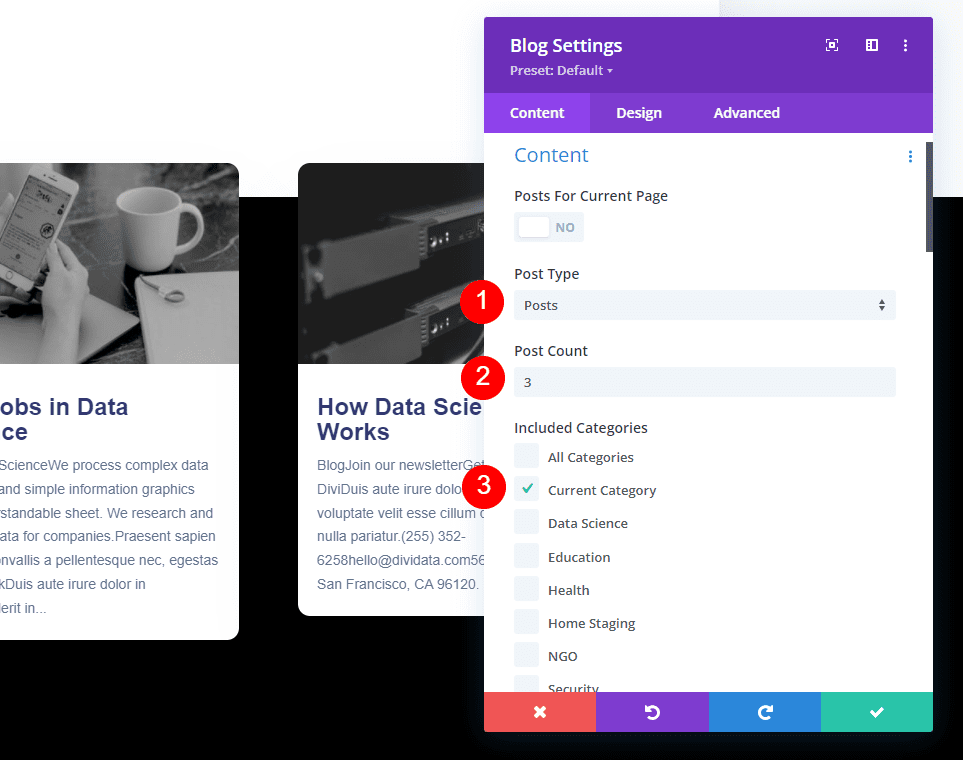
Leave the Post Type set to Posts. Set the Post Count to 3. Under Included Categories, select Current Category. If you’re creating a blog post template for a specific category, then select that category here. You can see more about assigning a blog post template to a specific category in the article How to Use Different Blog Post Templates for Different Categories with Divi.
- Post Type: Posts
- Post Count: 3
- Included Categories: Current Category
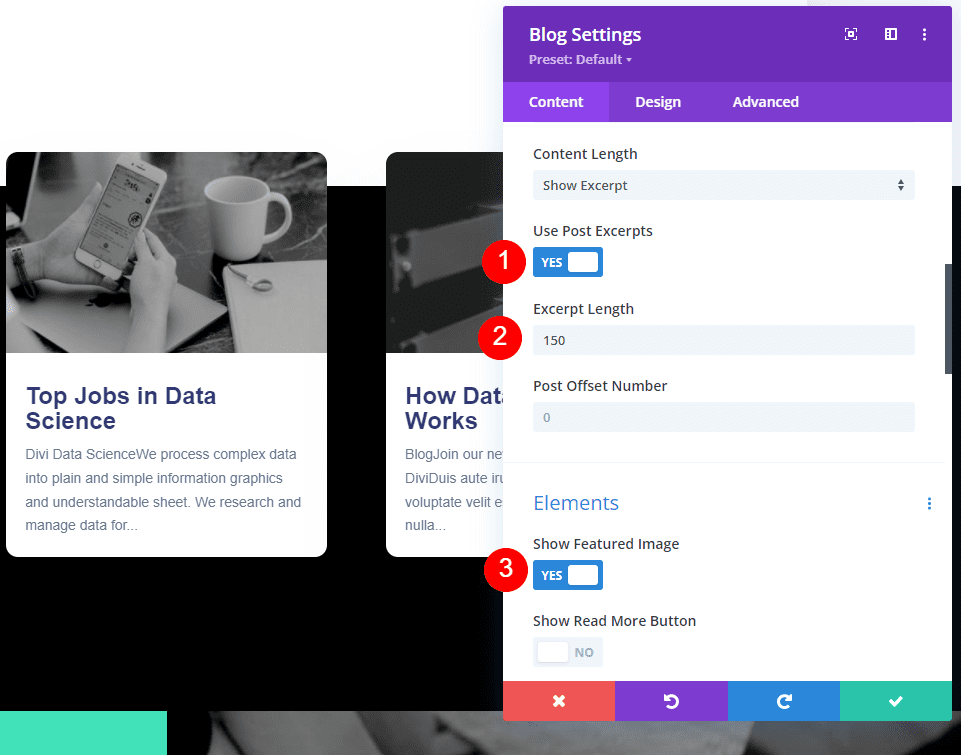
Select Yes to Use Post Excerpts. Change the Excerpt Length to 150. Under Elements, select Yes to Show the Featured Image.
- Use Post Excerpts: Yes
- Excerpt Length: 150
- Show Featured Image: Yes
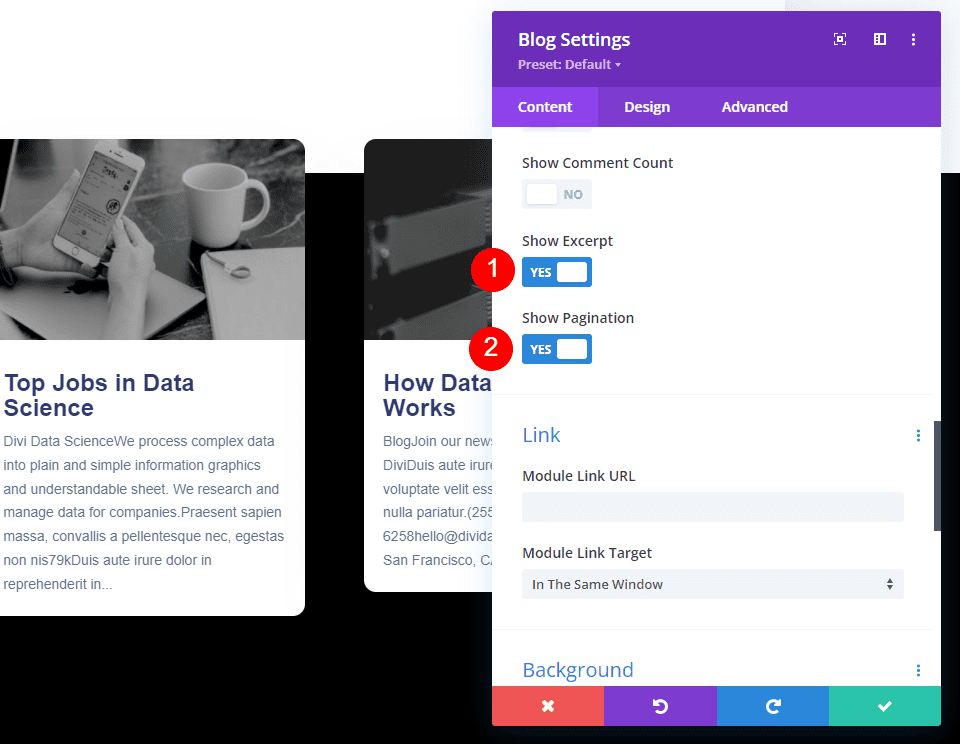
Also under Elements, select to Show the Excerpt and Pagination.
- Show Excerpt: Yes
- Show Pagination: Yes
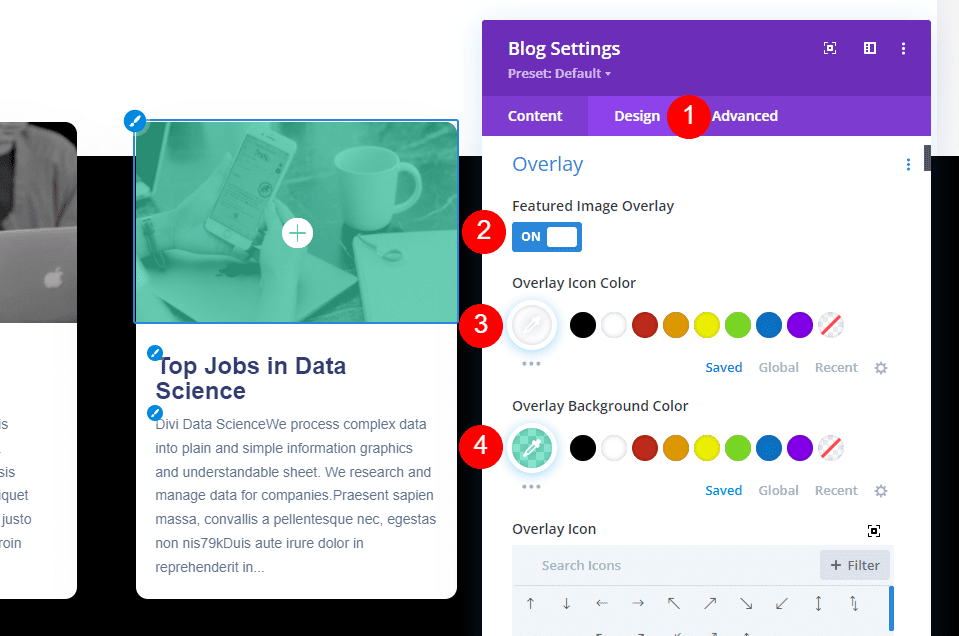
Next, go to the Design tab. Make sure the Featured Image Overlay is enabled. Change the Overlay Icon Color to white and the Overlay Background Color to rgba(65,226,186,0.62).
- Featured Image Overlay: On
- Overlay Icon Color: #ffffff
- Overlay Background Color: rgba(65,226,186,0.62)
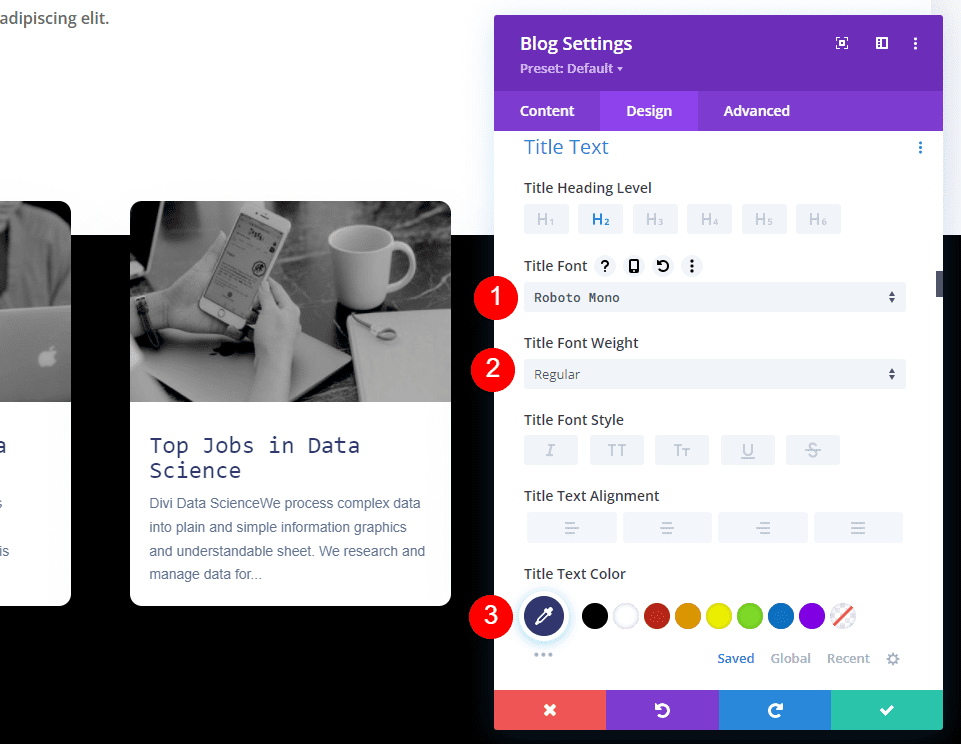
Change the Title Font to Roboto Mono. Change the Weight to Regular and the color to a dark blue, #323770.
- Title Text: Roboto Mono
- Text Color: #323770
- Font Weight: Regular

Set the Desktop Title Text to 15px and change the Phone Title Text to 14px. Change the Title Line Height to 1.7em.
- Title Text Size (desktop): 15px
- Text Size (phone): 14px
- TLine Height: 1.7em
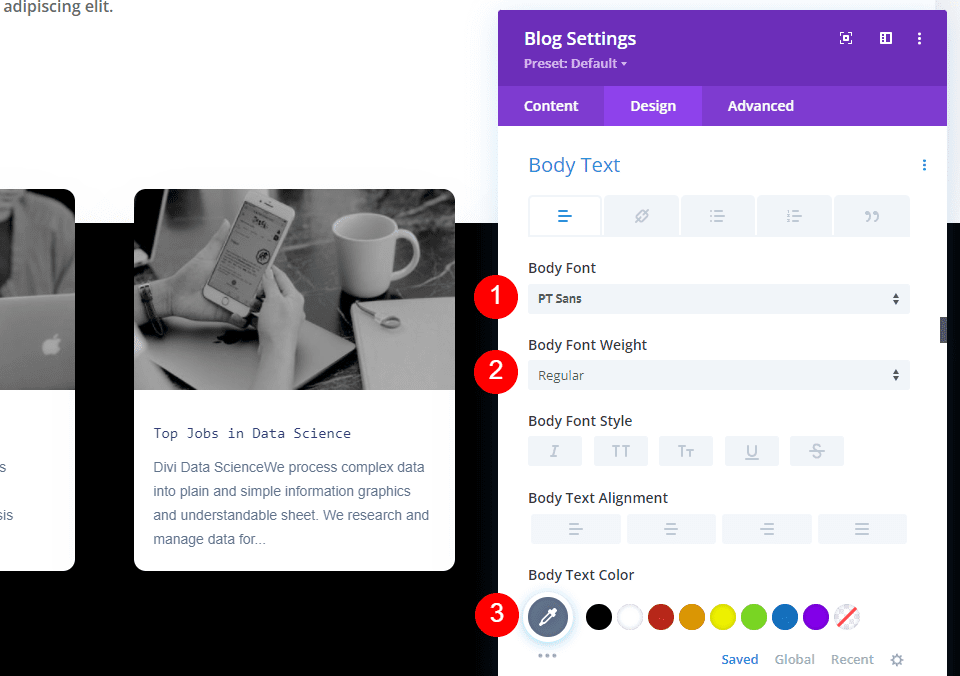
For the Body Text, set the font to PT Sans, the Weight to Regular, and the color to #62748a (these are the default settings).
- Body Text Font: PT Sans
- Text Weight: Regular
- Text Color: #62748a

Select the Phone icon for the Body Text Size and change the phone size to 12px. Leave the desktop at the default 14px. Change the Line Height (for all screen sizes) to 2em.
- Body Text Size (desktop): 14px
- Text Size (phone): 12px
- Text Line Height: 2em
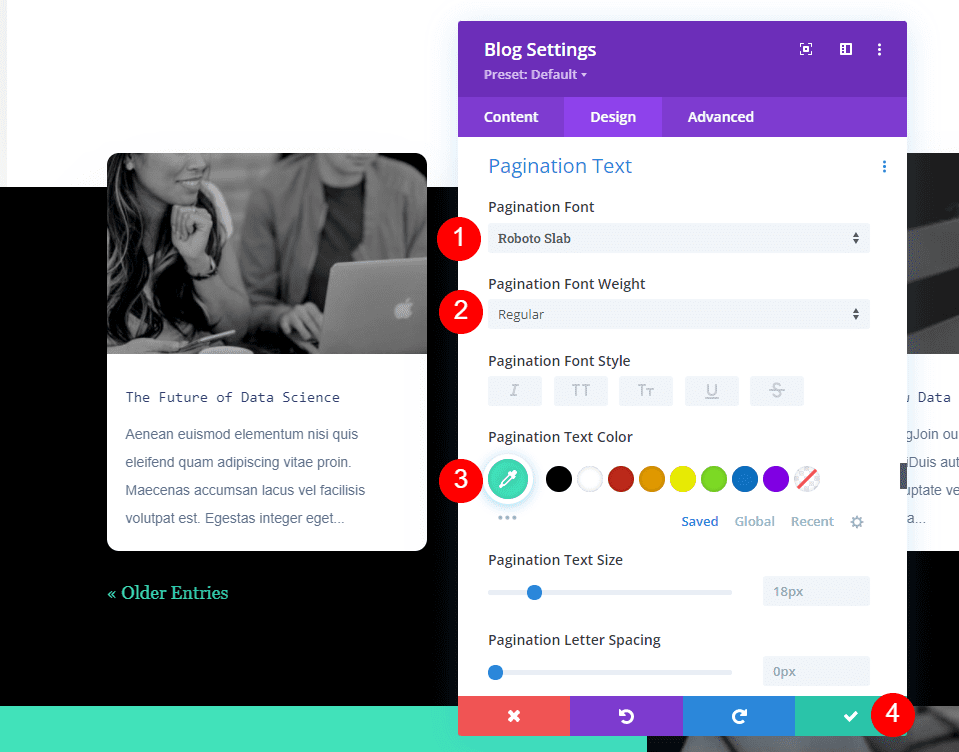
Next, scroll down to Pagination Text. For the font, select Roboto Slab. Set the Weight to Regular and change the Color to #41e2ba.
- Pagination Font: Roboto Slab
- Font Weight: Regular
- Color: #41e2ba
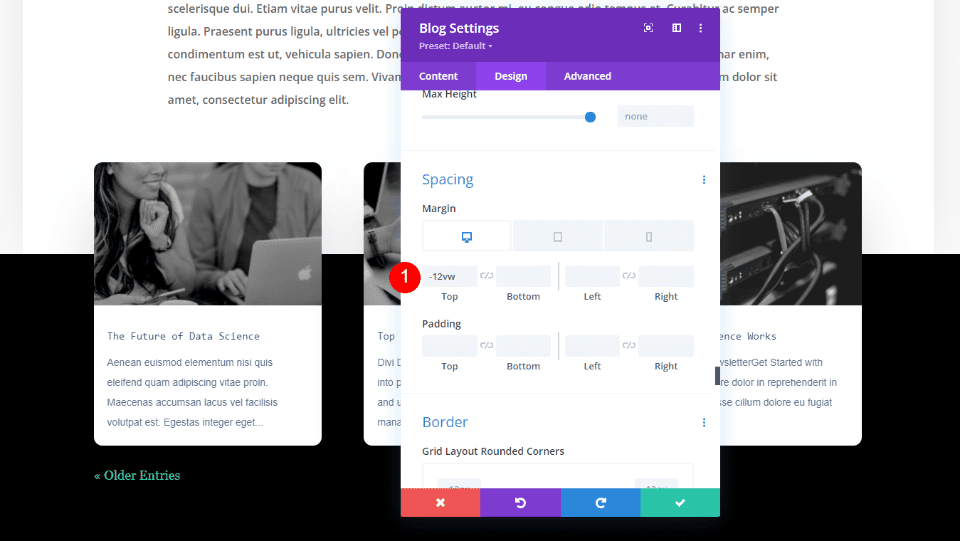
The blog module has a Top Margin of -7vw by default. If you want to change the amount of overlap, add more -vw (this example shows -12vw) to the Top Margin.
- Top Margin: -7vw (or preferred amount)
Add a Section Title
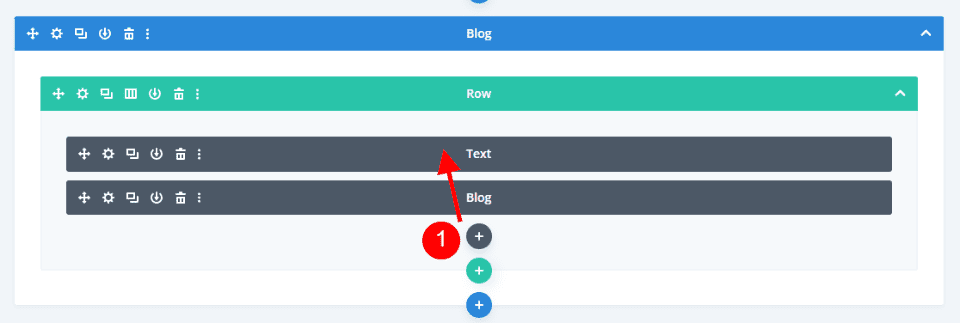
Finally, we’ll add a title to the section, so users know at a glance that these are related posts. We could also leave off the title to the section because it’s easy enough for users to understand that the posts are related to what they’re reading. Add a new Text module by clicking the gray plus icon and dragging it above the Blog module in the same Row. I’m looking at it in the wireframe view because our settings currently make it appear behind the Blog module.
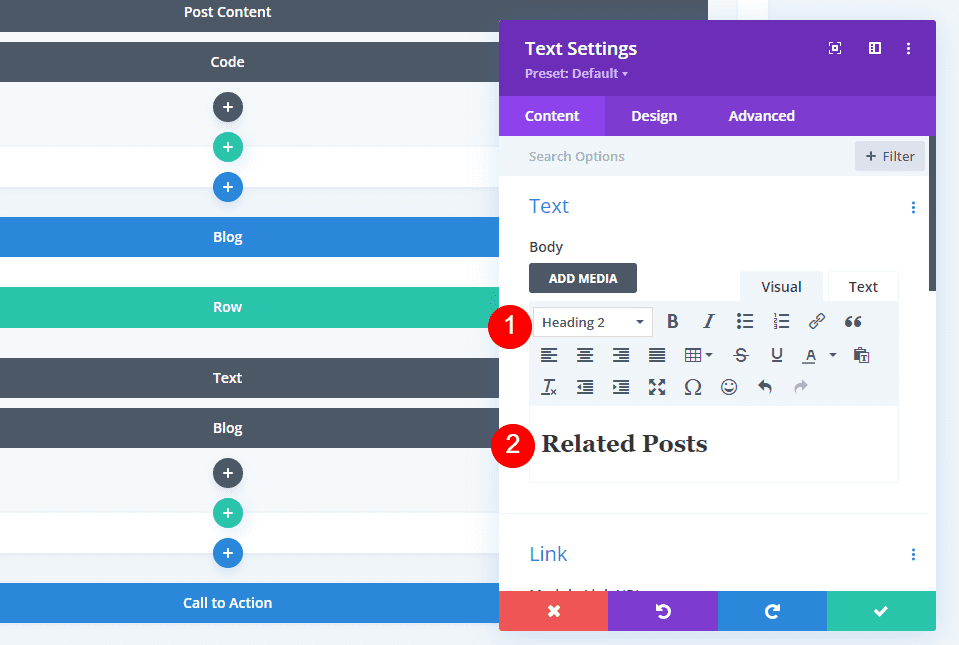
Select Heading 2 in the content editor and type the title, Related Posts.
- Text: Heading 2
- Content: Related Posts
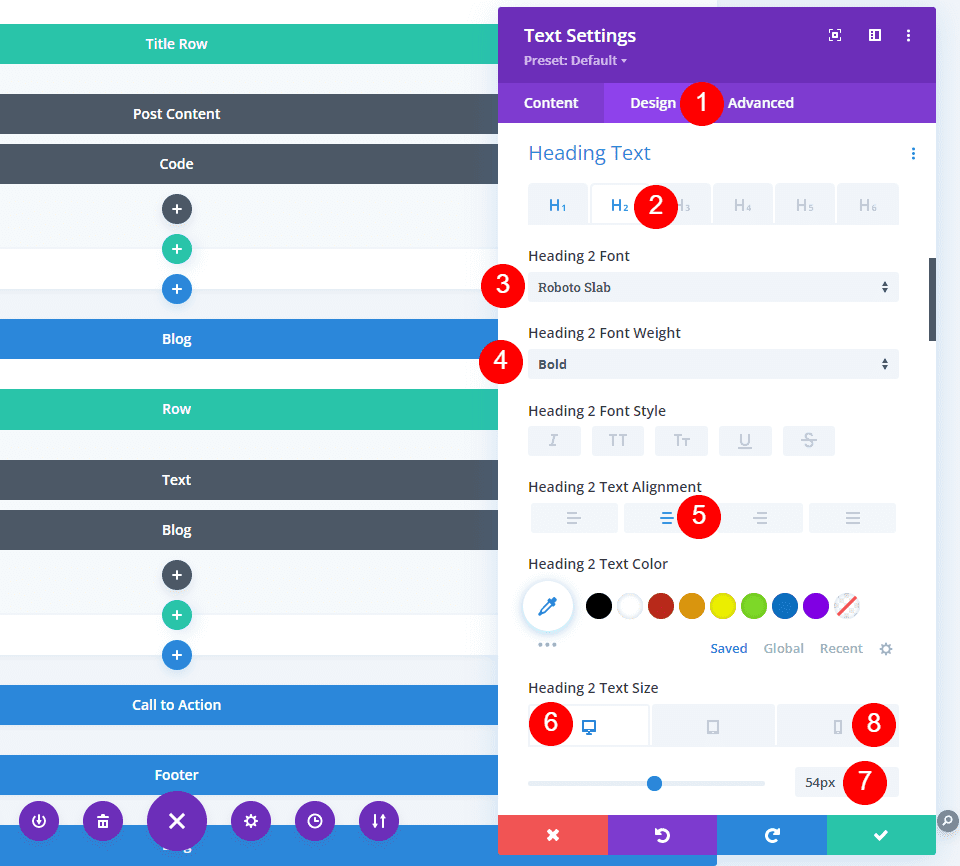
Select the Design tab, scroll down to Heading Text, and choose H2. For the Heading 2 Font, select Roboto Slab. Set the Font Weight to Bold and choose Center Alignment. Set the Desktop Font Size to 53px and the Phone Font Size to 15px.
- Heading 2 Font: Robo Slab
- Font Weight: Bold
- Desktop Font Size: 54px
- Phone Font Size: 26px
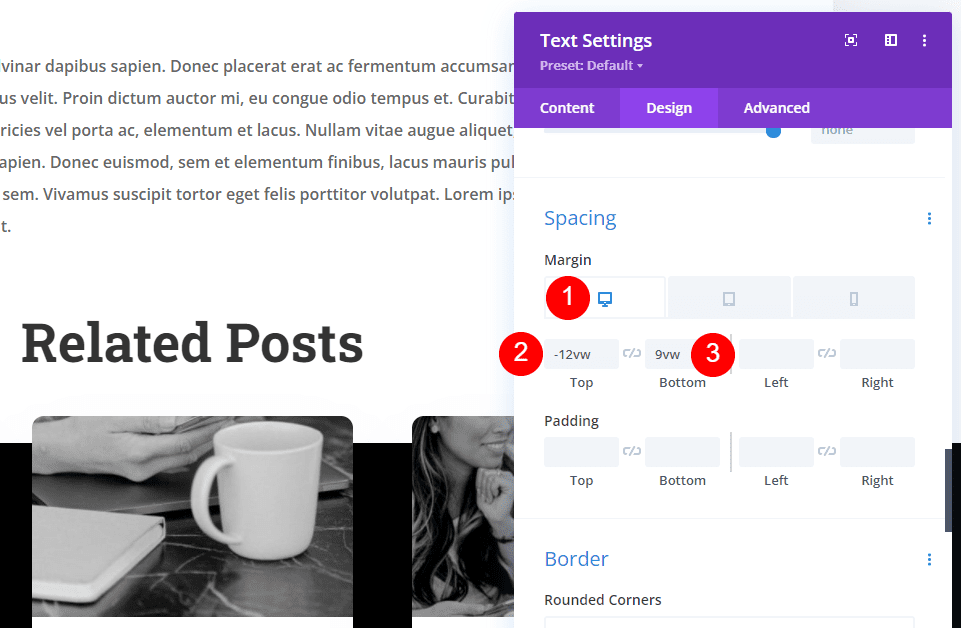
Scroll down to Spacing. Select the desktop settings and set the Top Margin to -12vw and the Bottom Margin to 9vw.
- Top Margin: -12vw
- Bottom Margin: 9vw
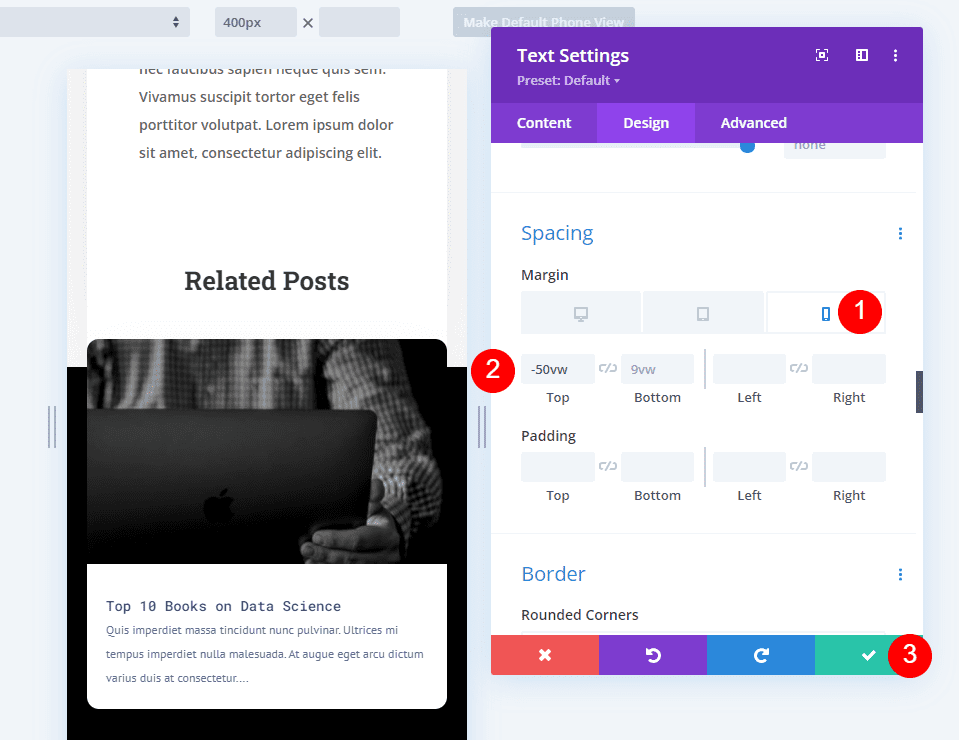
Select the Phone icon for the Margin settings and change the Top Margin to -50vw. Close the settings and save your changes.
- Top Margin: -50vw
Results
Here’s a look at our related posts on a desktop.
Here’s how our related posts look on a phone. It still has the overlap.
This does include the navigation as well. Here’s a look at the bottom of the related posts.
Ending Thoughts
That’s our look at how to add related posts to your Divi blog post template. You can set it to display the current category or any specific category you want. This is easy to do with a Blog module and it can easily match your blog post template.
We want to hear from you. Have you added related posts to your blog post template? let us know about your experience in the comments.


How can one go about showing related posts but not the current post?
Hi Randy, I was wondering if there is a way of doing the same but with ‘popular’ posts. ie ones that have been viewed the most or have the most comments? Thanks