
Website users can be passive and indecisive unless called to take action. That’s why tools like the Divi Theme Builder are so handy. For websites that use multiple categories of content, a single Call-To-Action module (CTA) or optin cannot be optimized for all visitor types. However, by using theme builder layouts and Divi and its dynamic content feature, you can show varied calls to action based on the post content the user is viewing. Doing so will make your conversion rates skyrocket while at the same time making your visitors have a more personalized experience.
Subscribe To Our Youtube Channel
How to Add a Different CTA Per Post Category
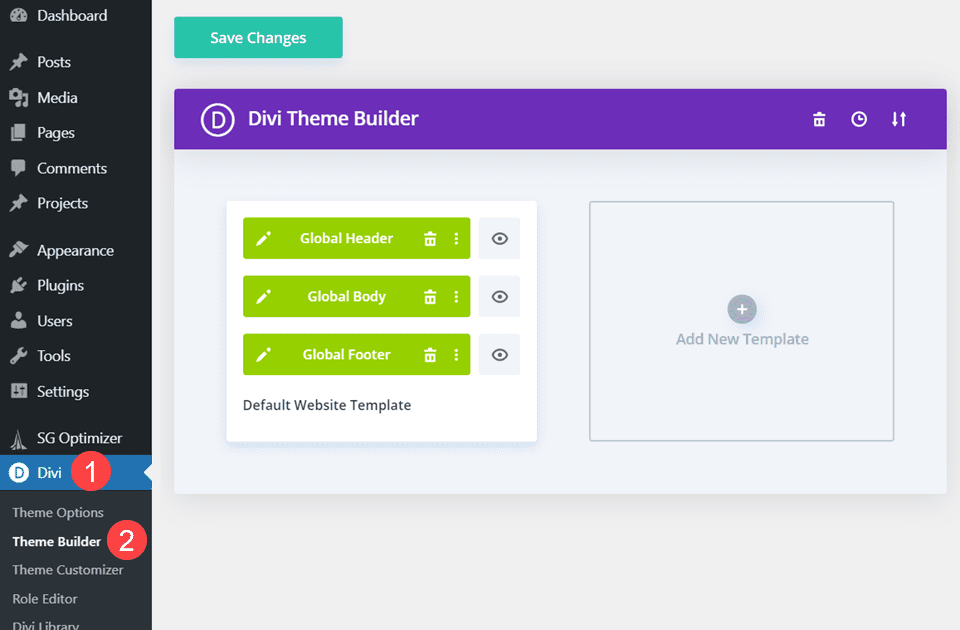
To perform this function, we are going to be using the Divi Theme builder. You can find it inside your WordPress admin panel under Divi – Theme Builder.
The Theme Builder is an incredibly versatile tool, and we are going to be using it to add a CTA to multiple post categories. Because of this, we are working under the presumption that you have an existing design for your blogs already in place.
Create A New Theme Builder Template
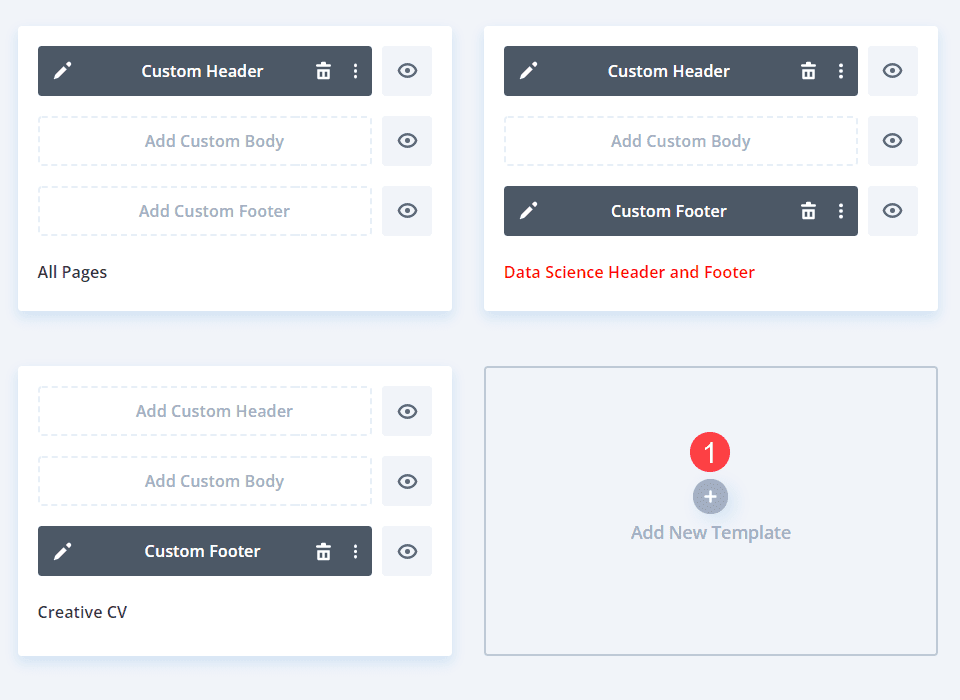
First, we need to create a new template. You can do so by clicking Add New Template in the theme builder dashboard.
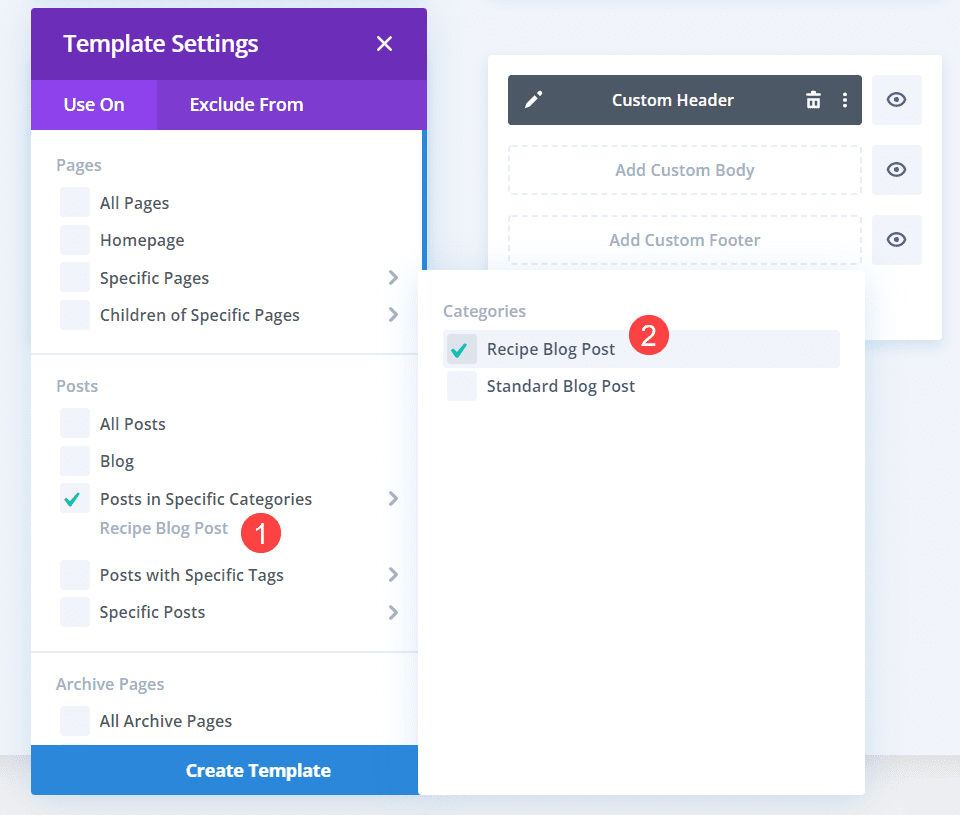
Choose the Specific Categories
Divi will then prompt you to choose which content to apply the template to. Select Posts in Specific Categories. Next, you will select the specific categories you want this CTA to appear in.
Eventually, you will repeat this process to choose other categories for different CTAs to display within. For this tutorial, we are choosing just one category per CTA, but you can use a new template for each category you need to differentiate.
Edit the Post Body
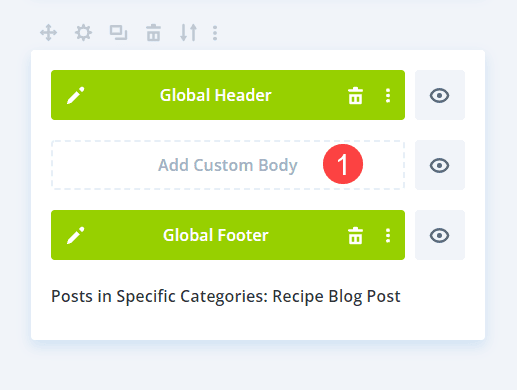
When the template has been created, you can click Add Custom Body to enter the Divi builder.
Once inside, you will add a Call to Action module inside the existing section and row by clicking the black + icon.
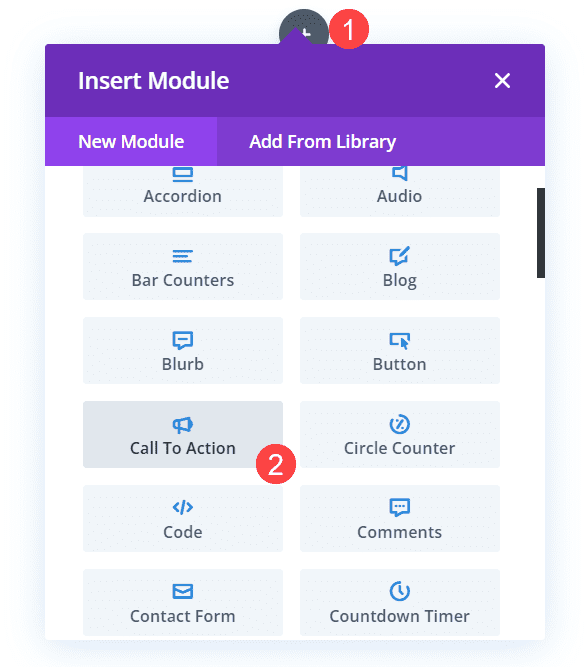
Add a Post Content Module
Next, click the black + icon again, this time selecting the Post Content module from the menu
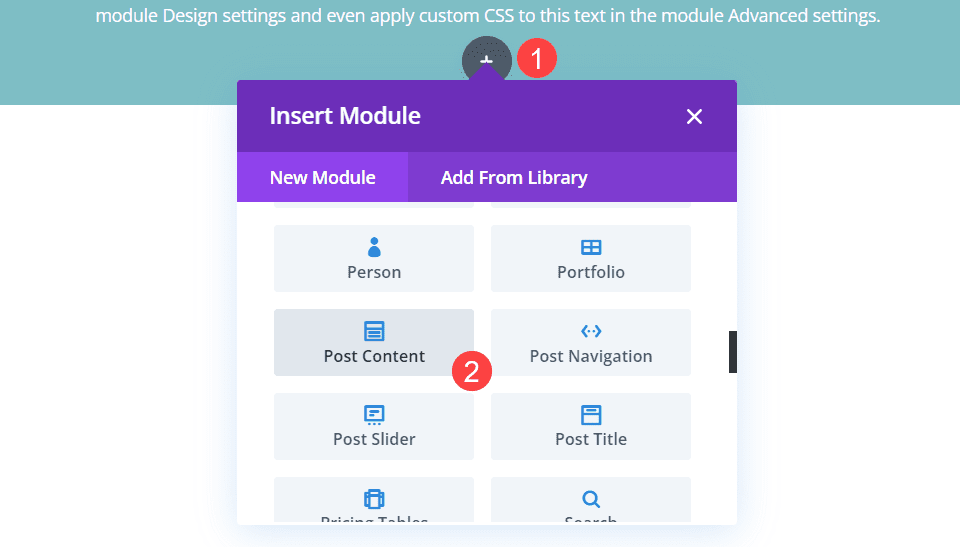
The Post Content module will display dynamic content based on what the associated page URL contains. Whether it’s an article or a fully designed landing page, the Post Content module is smart enough to display that singularly designed and written content.
Edit the Row Settings
Since we’re applying this template to existing pages and posts, we need to make sure that the design isn’t disturbed. So head into the Row Settings and find the Design tab.
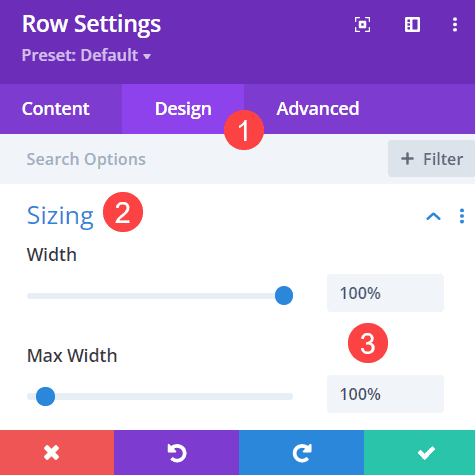
Scroll until you find Sizing. Set the Width and Max Width values to 100%. This should make it so that any design you have created for blog posts already will display appropriately.
Style Your CTA Module
Once both modules are in place and the row width has been set to 100%, go into the CTA module and style it to your wishes. The primary details you should concern yourself with in terms of being category-specific are under the Content tab.
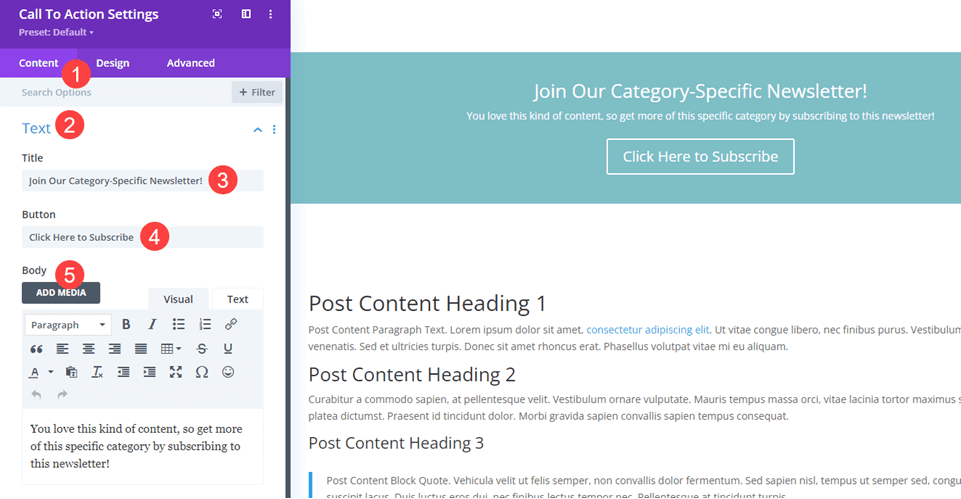
The Text section under the Content tab is where you can most differentiate your various Calls to Action. You want to have a unique Title, as well as compelling Button text. The Body can consist of a description about why this particular category has this specific CTA. Whether it’s an email newsletter for a specific subject, a conversion tactic for your new online course, or even a call for new content creators within the specific categories.
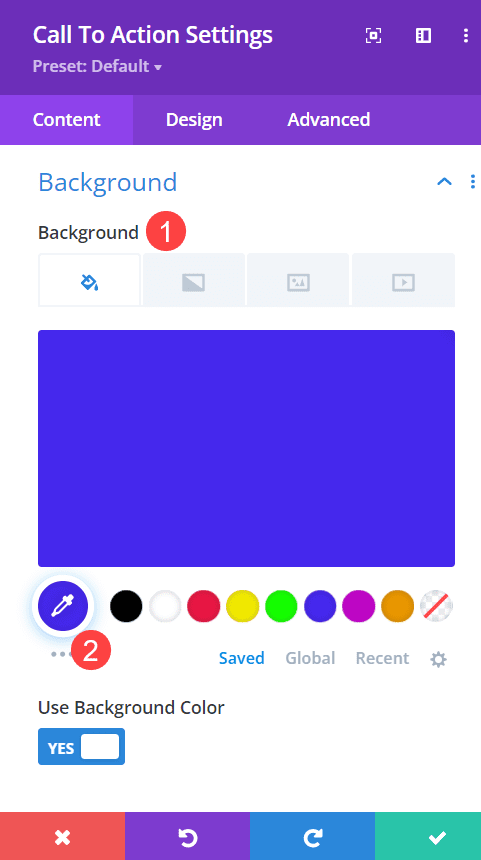
Set the Background Color
The design options for a Call to Action are endless, but one of the most striking and easiest is to simply change the background color. As you’ve set the module’s row to full-width, setting a complimentary color under the Background section of the Content tab can make a world of difference.
Adjust Font Styles
Under the Design tab, you will also want to ensure the various fonts match the rest of your site. Be sure to check the Text, Body Text, and Title Text to make sure that the Font and Font Weight and other styles are set to default (or match/compliment the rest of the site’s primary settings).

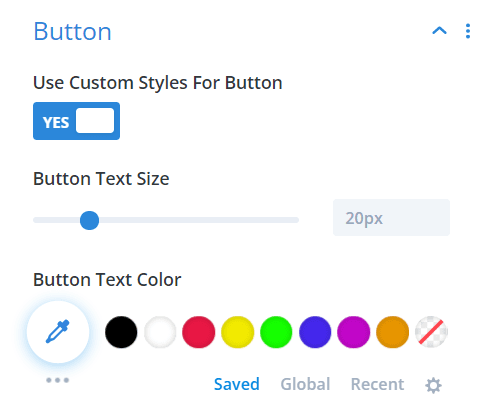
Also, to make sure that the Button text and styles match, you will want to have the Use Custom Styles for Button toggle enabled.
Animate the Call to Action Module
Calls to Action need to stand out from the rest of your content, and adding a brief animation to the module can bring the user’s attention to it without a lot of extra effort. In the CTA Module, find Animation under the Design tab.
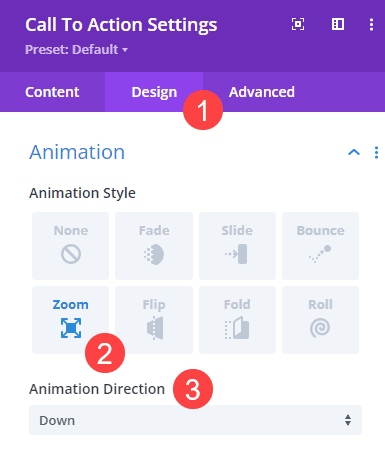
We have chosen to use the Zoom animation animating Down (meaning, the animation originates from the top, moving downward). We didn’t add a delay to the animation because of it being at the top of the screen. With a low page-load speed, the animation should be unmissable.
Optional: Sticky Position
Under the Advanced tab of the Call to Action Settings, you will find the Scroll Effects heading.
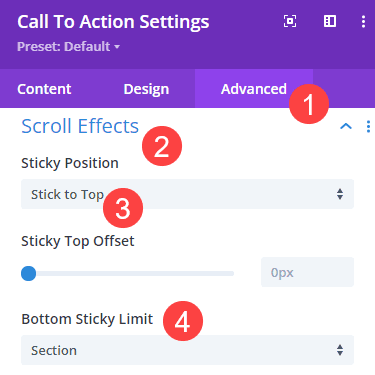
Set the Sticky Position to Stick to Top and the Bottom Sticky Limit to Section. The CTA will attach itself ot the top of the screen once the user has scrolled beyond where the CTA originates, it will continue through the main content of the post or page, but stop when it reaches the end of its container section.
If you want the CTA to follow the user the entire length of the page, you can always set the Bottom Sticky Limit to None and that will keep the CTA at the top of the user’s screen regardless of how far they scroll.
Other Page Categories
Head back into the theme builder dashboard now, and you will see the Custom Body you designed is live in the template labeled Posts in Specific Categories: Category Name.
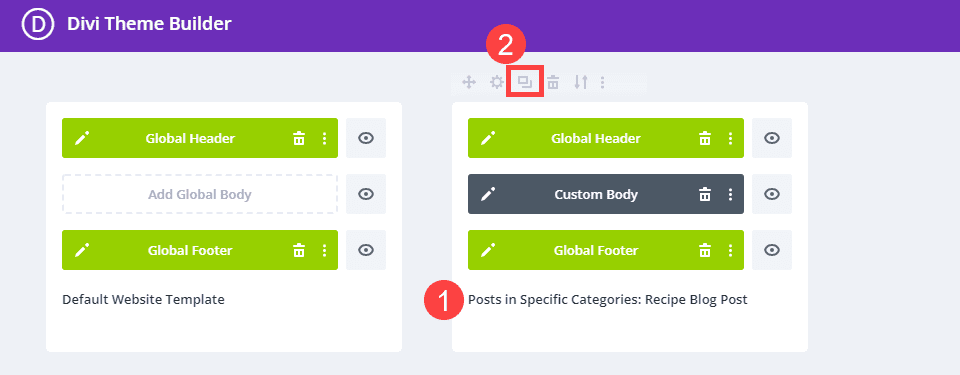
Because this Call to Action only applies to the selected categories, you can click the Duplicate Template icon that appears when you hover over the template.
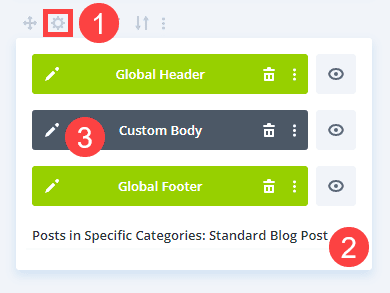
Divi may then prompt you to choose which content to which the duplicate template is assigned. If not, then you can do it manually by clicking the gear icon in the new template. Select the new post categories you want to use a different Call to Action.
Then, you will simply edit the Custom Body of the new template and repeat the steps for creating and styling the Call to Action module that fits the new specific category you’ve chosen. And that’s it! You’re done!
Wrapping Up
After you’ve completed all these the above steps for as many specific categories as you want separate Calls to Action, whenever a visitor loads the one category, the attached CTA module will appear. But a different user might be looking at a post in another category and be called to action in an entirely different way. These personalization and targeting options will increase conversion and enhance your site’s overall user experience.
How will you use having a different Call to Action for specific categories?
Article featured image by Pictrider / shutterstock.com


This is super cool, will you ved able to use cache on these pages ?
It would be great if you can add a short video illustrating what this looks like in action. Usually a short video is part of the How tos 🙂