
Looking for a new and unique way to structure your homepage? Creating a navigation dashboard might be the way to go. In this tutorial, we’re going to show you how exactly you can achieve a stunning dashboard page which you can use for many purposes.
Whether you want to change the way people navigate on your page, or you want to highlight services your company offers, creating a dashboard will help you achieve exactly what you had in mind. We’re using Divi and its built-in options only and on top of that, we’ve also provided you with both a light and dark color palette that you can use. This tutorial is inspired by one of Edoardo Mercati‘s designs.
Let’s get to it!
- 1 Preview
- 2 Color Palettes
-
3
Let’s Start Creating
- 3.1 Add New Standard Section
- 3.2 Add Row #1
- 3.3 Add Title Text Module to Column 1
- 3.4 Add Divider Module to Column 1
- 3.5 Add Description Text Module to Column 1
- 3.6 Add Blurb Module to Column 2
- 3.7 Clone Blurb Module Three Times & Place 2 in Remaining Column
- 3.8 Change New Blurb Modules
- 3.9 Add Row #2
- 3.10 Add Text Module
- 3.11 Add Divider Module
- 3.12 Add Row #3
- 3.13 Add Blurb Module to Column 1
- 3.14 Add Button Module to Column 1
- 3.15 Clone Blurb & Button Module Three Times & Place in Remaining Columns
- 3.16 Change New Blurb Modules
- 3.17 Clone Row
- 3.18 Clone Row
- 3.19 Clone 5-Column Row
- 4 Preview
- 5 Final Thoughts
Preview
Before we dive into the tutorial, let’s take a look at the end result on different screen sizes:

Color Palettes
Before you start, you can choose whether you want to create a light or dark dashboard. The colors you would need for each color palette are listed below. Make sure you keep these color codes close so you can use them once you go through the tutorial. When using a color specific to the color palette, we’ll refer to the color number.
Light
- Color #1: #f6f6f6 (section background)
- Color #2: #ffffff (column background)
- Color #3: #333333 (title text color)
- Color #4: #000000 (divider color)
- Color #5: #6F6B68 (body text color blurb)
- Color #6: #e5e5e5 (column background 2)
- Color #7: #ffffff (blurb background color)
Dark
- Color #1: #141414
- Color #2: #212121
- Color #3: #ffffff
- Color #4: #ffffff
- Color #5: #dddddd
- Color #6: #212121
- Color #7: #333333
Mutual Colors
- Color #7: #0457ff
- Color #8: #cc0432
- Color #9: #839e00
- Color #10: #c68e00
Let’s Start Creating
Add New Standard Section
Background Color
Start by adding a new section to your page. Then, open the section settings and add a background color:
- Background Color: Color #1 (Find in Color Palette)
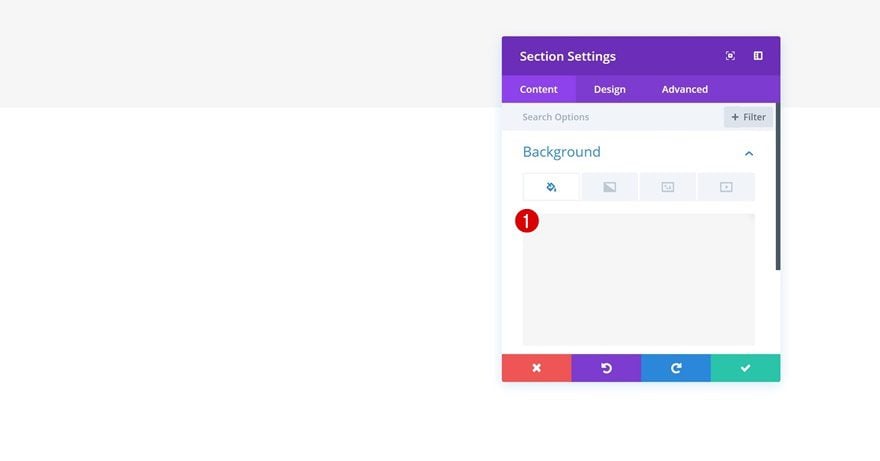
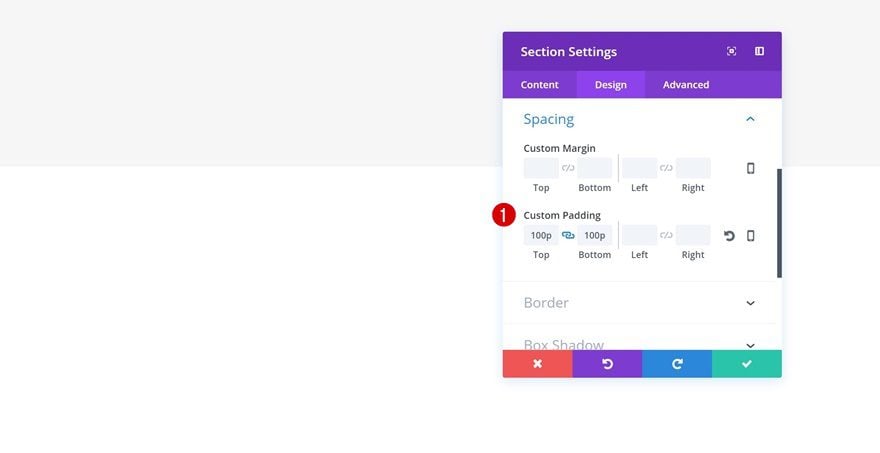
Spacing
To create some extra space at the top and bottom, we’ll apply some custom padding as well:
- Top Padding: 100px
- Bottom Padding: 100px
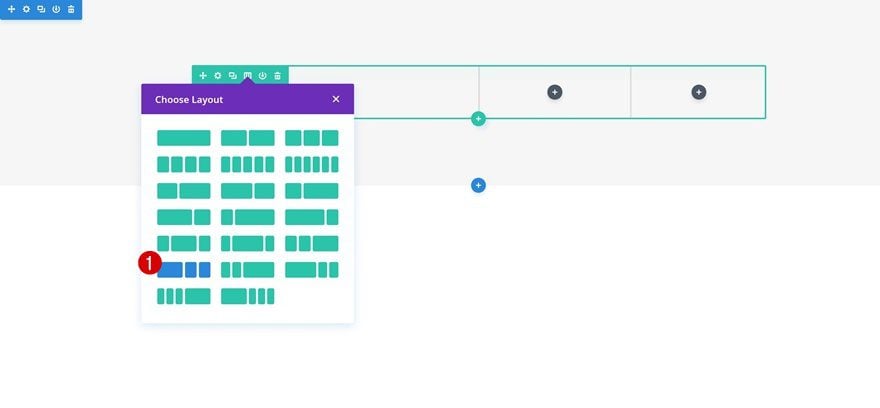
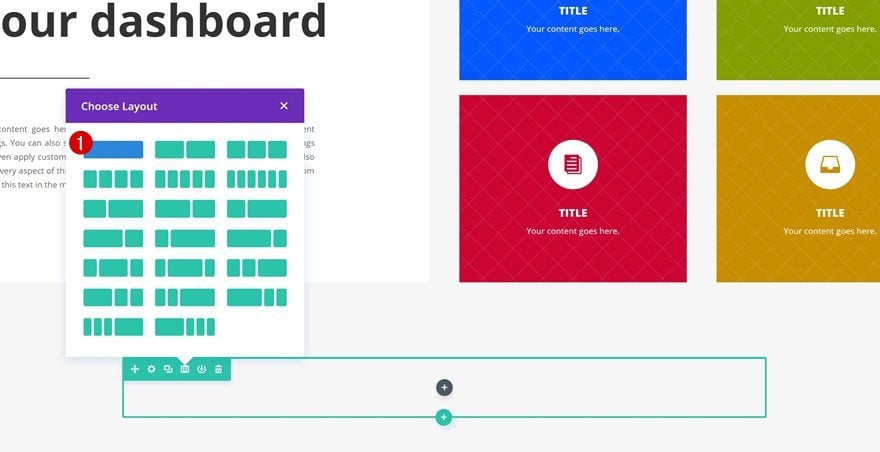
Add Row #1
Column Structure
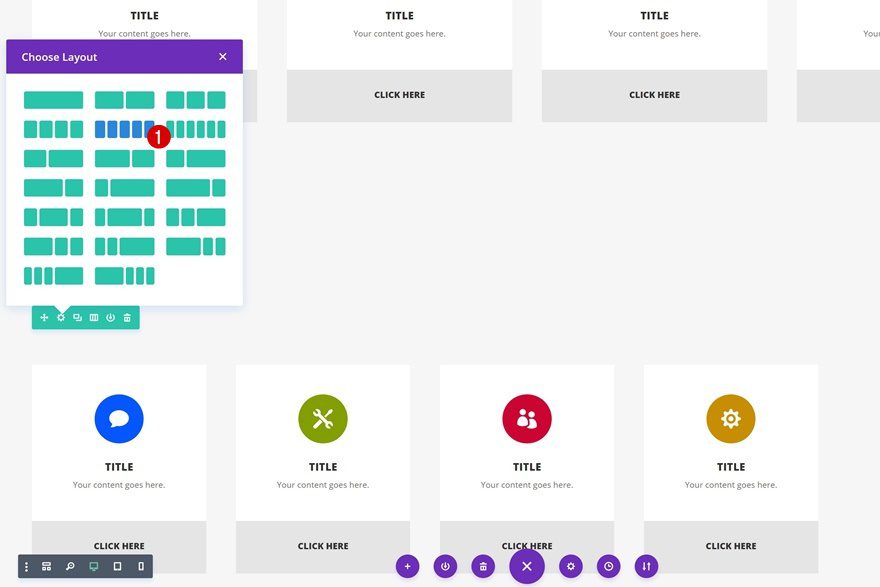
Now that we’re done modifying the section settings, we can start adding rows. Choose the following column structure for your first row:
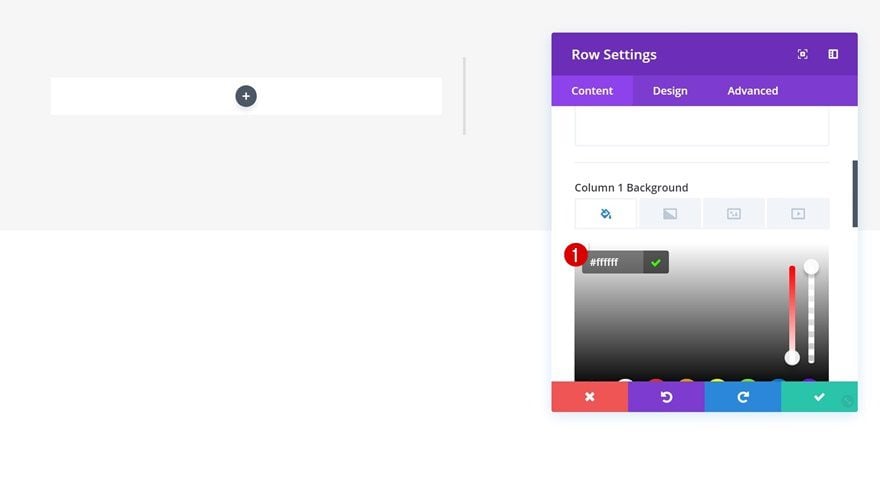
Column 1 Background Color
Without adding any modules yet, open the row settings and add a column 1 background color:
- Column 1 Background Color: Color #2 (Find in Color Palette)
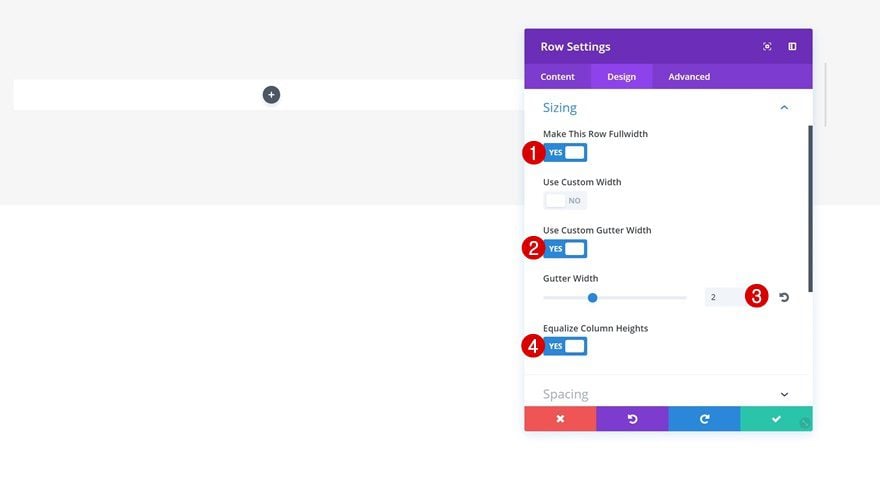
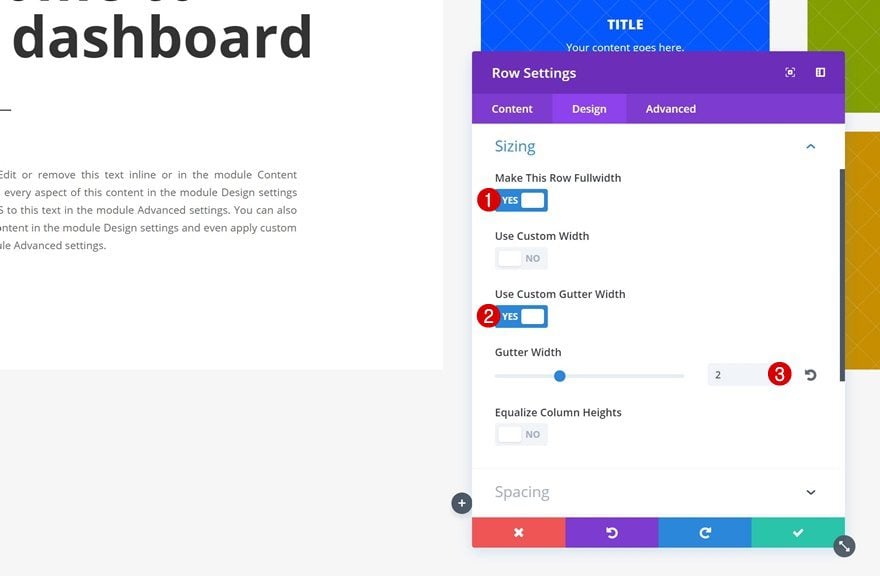
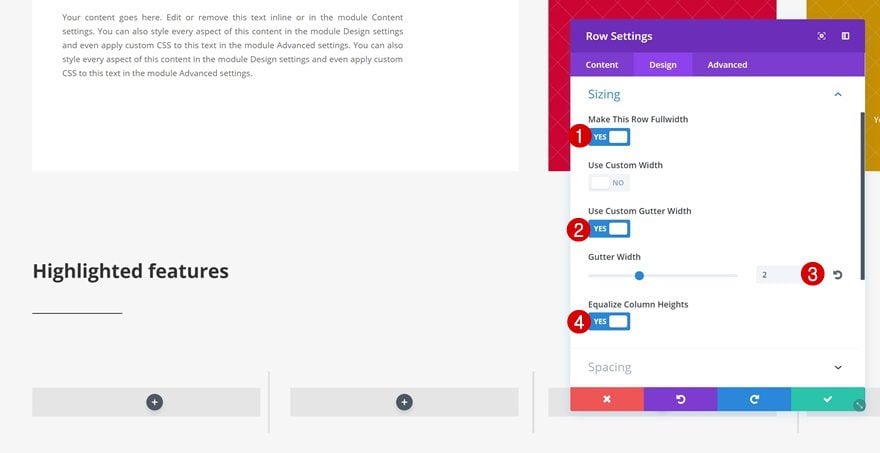
Sizing
Go to the Design tab next and change the Sizing settings of your row:
- Make This Row Fullwidth: Yes
- Use Custom Gutter Width: Yes
- Gutter Width: 2
- Equalize Column Heights: Yes
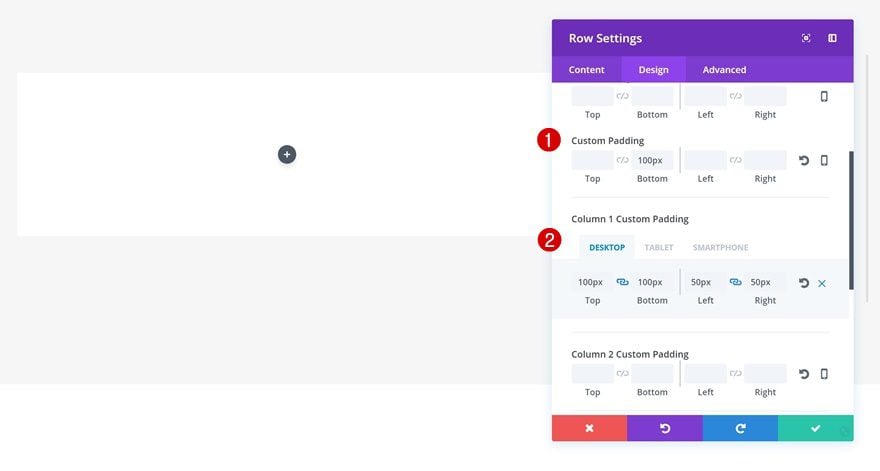
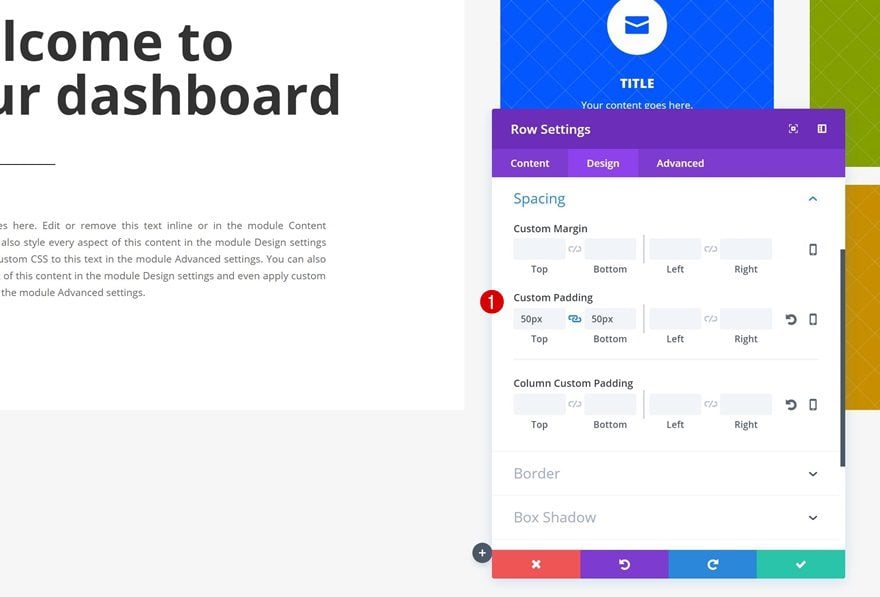
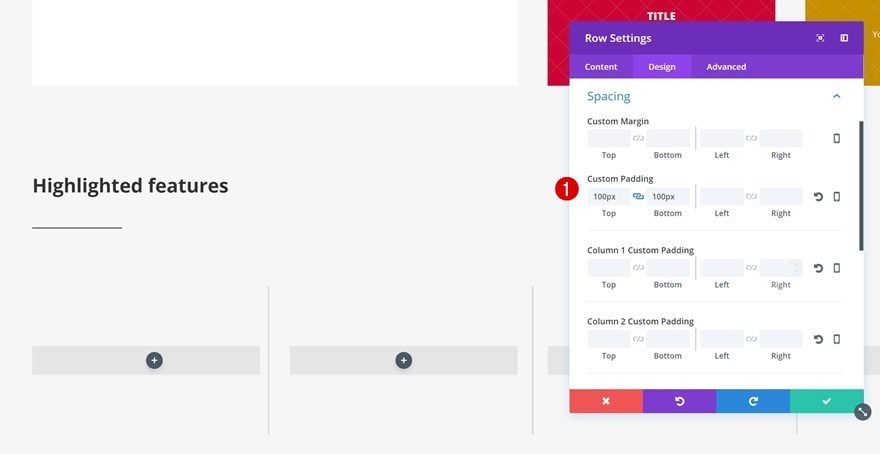
Spacing
Lastly, add some padding to the row and first column:
- Bottom Padding: 100px
- Column 1 Top Padding: 100px
- Column 1 Bottom Padding: 100px
- Column 1 Left Padding: 50px
- Column 1 Right Padding: 50px
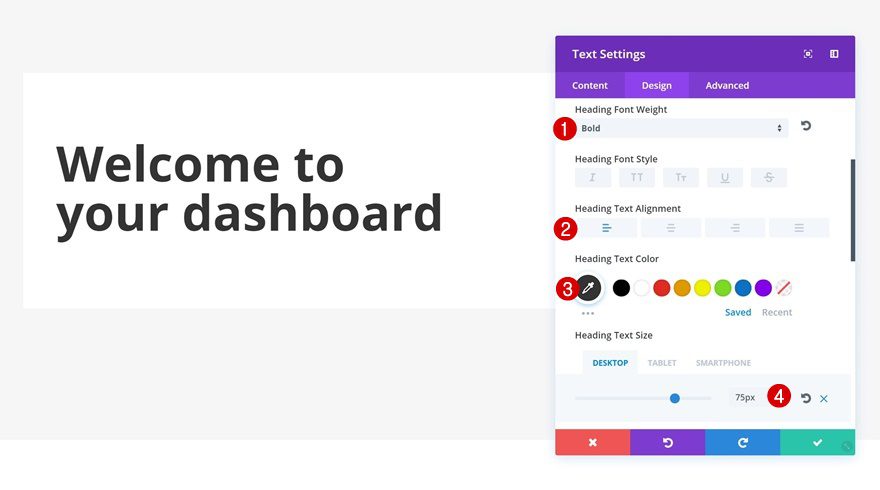
Add Title Text Module to Column 1
H1 Text Settings
Time to start adding modules! We’ll start by adding a title Text Module. Once you’ve added your H1 copy, change the Heading Text Settings of your module:
- Heading Font Weight: Bold
- Heading Text Alignment: Left
- Heading Text Color: Color #3 (Find in Color Palette)
- Heading Text Size: 75px (Desktop), 55px (Tablet), 36px (Phone)
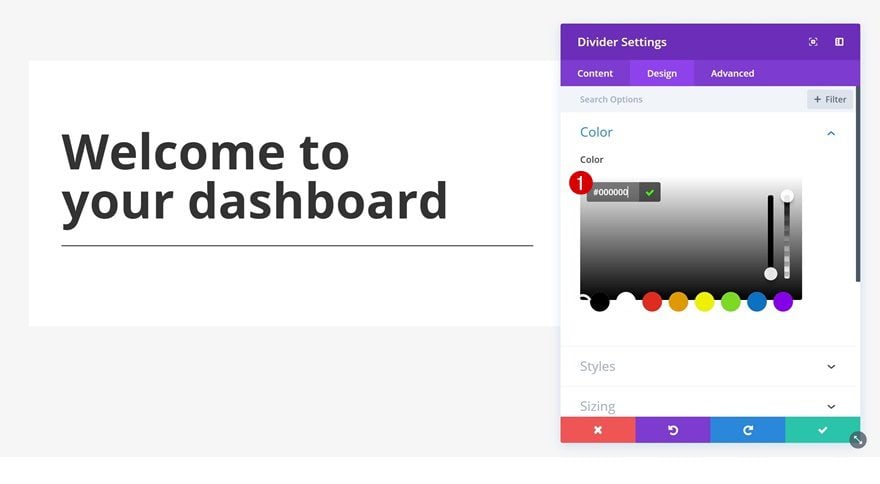
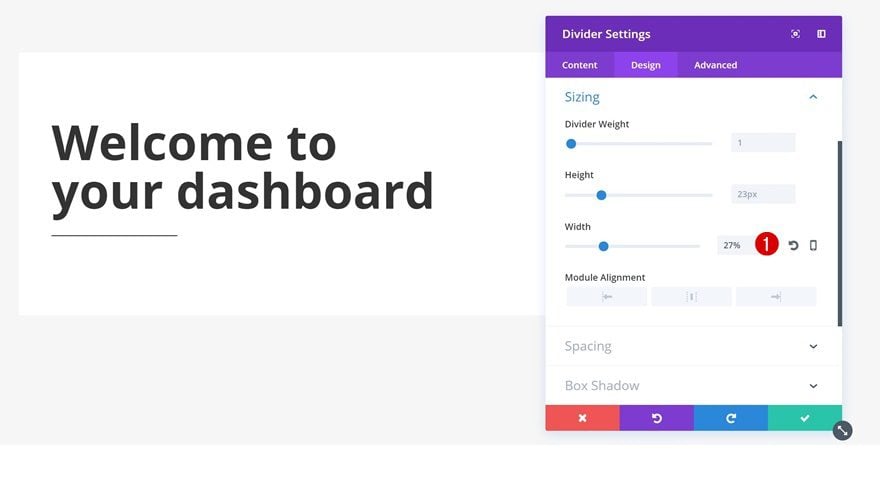
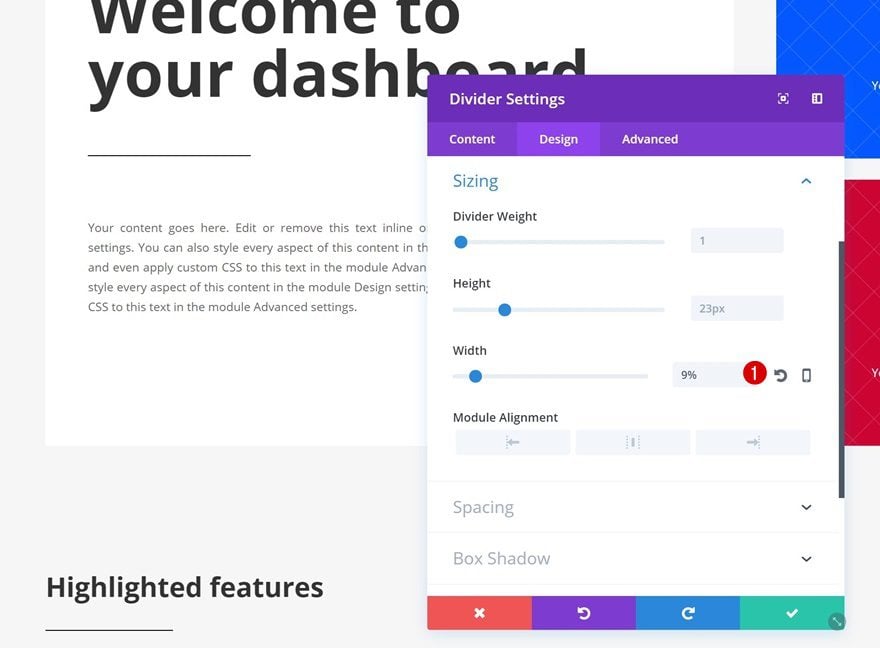
Add Divider Module to Column 1
Divider Color
Right below the title Text Module, go ahead and add a Divider Module with the following color:
- Divider Color: Color #4 (Find in Color Palette)
Sizing
Open the Sizing settings next and adjust the width of your divider:
- Width: 27%
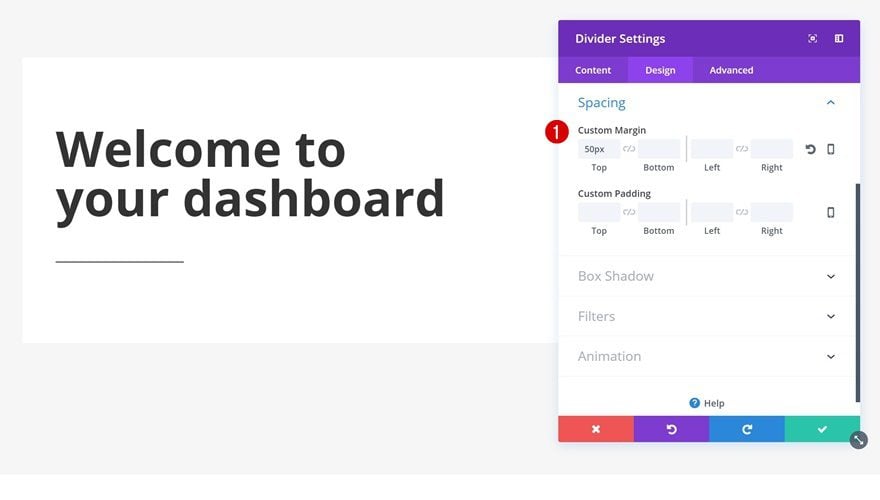
Spacing
Add some space at the top of your divider as well:
- Top Margin: 50px
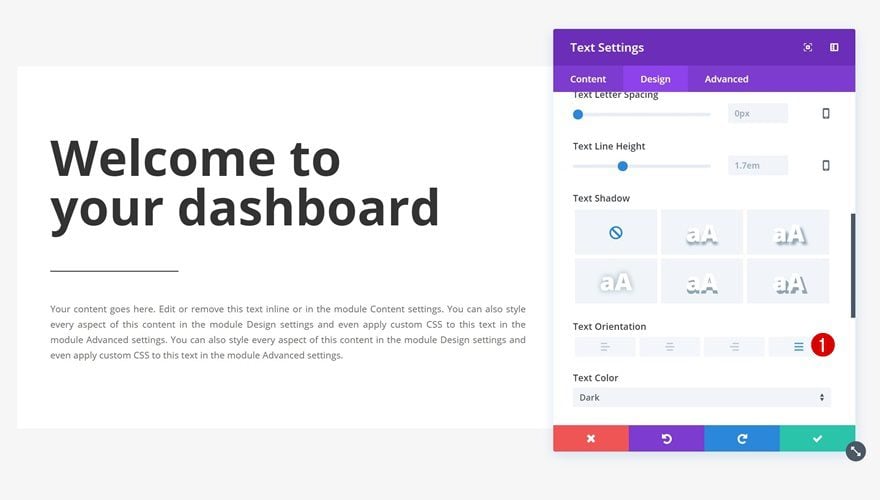
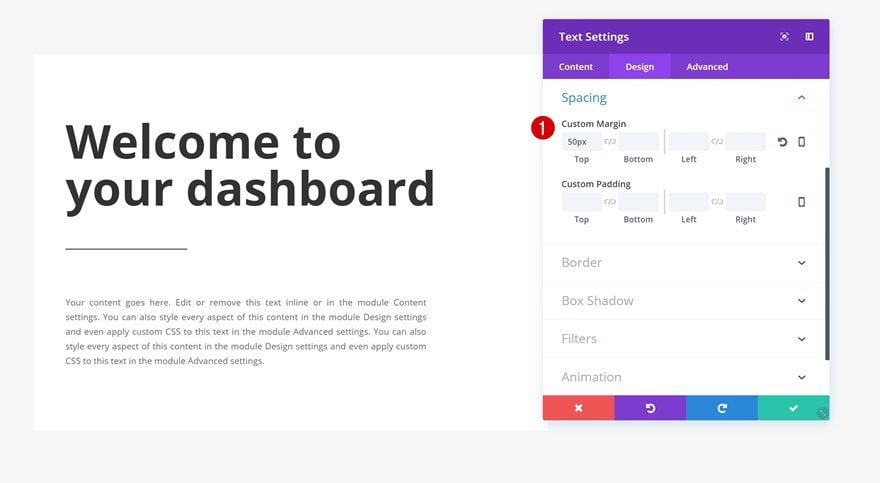
Add Description Text Module to Column 1
Text Settings
The next and last module in this row is a description Text Module. After you’ve added your content, change the text orientation in the text settings:
- Text Orientation: Justify
Sizing
Change the Sizing settings of this module as well:
- Width: 80% (Desktop), 100% (Tablet & Phone)
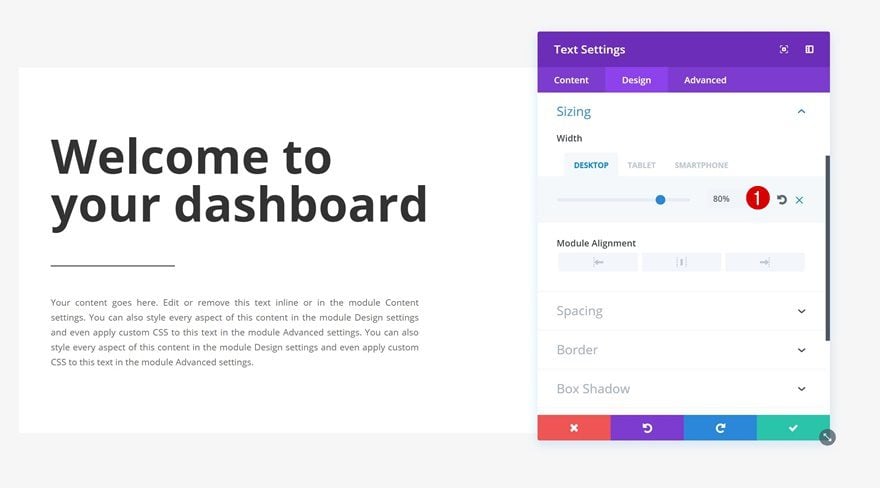
Spacing
And add some space at the top of your module using custom margin:
- Top Margin: 50px
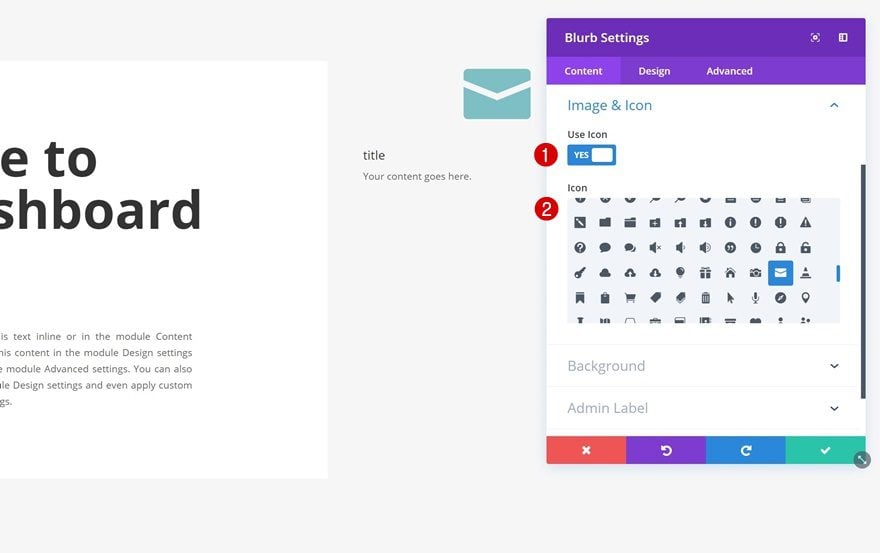
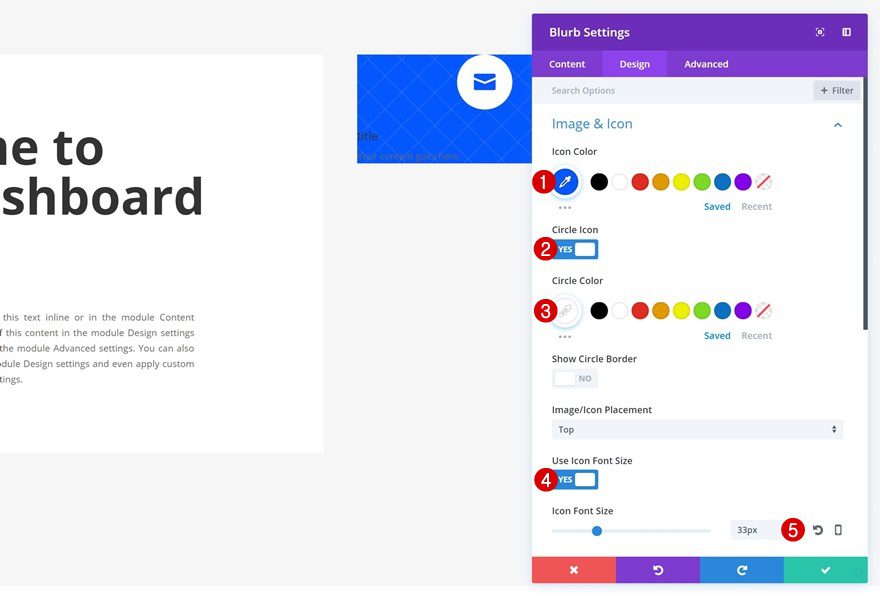
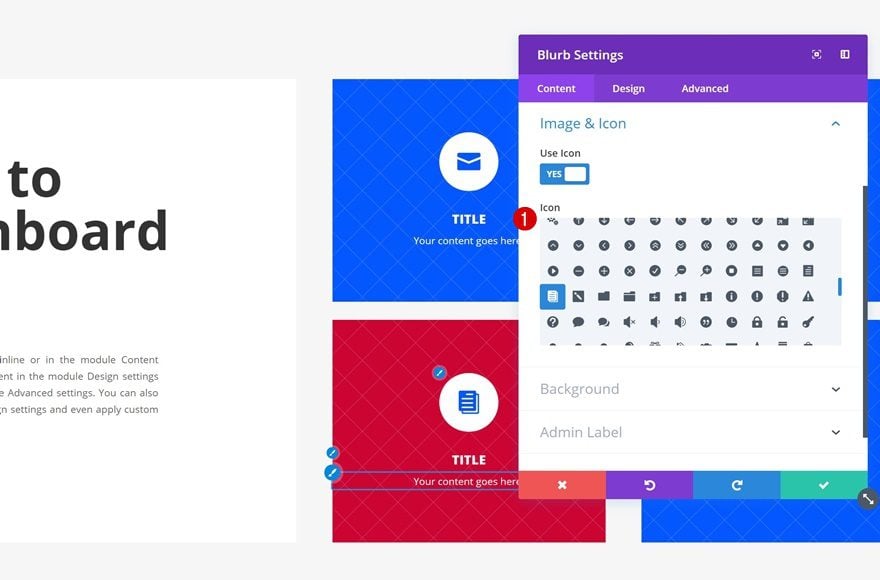
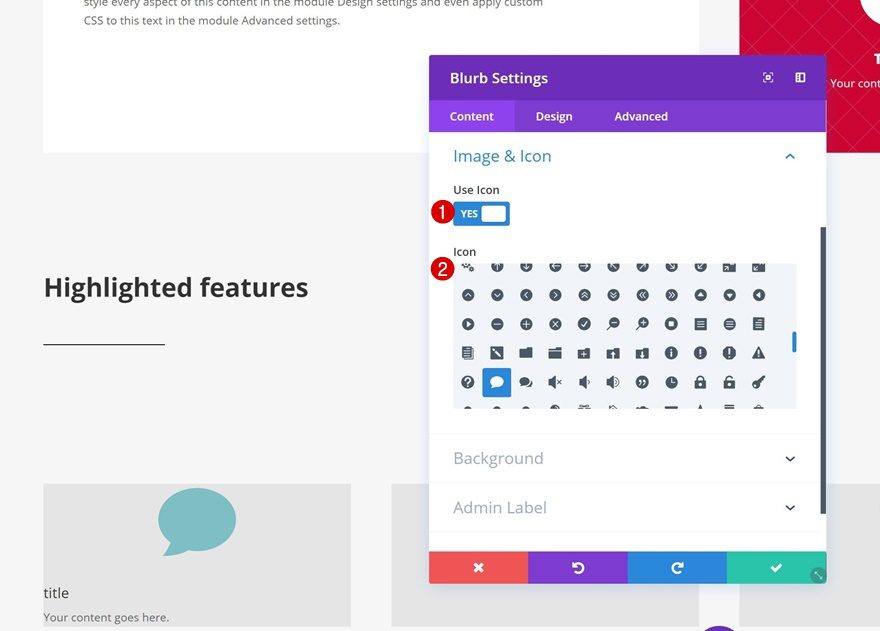
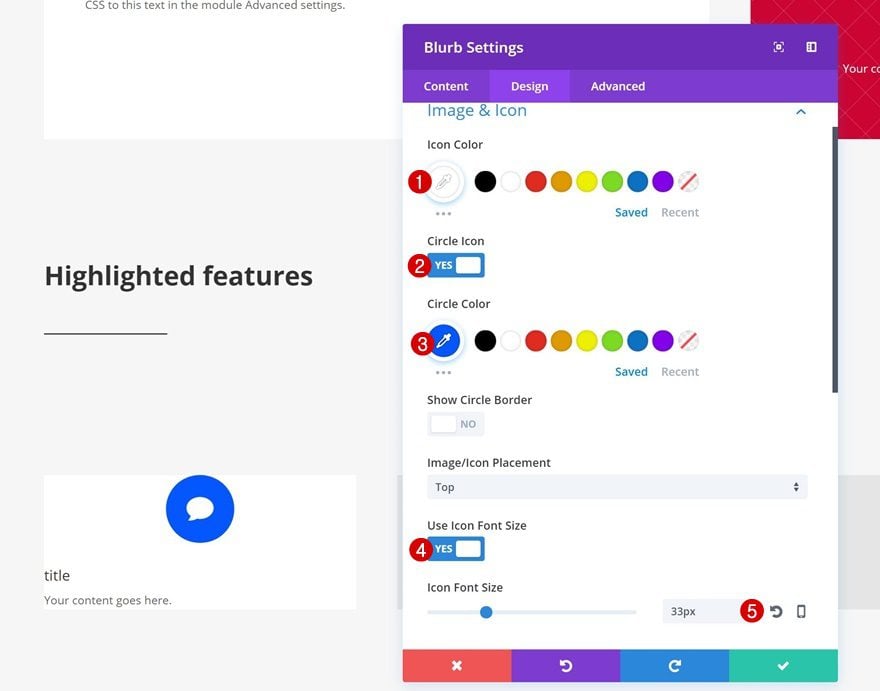
Add Blurb Module to Column 2
Icon
We can now move on to the second column. We’ll start off by creating one of the Blurb Modules. Afterwards, we can clone this module and change it accordingly. After adding the Blurb Module and changing the content, select an icon of your choice.
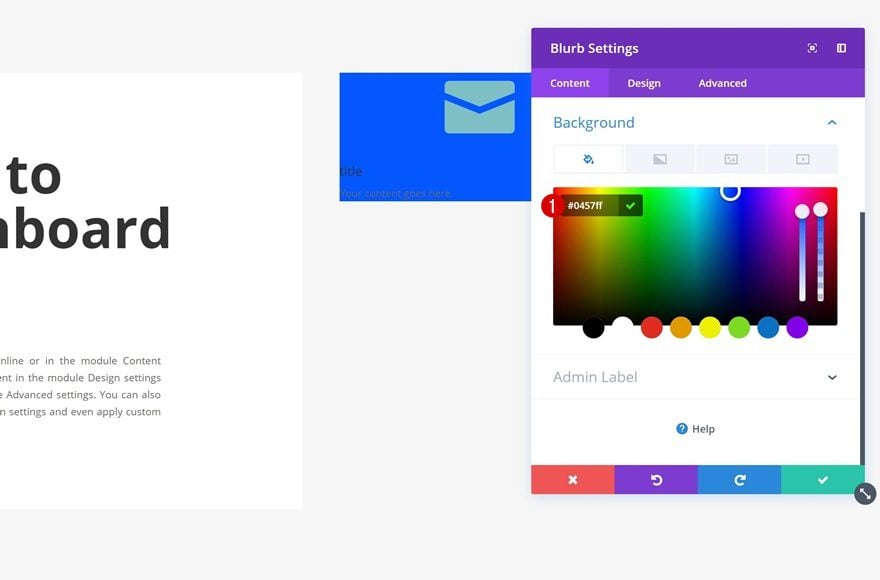
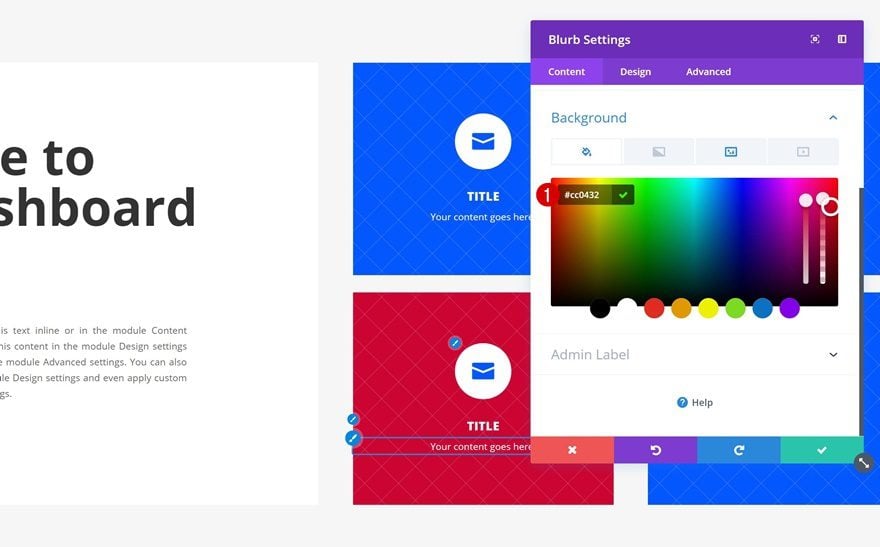
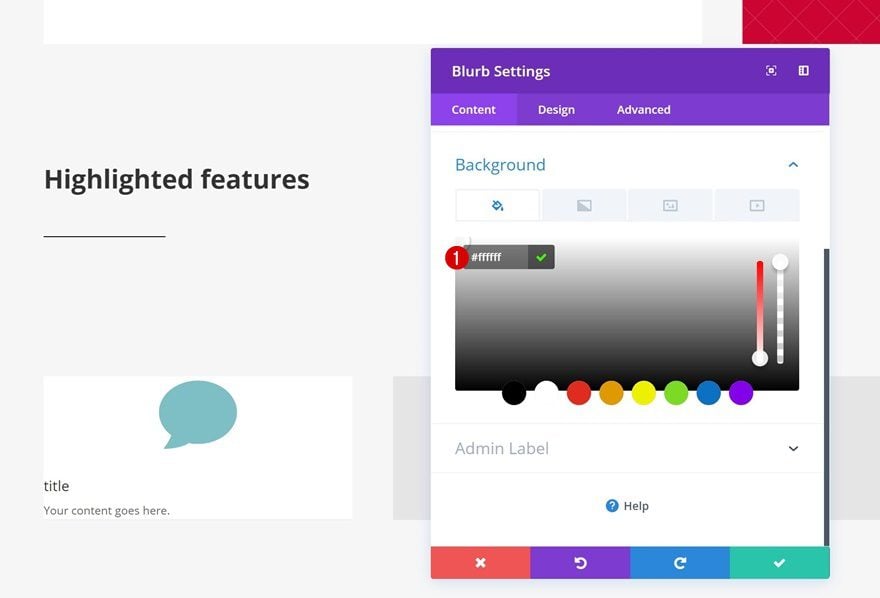
Background Color
Continue by adding a background color to your Blurb Module:
- Background Color: Color #7 (Find in Color Palette)
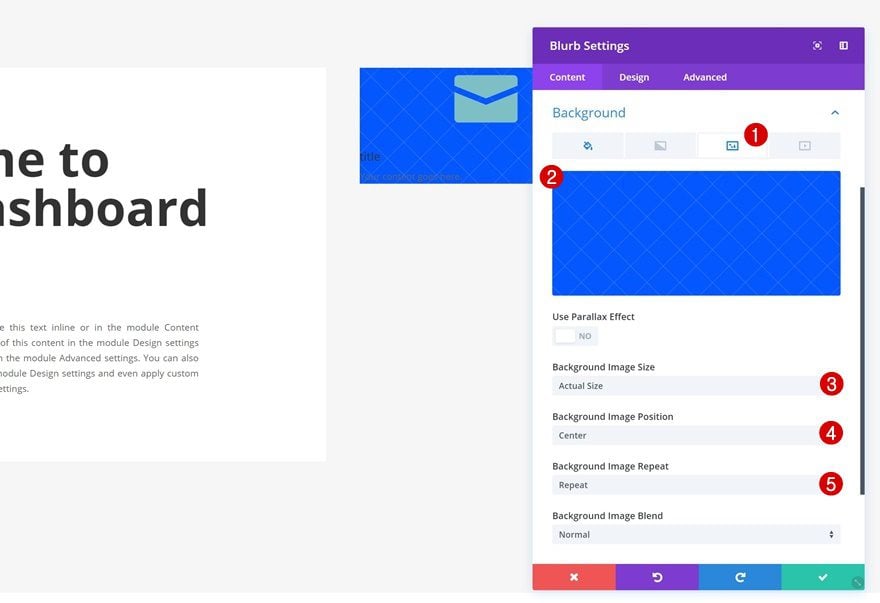
Background Pattern
Save the following small pattern to your computer:
![]()
Upload it as your background image along with the following settings:
- Background Image Size: Actual Size
- Background Image Position: Center
- Background Image Repeat: Repeat
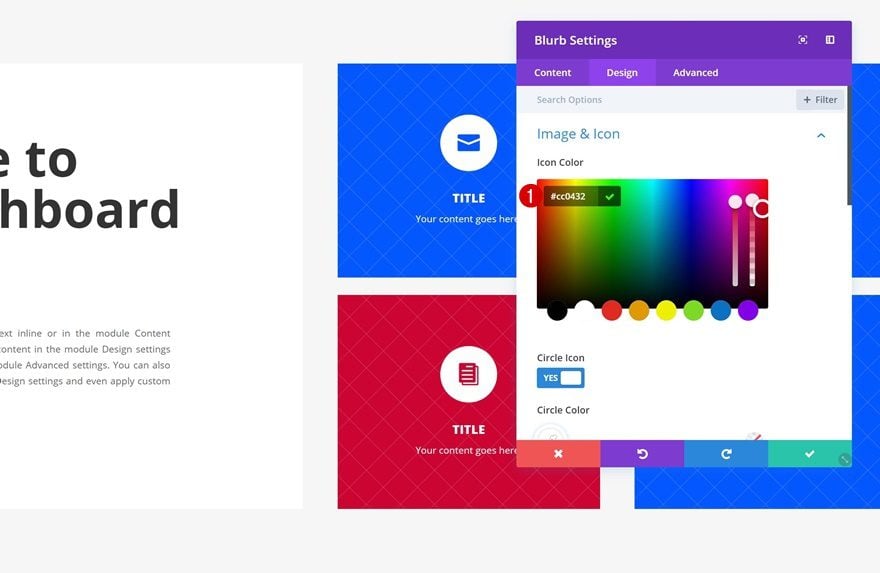
Icon Settings
Move on to the Design tab, open the Image & Icon settings and change the settings accordingly:
- Icon Color: Color #7 (Find in Color Palette)
- Circle Icon: Yes
- Circle Color: #FFFFFF
- Use Icon Font Size: 33px
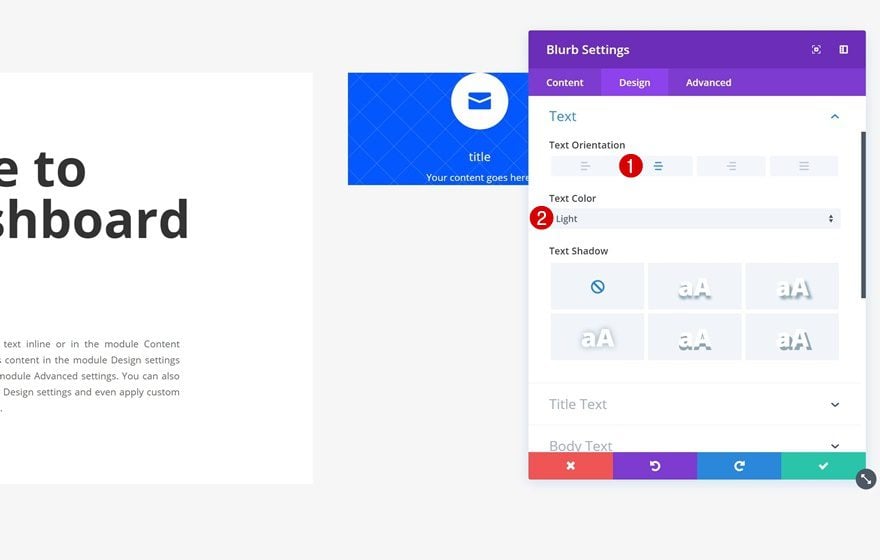
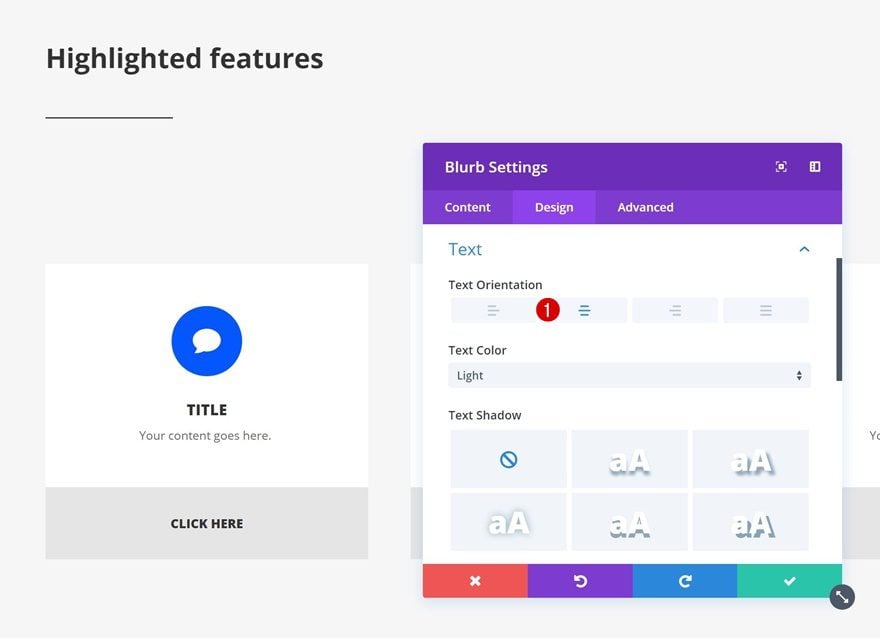
Text Settings
Then, open the text settings and make some changes:
- Text Orientation: Center
- Text Color: Light
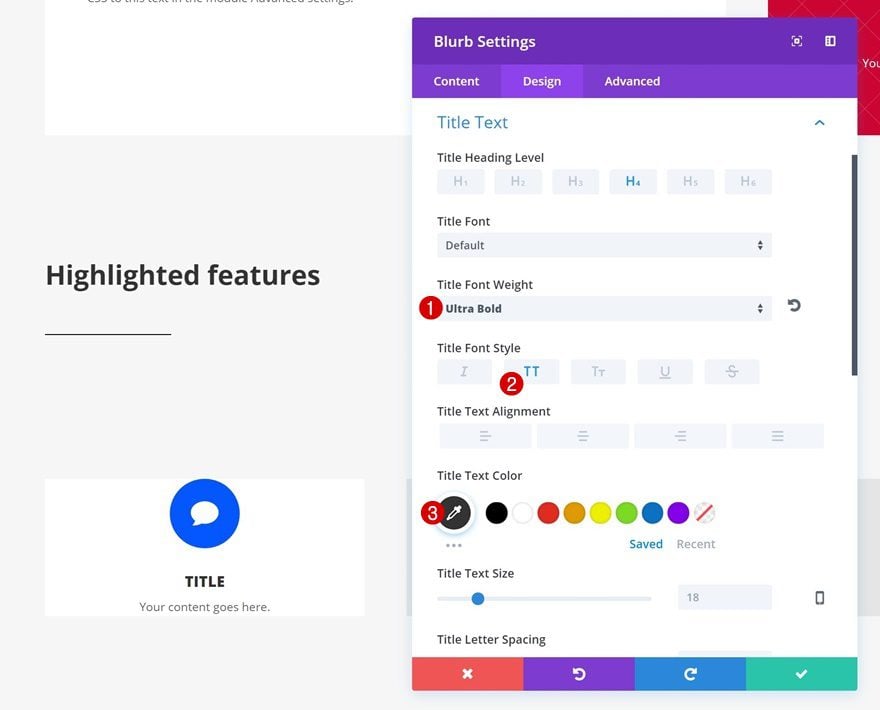
Title Text Settings
The title of our Blurb Module needs some additional changes as well:
- Title Font Weight: Ultra Bold
- Title Font Style: Uppercase

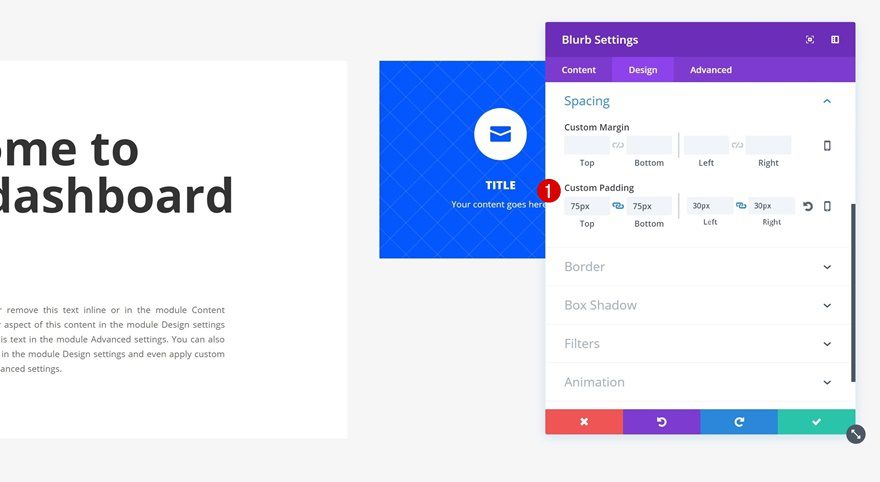
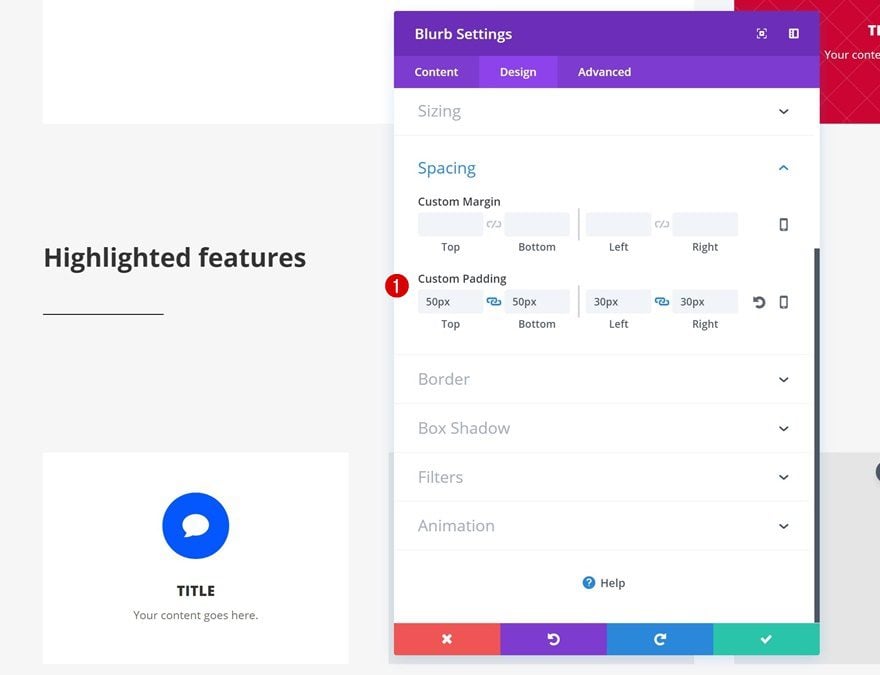
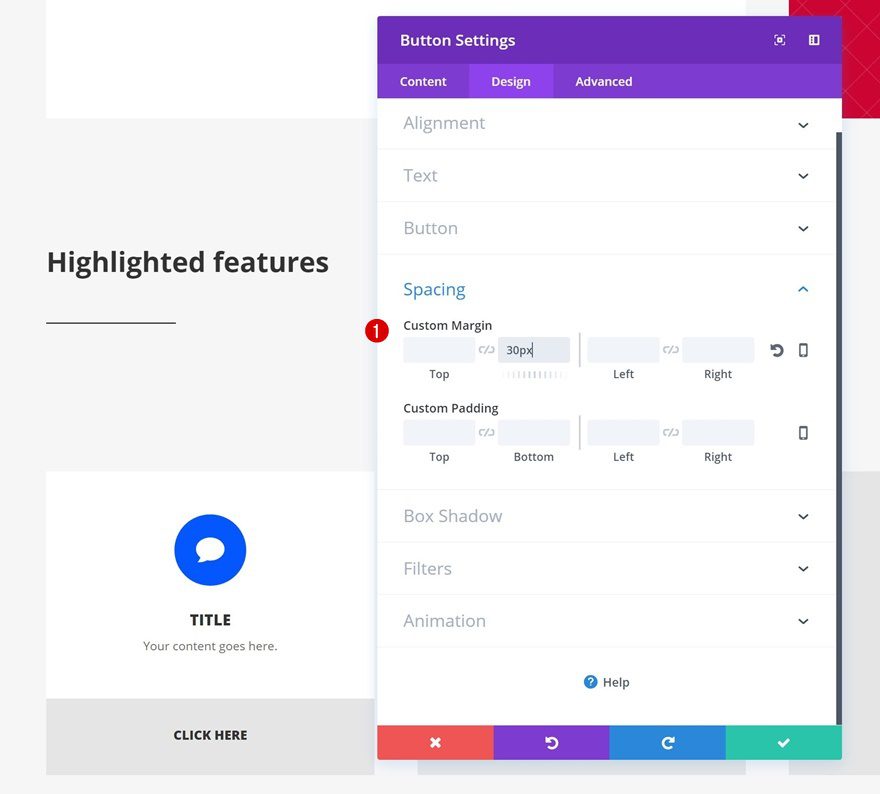
Spacing
Last but not least, add some custom padding to give your Blurb Module the look and feel you want:
- Top Padding: 75px
- Bottom Padding: 75px
- Left Padding: 30px
- Right Padding: 30px
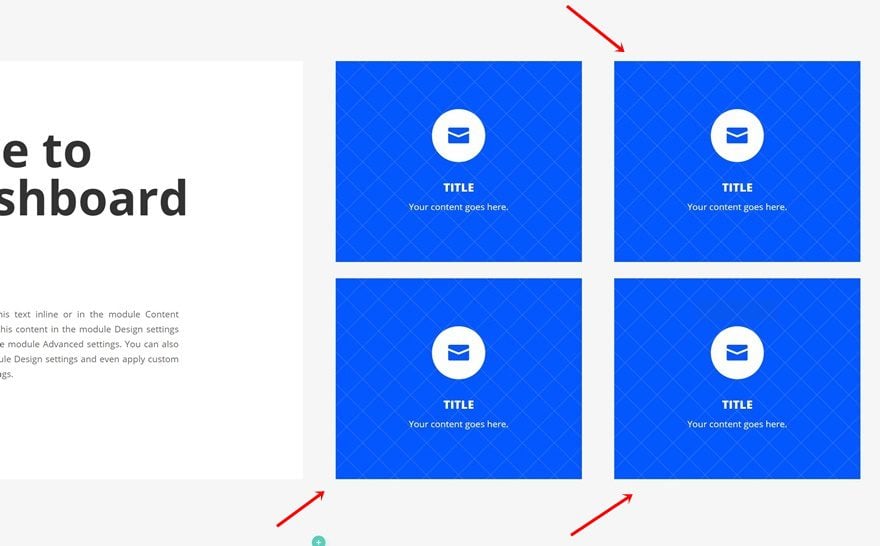
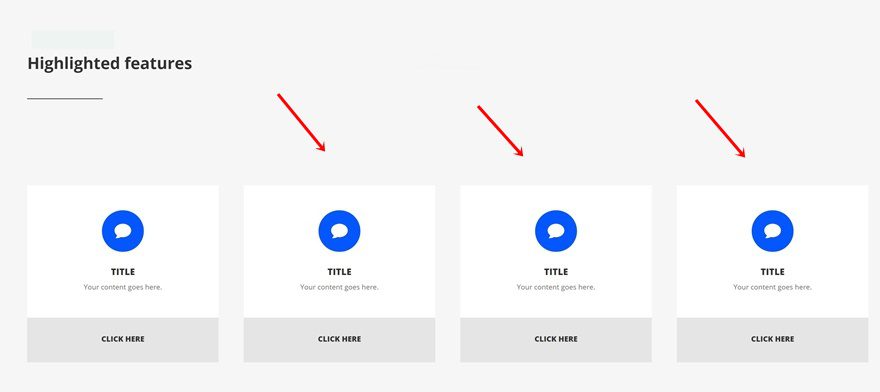
Clone Blurb Module Three Times & Place 2 in Remaining Column
Now that we’re done with the first Blurb Module, go ahead and clone it three times. Leave one of the duplicates in the first column and place the other two in the remaining column of the row.
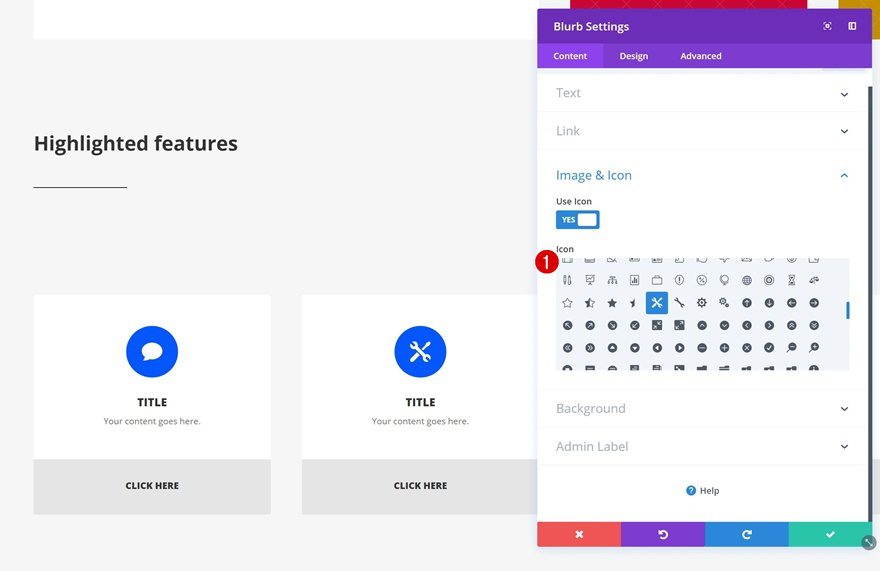
Change New Blurb Modules
Change Icon
For each one of the duplicates, you’ll need to change the icon that is being used.
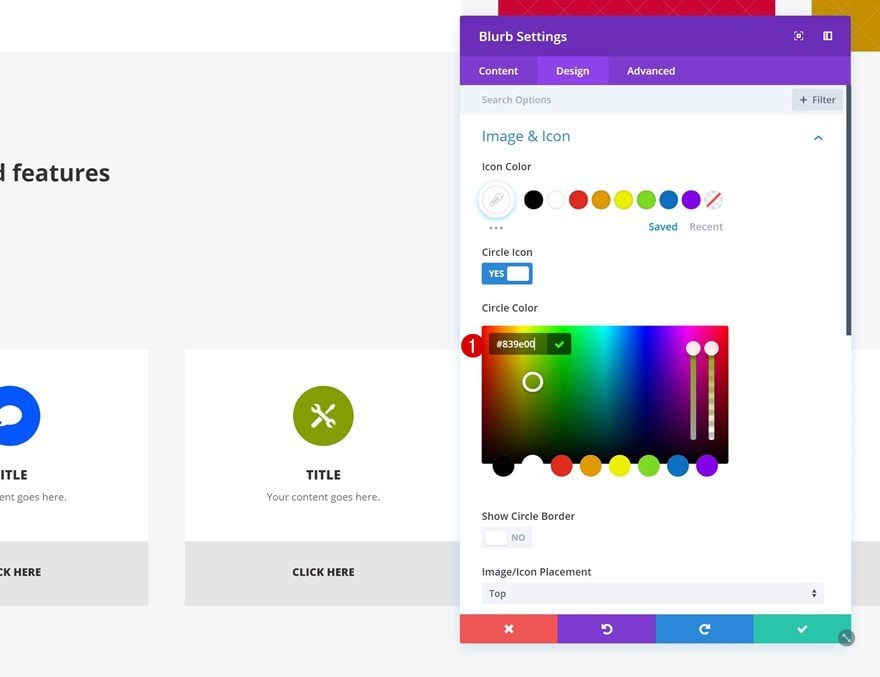
Change Background Color
Likewise, you’ll need to change the background color to a color of choice or one of the colors in the color palette (color #8, #9 or #10).
Change Icon Color
Change the Icon Color into the same color you’re using for the background.
Add Row #2
Column Structure
The second row needs the following column structure:
Sizing
Open the row settings, go to the Sizing settings and increase the width of your row:
- Make This Row Fullwidth: Yes
- Use Custom Gutter Width: Yes
- Gutter Width: 2
Spacing
Open the Spacing settings next and add some custom padding to the top and bottom of your row:
- Top Padding: 50px
- Bottom Padding: 50px
Add Text Module
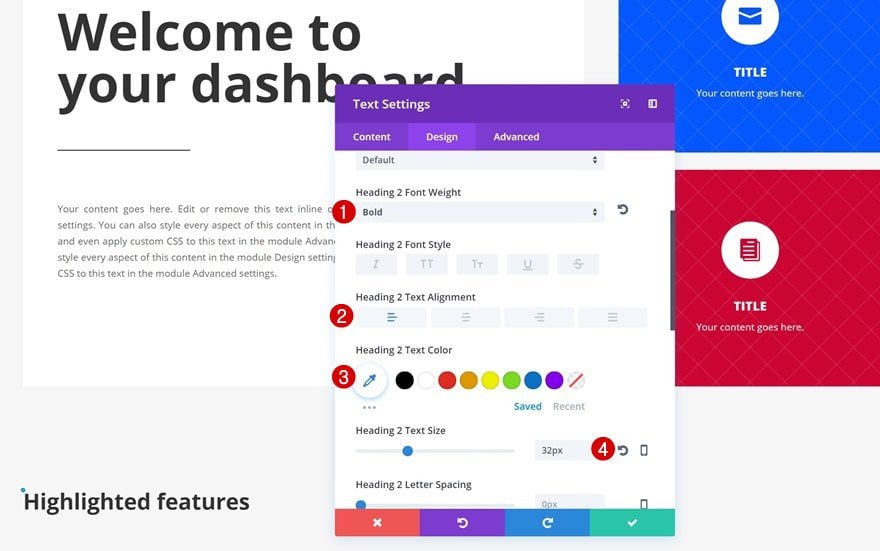
H2 Text Settings
The first module you’ll need in the column of the row is a title Text Module. After adding the H2 content, change the H2 text settings:
- Heading 2 Font Weight: Bold
- Heading 2 Text Alignment: Left
- Heading 2 Text Color: Color #3 (Find in Color Palette)
- Heading Text Size: 32px
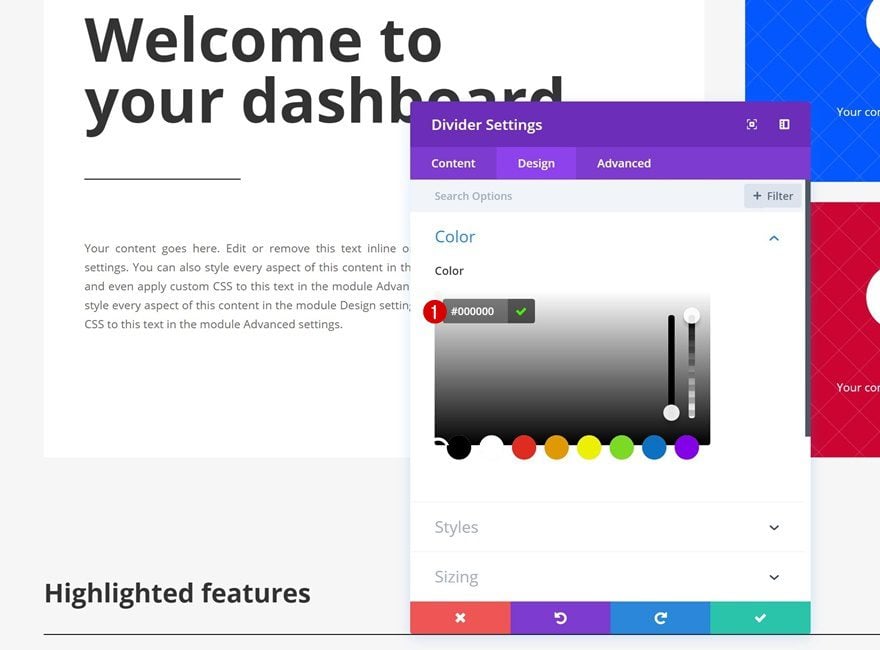
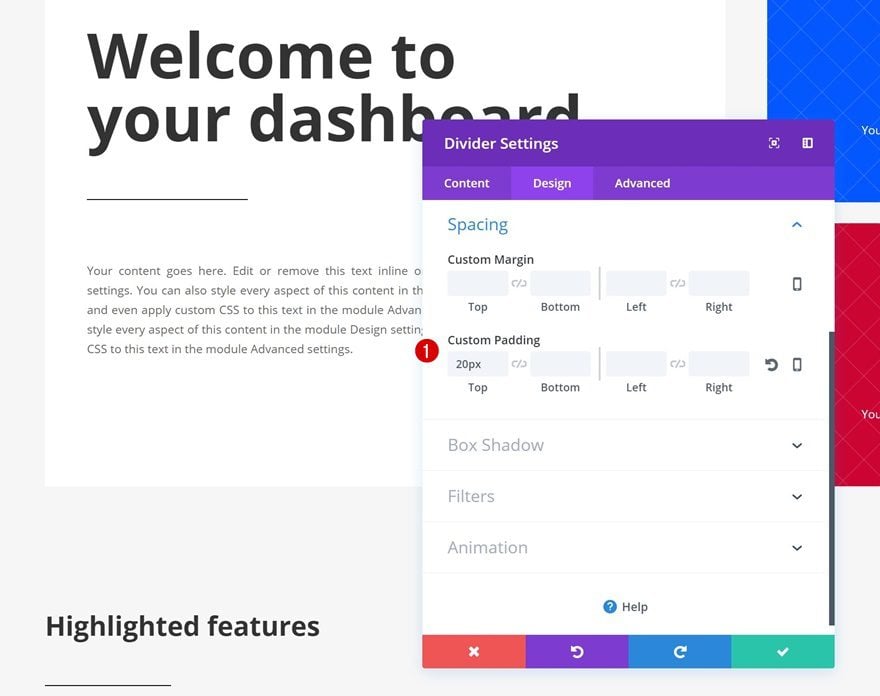
Add Divider Module
Divider Color
Right below the title Text Module, add a Divider Module with the following color:
- Color: Color #4 (Find in Color Palette)
Sizing
Change the width of the divider next:
- Width: 9%
Spacing
Lastly, add some space to the top of your divider:
- Top Padding: 20px
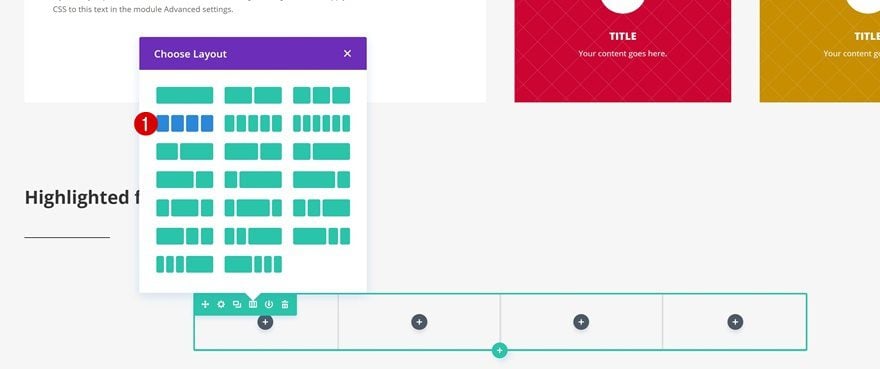
Add Row #3
Column Structure
To share the highlighted features, select the following column structure for your new row:
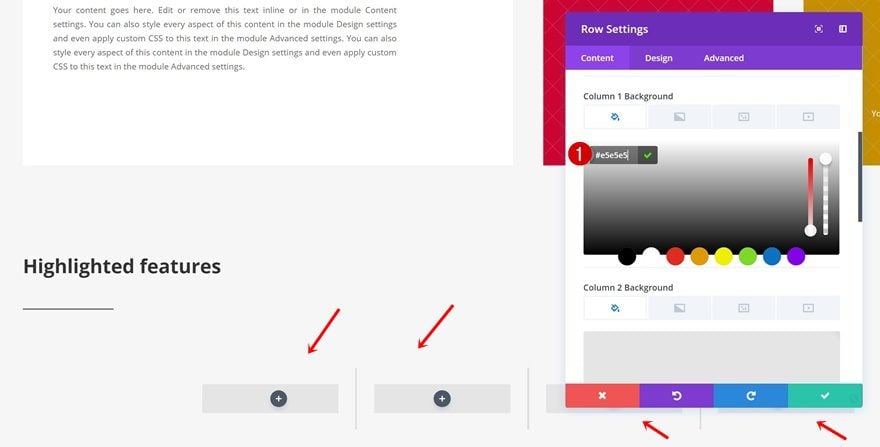
Column Background Color
Open the row settings and add the following background color to each one of your columns:
- Column Background Color: Color #6 (Find in Color Palette)
Sizing
Increase the width of your row next:
- Make This Row Fullwidth: Yes
- Use Custom Gutter Width: Yes
- Gutter Width: 2
- Equalize Column Heights: Yes
Spacing
And add some padding as well:
- Top Padding: 100px
- Bottom Padding: 100px
Add Blurb Module to Column 1
Icon
We can now start adding the different modules. We’ll start off with a Blurb Module in the first column. After adding the content, select an icon of your choice.
Background Color
Give your Blurb Module a background color next:
- Background Color: Color #7 (Find in Color Palette)
Icon Settings
Move on to the Design tab and change the icon settings:
- Icon Color: #ffffff
- Circle Icon: Yes
- Circle Color: Color #7 (Find in Color Palette)
- Use Icon Font Size: Yes
- Icon Font Size: 33px
Text Settings
Change the Text Orientation of your Blurb Module as well:
- Text Orientation: Center
Title Text Settings
Go to the Title Text Settings next and make some changes:
- Title Font Weight: Ultra Bold
- Title Font Style: Uppercase
- Title Text Color: Color #3 (Find in Color Palette)
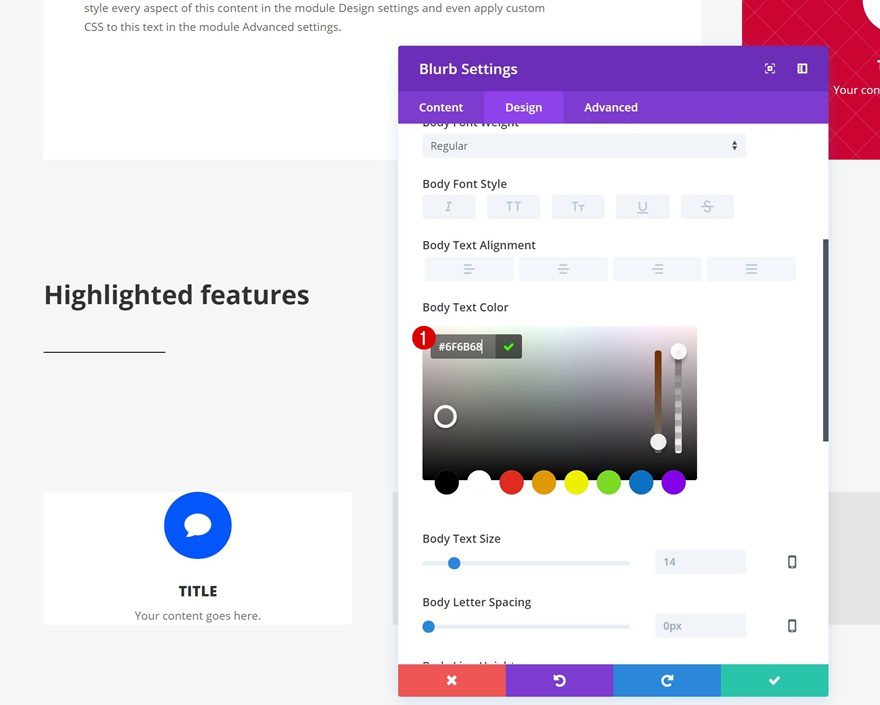
Body Text Settings
The body text of the Blurb Module needs another color as well:
- Body Text Color: Color #5 (Find in Color Palette)
Spacing
Lastly, add some custom Spacing settings to your Blurb Module:
- Top Padding: 50px
- Bottom Padding: 50px
- Left Padding: 30px
- Right Padding: 30px
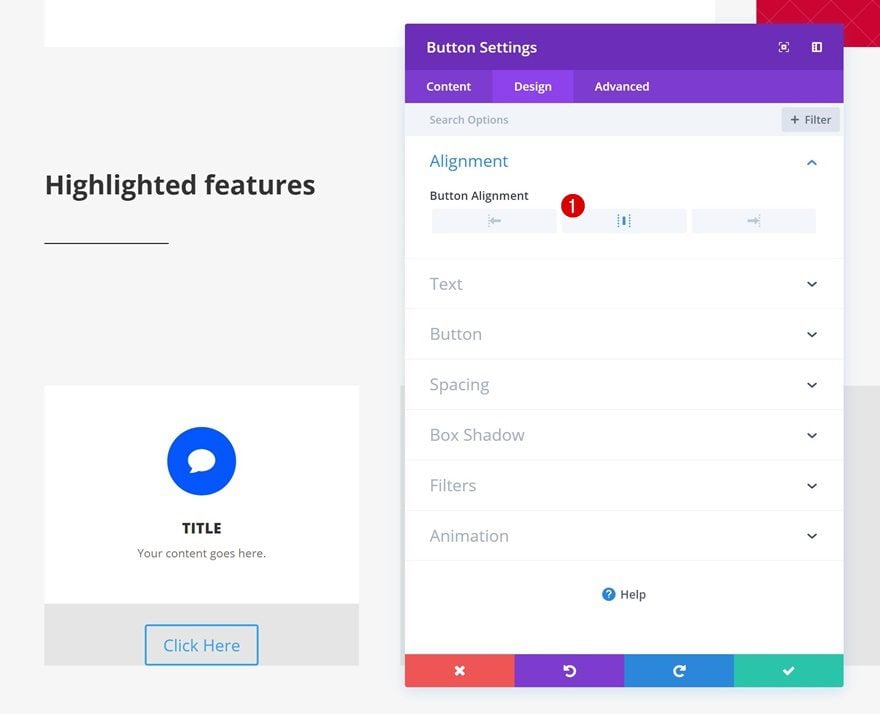
Button Alignment
Right below the Blurb Module, go ahead and add a Button Module. Open its settings and change the Button Alignment:
- Button Alignment: Center
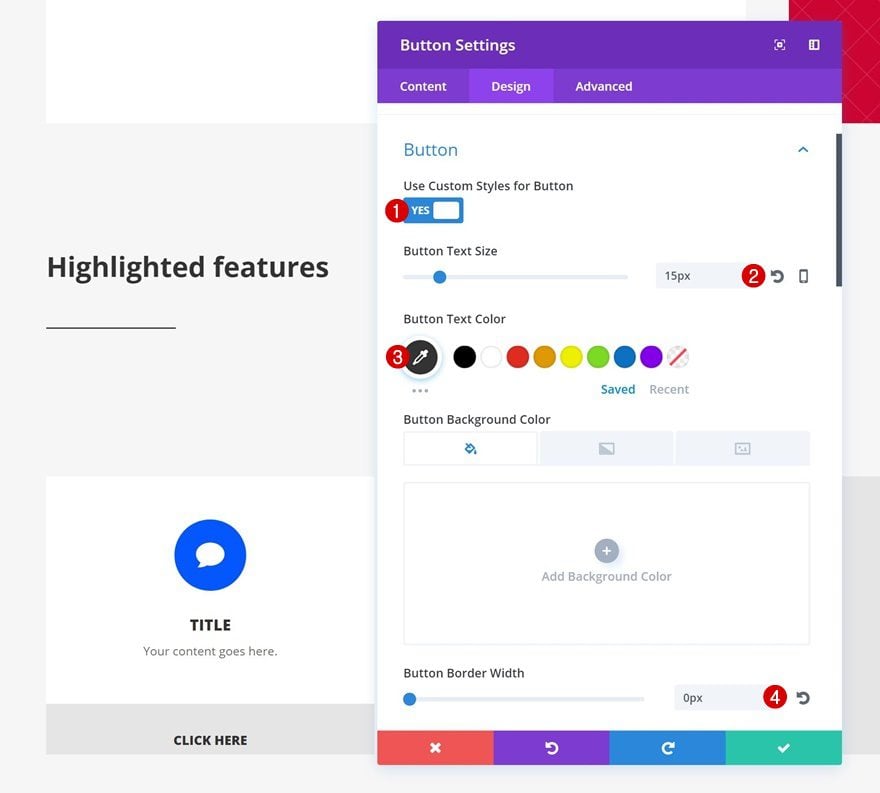
Button Settings
Change the appearance of your button next:
- Use Custom Styles for Button: Yes
- Button Text Size: 15px
- Button Text Color: Color #3
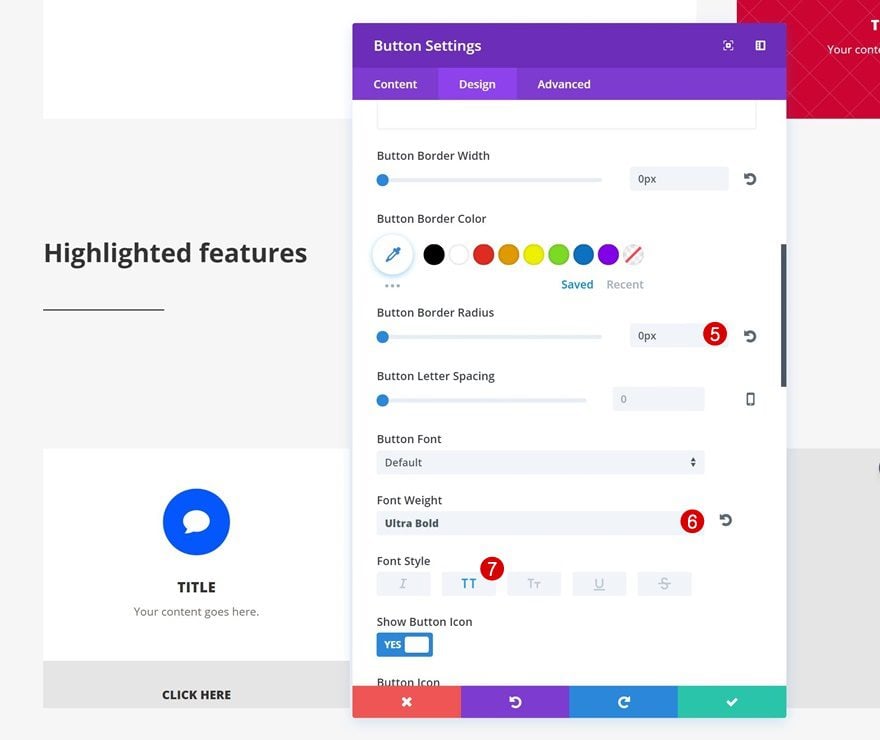
- Button Border Width: 0px
- Button Border Radius: 0px
- Font Weight: Ultra Bold
- Font Style: Uppercase
Spacing
Add some margin at the bottom of your Button Module as well:
- Bottom Margin: 30px
Clone both modules in the first column three times and place them in the remaining columns of your row.
Change New Blurb Modules
Change Icon
Change the icon of each duplicate Blurb Module into a new icon of choice.
Change Icon Color
Change the Icon Color as well. Feel free to use number #8, #9 and #10 of the color palette.
Clone Row
Locate & Clone Row
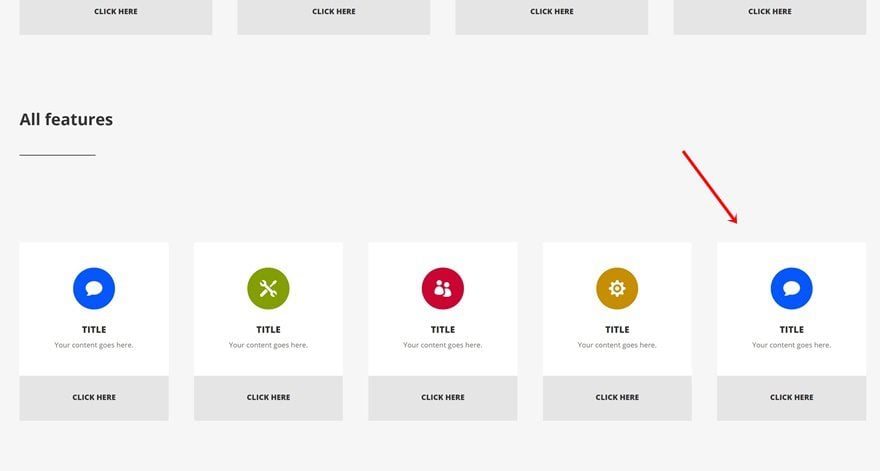
To display all features, instead of just the highlighted ones, we’re going to clone the row containing the title.
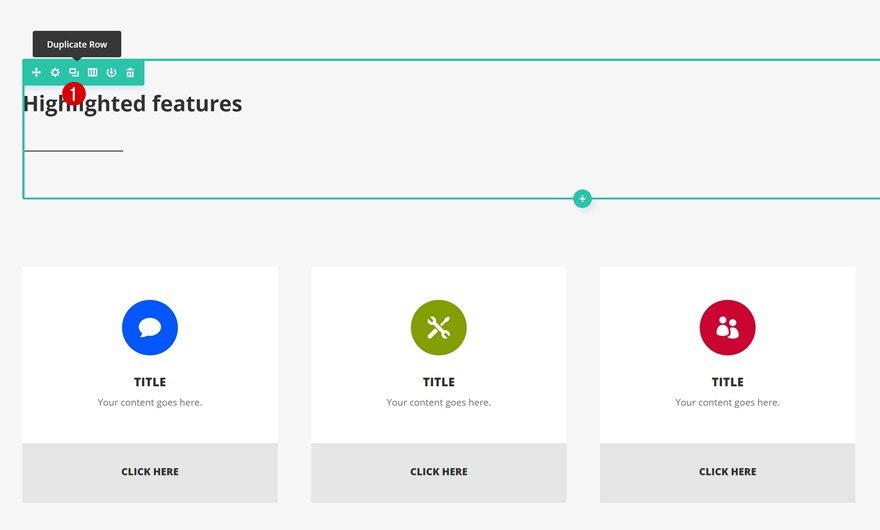
Place Row
Then, we’ll place it right below the last row we’ve created.
Clone Row
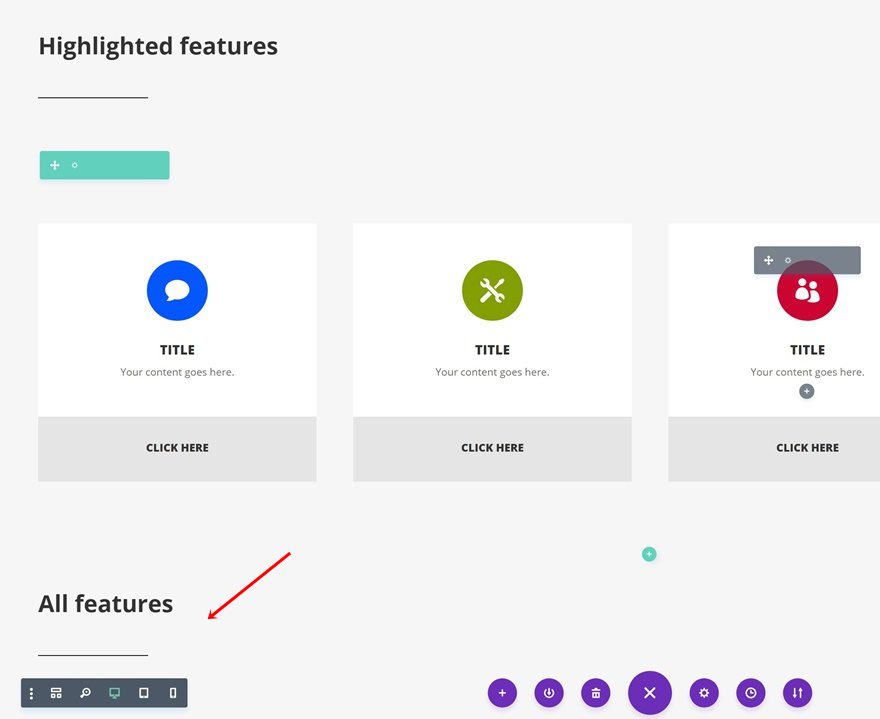
Locate & Clone Row
Do the same thing with the row containing the highlighted Blurb Modules.
Place Row
And place it below your new title.
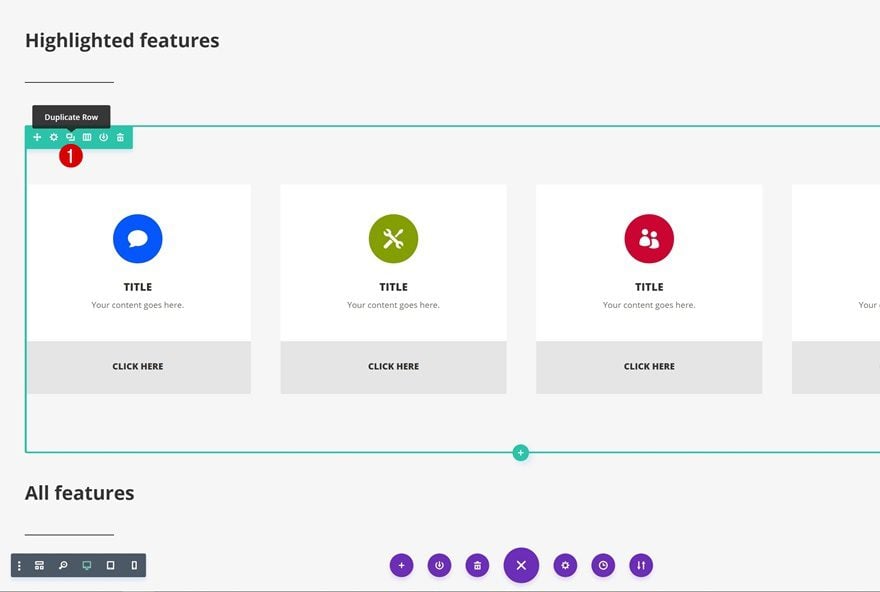
Change Column Structure
To make more features show up in this row, we’re going to change the column structure into 5 columns instead of 4:
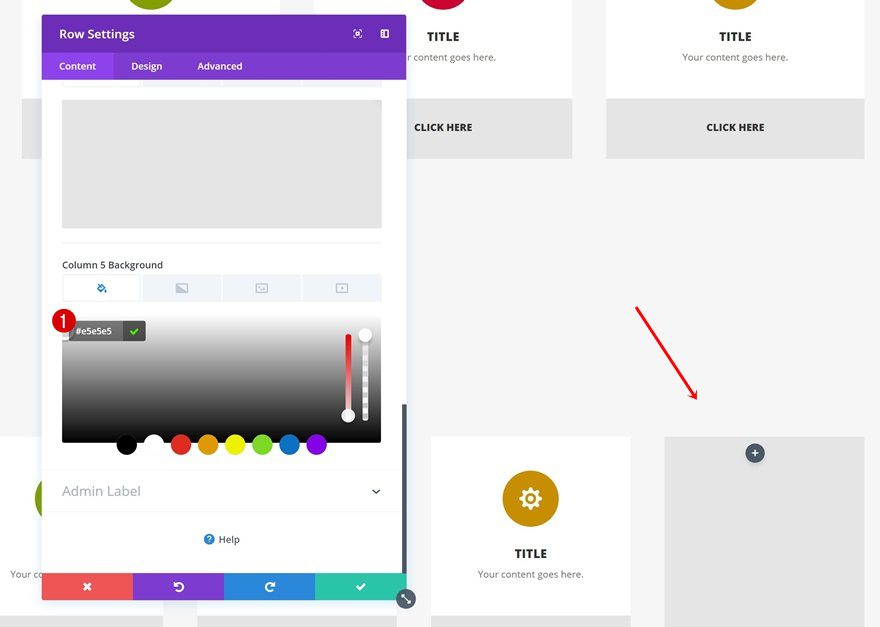
Add Column 5 Column Background Color
Add the column background color to your new column as well:
- Column Background Color: Color #6 (Find in Color Palette)
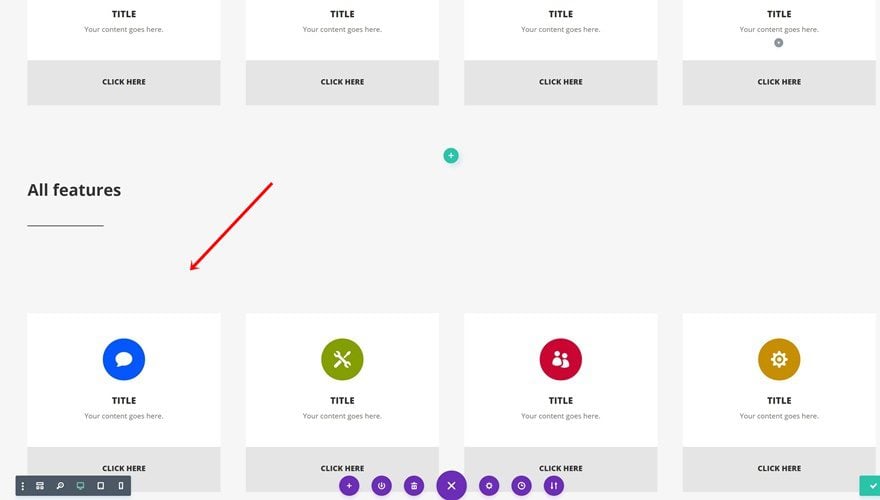
Clone Blurb and Button Modules & Place in Column 5
Clone one of the Blurb Modules in your row and fill up the space by placing the duplicate in column 5. Change the icon and icon color as well.
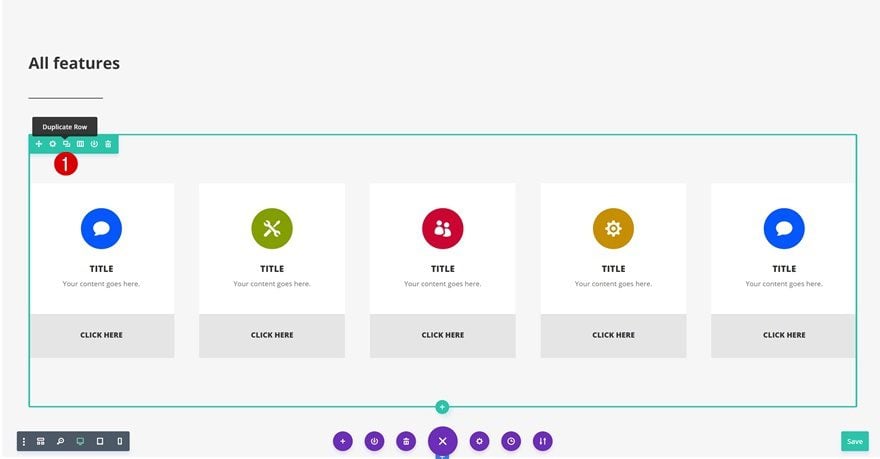
Clone 5-Column Row
Last but not least, clone this 5-column row to create two rows with all the features you want to offer and you’re done!
Preview
Now that we’ve gone through all the steps, let’s take a final look at the end result on different screen sizes.
Final Thoughts
Dashboards look great and allow you to ease user navigation on your website. In this post, we’ve shared a stunning dashboard design with two color palettes which you can create from scratch using Divi’s built-in options only. If you have any questions or suggestions, make sure you leave a comment in the comment section below!


I just love the new feature of Divi. The design of it also so nice. The customization option has become so easy.
I am relatively new to DIVI. I especially appreciate how you explained in detail the steps you were taking. I am getting better at DIVI, but most of what I learned has been by experimenting. Most of the DIVI tutorials and videos were not helpful to me: It seems like they were written for computer geeks. This was the first tutorial which I read from DIVI which was easily understandable. Thank you 🙂
It works on normal screen, but why I have different result on mobile view? Its only show 1 blurb on 1 row, while yours shown 2 blurb on 1 row
If there is no layout download for this tutorial you really need to remove the ‘Join To Download’ button in the menu. It’s a reasonable assumption – since it is a non-specific statement – that the download refers to the subject of the tutorial. in the event there is nothing to download – removing this link will remove the confusion. Alternatively – make it a more specific button ‘join to download products’ etc.
And why am I being asked to enter my details on the comments section when I am already logged in to your site.
Any chance we can download this layout?
This is very beautiful. I will definitely going to design this one by following the instructions.
I like the design, but how exactly does this work? Can you please show us how to hook this dashboard up so that a client can use it to manipulate the modules on their DIVI website? THANK YOU! : )
Hi, I have question here.
Just wondering what was the reason if we use this? To me it seem rather be not suitable to have one. a website.
Please enlighten me.
Thank in advance.
Regards.
I AGREE! — I like the design, but how exactly does this work? Can you please show us how to hook this dashboard up so that a client can use it to manipulate the modules on their DIVI website? THANK YOU! : )
Nice design! I´m gonna try this on my next project!
Hi, its great
is it possible to download and impor ?
Best wishes
Angel
Very nice design! Some of your best. I like the idea of a dashboard design. I might want to to incorporate featured images, too, for a blog feed.
Do you have a site up like this where we can look at a live page?
Donjete thanks for sharing this such a great informative new Divi Features. I just love Divi builder. I’ll try this new one asap. I hope this is going to be the next level of Divi builder.
Donjete thanks for sharing this such a great informative new Divi Features. I just love Divi builder. I’ll try this new one asap. I hope this is going to be the next level of Divi builder
Excellent design and function Donjete. It would be very helpful if Elegant Themes provided this layout as a template which could be used as a starting point to design from.
Wau great.. is it possible to download the settings/pack so I can import it on my site?
BR Thomas
Wau.. great
is it possible to download all the settings/pack, so I can import it on my side ?
BT
Thomas
This is an awesome desing. I have a question, How can I do to only people registred in my site can see this dashboard?
I have a Client Portal, but I can’t customize like this on your post so I want to use this awesome desing and show information per every client with diferent informatio.
Wow, this is great! I’m going to give it a try… thanks!
Me Too! I think I will redesign the inside of the affiliate dashboard like this.