
Do you want to create custom Divi modules without touching a line of code? With Divi 5’s new Module Groups, you can now combine multiple elements into a single, reusable layout — all from inside the Visual Builder. No JavaScript. No PHP. Just drag, drop, and design.
In this quick guide, we will show you how to create your own modules using Divi’s new Groups. You’ll see specifically how to build from scratch a Blurb, Pricing Table, Testimonial, or any other type of Module you can imagine.
Note: Divi 5 is ready to be used on new websites, but we don’t recommend converting existing sites to Divi 5 just yet. You’ll see something from us when we’re confident in the update process.
What Are Divi’s New Module Groups?
Groups, or Module Groups, are a new container element that pairs multiple modules and/or rows into a single unit within a column. This has the advantage of grouping multiple smaller elements and allowing you to move the whole group wherever you need it on the page.
Module Groups can be moved throughout your page without trouble and will become particularly helpful when Flexbox and the Loop Builder feature are released. Once the Loop Builder is released, you’ll be able to use Groups to create custom blog layouts, footer menus, image galleries, and more. So, it’s useful now, but in a few months, it’ll be even more impressive to use.
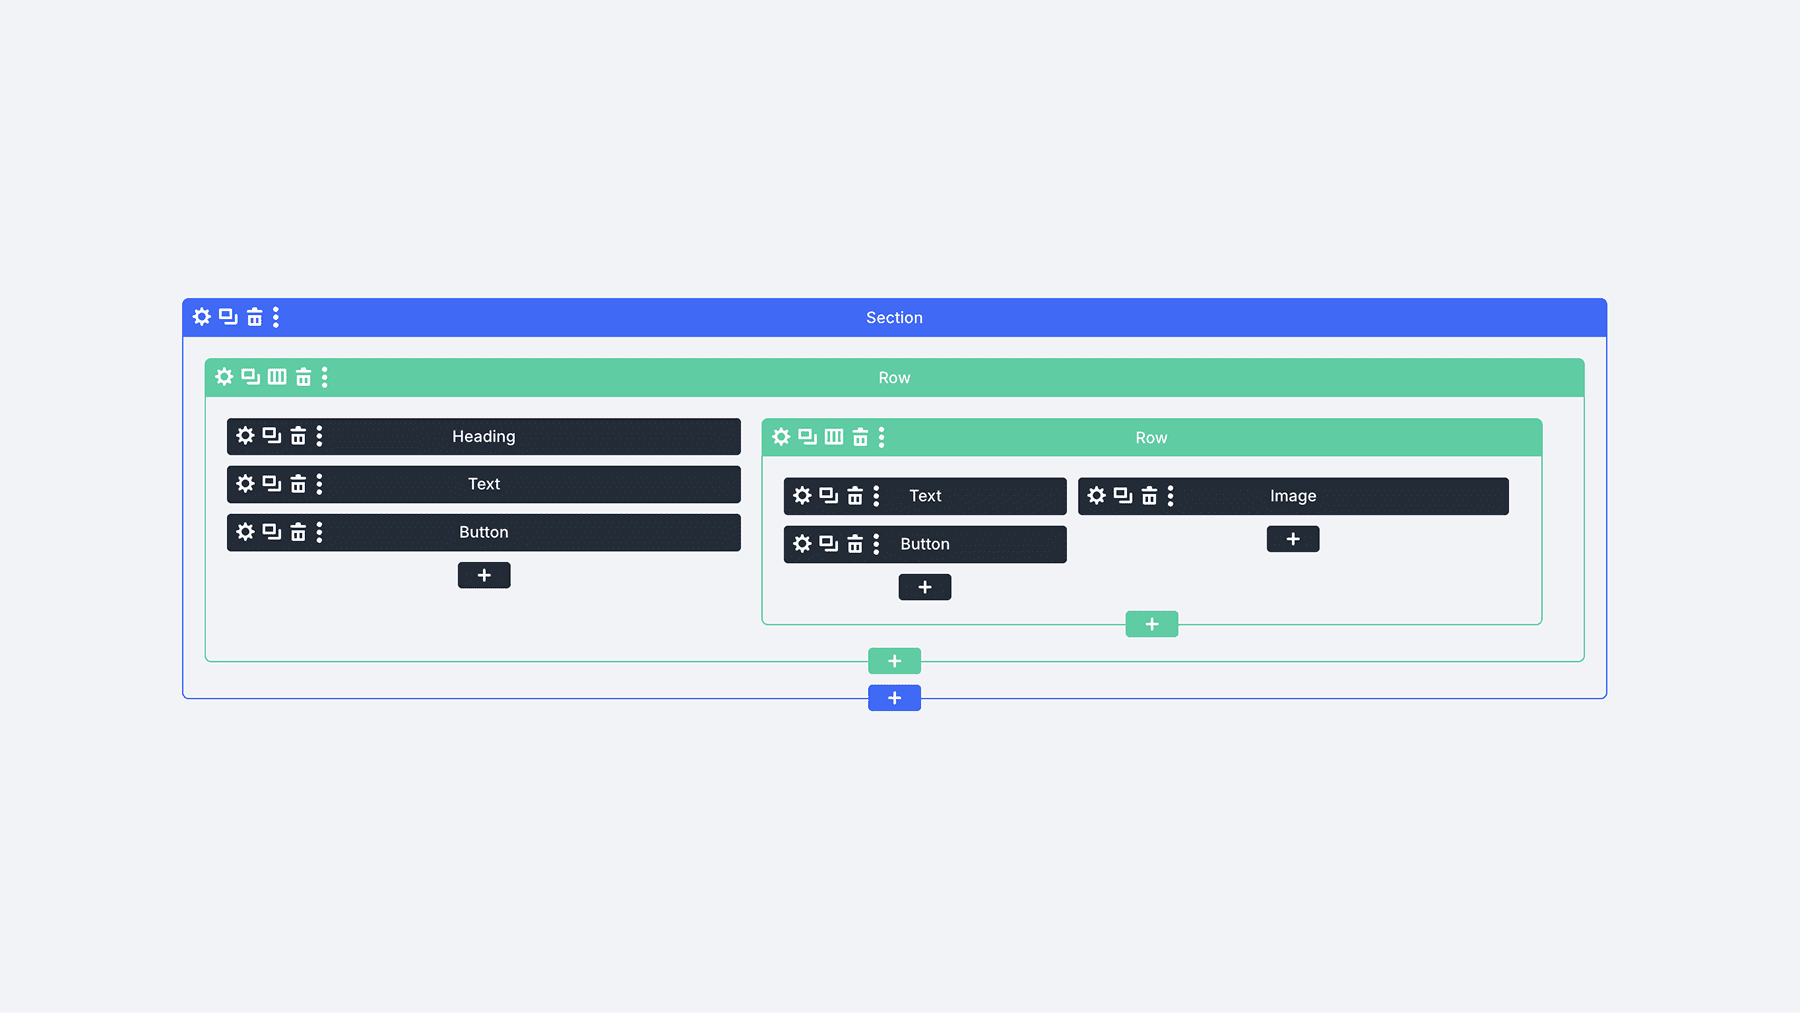
Nested Rows were another highly requested Divi feature we added to Divi 5. They let you put Rows inside of Rows to your heart’s content. Although the name “Module Groups” might make it seem that you can only group modules, the opposite is true. As a matter of fact, you can use nested rows inside groups, which opens the opportunity to build infinitely nested layout structures and have them be part of a reusable group.
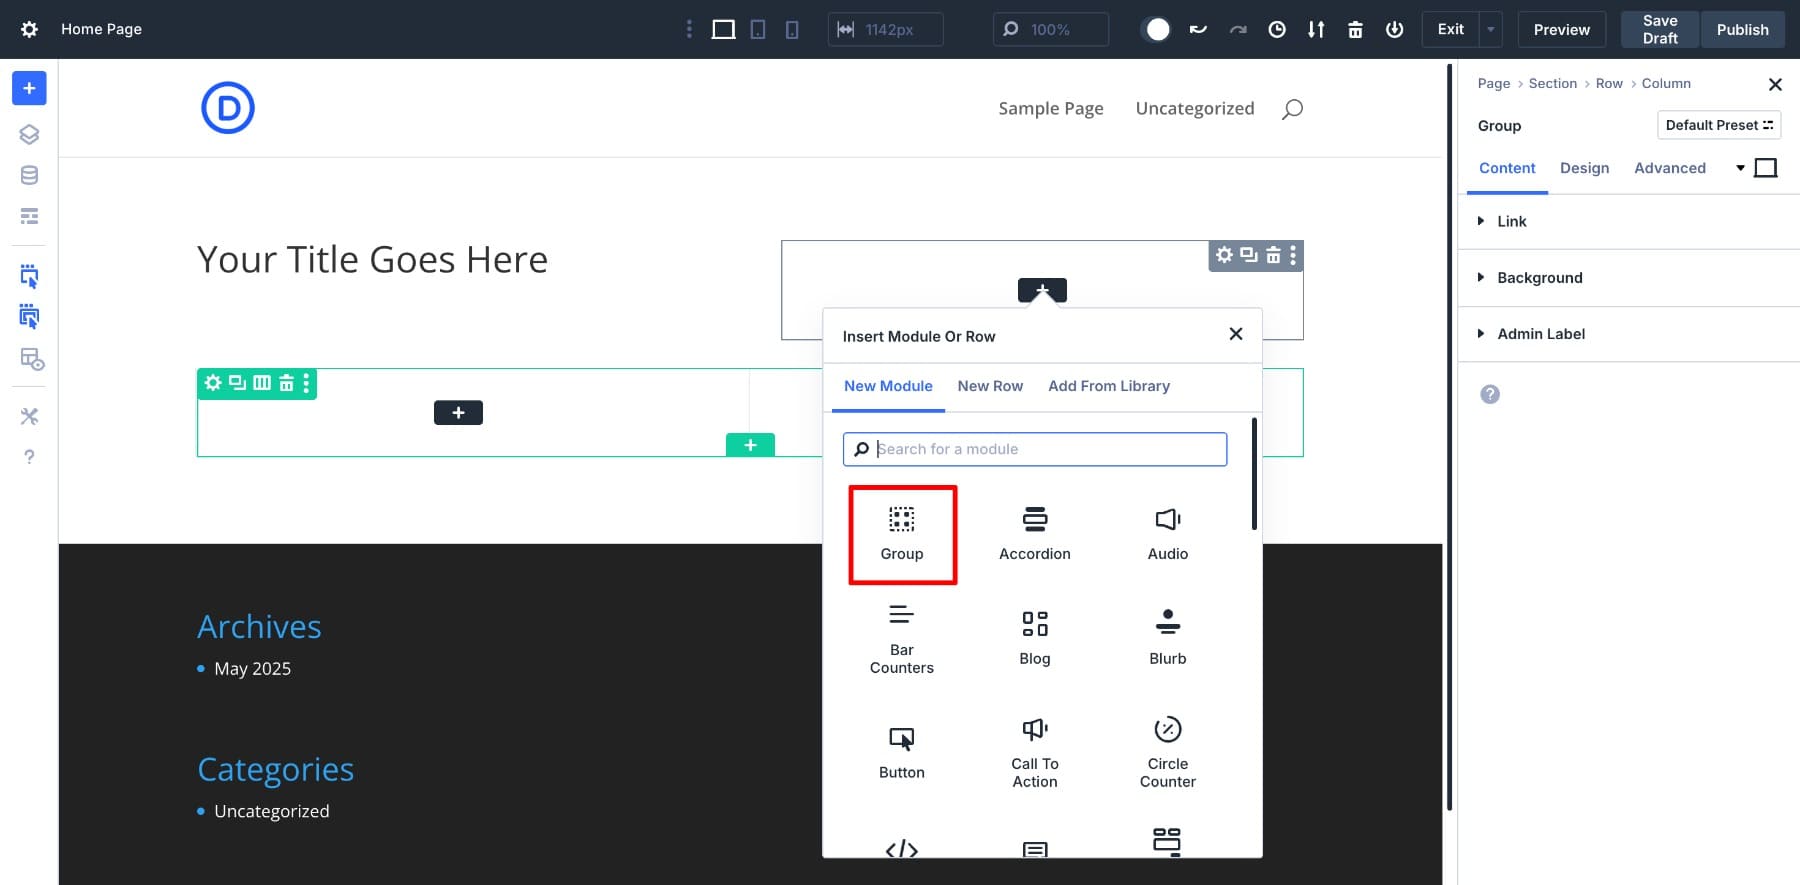
How To Create Your Own Divi Modules
Module Groups allow you to create your own Modules inside the Editor. You can group modules and nested rows together to create complex arrangements that resemble some of our larger modules.
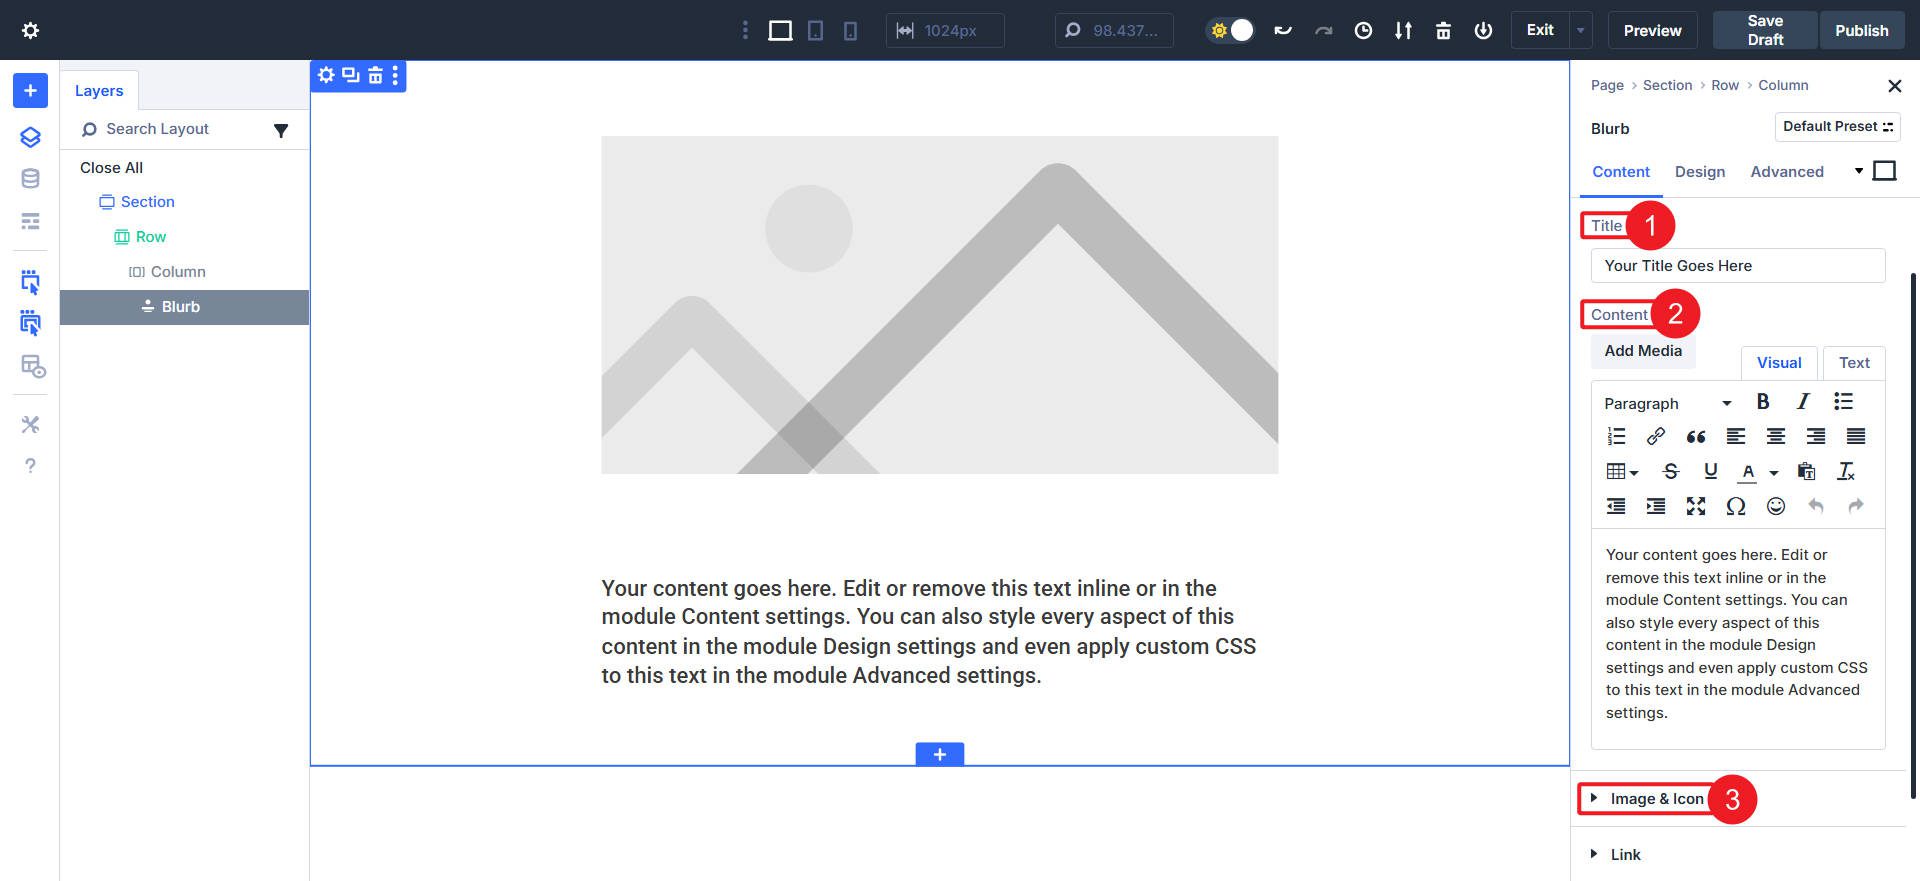
1. Create Your Own Blurb Module
Our Built-In Blurb Module
The Blurb Module is a staple in many Divi designs. It’s a go-to Module, but when you break it down, it has just a few things that make it click. Those are:
An image/icon, Title/Heading, and Body content. We can create a Module Group and place these Modules inside it: an image or icon, a heading, and a text module. Together, those three Modules can reproduce the same content usable in the Blurb Module.
Anatomy of a Blurb Module
Creating Your Own Blurb Module Group
Here is an example of a Blurb Module with an icon on the left side and a visually identical replication of the Blurb Module using a:
Group, Inner Row, Column (1) with an Icon Module, and Column (2) with a Heading and Text Module.
X-Ray is turned on to see the skeleton of each to see their similarities, even though they are constructed differently.
The only thing special with this arrangement is that the first column is set to an 18% width, and the second occupies an 82% width (column sizing options are new with the Nested Rows feature update).
Building your modules like this has the added benefit of giving you more design styling options for each individual element. The Blurb Module makes the image/icon placement easier, but has its trade-offs. Use the approach that gets you the closest to your desired design.
2. Create Your Own Pricing Tables Module
Our Built-In Pricing Table Module
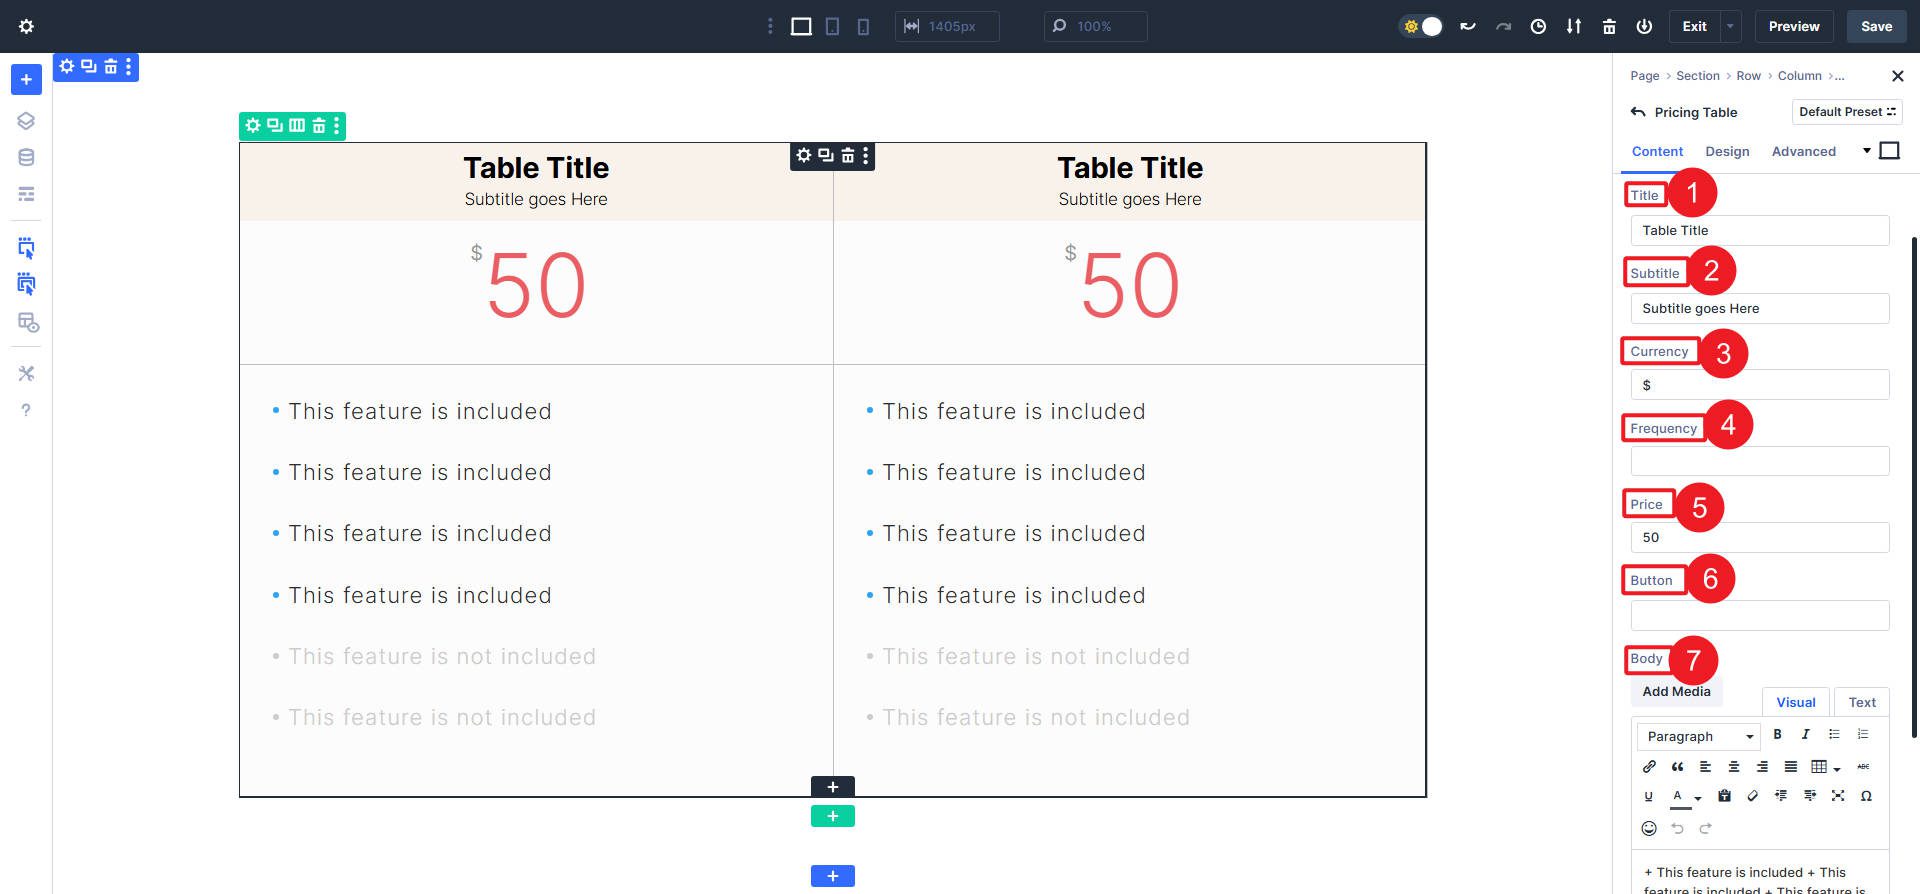
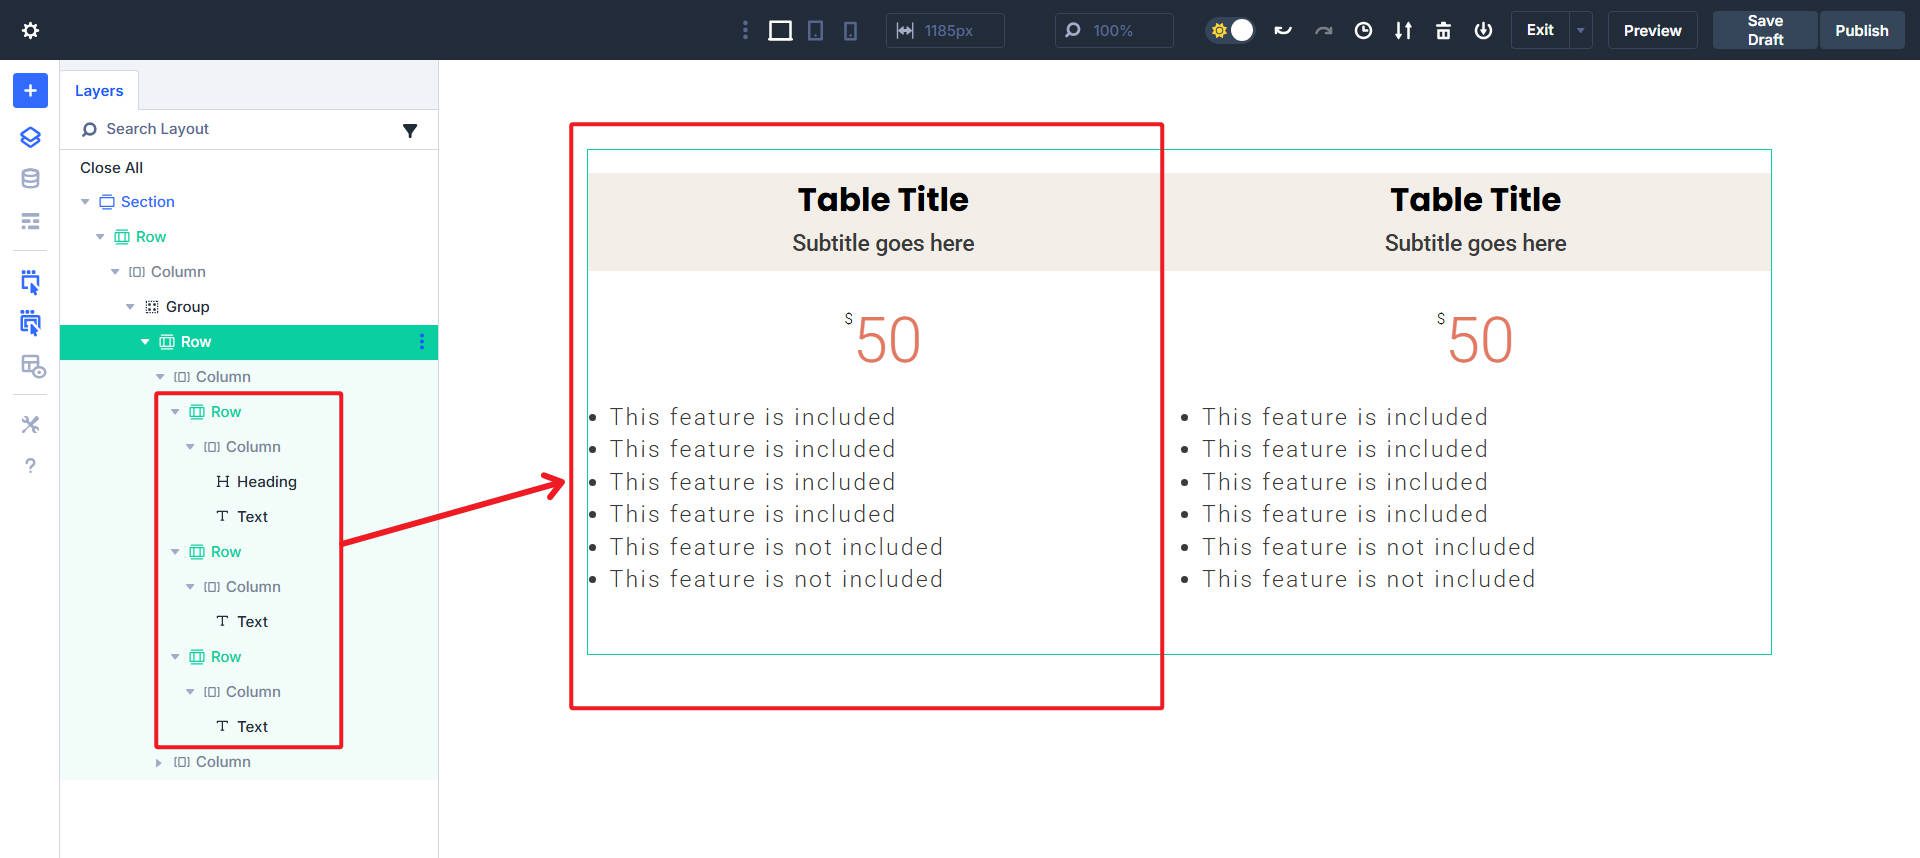
Some Divi Modules have a lot more going on. That’s the case with the Pricing Table Module. There are several fields per pricing table as you can see below.
Anatomy of a Pricing Table Module
Creating Your Own Pricing Table Module Group
If we recreate the Pricing Table Module using Module Groups and individual modules, we’ll get this result.
Notice the seven separate text/option fields per table. Visually, each table has three main parts (heading, price, and details). There are a couple of ways of doing this inside a Group, but below, we used three Nested Rows for each. From there, we used Heading and Text Modules inside each section to recreate the pricing table.
The nice thing about using the Pricing Table Module is that it handles most of the layout, and you get a head start. But sometimes that means it is harder to work with when you want specific things done with it. Doing extra work to create this pricing table layout with simpler Modules gives us more design control and freedom.
3. Create Your Own Testimonial Module
Our Built-In Testimonial Module
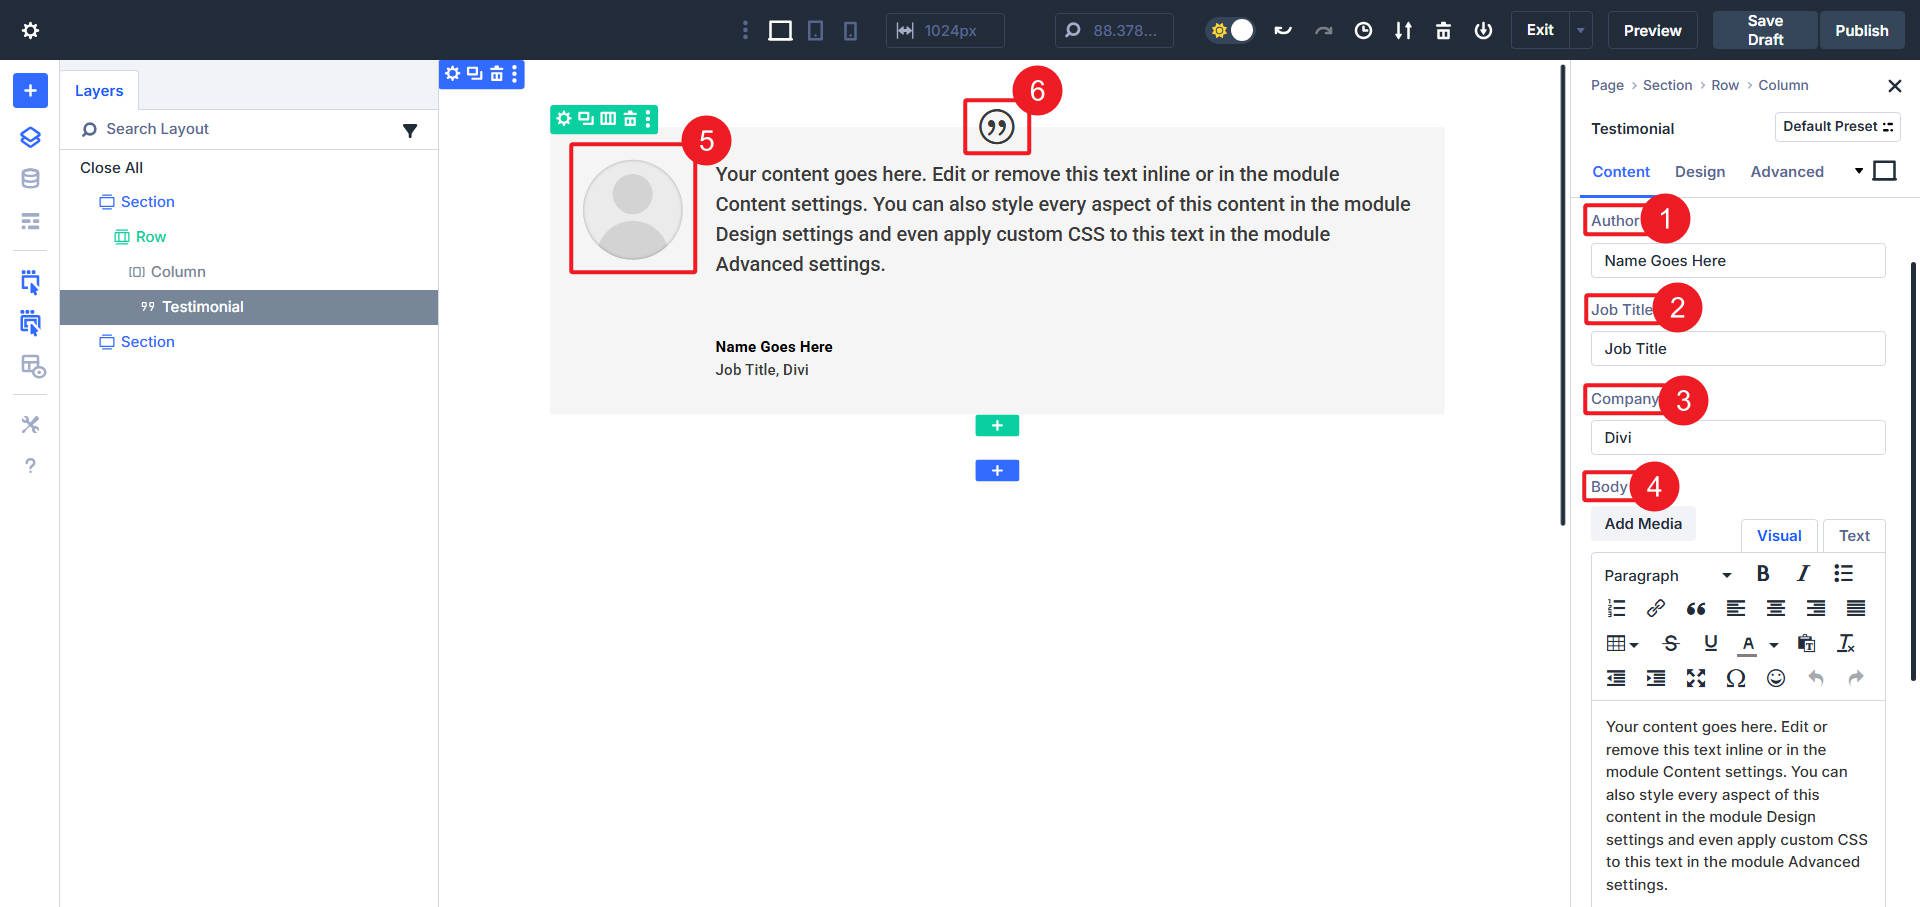
Divi’s Testimonial Modules is another one that has a lot going on. It includes up to four different text elements and a pair of image/icon options.
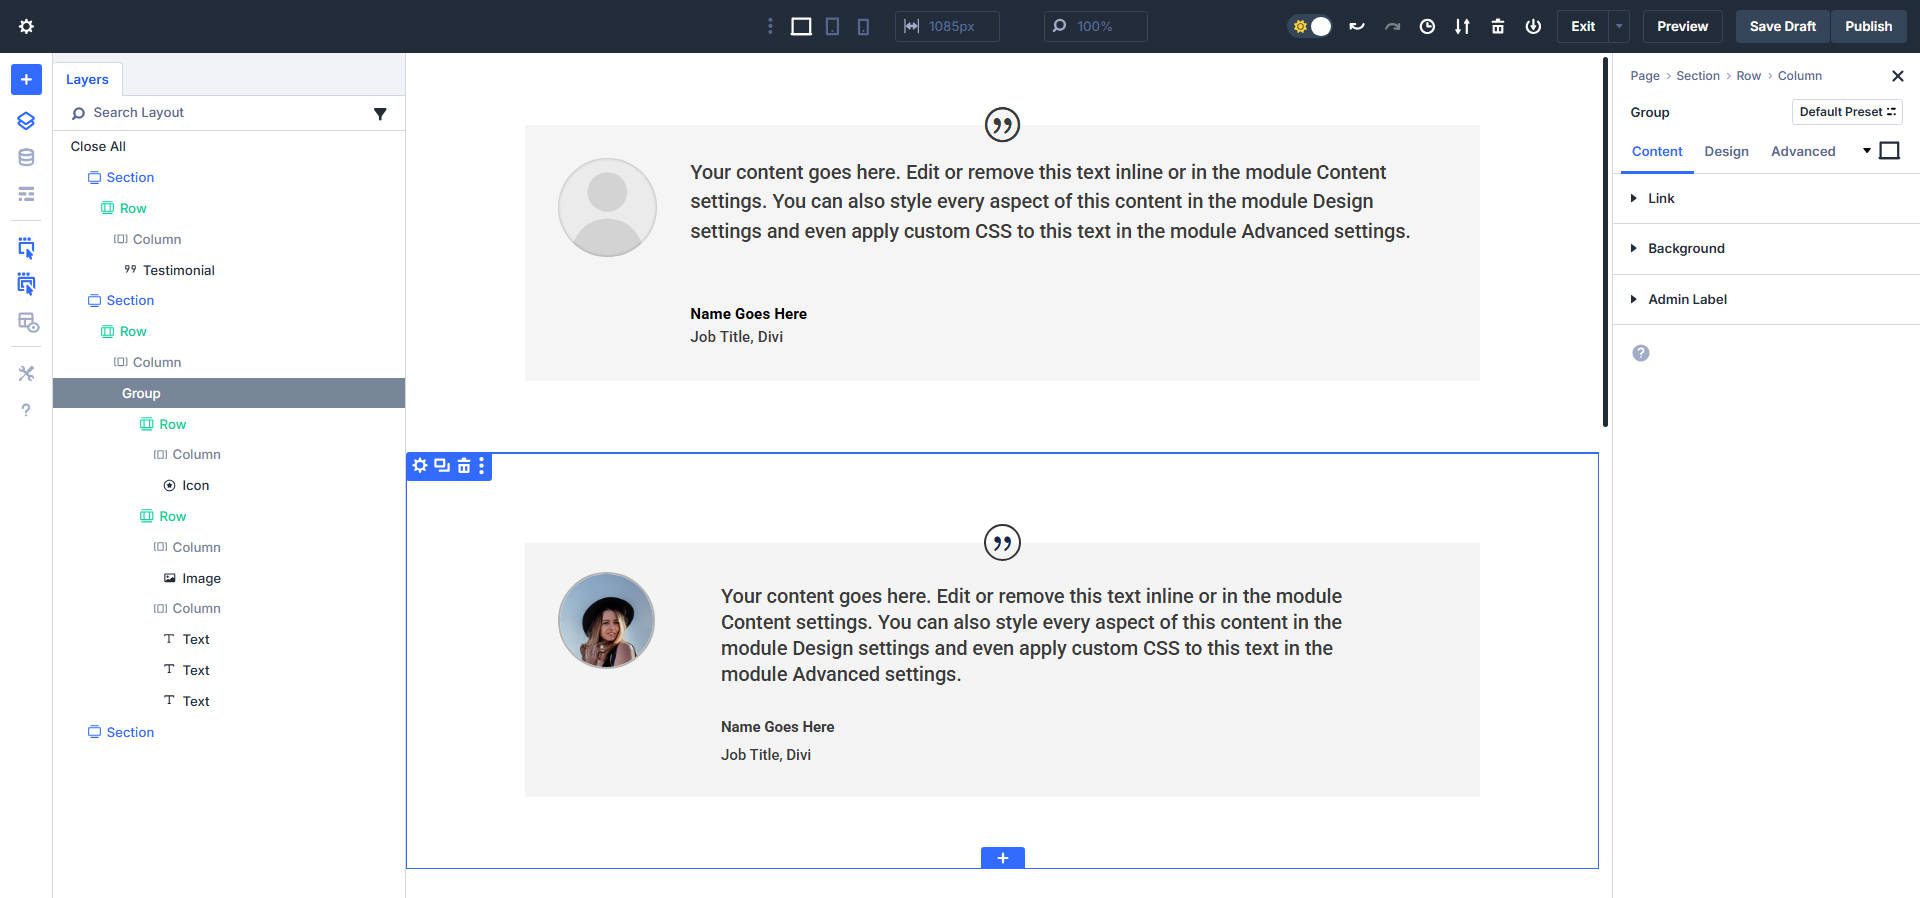
Creating Your Own Testimonial Module Group
The most time-consuming aspect of recreating the Testimonial Module is getting the spacing right (especially at multiple breakpoints). But once you get that, things are quite straightforward. Throughout the Group layout, we used a couple of Rows and the Icon, Image, Heading, and Text Modules.
The nice thing about recreating some of these Modules is that you open yourself up to more possibilities. Some more complicated Modules have an opinionated layout that only extensive CSS can manipulate. But when you build it yourself, you have more freedom to move around many of those sub-elements.
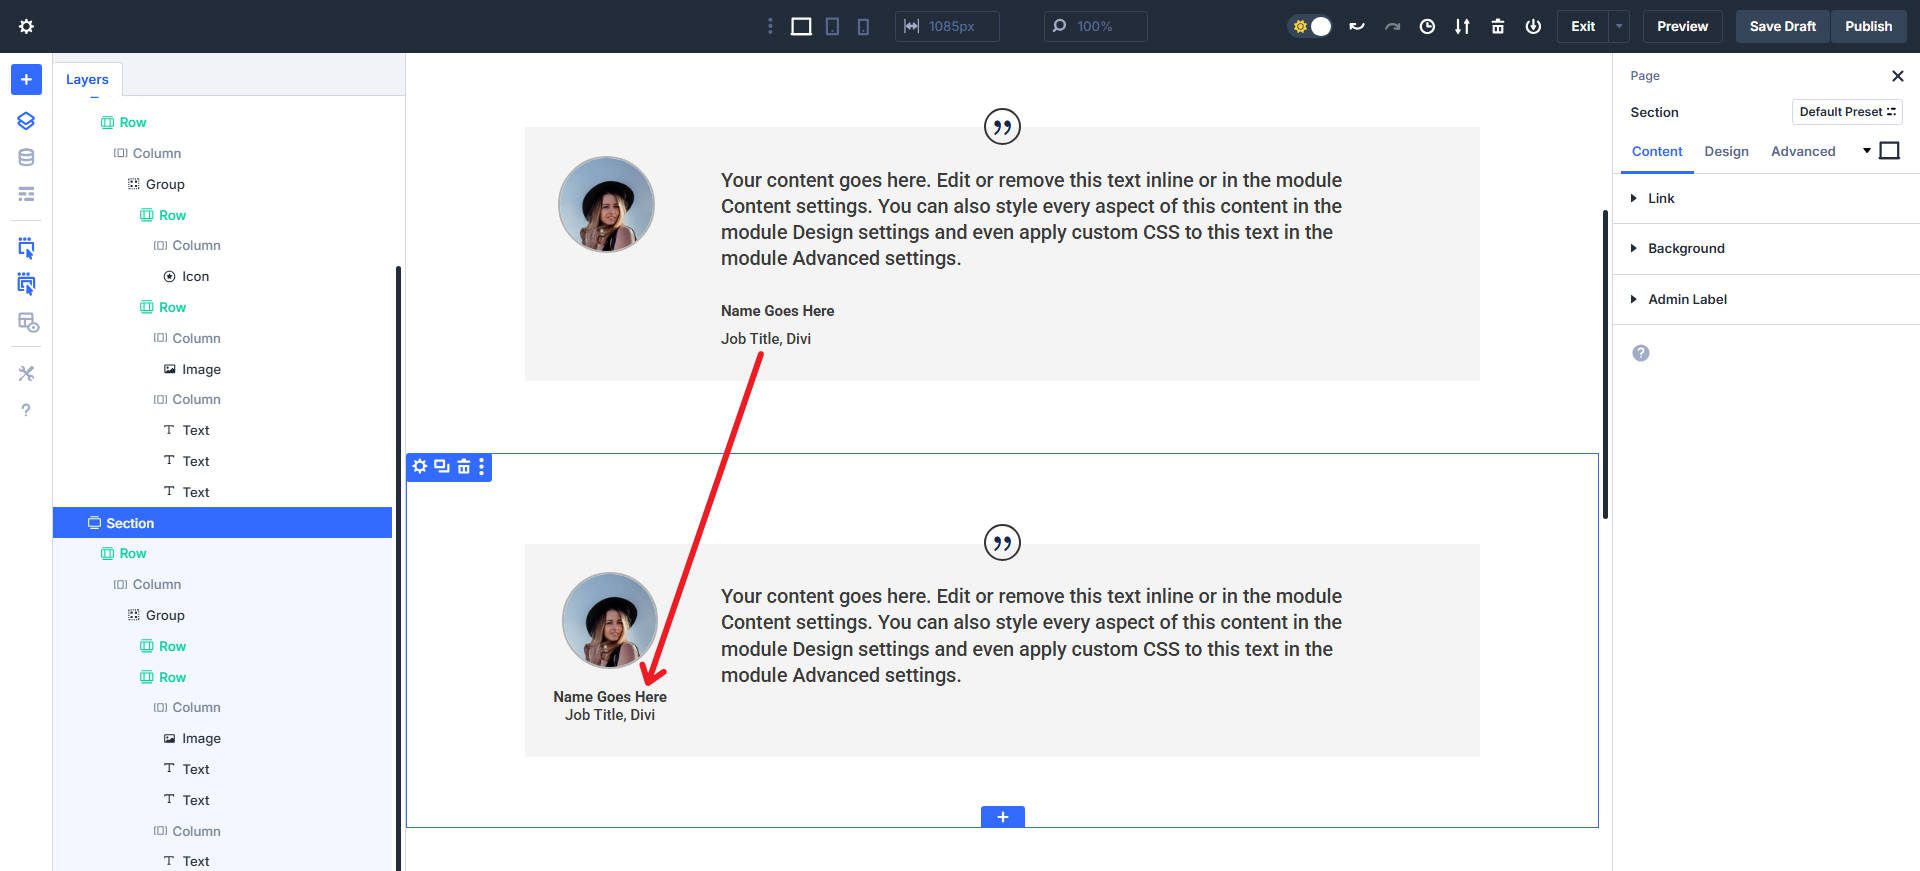
When designing like this, more layout possibilities open up. For instance, you can do what isn’t possible (at least what isn’t easy) with the Testimonial Module by moving elements to completely different positions within the greater Group layout. If your design demands some flexibility, building out some of these piecemeal may help you achieve the precision you are after.
I also love the idea of you being able to create a custom Testimonial Module, like the one above, and use the forthcoming Loop Builder to pull testimonials from a CPT. It’ll give you design freedom + the ability to build faster with structured data and content.
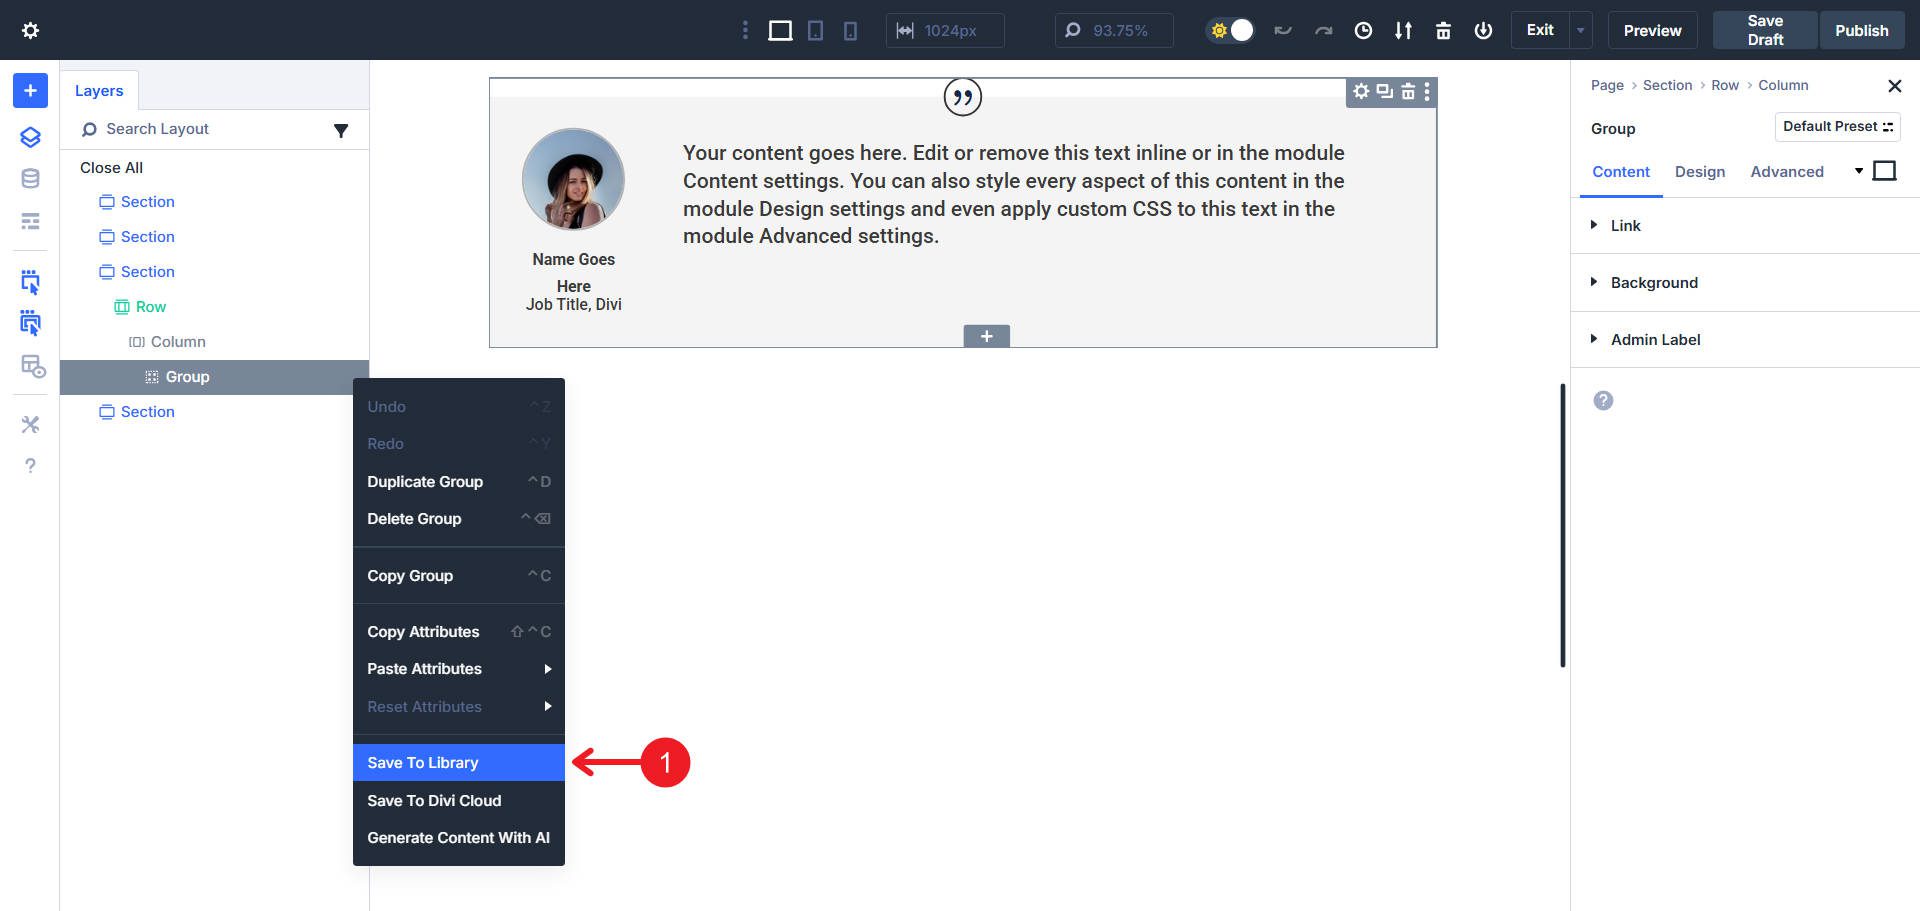
Save Your Custom Module As A Global Element
When your new module feels right, save it as a Global Element for use elsewhere on your site. Open the Group settings menu. Click the “Save to Library” option.
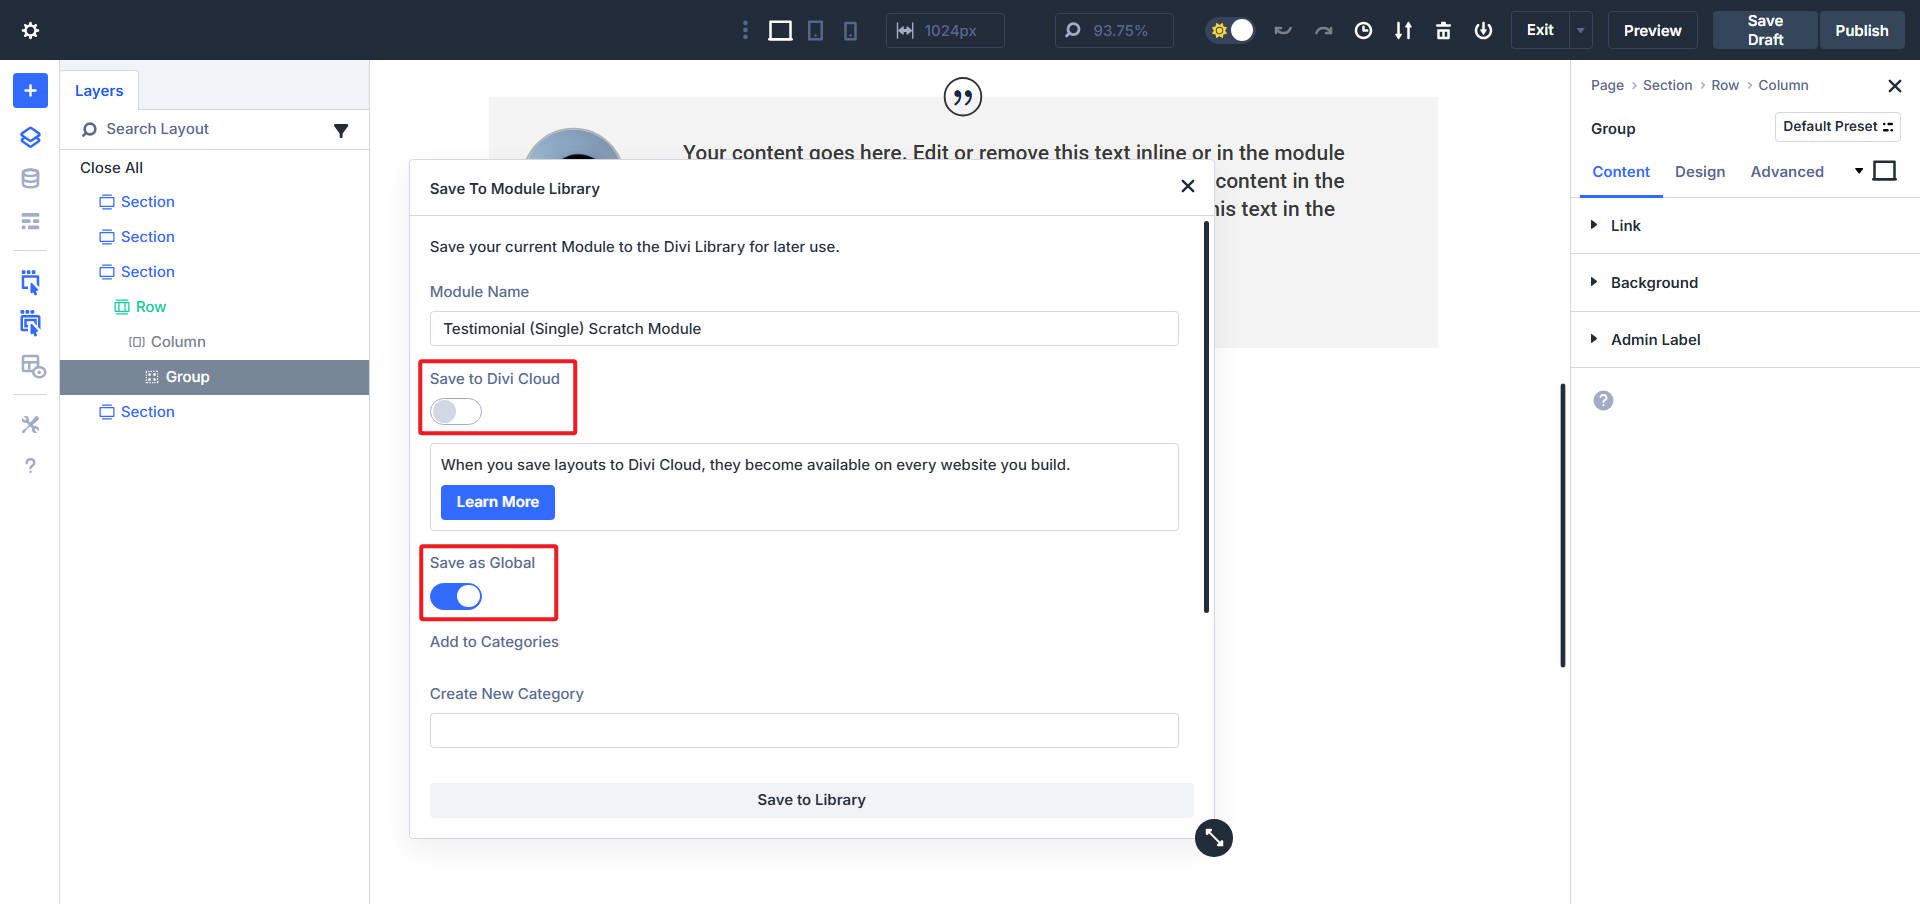
A modal will appear where you can name your Module for easy usage later. Toggle “Save as Global” to store it in the Divi Library. Any change you make later updates every copy across your site.
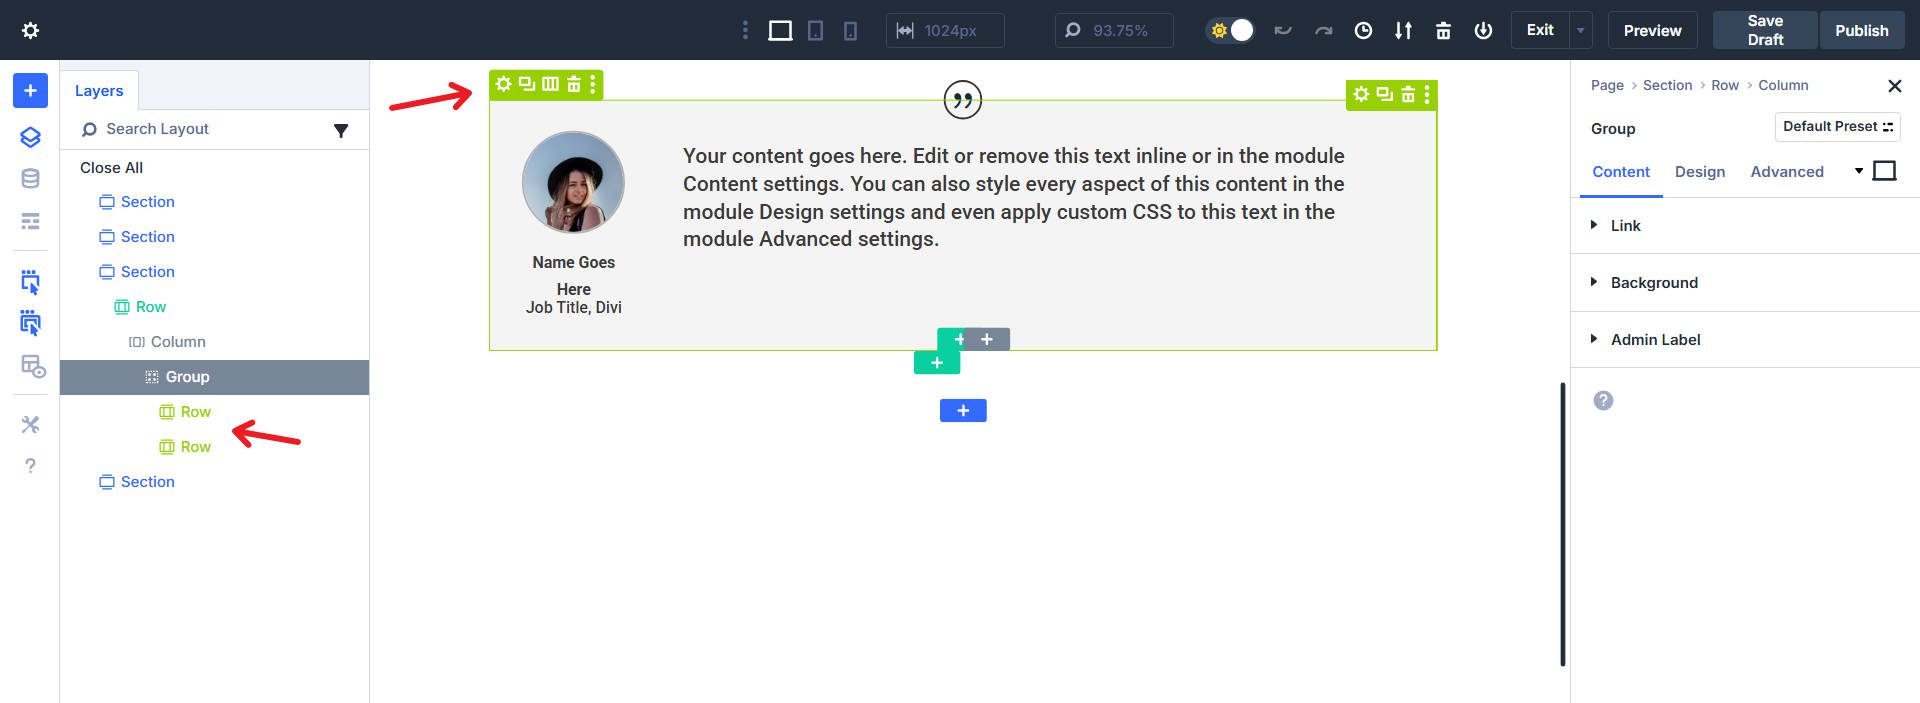
Your Global Element will now have a distinct Green color to help you notice it is Global.
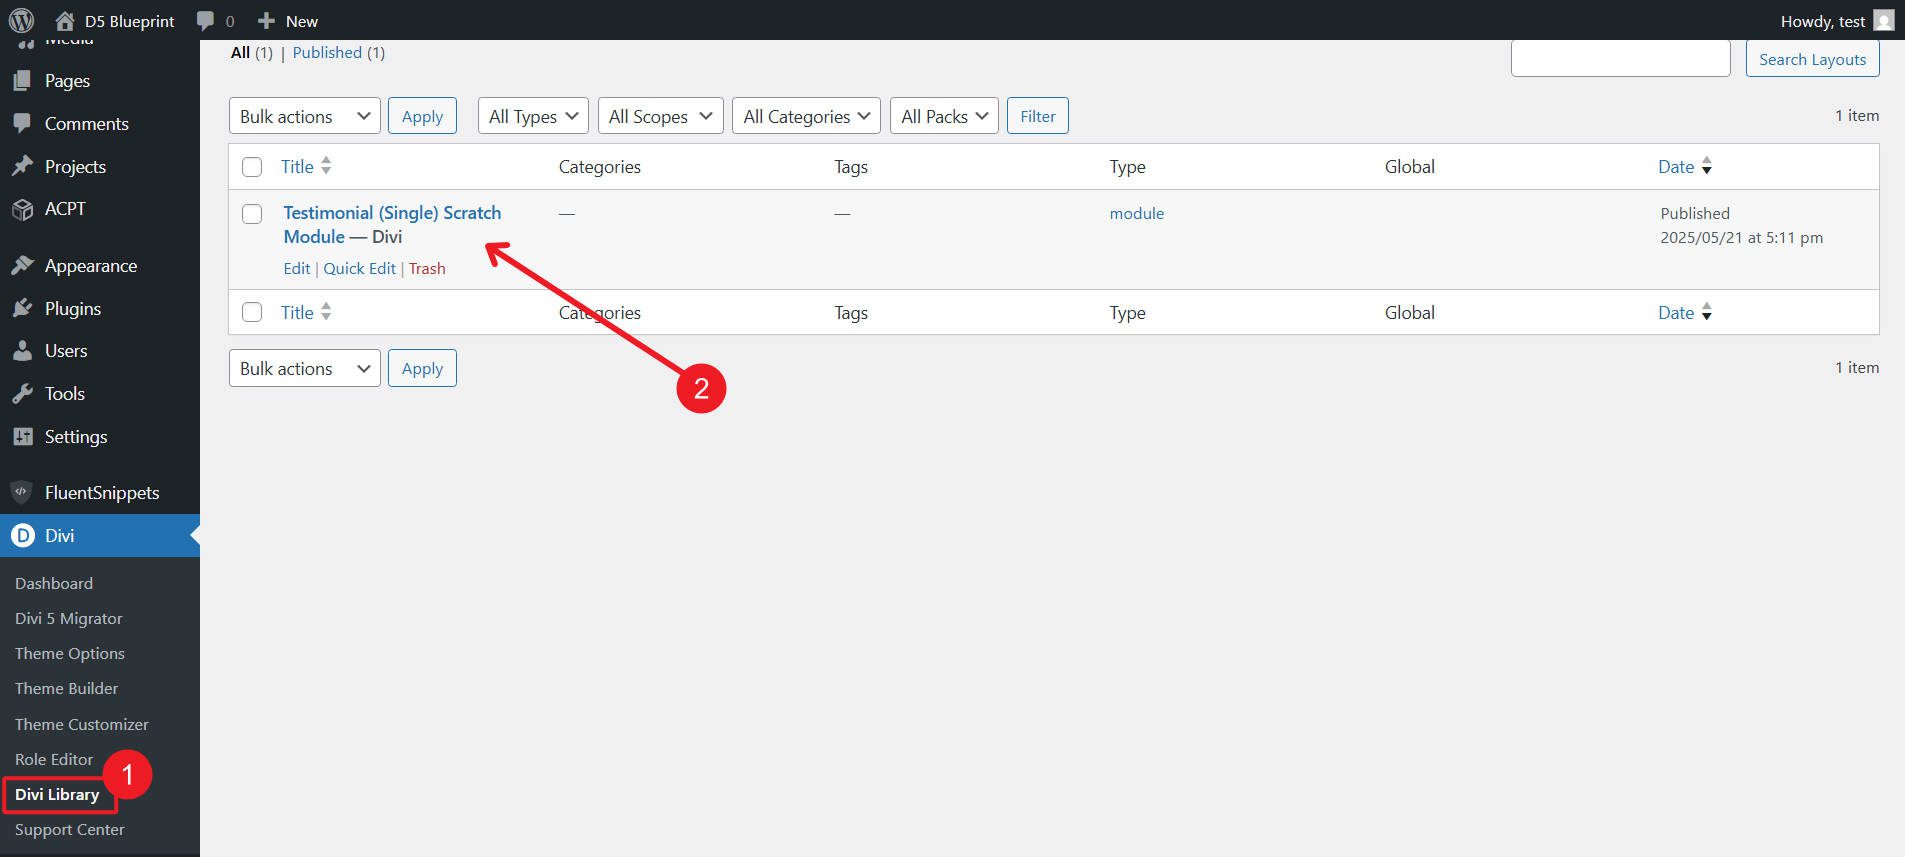
You can access all your saved Global Elements and other Library Items in Dashboard> Divi > Divi Library. Editing a Global Element here will update it across the site. You can also edit Global Elements directly on the pages they are used on (and it will update sitewide).
Need the module on every site you build? Toggle “Save to Divi Cloud.” The module is now in your cloud library, ready for any project anywhere. Library items keep things on one site, while Divi Cloud travels with you from site to site. Use both to speed up builds and usher in greater consistency.
Build Something New Today
Module Groups put new power in your hands. You can shape layouts that are original and just what you need. Start by recreating a Blurb Module and see how the process fits. As you get used to using Divi this way, you’ll notice yourself creating even more intricate designs because you can use the standard Modules or create your own.
Much of what was covered above was possible with Divi before Groups dropped, but they make things easier. Especially when we launch Flex and the Loop Builder, Groups will become a staple of your designing with Divi.
Ready to level up? Grab a fresh site and test your first custom module today.


I think ET making D5 the ultimate lean visual builder out there has been great! I have been using Divi since D2 and an impressed with the progress. However, is there a noticeable difference in code bloat in D5 between using, say, the Blurb Module and Nested Rows/Module Groups if you are accomplishing the same task? Obviously the useful flexibility of Nested Rows/Module Groups is wonderful, but what is the code bloat difference and if it has been tested for pagespeed?
Bloat would be the wrong word and it would depend entirely on what you are recreating and how you do so. At worst, it would be a few extra lines of HTML as per how your Module is constructed. Page speed would be unaffected.
By recreating your own Blurb Module, you can get down to 5 div/spans instead of the Blurb Module’s intrinsic 6, for instance.