
There are quite a few top WordPress form plugins to choose from. Some are easy to use but have limited features while others have lots of features but can be complicated to use. WP Ninja Forms shows that it doesn’t have to be this way. Ninja Forms is a simple form builder with lots of features and it can even be expanded further, giving you the tools to build any type of form easily.
In this review I take a look at Ninja Forms and a few of its add-ons. As usual I dove right in without looking at any documentation to get an idea of how intuitive it is to create forms.
Editions

I’m reviewing an edition with the Pro Builder Pack which includes:
- Layout & Styles
- Multi-Part Forms
- Conditional Logic
- File Uploads
There are several pricing levels which include a different number of websites the plugin can be used on. All editions include 1 year of support and updates. There are various add-on discounts depending on which edition you buy. There’s even an edition that includes every plugin and can be used on unlimited websites.
Settings
After installation you’ll need to activate your plugin and register your add-ons. All menu items, including the settings, are added to a menu to the dashboard under Forms.
Settings
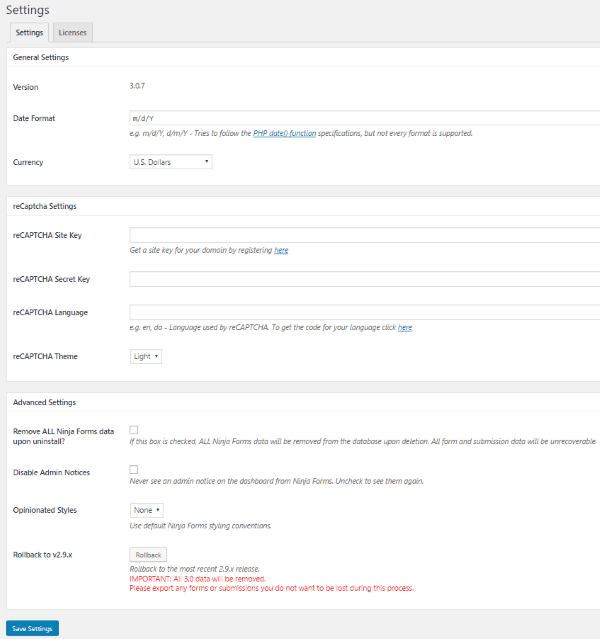
In the main settings screen you can adjust your general settings, reCAPTCHA, and advanced settings. An important setting here is the rollback feature, which lets you go back to 2.9 if you have issues with 3.0.
Licenses
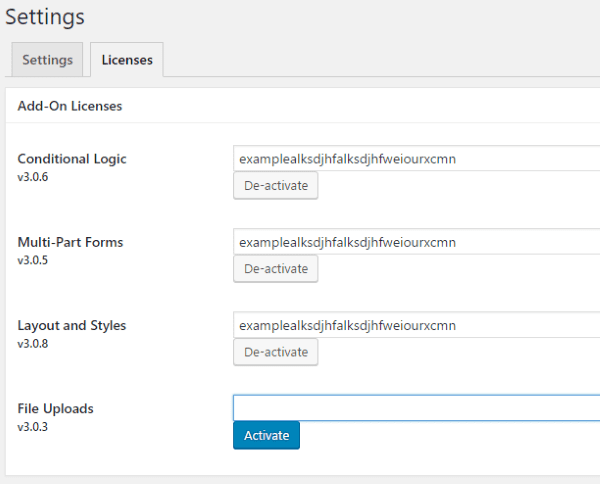
Paste in your add-on licenses and activate them one at a time.
All Forms
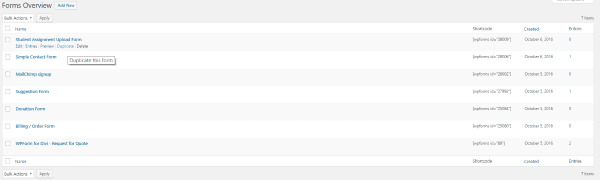
You can see all of your forms under All Forms in the menu. It starts with a Contact Me form already created. This screen gives you the shortcode so you can copy and paste it wherever you want your form.
Add New Form
To create a new form you can either select Add New Form in the All Forms screen or select Add New from the menu.
Form Fields Tab
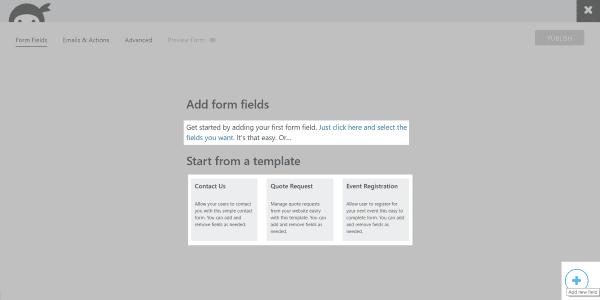
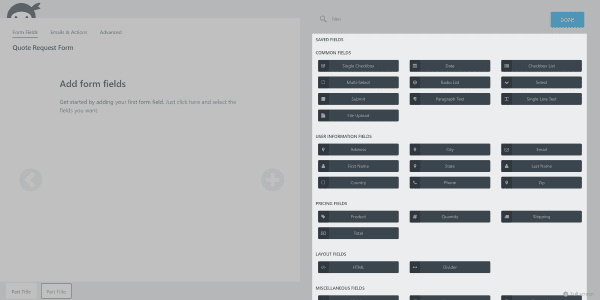
Clicking Add New Form takes you to a new screen where you can build the form. There are several tabs in the upper left corner for navigation. You start in the Form Fields tab. This is where you create the form.
You can either click on the text to select the fields you want, click on the symbol in the bottom right corner to add new fields, or click on one of three templates to get you started quicker. Templates include Contact Us, Quote Request, and Event Registration. I didn’t see a way to add more templates to this list, but you can duplicate any template so it is possible to create and import others into your All Forms list.
Templates
I loaded up the three templates to see how they worked. These are great for getting started quickly and for examples of how they were built.
Contact Us
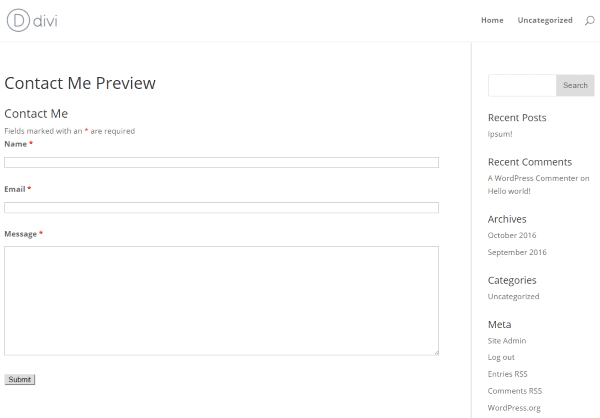
Here’s what the contact form template looks like within a page. This is the simplest of the three forms.
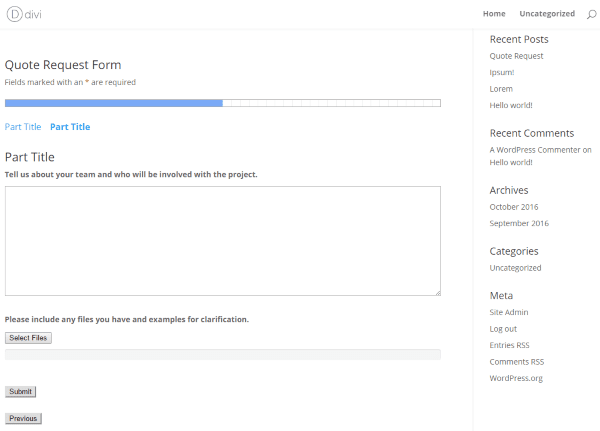
Quote Request
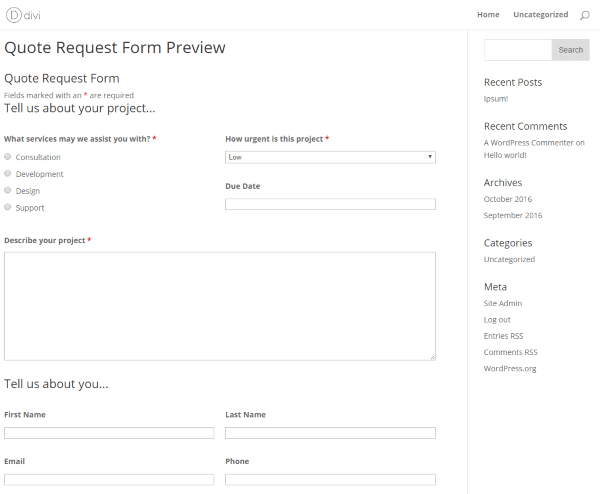
Here’s the quote request form template in a post. This template has several fields are lined up horizontally in columns.
This is done by adding a CSS class of one-half first (left side) or one-half (right side) in the CSS container.
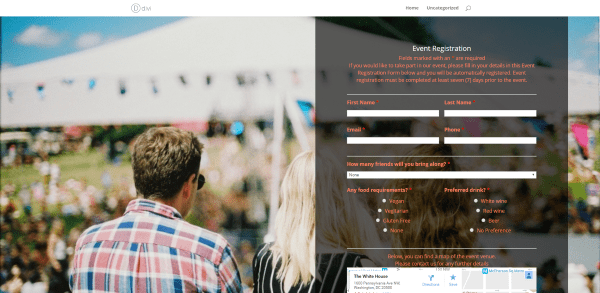
Event Registration
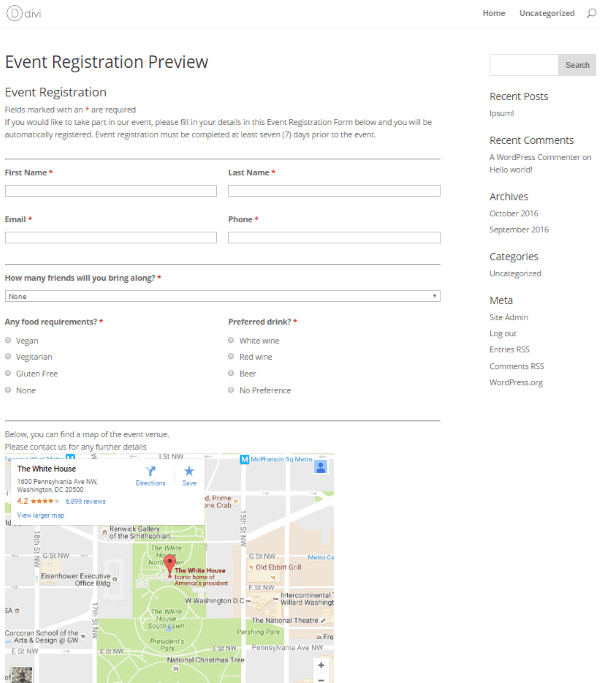
Here’s what the event registration form looks like in a post. You can see that it also has several columns. It also has a map. This was added by pasting code into an HTML field.
Creating the Form from Scratch
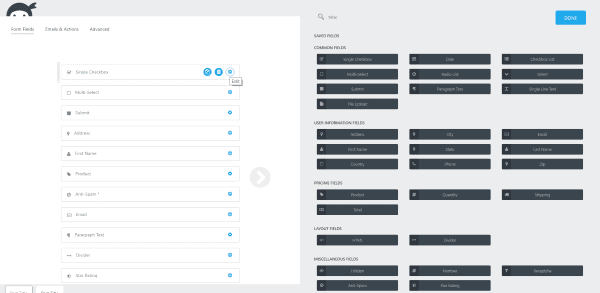
Clicking Just click here and select the fields you want opens several fields you can choose from. The saved fields on the right side of the screen includes several categories: Common, User Information, Pricing, Layout, and Miscellaneous fields. You can toggle this screen to be full-screen if you want. I selected several fields to see how it works.
Each field has a gear. When you mouse over the gear you get several more choices. You can duplicate the field, delete it, or edit.
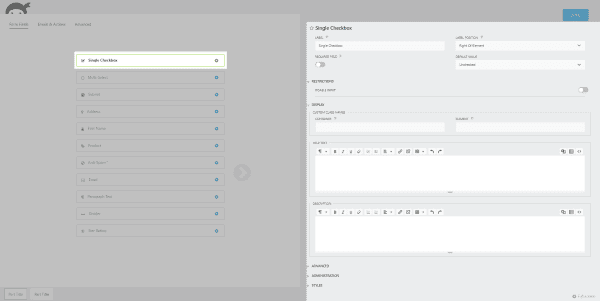
You get the edit screen on the right side where you can make changes to the field. Almost all of the fields include the same basic options including label editing, display, advanced, administration, and styles. Most also have a few options that are specific to that field type.
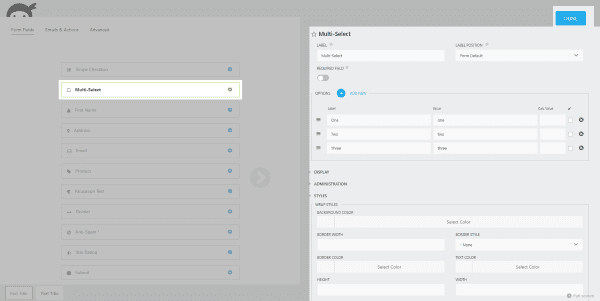
For example, the field called Multi-Select includes options for the labels and values. You can also style it under the Styles option. Styles include color, fonts, etc. Options include Wrap Styles, Label Styles, and Element Styles. Other options include List Item Row, Element, and Label. It has advanced CSS features for each style type.
You can set fields to be required and choose where the label will be placed. You can move the fields around with drag and drop. This would be easier with WYSIWYG (what you see is what you get) but it’s not hard to visualize what the form will look like. You can preview it from another screen.
Once you’ve created the form and made your adjustments select DONE in the upper left corner and select Publish. Now go to All Forms in the dashboard and copy the shortcode to paste into your content.
My Form
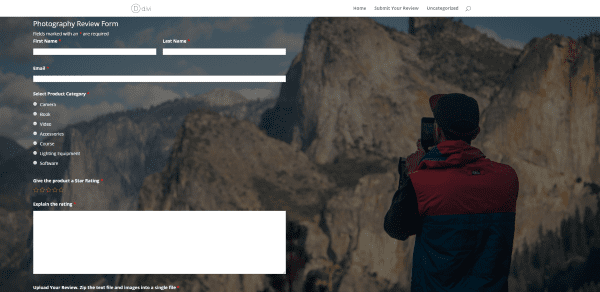
As you can see I’ve added the form to a Divi module. I created a form where writers would upload reviews of photography products. Writers must choose a category for their review, give it a star rating, and then explain the rating. I set a restriction that it would only accept zip files. The label for the file upload box gives the instructions that the text and images should be zipped into a single file.
Emails and Action Tab
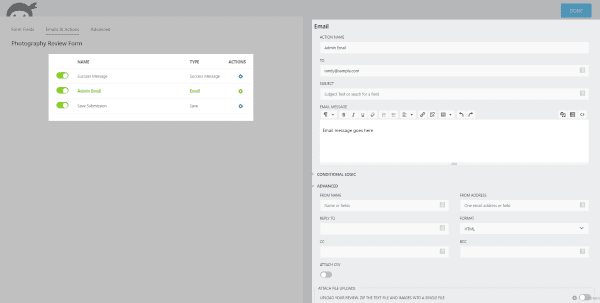
Emails and Action lets you decide what happens with messages. You can create a success message, admin email, and choose how to save the submission. You can even use conditional logic and advanced features. You can also choose whether or not to include the file attachments in the email that gets sent to you.
Advanced Tab
The Advanced settings include:
- Display
- Restrictions
- Calculations
- Styles
- Conditional Logic
- Multi-part
Here’s a look at each setting.
Display Settings
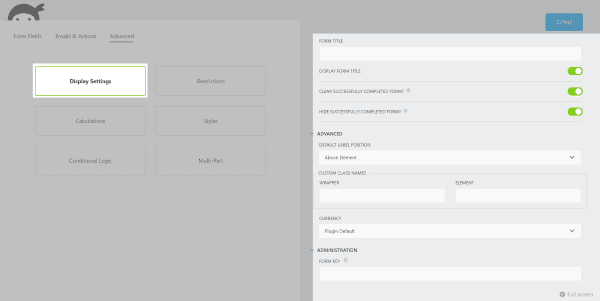
Here you can give the form a title, choose how it reacts after a successful completion, choose label position, use custom CSS, choose the currency, and use a form key. The form key is used for referencing the form when programming your own code.
Restrictions
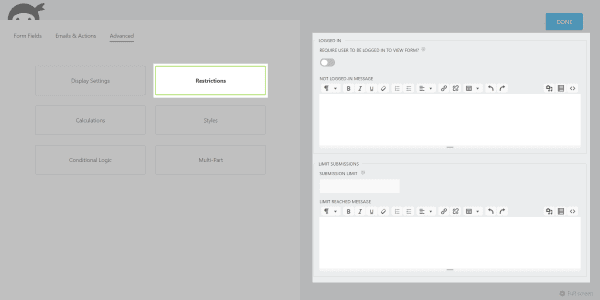
Set up restrictions such as require a user to be logged in before they can view a form and limit the number of submissions. You can create a custom message for both settings.
Calculations

Here you can create a calculation variable that you can add to an HTML field, use in an email action, etc., using the Merge tag. You choose the fields it applies to from a dropdown list as you build the calculation using standard mathematical operands.
This feature isn’t as intuitive as the others and it doesn’t give examples. It does have examples in the documentation which includes inserting the variable into HTML from the Merge tag dropdown list.
Styles
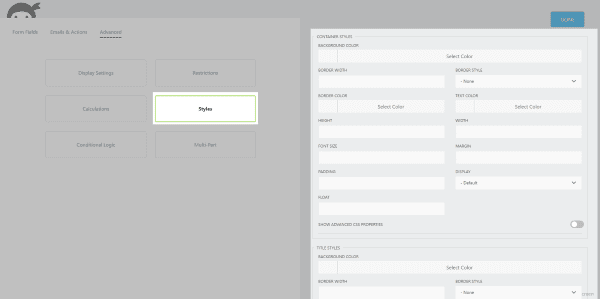
Here’s where you can change the colors and fonts for the containers, titles, rows, ODD rows, and response and error messages. You can also adjust margin, width, height, padding, float, and more. Each section has an advanced CSS properties field that you can enable and paste in your own CSS.
Conditional Logic
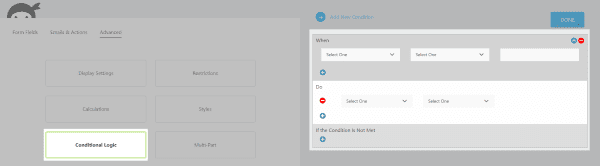
Conditional Logic lets you set up conditions for your forms and emails. This is useful for hiding fields until a condition is met or automatically choosing how and when an email is sent. Setting them up is simple because you just need to select the fields from dropdown boxes and decide what the condition is. You can even use multiple conditions and layer them if you want. You can add as many conditions as you want.
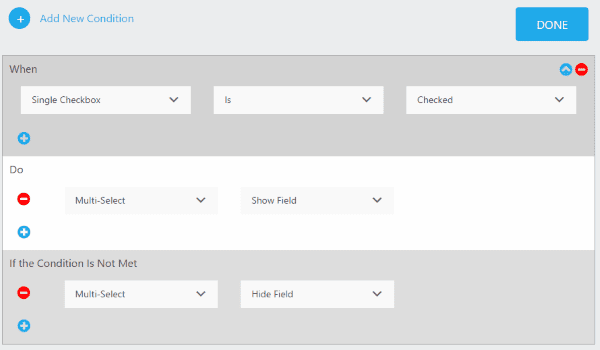
This allows you to easily add some interesting conditions. For example, in this condition for the single checkbox, if it is checked then display the multi-select field. Otherwise keep the multi-select field hidden.
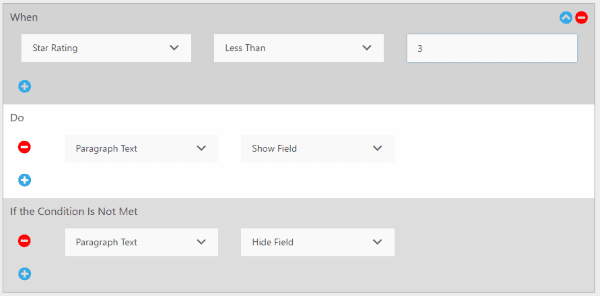
In this condition, if the user gives less than 3 on the star rating a paragraph box will appear where they will be asked for more information about their rating. If the rating is above three the field will remain hidden.
Multi-Part

Here you can enable several settings for multi-part forms such as Validate Each Part, Show Breadcrumbs, Show Progress Bar, and Show Party Tiles. There’s also a styles settings for each to style container, buttons, hover, and active button. Each one has advanced CSS properties as well.
Preview
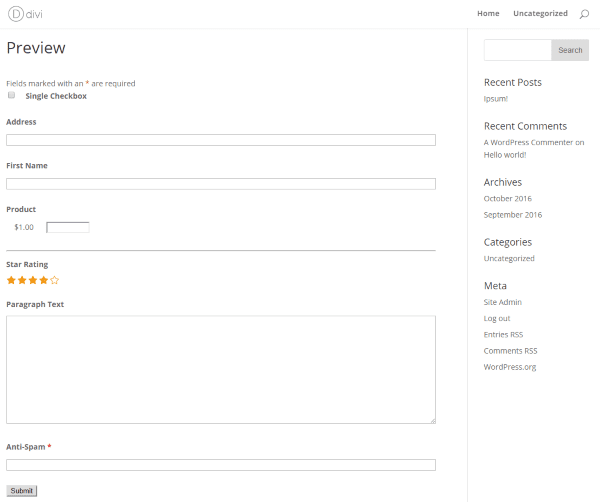
Click the Preview button to see what the form will look like on your website. After setting my conditions it would show the form without the paragraph text. I selected a star rating and found that it was counting the stars differently than I was. I was thinking of two stars as two stars that were selected, while it’s thinking two stars means you’ve selected the second star from the right. I think of as 4 stars. I didn’t see any way to change this in the settings.
Multi Part Forms
Forms are not limited to single pages (parts). They can have as many parts as you want. Click the circled plus to create another part of the form where you can add more fields. You can name each part individually. Select the arrow on the left to see the first part of the form. You can even drag and drop fields between the parts, and duplicate or remove the parts.
I enabled breadcrumbs and a progress bar to show the user how far they are into the form. This is especially useful for larger forms. I like that extra level of UI/UX. It’s a simple feature but it adds a lot to the user’s experience.
Adding the Forms to Pages and Posts
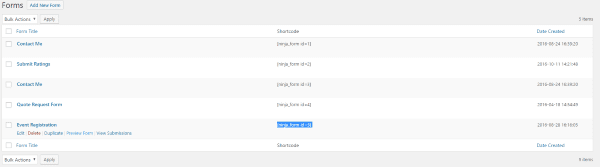
You’ll find the list of forms by clicking All Forms in the dashboard menu. Here you can select the shortcodes to paste into your content (in the Text tab of the editor, or Text or Code module in Divi). The forms list includes buttons to edit, delete, duplicate, preview, and view the submissions for each form from this list.

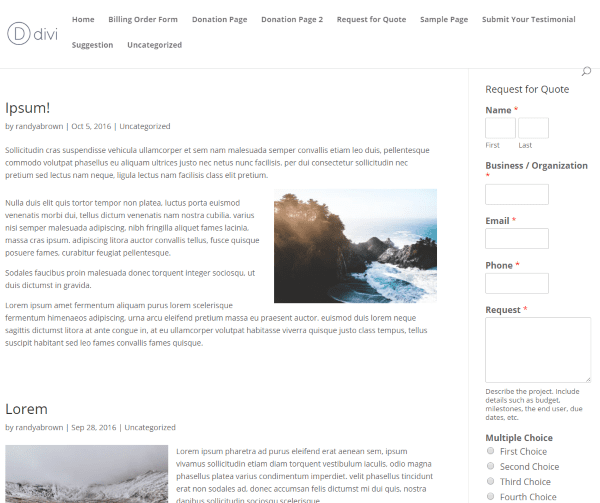
It works great with Divi. Here I placed it within a text module and used a black background with an opacity of 50 for column 2 in the row. The photo is from Unsplash. You can use Divi’s text adjustments in the Advanced Design Settings tab of the module and use Divi’s Custom CSS.
This styling was brought to you by Ninja Forms’ Style Settings. These settings take precedence over the Divi module settings.
Widget
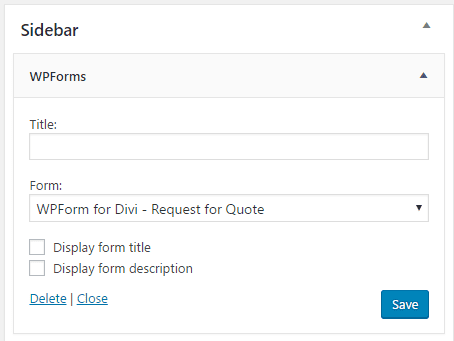
Ninja Forms includes a widget you can drop in your sidebar. You can choose any form you want from the dropdown box. Depending on the design of your form it may not work well with the space allocated to the side bar.
The forms will format to fit the space, but I recommend creating a form just for sidebars. This is the original events registration form. I’m going to duplicate this form and streamline it for use in the sidebar.

I streamlined the form by removing some of the text and the dividers. I also added some conditional logic to only show the food and drink fields if there was a preference. I also stacked the name fields vertically rather than horizontally and removed the phone field. The result is a smaller and cleaner form.
Submissions
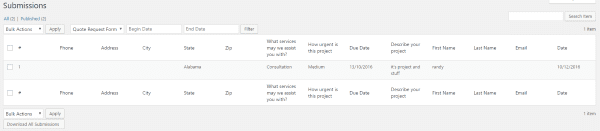
Go to Submissions in the menu and select the form you want from the dropdown box and click Filter. You’ll see the list of submissions for that form. The expected functions are here to edit, filter by a date-range, and export the submissions. Select a different forms from the dropdown box. It will also send you an email that includes the submitted information.
Import / Export
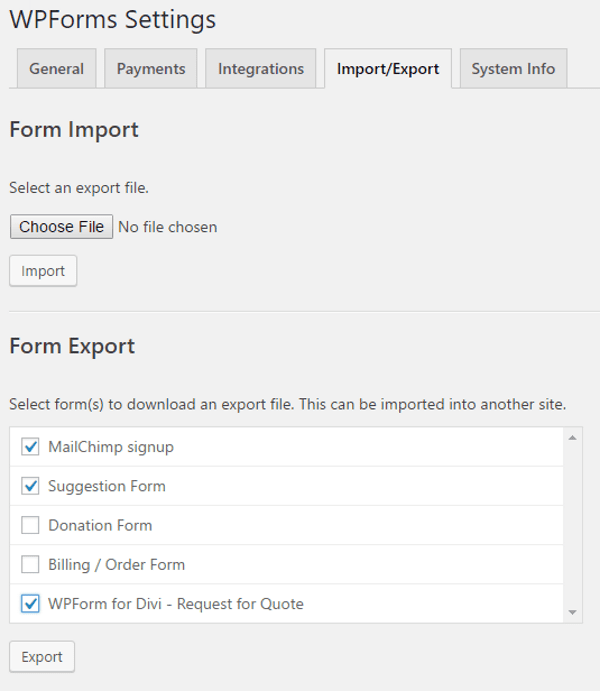
There are several options for importing and exporting including complete forms, your favorite fields, and styles. This works the same as any import/export function. Exporting saves the file to your computer. Importing adds the file to your list in All Forms.
Style Settings
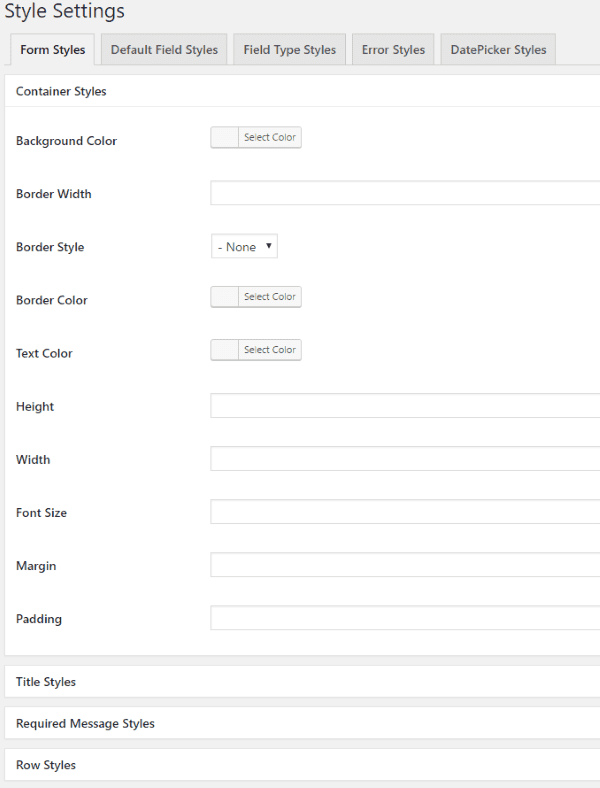
Style all of your forms at once from Style Settings in the menu. Style settings include the container, titles, required message, row, odd row, and success response message. You can enable an advanced area where you can enter custom CSS for each section. The expected elements can be styled from the background to the font sizes, etc. Within style settings there are tabs for Default Field, Field Type, Error, and DatePicker styles.
The styling that you perform here will over-ride any styling that you’ve done in the Divi modules. This will be used as default if you’ve not made adjustments in the form settings. Styling priority is 1- the form, 2- general style settings (the settings in this section), 3- Divi module.
Get Help
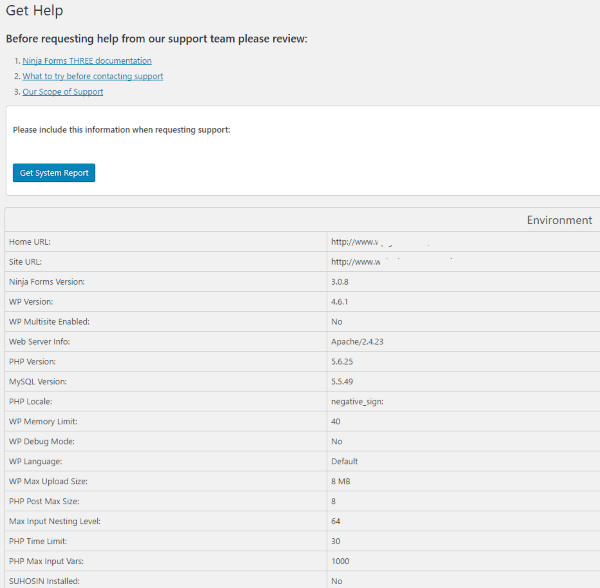
Get Help contains links for various types of help that is available and gives you system information that includes your server and app info, and a list of activated plugins to help in troubleshooting problems. Before getting help they want you to visit their documentation, perform some of troubleshooting on your own, and then view what the scope of support includes.
I used the help at their website for help with calculations. The information was short but thorough enough to help me create the calculation I wanted.
Add-Ons

There are currently 48 add-ons available to expand the functionality of Ninja Forms. Some add features to the forms, such as conditional logic, front end editor, multi-part forms, tables, analytics, and modals, while others connect your forms to other services for taking payments, newsletter subscriptions, etc.
Add-ons cost extra. They are priced yearly and most cost around $50 for use on a single website and $99 for 20 websites. Each one has its own documentation.
File Uploads

The File Uploads feature lets you see the files and make selections for upload limits and storage locations. Internal storage options include a custom directory on your server and various dynamic directories that you can create using shortcodes. For example- allow registered users to have their own directory or create a directory based on date. External storage options include DropBox and Amazon S3.
Final Thoughts
Ninja Forms is a great choice for both beginners and developers. It strikes a great balance between being easy to use and giving you the functionality to customize it to your liking. I especially like the CSS features, conditional logic, columns, multi-part, and calculations. You can control and even correct the data formatting.
The interface is intuitive. Building the forms is simple but there is no WYSIWYG feature out of the box. Everything is built in a stack. You can use CSS to create columns within the form, but you can’t see what this looks like until you select Preview. Fortunately there is an add-on for that. If you prefer WYSIWYG then I’d recommend getting the Front-End Editor add-on. Either way, Ninja Forms has enough features built in and enough add-ons to make any kind of form you want. Ninja Forms is easy to recommend to anyone that builds a lot of forms.
Have you tried WP Ninja Forms?
Image by CandyDuck / shutterstock.com.


I used Ninjaforms for 2 years. Recently, their support is non-existent. I had waited for WEEKS for resolution of a fatal error. When they replied to my inquiries, they just said they were trying to schedule a time to work on it. I waited long enough and switched to Gravity. With Gravity, I had a couple of questions regarding installation and they replied within an hour! The forms look nicer, too!
Formidable Pro FTW!
It comes with perpetual update.
And none of other form plugins have function to display entries.
I learned few things from this post and comment section. A few months back I’m installed and configured the Gravity forms on my client site. Gravity form really works great, but the price of that plugin is not affordable to my customers. Therefore I am looking for alternate to Gravity form on the internet and landed on this article. Ninja and Gravity forms are costly.
ARForms looks great because its features are something similar to other forms and also the price is very cheap. Thanks for this post and it helps me.
If you are looking for a free solid form plugin, then go look at Caldera Forms on the WP repo.
What a great find. Thank, Luke!
Thanks Luke for your recommendation.
For us, the major benefit of Ninja Forms over Gravity Forms, the competitor everyone seems to love, is that we only pay for add-ons (eg: integrations with other services) that we need rather than getting lots of features we don’t want just to get conditional logic (for example) and as such spend a lot less with Ninja Forms than we would with Gravity Forms.
Unfortunately, I’ve begun noticing that once I want or need something specific, such as regex-style field validation or field input comparison, there’s simply no way to get that done for a non-programmer, so I’m seriously looking at a cost-effective alternative that does offer these features.
Except conditional logic is already in Gravity Forms core and not an extension that you would need to purchase to get that core function.
Forget Ninja or Gravity forms. I tried both and more but no other WP form builder, in my opinion, beats the flexibility and front-end and backend UI superiority of ARforms from CodeCanyon. Price wise, with the onetime site licence in the very low tens, ARForms is way more budget friendlier and has the necessary add-ons to get the job done easily. It happens not be as popular as the Ninjas and Gravitys, but it’a a way better form builder plugin for WordPress. Disclaimer: I have NO affiliation with the plugin, I’m just a fan and user of Divi and ARForms.
One thing is for sure.. We have tooooooooo many wordpress contact form plugins.
Now we are up to two premium DIVI contact form modules.
Thanks Douglas! ARForms looks like a good one. It looks intuitive and powerful at a great price.
My money is still on Formidable Pro.
Ninja versus Gravity. Basically the same features. $99 versus $39 for personal. $499 versus $199 for unlimited. Duh!!!
Yeah, Gravity Forms all day… I’m a little surprised to see a post on here that wasn’t actually helpful. Usually ElegantThemes is good about putting out useful content in their Blog and not just namedropping affiliates.
It’s frustrating to read these lengthy reviews when Gravity Forms still seems to be the obvious best choice.
+1 there is a total bias here against Gravity Forms for some reason. It’s by far the best form plugin for wp and they’ll do whatever they can not to talk about it.
The agency license is pretty expensive for Ninja Forms, the Gravity Forms developer license is almost $300 cheaper.
I appreciate your thoughts on Gravity Forms. The Gravity Forms review is coming soon. I just haven’t gotten to it yet.
Good to know, thanks for the reply.
Do not forget to mention the Gravity forms for Divi wordpress plugin which gives GF all the necessary Divi styles in just one click.
It appears there is two plugins on the directory. What is your preference (Surbma or Divispace)?
Both of those styling plugins work very well for GF, either would be solid to use.
+1