
There are two ways to approach Divi and its built-in settings. The first, and most obvious approach is using the settings within their range while focusing on that particular element on your page. The second approach allows you to look beyond the obvious and use settings in a way you wouldn’t have thought of before. One of those settings involves box shadows. Normally, they’re used to create a certain depth for your elements. Whether you’re adding it to a section, row or module, their most obvious intent is to highlight.
But you can also use box shadows for overall design purposes on your website. They can replace background textures and add asymmetry to your website. In this tutorial, we’re going to show you how to think outside the box with box shadows using Divi’s Business Consultant Layout Pack landing page. After you’ve understood the way it works, you can apply this tactic to any page you’re creating which will make your website look a bit more unique and thought-through.
Let’s get to it!
Preview
Before we dive into the tutorial, let’s take a look at the box shadow effects once applied on a page:
Approach
- You can apply a box shadow to (almost) any element on your page
- By default, these box shadows are tied to the element and used to enhance it
- However, you can use them for overall page design purposes as well
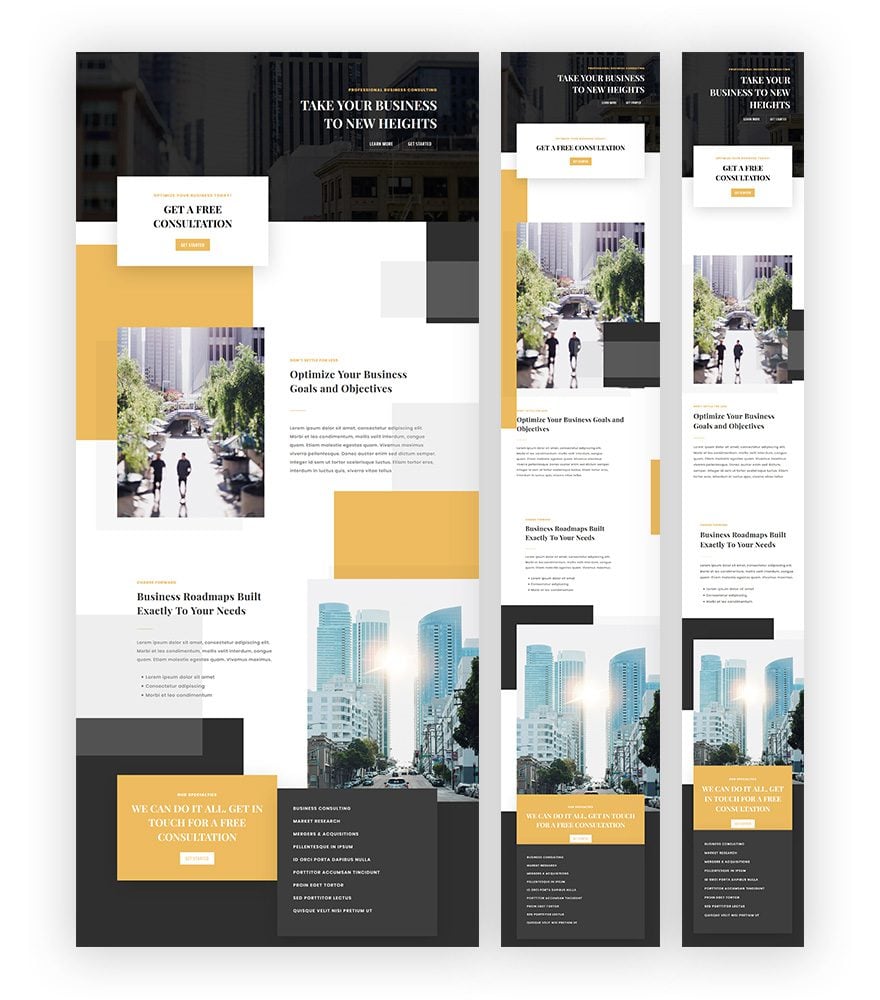
- For this tutorial, we’re using the Business Consultant landing page layout from our premade layout packs
- But you can use this design tactic on any design
- Use sections/rows/modules that don’t have a box shadow applied to them yet
- Use the Visual Builder to apply these box shadows (allows you to play around with the look and feel)
- We’re expanding the default range of both the horizontal and vertical position
- Depending on how we want to position this box shadow, we’ll use both positive and negative values
- This allows the box shadow to look non-related to the section/row/module but rather part of the entire page design
Thinking Outside the Box with Divi Box Shadows
Subscribe To Our Youtube Channel
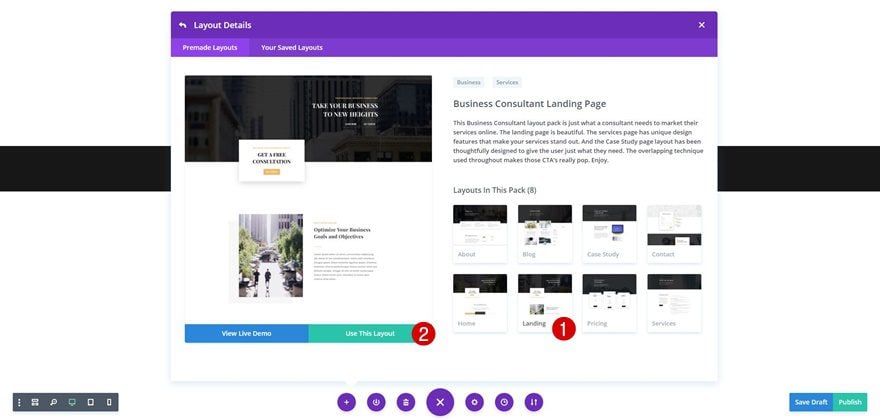
Upload Business Consultant Landing Page Layout
We’ll start off this tutorial by creating a new page and enabling the Visual Builder. We’ll focus on the box shadows and how to use them on your page, that’s why we’ll use an already existing layout. To upload this layout, click on the icon located at the bottom of your page, select the plus icon next, scroll down the different layout packs until you come across the Business Consultant Layout Pack and use the landing page layout.
Sections
Box Shadow #1
Location of Section on Page
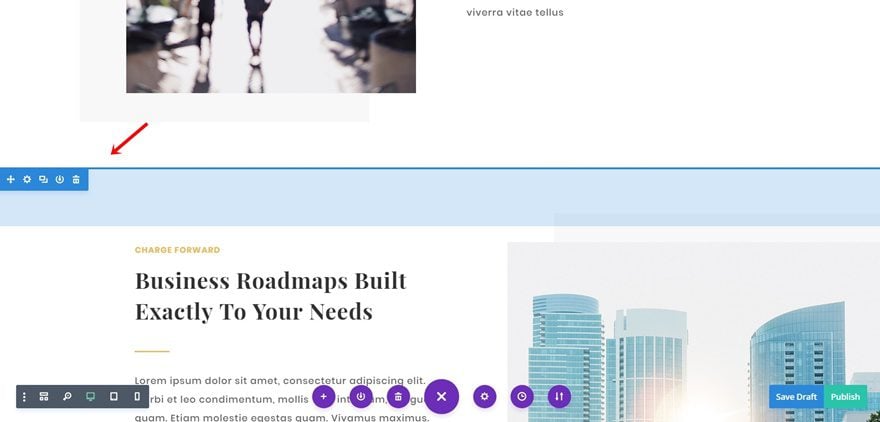
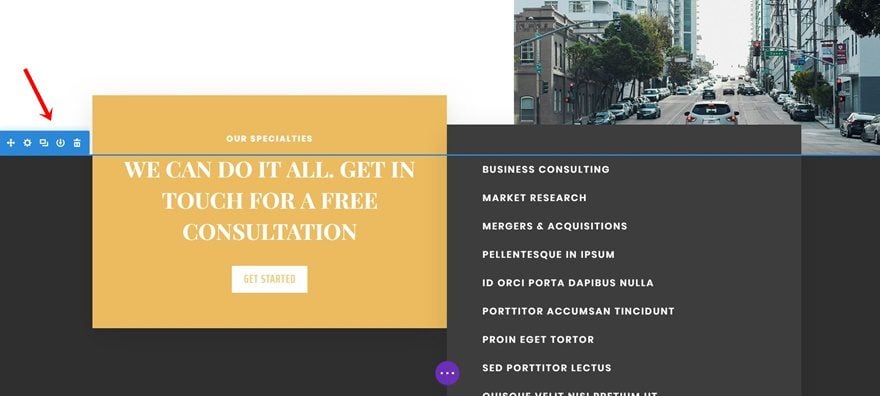
You can apply a box shadow to almost any element on your page. We’ll start by using section box shadows. The first box shadow we’ll add is part of the following section on your page:
Apply Box Shadow
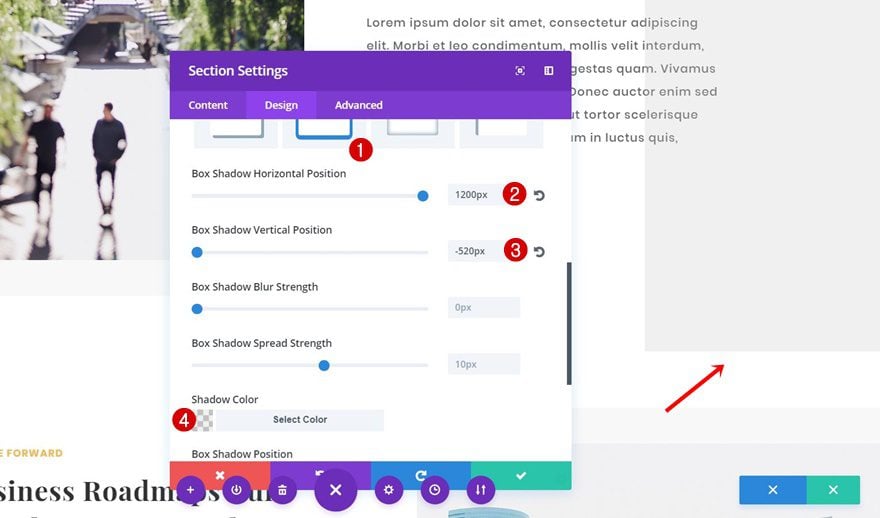
After opening the section settings, apply the following box shadow to it:
- Box Shadow Horizontal Position: 1200px
- Box Shadow Vertical Position: -520px
- Box Shadow Color: rgba(198,198,198,0.27)
Box Shadow #2
Location of Section on Page
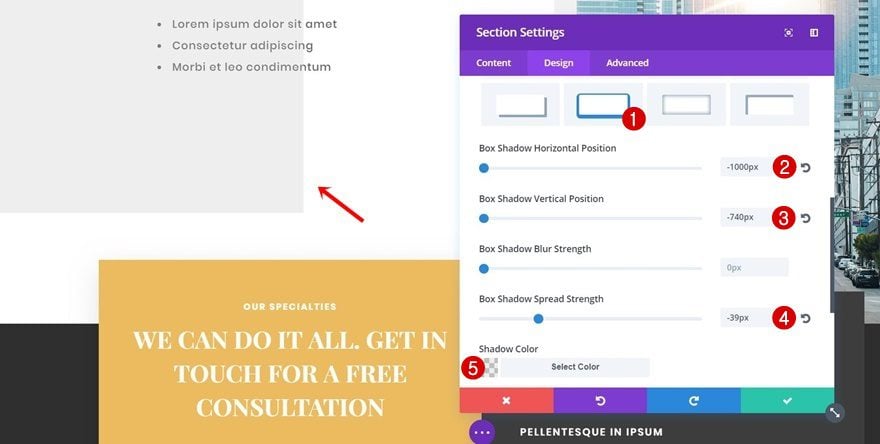
The second section we’ll apply a box shadow two is the following one:
Apply Box Shadow
We’re using this section to add a light-gray box shadow to the left side of our page:
- Box Shadow Horizontal Position: -1000px
- Box Shadow Vertical Position: -740px
- Box Shadow Spread Strength: -39px
- Box Shadow Color: rgba(188,188,188,0.25)
Rows
Box Shadow #1
Location of Row on Page
We’ll also add a box shadow to the following row on our page:
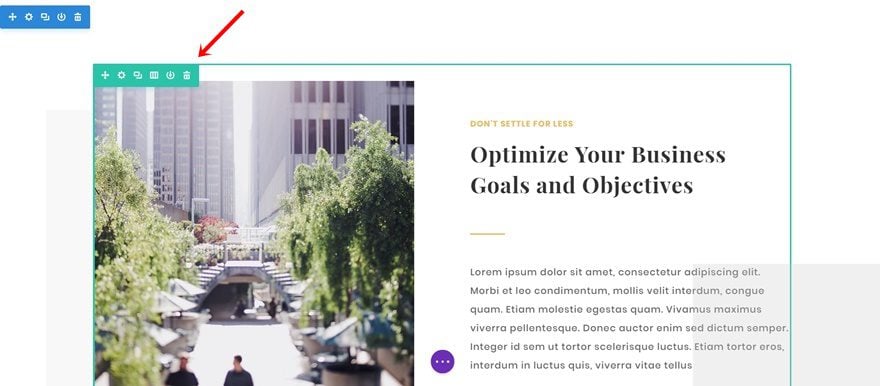
Apply Box Shadow
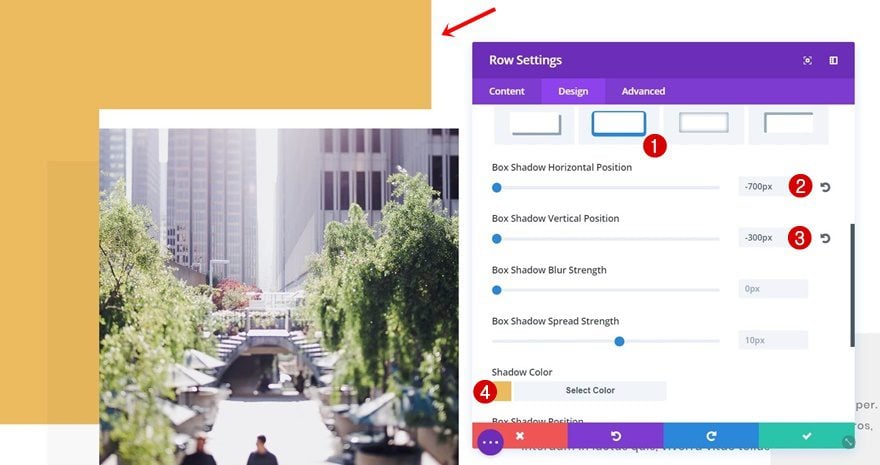
We’re adding an orange box shadow (that matches the entire layout pack):
- Box Shadow Horizontal Position: -700px
- Box Shadow Vertical Position: -300px
- Box Shadow Color: #edbb5f
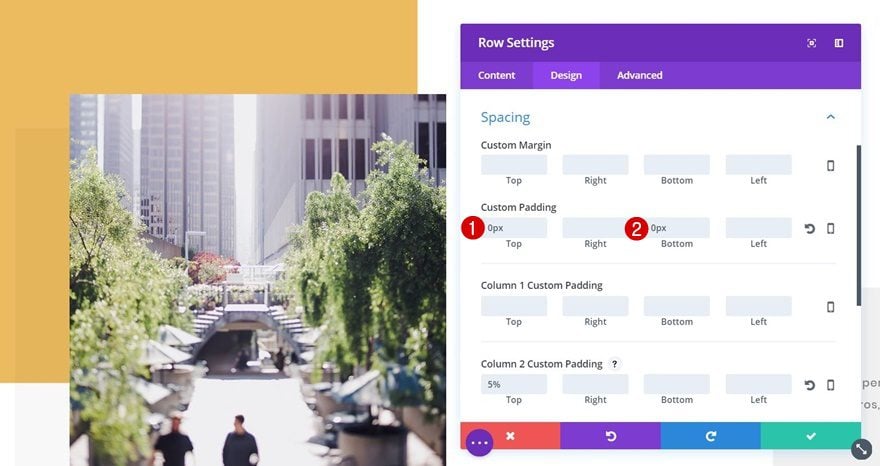
Remove Row Padding
As you can notice in the previous print screen, there’s still some white space at the top and bottom of your row. This padding overlaps the box shadow you’ve added in the previous step. To get rid of this white background, add ‘0px’ to the top and bottom padding of your row.
Text Modules
Text Module Box Shadow #1
Location of Text Module on Page
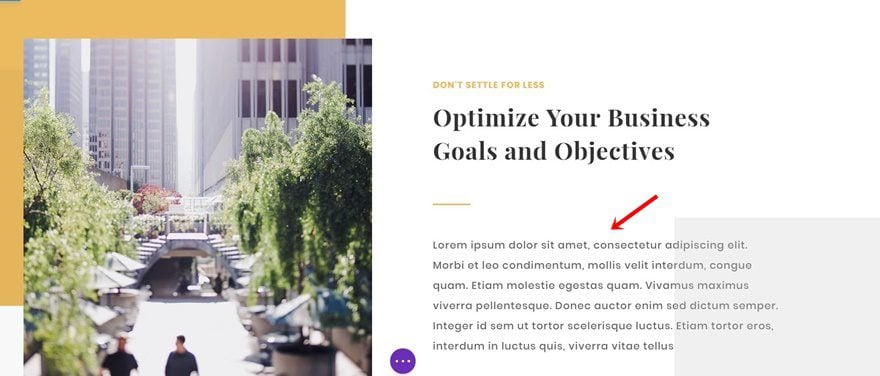
Besides sections and rows, you can also add box shadows to modules. The text modules on your page, for instance. Open the following Text Module:

Apply Box Shadow
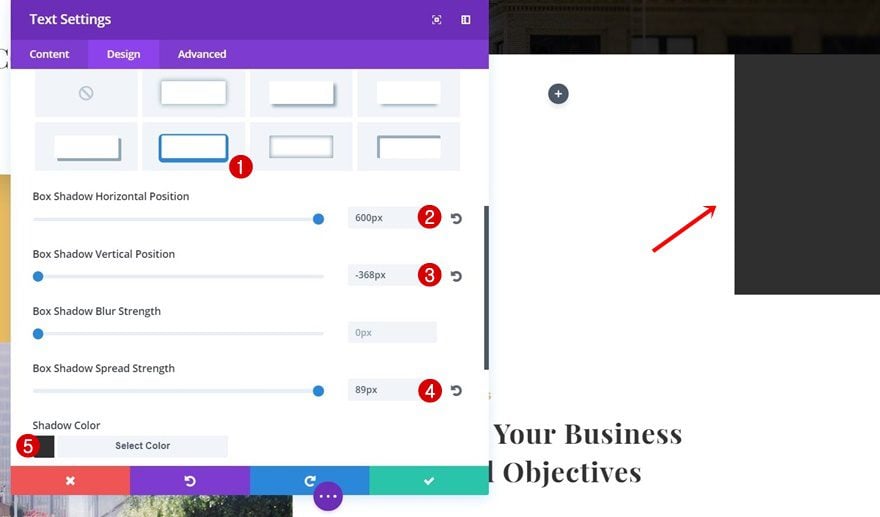
And apply the following box shadow that’ll add a box shadow to the right top of your section:
- Box Shadow Horizontal Position: 600px
- Box Shadow Vertical Position: -368px
- Box Shadow Spread Strength: 89px
- Box Shadow Color: #2f2f2f
Text Module Box Shadow #2
Location of Text Module on Page
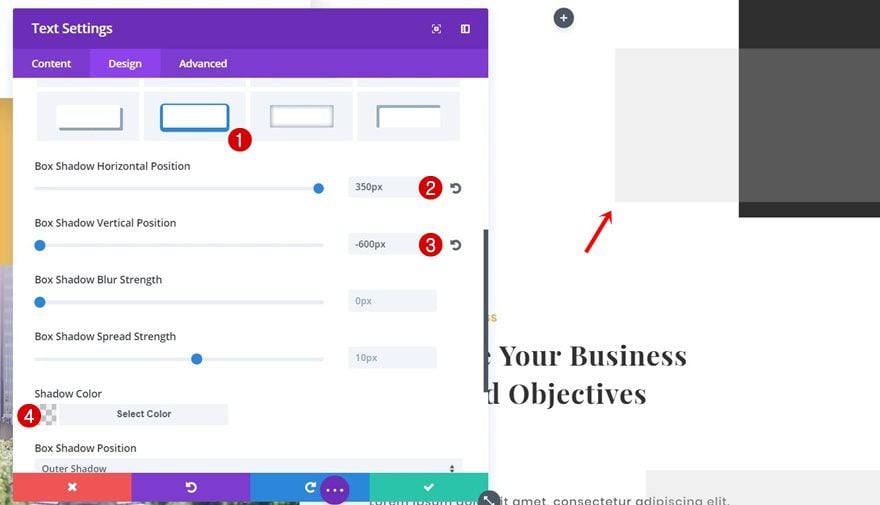
We’ll use the second Text Module box shadow to overlap the previous box shadow as well:
Apply Box Shadow
After adding the box shadow, you’ll watch a box shadow overlap the previous one you’ve added to your page:
- Box Shadow Horizontal Position: 350px
- Box Shadow Vertical Position: -600px
- Box Shadow Color: rgba(198,198,198,0.27)
Text Module Box Shadow #3
Location of Text Module on Page
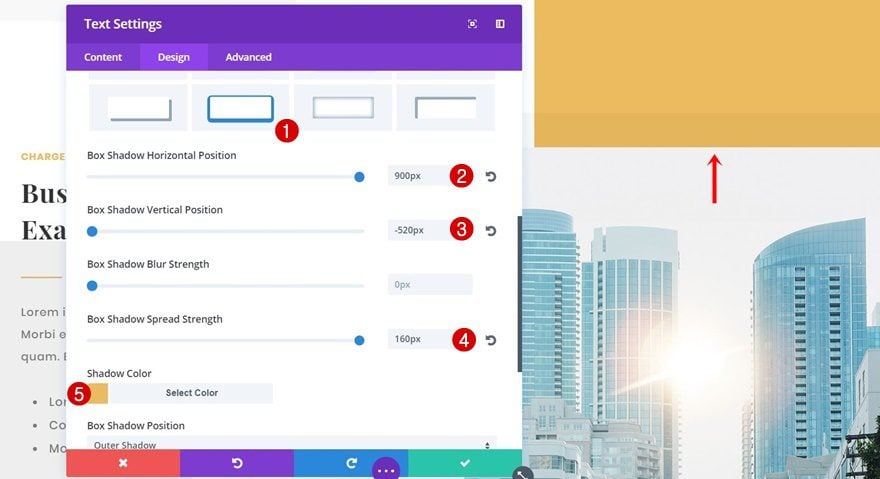
Scroll down your page until you come across the following Text Module next:

Apply Box Shadow
We’re creating an orange box shadow using the following settings:
- Box Shadow Horizontal Position: 900px
- Box Shadow Vertical Position: -520px
- Box Shadow Spread Strength: 160px
- Box Shadow Color: #edbb5f
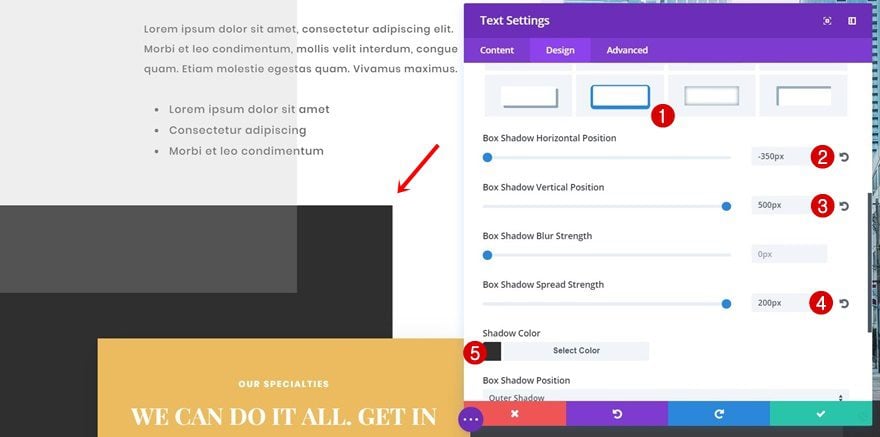
Text Module Box Shadow #3
Location of Text Module on Page
The last box shadow we’ll apply is part of the Text Module right above the one you’ve used in the previous step of this post: 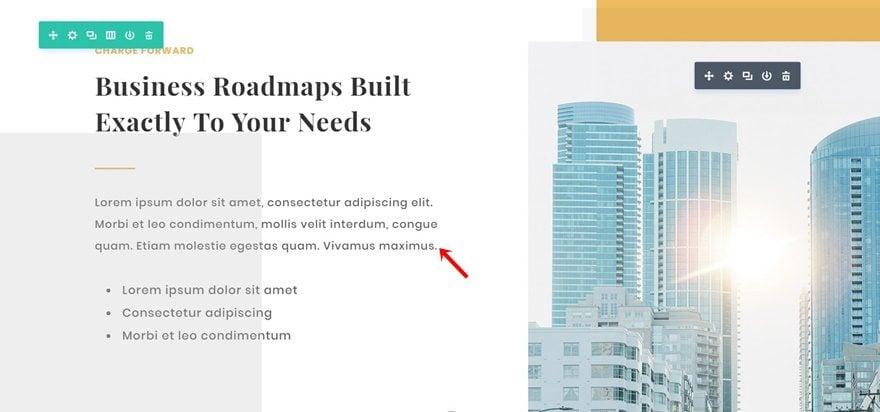
Apply Box Shadow
We’re using the same color for this box shadow as was used for the background of the section below. The box shadow color along with the following settings will create a stunning result:
- Box Shadow Horizontal Position: -350px
- Box Shadow Vertical Position: 500px
- Box Shadow Spread Strength: 200px
- Box Shadow Color: #2f2f2f
Preview
Now that we’ve gone through all the steps, let’s take a final look at the Business Consultant landing page after adding multiple box shadows to it:
Final Thoughts
In this post, we’ve shown you how to think outside the box with box shadows. Besides using box shadows to highlight a certain section, row or module, you can also use them for overall design purposes on your website. This approach can help you create unique pages that live up to current design trends. If you have any questions or suggestions, make sure you leave a comment in the comment section below!


Hi divi
So beautiful design… but how will it look on mobile and tablet???
Louise, Denmark
I love this way to think outside the box!!
Strange logic of using a box shaddow, but it’s certainly working.
Thanks for sharing!
Great ! Just the ideas I needed to improve some designs…
Wonderful tut! I love love love box shadow creativity.
Very cool design, I like out-the-box layouts like this. Great work!
I like the changes you have done to the layout.
Great
This is brilliant! Just right what I need for a client. Cheers!
Love the creative alternative uses.
This is really cool! I also love how you show how it’ll look like on mobile! Everyday, something impressive is dropped on the blog! LOVE IT!
offtopic: I have become a member right after the famous divi 3.0 launch, who was preceeded by the amazing divi 100 marathon blog posts series. Now, I visit your blog daily waiting for the amazing release of the theme builder update, a huge game changer hopefully. Now, the thing is that this waiting is lasting a bit too long and instead of getting this much awaited release, we get more sneak previews on other topics.
Long story short, it would be a huge help to me if you could announce a date in the future for this release. I know everyone is working hard on this, but, the sneak peek was on May 17th, and I am so tired and so disappointed with every update that it’s not the update release I am waiting for. All I am saying is that may be it would be a great idea for you to set up a public calendar for theme update releases. When there has been too much time between the sneak peek teasing and the actual release, the waiting becomes quite unpleasant.
Thank you again for the amazing tools you keep us going our webdesign capabilities to unbelievable levels!
+1 for theme builder.
Can you share how you determined the settings for horizontal and vertical position?
I wish they would make these available for download or add to the layout pack that is already delivered in Divi.
That would be nice but by following along you are learning how to apply these different customisation’s. I think the Tuts are brilliant and this is one of my favourite so far.
Keep these coming please, it shows what is possible and so easy.
Agreed! We learn best by doing!
At least a live preview would compliment the tut nicely imo. Or did I miss the link?