")
Divi and its new border options add a ton of new possibilities to designing a new website with Divi’s built-in settings only. To help you illustrate some of the things you can do with the border options, we’re recreating the examples of the announcement post. In the first part of this post, we’ve handled 7 of the 13 examples. And in this post, we’ll be handling the remaining examples step by step.
We’re not going to share all of the settings of every module that is being used. We’re rather going to focus on the settings that’ll help you achieve the border results. Let’s take a look at the examples we’ll be recreating step by step before we dive into the tutorial.
- 1 The Examples We’ll be Recreating in This Post
- 2 How to Use Divi’s New Border Style Options on Your Website (Part 2)
- 3 Recreate Borders of Example #8
- 4 Recreate Borders of Example #9
- 5 Recreate Borders of Example #10
- 6 Recreate Borders of Example #11
- 7 Recreate Borders of Example #12
- 8 Recreate Borders of Example #13
- 9 Final Thoughts
The Examples We’ll be Recreating in This Post
Example #8

Example #9
Example #10
Example #11
Example #12
Example #13
How to Use Divi’s New Border Style Options on Your Website (Part 2)
Subscribe To Our Youtube Channel
Recreate Borders of Example #8
The Border Concept
This example makes use of both options you have within the Border subcategory; rounded corners and border styles. The border settings are made to each one of the tables individually, instead of all of them at once, because they’re slightly different from one another.
Row Settings
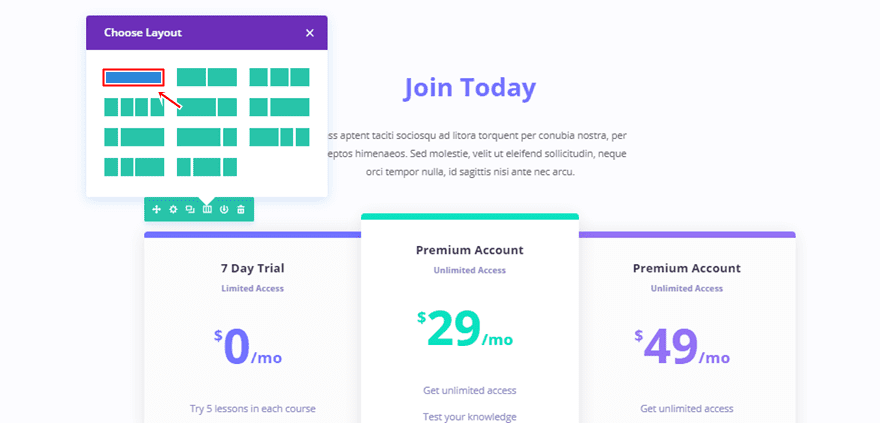
Column Structure
Start by adding a row with one column to an existing section.
Add Pricing Tables Module & Tables
Then, add a Pricing Tables Module to that row and add the tables to it.
First Pricing Table
Border Settings
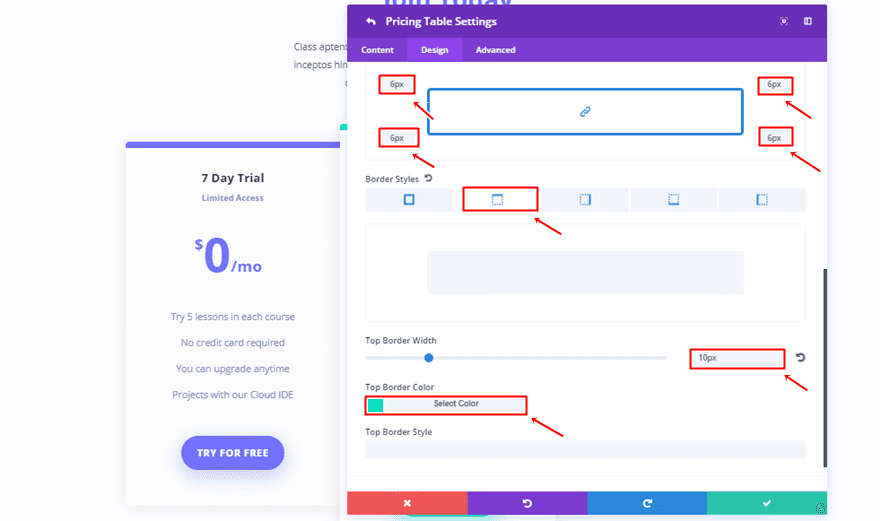
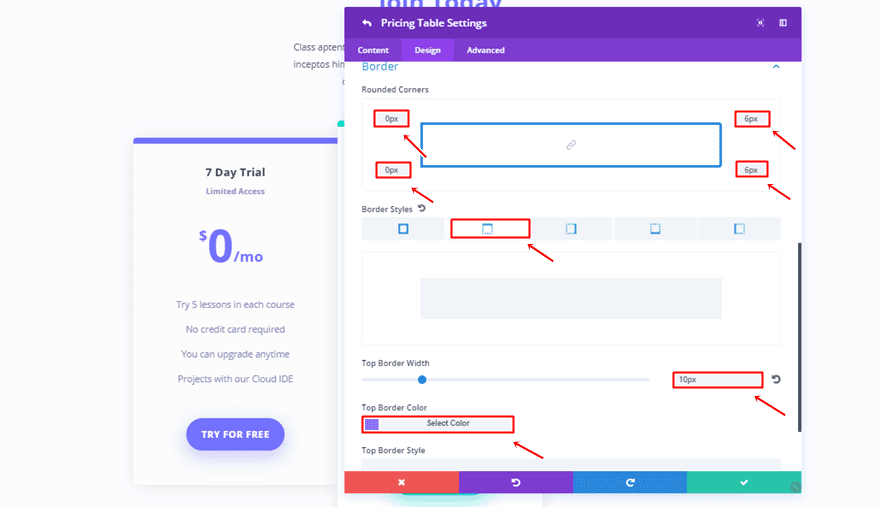
Each pricing table needs the border settings individually. That’s because they slightly differ from one another. Open the first pricing table, the one on the left, and add the following settings to the Border subcategory:
- Top Left: 6px
- Bottom Left: 6px
- Top Right: 0px
- Bottom Right: 0px
- Top Border Width: 10px
- Top Border Color: #7272ff

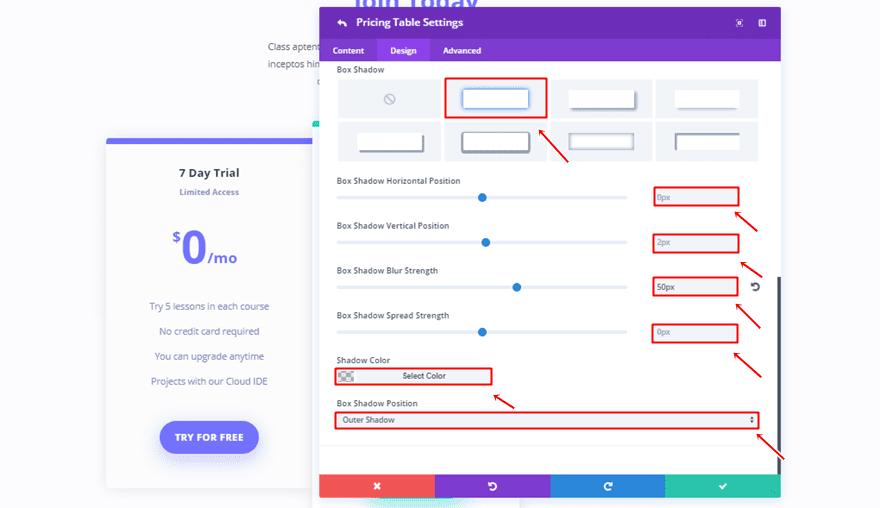
Box Shadow Settings
Then, open the Box Shadow subcategory and use the following settings:
- Box Shadow Horizontal Position: 0px
- Box Shadow Vertical Position: 2px
- Box Shadow Blur Strength: 50px
- Box Shadow Spread Strength: 0px
- Shadow Color: rgba(0,0,0,0.1)
- Box Shadow Position: Outer Shadow
Second Pricing Table
Border Settings
The second pricing table, has instead, the following settings:
- Top Left: 6px
- Bottom Left: 6px
- Top Right: 6px
- Bottom Right: 6px
- Top Border Width: 10px
- Top Border Color: #09e1c0
Box Shadow Settings
Use the same box shadow as the one for the first pricing table.
Third Pricing Table
Border Settings
The last pricing table will need the following settings for the Border subcategory:
- Top Left: 0px
- Bottom Left: 0px
- Top Right: 6px
- Bottom Right: 6px
Box Shadow Settings
Again, the same settings apply to the Box Shadow subcategory.
Recreate Borders of Example #9
The Border Concept
This border concept allows you to create a border on the entire row. We’re using the same color for the row background and the border which helps us create some space between the column 2 background image and the row.
Row Settings
Column Structure
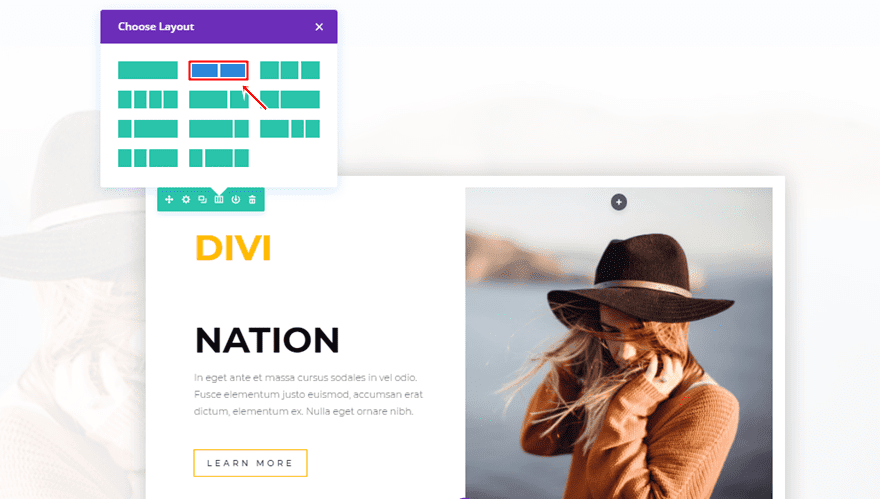
For this example, you will need to add a two-column row to an existing section.
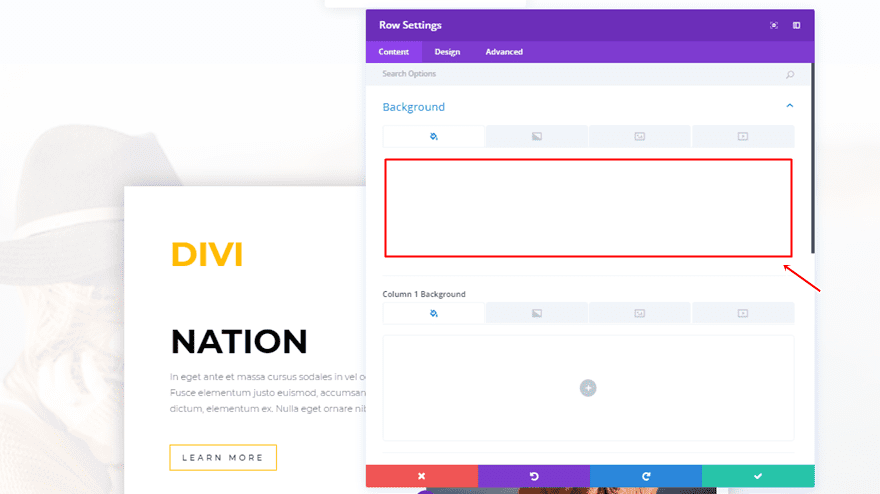
Background Color
Then, open the row settings and add ‘#ffffff’ as the background color.
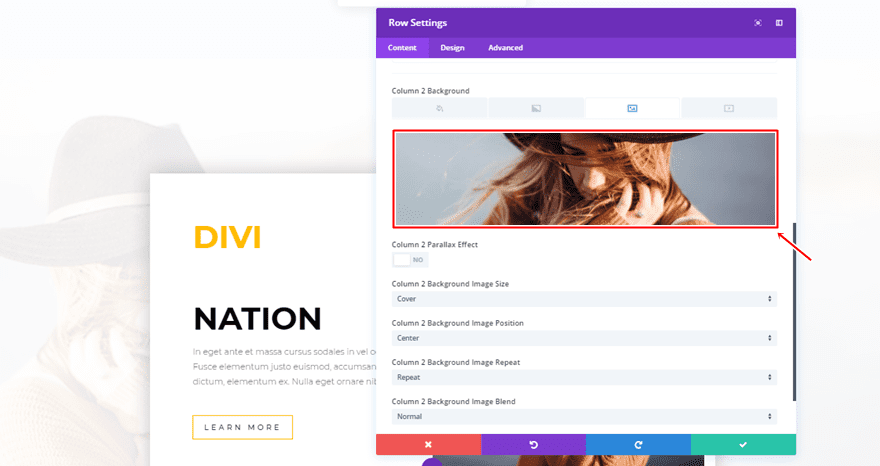
Column 2 Background Image
Then you can add all kinds of modules to that row, or, choose a column background images you’d like to appear within your row.
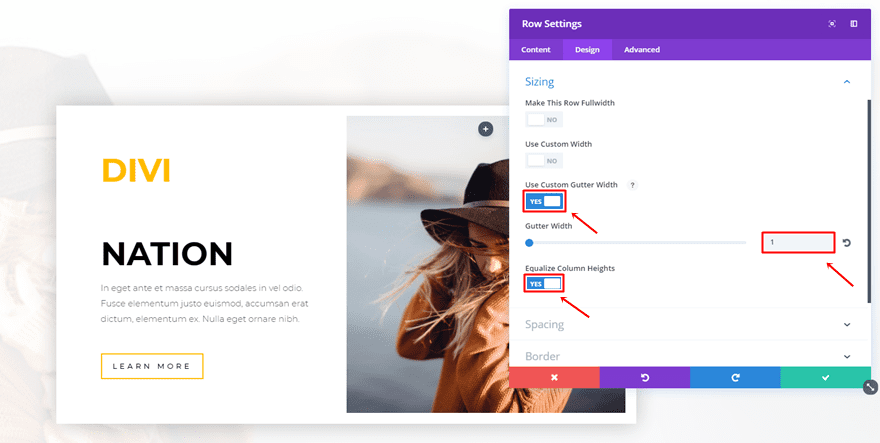
Sizing
Move on to the Design tab and add the following settings to the Sizing subcategory:
- Use Custom Gutter Width: Yes
- Gutter Width: 1
- Equalize Column Heights: Yes
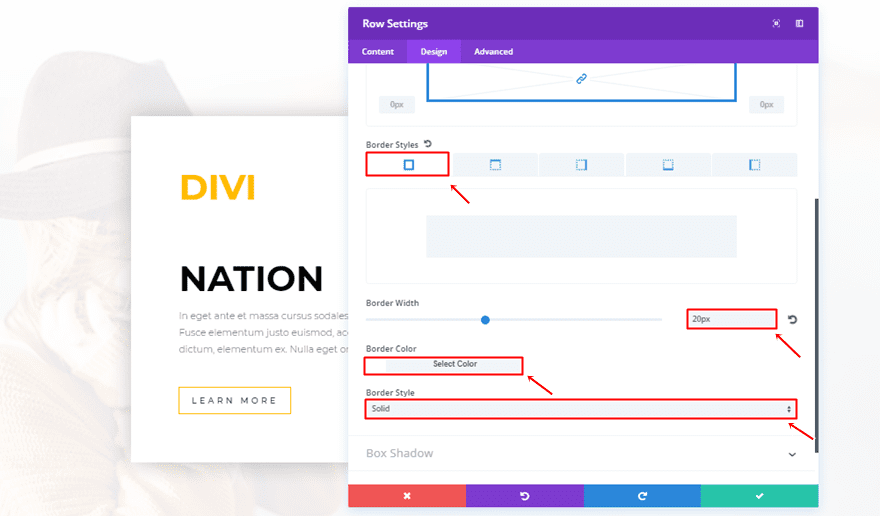
Border
Then, scroll down and add the following border style to your row:
- Border Width: 20px
- Border Color: #ffffff
- Border Style: Solid
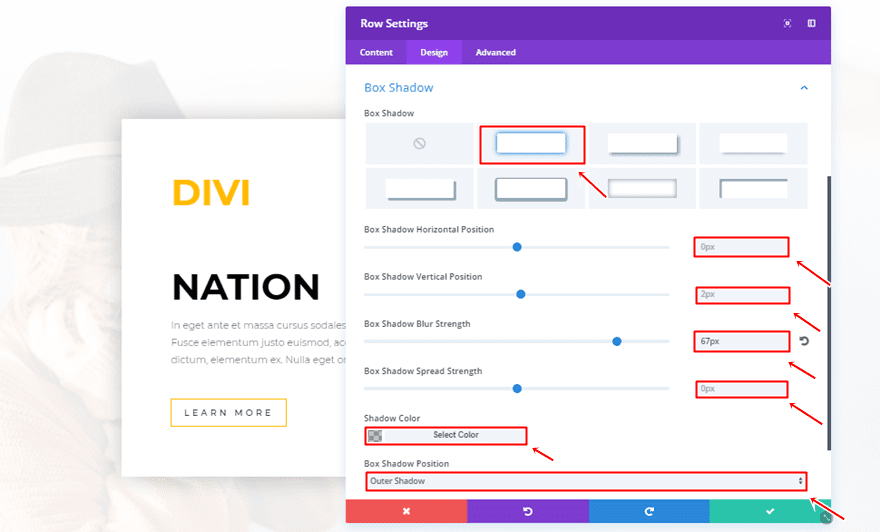
Box Shadow
Lastly, you can also add some box shadow to create more depth:
- Box Shadow Horizontal Position: 0px
- Box Shadow Vertical Position: 2px
- Box Shadow Blur Strength: 67px
- Box Shadow Spread Strength: 0px
- Shadow Color: rgba(0,0,0,0.23)
- Box Shadow Position: Outer Shadow
Recreate Borders of Example #10
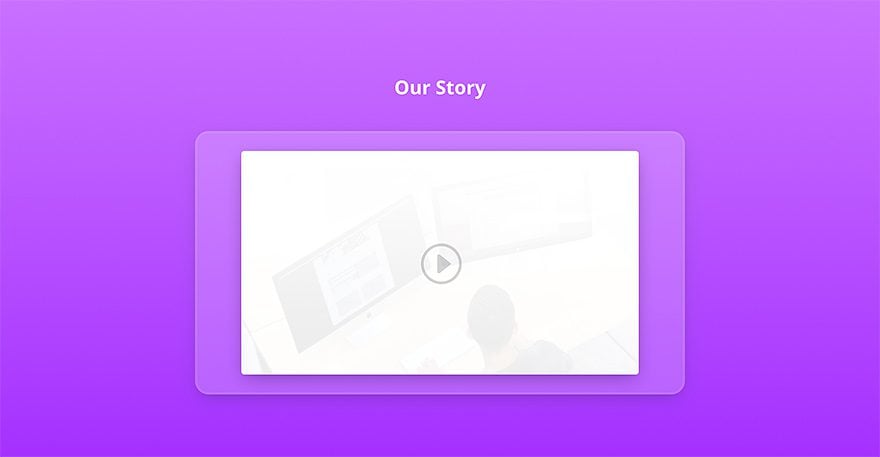
The Border Concept
For the next example, we’re going to create a tablet that is half transparent. This, in combination with a gradient background, gives a beautiful result.
Section Settings
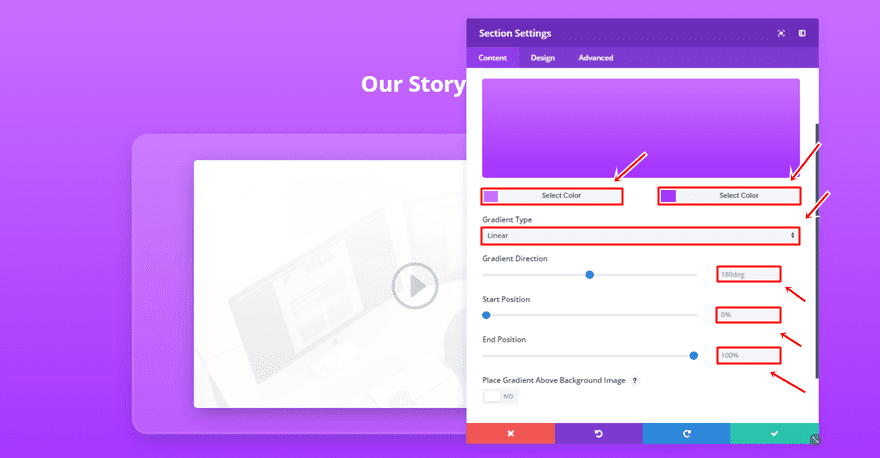
Gradient Background
Start by adding a new standard section and add a gradient background to it. In this example, we’ve used the following settings:
- First Color: #ca70ff
- Second Color: #a530ff
- Gradient Type: Linear
- Gradient Direction: 180deg
- Start Position: 0%
- End Position: 100%
Row Settings
Column Structure
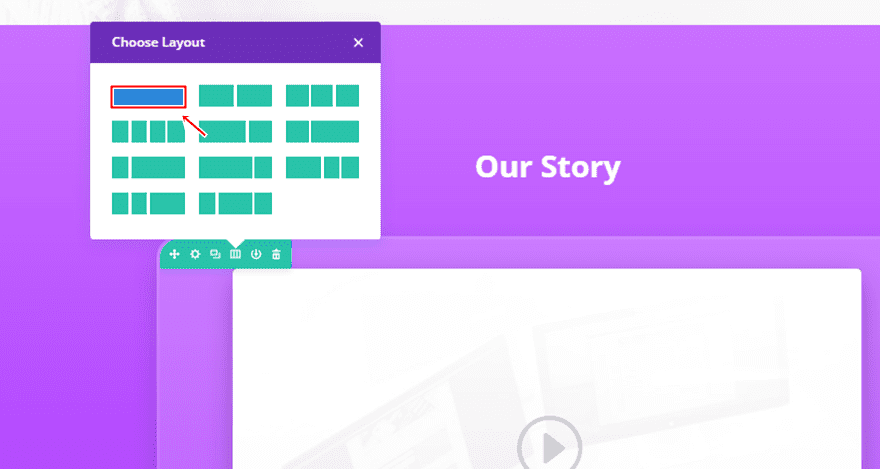
Then, add a row with one column to the section you’ve created.
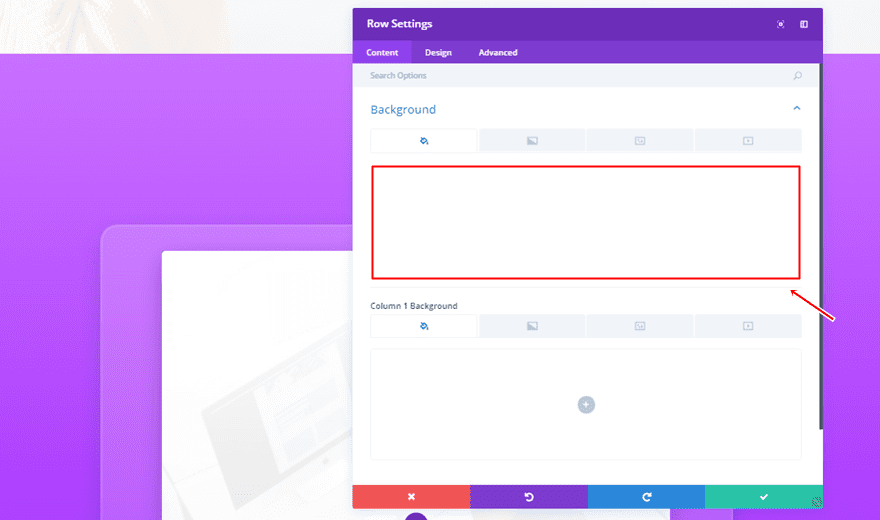
Background Color
Open the row settings and add ‘rgba(255,255,255,0.19)’ as the background color.
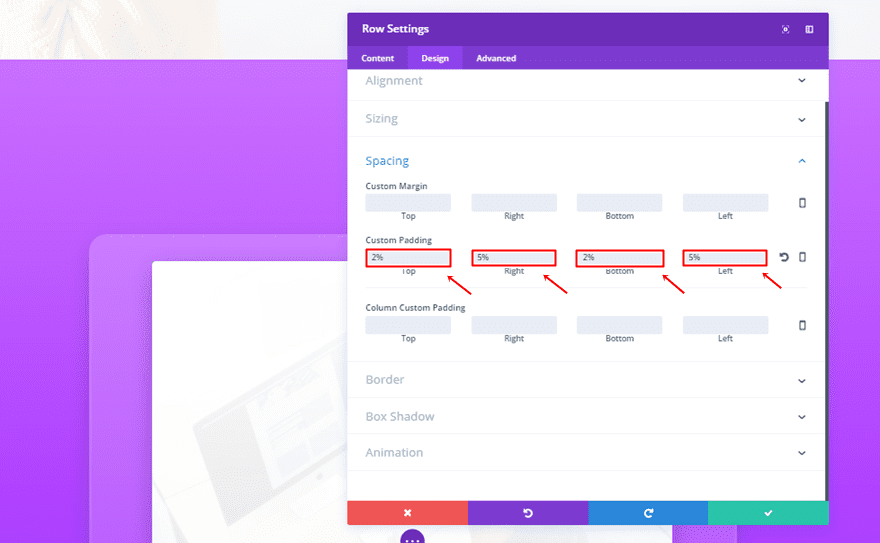
Spacing
Then, move on to the Design tab and add the following Custom Padding:
- Top & Bottom: 2%
- Right & Left: 5%
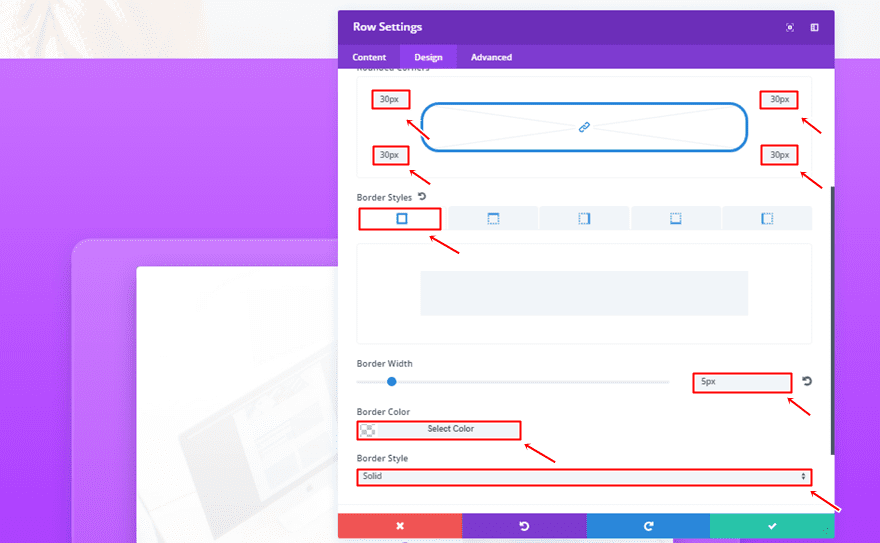
Border
Scroll down, open the Border subcategory and add the following settings to it:
- Top Left: 30px
- Bottom Left: 30px
- Top Right: 30px
- Bottom Right: 30px
- Border Width: 5px
- Border Color: rgba(255,255,255,0.07)
- Border Style: Solid
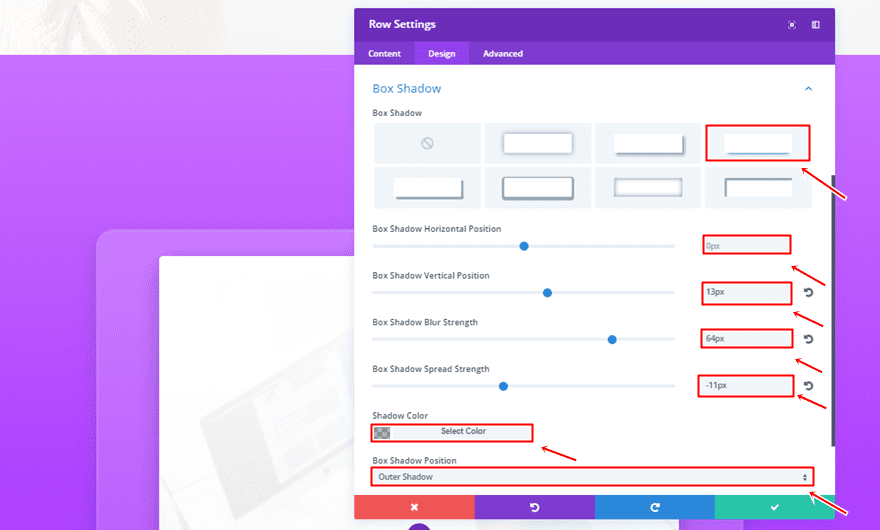
Box Shadow
Lastly, add the following box shadow to the row:
- Box Shadow Horizontal Position: 0px
- Box Shadow Vertical Position: 13px
- Box Shadow Blur Strength: 64px
- Box Shadow Spread Strength: -11px
- Shadow Color: rgba(26,54,68,0.36)
- Box Shadow Position: Outer Shadow
Add Video Module to Column
Lastly, add a Video Module to the column of your row and upload a video or insert a video link.
Recreate Borders of Example #11
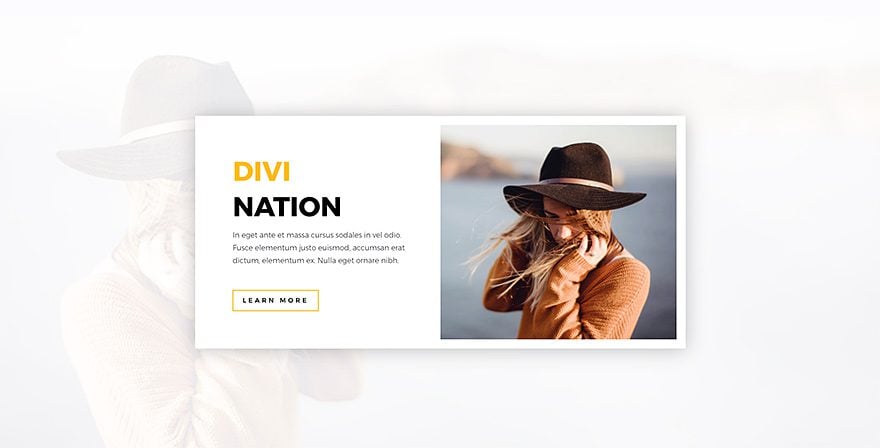
The Border Concept
The next example of awesome border settings is one that is applied to an Image Module. You can create stunning results for your images by combining box shadows and borders and this example shows that off.
Image Module Settings
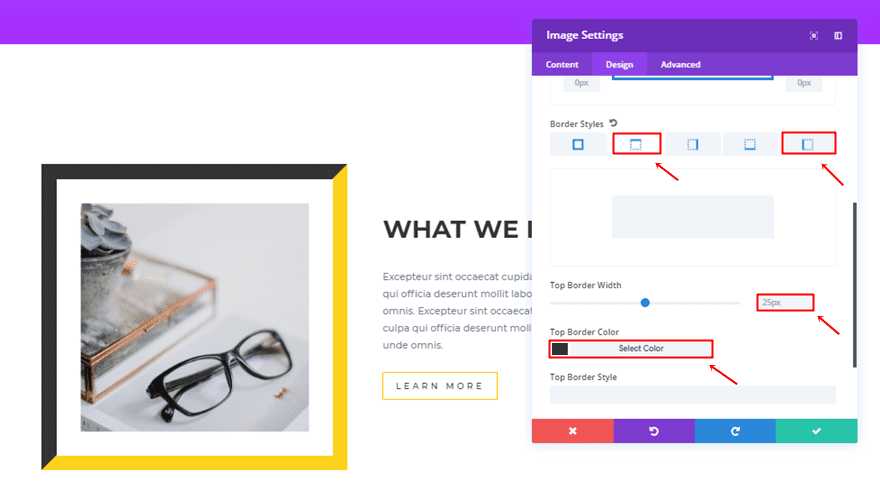
Border
Add an Image Module to an existing column and after adding the image, move on to the Design tab. Open the Border subcategory and add the following settings to the top and left side:
- Border Width: 25px
- Border Color: #333333
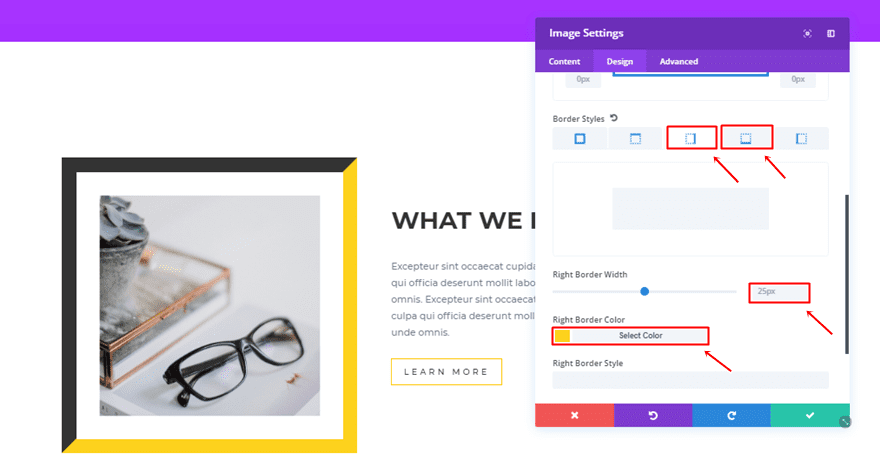
And the following settings to the right and bottom:
- Border Width: 25px
- Border Color: #fcd21d
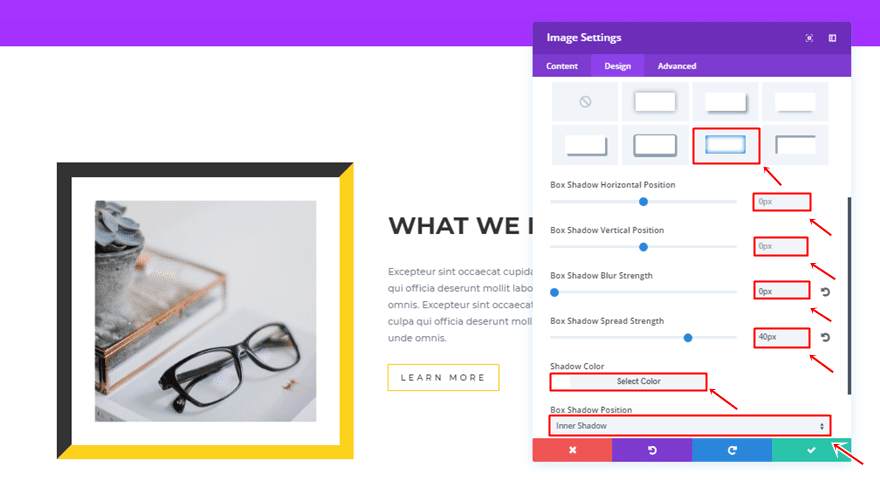
Box Shadow
Then, add the following box shadow as well:
- Box Shadow Horizontal Position: 0px
- Box Shadow Vertical Position: 0px
- Box Shadow Blur Strength: 0px
- Box Shadow Spread Strength: 40px
- Shadow Color: #ffffff
- Box Shadow Position: Inner Shadow
Recreate Borders of Example #12
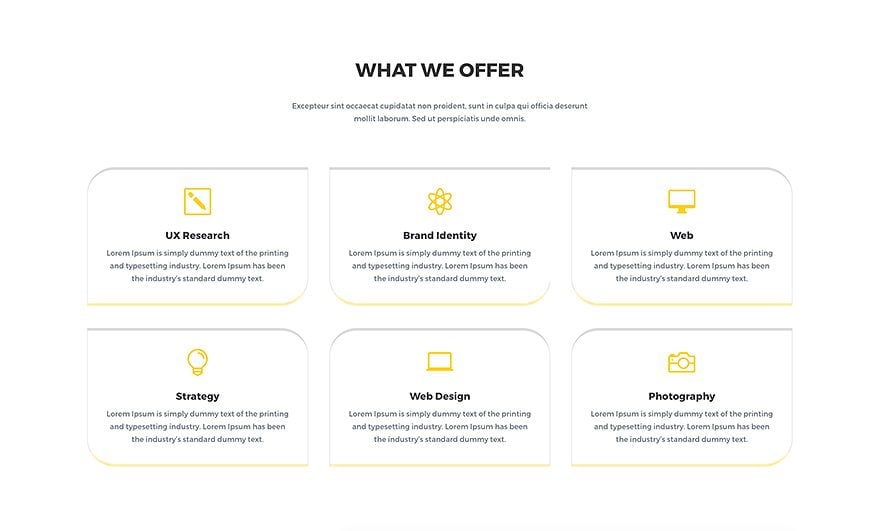
The Border Concept
The following example allows you to create a bigger picture for the Blurb Modules you’re using on your website. Although there’s only a little difference between the modules, it’s enough to make them stand out from each other.
Row Settings
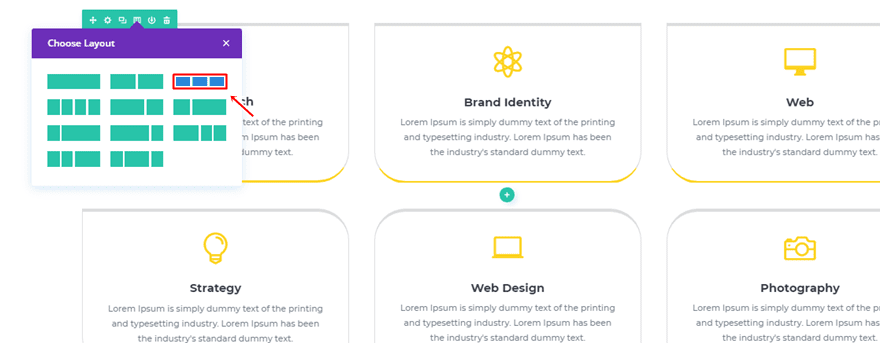
Column Structure
Start by adding two rows with both three columns.
Blurb Module Overall Settings
Spacing
The first thing we’ll be doing is adding all the settings that apply to all of the Blurb Modules. The Custom Padding of ’40px’ for each option is one of those settings.
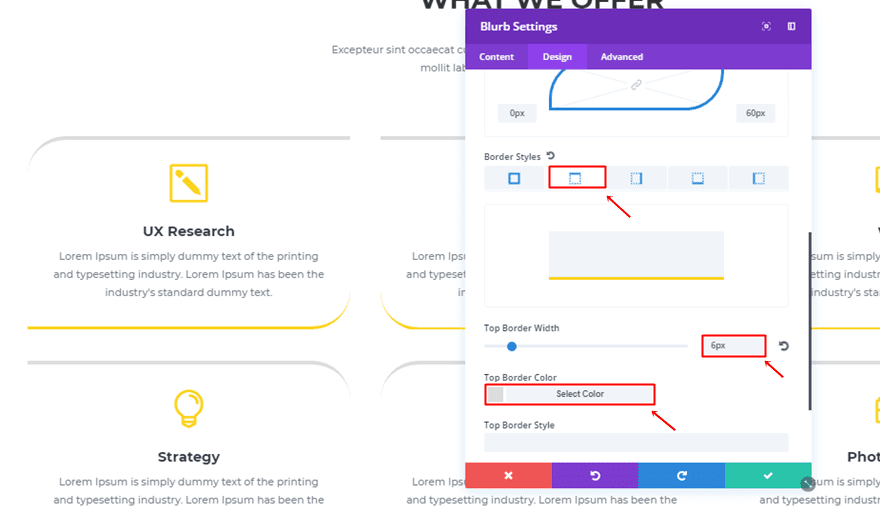
Border Style
Then, add the following top border to the Border subcategory:
- Border Width: 6px
- Border Color: #dddddd
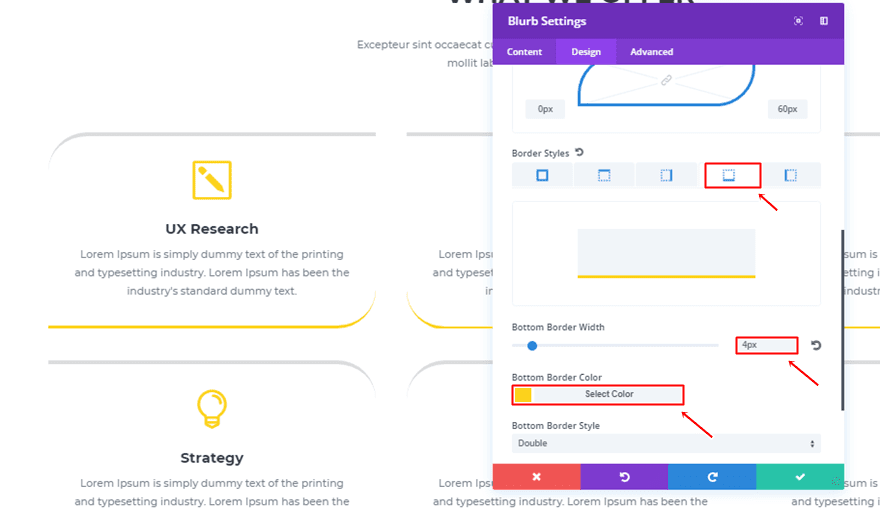
The bottom will need the following settings:
- Border Width: 4px
- Border Color: #fcd21d
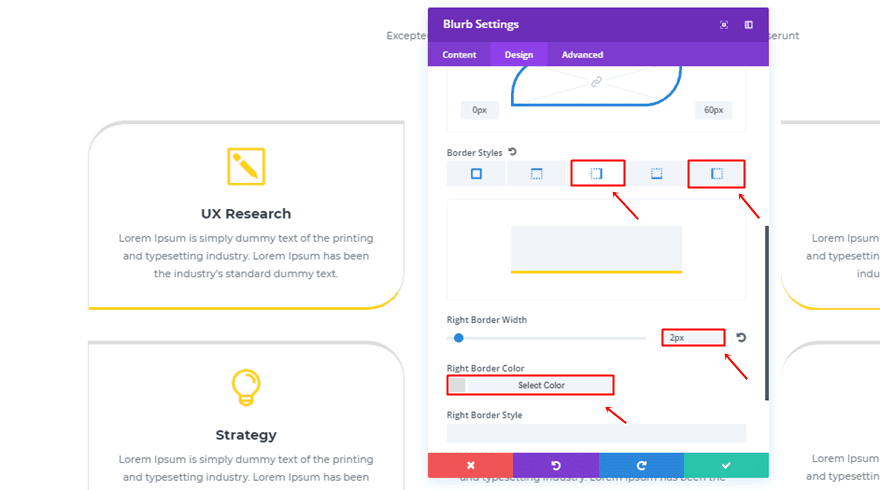
Lastly, add the following border style to the left and right side:
- Border Width: 2px
- Border Color: #dddddd
Clone Blurb Module Five Times
Once you’ve added all of the general settings to a Blurb Module, you can clone these five times and place them within the remaining columns. In the next part, we’re going to add the various rounded corners to each Blurb Module individually.
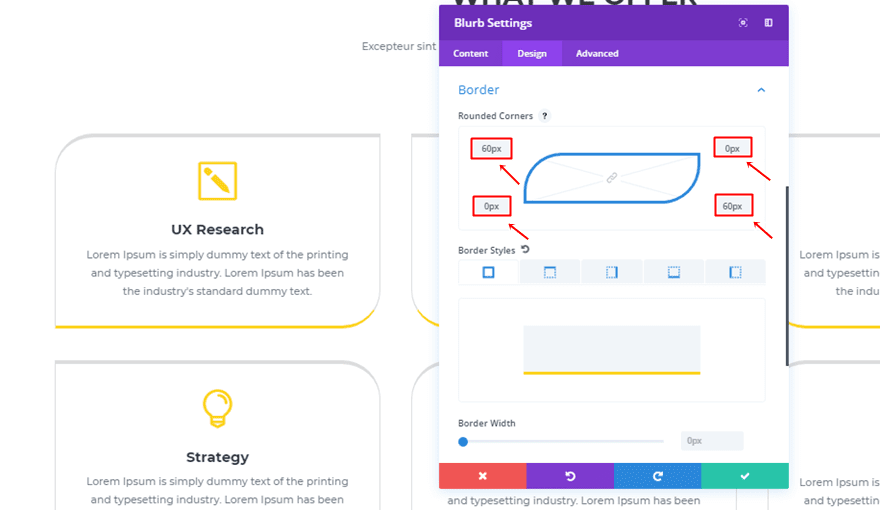
First Row Rounded Corners
Left Blurb Module
The first Blurb Module within the first row has the following rounded corners:
- Top Left: 60px
- Bottom Left: 0px
- Top Right: 0px
- Bottom Right: 60px
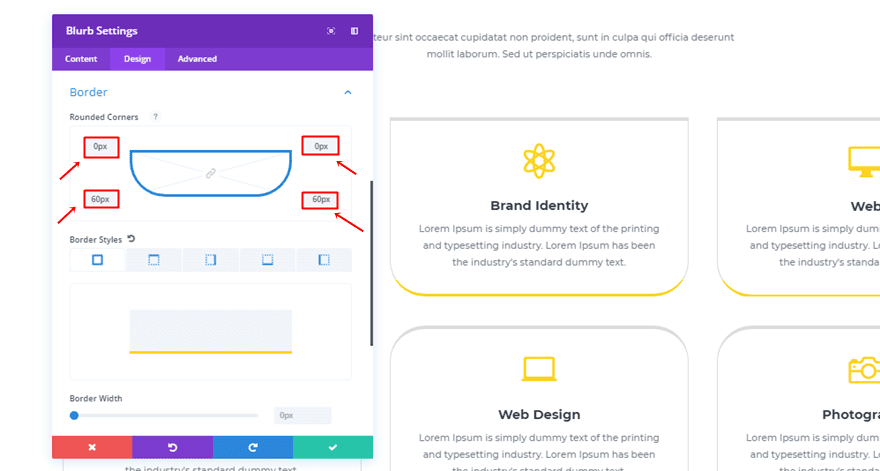
Middle Blurb Module
The second Blurb Module’s rounded corners are the following:
- Top Left: 0px
- Bottom Left: 60px
- Top Right: 0px
- Bottom Right: 60px
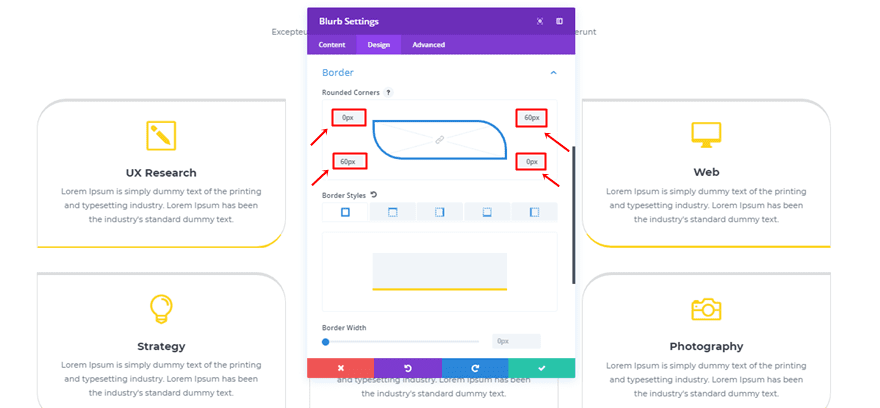
Right Blurb Module
The last Blurb Module of the first row has the following rounded corners:
- Top Left: 0px
- Bottom Left: 60px
- Top Right: 60px
- Bottom Right: 0px
Second Row Rounded Corners
Left Blurb Module
The left and first Blurb Module of the second row has the same settings as the last one in the first row:
- Top Left: 0px
- Bottom Left: 60px
- Top Right: 60px
- Bottom Right: 0px
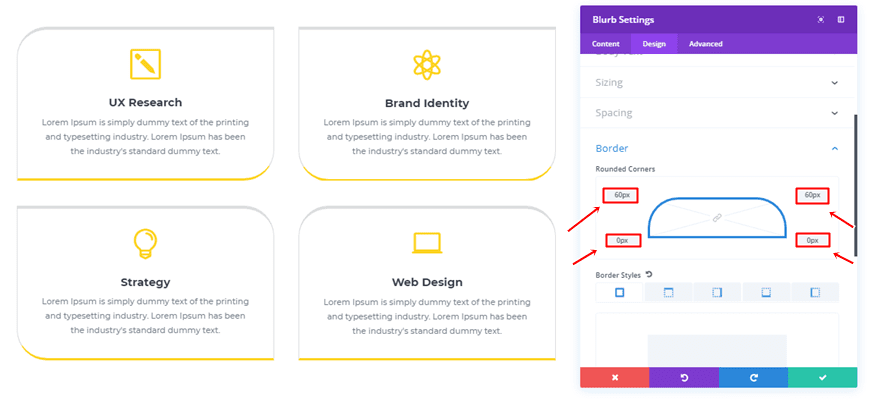
Middle Blurb Module
The middle one needs the following rounded corners:
- Top Left: 60px
- Bottom Left: 0px
- Top Right: 60px
- Bottom Right: 0px
Right Blurb Module
The last Blurb Module of the second row has the same rounded corners as the first Blurb Module in the first row:
- Top Left: 60px
- Bottom Left: 0px
- Top Right: 0px
- Bottom Right: 60px
Recreate Borders of Example #13
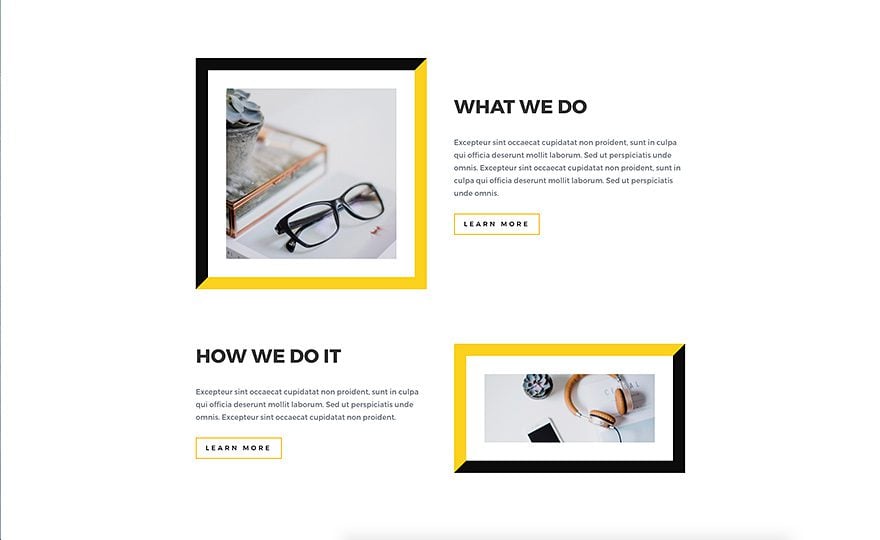
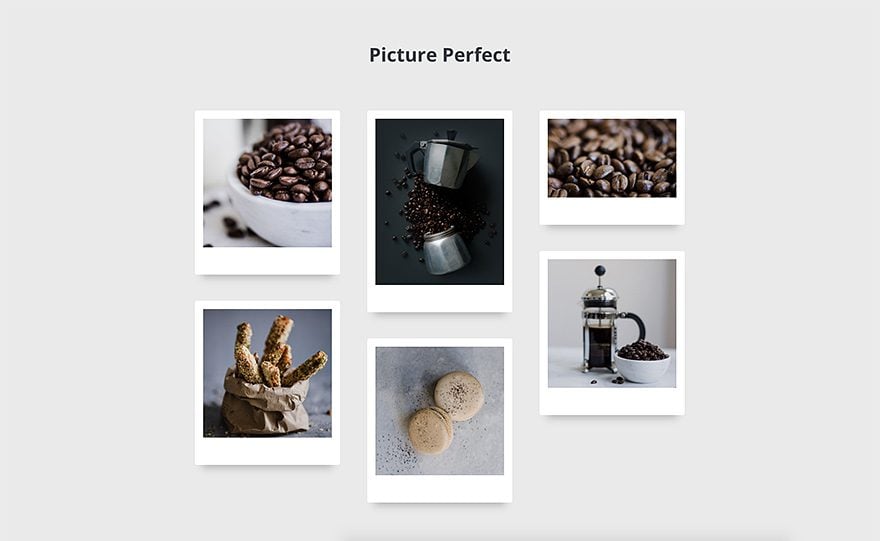
The Border Concept
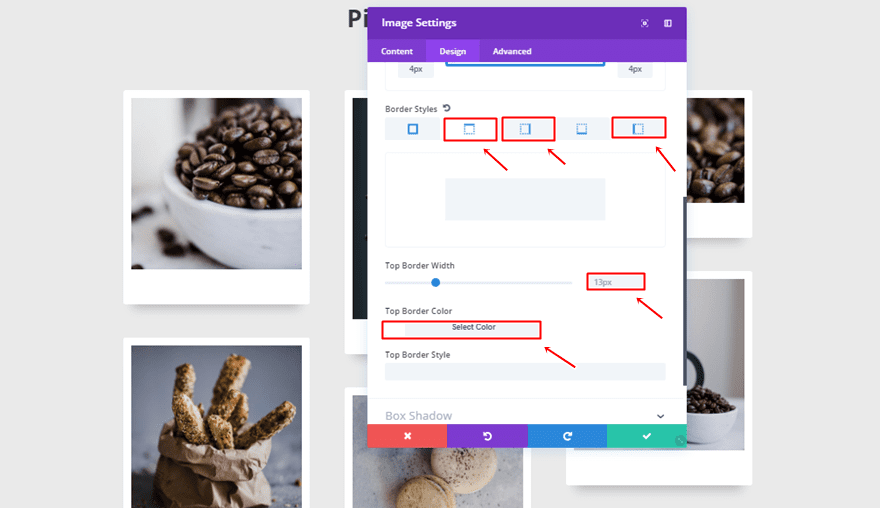
The last example of this post helps you add a Polaroid effect to your images. This is, for instance, a great way to showcase images in a memorable way. We’re, again, using a combination of border settings and box shadow settings.
Image Module Settings
Border
Add an Image Module to an existing row and make use of the following settings for the top, right and left side:
- Border Width: 13px
- Border Color: #ffffff
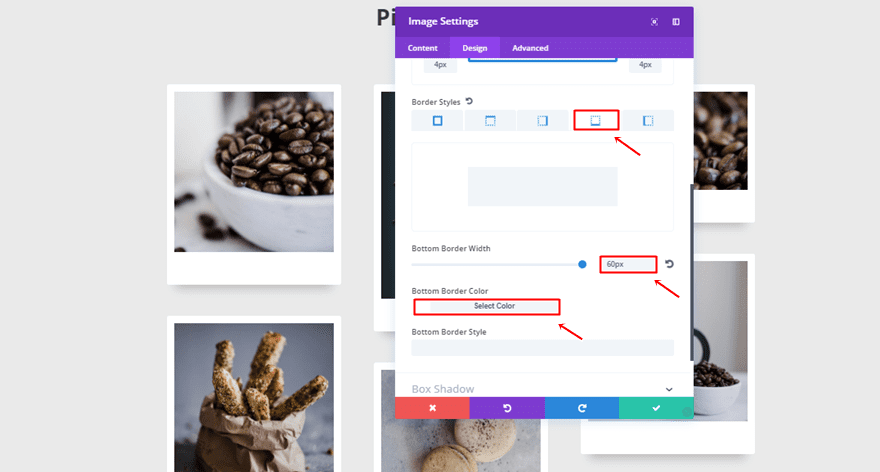
The bottom is slightly different:
- Border Width: 60px
- Border Color: #ffffff
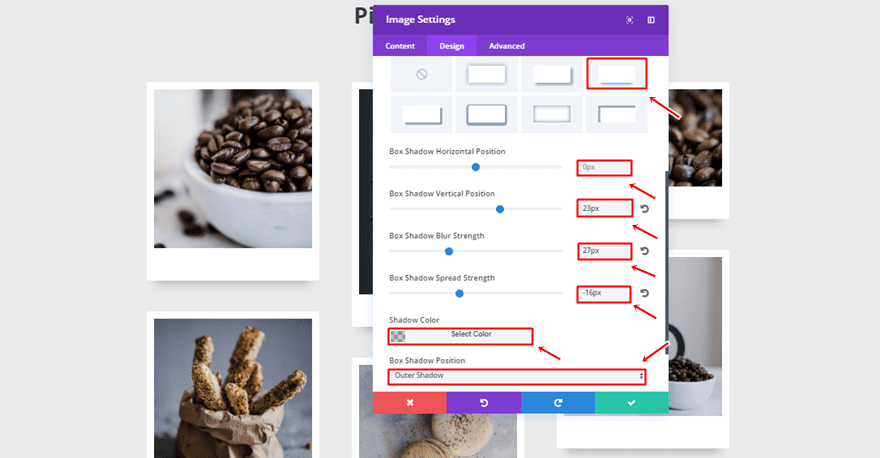
Box Shadow
Lastly, add the following box shadow:
- Box Shadow Horizontal Position: 0px
- Box Shadow Vertical Position: 23px
- Box Shadow Blur Strength: 27px
- Box Shadow Spread Strength: 16px
- Shadow Color: rgba(0,0,0,0.21)
- Box Shadow Position: Outer Shadow
Clone Image Module as Many Times as Needed
To create the entire result, you can clone the Image Module as many times as you want and place them in the different columns. The only thing you’ll have to change is the image.
Final Thoughts
This was part two of exploring the new Divi border options. All of the examples that were made within this blog post are part of Divi’s built-in settings and don’t require any additional CSS code at all. If you have any questions; make sure you leave them in the comment section below!
Featured Image by estherpoon / shutterstock.com


Is there a way to add text into a border, say above a landing page photo background? That would be sweet! Thanks
Nice Options! Thanks 🙂
Super clever ways to use borders and divi – thanks so much for all your work.