
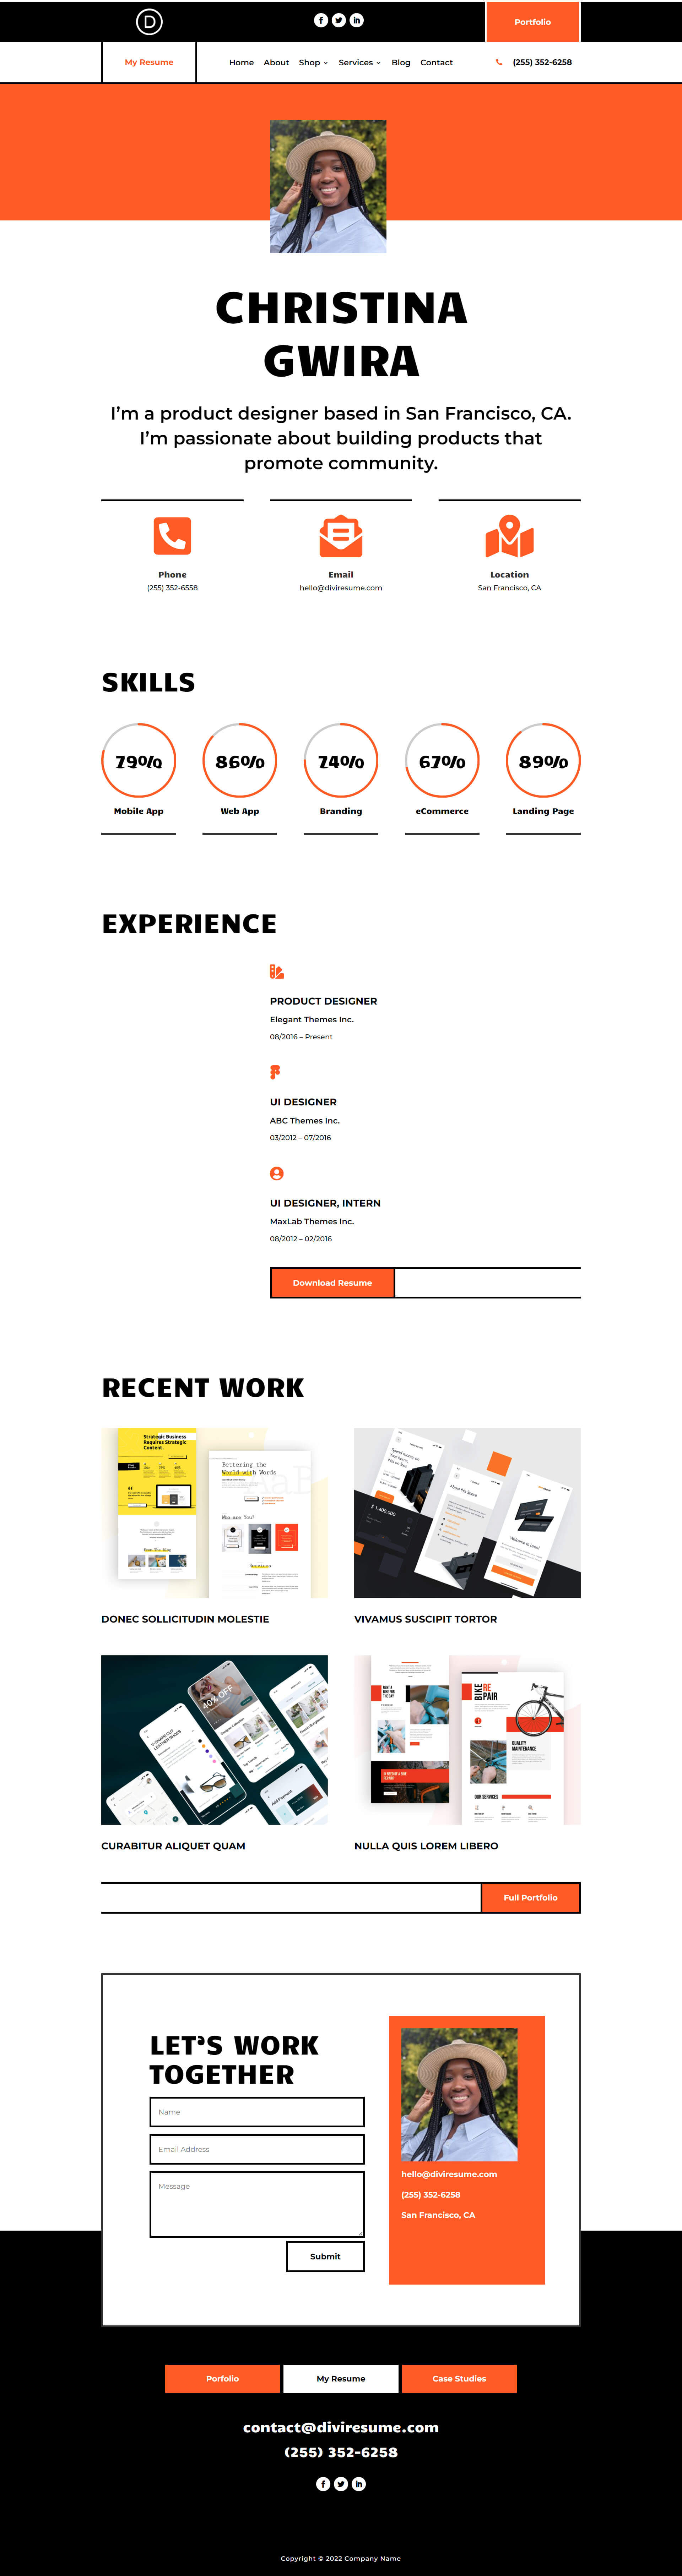
Although a traditional resume is timeless, consider creating an online resume website to showcase your skills as well. Especially if you’re searching for a job in the tech industry. In this tutorial, we’ll show you how to use Divi and the FREE Creative CV Layout Pack to create an online resume website design! We’ll focus on using the built-in Divi Circle Counter Module as well.
Online Resume Website Design: Why is it Important?
While dropping off a paper resume may work in some industries, in tech, that is a thing of the past. It is important to consider resources that will give your resume the boost it needs to get the job. At the very least, we want an interview! An online resume website creates a central place where recruiters, headhunters, and potential managers can learn more about you. Building a strong personal brand online allows your future employers to see the real you, in addition to what’s on your resume. Some pages that you can consider adding to your personal resume website include:
- An About Page: Firstly, and more importantly, remember to craft a brand voice that is uniquely you. Don’t forget to brag about yourself!
- An Online Resume: An online resume puts you in front of the companies looking at your job application. Additionally, search engines like Google and Bing can find it as well. The more eyes that see it, the more chances you have of finding your next opportunity!
- A Testimonials Page: Showcasing praise and good work from prior (or current!) bosses and is great social proof.
- A Portfolio/Gallery: If you have examples of your work, putting them into a portfolio adds dimension to your resume.
- A Contact Page: A contact form and email address make it easy for people to get in touch with you, and give you that job!
If this is all new to you, don’t worry! We’ll help you get started with designing your online resume website. At Divi, we created the FREE Creative CV Layout Pack that you can download. In this pack, we have page layouts for each of the pages listed above. Also, we’ll be using Divi’s animation features, as well as cool modules like the Circle Counter Module to showcase our various skill sets online.
Let’s get started and get that tech bag!
Starting Your Online Resume Website Design
Download and Install the Layout Pack
The first step to building our online resume website is downloading and installing the Creative CV Layout Pack. We have instructions on the process in this blog post. This tutorial will focus on upgrading the home layout of the pack with the Circle Counter Module. This is a native Divi module and is the perfect way to showcase your skill set. With clean lines, animation, and more, you can display your skills in a highly visual way, setting you and your resume apart.
This is what the home layout looks like out of the box:
Though this layout is a good jumping-off point for our online resume website design, we will make it more personalized. Firstly, we will use Circle Counter Modules to animate the skills section. Then, we will add some animation to the other modules on the page. Finally, we’ll add some more visual interest to the page with the Icon Module.
Updating the Skills Section
Changing the Row Structure
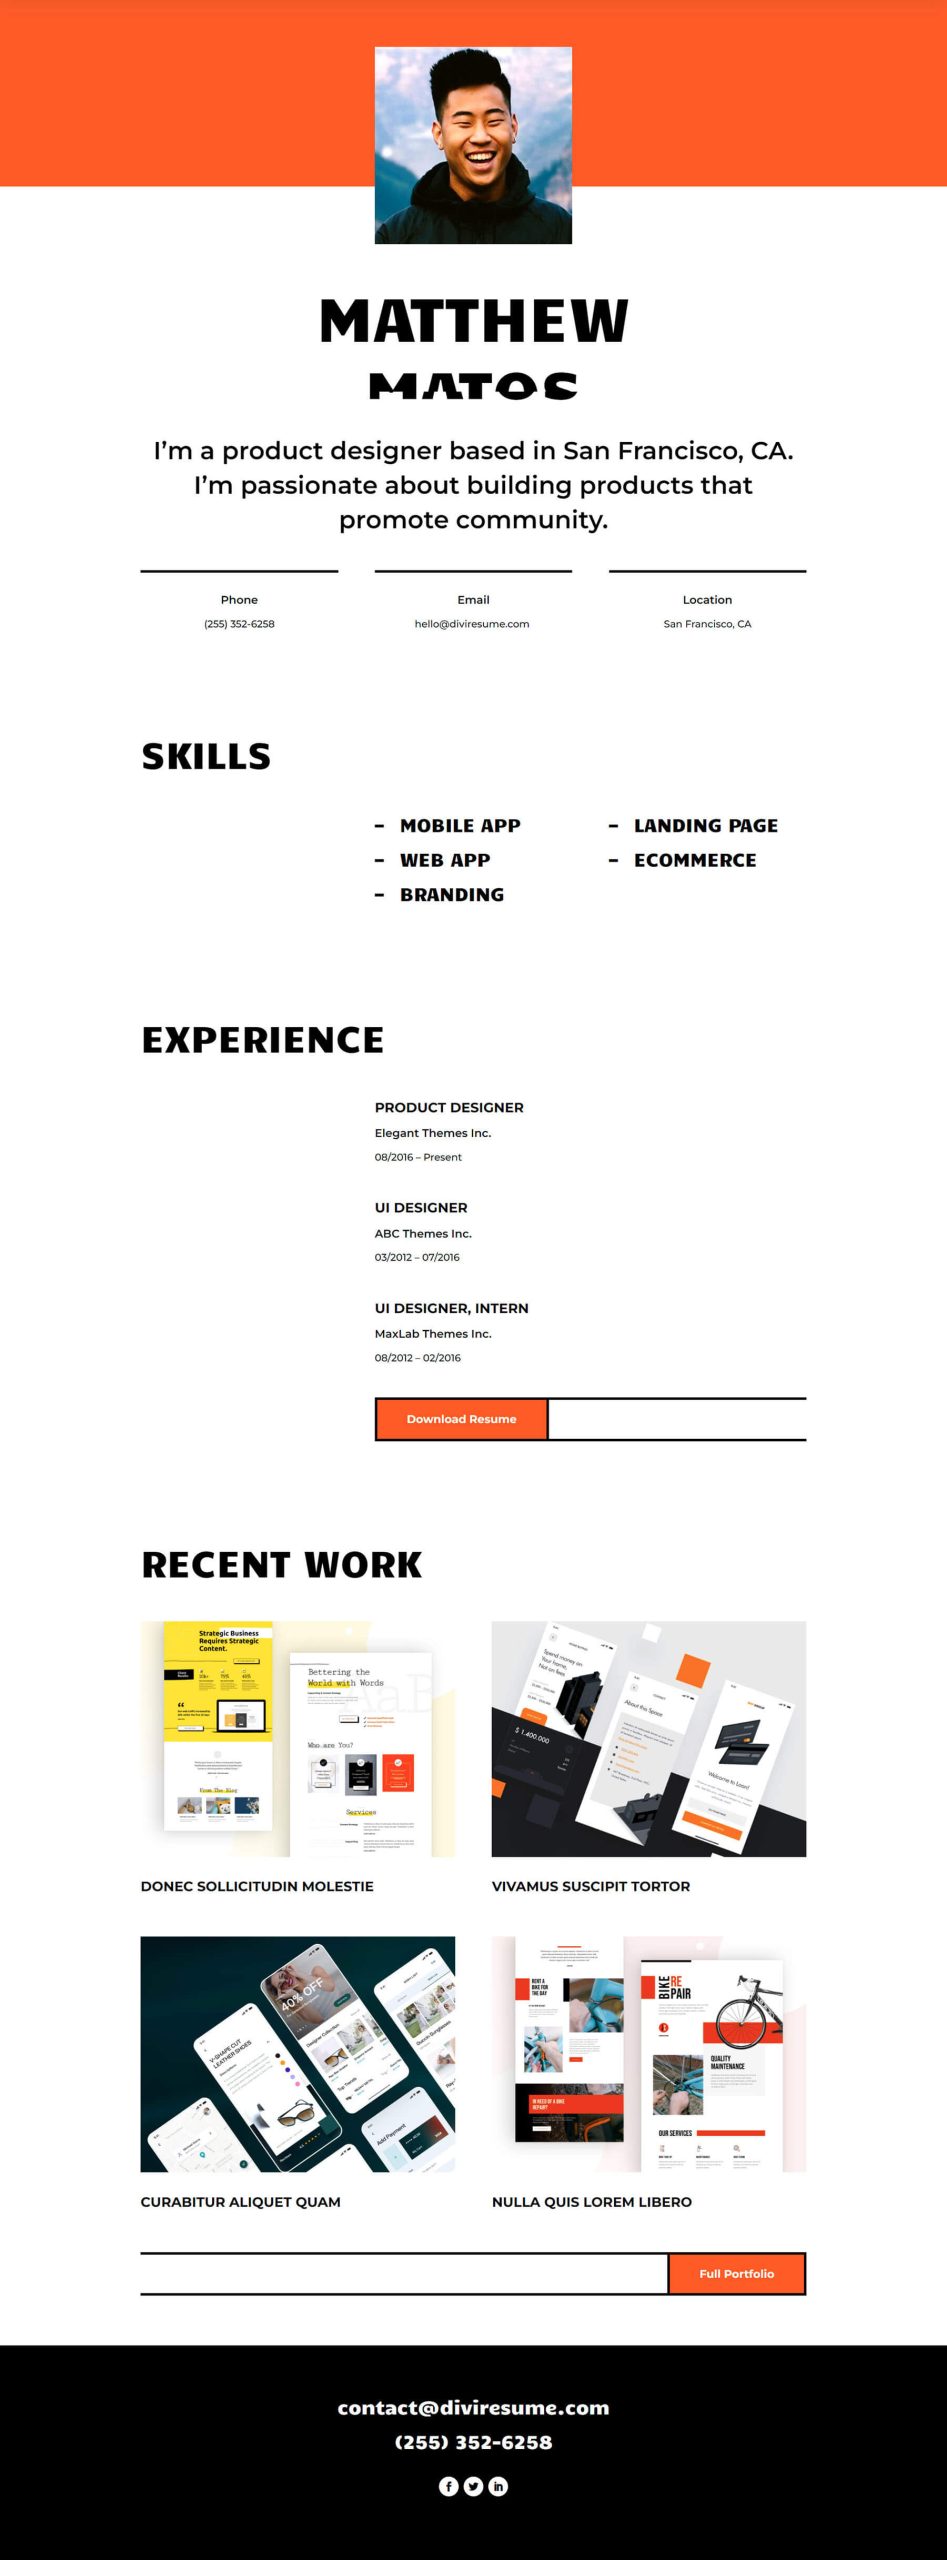
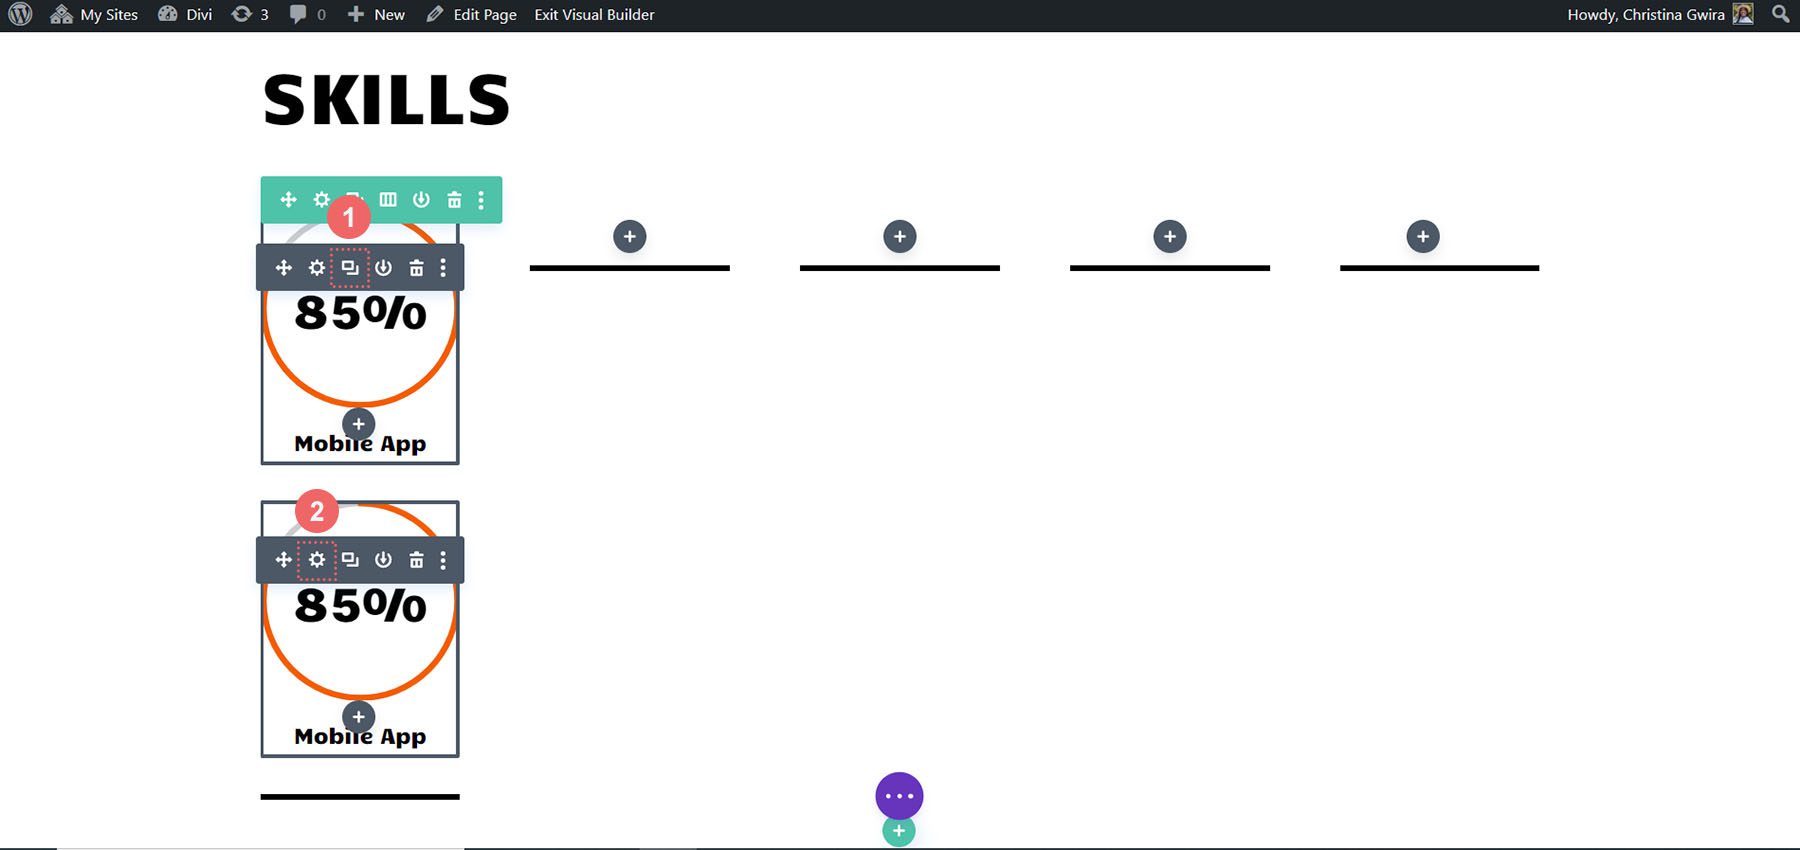
First, let’s remove the Text Modules that are currently in this section. Hover over each module, and click on the trash can icon in the Module Settings menu that appears.
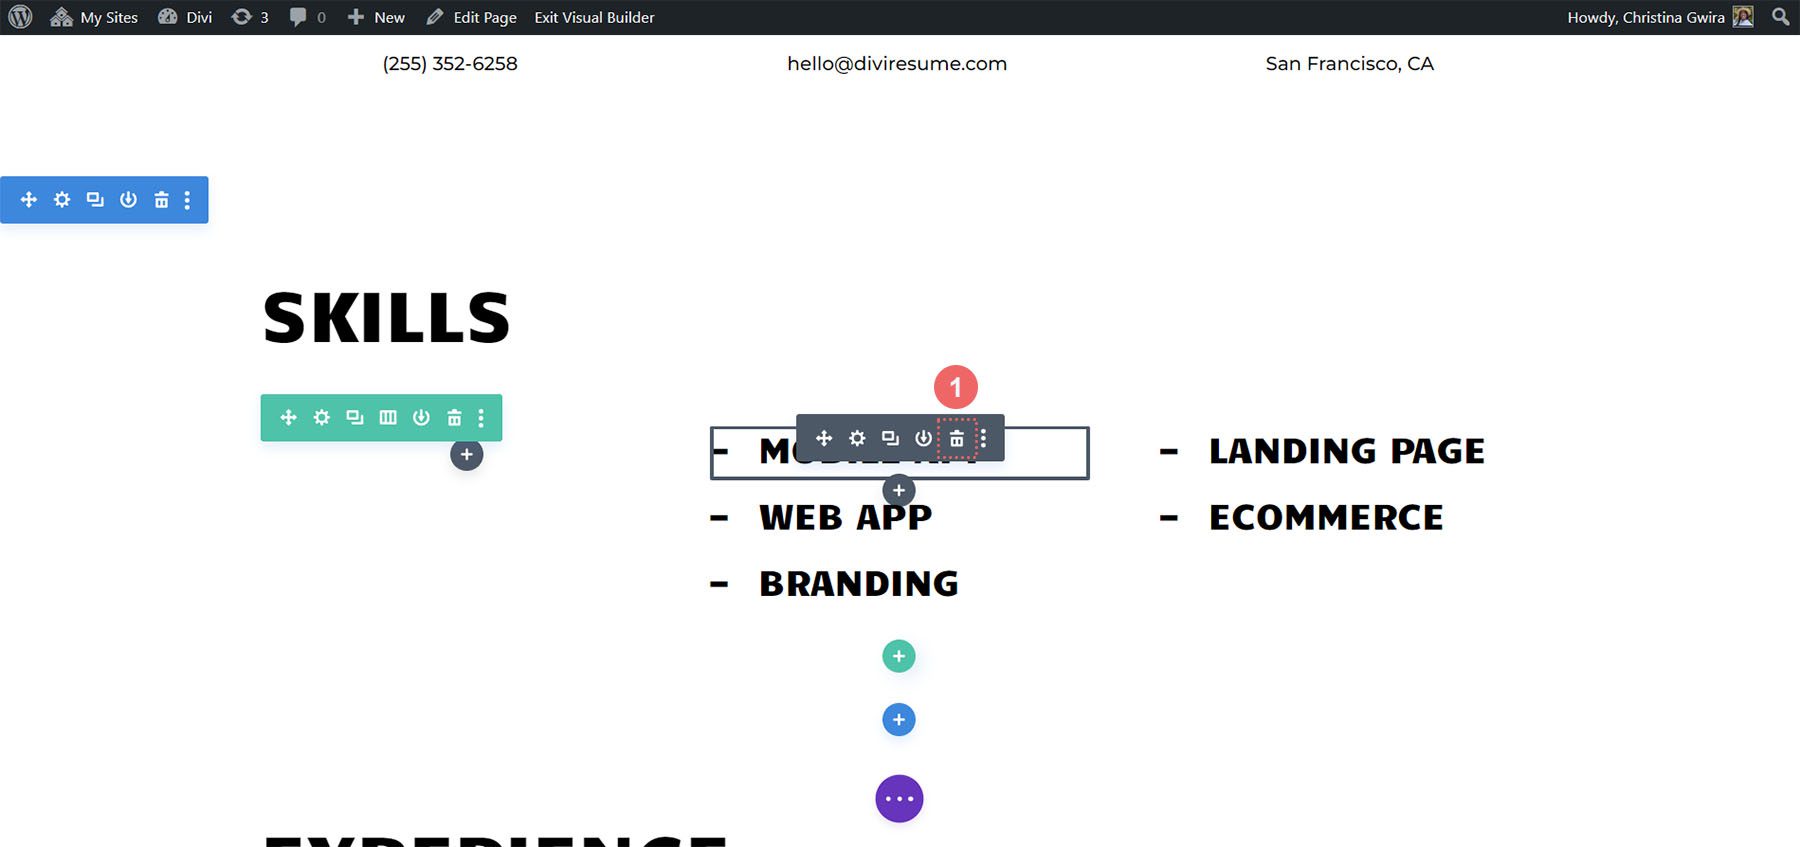
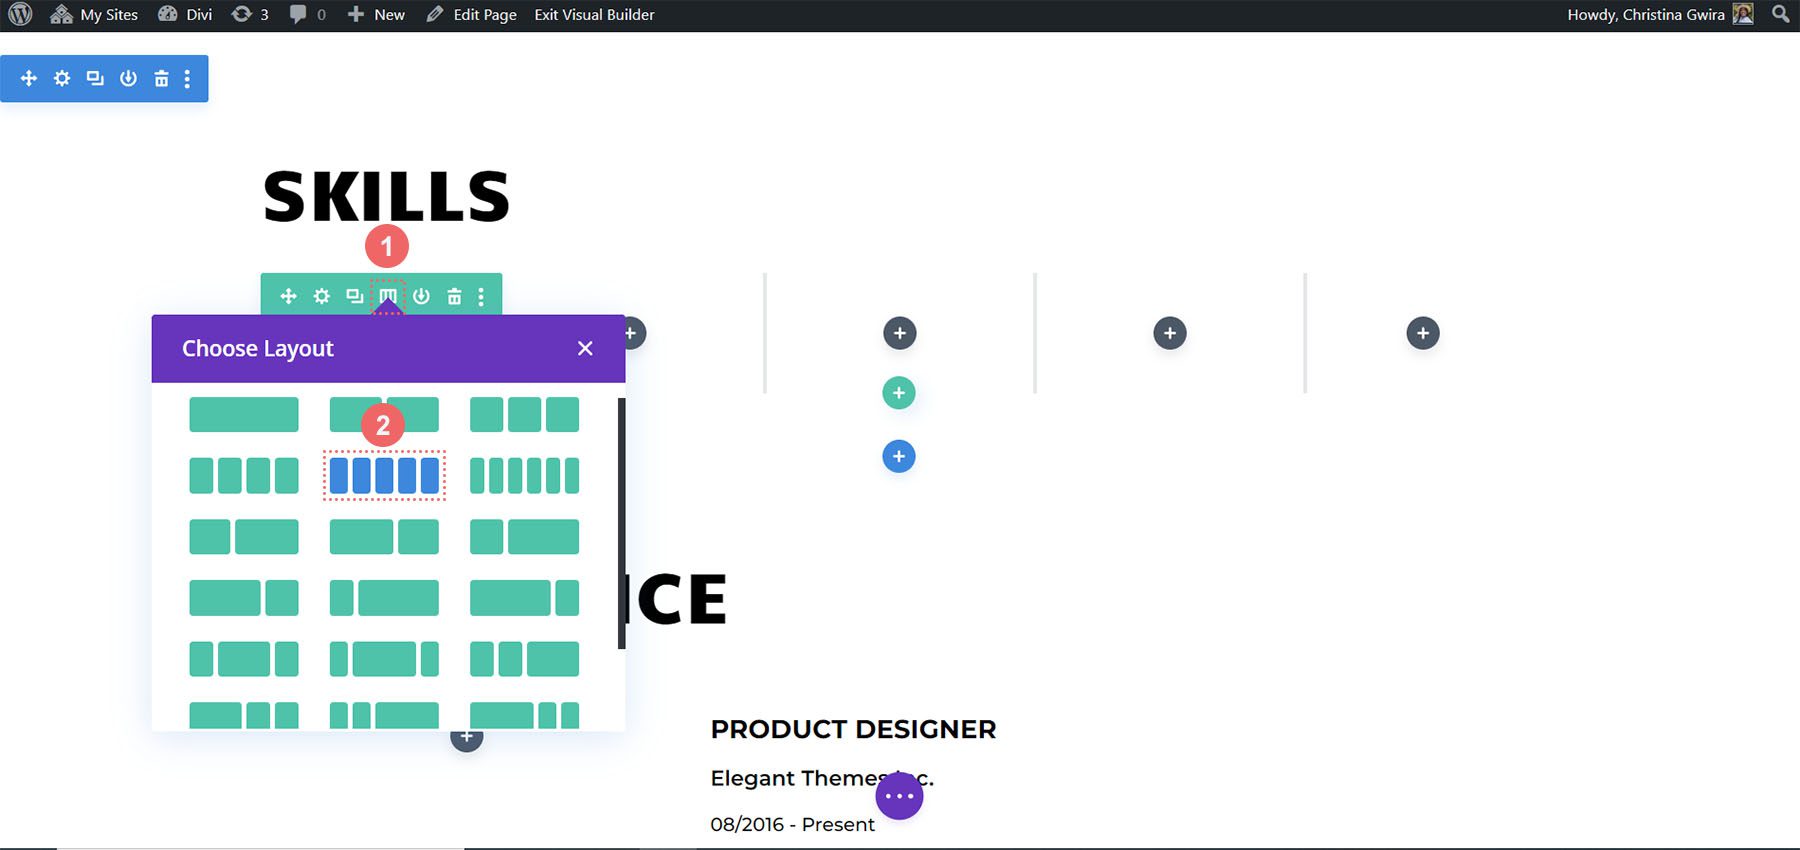
Secondly, change the structure of the row. Click on the grid icon within the row’s hover menu. Then, select the number of columns that match up with the number of skills you want to showcase. We went with 5 columns, so we clicked the icon for 5 columns.
Styling the Row
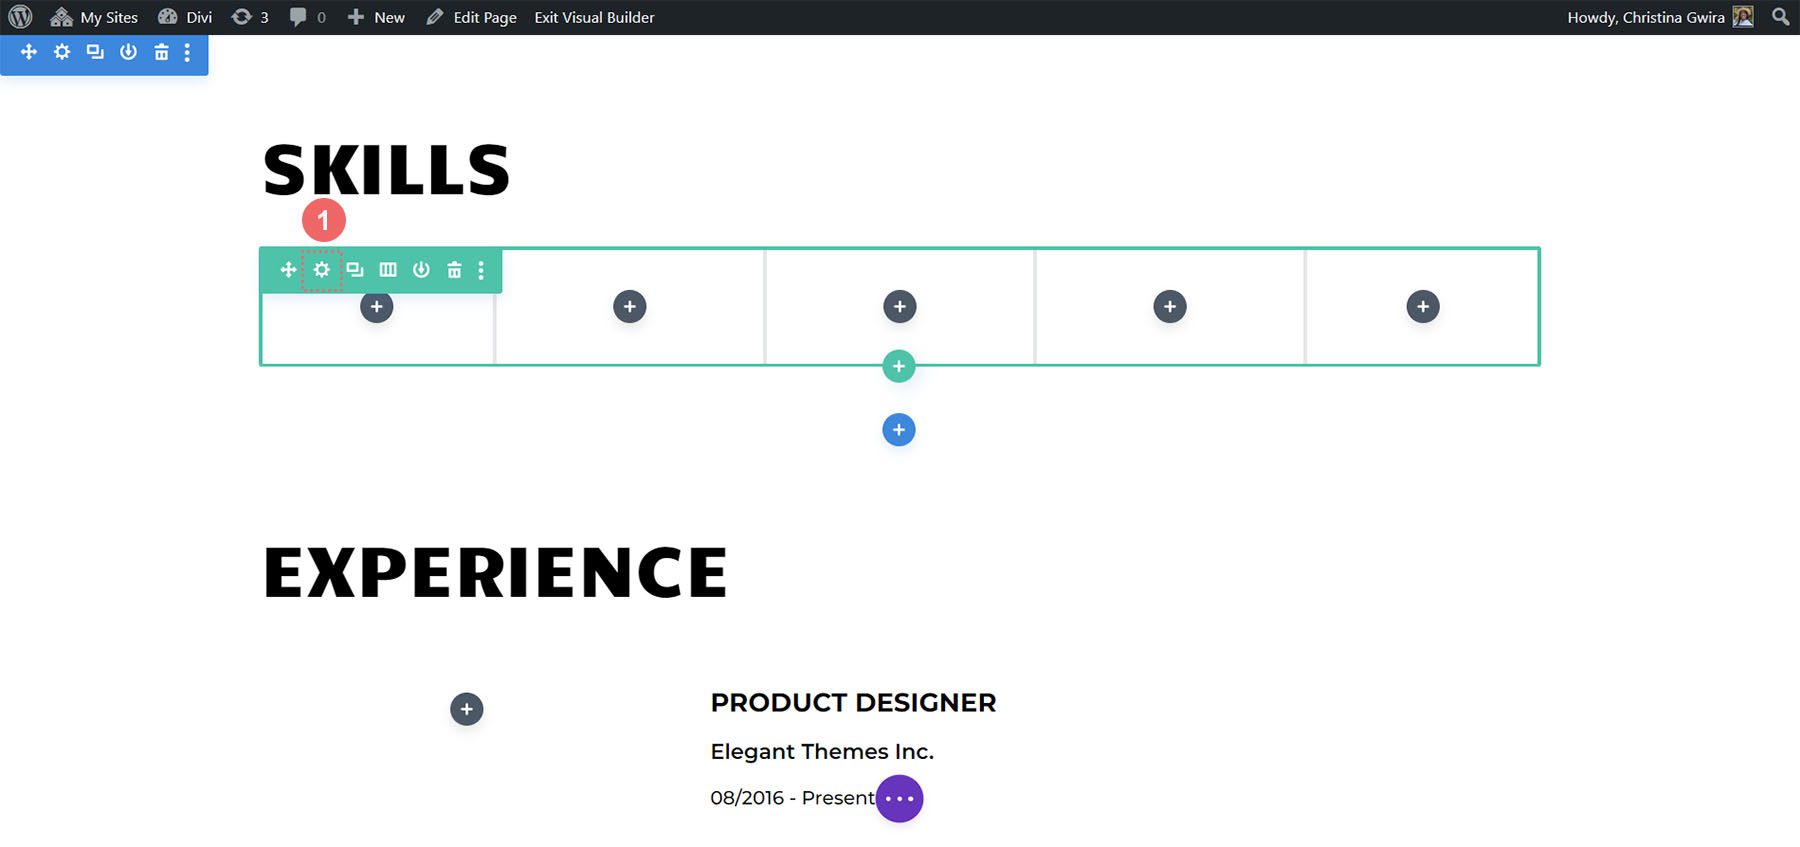
For each column within the row, we want to add a border. This is a callback to the borders that are used throughout the Creative CV Layout Pack. To do this, click on the gear icon to open the Row Settings modal box.
Adding the Column Border
Once in the Row Settings, click on the gear icon on the first column.
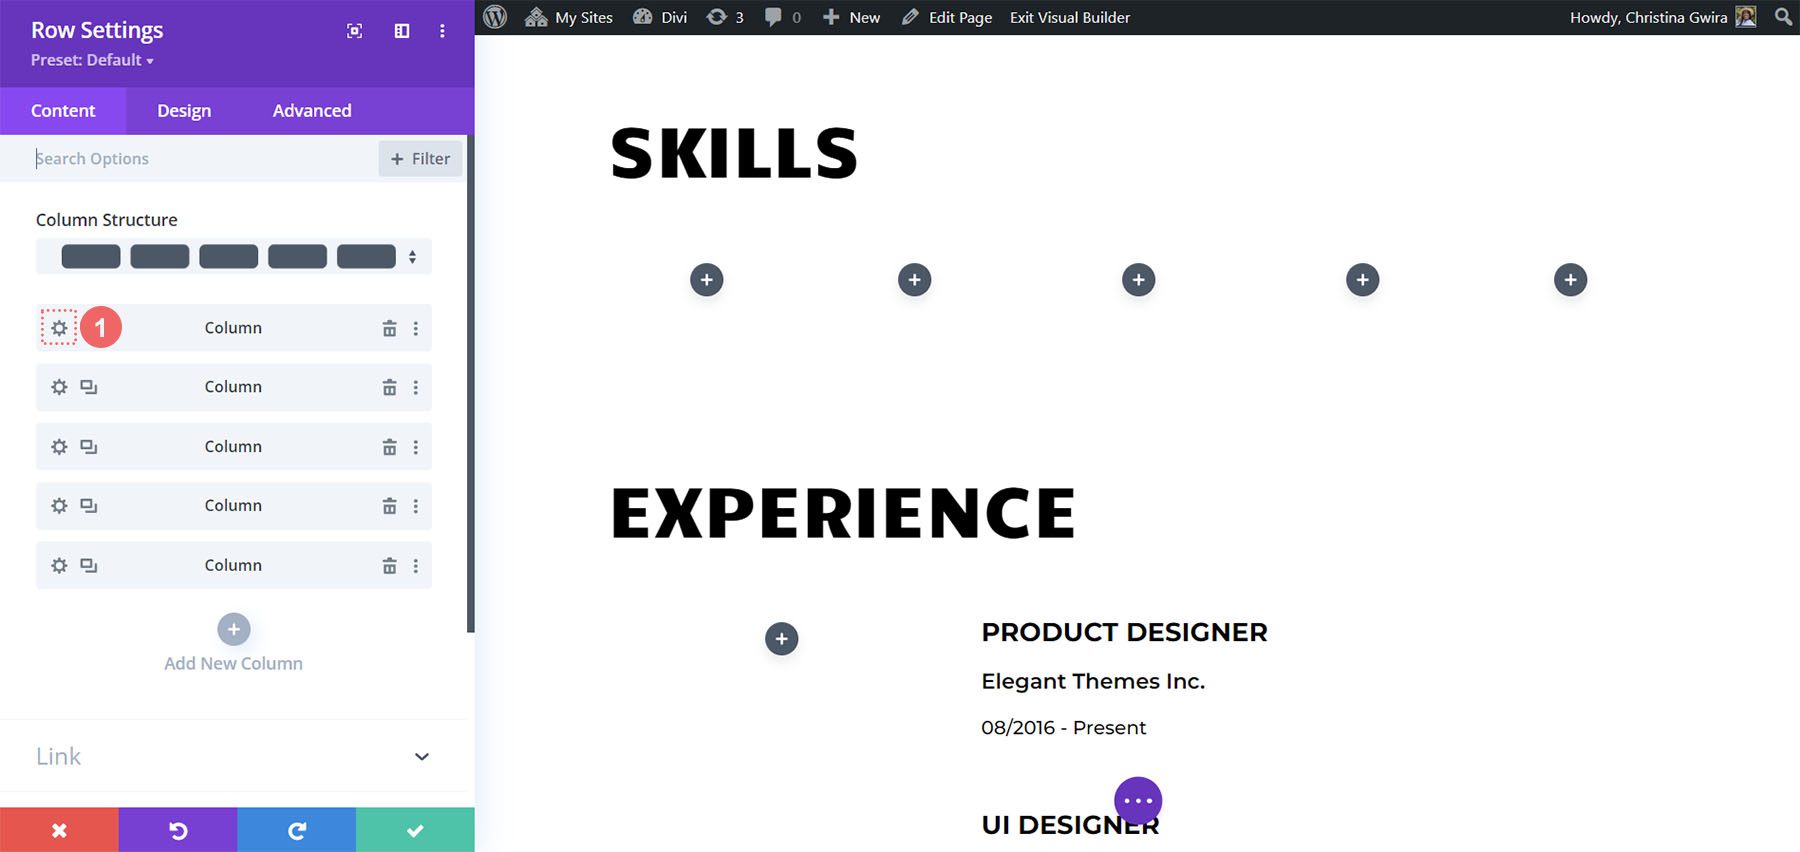
This will open the Column Settings. Within the Column Settings, click on the Design tab. Next, click on the Border tab. We’ll add a thick, black, bottom border to each of the 5 columns in this row. Here are the settings to use:
Bottom Border Settings:
- Border Weight: 5px
- Border Color: #000000
- Border Style: Solid
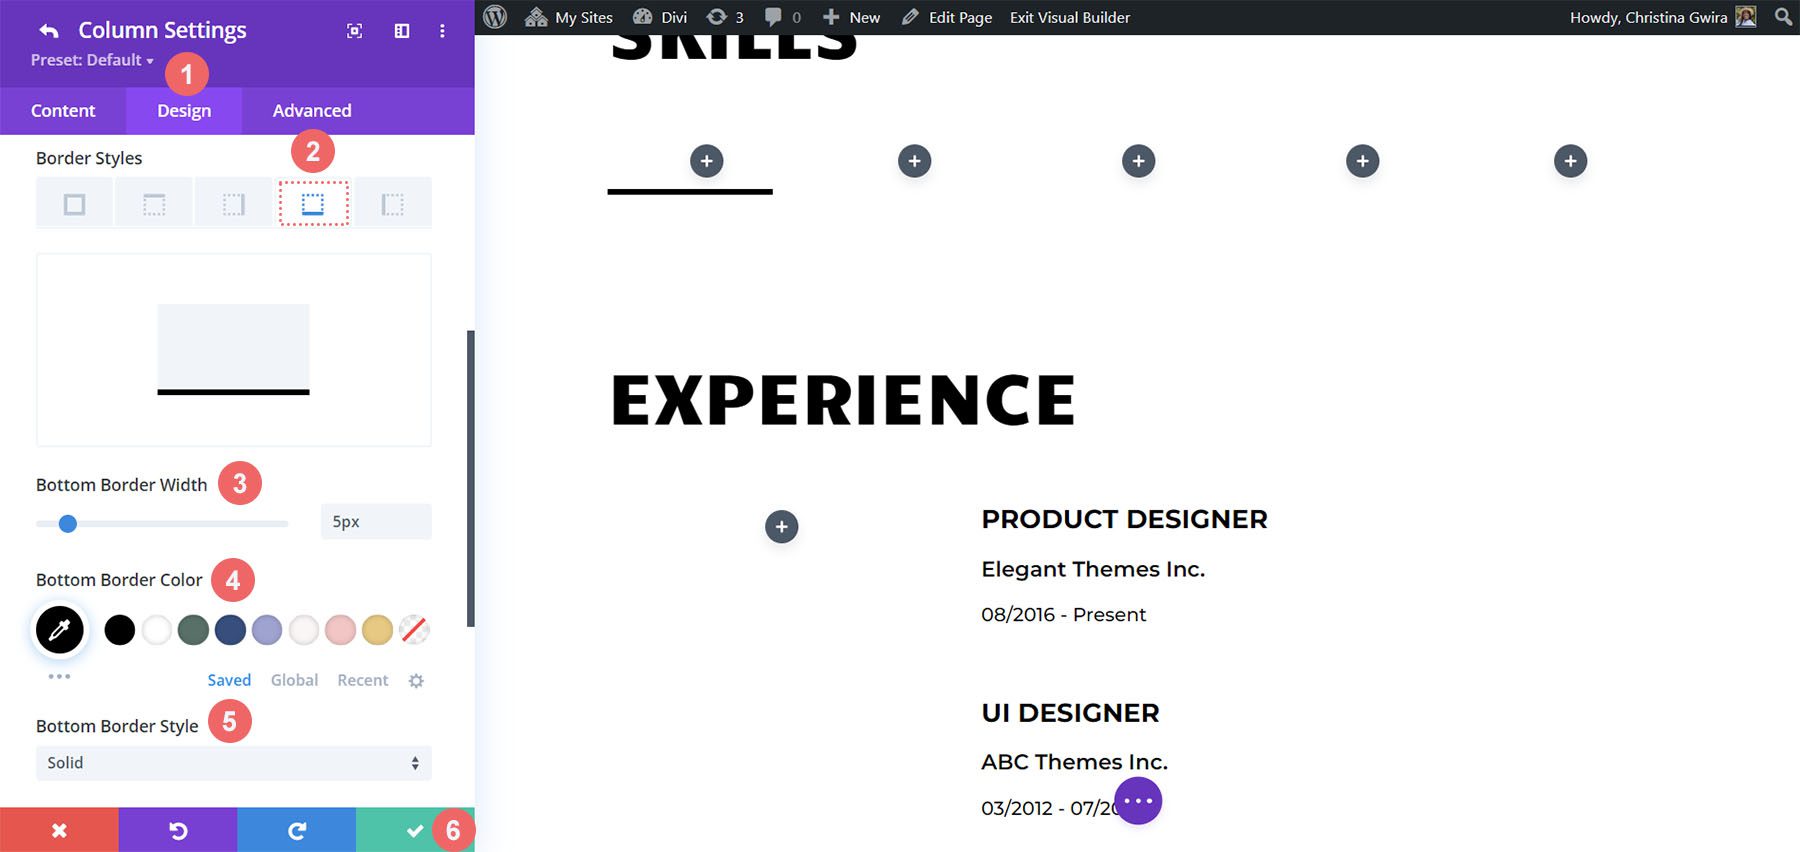
Once your settings are inputted, click the green checkmark to save your column settings. Follow the steps for the remaining columns in the row. When that is complete, save the row.
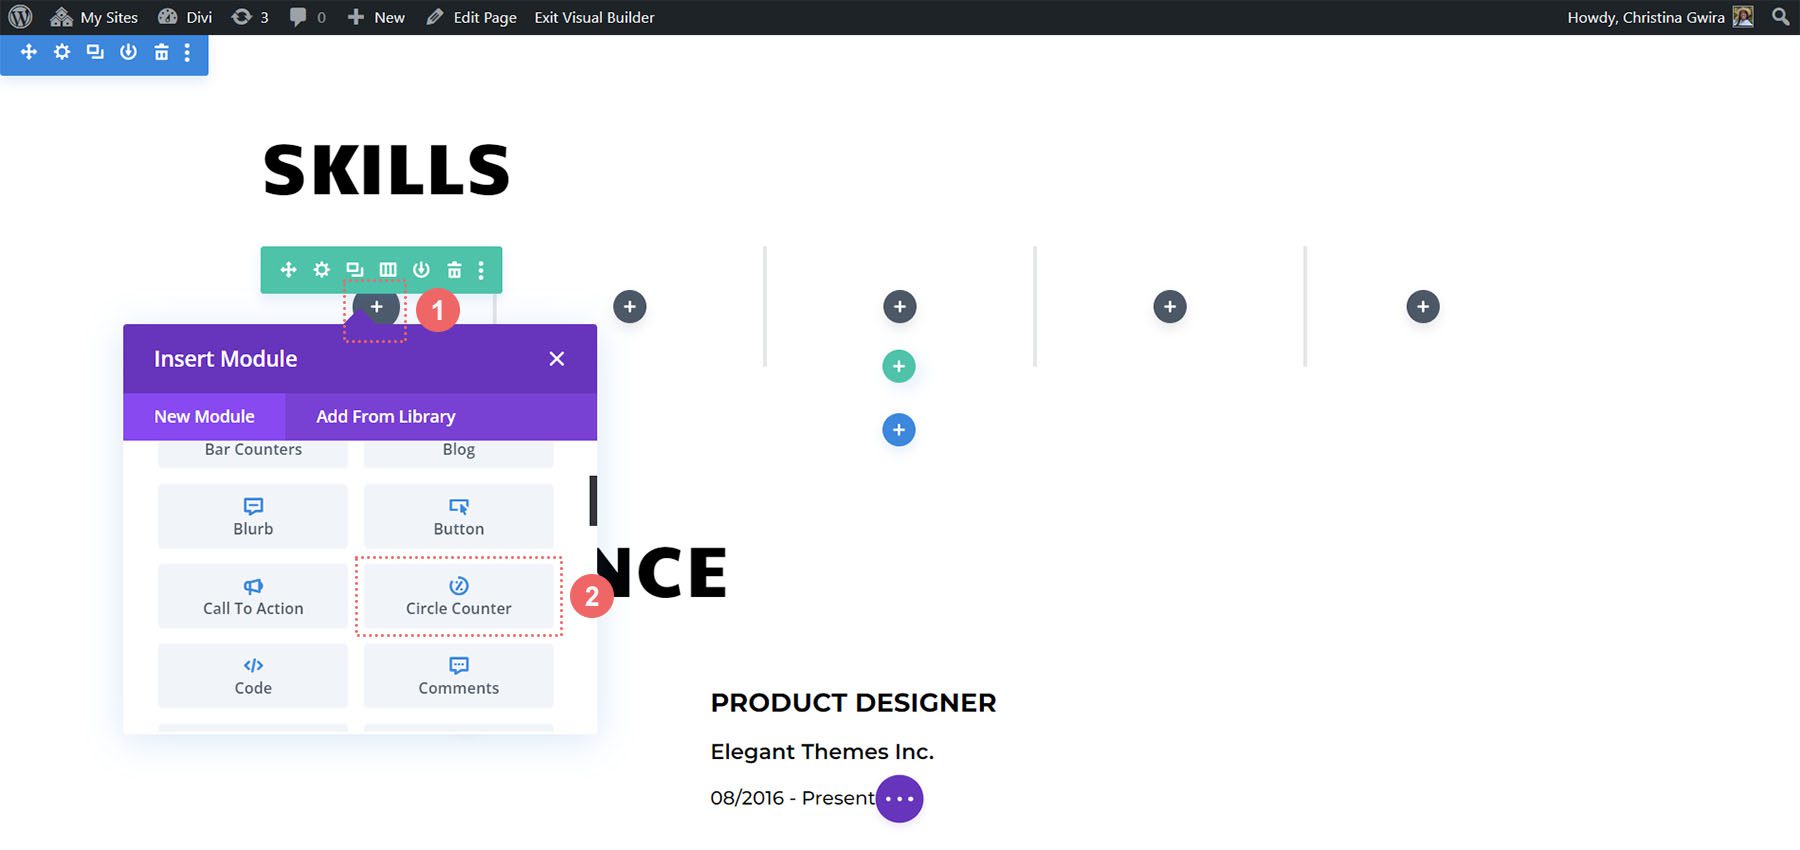
Integrating Circle Counter Module
Now that our foundation is set, let’s add the first star of the show, the Circle Counter Module. Click on the gray plus icon in the first column. Select the Circle Counter icon to add the first module to the row.
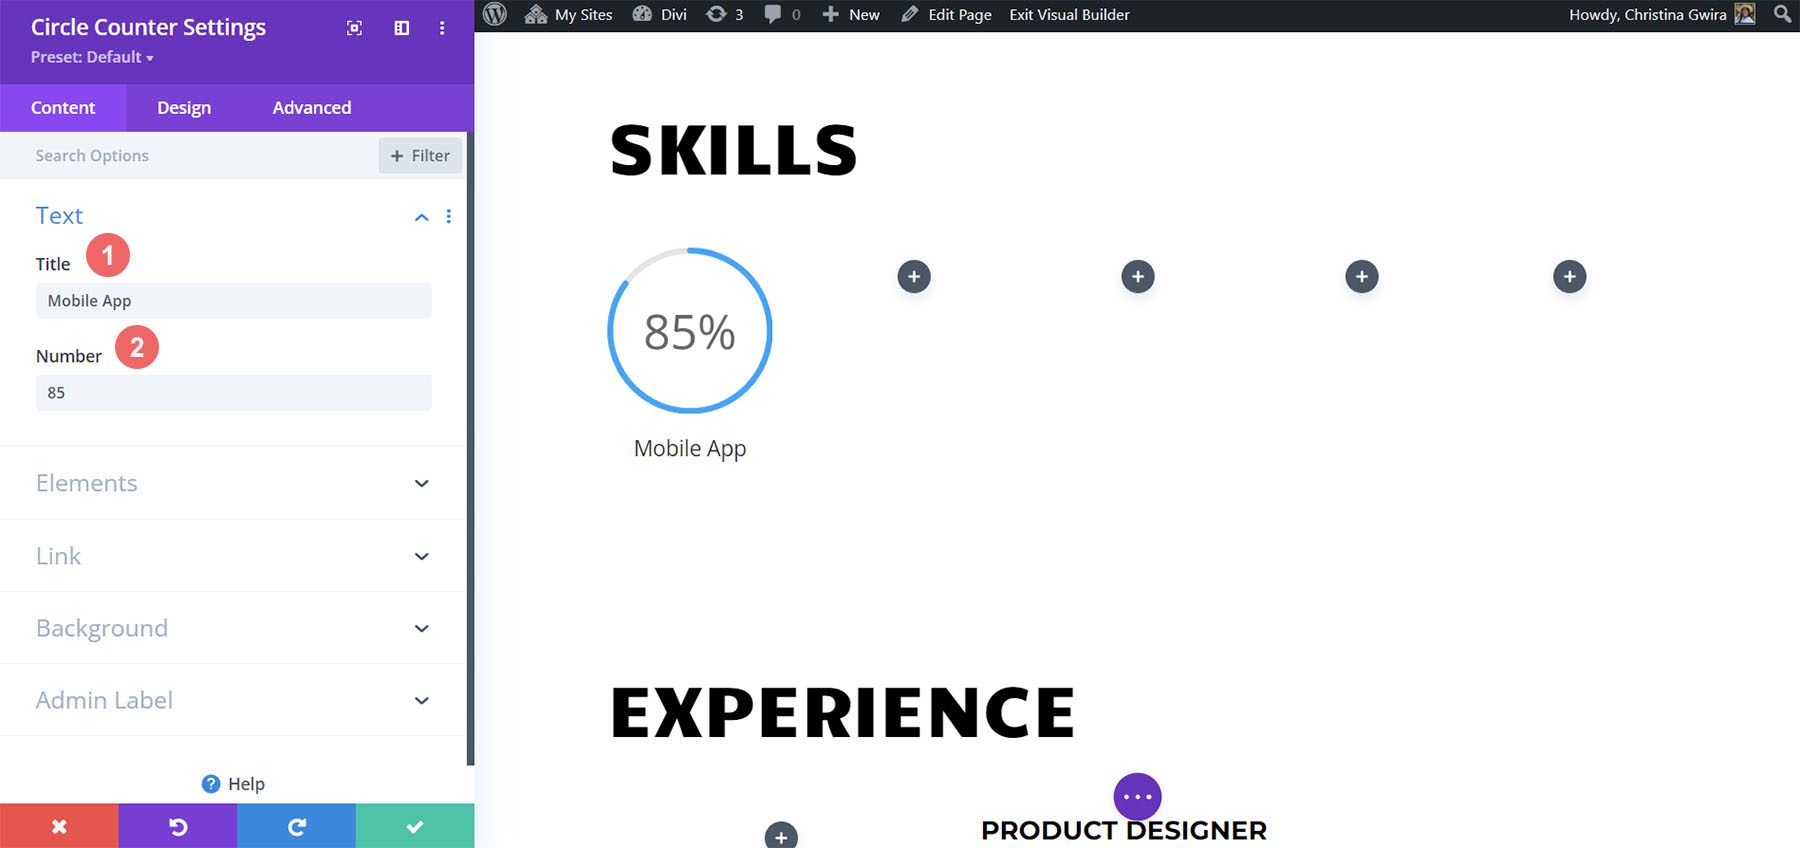
Adding Content
We’re going to take inspiration from the branding of the Creative CV Layout Pack to style our newest addition. To start, add the skill that you want to showcase in the Title field under the Content tab. Next, add in the percentage that correlates to that skill. Remember, authenticity is key when building your personal brand and showing up online.
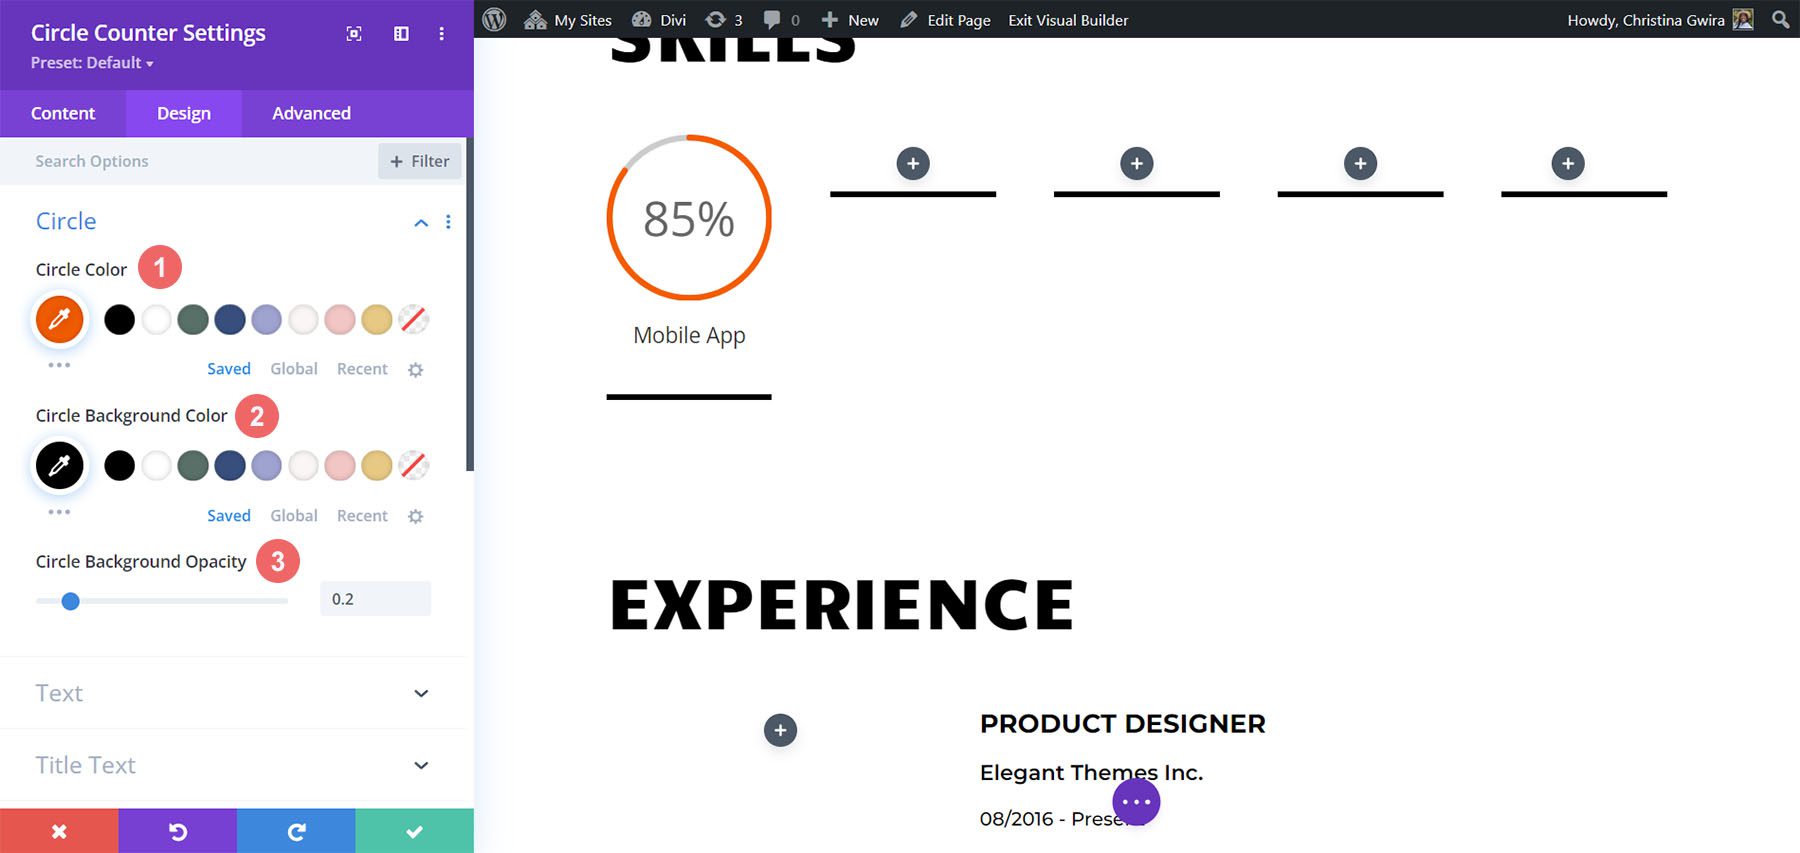
Styling the Circle
Using the brand design of the Creative CV template as a guide, we move to the Design tab to start adding color to our Circle Counter Module. In the Design tab, we start by clicking the Circle tab. We use the following settings to style the circle part of our module:
Circle Design Settings:
- Circle Color: #fe5a25
- Circle Background Color: #000000
- Circle Background Opacity: 0.2
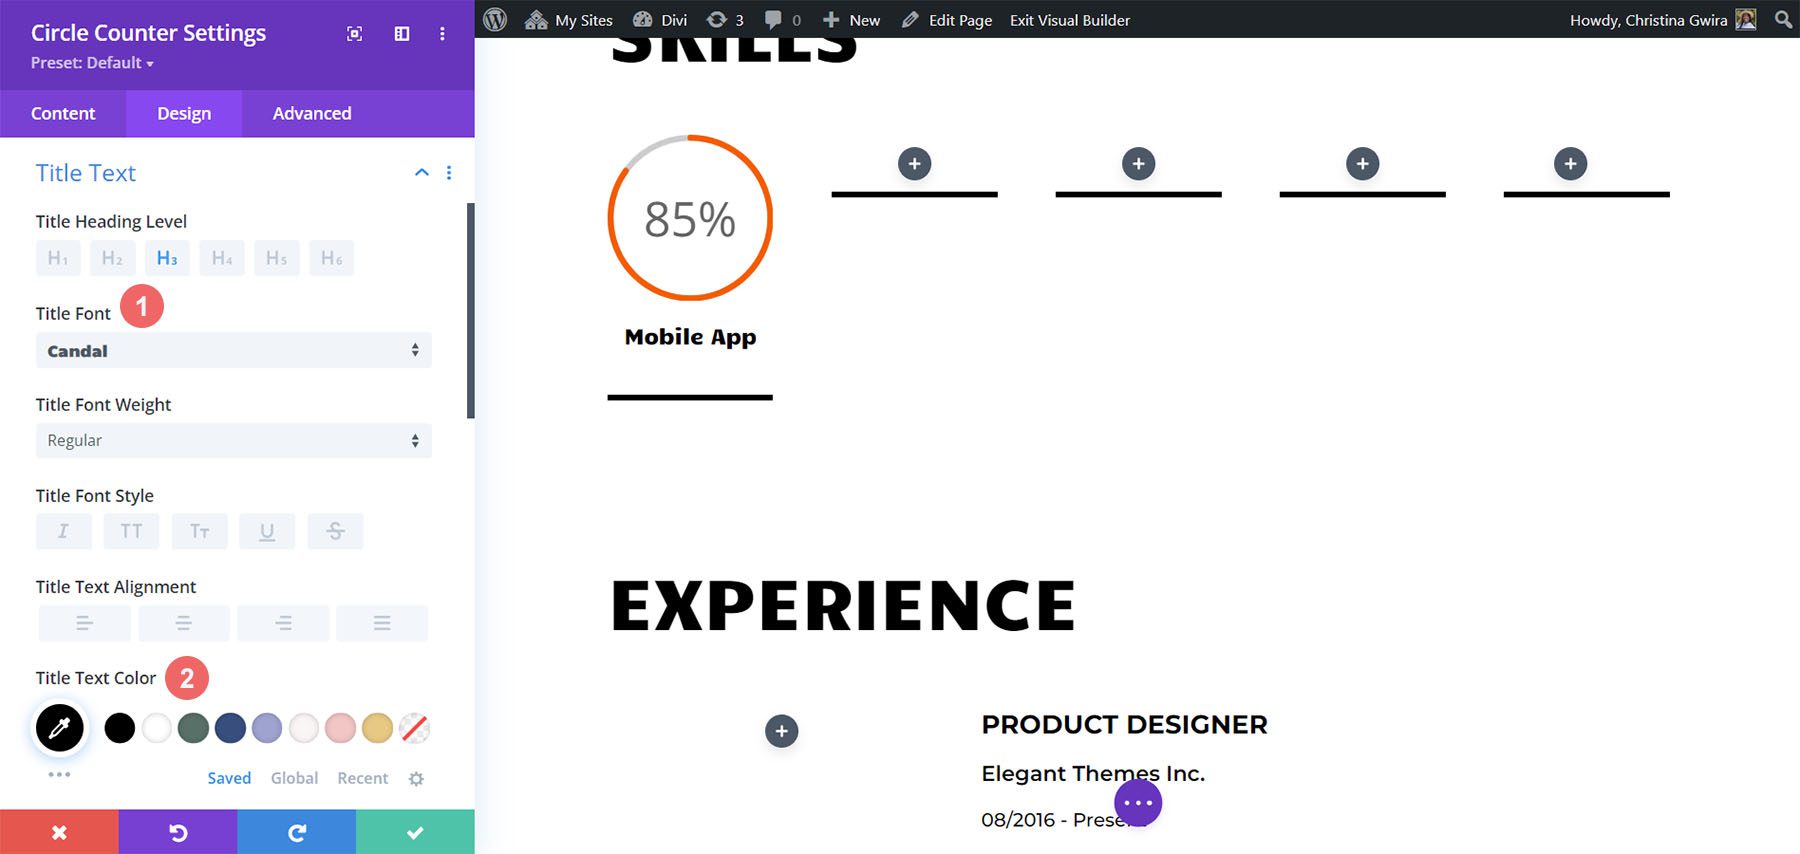
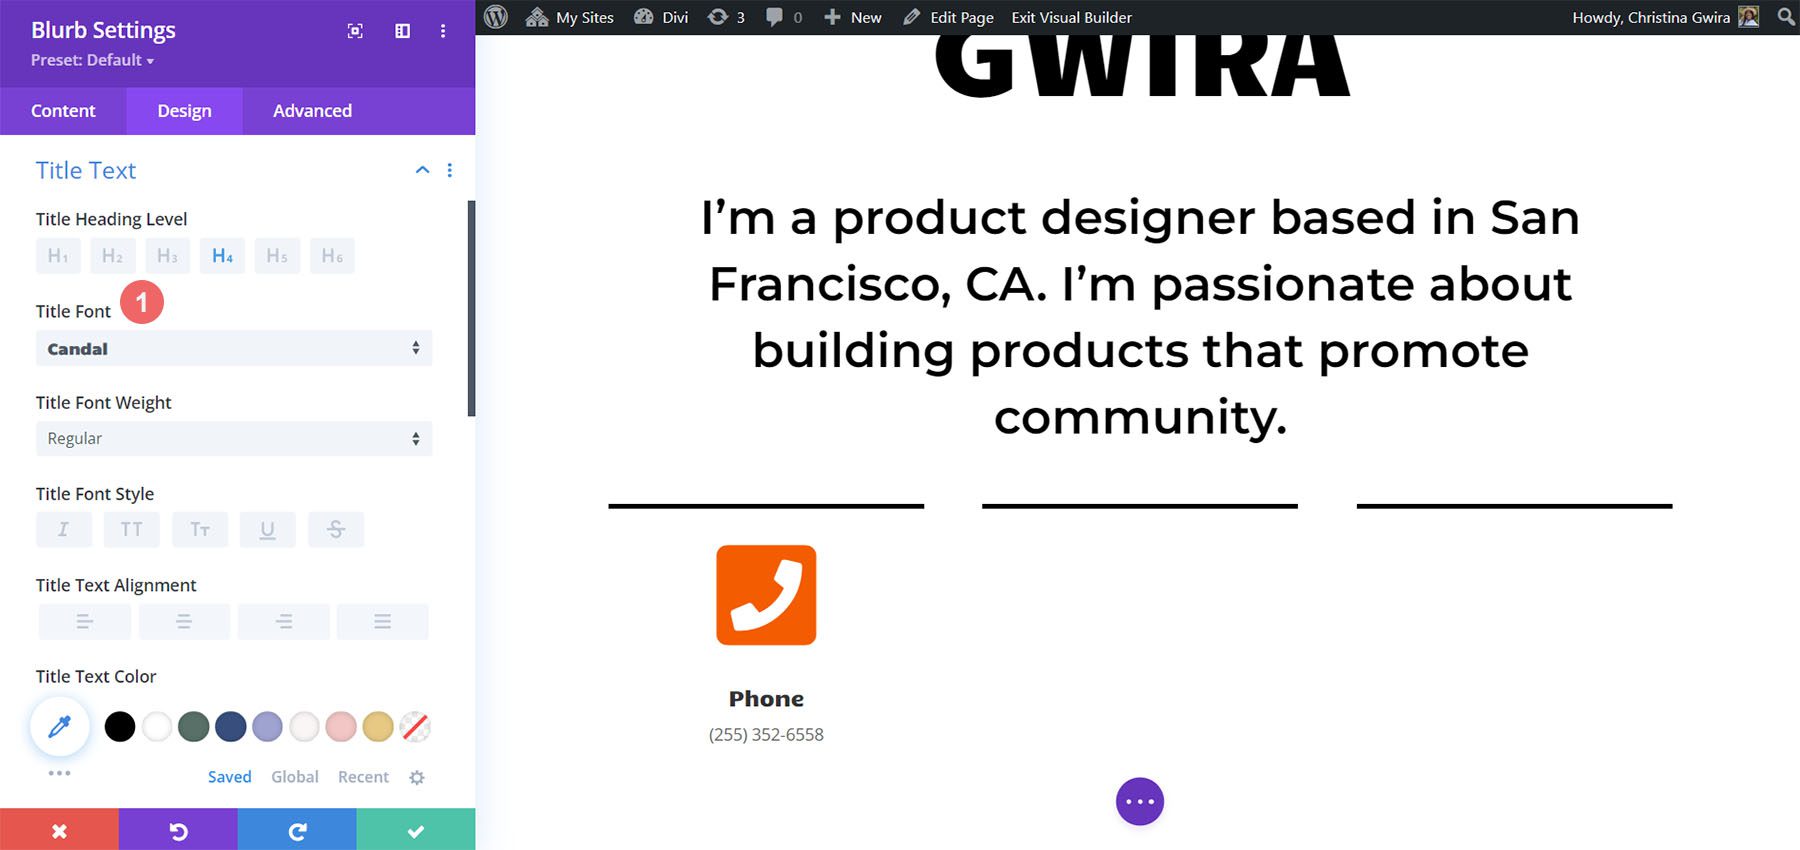
Setting Up Title Text Styles
Next, we move to style the title of our module by clicking on the Title Text tab. We will use the same font that is used throughout the layout: Candal. The settings for the Title Text styling is as follows:
Title Text Design Settings:
- Title Font: Candal
- Title Text Color: #000000
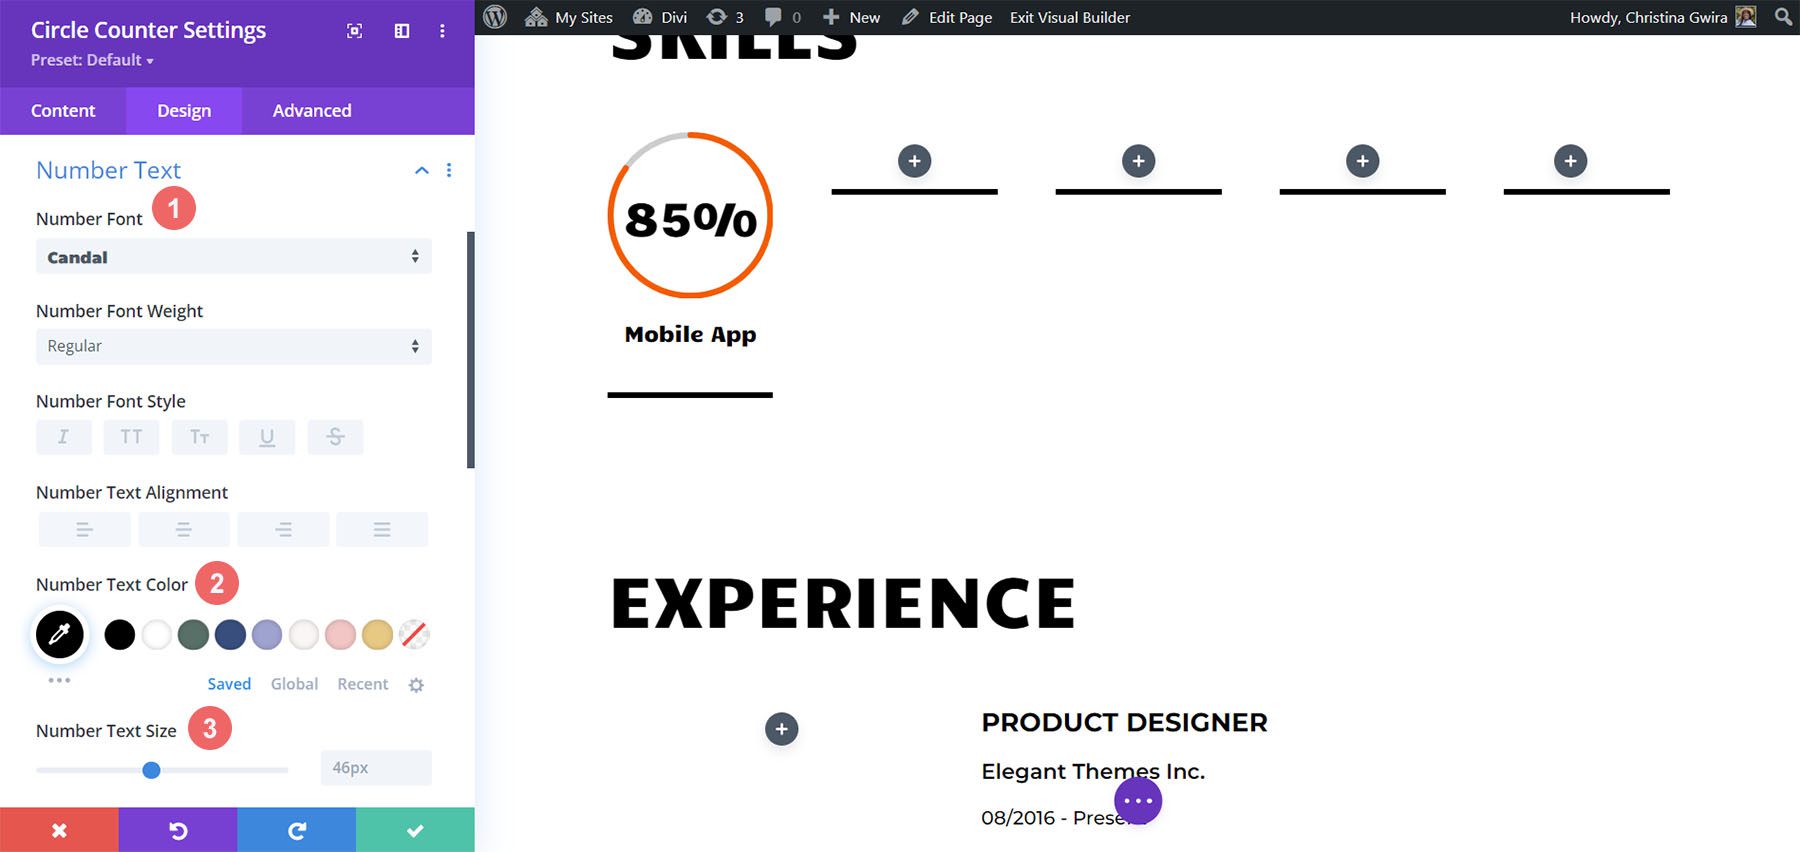
Styling the Number Text
The Number Text styling follows the same pattern as the Title Text. However, we use a larger font size. This draws attention to our skillsets displayed in the Circle Counter Module. Here are the settings for the Number Text that we access by clicking the Number Text tab:
Number Text Settings:
- Number Font: Candal
- Number Text Color: #000000
- Number Text Size: 46px
Add Animation
The final touch to our Circle Counter Module is to add an entrance animation. Once our visual design is established, we can set up our motion design. With Divi, it’s easy to add micro animations to various modules used throughout your design. In our case, we’ll add a slide animation to our Circle Counter Modules. To do this, we first start by clicking on the Animation tab. Next, we click on the Slide Animation Style. Lastly, we click on the Up Animation Direction.
Animation Settings:
- Animation Style: Slide
- Animation Direction: Up
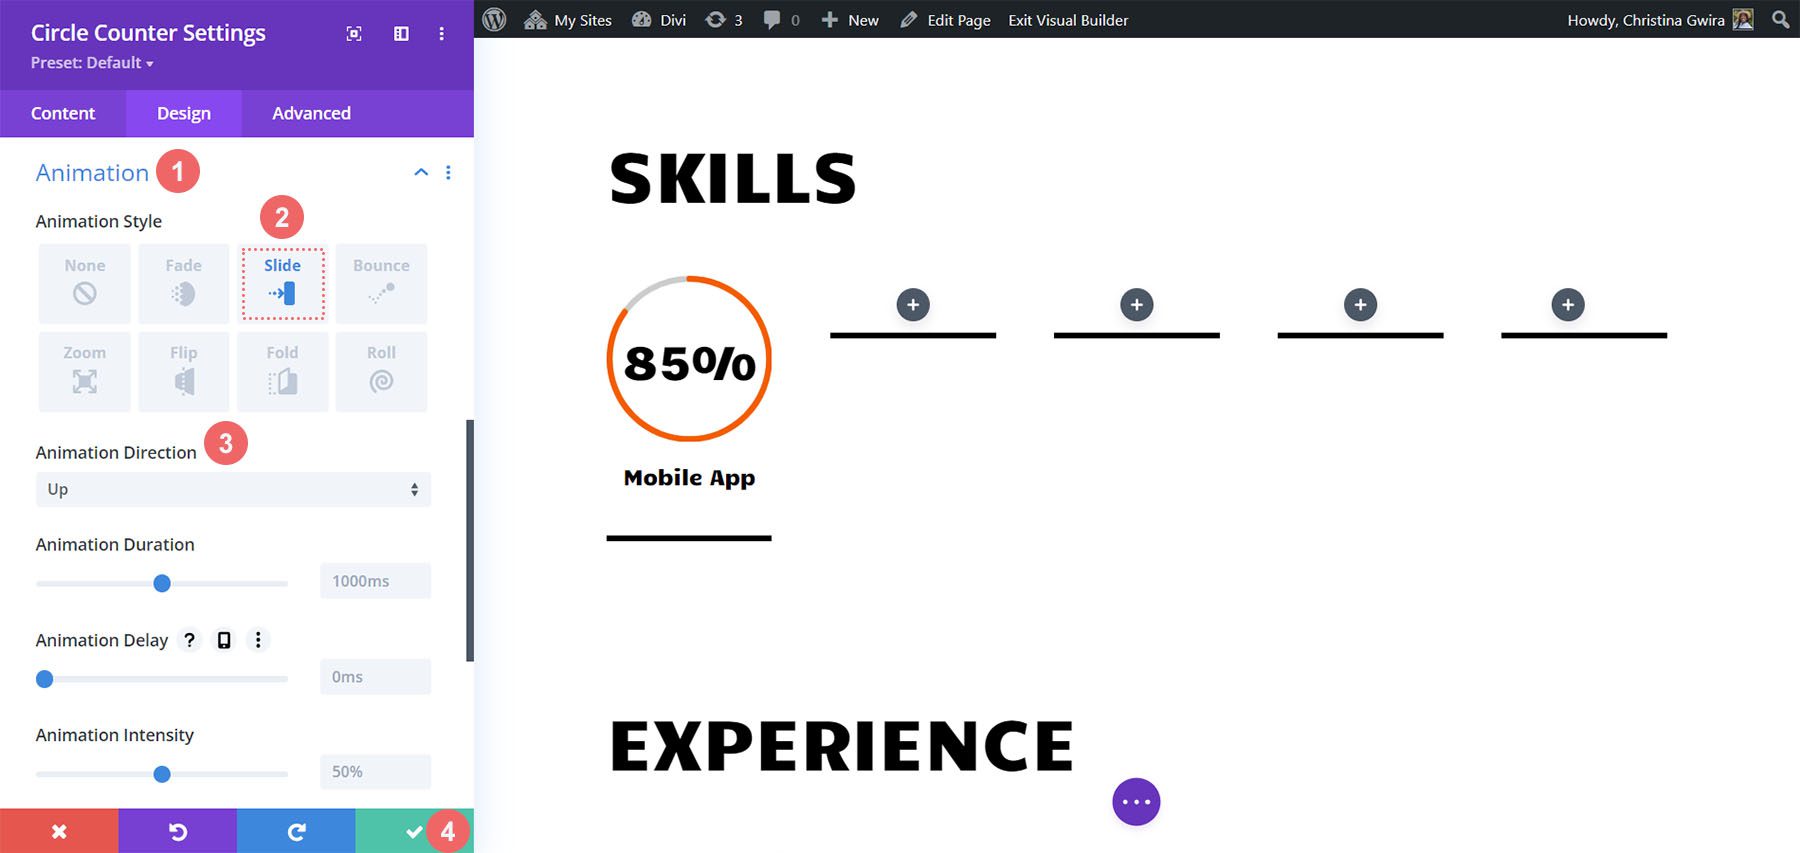
As you can see, there are quite a few settings available to further style the animation of this module. However, we want to keep our motion design simple and classic, so we will leave most settings at their default.
Click on the green icon at the bottom of the Circle Counter Setting menu to save your settings.
Duplicate and Edit
Now that the first Circle Counter Module is complete, we can duplicate our work. This will allow us to save time and create continuity within our work. To do this, hover over the Circle Counter Module and click on the Duplicate icon. Next, on the newly duplicated module, click on the gear icon to enter the settings.
Update the Content tab with your other skills and talents. However, leave the Design tab alone. After saving your work within that module, hover over the module again, and click and drag it to move it into the second column.
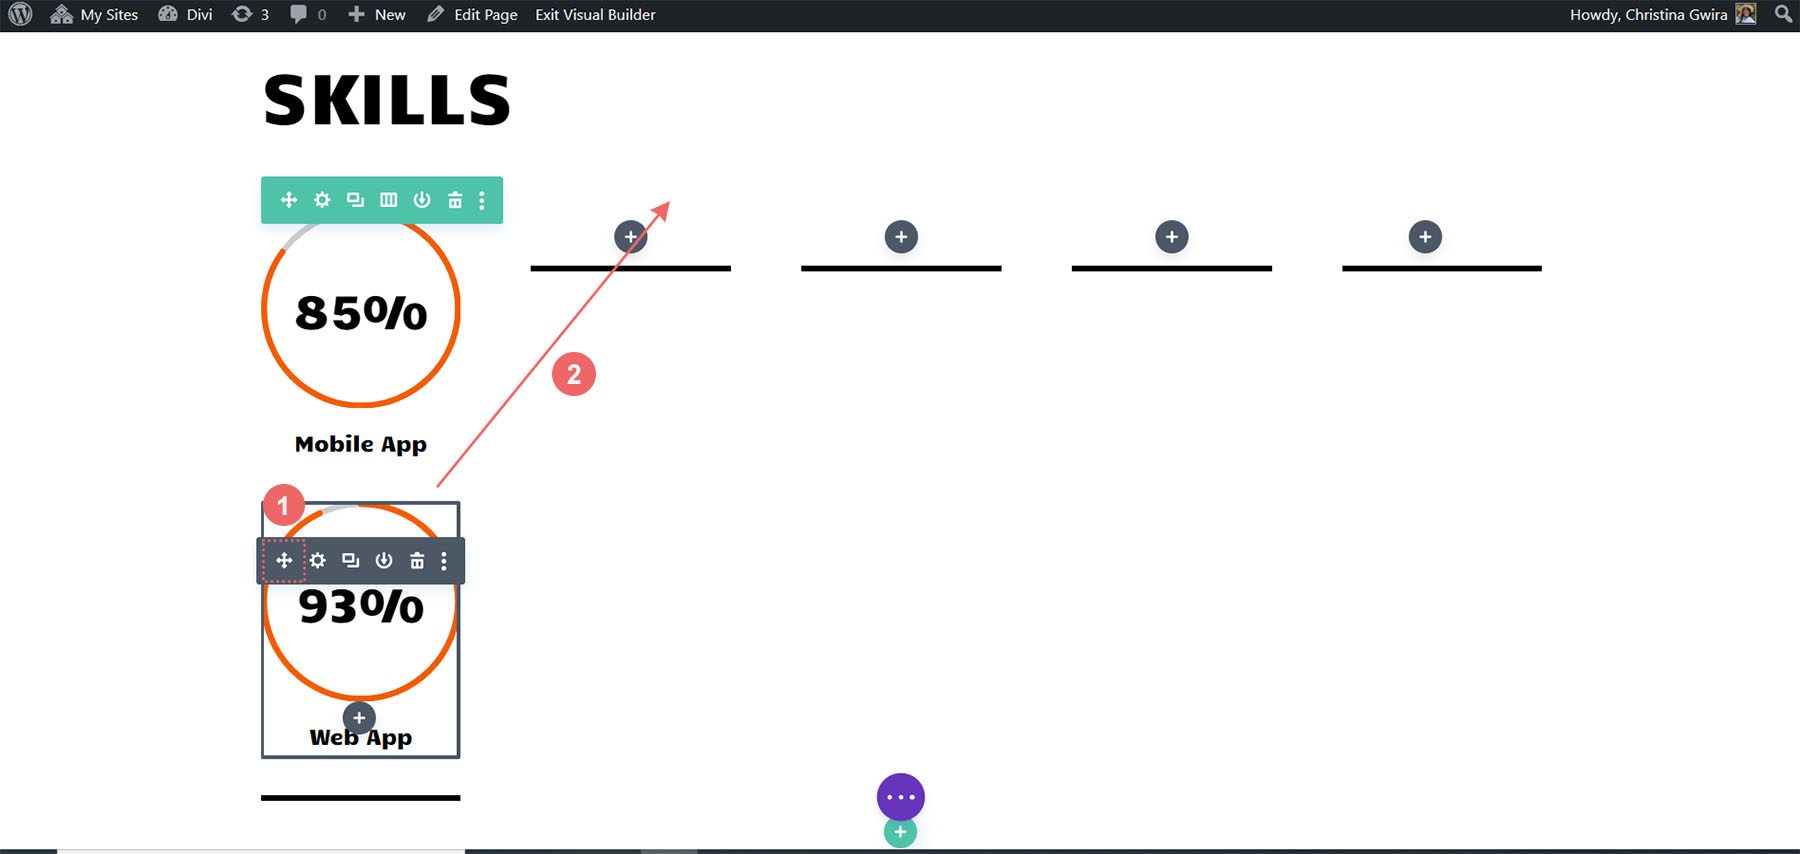
Repeat this until all your skills are within the columns of your row.
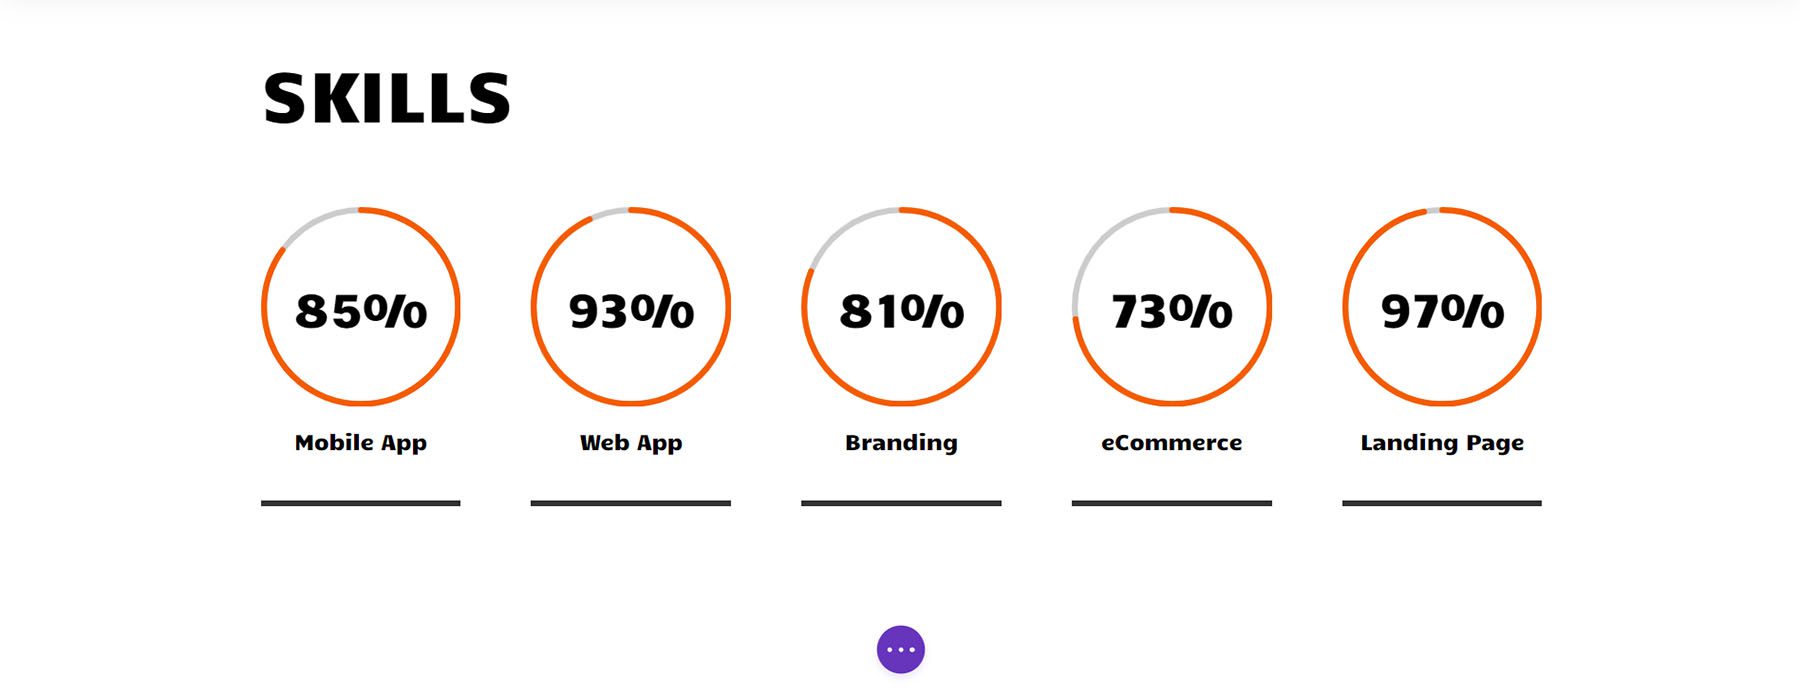
With our Circle Modules beautifully in place showing our skills, let’s add some excitement to the other modules on this page.
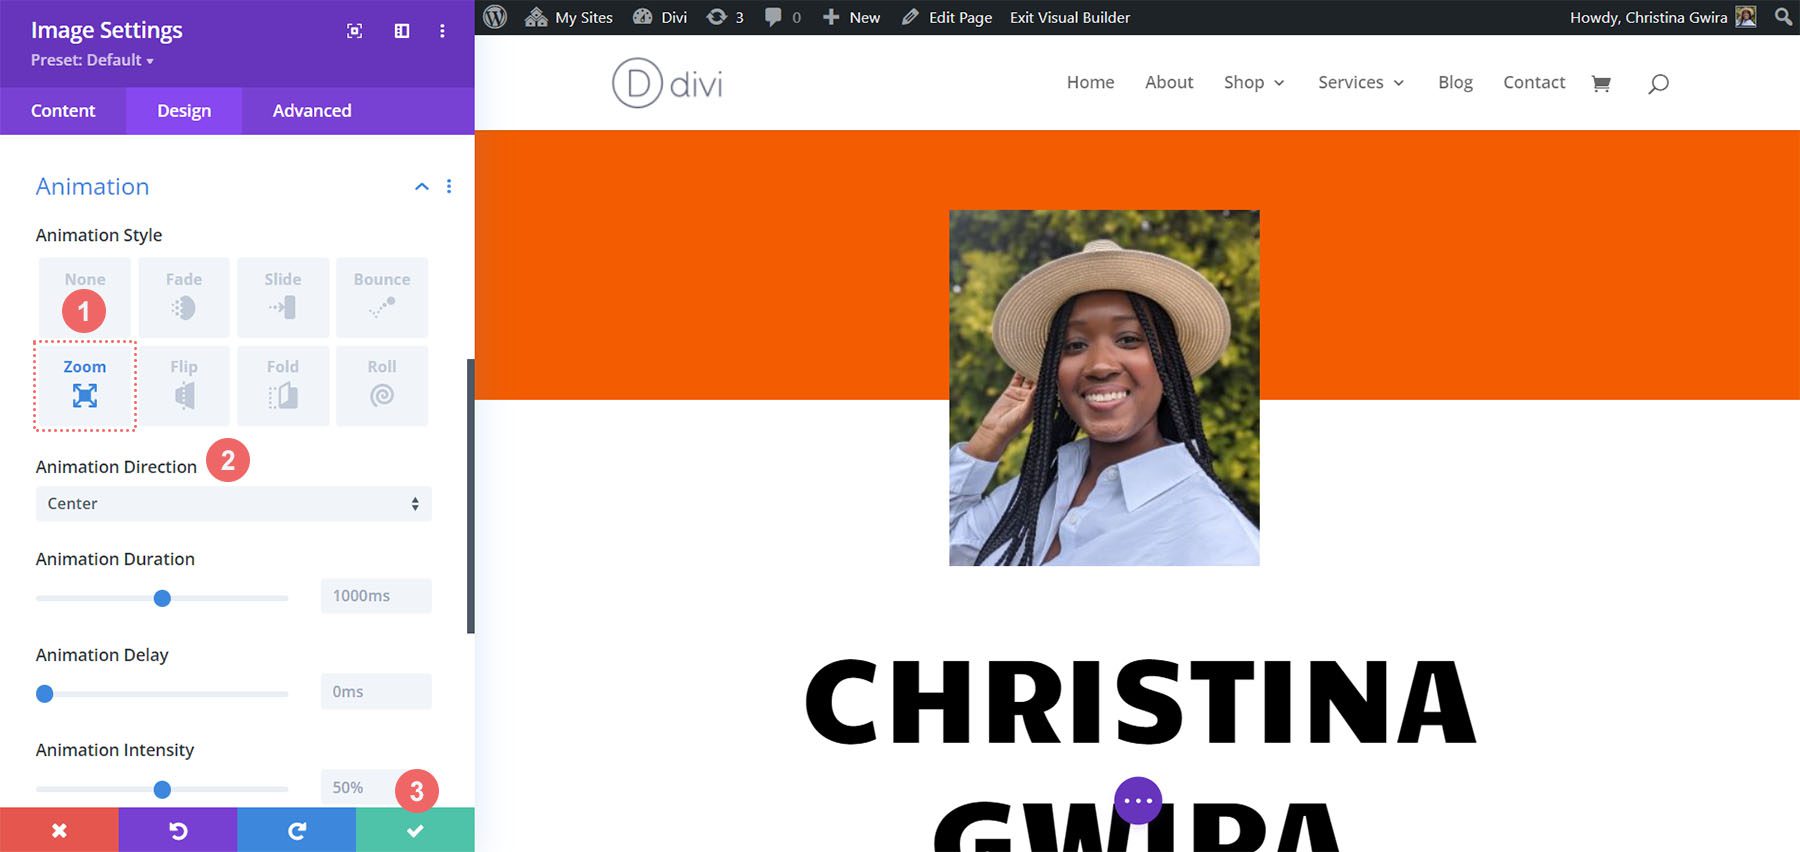
Add Animation to Profile Photo
At the top of our page, we have an Image Module. Here, upload a professional, bright, and crisp headshot of yourself. To do this, click on the gear icon after hovering over the module. Then, click on the Design tab for us to add an exciting animation to the photo.
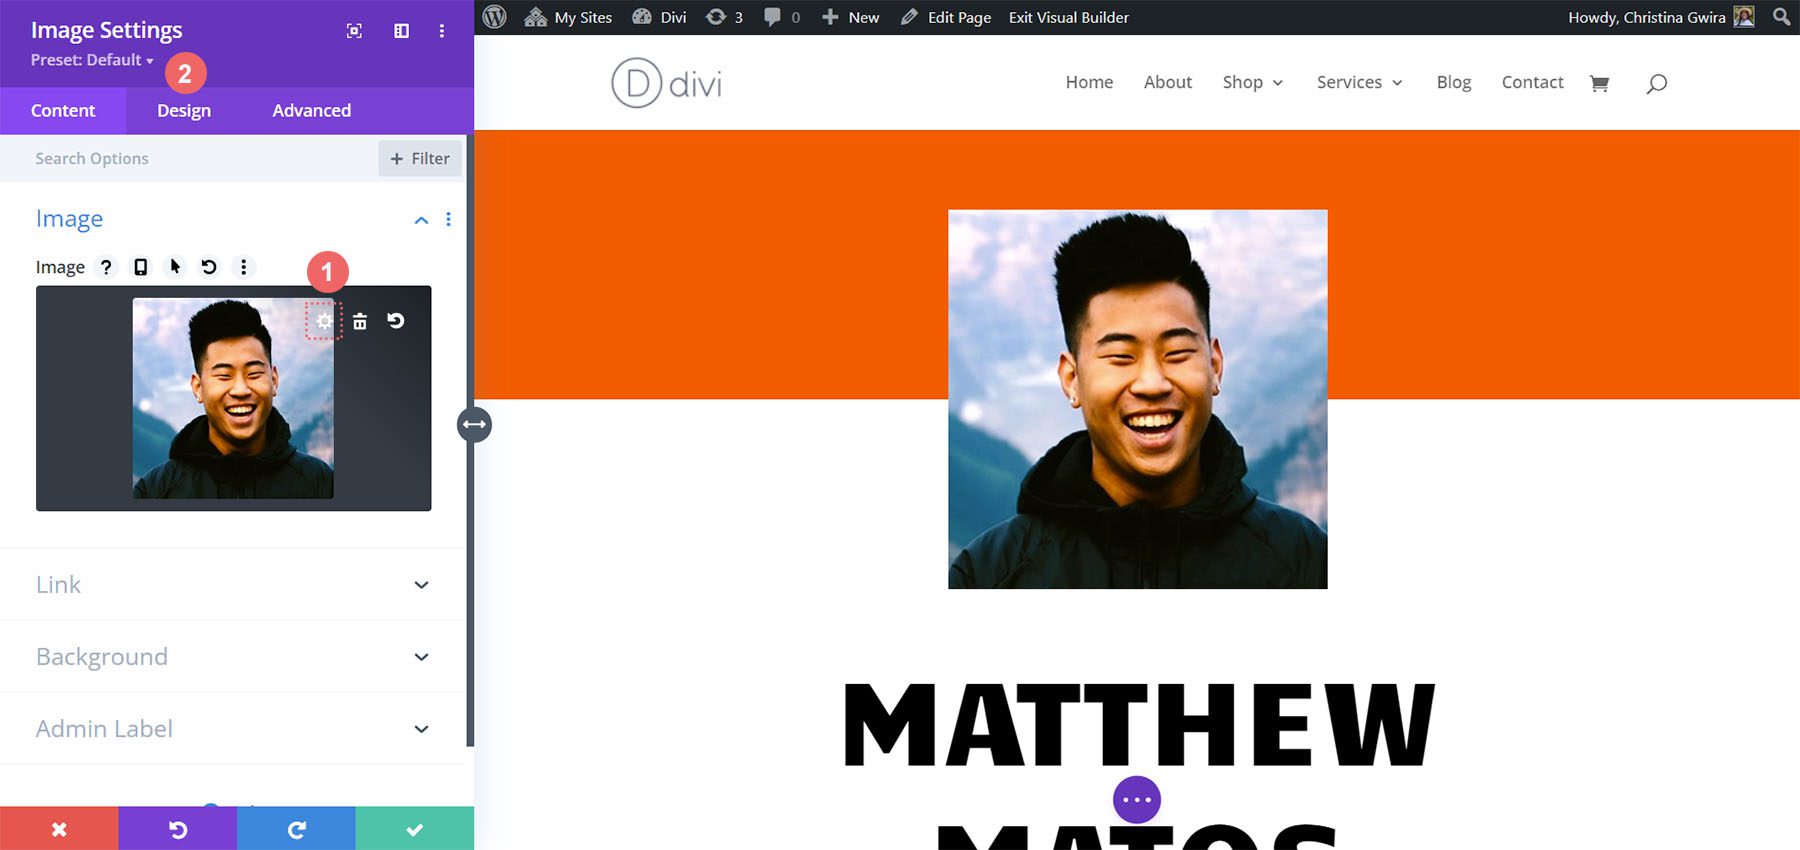
Once in the Design tab, click on the Animation tab. Like the Circle Counter Modules, we’ll keep our animations relatively simple. In this case, we’ll use a Zoom animation with the default settings to grab visitors’ attention to our website. Here are the settings that we use to apply a zoom animation to our image:
Animation Settings:
- Animation Style: Zoom
- Animation Direction: Center
As we’re working through the online resume website design, remember to modify the static modules such as text to personalize the template to your needs.
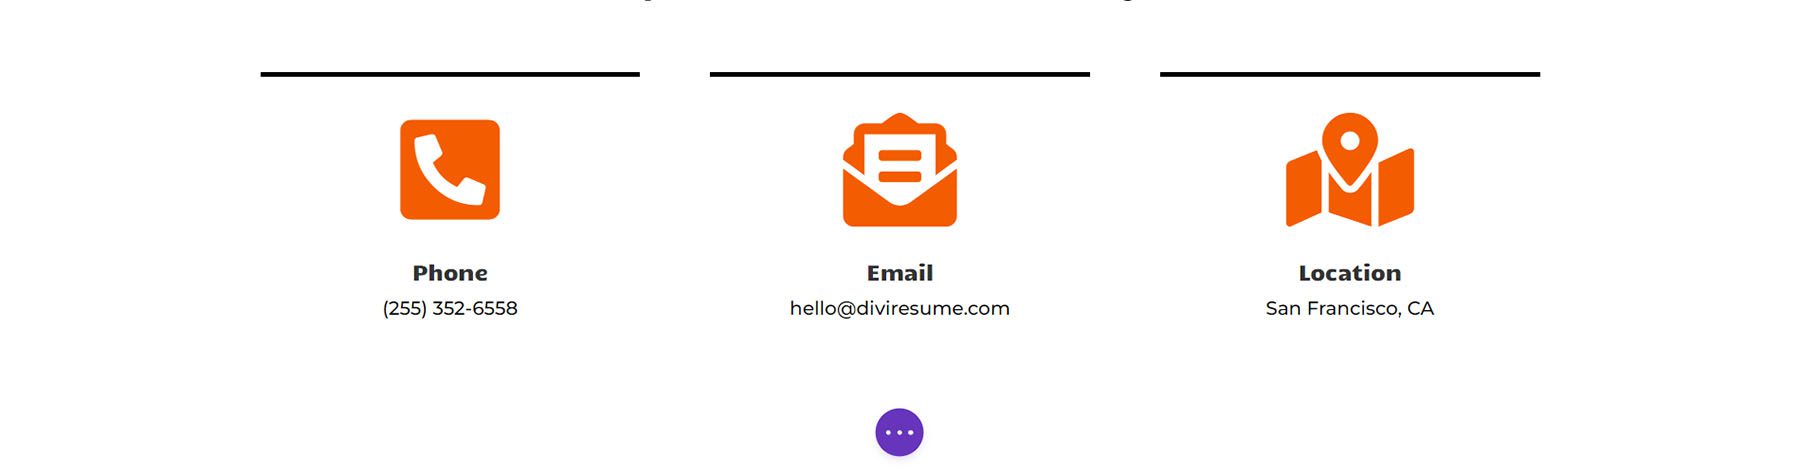
Add Blurb Modules
Next on our hit list, we’ll replace the contact text with Blurb Modules. We do this for two reasons. The first is to add more color to the icon that is included within the module. Secondly, we can add a subtle animation to a single Blurb Module, as opposed to having several lines of text flying across the screen if we were to keep the section as is.
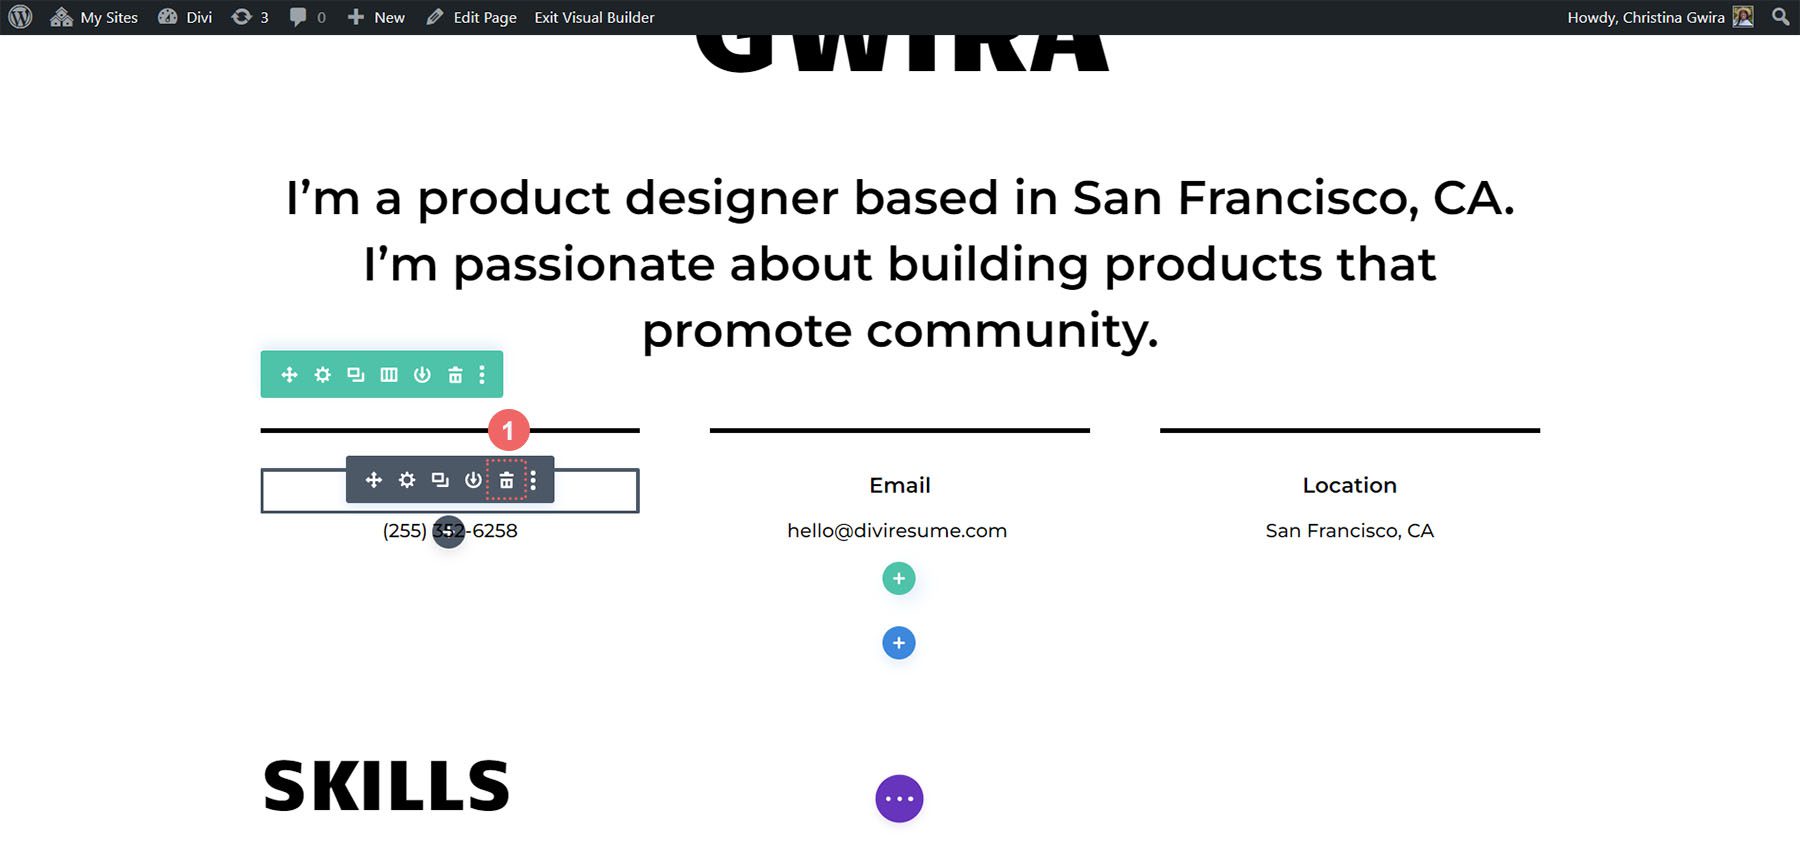
To get started, we hover over each Text Module, click the trash can icon, and remove them from the section.
Next, we click on the gray plus icon to add a Blurb Module to the first column. Like the Circle Counter Modules, we’ll duplicate the module once we have styled it.
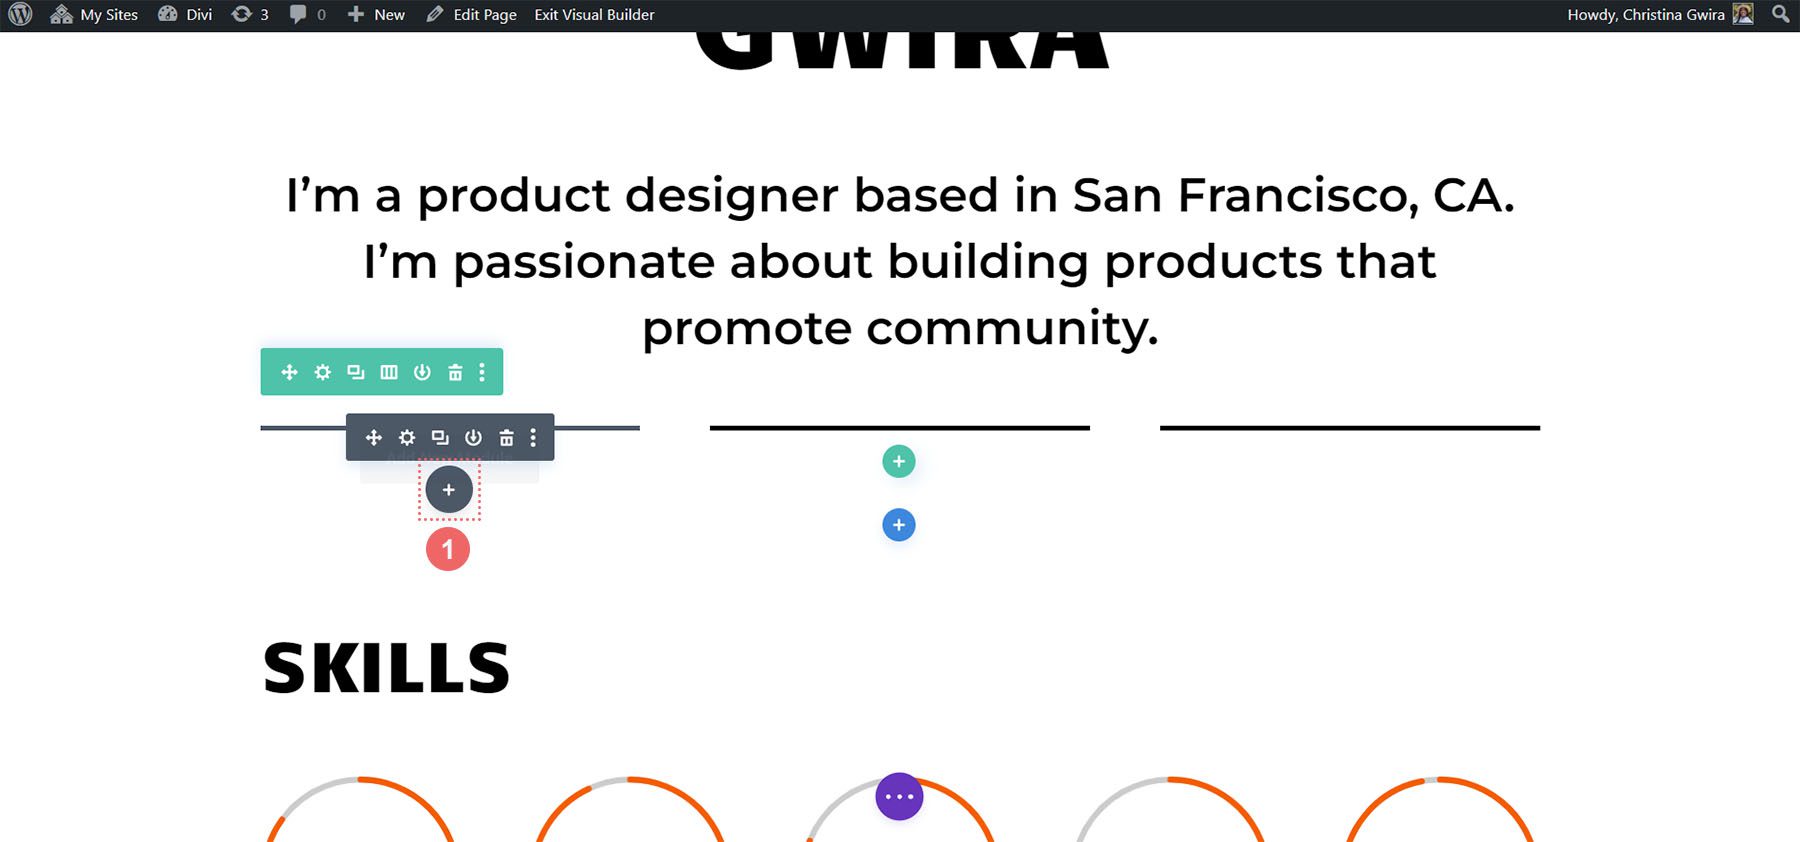
Next, we click on the Blurb Module icon.
![]()
Add Your Content
We navigate to the Text tab and add our content. We’ll showcase our phone number, email address, and location. For this first module, we’ll be inputting our phone number details.

Add Icon
Next, we click on the Image & Icon tab. Once there, we select yes on the Use Icon toggle. We then use the search box to select a phone icon. This is the one we chose.
![]()
Style Icon
Now we click and move to the Design tab to style our blurb. We use the following settings for the icon:
Image & Icon Design Settings:
- Icon Color: #fe5a26
- Image/Icon Placement: Top
- Image/Icon Width: 96px
![]()
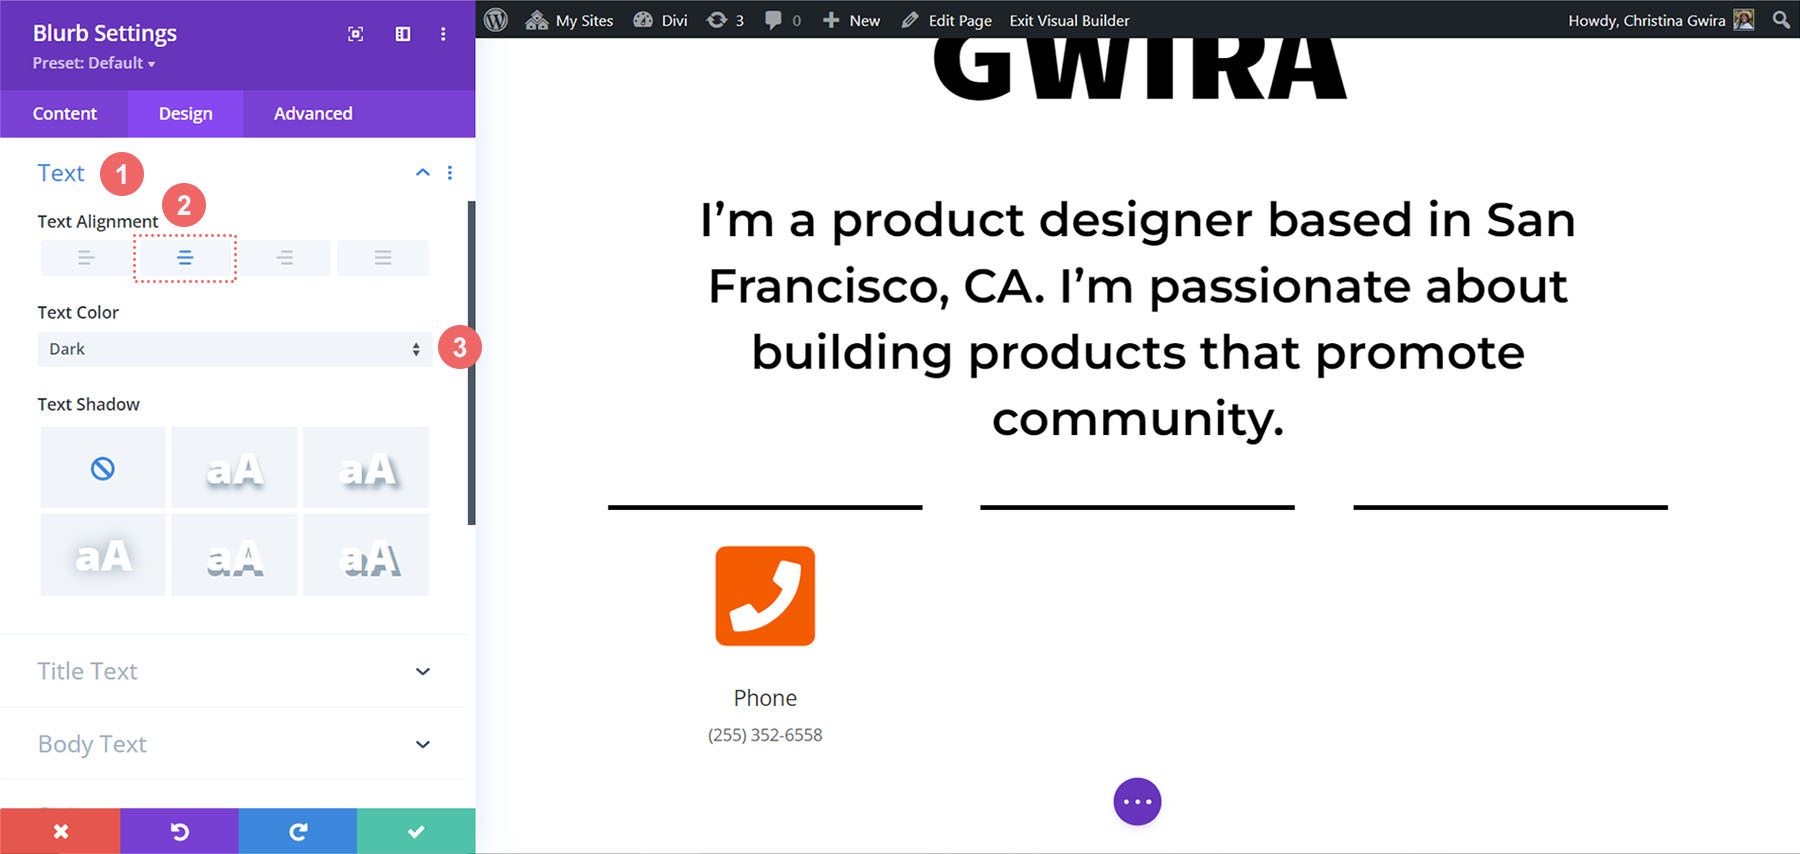
Set Text Alignment & Color
Now, we click on the Text tab. We want to center-align our text and make the text throughout the module Dark. Therefore, we click the center icon, and then we click Dark from the Text Color dropdown.
Style Title Text
As with the Circle Counter Module, we’ll use the font throughout the layout pack. Clicking on the Title Text tab, the only setting we change is for the font family, which will be Candal.
Body Text Styling
For the Body Text, we’ll be using a different font. As such, we’ll have to add a few other tweaks to the settings to make the Blurb Module mimic the styling of the Text Modules that used to grace this section. Here are those settings:
Body Text Settings:
- Body Font: Montserrat
- Body Font Weight: Regular
- Body Text Size: 16px

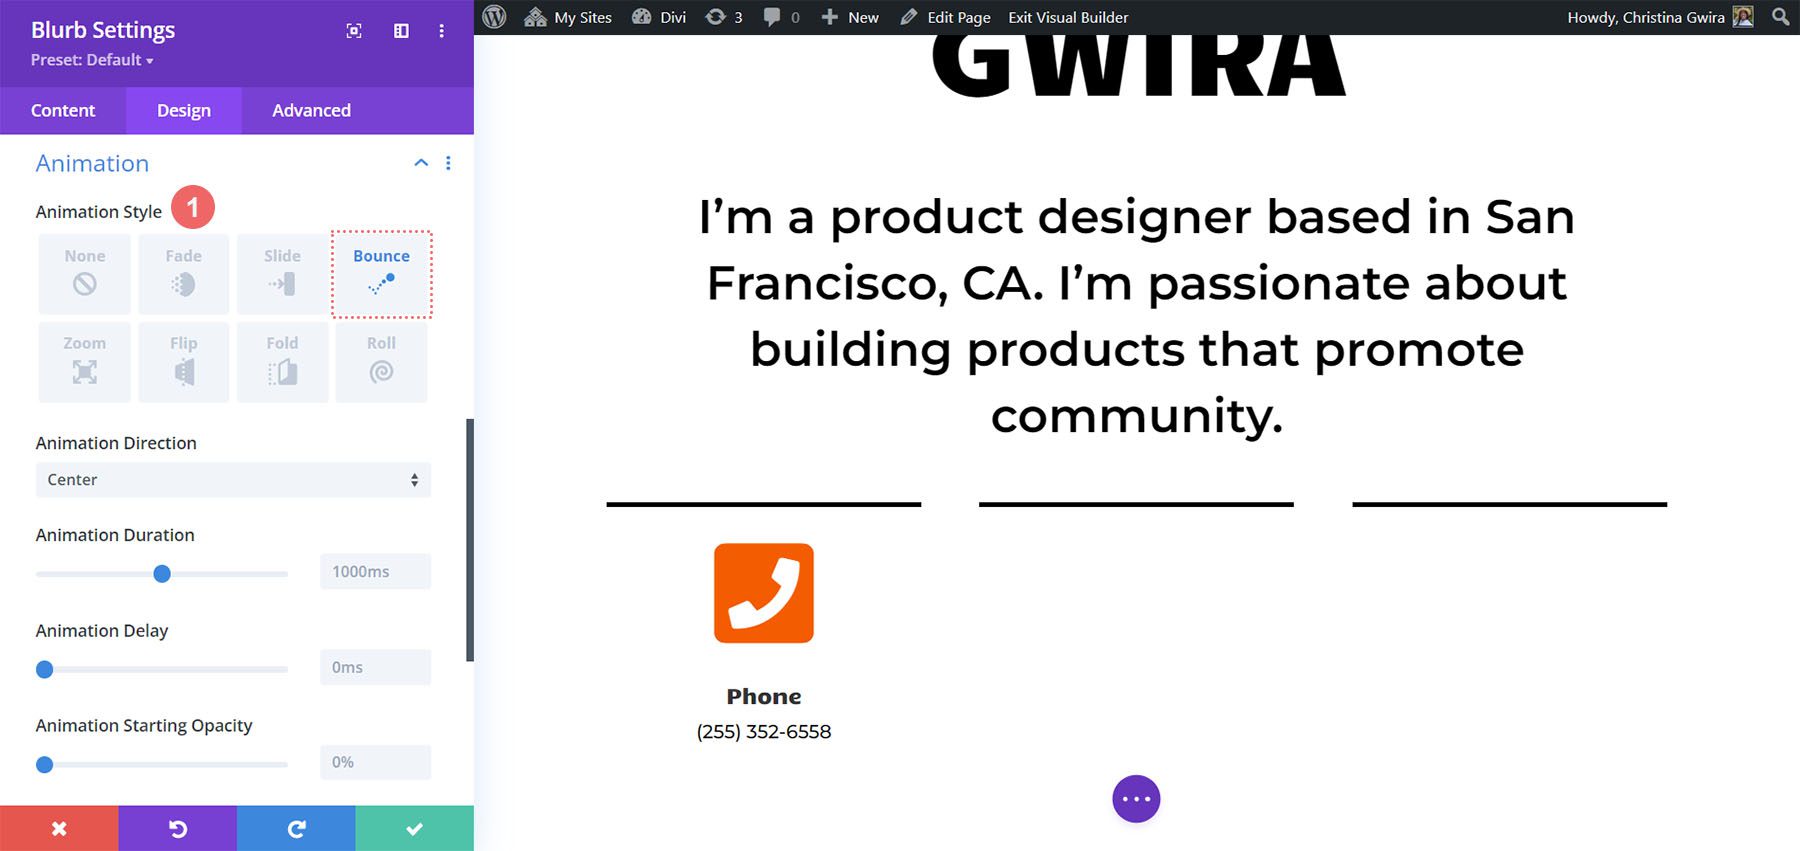
Add Animation
To wrap up our design of the Blurb Module, we’re going to add an entry animation. Like the Image Module, we want this entrance to catch the eye. After clicking on the Animation tab, we click on the Bounce icon. We leave the Animation Direction, as well as the other settings, at their default options.
Animation Settings:
- Animation Style: Bounce
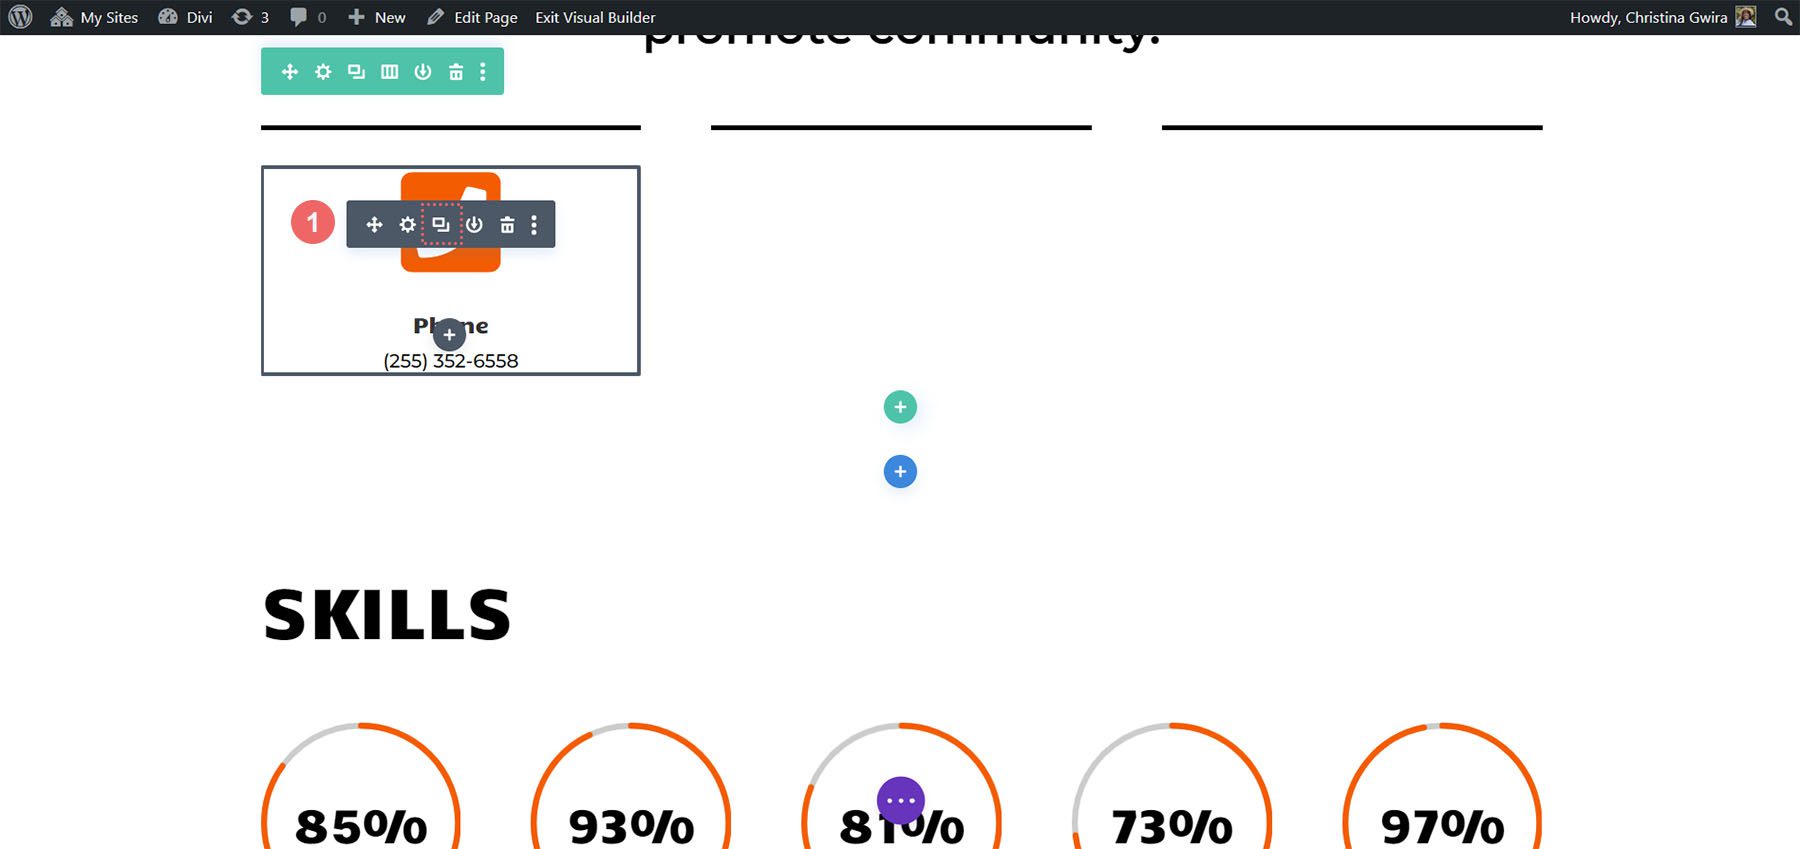
Duplicate Module
After clicking on the green icon to save all our hard work, we will duplicate our Blurb Module.
After duplicating the module, go back to the content tab to update the Text and Image & Icon tabs to match your needs. While we used the Blurb Modules to showcase our phone, email, and location, you may want to use them to display other relevant things to your role or industry. Get creative!
Adding the Final Touches to Your Online Resume Website Design
Using one of the newest Divi native modules, the Icon Module, we will add a sprinkling of iconography to our digital resume. To do this, we will first scroll to the resume section of our page.
Adding the Icon Module
Then, we will click on the gray plus icon to add one Icon Module to the column. We want the icon to go at the start of each entry within our resume. Ideally, we also want the icon to be a general visual representation of the company or role.
![]()
Then, using the search box, type in a term that resonates with the position this icon will represent on your resume.
![]()
In our example, we used a color swatch to represent the role that color plays in UI, UX, and ultimately the work of a product designer.
Styling the Icon
We then click on the Design tab. We use the following settings to change the color and size of the icon:
Icon Settings:
- Icon Color: #fe5a26
- Icon Size: 32px
![]()
Our last design change will be to left align the Icon Module. To do that, click on the Alignment tab. Then, click on the left align icon. Finally, click on the green checkmark button at the foot of the settings window to lock in your icon settings.
![]()
With the Icon Module designed, we will now click and drag it to the top of our role title.
![]()
For each entry in your resume, add an icon to represent the mentioned role. For this current resume, these are the icons chosen:
![]()
Final Look
With these subtle animations and additional modules like the Icon Module and the Circle Counter Module, we’ve been able to bring new life to the Creative CV home layout:
If you’d like to take the layout a step further, you can also check out the FREE header, footer, and blog post template which can supplement the Creative CV Layout Pack as a whole. You can see the header and footer freebie in use above. Making your work public online can be a scary step in your job search journey. But with a tool like Divi in your arsenal, the pressure to build and maintain an online presence can be reduced. Having the right resources to create a visually appealing yet professional website requires balance and skill.
Final Thoughts
All in all, we’d love to hear your thoughts on your tech journey. If you’ve been looking to get into tech, would you consider making a website for your resume? If you’re not in tech, do you think a website like this could help you in your career? Let us know in the comments down below, and let’s get a conversation going.


I have been very curious about what the perceived advantage is to providing some arbitrary, less than 100% metric of your knowledge in a particular area. It’s just not something I’d do on a resume. My husband and I spent our careers in the high tech industry, we’re both engineers and ended our careers in upper management. We spent hours upon hours weeding thru resumes and conducting interviews. Those metrics would not have read well in our industry. You’d best know your stuff because the interviews are tough. Also, in our industry, websites with the resumes would not be of interest. If they were there, maybe… maybe someone in HR would glance at it but I don’t really see it as likely the interviewer would. It would smack of being inexperienced in our industry, trying to be too flashy when the focus is technology. The company representatives would get what they needed thru the interview process. To get to the interview, resumes need to provide a good overview, appropriate keywords and you need the experience/education. We worked in product development engineering – systems, software and hardware. Maybe there are other areas where the website would be of interest – technical writing, maybe. I see web design/development as a different area and there adding the website may make more sense. I’m afraid I truly just don’t get the metrics. Personally I’d probably bypass a resume with those on it, and I suspect a good number of my colleagues would have also, because they are both arbitrary and relatively meaningless.
Well when it comes to systems engineering, software development, etc., these days, the way to maximize time/efficiency is to have the candidate take 1 or 2 preliminary exams covering required skills in order pre-qualify them for an interview….