
Cloudways SMTP is a simple, yet powerful feature available with a Divi hosting plan by Cloudways. SMTP is used by email providers to send emails. SMTP is an internet protocol — a set of rules for configuring and managing data. Almost all online activity uses protocols. For example, they enable web-ready devices to access networks all over the world wide web, allowing us to do things like shop online, read blog posts, and send emails via Gmail. In this post, we’ll explain two ways to set up SMTP with Divi Hosting using the Cloudways platform.
What is Divi Hosting by Cloudways?
Cloudways is a cloud hosting provider that uses a customizable approach to hosting. Options are abundant — allowing you to choose your server, file storage location, storage options, and bandwidth. Divi hosting by Cloudways offers users WordPress with Divi pre-installed. Upon starting a Divi hosting plan, you’re ready to start building your site.

What is SMTP?
SMTP stands for Simple Mail Transfer Protocol. As we previously mentioned, SMTP is an internet protocol used to send email messages. SMTP works alongside Internet Message Access Protocol (IMAP) and Post Office Protocol (POP) to send and receive emails. That being said, SMTP is the only dedicated protocol used for sending emails. Most common email providers, such as Outlook and Gmail, depend on SMTP for sending email messages.
How Does SMTP Work?
Email messages can’t be sent reliably through WordPress without SMTP, however it uses PHP mail() by default. Really, an upgrade is needed, and the requires the use of an SMTP server is required. So how does SMTP work? SMTP bridges the gap between the PHP mail() function in WordPress and the email servers most people use. We’ll explain.
First of all, when you click “Send,” your email is converted into lines of code and then transferred to your SMTP server. From there, your email is sent to the destination server. If you don’t have SMTP, your email won’t be delivered reliably.
Having an SMTP server ensures that the sender is using a valid and active email account. If the email address can’t be verified, it will be returned to the sender. Therefore, the sender is alerted that a problem has occurred. The process for sending mail through an SMTP server can be broken down into just a few steps.
What Steps Does SMTP Take to Send A Message?
The email client (Outlook, Gmail, Exchange, etc) connects to the SMTP server through a port. Next, the email client communicates with the SMTP server to transmit details of the email. Basically, this includes the sender and receiver email addresses, as well as the contents of the message. Next, it will break down the information contained in the recipient’s email address. For example, we’ll use the email [email protected]. SMTP will first examine johnsmith, then the domain name — gmail.com. Generally, if the sender has the same domain as the recipient, the delivery process is simple. POP3 takes over immediately to deliver the message. In contrast, when using a custom SMTP server, the process takes a bit longer to complete.
Every domain name has a unique IP address. SMTP uses the IP to check the validity of the sender. For example, it will make sure that the email address is an active one, which helps to prevent spam. Once that security check is complete, SMTP hands the message over to the recipient server, where the email is delivered. However, if the security check fails, the email will be returned to the sender.
Cloudways SMTP Email Setup
Now that you’re well-versed on what an SMTP server is and how it works, we’re going to show you how to set one up using Cloudways. There are two ways that you can accomplish this. Your first option is using your own SMTP account (through Gmail, SendGrid, Mailgun, or another provider) or by using the Elastic Email add-on available through Cloudways. For this example, we’ll show you the first option using Gmail’s SMTP server.
Setting Up Cloudways SMTP With Gmail
You may not be aware of this, but Gmail actually has its own SMTP server. If you are a Gmail user, setting up an SMTP connection on Cloudways is fast and easy.
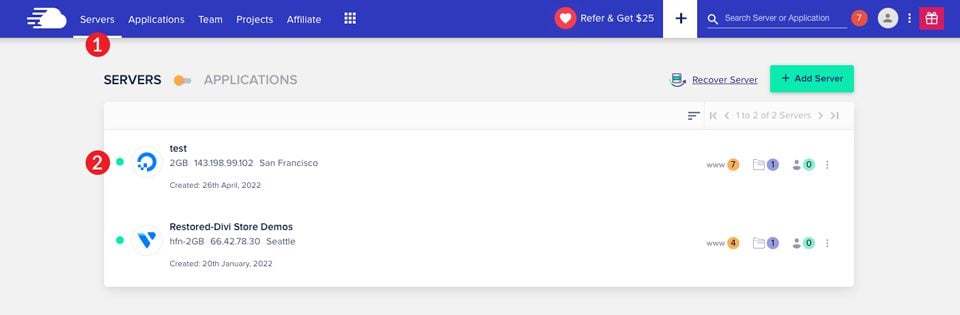
First, log in to your Cloudways account. Next, navigate to Servers in the main navigation bar. From there, select the server you wish to setup SMTP on.
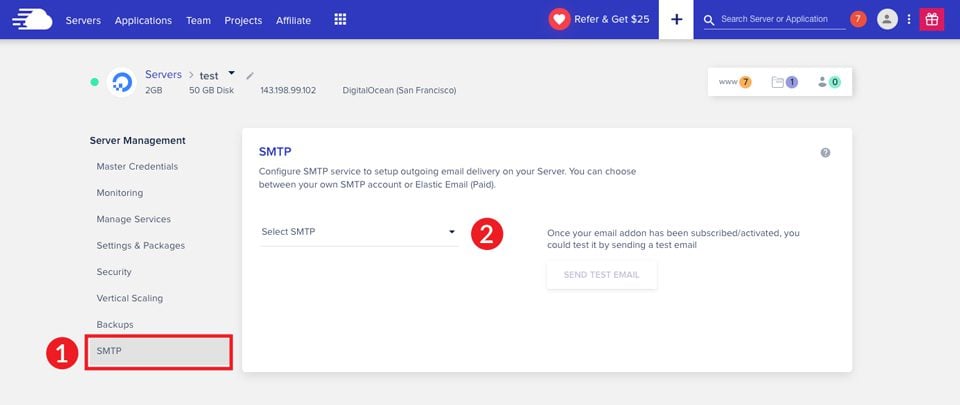
Next, click on the SMTP tab located at the bottom of the available options. Under Select SMTP, choose Your Own SMTP.
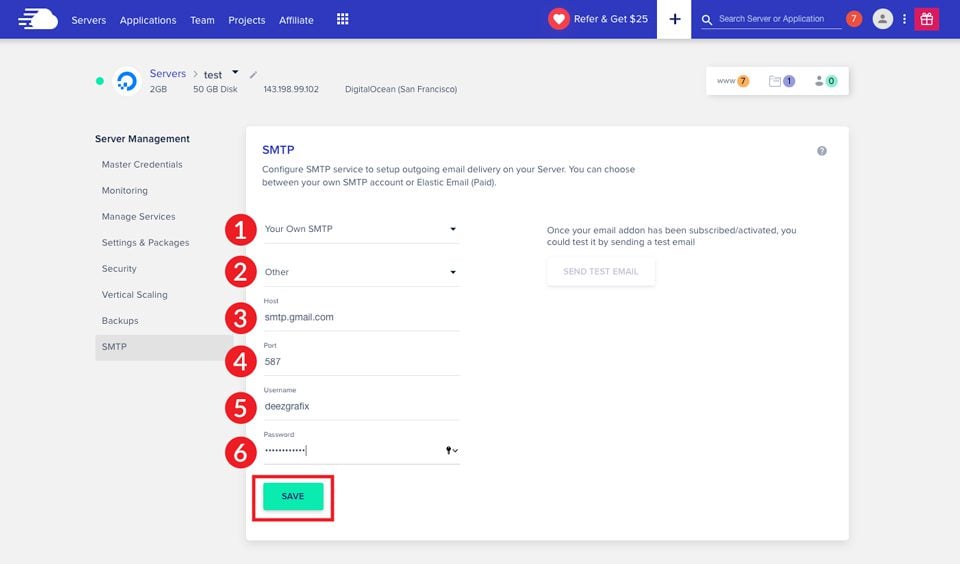
Now you’ll input your credentials. Choose Other from the dropdown list. Under Host, put smtp.gmail.com. For port, enter 587. Next, you’ll enter your Gmail username and password. Finally, click the SAVE button.
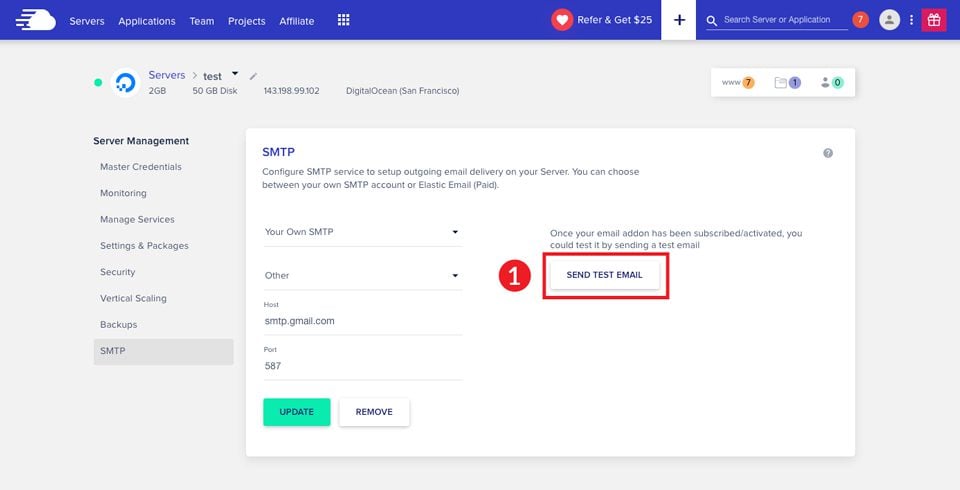
If you wish to test your settings, click the SEND TEST EMAIL button. We recommend not skipping this step.
A dialog box will appear. Enter the sender’s address and receiver’s email addresses. Finally, click SEND TEST EMAIL.
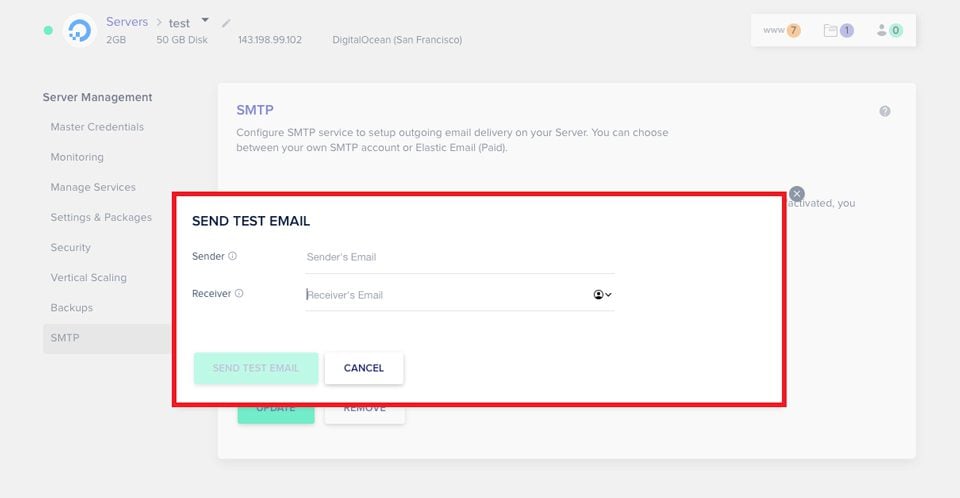
Note: In order for your test email to be sent successfully, ensure that your DNS records are properly configured. Otherwise, your test email will likely end up in your spam folder.
Once you’ve configured the setup, all of your outgoing emails will be delivered successfully. Although we are using Gmail in this example, these steps will work with most any email provider you choose.
Cloudways SMTP With Elastic Email
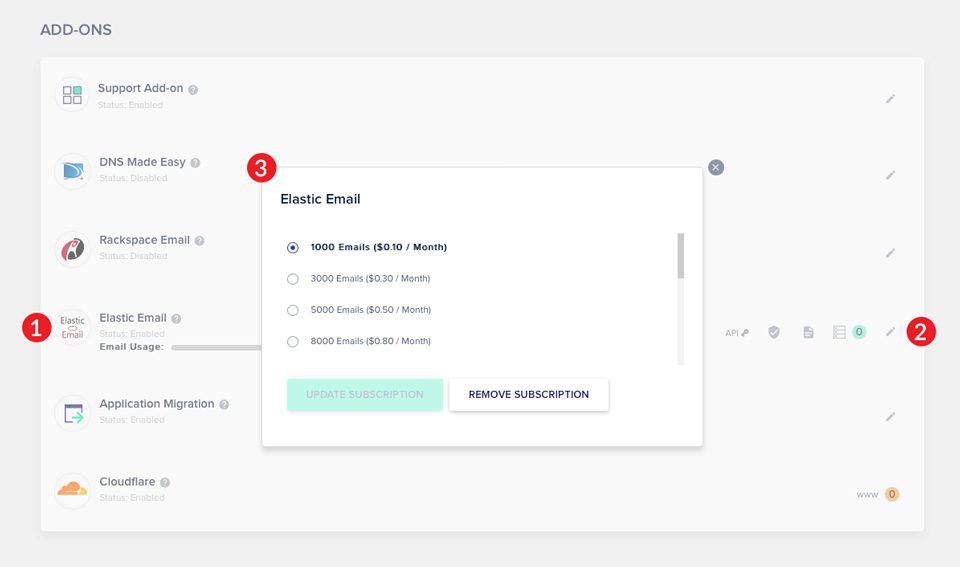
Cloudways offers Elastic Email capability as an account add-on. Elastic is one of the most notable SMTP email servers for marketers. It is mostly used for transactional emails — user notifications, password reset links, shipping confirmations, and user actions. Using the Elastic add-on enables you to send more than the 500 email per day limit you’ll get using a free SMTP provider such as Gmail.
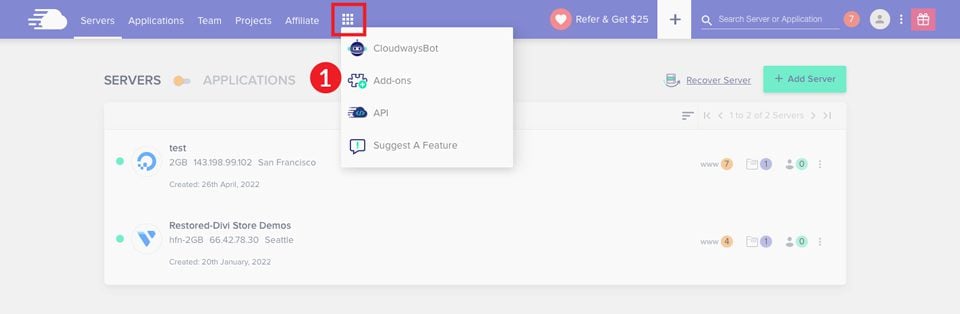
Upgrading your plan to include Elastic is a simple process. Navigate to the grid icon in the main menu. Next, click add-ons.
Cloudways offers several packages to choose from. Prices vary depending on your selection. For example, adding 1000 emails a day will cost .10¢ a month. 3000 emails adds .30¢ a month to your overall cost. Additionally, you can opt for 5000 emails per month for .50¢, and 8000 emails for .80¢ per month.
Setting Up Elastic Email
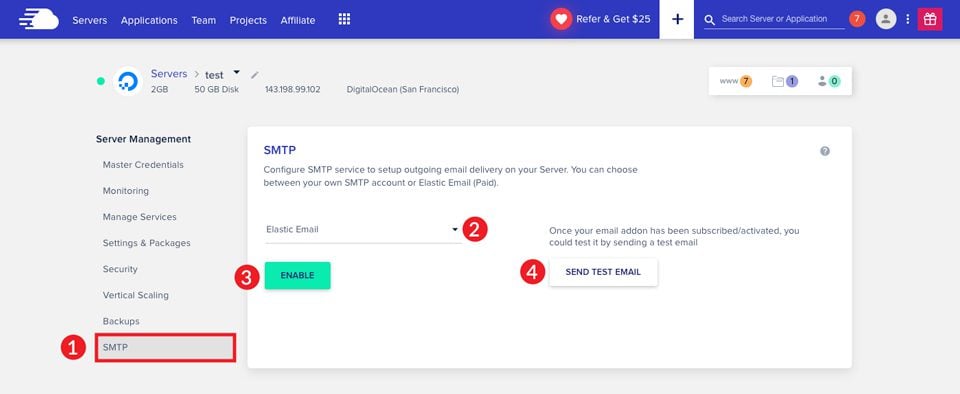
To set up your SMTP with Elastic, navigate to Servers in the main menu. Next, choose your server.
On the next screen, choose SMTP. To configure your settings, choose Elastic Email from the dropdown, then click the ENABLE button.
Once you’ve saved your settings, you should send a test email. We highly recommend this step to ensure delivery of your messages.
Cloudways SMTP at the Application Level
We’d like to note that both of previously mentioned methods only enable SMTP at the server level. If you have multiple applications on your server that require different SMTP providers, you’ll need to update your email address in each application. If you’re in the market for a SMTP email provider, check out our top 15 SMTP email services.
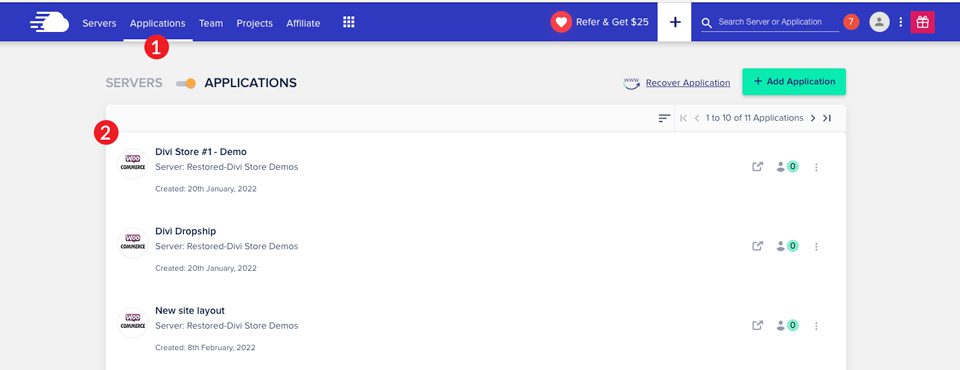
When setting SMTP at the application level, you’ll need to change the from address in the application itself. To achieve this, click applications in the main menu. Next, choose the application you wish to change.
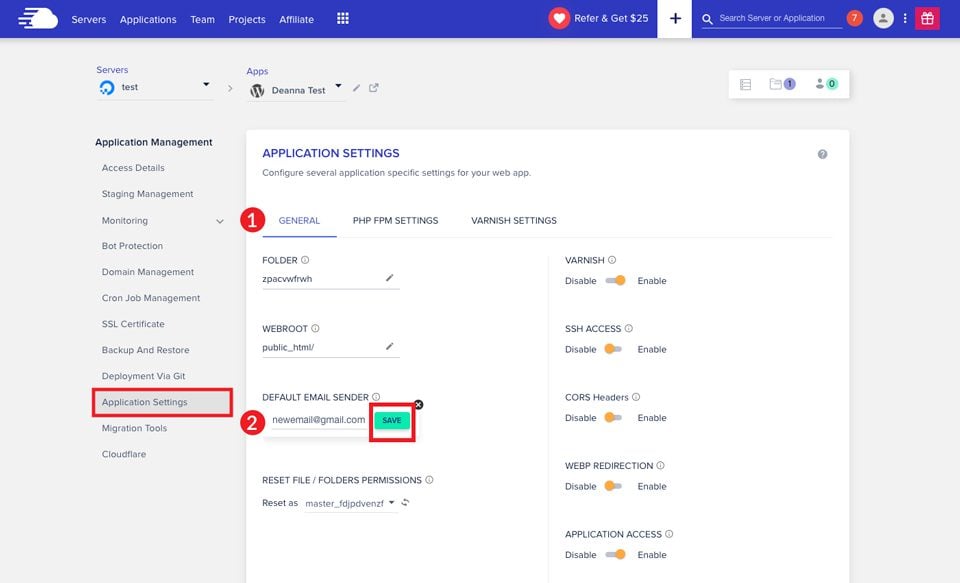
On the next screen, navigate to Application Settings. In the general tab, locate DEFAULT EMAIL SENDER. Enter the email address to use for your from address, then click SAVE.
Cloudways Makes SMTP Setup a Breeze
To sum up, SMTP is a necessary internet protocol for sending emails through WordPress. Since WordPress utilizes the PHP mail() function, users are required to incorporate SMTP in their server settings to send emails. Most WordPress hosting providers provide the ability to send emails through WordPress. However, there aren’t many who let you have a more hands-on approach.
Cloudways makes SMTP setup quite simple. There are several choices for SMTP email providers, for example. Integrations for Mailgun, Mandrill, AuthSMTP, and SendGrid are included with Cloudways. Additionally, using providers such as Gmail is an easy task.
Do you have any questions about how to set up SMTP using Cloudways? If so, please feel free to drop your question below.


very rich and informative content and after read the article i gain more knowledge. Keep it up
Awesome! I really like it