
Companies often educate their visitors about their services by offering a helpful illustration of the steps to their process. For example, a web design agency may show their process of web development, or a bakery may feature their steps for creating the perfect cupcake.
With Divi, we can take the “steps to a process” to a whole different level using the built-in scroll effects. In this tutorial, we’ll show you a simple way to progressively flash the steps to a process as the user scrolls down the page. This will give the design a nice interactive boost that creatively emphasizes the intended message.
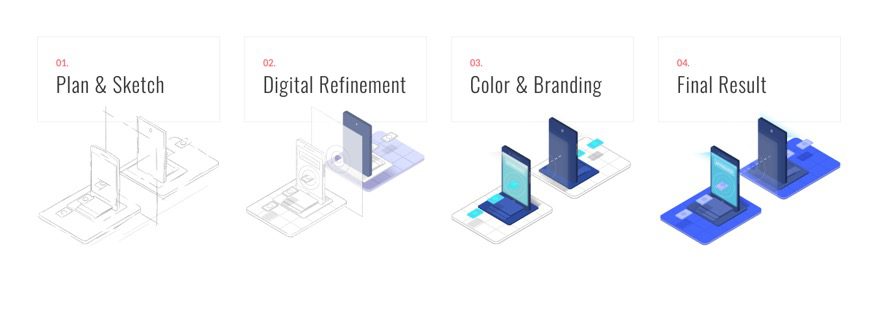
Sneak Peek

Download the Layout for FREE
To lay your hands on the designs from this tutorial, you will first need to download it using the button below. To gain access to the download you will need to subscribe to our newsletter by using the form below. As a new subscriber, you will receive even more Divi goodness and a free Divi Layout pack every Monday! If you’re already on the list, simply enter your email address below and click download. You will not be “resubscribed” or receive extra emails.

To import the layout to your page, simply extract the zip file and drag the JSON file into the Divi Builder.
Let’s get to the tutorial, shall we?
What You Need to Get Started

To get started, you will need to do the following:
- If you haven’t yet, install and activate the Divi Theme.
- Create a new page in WordPress and use the Divi Builder to edit the page on the front end (visual builder).
- Choose the option “Build From Scratch”.
After that, you will have a blank canvas to start designing in Divi.
How to Progressively Flash the Steps to a Process with Divi’s Scroll Effects
To create our layout to flash the steps to a process on scroll, we must begin with adding a new row.
Creating the Four-Column Row
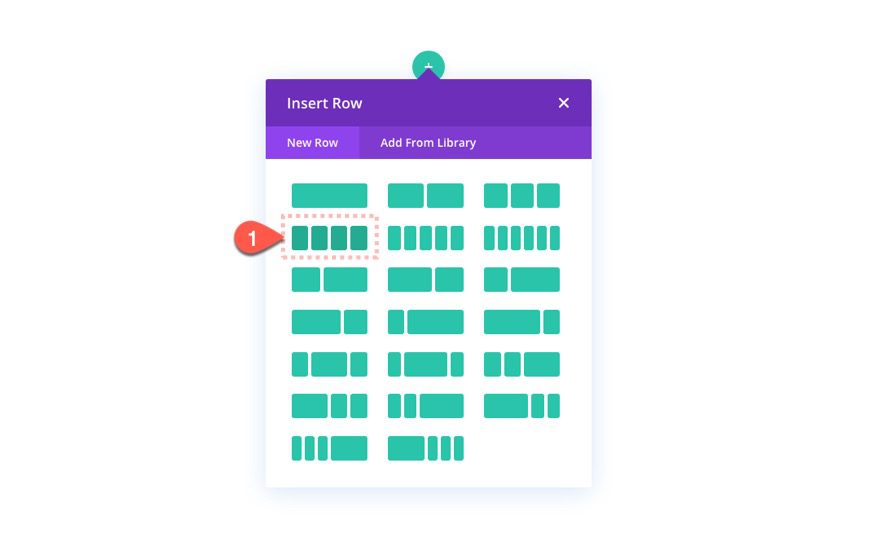
To begin, add a four-column row to the section.
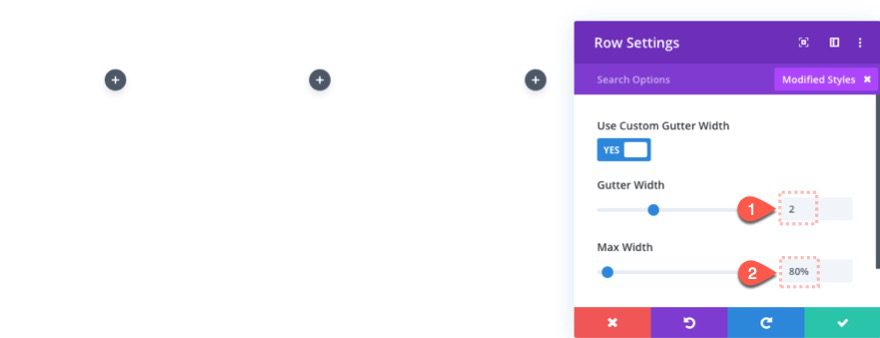
Before we start adding modules/content to the columns, open the settings for the row and update the following:
- Gutter Width: 2
- Max Width: 80%
Simple enough so far. Now let’s start adding some content.
Adding Content (steps) to Each Column
Since this design features a scroll effect that flashes the steps to a process, each of our columns will contain one of the steps. Column 1 will contain content to illustrate step 1. Column 2 will contain content for step 2. And so on.
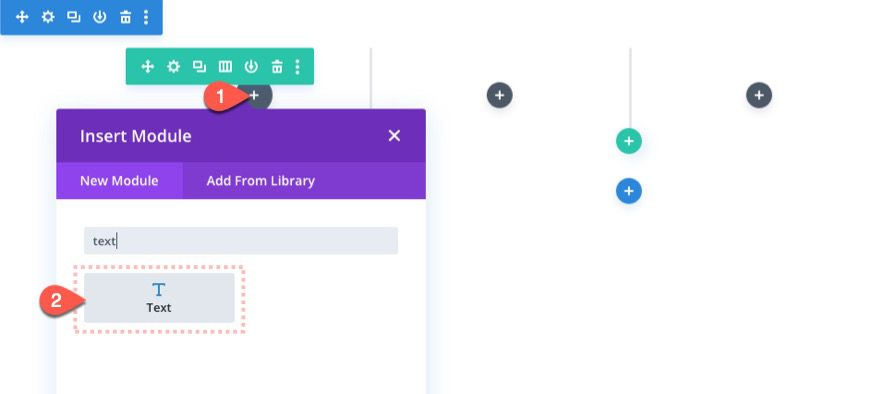
Add Text Module to Column 1
Add a new text module to column 1.
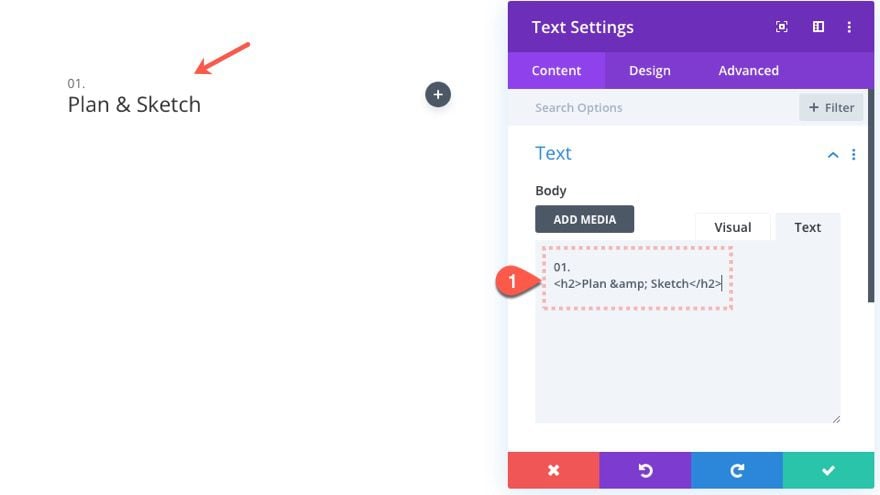
Text Module Content and Design
Then update the text content as follows:
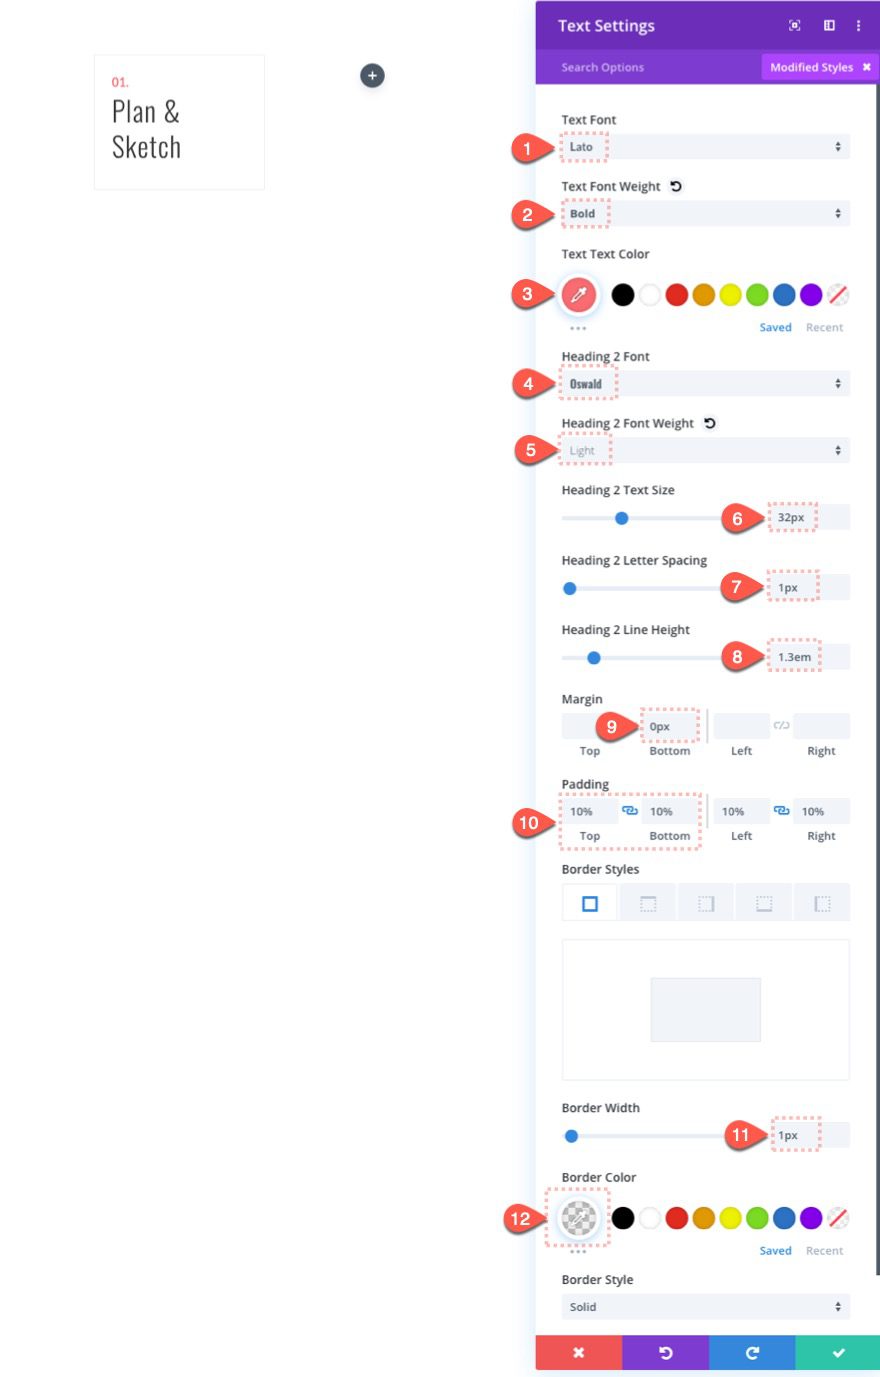
Open the design tab and update the following settings:
- Text Font: Lato
- Text Font Weight: Bold
- Text Text Color: #fc6d71
- Heading 2 font: Oswald
- Heading 2 Font Weight: Light
- Heading 2 Text Size: 32px
- Heading 2 Letter Spacing: 1px
- Heading 2 Line Height: 1.3em
- Margin: 0px bottom
- Padding: 10% top, 10% bottom
- Border Width: 1px
- Border Color: rgba(166,166,166,0.16)
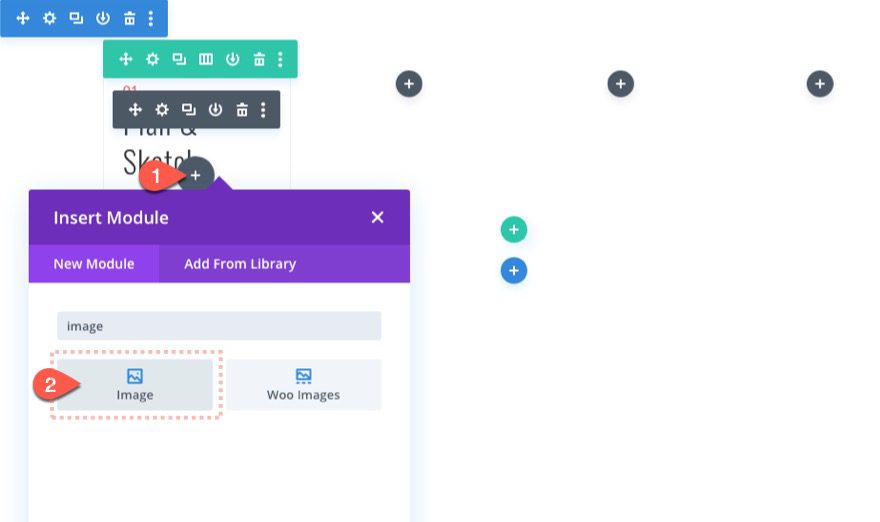
Add Image Module to Column 1
Once the text module is in place, add an image module below the text module in column 1.
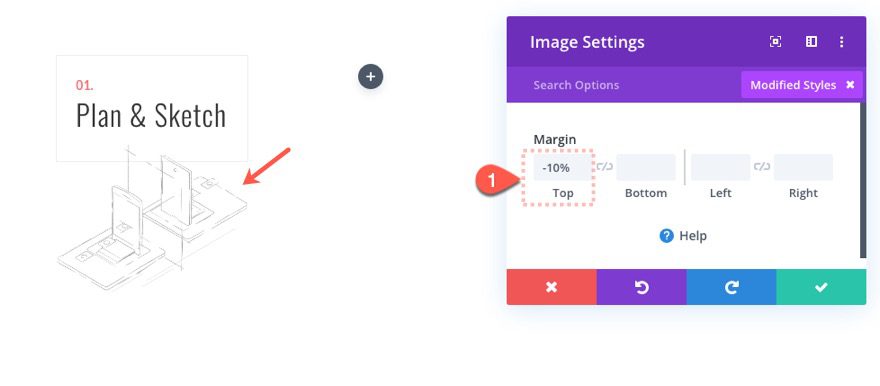
Then update the image margin as follows:
Copy and Paste Column 1 Content
To speed up the design process, we can use multi-select to select the two modules in column 1 and then paste them into each of the remaining four columns.

Update Content for Duplicate Modules
Once the duplicate modules are in place, go back and update the text content and images to reflect each of the four steps in the process.
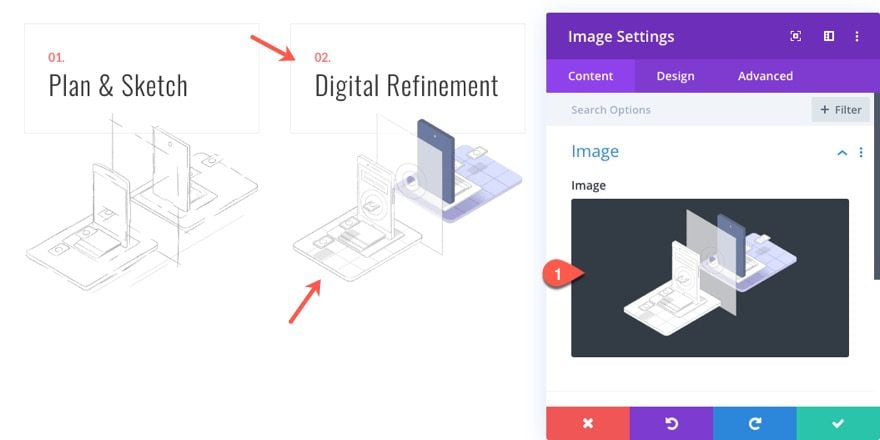
Once done, your design should look something like this.
Adding Scroll Effects to Each Column
We are now ready to add the scroll effects to flash each step of the process as the user scrolls down the page. Instead of adding scroll effects to each of the modules, we will add the scroll effect to each column so that the effect is applied to all modules in the content.
To create the flashing scroll effect, we are going to use the Fading In and Out scroll effect for each column. The idea is to begin the effect by starting with 0% opacity, continue to 100% opacity, and then back down to 0%.
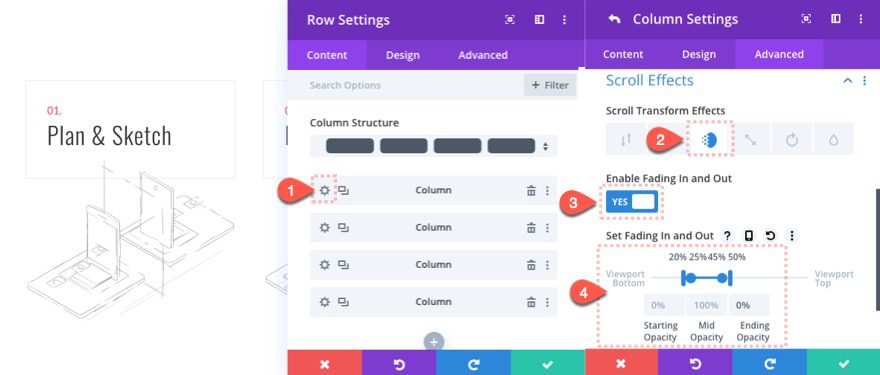
Column 1 Scroll Effects
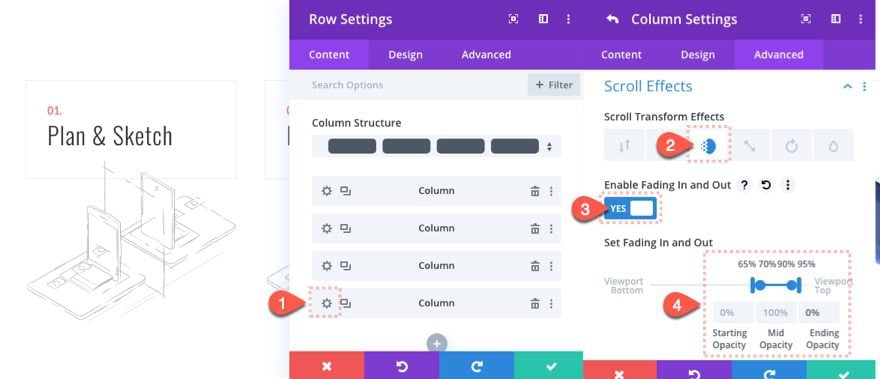
In the row settings, open the settings for column 1 and add the following scroll effect:
Under the Fading In and Out options tab:
- Enable Fading In and Out: YES
- Starting Opacity: 0% (at 20% viewport)
- Mid Opacity: 100% (at 25%-45% viewport)
- Ending Opacity: 0% (at 50% viewport)
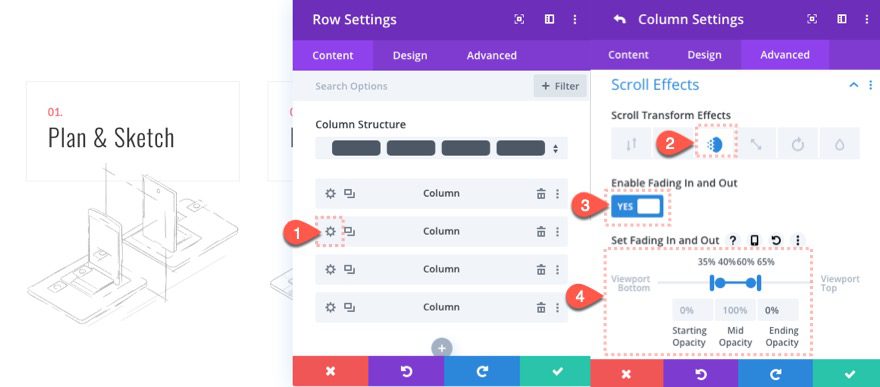
Column 2 Scroll Effects
Open the settings for column 2 and add the following scroll effect:
Under the Fading In and Out options tab:
- Enable Fading In and Out: YES
- Starting Opacity: 0% (at 35% viewport)
- Mid Opacity: 100% (at 40%-60% viewport)
- Ending Opacity: 0% (at 65% viewport)
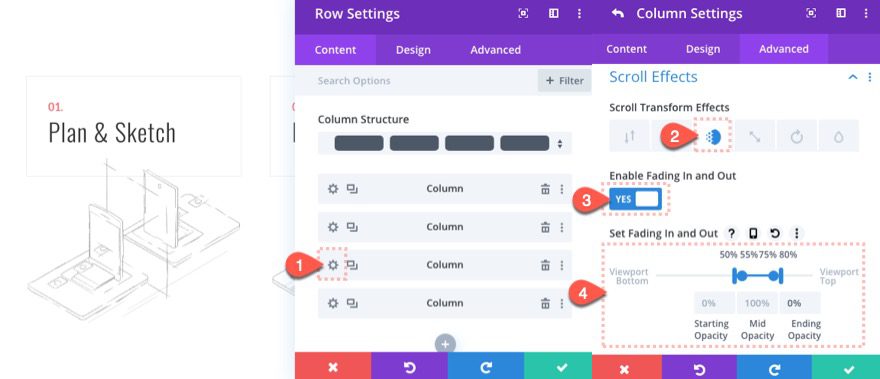
Column 3 Scroll Effects
Column 4 Scroll Effects

Adding a Heading
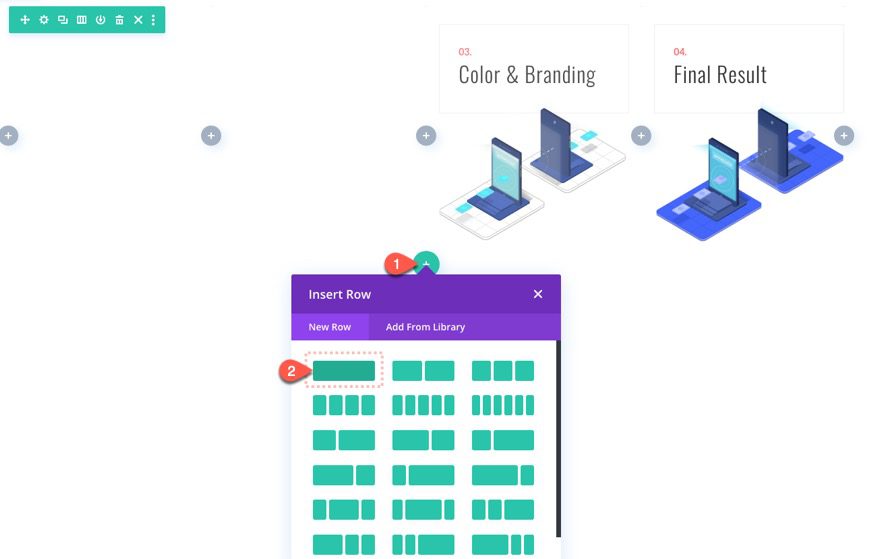
As a final touch, we can add a heading to our layout. To do this, add a new one-column row below the current row.
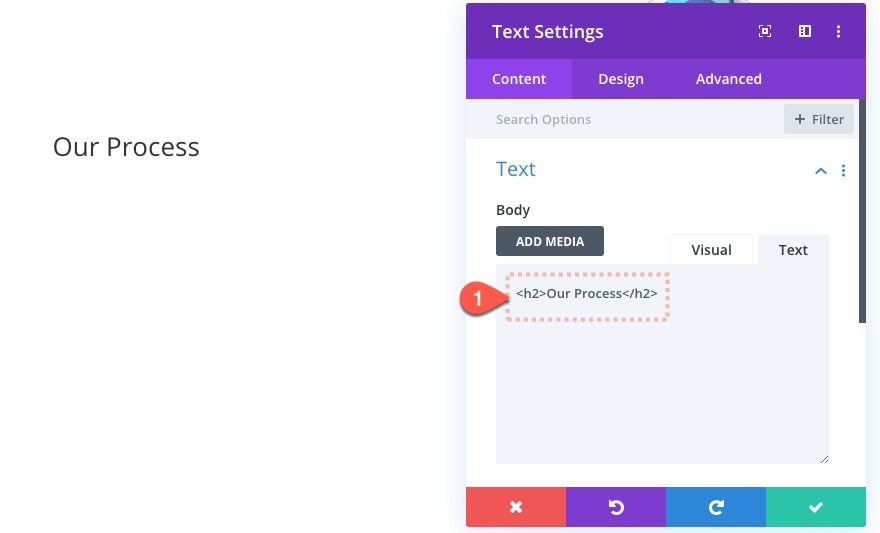
Then add a text module to the row with the following content:
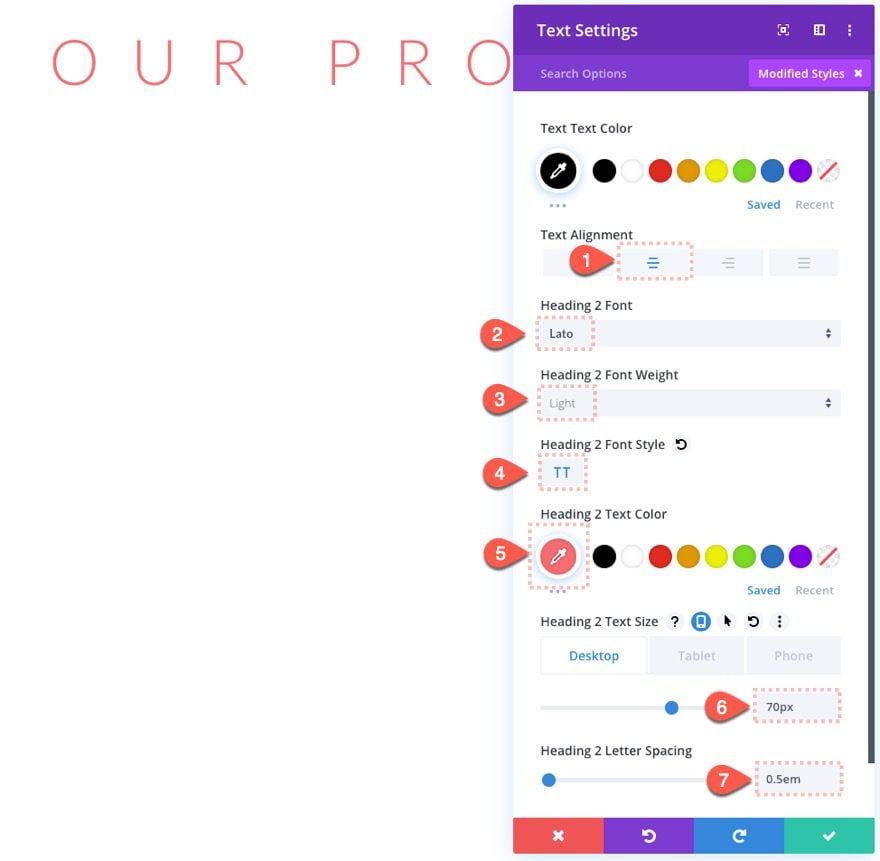
Under the design tab, update the following:
- Text Alignment: Lato
- Heading 2 Font Weight: Light
- Heading 2 Font Style: TT
- Heading 2 Text Color: #fc6d71
- Heading 2 Text Size: 70px (desktop), 40px (tablet), 24px (phone)
- Heading 2 Letter Spacing: 0.5em
Final Result
To see the result on a live page, you will need to add some additional space above and below the section to see the scroll effect from start to finish. One easy way to do this is to add top and bottom margin to the section.
Here is the result.
Final Thoughts
Illustrating the steps to a process doesn’t have to be limited to a static image or graphic. With Divi’s scroll effect, you can bring life to the illustration by progressively flashing each step into view as the user scrolls down the page. And, since the scroll effect is added to each column, you can easily change the modules/content within each column without disrupting the functionality. Hopefully, this will be a useful technique to add to your design toolbox.
I look forward to hearing from you in the comments.
Cheers!


The content of the JSON file in the download area is completely different from what is shown. Too bad. Will the correct file still be delivered?
I love this design for showing steps. I am having trouble with the scrolling effect or and affect I use showing up really slow on the tablet or phone layouts, to the point where I have had to remove them on the phone and tablet layouts. Do you know what could be causing this?
looks like the json file is totally different to what it showed above
The correct JSON is there now. Thanks for letting me know. My mistake.
Yes, jvalin, for me it is also the wrong ZIP, I just downloaded. It is full of errors by hovering – in Chrome Browser. I hope Elegantthemes team will change this download file soon.
I just uploaded the correct JSON file. Sorry about that!
The layout design provided with this tutorial is totally different. You must upload the correct layout.
I just uploaded the correct JSON file. Sorry about that!
I am a fan of elegant themes. After looking into the steps of divis scroll effects and it’s easy to implement process, I must say this is awesome. I would highly recommend this to my clients and followers. Thanks once again to make our life easy.
Great to hear. Thanks, Kate.