
A sticky footer is a fantastic way to display important content to your visitors. The footer stays at the bottom of the screen as they scroll so they always have easy access to the content. This is ideal for contact information, special links, and more. Fortunately, creating a sticky footer is easy with Divi. In this tutorial, we’ll see how to make one section of your Divi footer sticky, and we’ll adjust it differently for desktop and phone devices.
Preview
Before we get started, let’s take a look at what we’ll build in this tutorial.
Here’s how our sticky Divi footer looks on a desktop.
Here’s how our sticky Divi footer looks on a phone.
There are several advantages of using a sticky footer…
First, pages that don’t have enough content to fill the height of the screen will have a floating footer by default. A sticky footer locks the footer at the bottom of the screen, keeping it from floating. This makes the page look better and less distracting to readers.
Another advantage is that it’s a great place to put calls to action or information that the user can use at their fingertips. Contact information, sales ads, banner ads, and lots more can be placed in the sticky footer. Phone numbers are especially helpful for phones because you can make them clickable.
First, you’ll need a footer template to use with the Divi Theme Builder. You can build your own or get a free template from the Elegant Themes blog. Elegant Themes provides free header and footer templates that match many of the free layout packs available within Divi. You can find the footer templates by searching the blog for “free footer” or “footer template”. Download your template and unzip the file.

For my examples, I’m using the free Header and Footer Template for Divi’s Estate Planning Layout Pack. I’m also using the landing page from the Estate Planning layout pack for the page content.
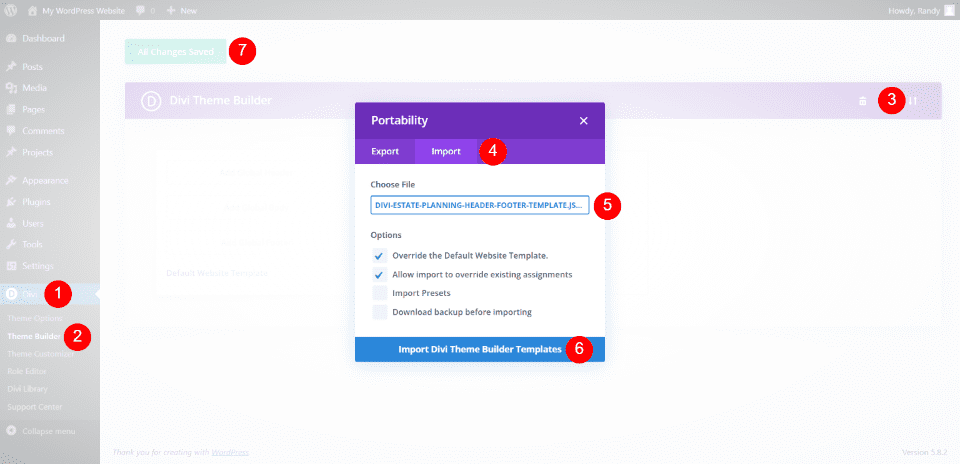
To upload your footer template, go to Divi > Theme Builder in the WordPress dashboard. Click the Portability icon in the upper right and select Import within the modal that opens. Next, click Choose File and navigate to your JSON file on your computer and select it. Finally, click the button Import Divi Theme Builder Template at the bottom of the modal. Wait for the template to upload and save your settings.
You can edit the template from the Theme Builder on the backend or within the Visual Builder on the front end.
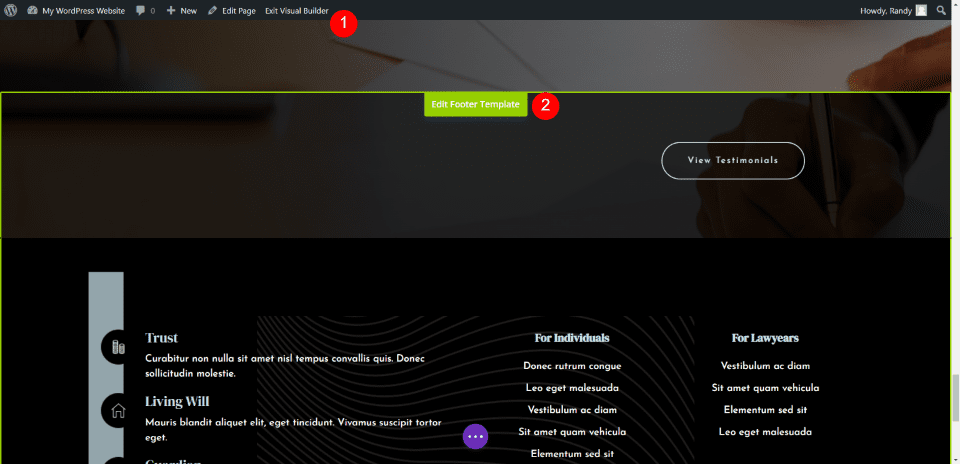
I’m working on the front end so I can see the results live to make sure it works with the body of the website. On the front end, select Enable Visual Builder and scroll down to the footer, and select Edit Footer Template.
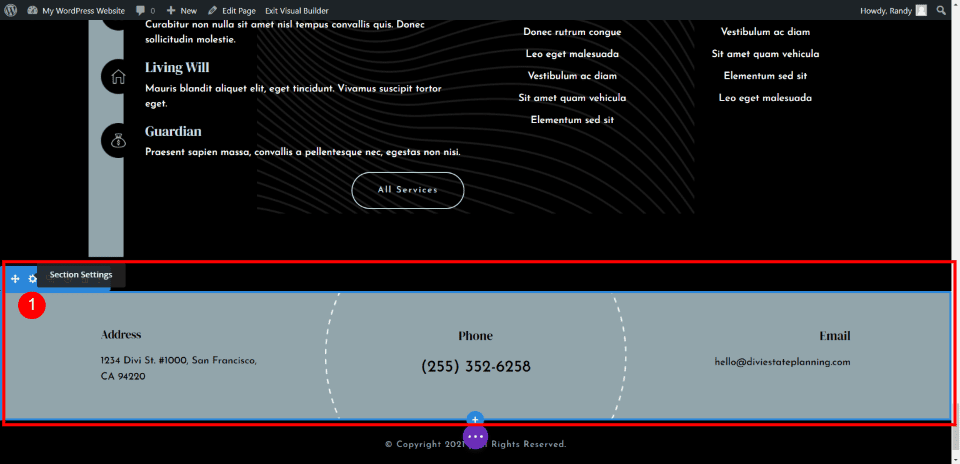
We will make one section of the footer sticky. This section includes the address, phone, and email information. We’ll make it smaller while it’s in the sticky state and we’ll make different adjustments for the desktop and footer. Hover over the section that we want to make sticky and select the settings icon.
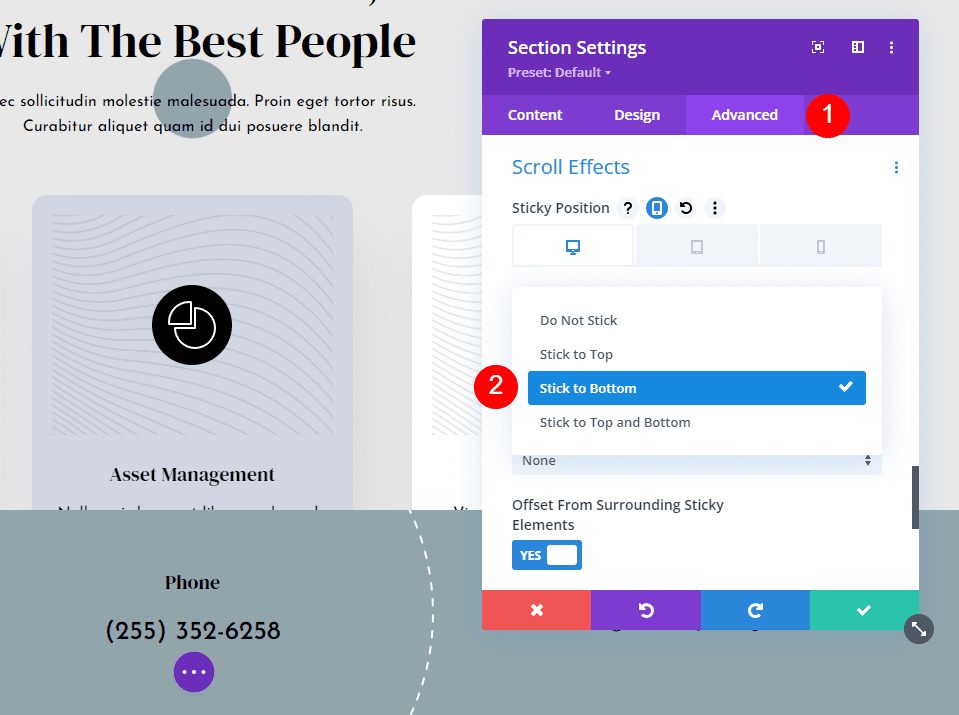
Select the Advanced tab and scroll down to Scroll Effects. This first setting is Sticky Position. Click on the dropdown box and choose Stick to Bottom. This will enable the sticky options throughout the section.
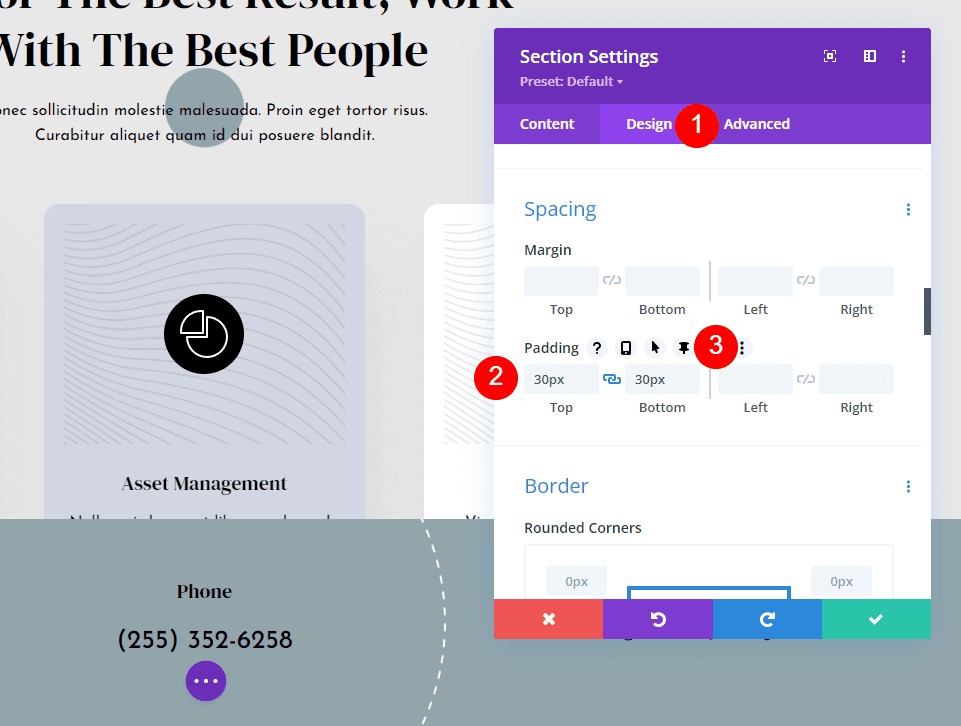
Next, go to the Design tab and scroll down to Spacing. It should already have the padding for the Top and Bottom in place, but if it isn’t there, add 30px to each.
- Padding: 30px, Top and Bottom
Hover over the fields to reveal several options. Click on the pin icon. This opens the sticky adjustments for this setting.
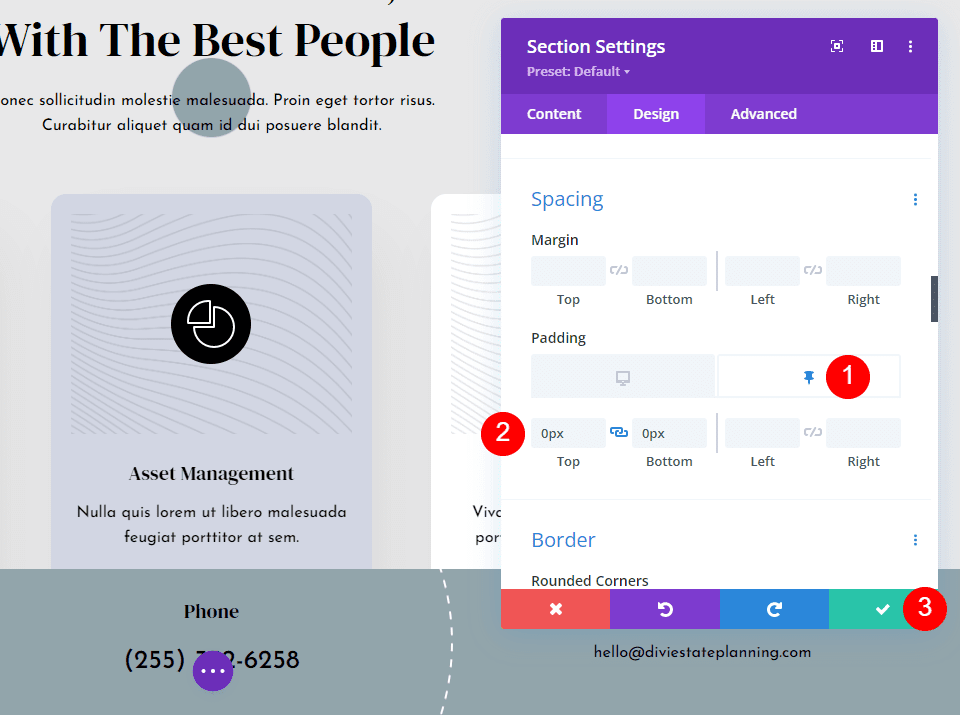
You’ll see a desktop icon and a pin icon. The desktop icon will be active. Click on the pin icon to adjust the padding for the sticky state of the section. Add 0px for the Top and Bottom.
- Sticky Padding: 0px, Top and Bottom.
You can already see the section is shorter than it was. This will allow the section to look smaller when it’s outside of its section and then grow to its normal size when it locks into place in the footer. This is all we need to do for the desktop settings. Tablet will automatically follow these settings.

We’ll make some changes to the footer’s design for the Phone. Hover over the row and click the settings icon.
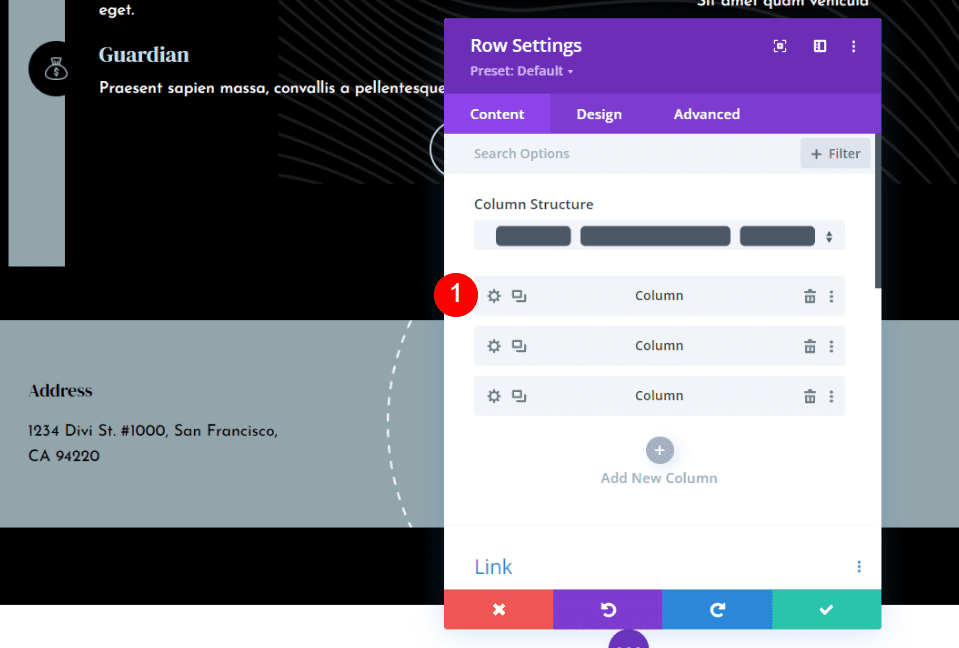
Next, we’ll make adjustments to two of the columns. Click the settings icon for the first column.
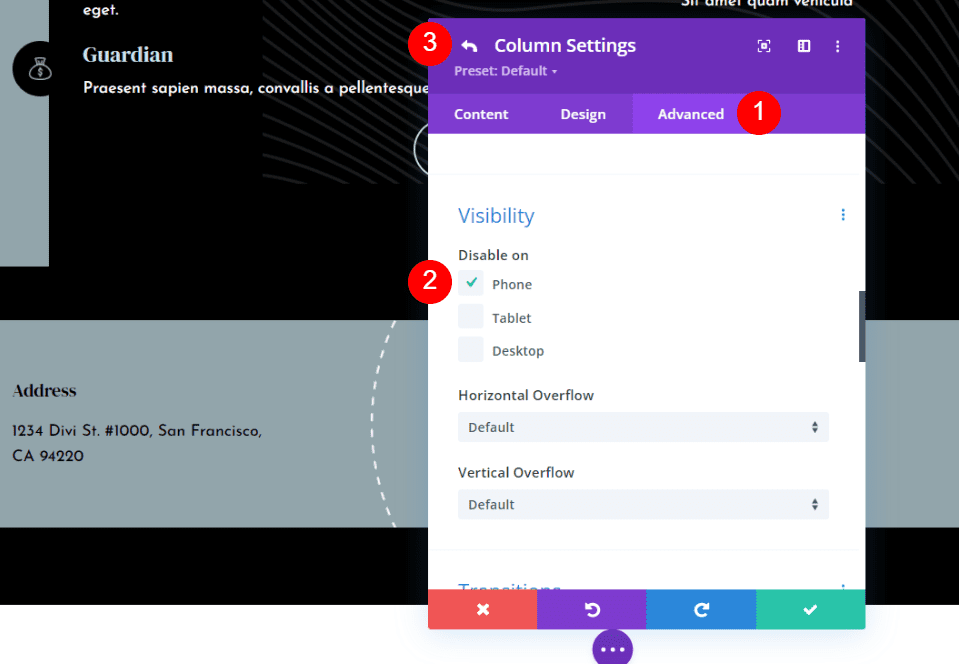
Select the Advanced tab and scroll down to Visibility. Under Disable On, check Phone. We will leave it enabled on a tablet because it works the same as a desktop. Click on the back arrow in the upper left of the modal.
- Disable On: Phone
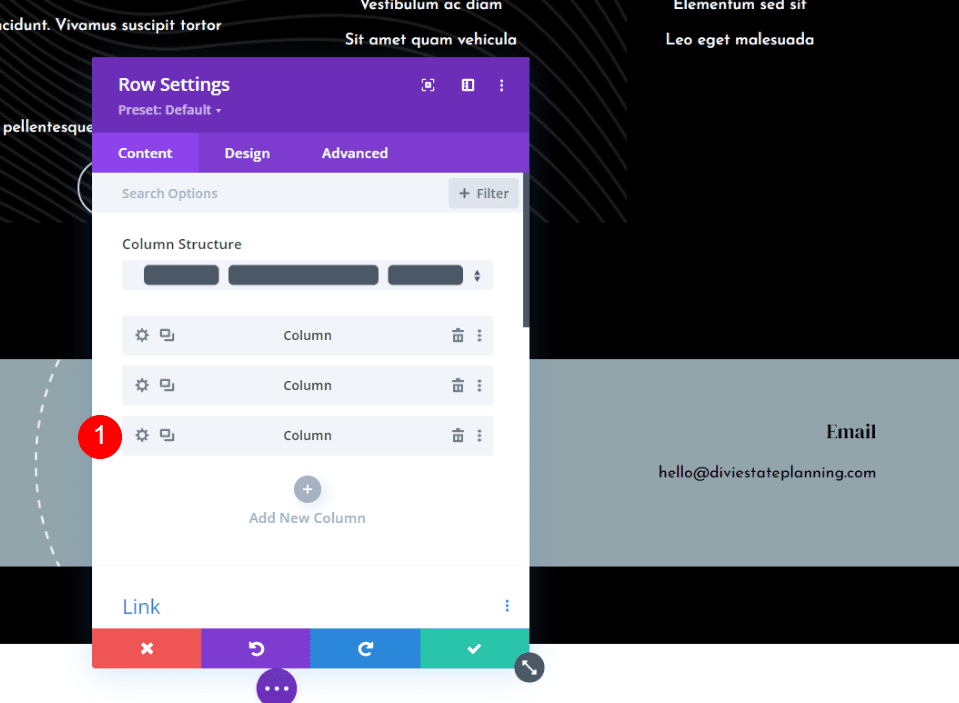
Next, click on the settings icon for the third column.

Go to the Advanced tab, scroll to Visibility, and disable it on Phone. Click on the green check at the bottom or click the return arrow at the top.
- Disable On: Phone
Close the modal and save your changes.
Clickable Phone Number
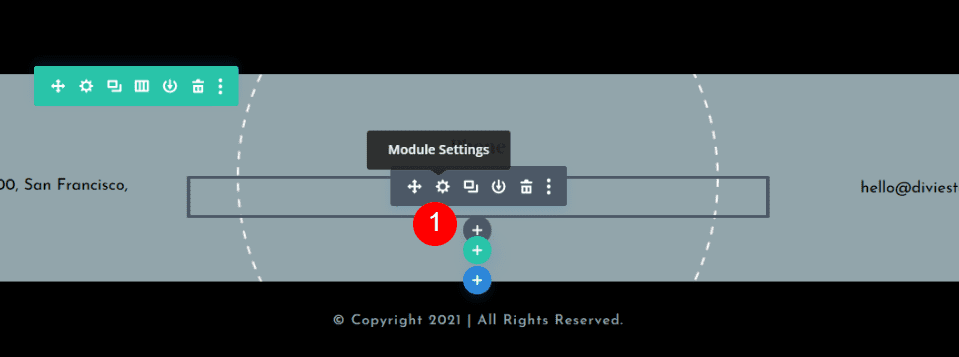
Since the phone version of this sticky footer will only show the phone number, I want to make it clickable. This makes use of the phone number staying on the screen and creates a call to action. Click on the settings for the Text module that has the phone number.
We’ll make the number clickable for phones only. Desktop and Tablet will not be clickable. If you want it clickable on desktop, then skip clicking on the icon.
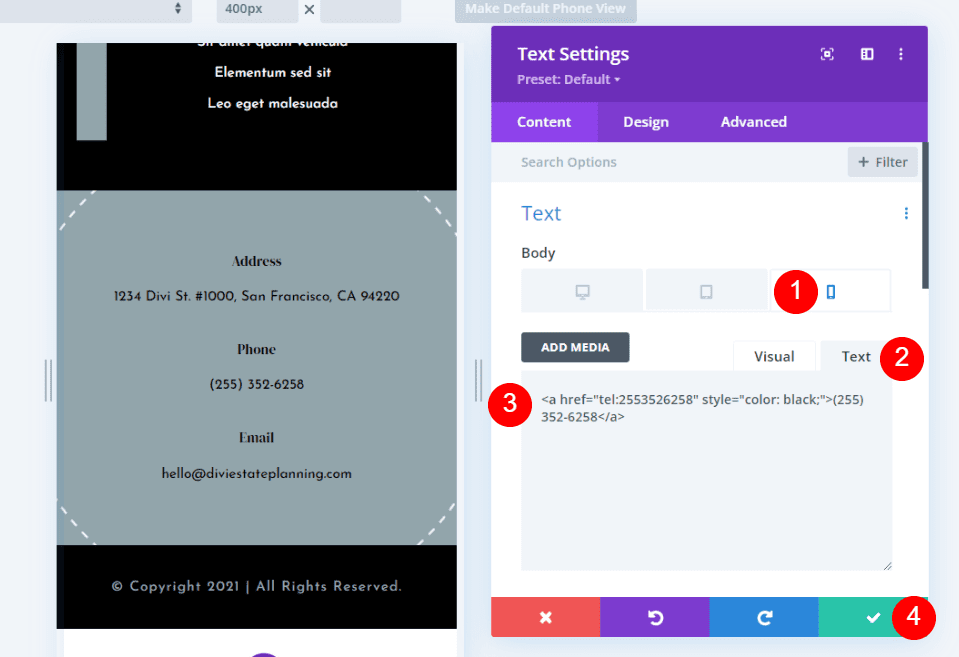
Select the Phone icon. Select the Text tab in the Body content editor and paste this HTML for a clickable phone number:
<a href="tel:2553526258" style="color: black;">(255) 252-6258</a>
For my example, I’m using the number that comes with the template. Simply change the number with your own. Since clickable links automatically change to the default link color, I’ve also added some inline CSS to change the color of the clickable link to black. Change the color by adding the name or hex code.
You could also change the title from Phone to Click to Call, or something similar.
Finally, close your settings and save your layout.
Results
Here’s how our sticky Divi footer looks on a desktop and a phone.
Here’s how our sticky Divi footer looks on a desktop.
Here’s how our sticky Divi footer looks on a phone. The phone number is clickable on this footer.
Ending Thoughts
That’s our look at how to make your Divi footer sticky using the Divi Builder’s sticky options. The entire footer, or any element of the footer, can be made sticky with a single click. The footer state options allow the elements to look different while they’re sticky. This opens up a lot of design options for sticky footers.
We want to hear from you. Have you used Divi’s sticky options to make your Divi footer sticky? Let us know about your experience in the comments below.


This is working for me to make my footer sticky, but now I have a horizontal scroll bar appearing when I scroll right to the bottom of the page (on desktop only, and only when I hit the very bottom of the page). I tried making the vertical and horizontal overflow of the sticky section “Hidden” but this didn’t help. Any ideas?
I was tried many ways to make the footer sticky and failed every time but this one works for me thanks a lot.
Really helpful post, you saved my lot’s off time. Thank you