
Creating text background designs with CSS is a great way to add a stunning design element to any website. The key to creating these custom text backgrounds is to use the background-clip CSS property with a text value. Because this method has recently gained popularity and browser support, we are going to show you how to use it in Divi. This opens up an additional layer of design that targets text elements (like H1, H2, p, etc…) in addition to all of the other wonderful design capabilities of Divi.
Let’s get started.
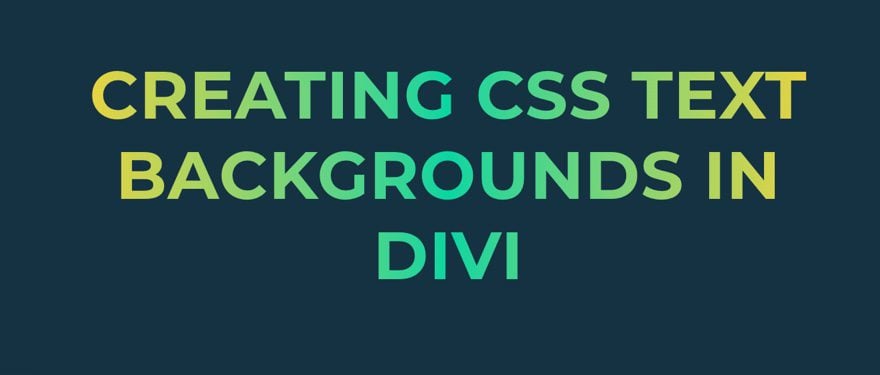
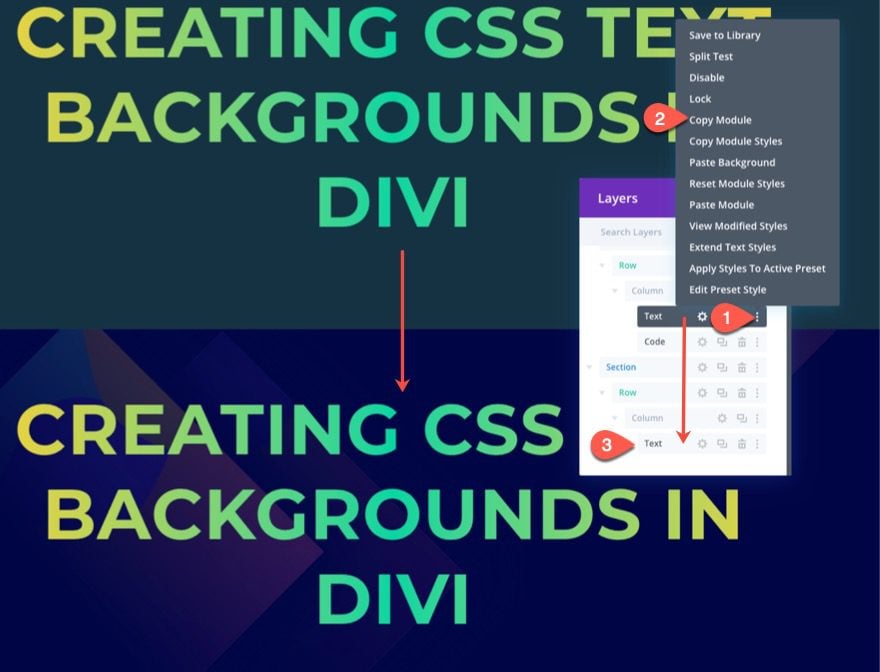
Sneak Peek
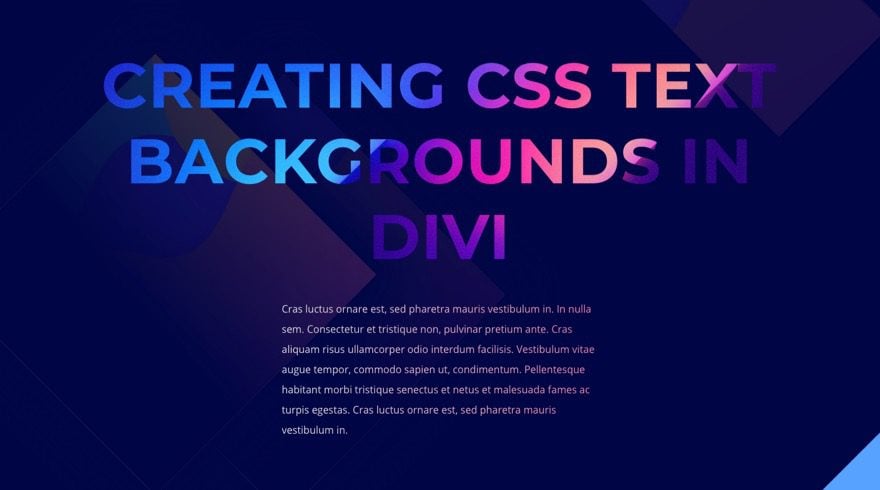
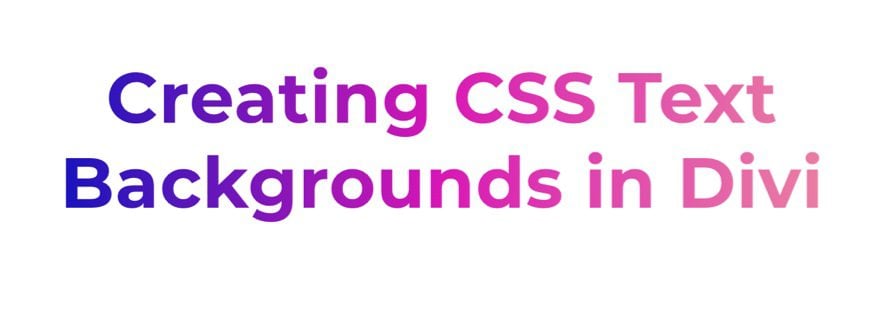
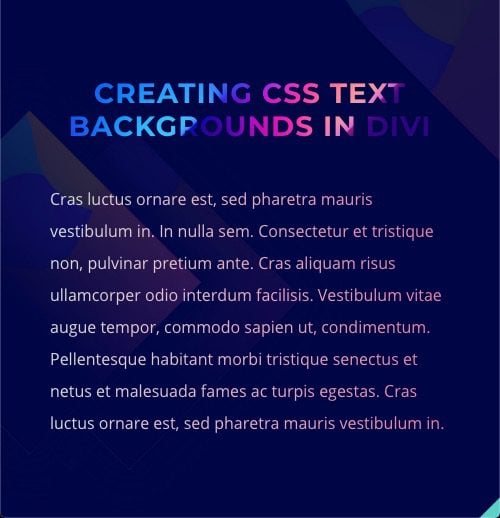
Here is a quick look at the design we’ll build in this tutorial.
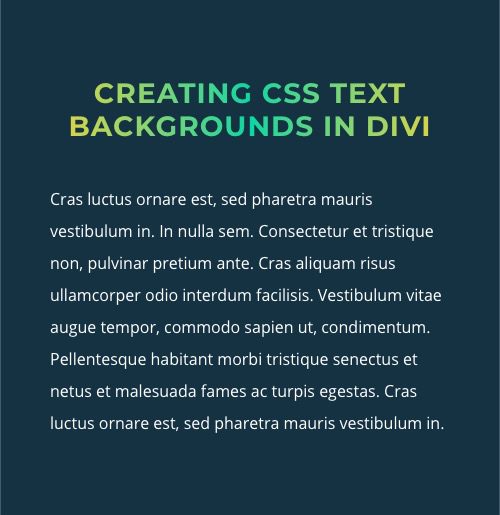
Here is an example of a linear-gradient background added to heading text using background-clip
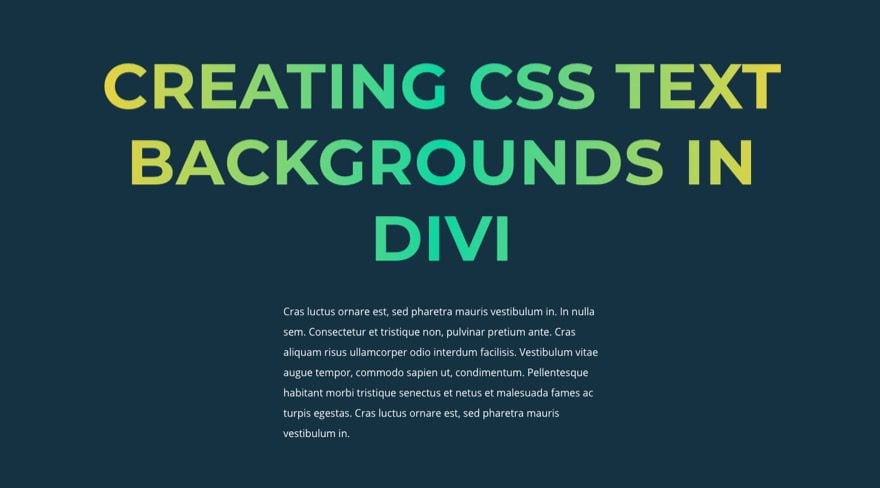
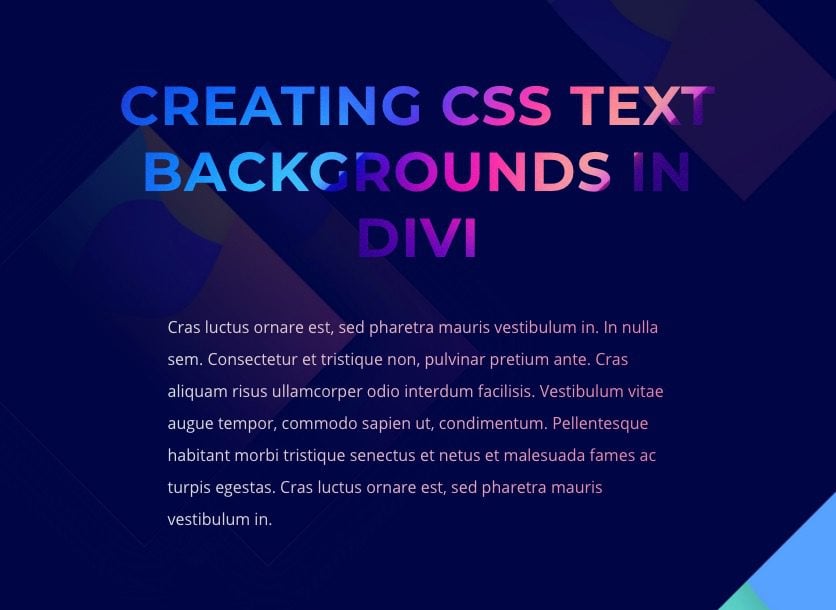
Here is an example of an image background added to heading text and a linear-gradient background added to the paragraph text using background-clip
And here is a codepen that demonstrates this concept as well.
Download the Layout for FREE
To lay your hands on the designs from this tutorial, you will first need to download it using the button below. To gain access to the download you will need to subscribe to our newsletter by using the form below. As a new subscriber, you will receive even more Divi goodness and a free Divi Layout pack every Monday! If you’re already on the list, simply enter your email address below and click download. You will not be “resubscribed” or receive extra emails.

To import the section layout to your Divi Library, navigate to the Divi Library.
Click the Import button.
In the portability popup, select the import tab and choose the download file from your computer.
Then click the import button.

Once done, the section layout will be available in the Divi Builder.
Let’s get to the tutorial, shall we?
What You Need to Get Started

To get started, you will need to do the following:
- If you haven’t yet, install and activate the Divi Theme.
- Create a new page in WordPress and use the Divi Builder to edit the page on the front end (visual builder).
- Choose the option “Build From Scratch”.
After that, you will have a blank canvas to start designing in Divi.
How to Use background-clip with Text
Before we start building our examples in Divi, let’s first get a better understanding of the CSS code needed to pull off a custom text background in CSS.
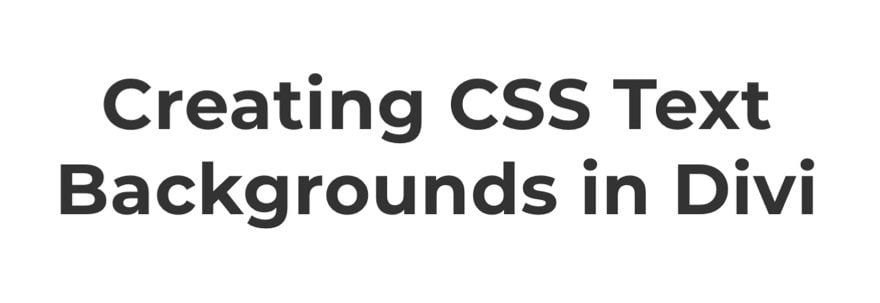
Let’s say we have an H2 heading element that looks like this.
First, you need to establish the background you want to use. In this example, we are going to add a gradient background to our h2 element using linear-gradient.
h2 {
  background: linear-gradient(to right, #1613bd 0%, #d915b5 50%,#ea7ea2 100%);


}
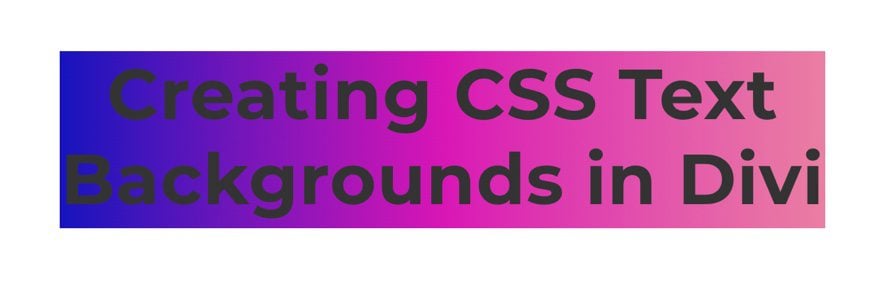
Next, we add background-clip:text along with the necessary “-webkit” prefix version to show the background of the element only behind the text.
h2 {
  background: linear-gradient(to right, #1613bd 0%, #d915b5 50%,#ea7ea2 100%);
  background-clip: text;
  -webkit-background-clip: text;

}
Then, we add -webkit-text-fill-color: transparent to override the color of the text and make it transparent.
h2 {
  background: linear-gradient(to right, #1613bd 0%, #d915b5 50%,#ea7ea2 100%);
  background-clip: text;
  -webkit-background-clip: text;
  -webkit-text-fill-color: transparent;
}
Then we add the browser prefixes needed to make the linear-gradients more browser-friendly:
h2 {
  background: -webkit-linear-gradient(to right, #1613bd 0%, #d915b5 50%,#ea7ea2 100%);
  background: -moz-linear-gradient(to right, #1613bd 0%, #d915b5 50%,#ea7ea2 100%);
  background: linear-gradient(to right, #1613bd 0%, #d915b5 50%,#ea7ea2 100%);
  background-clip:text;
  -webkit-background-clip: text;
  -webkit-text-fill-color: transparent;
}
As you can see, this example uses three colors to create a gradient, but you can easily add as many as you want.
That’s really all there is to it. Of course, it helps to have a better understanding of how to use the linear-gradient function to design the type of gradient background you want.
For more check out the documentation on the linear-gradient function. You can also explore this CSS Text Gradient Generator to explore some fun options.
And, if don’t want to use a gradient, you could use an actual image background. The code would look something like this:
h2 {
  background: center / cover url("add image URL");
  background-clip:text;
  -webkit-background-clip: text;
  -webkit-text-fill-color: transparent;
}
Now that we have a better understanding of the CSS, let’s dive into the tutorial.
Designing Text Backgrounds with background-clip in Divi
Part 1: Using background-clip to Add a Gradient Background to an H1 Heading
For our first example, we are going to add a gradient background to an H1 heading.
The Section, Row, and Column
First, open the settings for the section and add a background color:
- Background Color: #153243

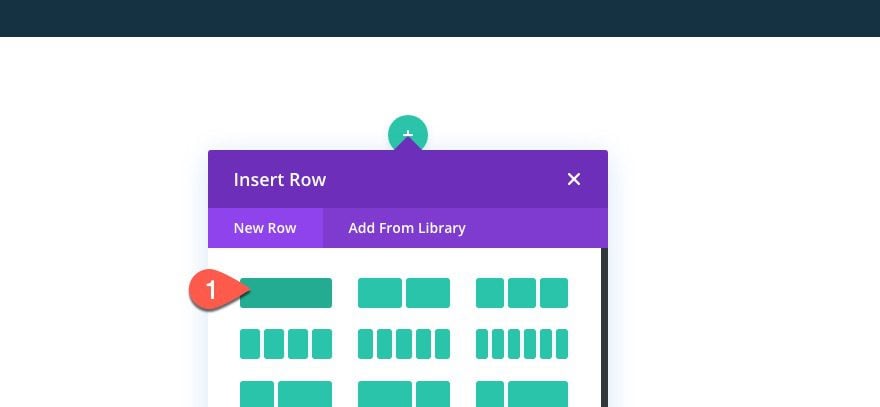
Inside the section, add a one-column row.
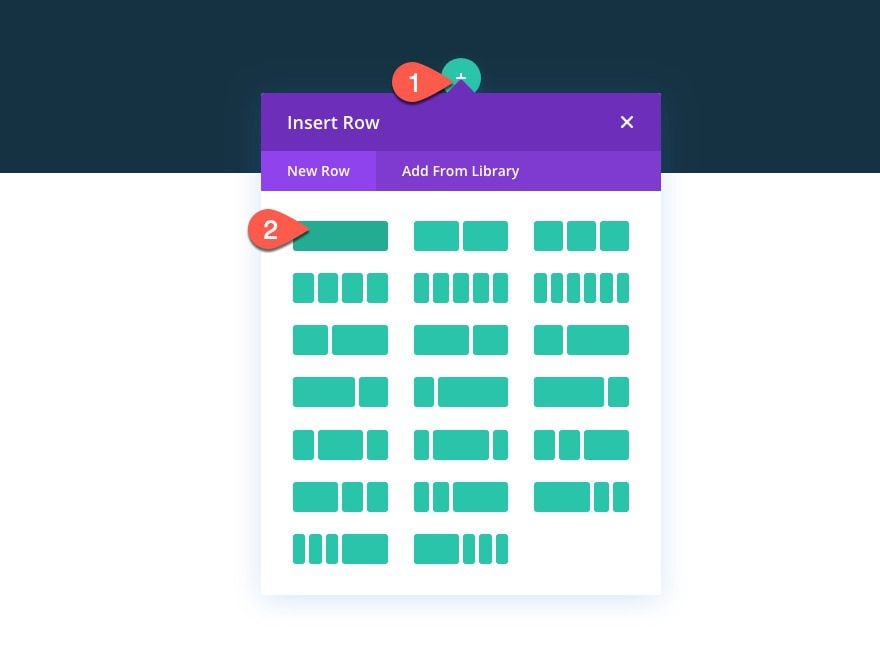
The Text Module with H1 Heading
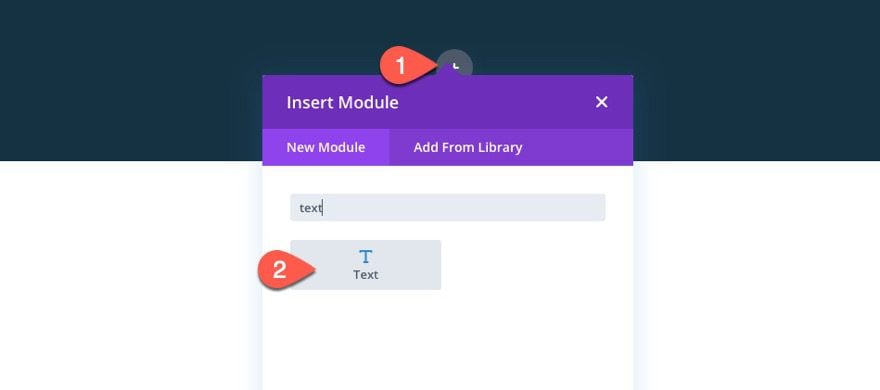
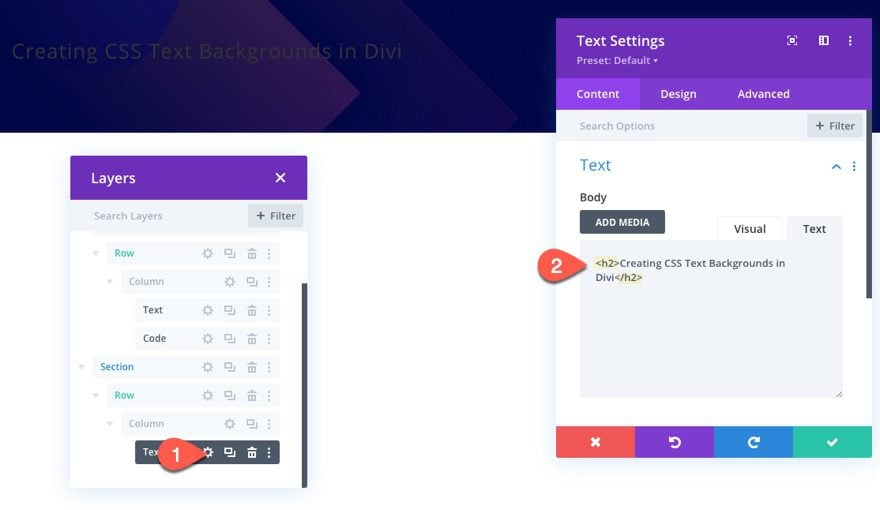
To add the H1 heading, add a new text module to the column of the row.
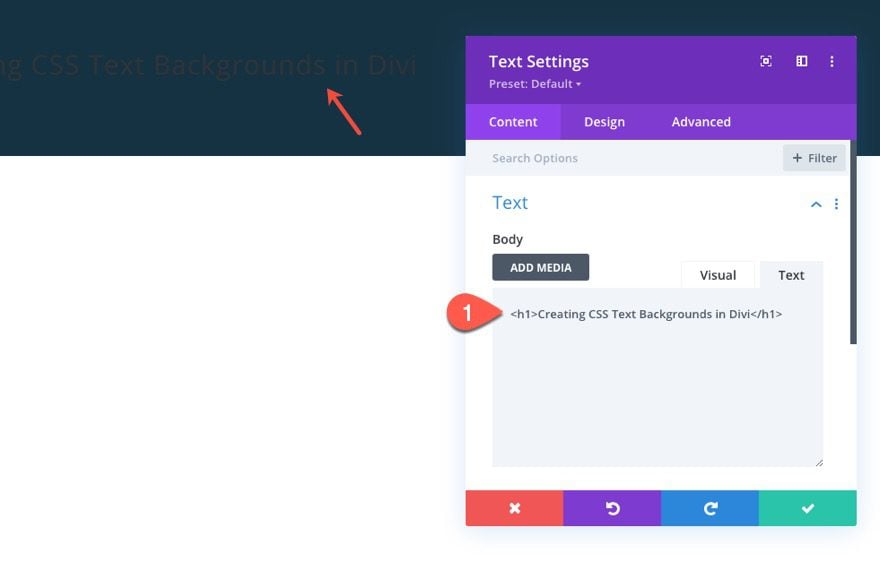
Open the text settings and paste the following H2 heading HTML under the text tab of the body content.
<h1>Creating CSS Text Backgrounds in Divi</h1>
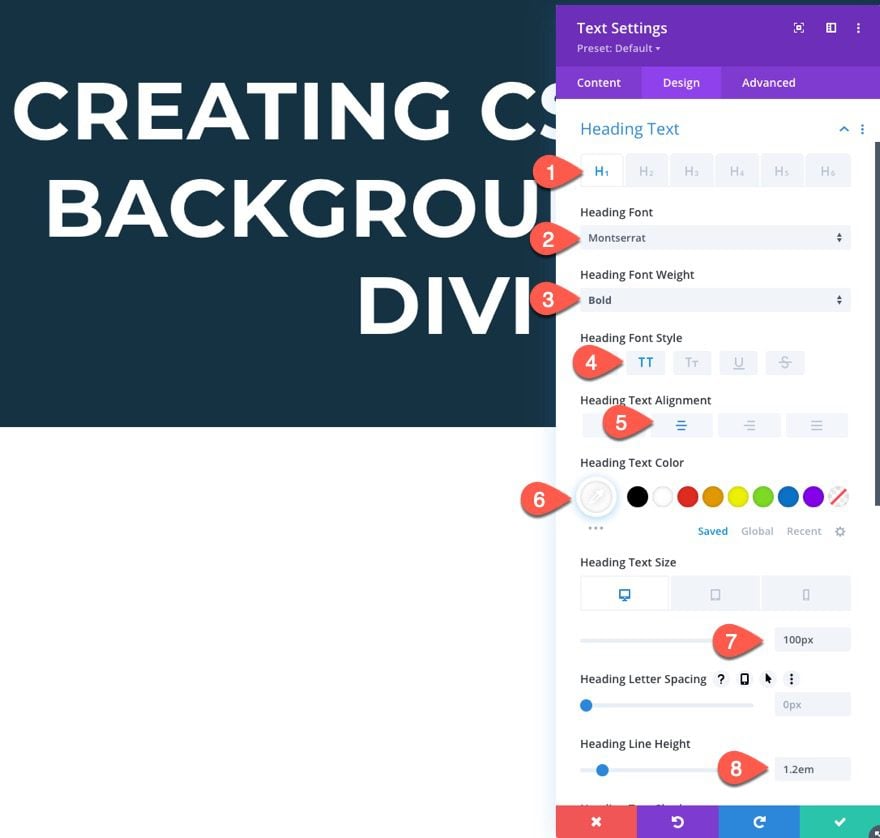
Under the design tab, update the H1 design settings as follows:
- Heading Font: Montserrat
- Heading Font Weight: Bold
- Heading Font Style: TT
- Heading Text Alignment: Center
- Heading Text Color: #ffffff
- Heading Text Size: 100px (desktop), 55px (tablet), 28px (phone)
- Heading Line Height: 1.2em
NOTE: The Heading text color will be overridden by the custom CSS, but it is nice to have one selected as a fallback just in case.
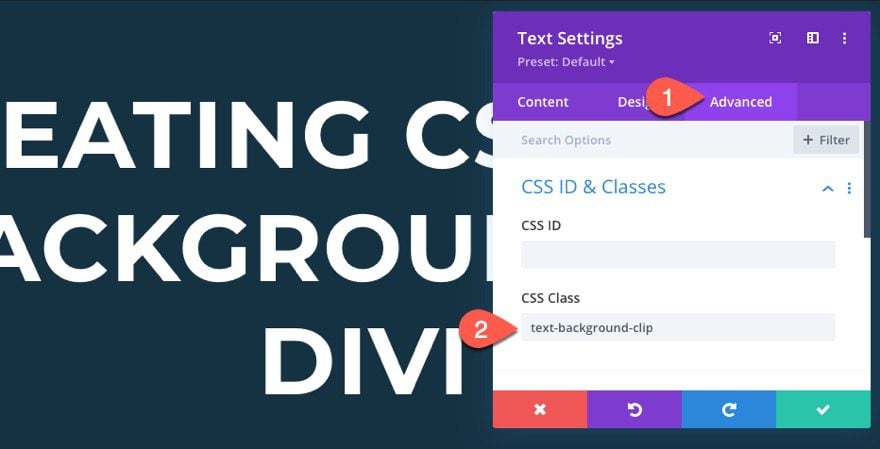
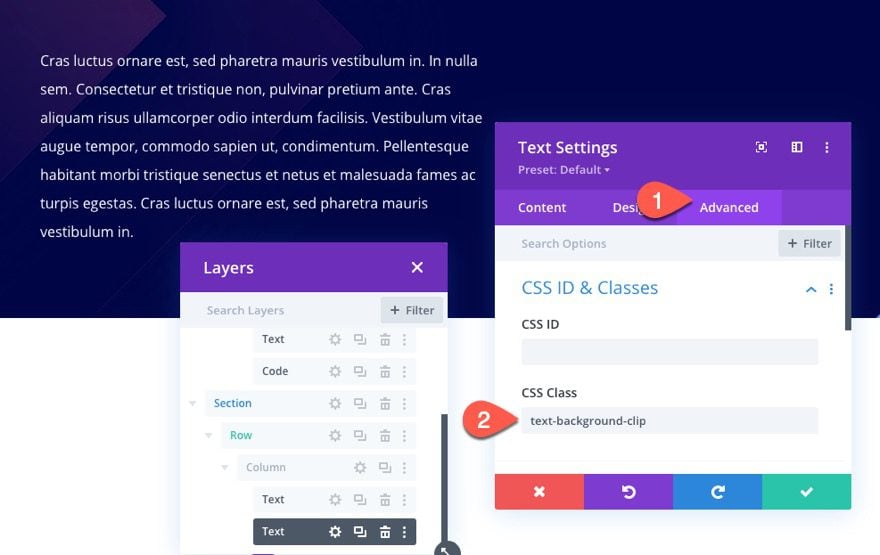
Under the advanced tab, add the following CSS Class:
- CSS Class: text-background-clip
We will use this class as a selector in our custom CSS code later.
The CSS Code
To add the CSS code to give the H1 a gradient background, add a new code module under the text module.
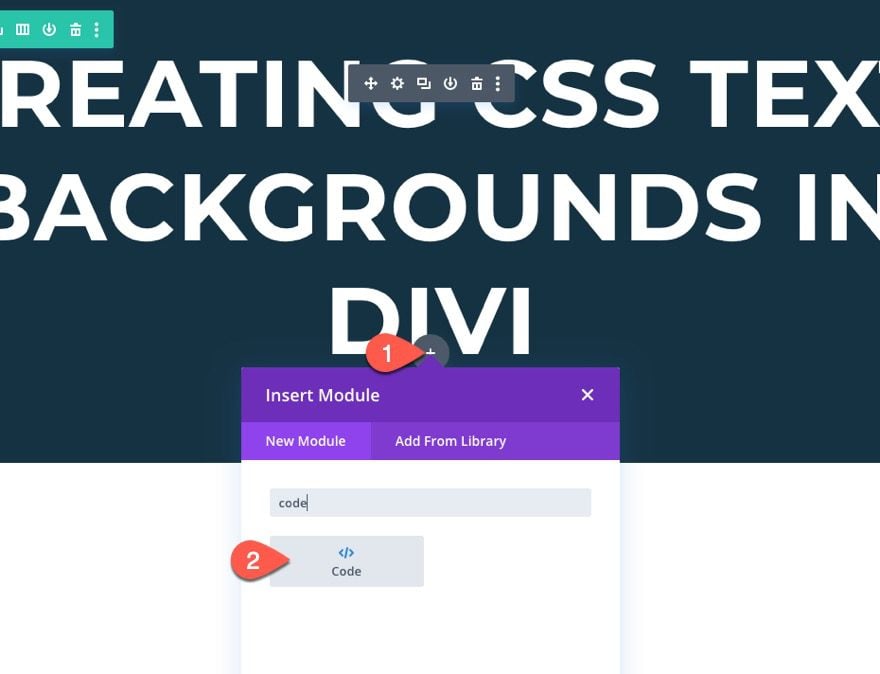
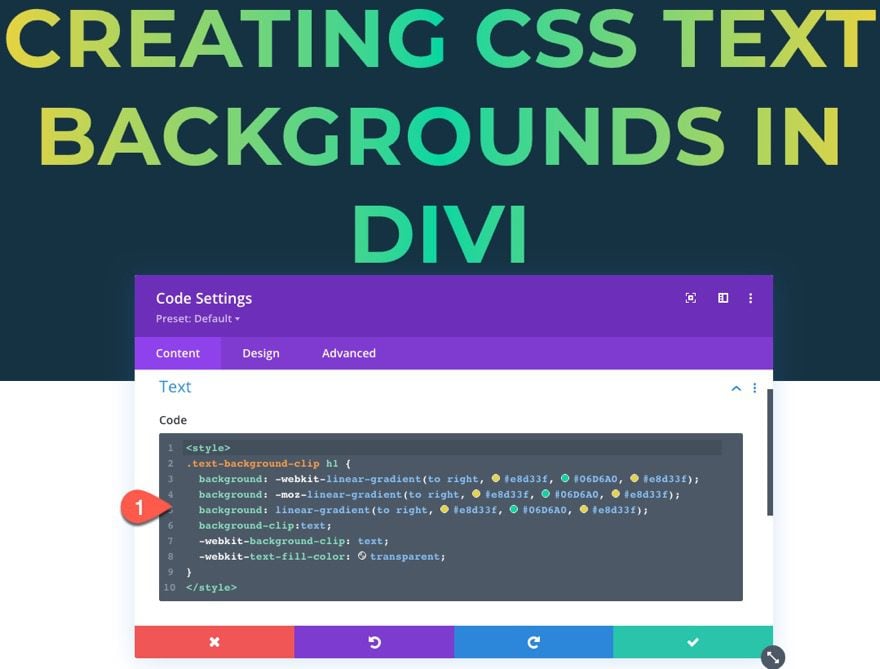
Then paste the following CSS inside the Code box making sure to wrap the code in the necessary style tags:
.text-background-clip h1 {
  background: -webkit-linear-gradient(to right, #e8d33f, #06D6A0, #e8d33f);
  background: -moz-linear-gradient(to right, #e8d33f, #06D6A0, #e8d33f);
  background: linear-gradient(to right, #e8d33f, #06D6A0, #e8d33f);
  background-clip:text;
  -webkit-background-clip: text;
  -webkit-text-fill-color: transparent;
}
NOTE: We will be coming back to this same code module to add additional CSS for our following examples.
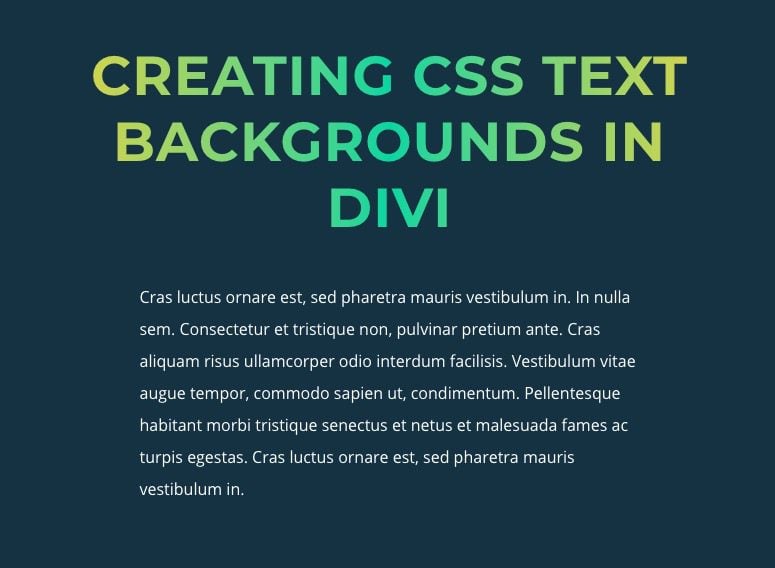
Result
Here is the result. As you can see, the gradient background has been clipped so that it only shows through the H1 heading element.
Part 1: Using background-clip to Add an Image Background to an H2 Heading
We are not limited to gradient backgrounds to style our text backgrounds. We can also style our text backgrounds with background images.
In this next example, we are going to use the same method (using “background-clip”) to add an image background to an H2 heading.
The Section, Row, and Column
To start, create a new regular section below the existing section of our first example.
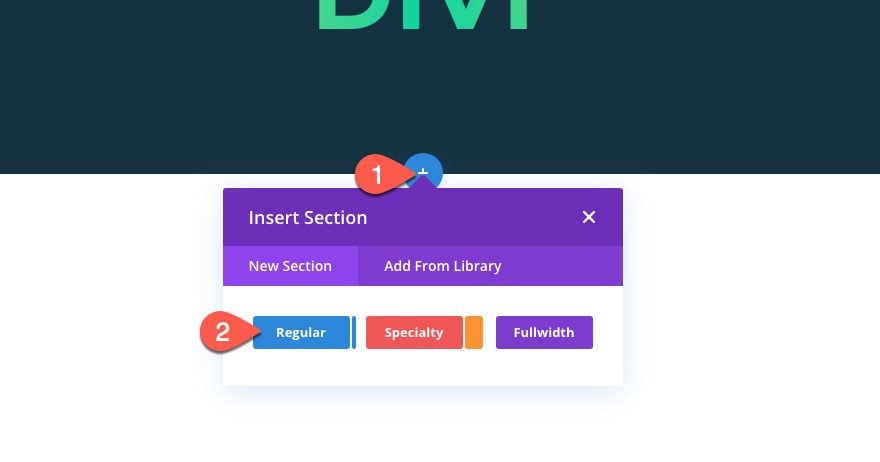
Then add a one-column row to the section.
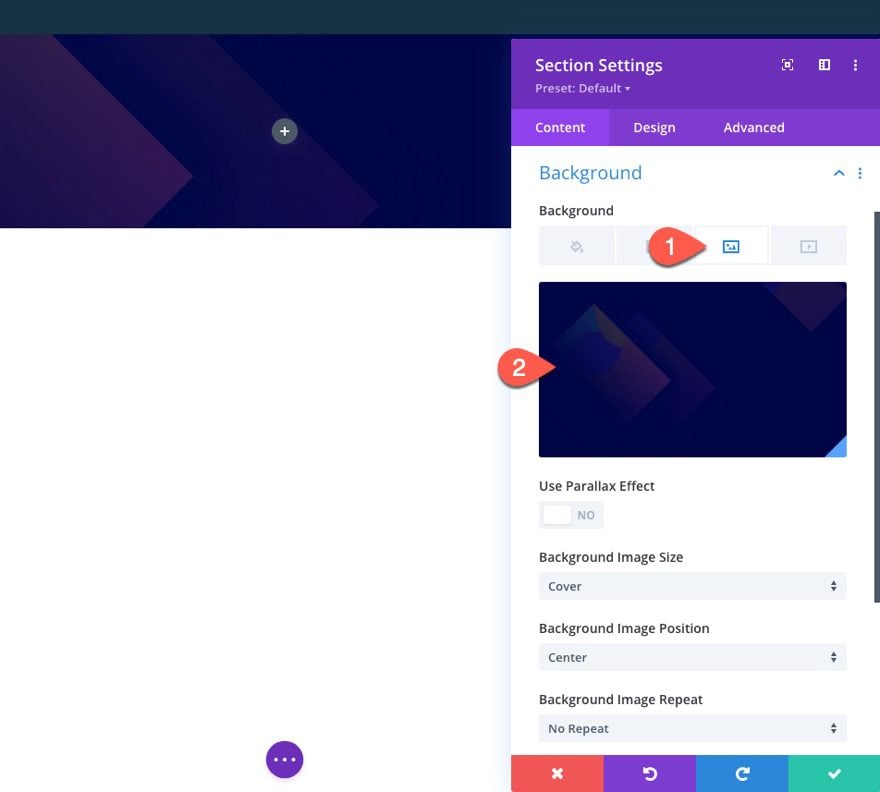
Open the section settings and add a dark background image to the section.
Next copy the existing text module in our first example above and paste it into the column of our new section.
Open the text settings for the duplicate text module and change the H1 heading to an H2 heading by updating the HTML:
<h2>Creating CSS Text Backgrounds in Divi</h2>
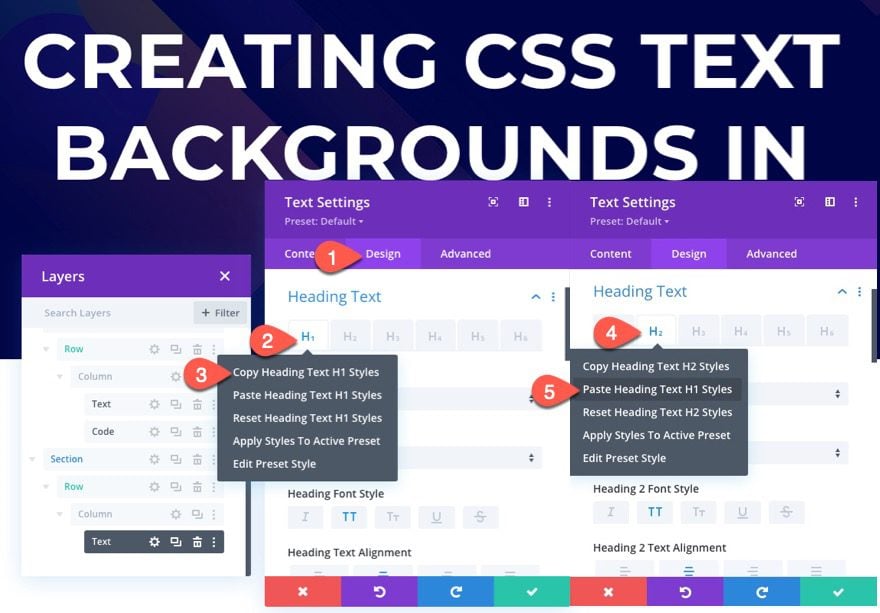
Under the design tab, right-click on the H1 tab and copy the heading text H1 styles. Then right-click on the H2 tab and past the heading text H1 styles so that the H2 heading will have the same styling.
The CSS Code
To add the CSS code needing to give the H2 an image background, open the existing code module we created earlier and paste the following CSS under the first CSS snippet:
.text-background-clip h2 {
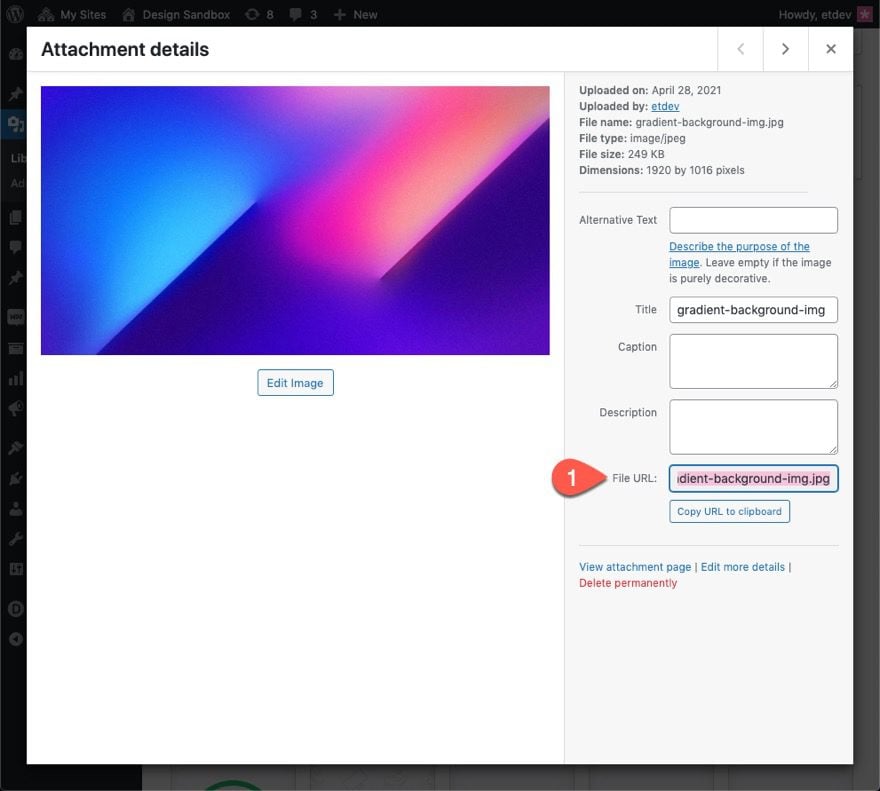
background: center / cover url("https://jason.sandbox.etdevs.com/design/wp-content/uploads/sites/4/2021/04/gradient-background-img.jpg");
background-clip:text;
-webkit-background-clip: text;
-webkit-text-fill-color: transparent;
}
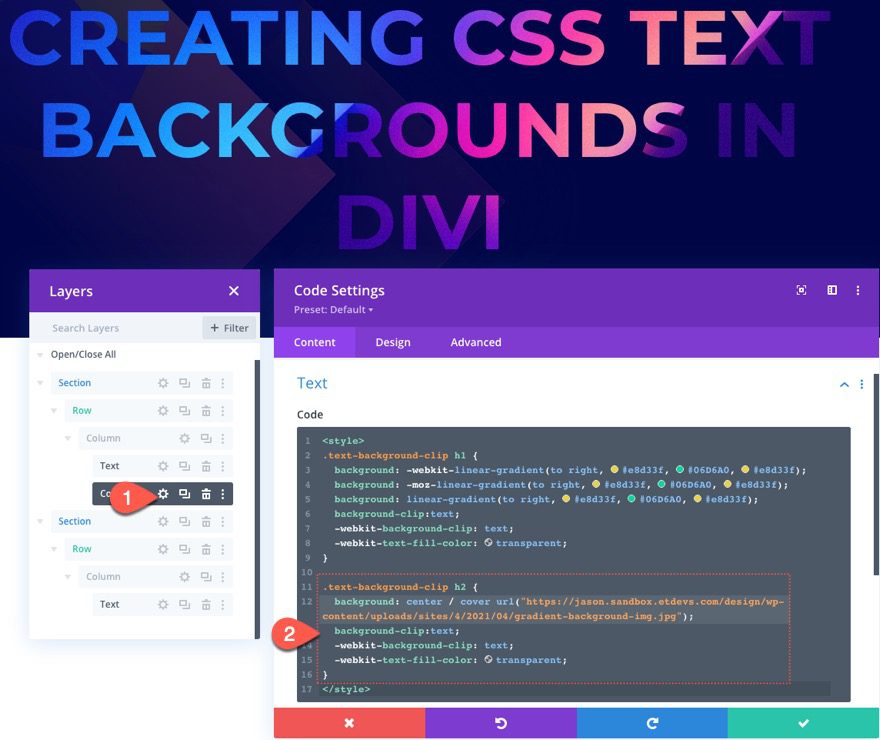
This will add a background image behind the H2 element. The background CSS shorthand includes “center” for the background-position, “cover” for the background-size, and the URL of the actual image.
To find the URL of an image on your own site, you can easily open your WordPress media gallery, select the image, and copy the file URL.
Result

Part 3: Using background-clip to Add a Gradient Background to Paragraph Text
For our final example, we are going to use background-clip to add a gradient background to paragraph text. The process is the same. The only difference will be the CSS code that will target the p tag for our paragraph text.
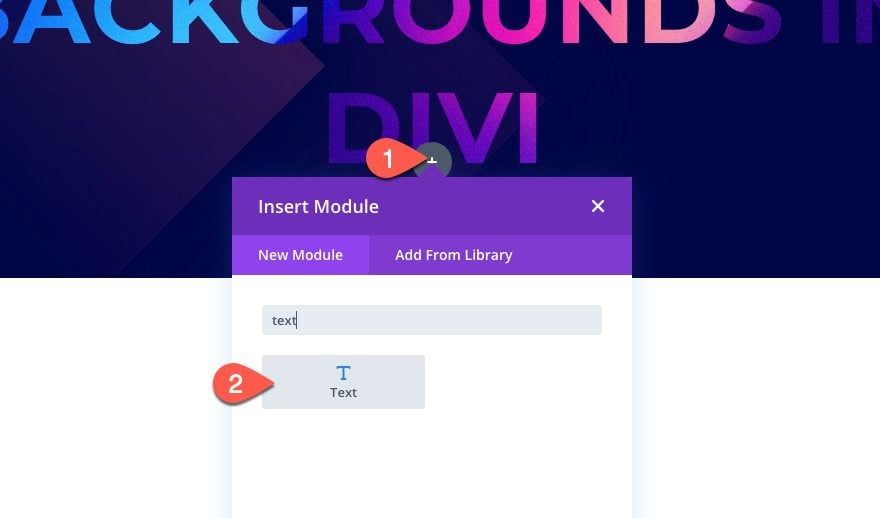
Add Text Module
Add a new text module under the previous text module in the same section we designed in part 2.
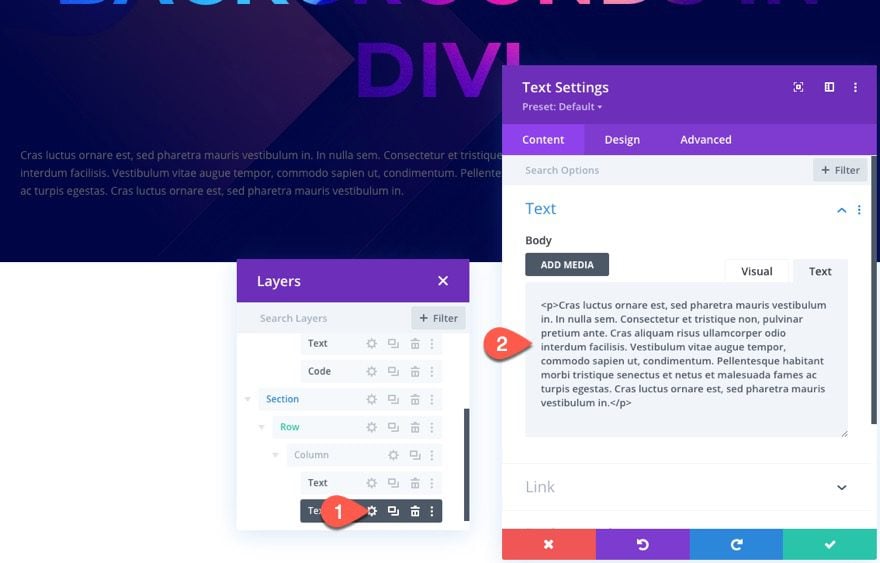
Update the body content with the following paragraph text HTML:
<p>Cras luctus ornare est, sed pharetra mauris vestibulum in. In nulla sem. Consectetur et tristique non, pulvinar pretium ante. Cras aliquam risus ullamcorper odio interdum facilisis. Vestibulum vitae augue tempor, commodo sapien ut, condimentum. Pellentesque habitant morbi tristique senectus et netus et malesuada fames ac turpis egestas. Cras luctus ornare est, sed pharetra mauris vestibulum in.</p>
NOTE: Make sure the text is wrapped with the p tag because this will be the selector we will target in our custom CSS code.
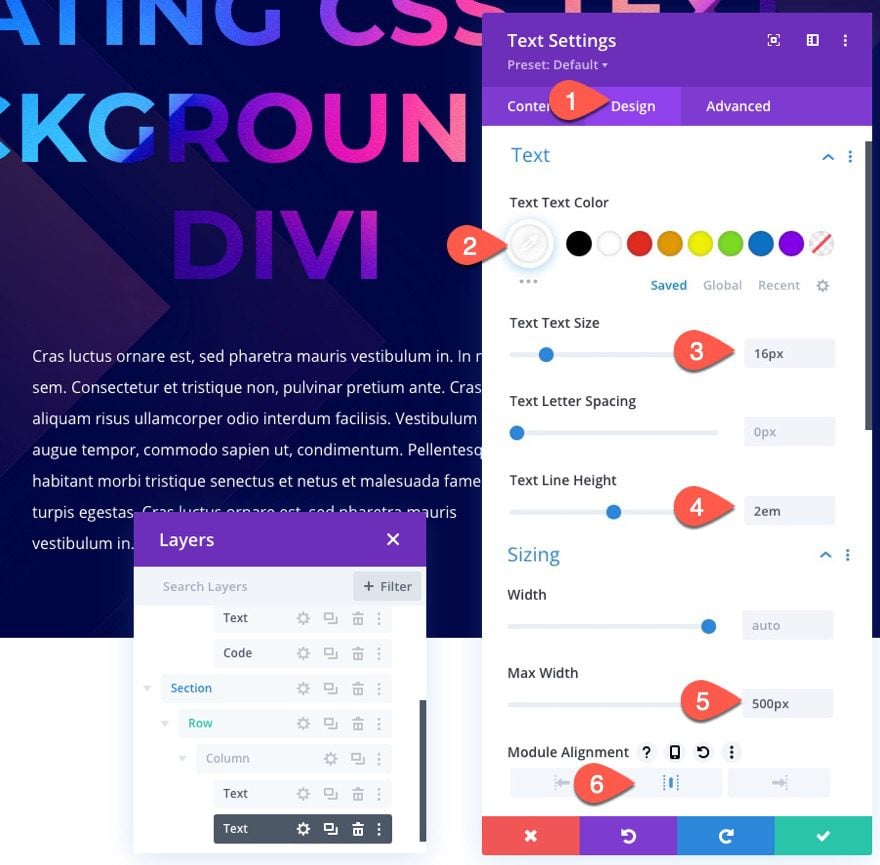
Under the design tab, update the following text styles:
- Text Text Color: #ffffff
- Text Text Size: 16px
- Text Line Height: 2em
- Max Width: 500px
- Module Alignment: Center
Under the advanced tab, add the same CSS Class used previously:
- CSS Class: text-background-clip
The CSS Code
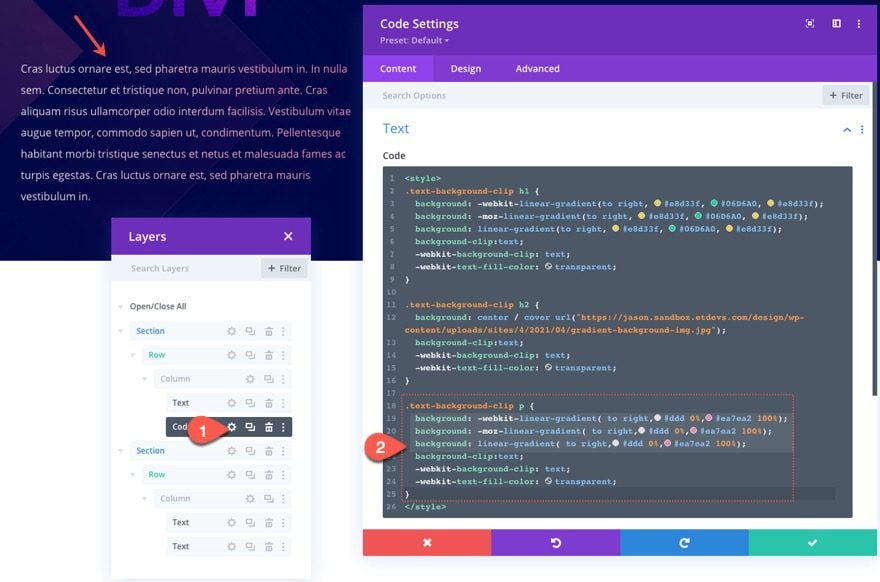
Finally, paste the CSS code that targets the p tag and adds a gradient background to the text using background-clip:text.
.text-background-clip p {
  background: -webkit-linear-gradient( to right,#ddd 0%,#ea7ea2 100%);
  background: -moz-linear-gradient( to right,#ddd 0%,#ea7ea2 100%);
  background: linear-gradient( to right,#ddd 0%,#ea7ea2 100%);
  background-clip:text;
  -webkit-background-clip: text;
  -webkit-text-fill-color: transparent;
}
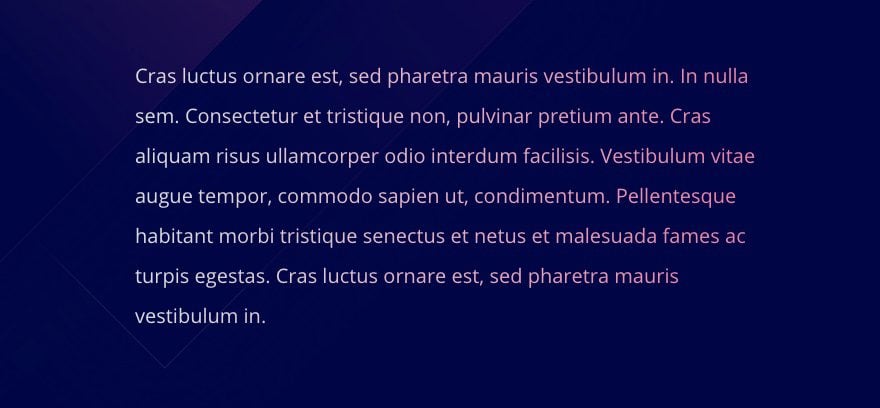
Result
Here is the result of the paragraph text background design.
Final Results
Now let’s check out the final results of our designs!
Here is an example of a linear-gradient background added to heading text using background-clip
Here is an example of an image background added to heading text and a linear-gradient background added to the paragraph text using background-clip
Final Thoughts
The ability to add custom text backgrounds to your site can be a useful design tool. And, if you get a better understanding of how to use the background CSS property in combination with background-clip:text, the possibilities are endless. If you need a little help with creating your own CSS, you can also explore this CSS Text Gradient Generator to help jumpstart the process.
Also, if you want a similar effect without all the custom CSS, check out how to apply gradient text color with Divi’s blend mode options.
I look forward to hearing from you in the comments.
Cheers!


Hi, great options to innovate, but i try it but i doesn`t, i don´t know if i missing something but when i write thr firts codes h2 {
background: linear-gradient(to right, #1613bd 0%, #d915b5 50%,#ea7ea2 100%);
background-clip: text; <—-I got a message "Expected (#) but found ‘text’.”
}
i have try several options but always i got the same message. I think the error is in background-clip: text; but i’m still trying…
Any ideas??
Thanks to all
Sorry divi community, i was checking step by step and i fix the problem… Thanks to all…
Thank you for sharing the article, I registered it and I will definitely review it later.
Woow! So amazing resources!
Loving ET and Divi, the best!!!
Thanks, Adry! Great to hear that.
Very nice effect and well described. Thank you.
Christopher,
Glad you liked it. We appreciate the support!