
No matter what kind of website you’re creating, highlighting copy and content remains one of the top priorities. With Divi and its built-in options, there are a ton of ways to get there. One of the possibilities you have is applying a gradient text color to your copy. This is a great approach for adding color to your website, especially if you’re keeping the rest of your website clean and minimalistic. It helps to balance whitespace and it gives your website a breath of fresh air.
In this tutorial, we’re going to show you how to give your text a gradient color using Divi’s built-in options only.
Let’s get to it!
Preview
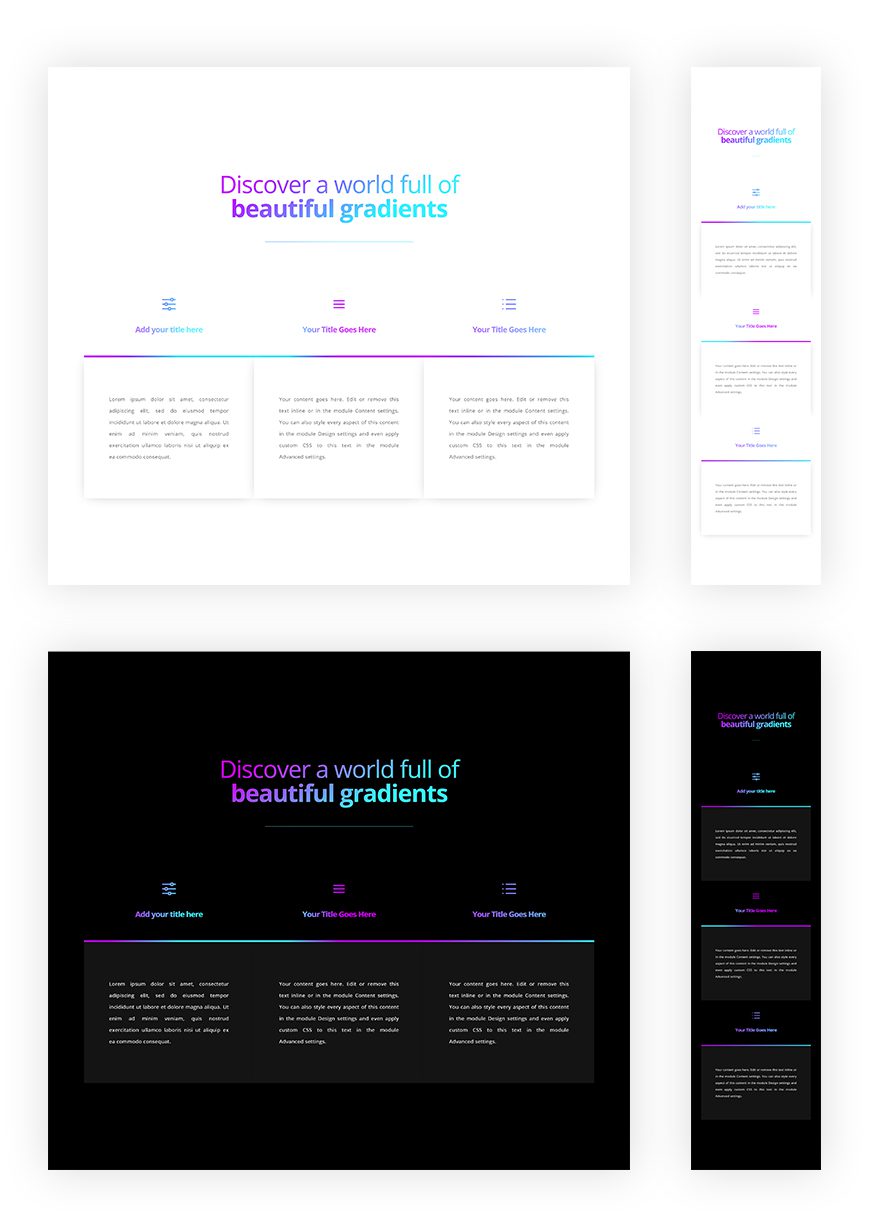
Before we dive into the tutorial, let’s take a look at the outcome on different screen sizes. We’ll show you how to make this work using both a light and dark color palette. Once you get the approach, you can create all kinds of designs with gradient text.
Approach
1. Understanding Divi Blend Modes
Blend modes work exactly the way you’re used to them in image editing software. They’re based upon layer structures. Concretely, that means a blend mode in Divi will follow a certain hierarchy:
- A blend mode applied to a module will blend the module + column below it
- A blend mode applied to a column will blend the column + row below it
- A blend mode applied to a row will blend the row + section below it
For this tutorial, it’s necessary to understand that a blend mode applied to a module will blend with the column below it. By giving the column a gradient background and the module in question a blend mode, we can manage to achieve gradient-colored text.
2. Choosing Between an Entirely Dark or Light Color Palette
To make this work, you’ll either have to use an entirely dark or light color palette. The blend modes we’re using, lighten and darken, will only deliver the desired outcome when you’re either using an entirely black or white color. When using other colors, the effect we’ve applied will kind of show through.
3. Removing All Gutter Width Between Columns & Modules
As mentioned in the first part of the approach, we’re going to use column gradient backgrounds. To make sure this gradient background doesn’t show up anywhere we don’t want to, we’re going to remove all the gutter width. By doing so, we’ll make sure that there’s no default custom margin being applied between modules. To make up for space we lose, we’ll manually add custom padding instead.
4. Using Padding Instead of Changing an Element’s Width
And to adjust the width of a design element, we’ll use custom left and right padding. Changing the width in the sizing settings would change the width of the entire module and would allow the column gradient background to show up on the left and right side, which is something we don’t want.
Let’s Start Creating!
Subscribe To Our Youtube Channel
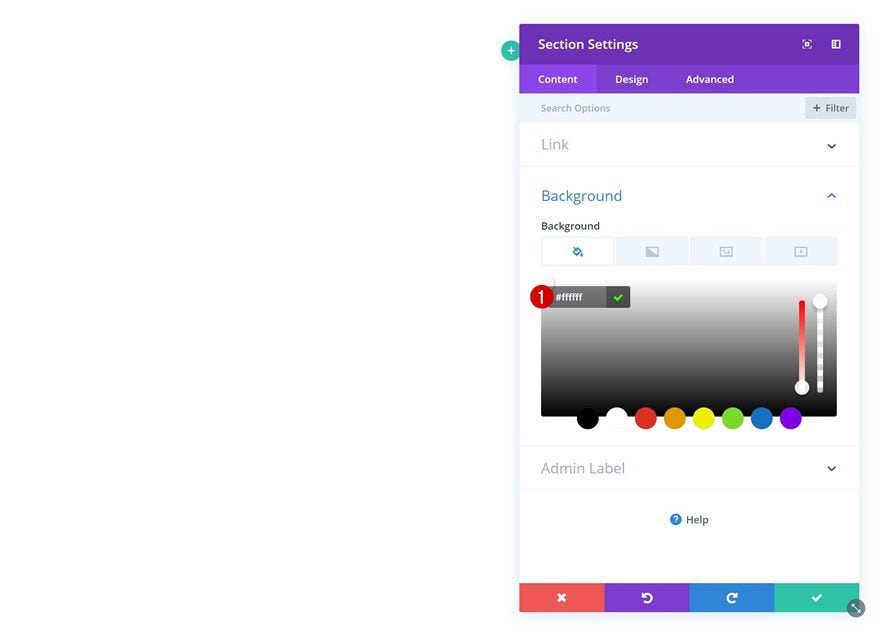
Add New Section
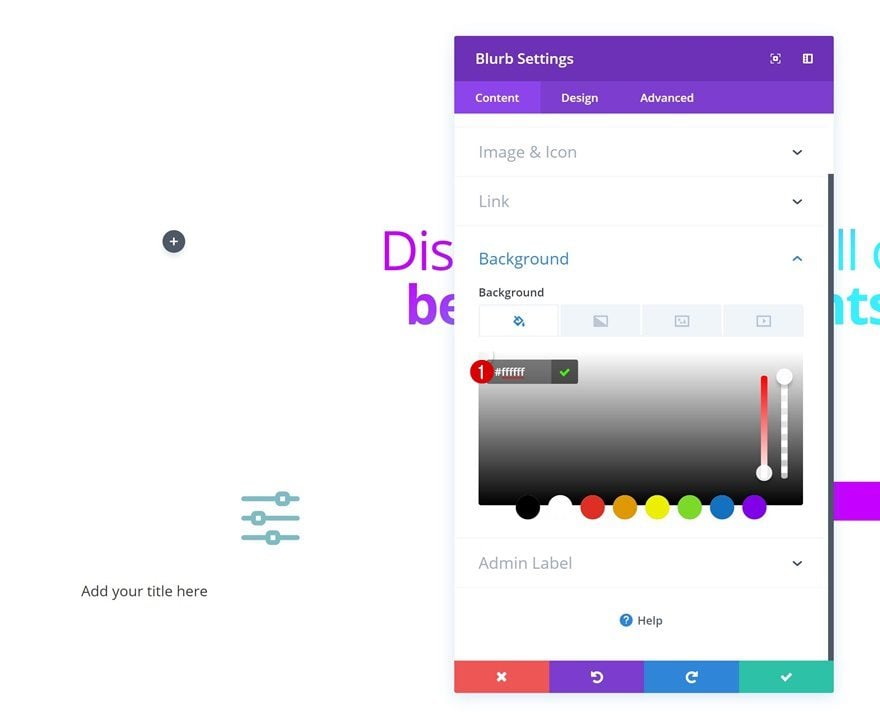
Background Color
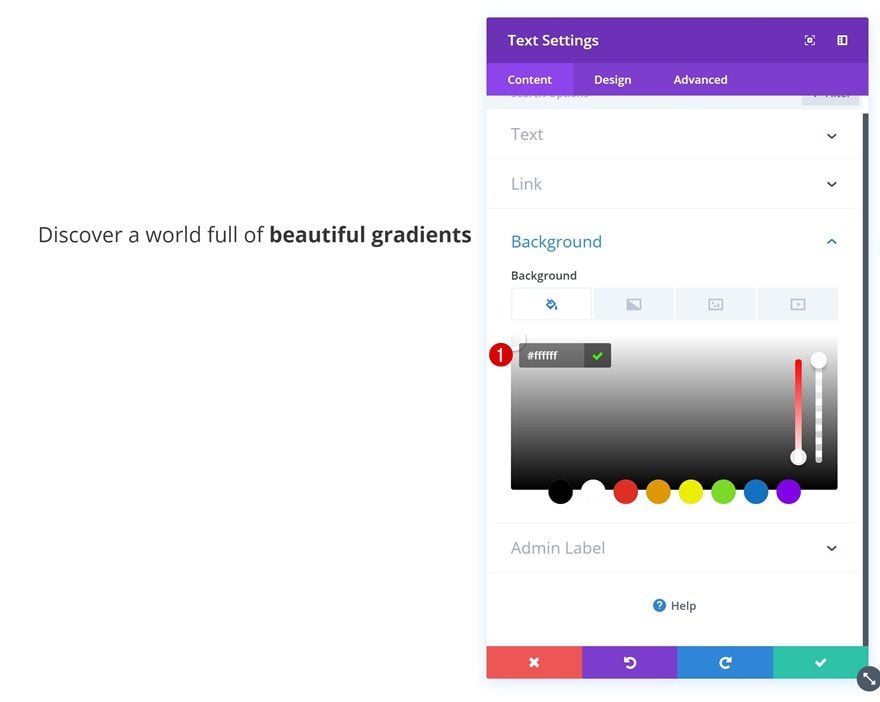
Let’s get started! Add a regular section to a new or existing page and give it the right background color (depending on if you want to recreate the light or dark layout).
- Background Color: #ffffff (Light Layout), #000000 (Dark Layout)
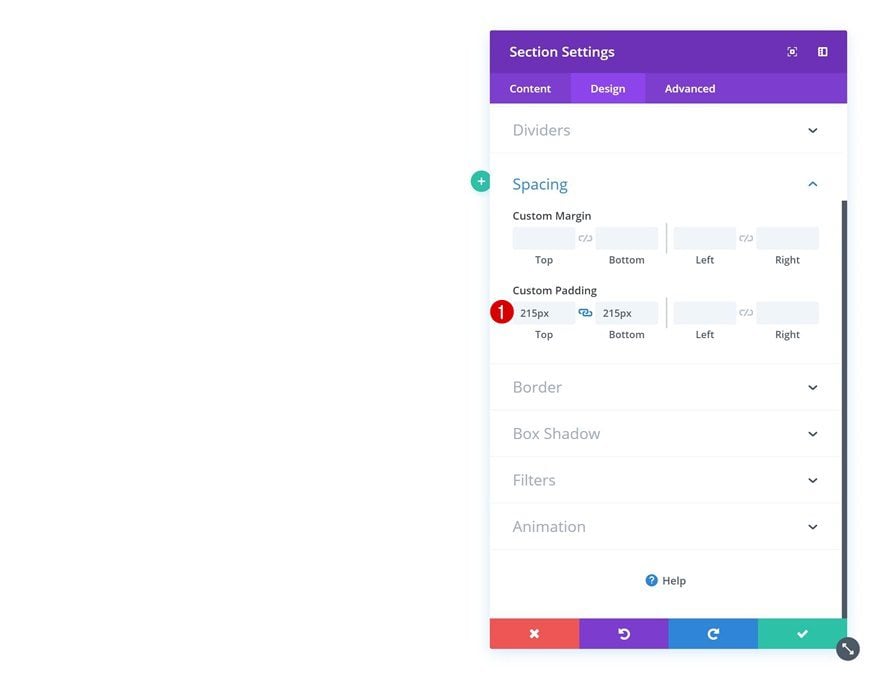
Spacing
Continue by adding some custom padding to the section.
- Top Padding: 215px
- Bottom Padding: 215px
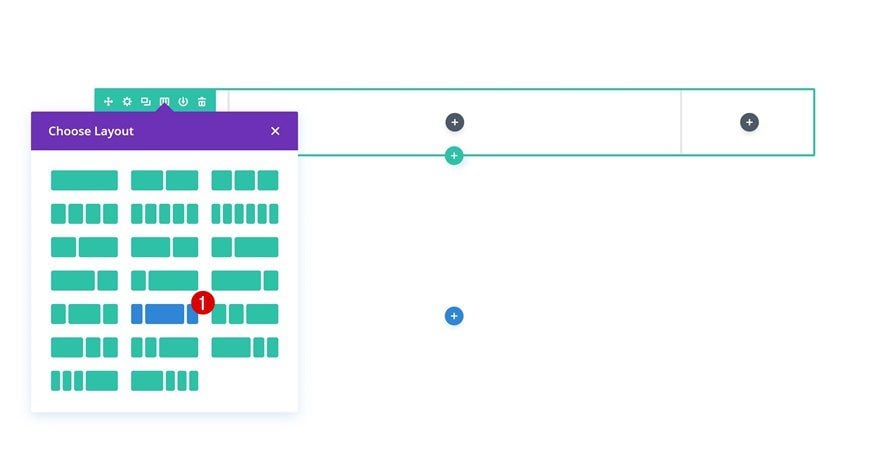
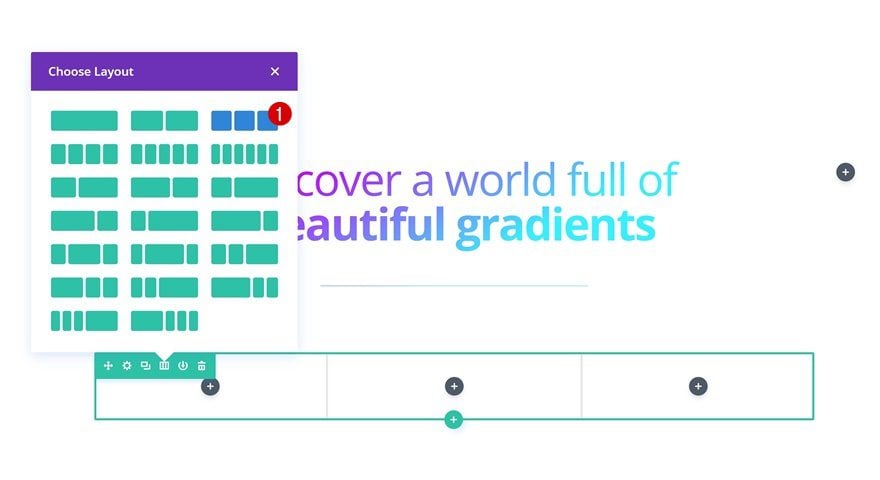
Add Row #1
Column Structure
Then, add a new row using the following column structure:
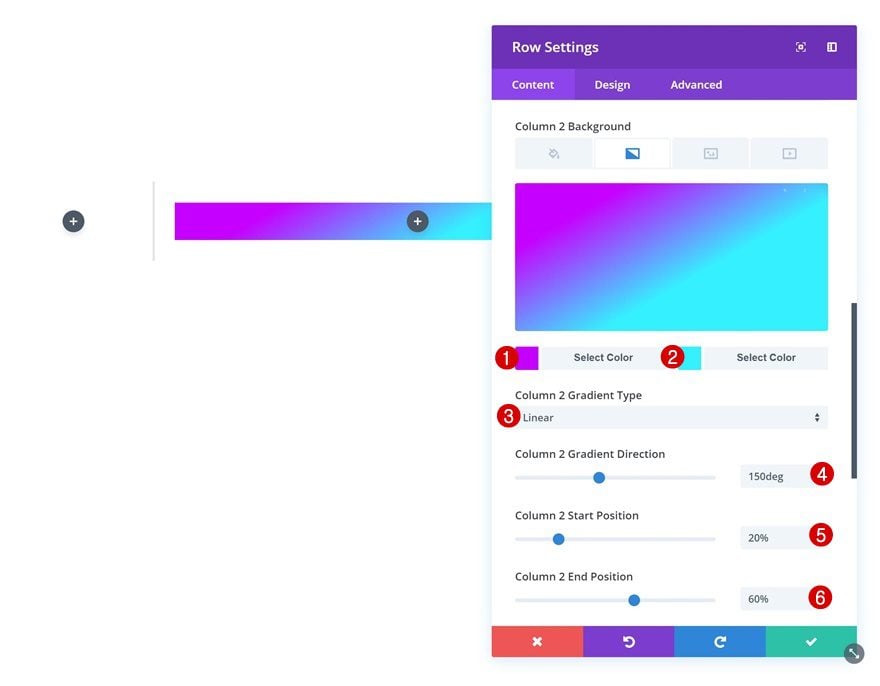
Column 2 Gradient Background
Add a gradient background to the second column of the row. This is where we’ll place the title Text Module in the next part of the tutorial.
- Color 1: #c700ff
- Color 2: #32f1ff
- Column 2 Gradient Direction: 150deg
- Column 2 Start Position: 20%
- Column 2 End Position: 60%
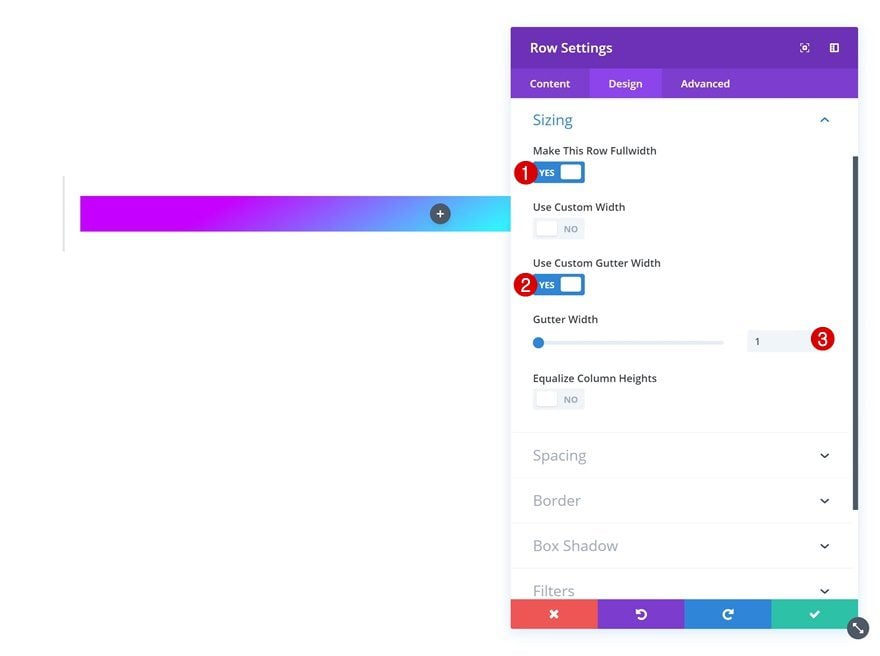
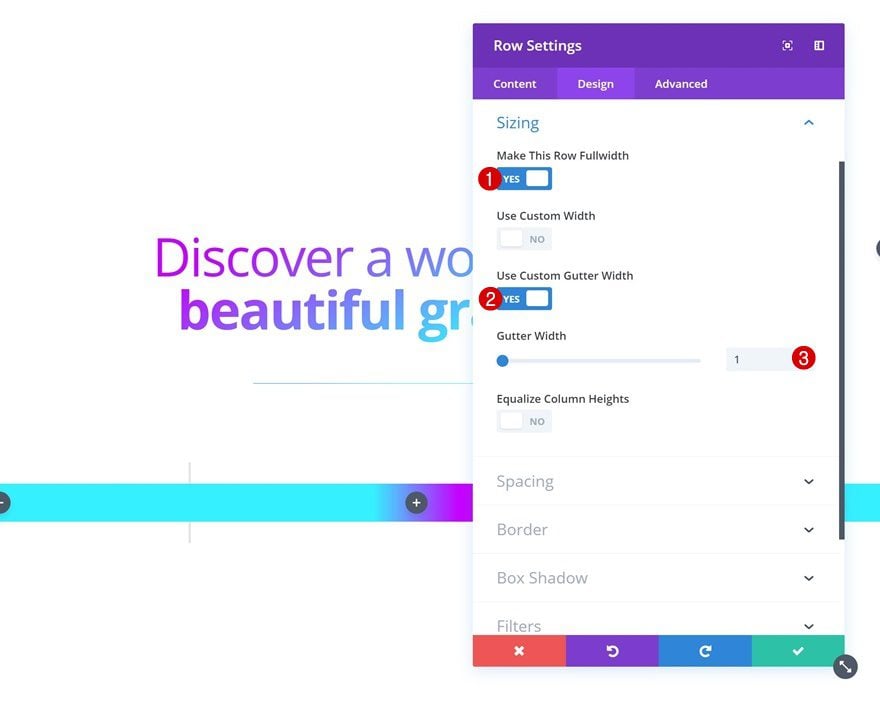
Sizing
Change the sizing settings as well.
- Make This Row Fullwidth: Yes
- Use Custom Gutter Width: Yes
- Gutter Width: 1
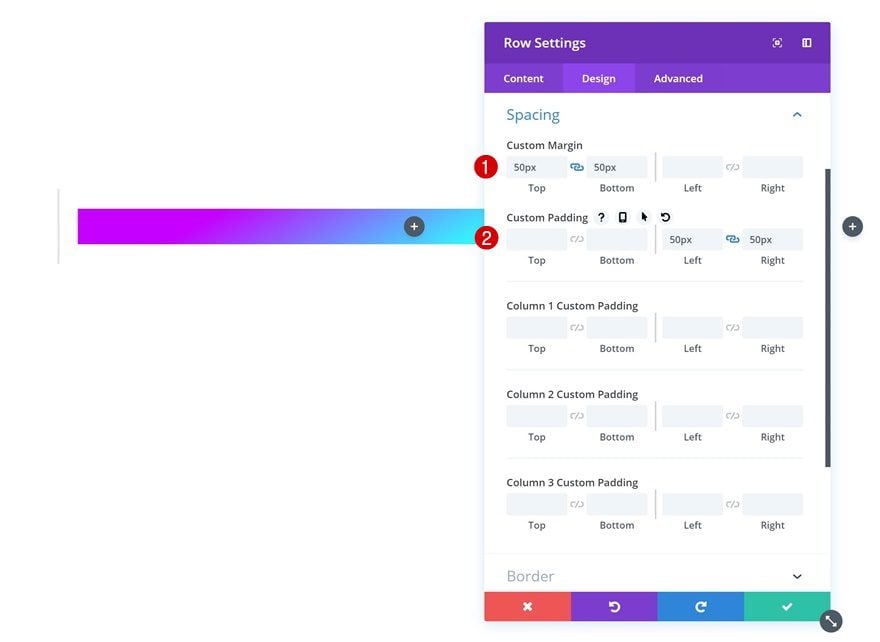
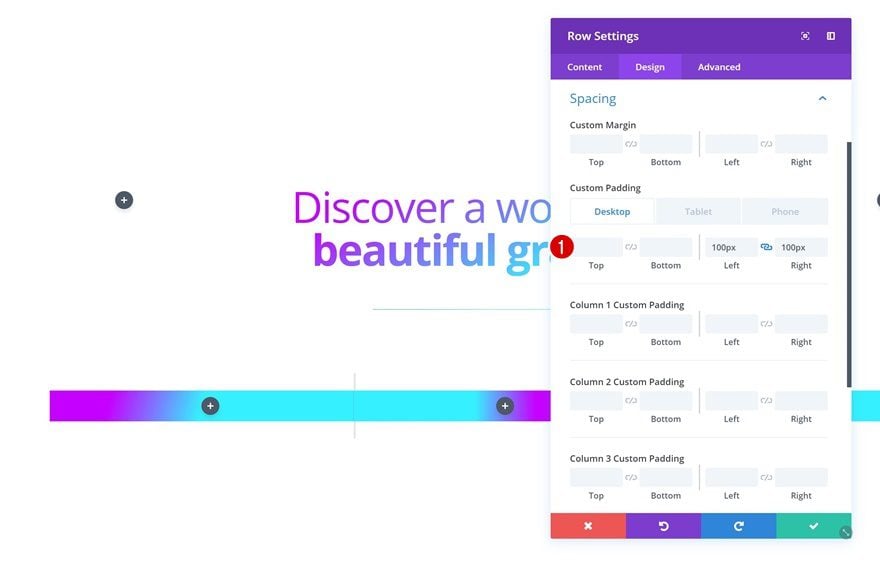
Spacing
And modify the spacing settings.
- Top Margin: 50px
- Bottom Margin: 50px
- Left Padding: 50px
- Right Padding: 50px
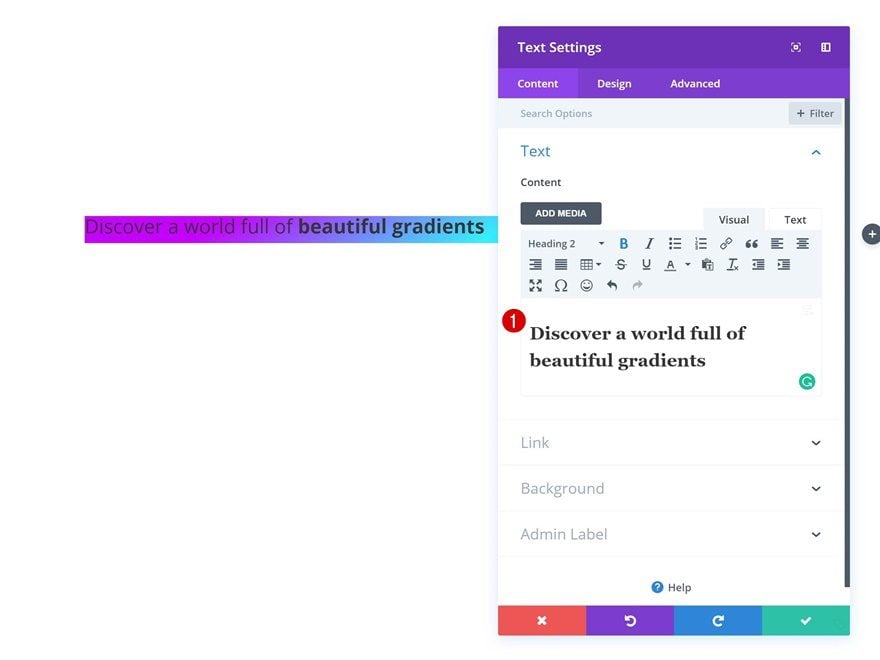
Add Text Module to Column 2
Add Content
Now go ahead and add a Text Module to the second column of the row you’ve added.
Background Color
Give your module the correct background, depending on the type of layout you want to recreate.
- Background Color: #ffffff (Light Layout), #000000 (Dark Layout)
Heading Text Settings
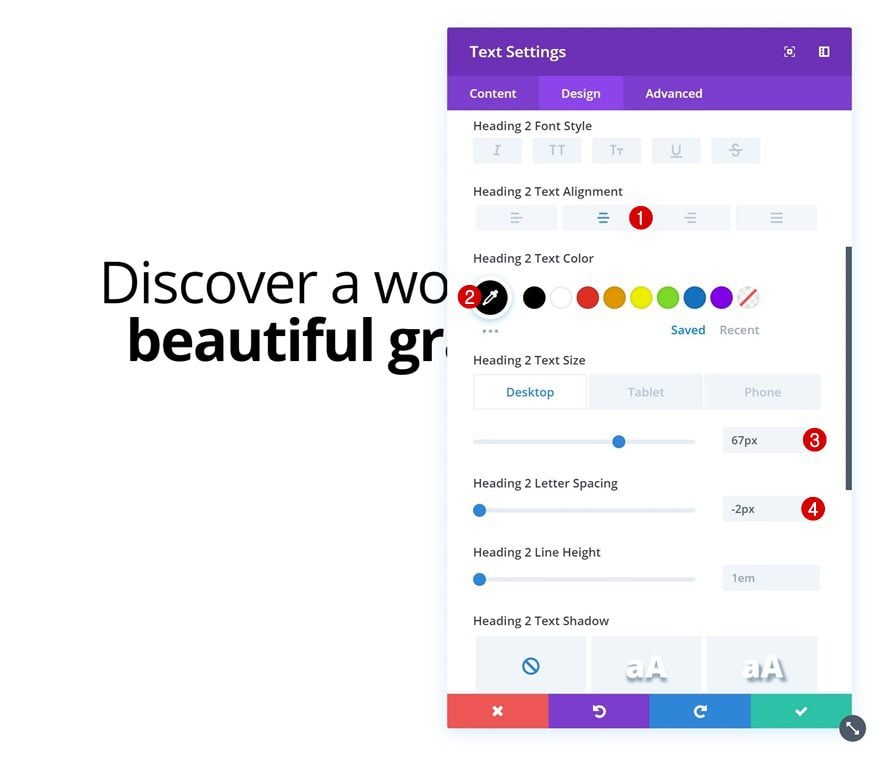
Change the heading text settings next.
- Heading 2 Text Alignment: Center
- Heading 2 Text Color: #000000 (Light Layout), #ffffff (Dark Layout)
- Heading 2 Text Size: 67px (Desktop), 50px (Tablet), 40px (Phone)
- Heading 2 Letter Spacing: -2px
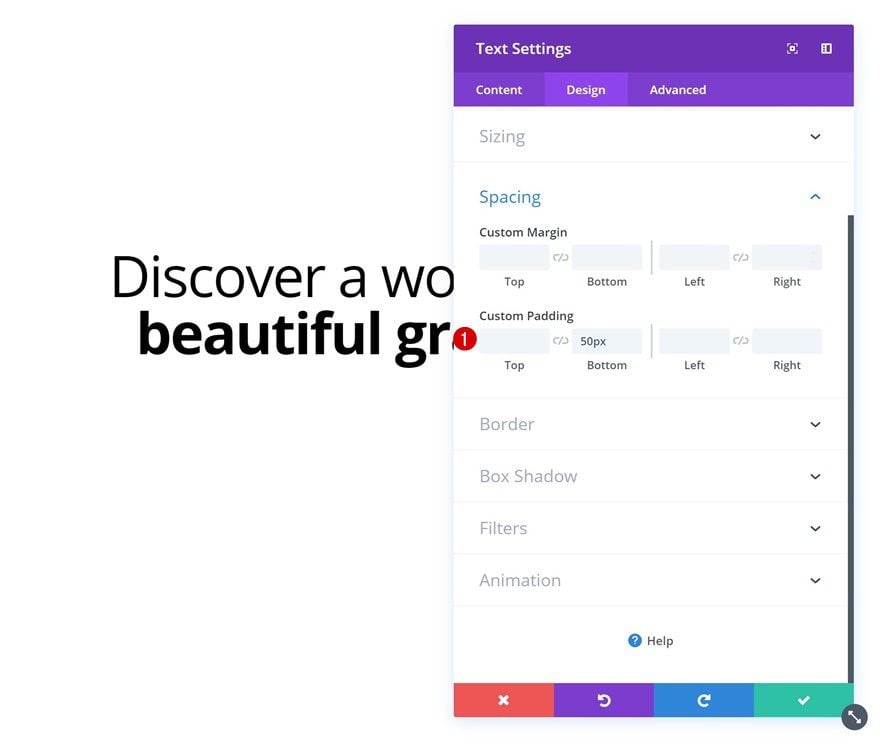
Spacing
And add some bottom padding. Remember, we’re using bottom padding instead of margin to make sure the column gradient background doesn’t show.
- Bottom Padding: 50px
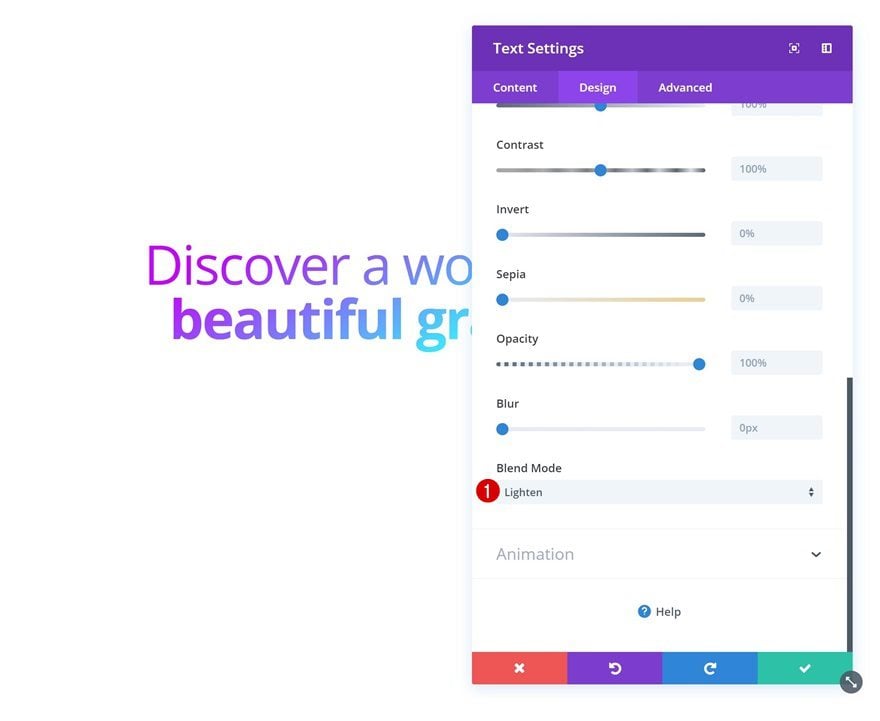
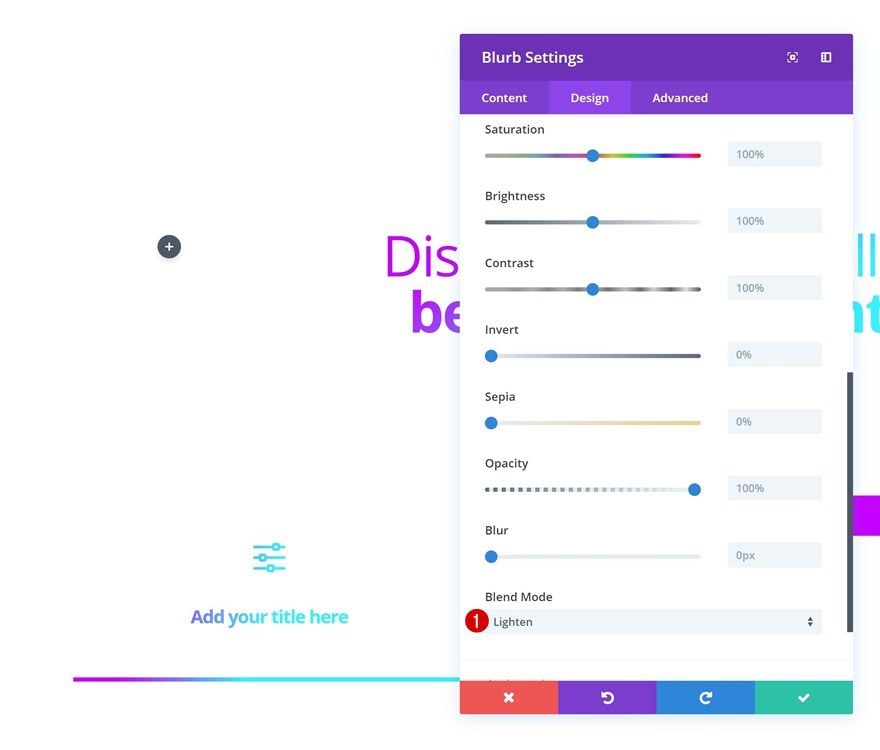
Blend Mode
To make the column’s gradient background apply to the module you’ve added, apply a blend mode in the filters settings.
- Blend Mode: Lighten (Light Layout), Darken (Dark Layout)
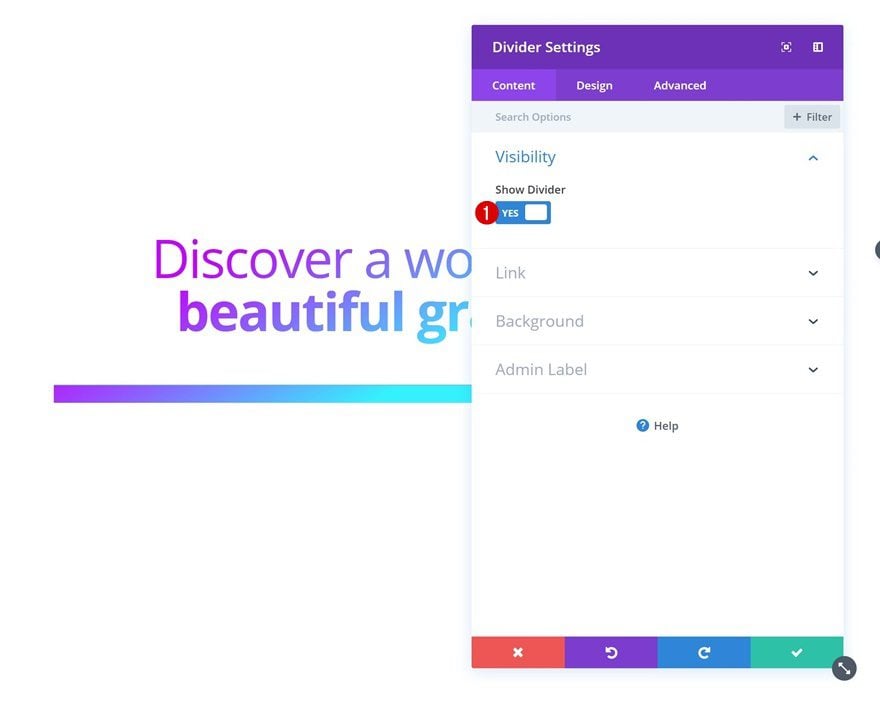
Add Divider Module to Row
Visibility
Second and last module we need in this row is a Divider Module.
- Show Divider: Yes
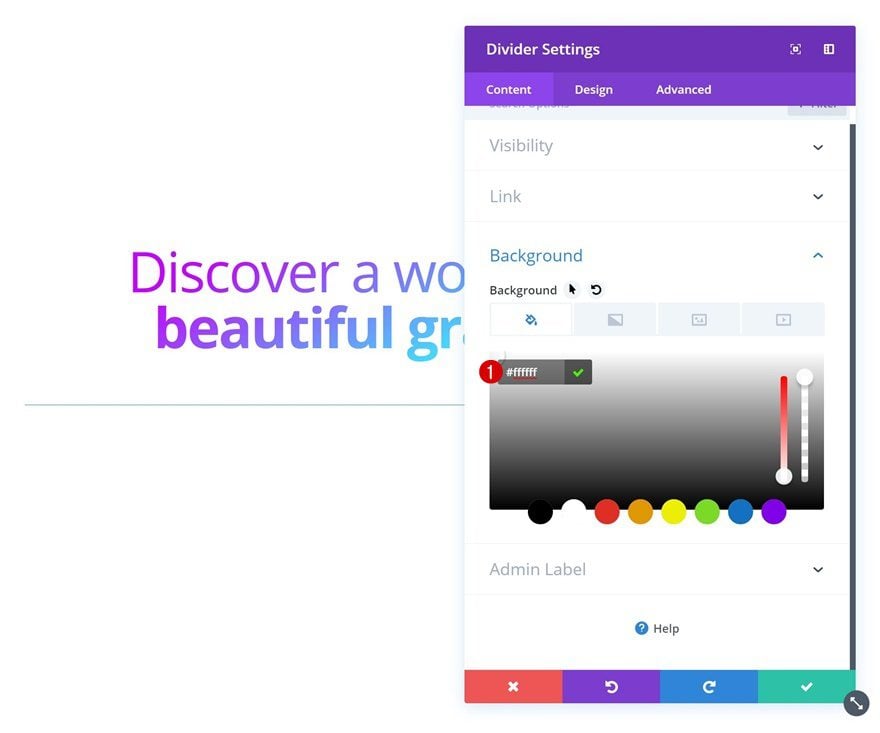
Background Color
Change the background color according to the type of layout you’re recreating.
- Background Color: #ffffff (Light Layout), #000000 (Dark Layout)
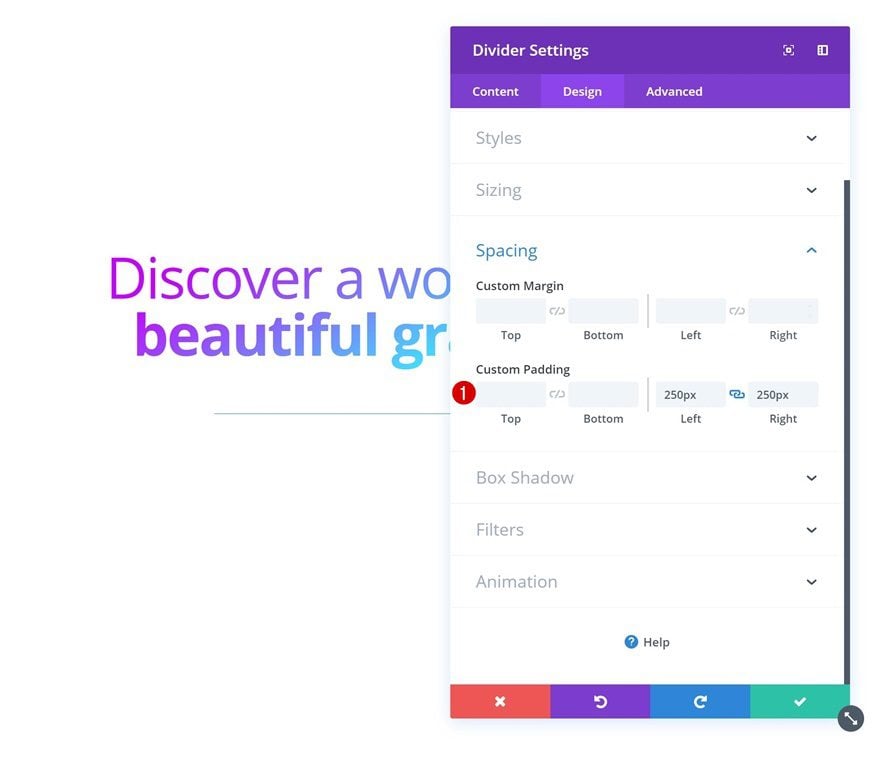
Spacing
To reduce the width of the divider, we’re going to add some custom padding to the left and right side.
- Left Padding: 250px
- Right Padding: 250px
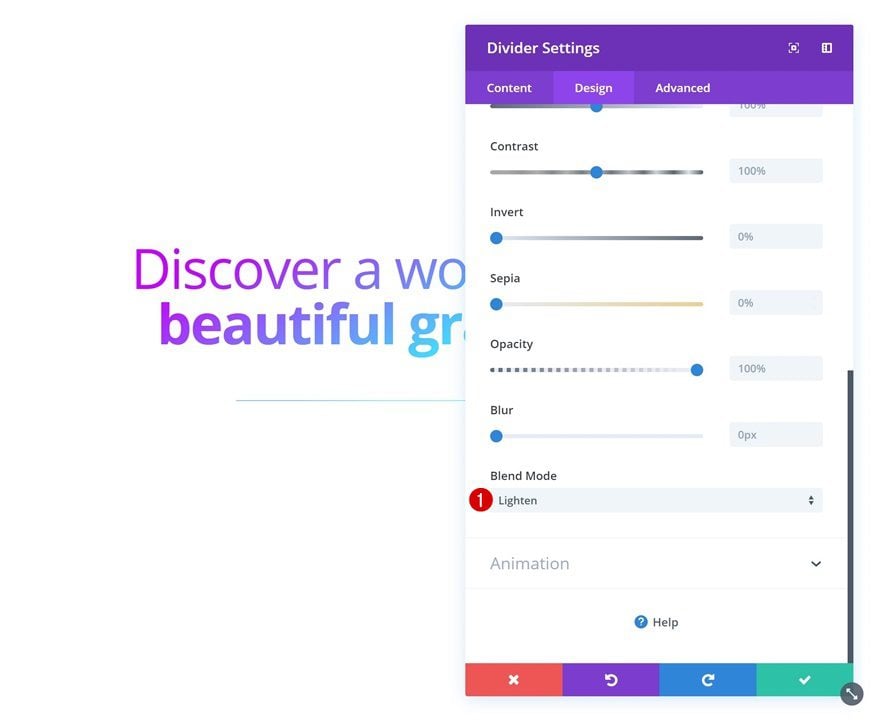
Blend Mode
Again, add a blend mode to make the column gradient background show.
- Blend Mode: Lighten (Light Layout), Darken (Dark Layout)
Add Row #2
Column Structure
On to the next row! Use the following column structure:
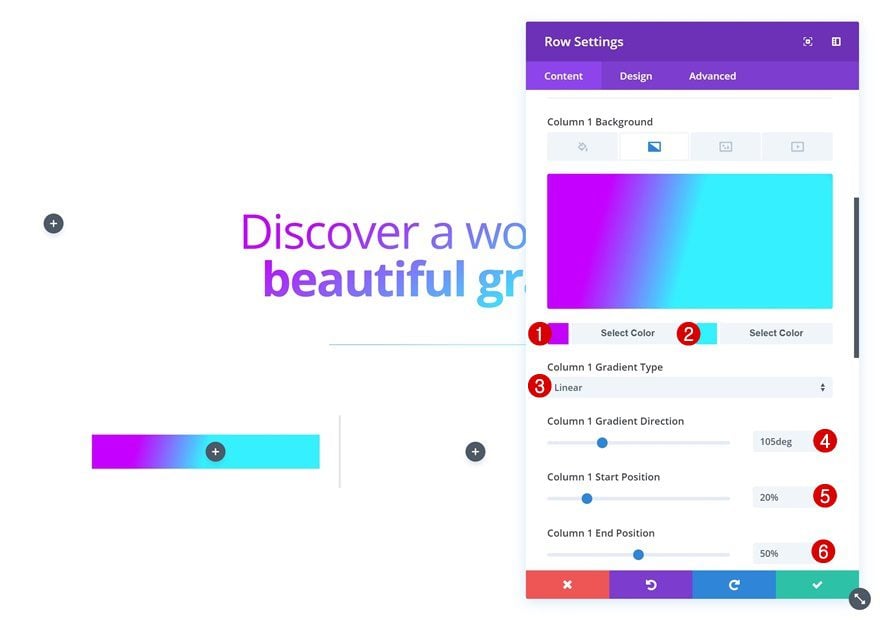
Column 1 Gradient Background
Continue by adding a gradient background to the first column.
- Color 1: #c700ff
- Color 2: #32f1ff
- Column 1 Gradient Type: Linear
- Column 1 Gradient Direction: 105deg
- Column 1 Start Position: 20%
- Column 1 End Position: 50%
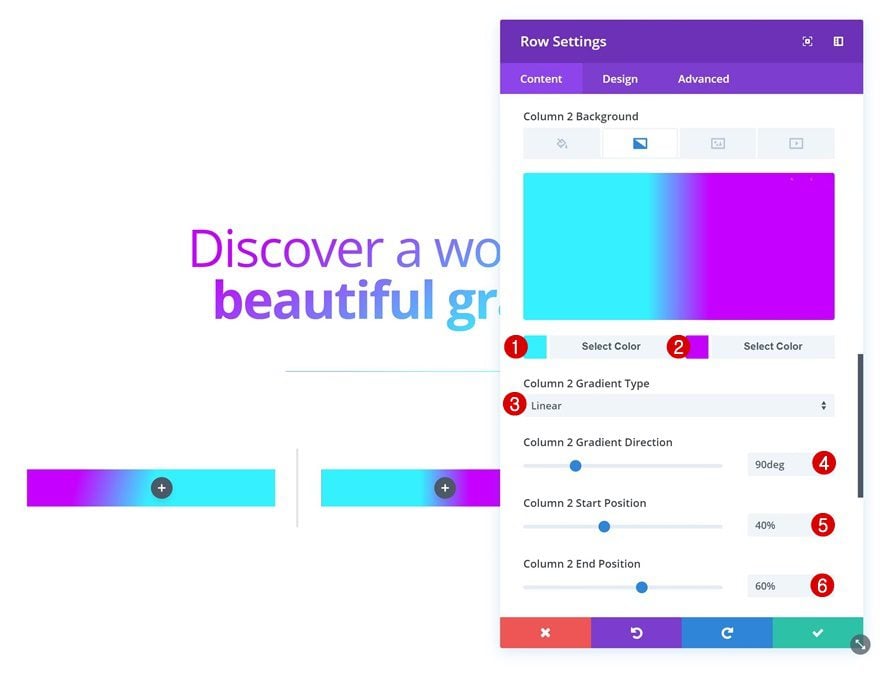
Column 2 Gradient Background
We’re using a gradient background for the second column as well.
- Color 1: #32f1ff
- Color 2: #c700ff
- Column 2 Gradient Type: Linear
- Column 2 Gradient Direction: 90deg
- Column 2 Start Position: 40%
- Column 2 End Position: 60%
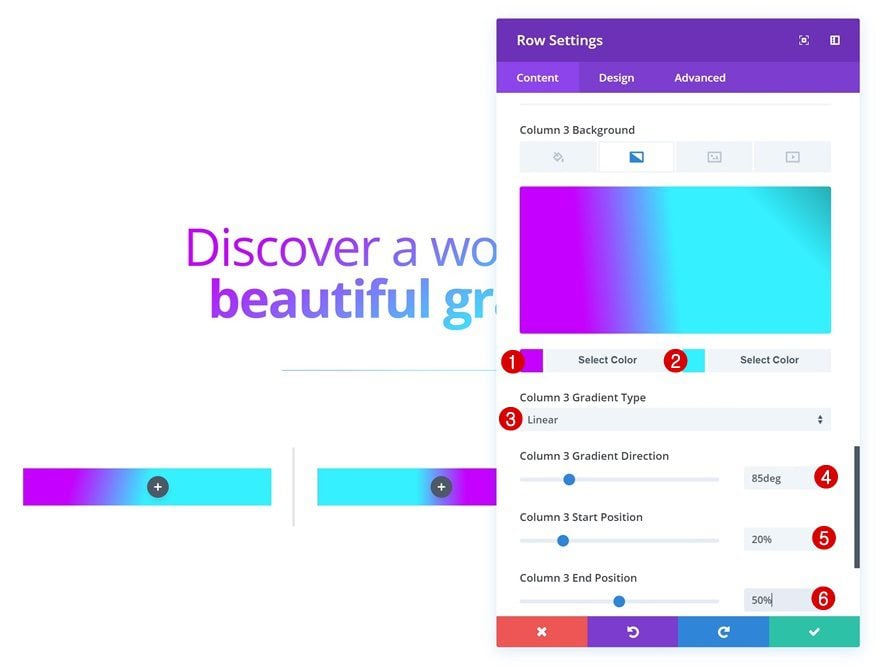
Column 3 Gradient Background
Same goes for the third column.
- Color 1: #c700ff
- Color 2: #32f1ff
- Column 3 Gradient Type: Linear
- Column 3 Gradient Direction: 85deg
- Column 3 Start Position: 20%
- Column 3 End Position: 50%
Sizing
Change the sizing settings next.
- Make This Row Fullwidth: Yes
- Use Custom Gutter Width: Yes
- Gutter Width: 1
Spacing
And add some custom left and right padding.
- Left Padding: 100px (Desktop & Tablet), 50px (Phone)
- Right Padding: 100px (Desktop & Tablet), 50px (Phone)
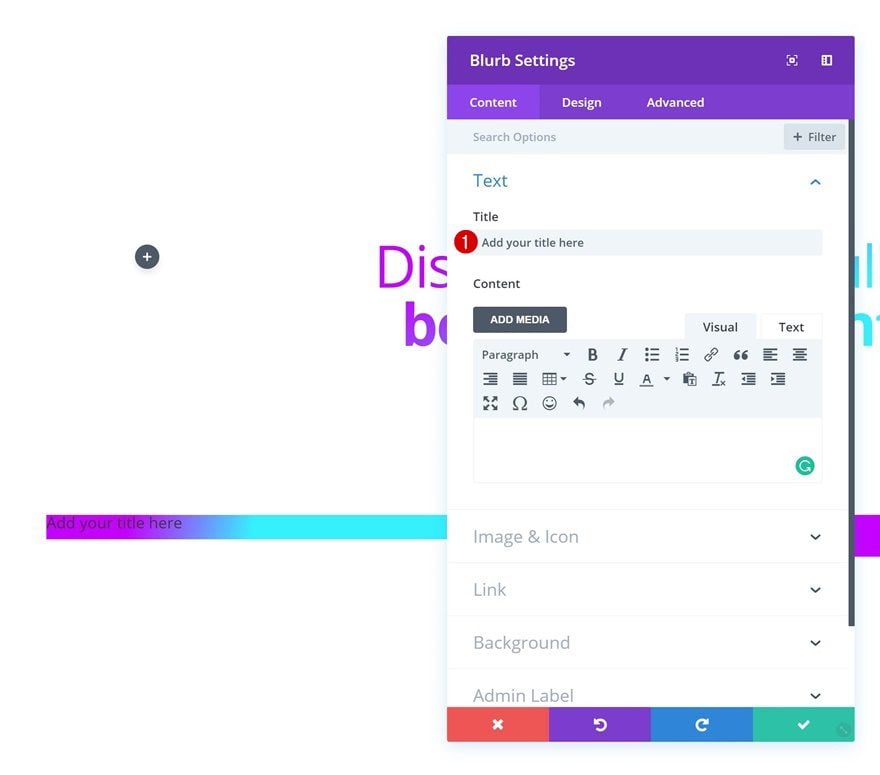
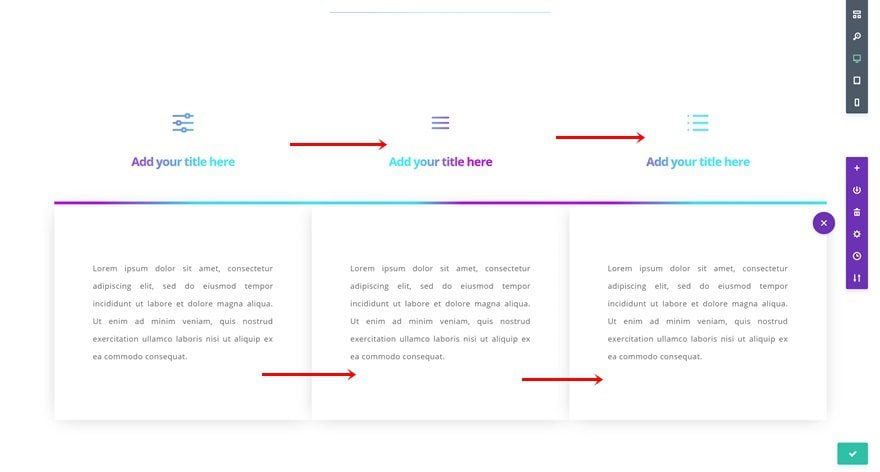
Add Blurb Module to Column 1
Add Content
Time to start adding modules! Add a Blurb Module to column 1 with a title of choice. Later on the post, we’ll use a separate module to add the body content.
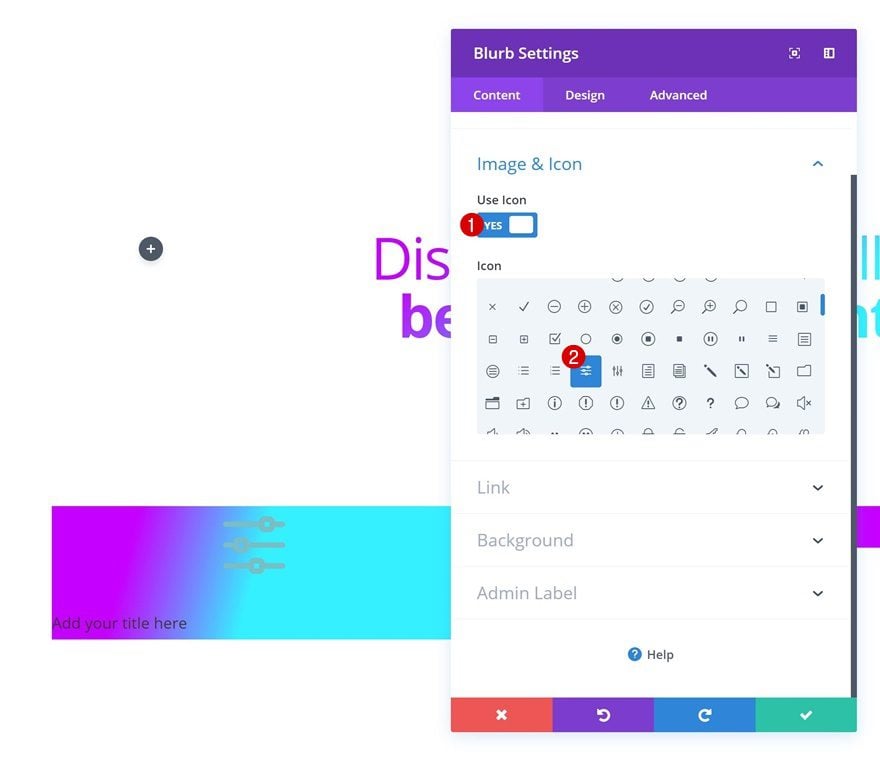
Choose Icon
Select an icon of choice.
Background Color
And modify the Blurb Module’s background color.
- Background Color: #ffffff (Light Layout), #000000 (Dark Layout)
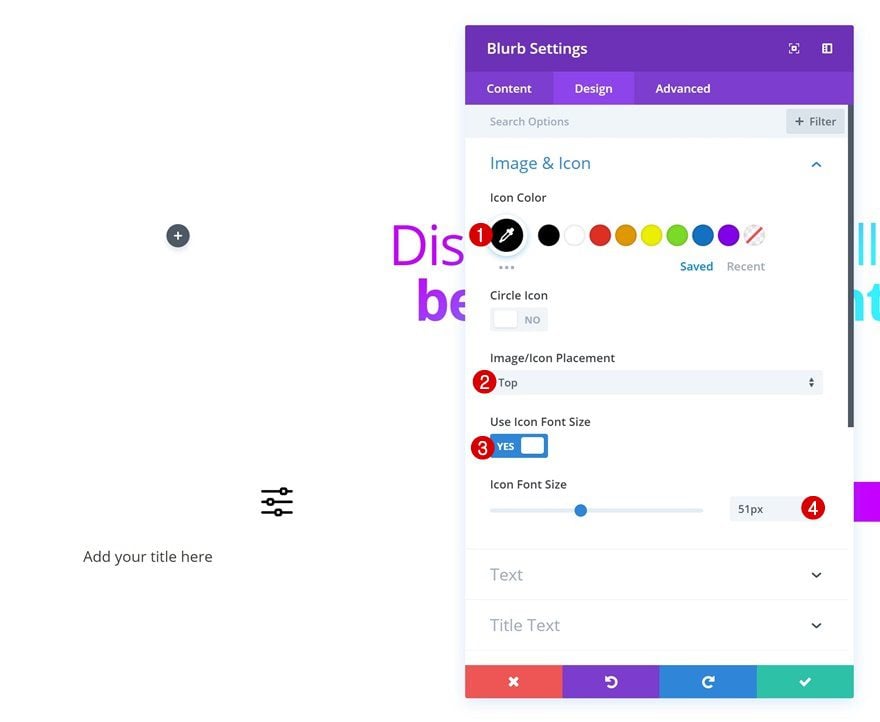
Icon Settings
Continue by going to the icon settings and making some changes there.
- Icon Color: #000000 (Light Layout), #ffffff (Dark Layout)
- Image/Icon Placement: Top
- Use Icon Font Size: Yes
- Icon Font Size: 51px
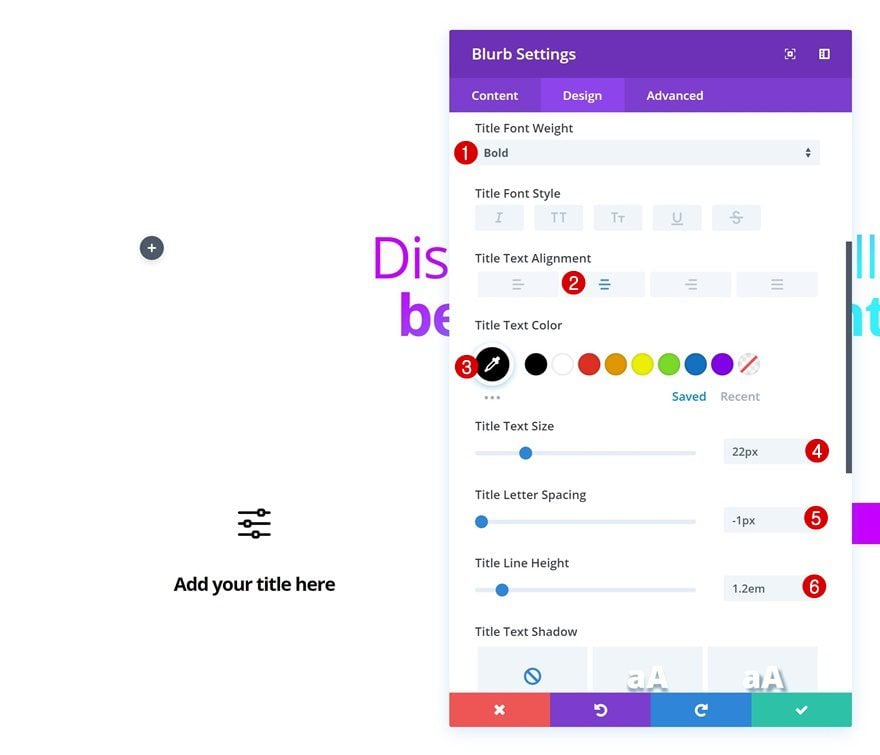
Title Text Settings
Change the title text settings as well.
- Title Font Weight: Bold
- Title Text Alignment: Center
- Title Text Color: #000000 (Light Layout), #ffffff (Dark Layout)
- Title Letter Spacing: -1px
- Title Line Height: 1.2em
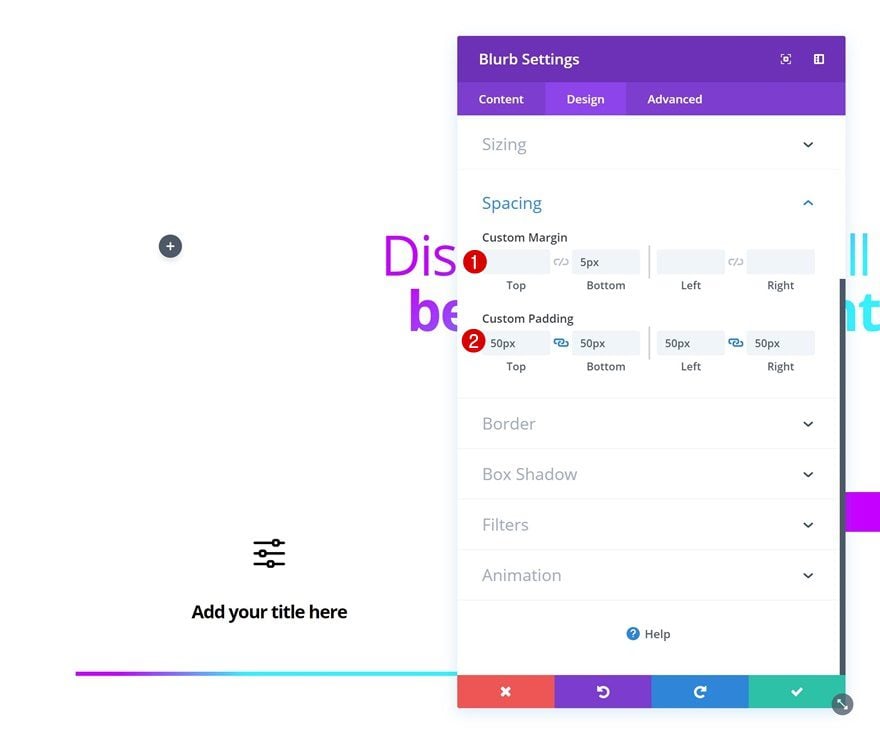
Spacing
Then, go to the spacing settings and add some custom margin and padding values.
- Bottom Margin: 5px
- Top Padding: 50px
- Bottom Padding: 50px
- Left Padding: 50px
- Right Padding: 50px
Blend Mode
Last but not least, apply the correct blend mode.
- Blend Mode: Lighten (Light Layout), Darken (Dark Layout)
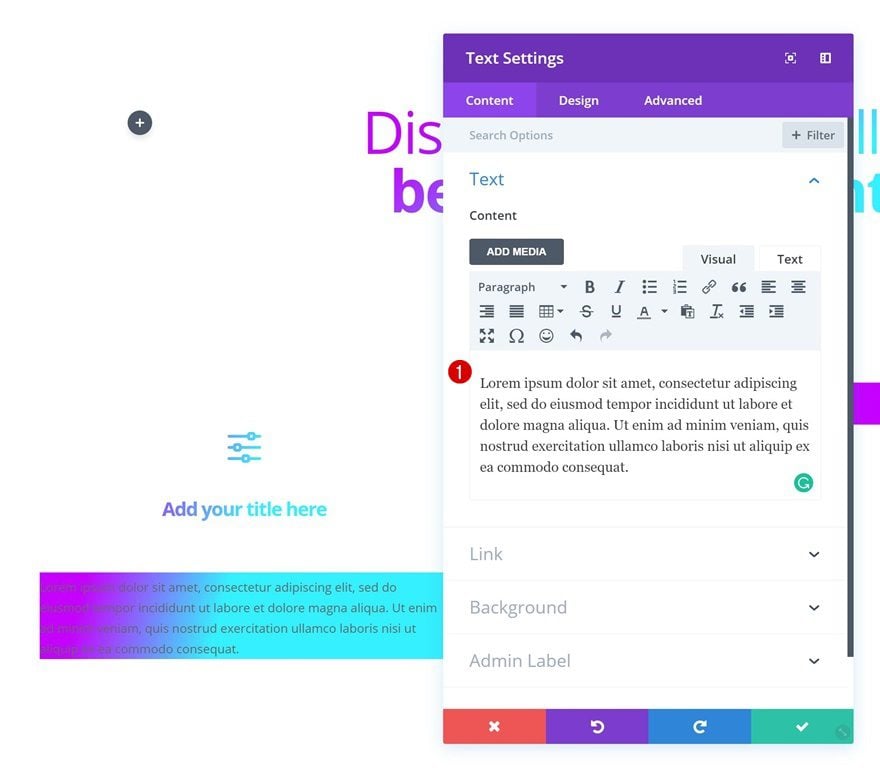
Add Text Module to Column 1
Add Content
We’re separating the title and body of the Blurb Module into two modules to make the blend mode apply to the icon and title only. Go ahead and add a Text Module right below the Blurb Module containing the body content.
Background Color
Next, add a background color.
- Background Color: #ffffff (Light Layout), #0c0c0c (Dark Layout)

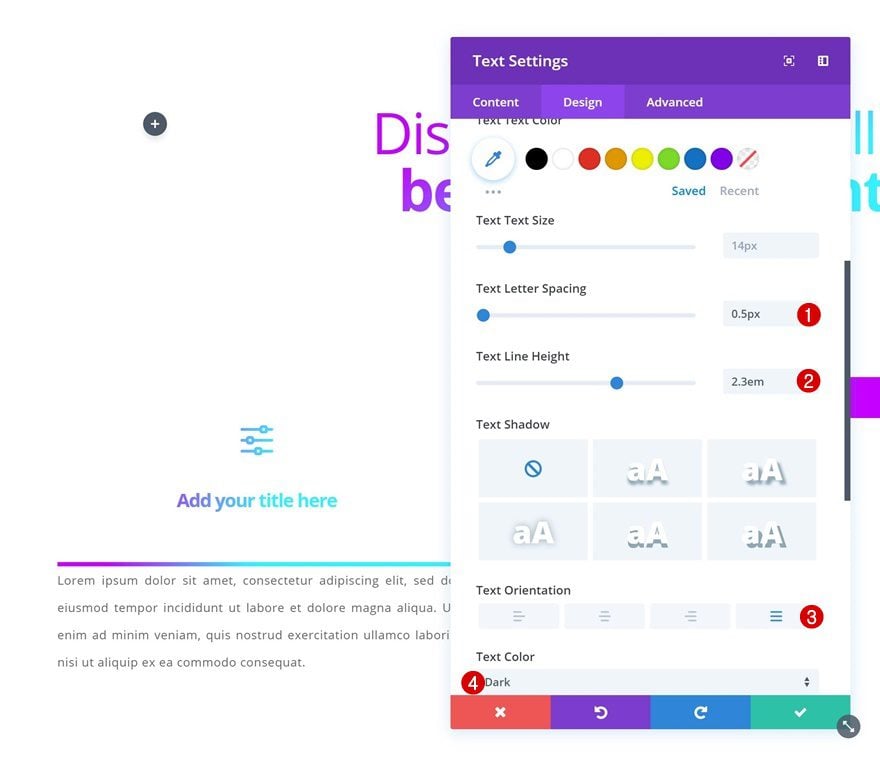
Text Settings
And change the text settings.
- Text Letter Spacing: 0.5px
- Text Line Height: 2.3em
- Text Orientation: Justify
- Text Color: Dark (Light Layout), Light (Dark Layout)
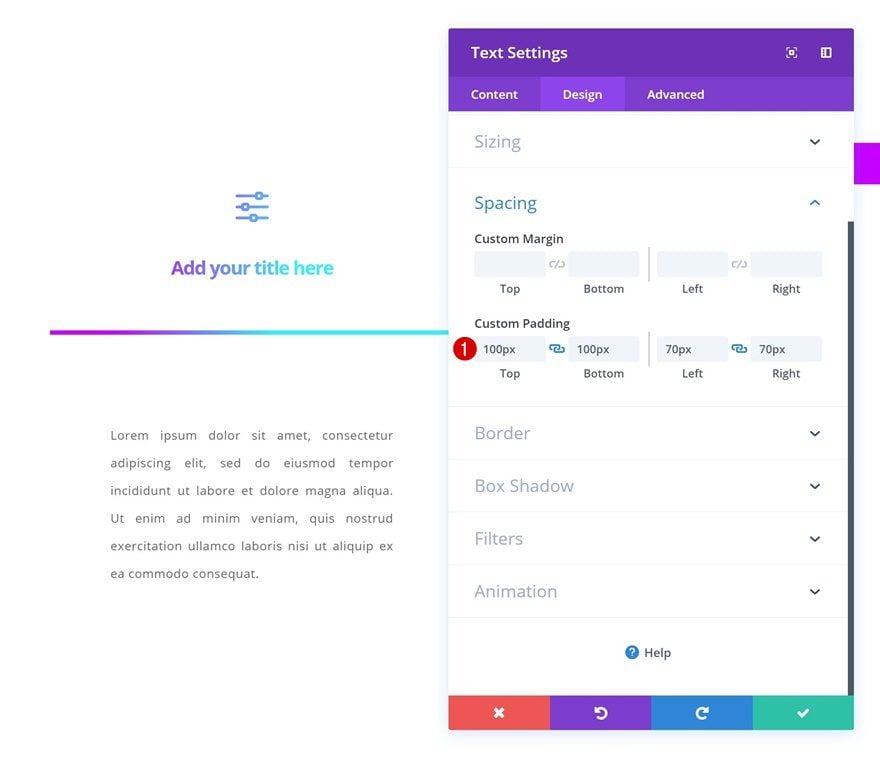
Spacing
To give the module some space to breathe, add some custom padding values in the spacing settings.
- Top Padding: 100px
- Bottom Padding: 100px
- Left Padding: 70px
- Right Padding: 70px
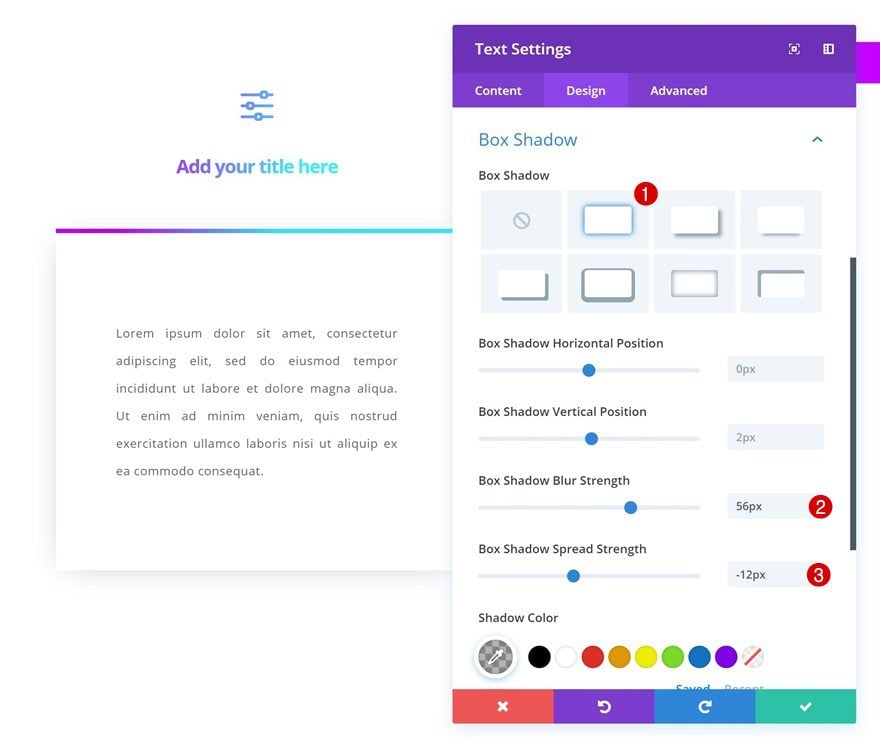
Box Shadow
And top it off, add a subtle box shadow as well.
- Box Shadow Blur Strength: 56px
- Box Shadow Spread Strength: -12px
- Shadow Color: rgba(0,0,0,0.3)
Clone Blurb Module & Text Module Twice + Place in Remaining Columns
Last but not least, clone both modules you can find in column 1 and place the duplicates in the two remaining columns. Change the content accordingly as well.
Preview
Now that we’ve gone through all the steps, let’s take a final look at the end result.
Final Thoughts
In this post, we’ve shown you how to create gradient text on your website using Divi’s built-in options only. To make this tutorial work, and to be able to practice the approach on other designs as well, it’s necessary you go through the approach section of this post and understand it while recreating the design. If you have any questions or suggestions, make sure you leave a comment in the comment section below!


This tutorial worked for me, but only with an h2 level heading. The moment I change it to an h1, it goes white even though all the settings for the h2 headings have been applied to the h1 headings. Weird. I also do not see the start/stop percentages, but the slider worked fine for me anyway. I agree with another commenter who said this would be much easier to use if it were included in the text color settings.
For me it is only working when I set the background colour of the Column and add the blend mode in the colour. Neither in the Row section nor in the Text Module. Took me like 3 hours to found that out. When I follow exactly the instructions here, it is not working.
I followed the instructions precisely, but unfortunately it doesn’t work. Don’t know what I’m doing wrong…
Depending on the background you’re using the tutorial has a error as the author assumes everybody is using the white background/light layout.
If your’re using the dark background instead of the Lighten filter, you need to use Darken and it should work 🙂
I would find these tips so much more useful if they were video rather than text. Why aren’t you doing as many videos as you used to?
Thanks, Donjete. I find your tutorials extremely useful not only for the techniques themselves but for the extra tutoring I need to get up to date on the Visual Builder. I need all of the steps you include to fill in the gaps in my Divi technical skills.
Donjete, everything you do is beautiful! Love it! Thank you again!
Thanks for the relevant Information.
Nice Tutorial, but way too many steps to achieve a text gradient.
It would be simpler to add the gradient in all the modules that use text as they do in Elementor.
Please, could you consider this?
Great tutorial! For those who are looking to have a simple module that does gradient text without going through many steps like the above tutorial then you should look out for this free plugin called Divi supreme Modules on WordPress plugin repo.
Timely tutorial! Exactly what I’ve been working (struggling) with the past couple days – blend modes with text & gradient. Your explanation really helps me. Thank you Donjetë!
Should be a one click function in divi, not a 20 page tutorial.
What’s the browser support with these methods?
Thanks for sharing such an amazing tutorial with us. I really loved the way you wrote this tutorial and delivered information with proper graphics. I’ll surely be using this amazing technique for my website. Looking for more such amazing tutorials in the future… 🙂
I say instead of doing all that why not have a single module that can do a text gradient instead as a standard DIVI module???
I was thinking the same thing. I wish these tutorials would either illustrate the core idea as simply as possible AND/OR make these available as downloads. When I have to work in shifts to scroll through a tutorial…
Hi Richard,
I think the point of the tutorial is to help you learn to do it yourself. This experience can then be used to develop your own creativity