
With Divi and its built-in sticky options allow, you can easily design a sticky social media follow module that will keep those social network icons at the forefront as the user scrolls down the page. Plus, by adding custom styling to the module in the sticky state, we can create unique design transitions when engaging the sticky state on scroll. So, if you are looking for complete control over the design of your sticky social media follow buttons, this tutorial is for you!
Sneak Peek
Here is a quick look at the design we’ll build in this tutorial.
Download the Layout for FREE
To lay your hands on the designs from this tutorial, you will first need to download it using the button below. To gain access to the download you will need to subscribe to our newsletter by using the form below. As a new subscriber, you will receive even more Divi goodness and a free Divi Layout pack every Monday! If you’re already on the list, simply enter your email address below and click download. You will not be “resubscribed” or receive extra emails.

Subscribe To Our Youtube Channel
To import the section layout to your Divi Library, navigate to the Divi Library.
Click the Import button.
In the portability popup, select the import tab and choose the download file from your computer.
Then click the import button.

Once done, the section layout will be available in the Divi Builder.
Let’s get to the tutorial, shall we?
What You Need to Get Started

To get started, you will need to do the following:
- If you haven’t yet, install and activate the Divi Theme.
- Create a new page in WordPress and use the Divi Builder to edit the page on the front end (visual builder).
- Choose the option “Build From Scratch”.
After that, you will have a blank canvas to start designing in Divi.
Using a Pre-Made Landing Page Layout
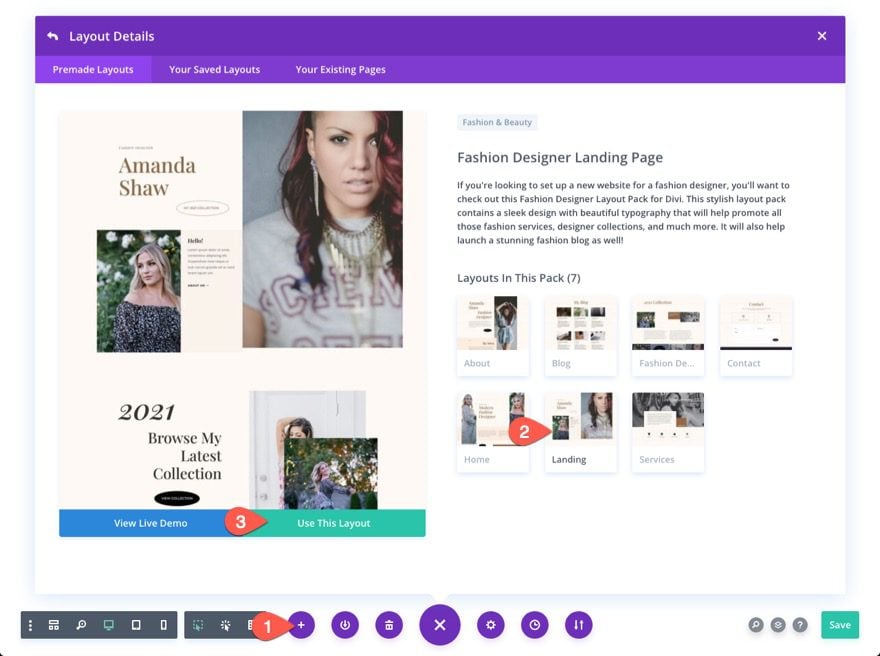
To get started, we need some mock page content in place before we design the sticky social media follow module. To do this, open the settings menu and click the Load from Library icon. From the Load from Library popup, find and select the Fashion Designer Landing Page layout. Then click the green “Use This Layout” button.
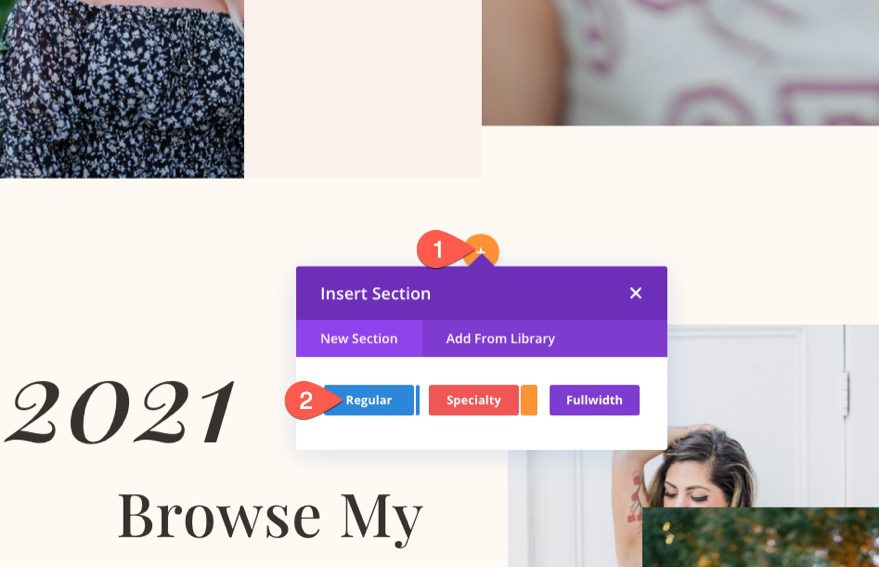
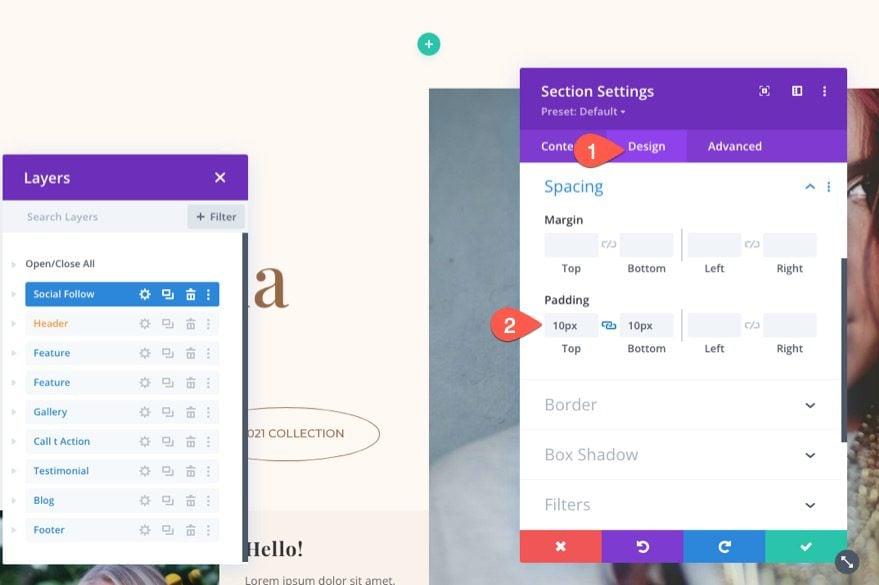
Creating the Section
Add a new regular section to the layout.
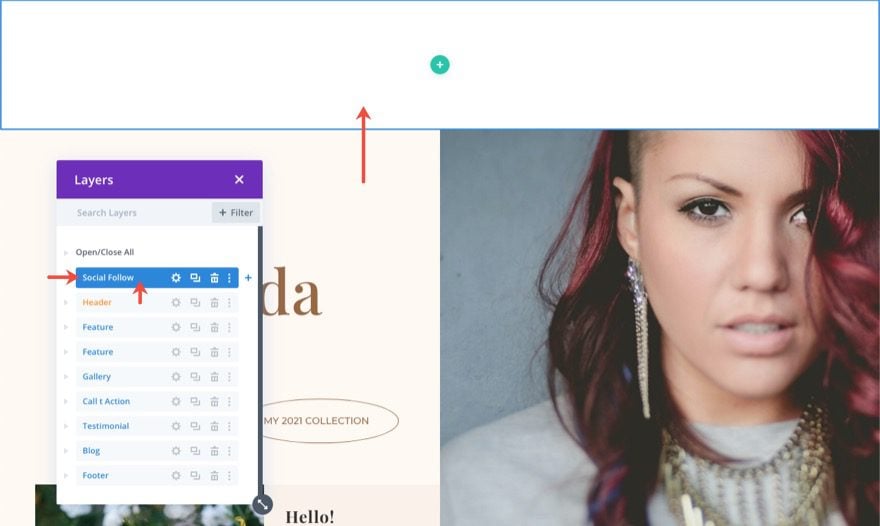
Then move the new section to the top of the page (or wherever you want to add your social media follow links).
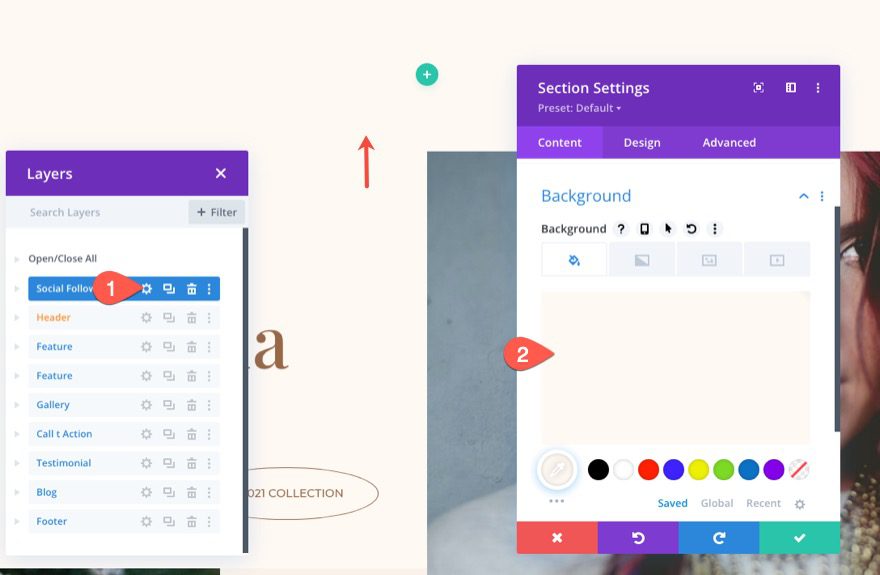
Open the section settings and update the background color to match the layout as follows:
- Background Color: #fff9f2
Under the design tab, update the padding of the section:
- Padding: 10px top 10px bottom
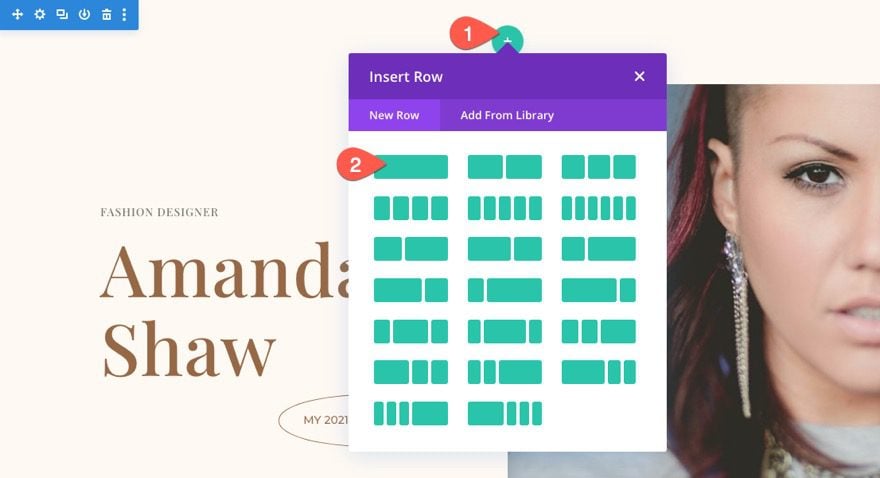
Creating the Row
Inside the section, add a one-column row.
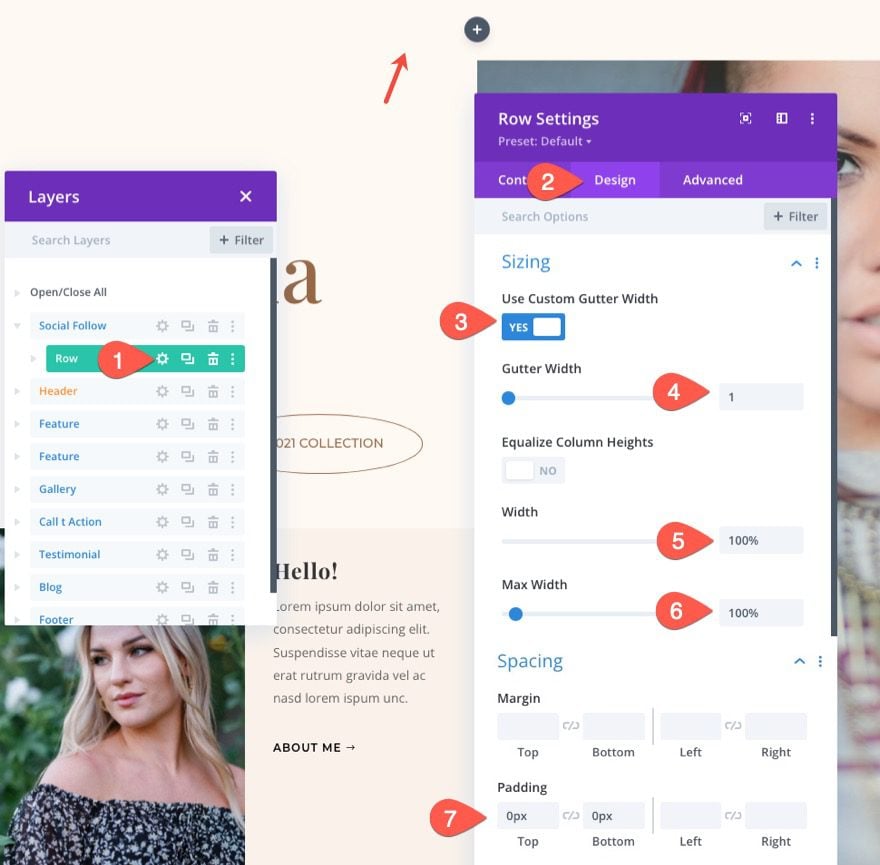
Open the row settings and update the size and spacing as follows:
- Use Custom Gutter Width: YES
- Gutter Width: 1
- Width: 100%
- Max Width: 100%
- Padding: 0px top, 0px bottom
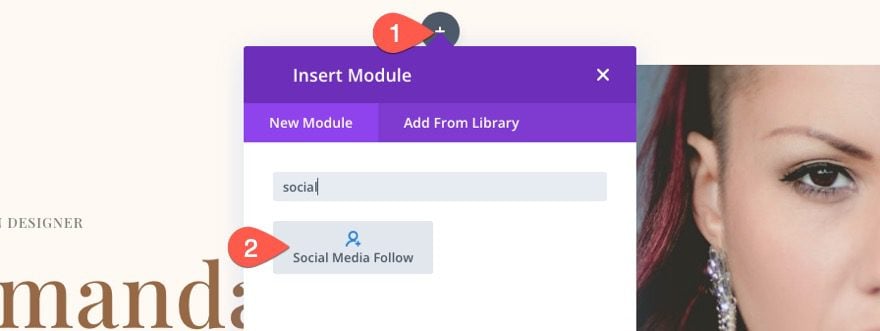
Once the section and row are in place, add a new Social Media Follow module to the row.
Updating the Module Settings
Open the social media follow module settings. The first thing we need to do is add a sticky position to the module using Divi’s Sticky Options. Under the Advanced tab, update the following:
- Sticky Position: Stick to Top
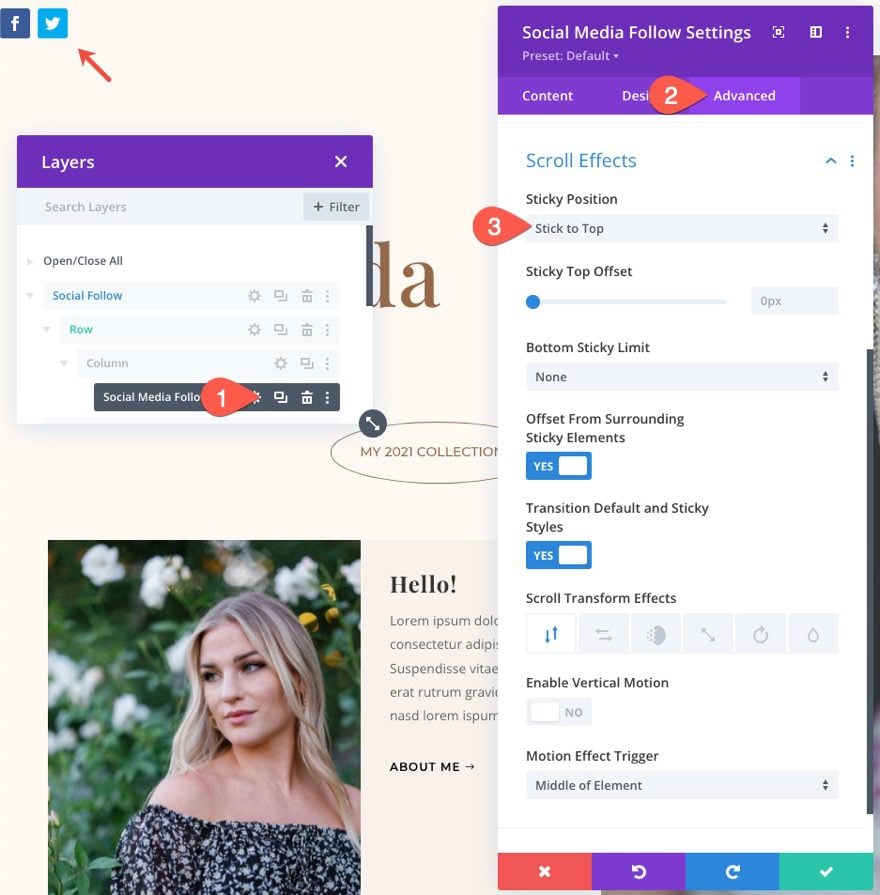
Once the sticky position is in place, you will be able to target the styling of the module in the sticky state (much like you can do to the hover state). This can be done by hovering over an option and clicking the thumbnail icon.
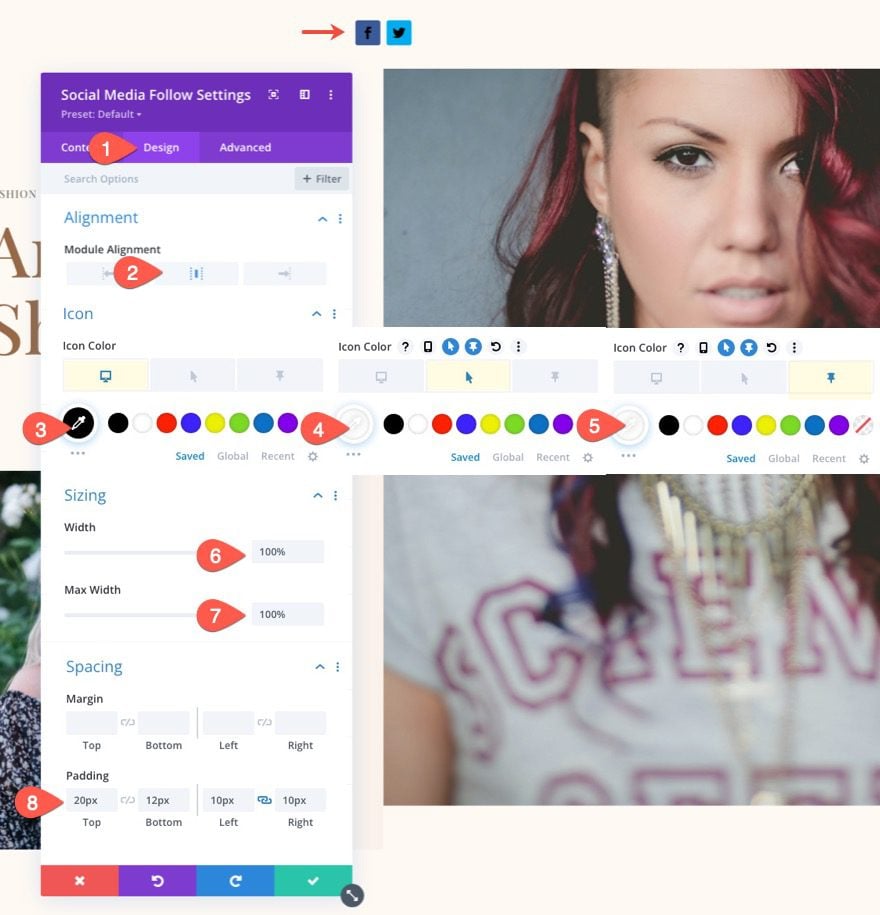
Under the design tab, update the following:
- Module Alignment: Center
- Icon Color: #000 (desktop), #fff (hover), #fff (sticky)
- Width: 100%
- Max Width: 100%
- Padding: 20px top, 12px bottom, 10px left, 10px right
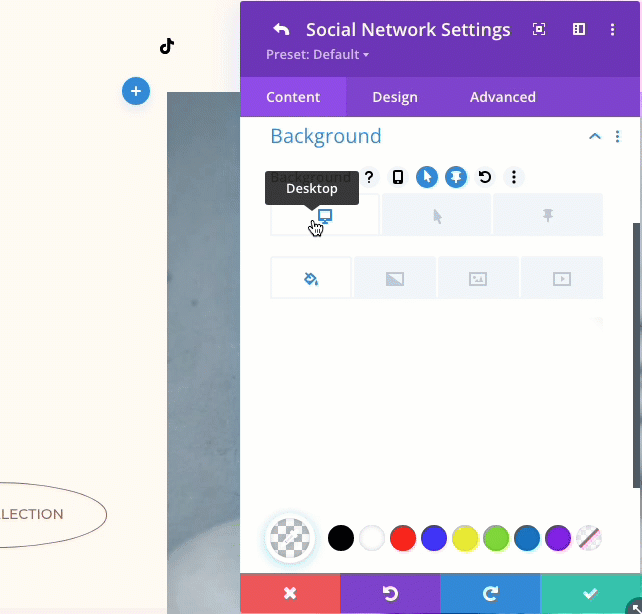
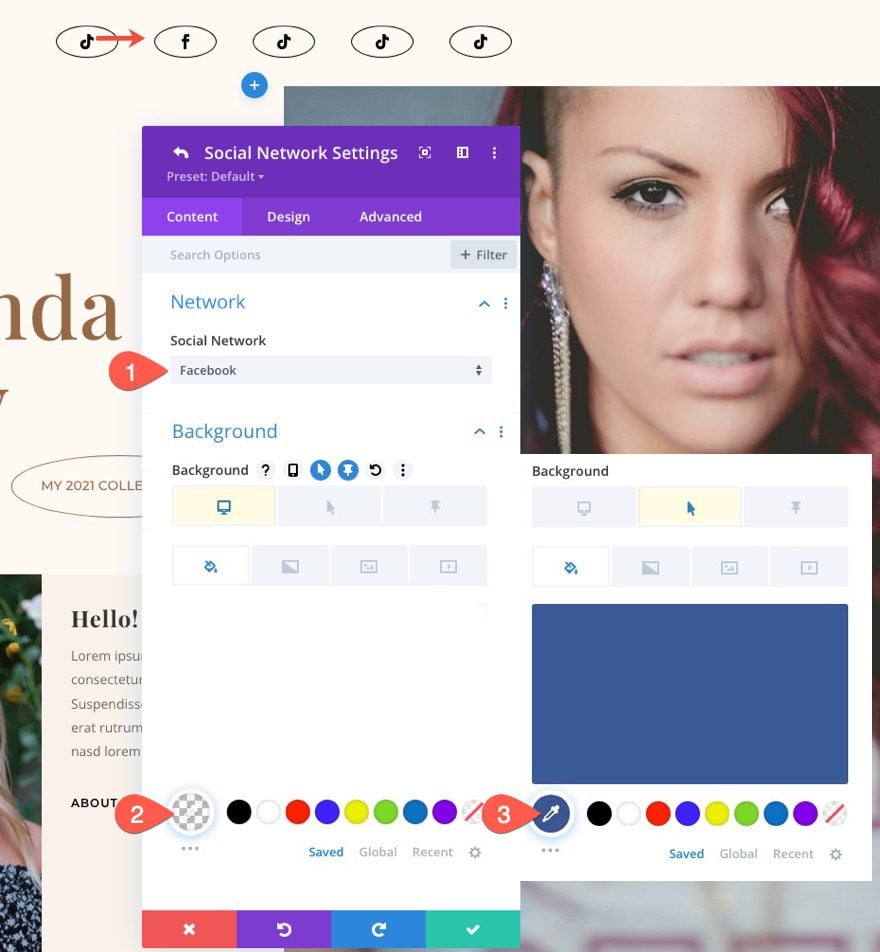
Social Network Settings
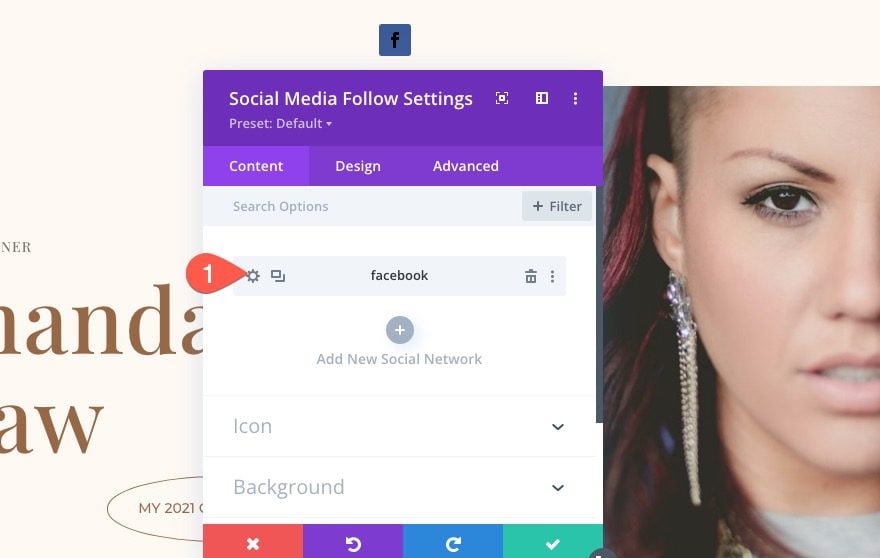
Once the module settigns are ready, we can now turn our attention to the styling the individual social network icons. To do this, we are going to style one social network icon first. Then we will duplicate the social network to create the others.
You should already have two social networks under the content tab by default. Delete one of them and click to edit the one that is left.
Under the Social Network Settings, select a Social Network and update the background colors for the desktop, hover, and sticky states.
- Social Network: TikTok (or whatever you want)
- Background: transparent (desktop), #fe2c55 (hover), #000 (sticky)
TIP: The background color will automatically change to match the branding of the Social Network. You can copy this color and add it as a hover state background color for the icon. This will show the social network’s default background color when hovering over the icon.
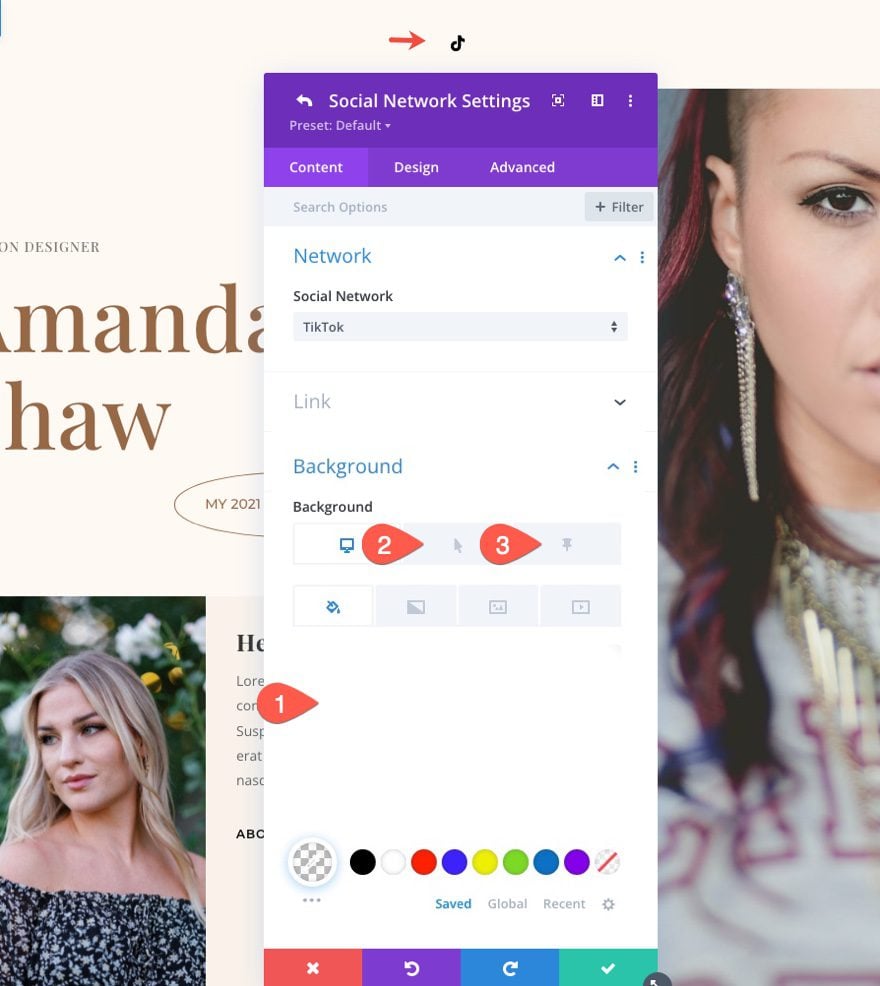
Now you can toggle through the tabs to see the background color for all three states (desktop, hover, and sticky).
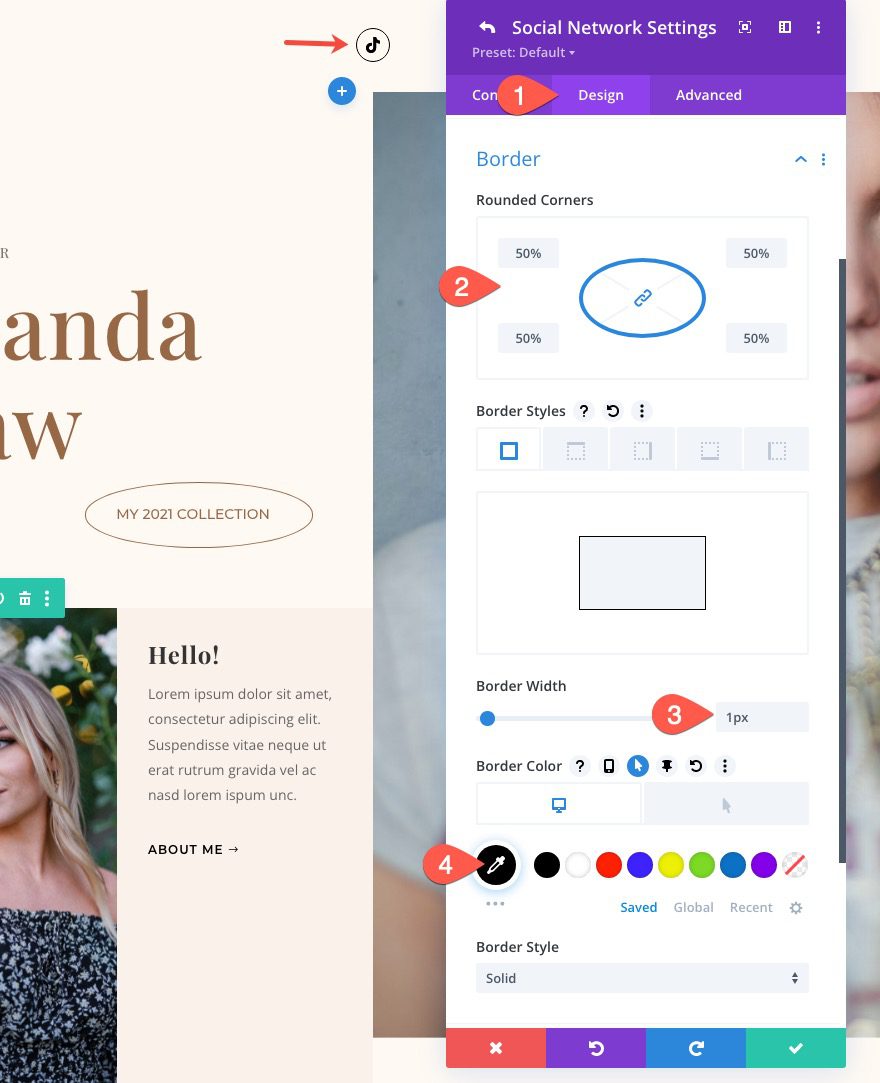
Next, let’s give the icon a nice oval shape and border to match the layout a bit better. Under the design tab, update the following:
- Rounded Corners: 50%
- Border Width: 1px
- Border Color: #000 (desktop), transparent (hover)
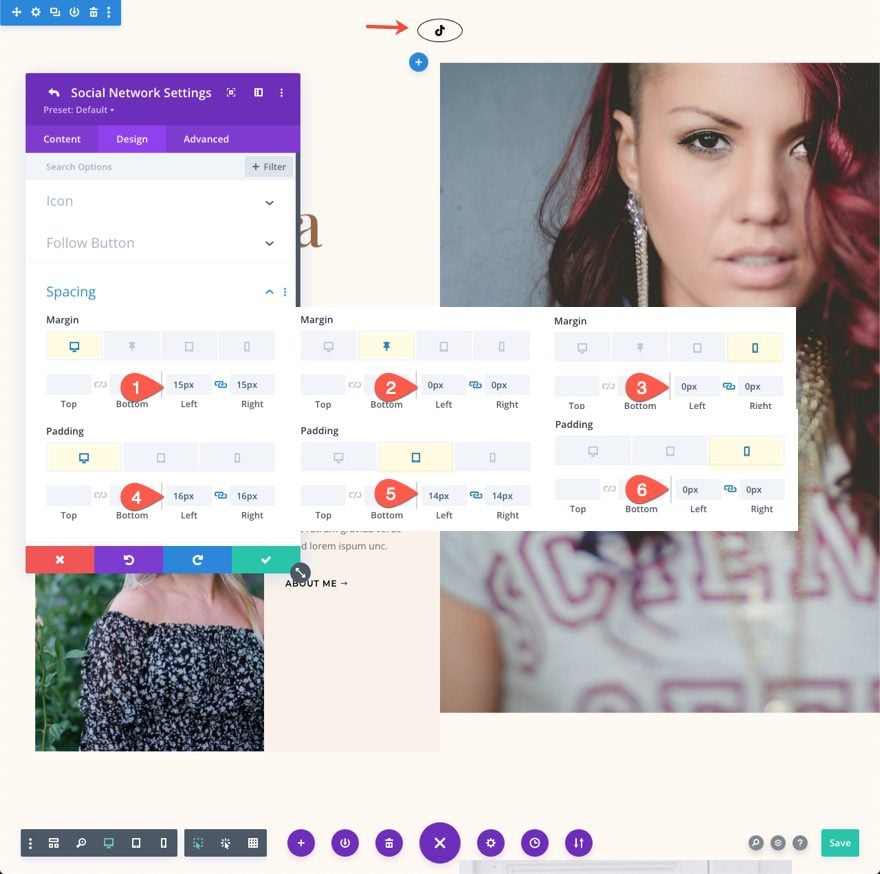
Right now the icon has a circle shape. To achieve a more oval shape, we can add more padding to the right and left. We can also create more space between the icons adding right and left margins. Make sure to update the spacing on tablet and phone display as well.
- Margin (desktop): 15px left, 15px right
- Margin (sticky): 0px left, 0px right
- Margin (phone): 0px left, 0px right
- Padding (desktop): 16px left, 16px right
- Padding (tablet): 14px left, 14px right
- Padding (phone): 0px left, 0px right
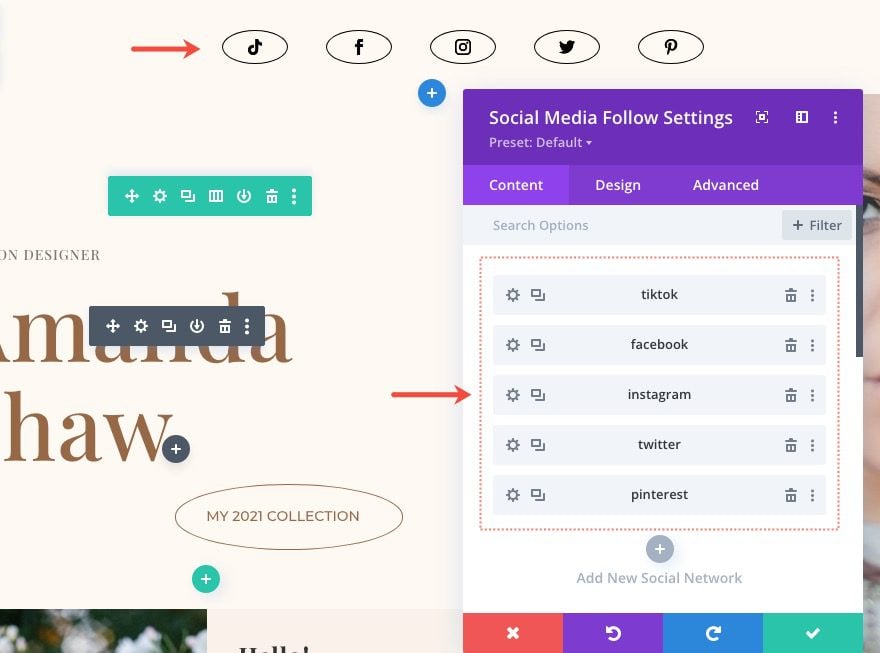
Now that we have completed the design of the first social network, we can duplicate the icon to create more. To do this, open the social media follow module settings, and click the duplicate icon on the social network item. For this example, let’s create 4 more.
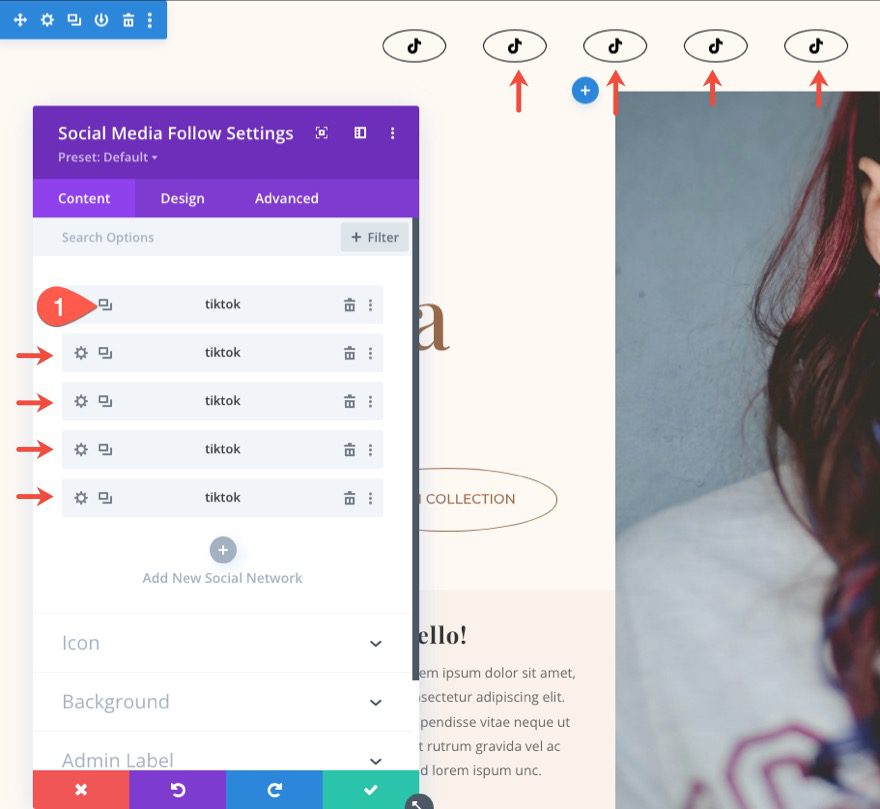
Now, all we have to do is update each of the new social network items with a new social network. Because this will change the background color, you will need to update the background color for each as well.
To do this, open the second social network settings and update the following:
- Social Network: Facebook
- Background Color: transparent (desktop), #3b5998 (hover)
Continue the same process to update the rest of the social networks.
Final Result
Now let’s check out the final result on the live page.
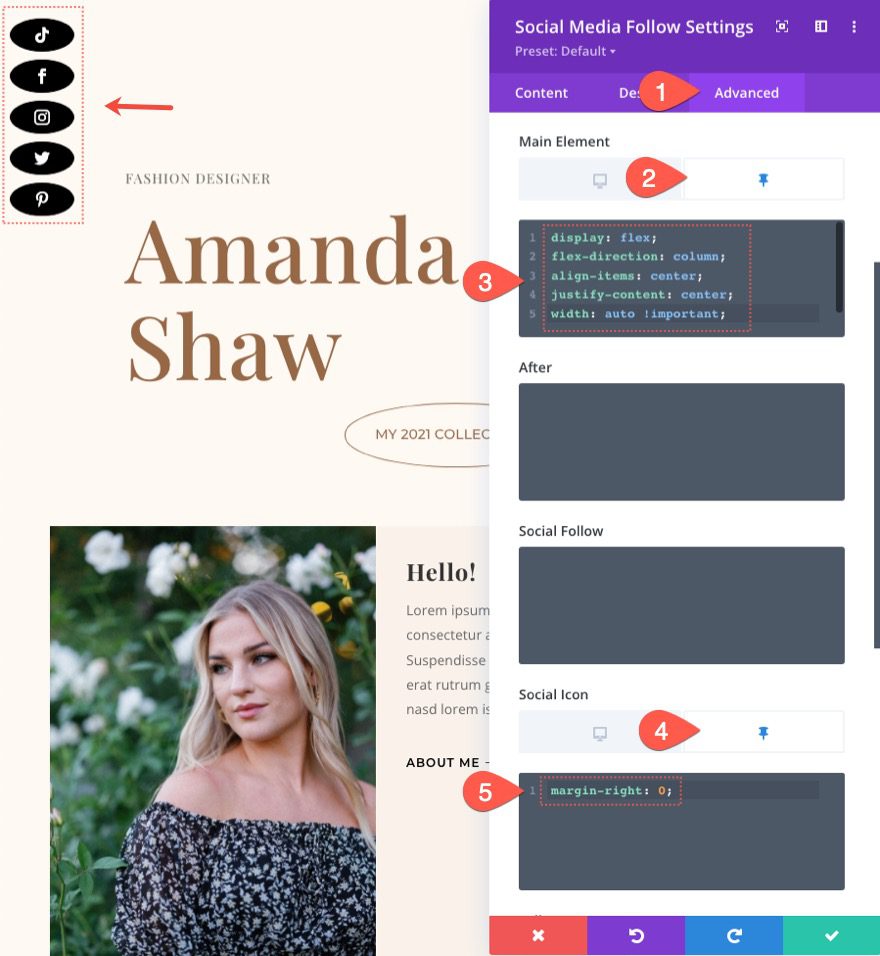
For a more unique design and transition, we can align the social media follow icons vertically when the sticky state is engaged. To do this, we can add a few snippets of CSS to the module.
Under the Advanced tab, add the following CSS to the Main Element in the Sticky state.
display:flex;
flex-direction: column;
align-items: center;
justify-content: center;
width: auto !important;
Then add the following CSS to the Social Icon in the Sticky state.
margin-right: 0;
Here is the result!
To align the network icons to the right in the sticky state, add the following under the existing CSS of the Main Element in the sticky state:
left: auto !important;
right: 0;
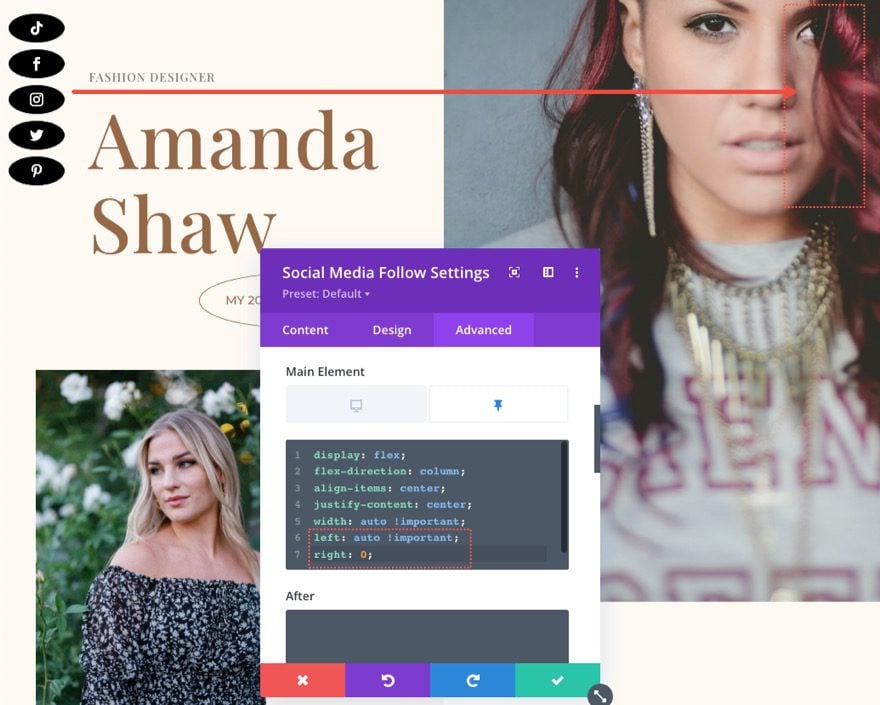
Here is the result!
Final Results
Here is another look at the final results of the sticky social media follow module designs.
Final Thoughts
Social media follow buttons are almost always a key feature on a website. They are one of the main ways to connect social media channels to a website. That’s why Divi’s social media follow module is packed with all the network icons and design options you need to create the perfect solution for your site. Hopefully, this sticky social media follow module design will come in handy for your next project.
For a more complete social media sharing solution, you can check out Monarch.
I look forward to hearing from you in the comments.
Cheers!


Nice article and it helped me a lot, a website that is designed professionally gives more visitors and makes a good first impression. Also, it boosts revenue, improves search engine ranking, and helps to reduce the bounce rate.
thanks it was so amazing and helpful !
Great! Glad you liked it, parsp.