
Knockout text images can open up a lot of opportunities for designing unique headers in Divi. Creating a knockout text effect can easily be done using a photo editor like Photoshop using the built-in knockout blending option. Basically this allows you to create images with transparent text (appearing to be knocked out of the image).
And knockout text images are really fun to use in Divi. Because the image text is transparent, you can add any kind of background behind the text for unique designs.
In this tutorial, I’m going to show you how to create an image with a knockout text effect using Photoshop. Then I’ll also cover how to use the image in Divi to create a beautiful header in minutes.
Inspiration for this design comes from one of our favorite Divi sites over at Marx Creative.
Sneak Peek
Here is a sneak peek at the design we will be creating in this tutorial.
Here the final design with the CSS parallax effect set for the image module background image.
Here is what it looks like on mobile.
How to Create a Knockout Text Image Using Photoshop
Subscribe To Our Youtube Channel
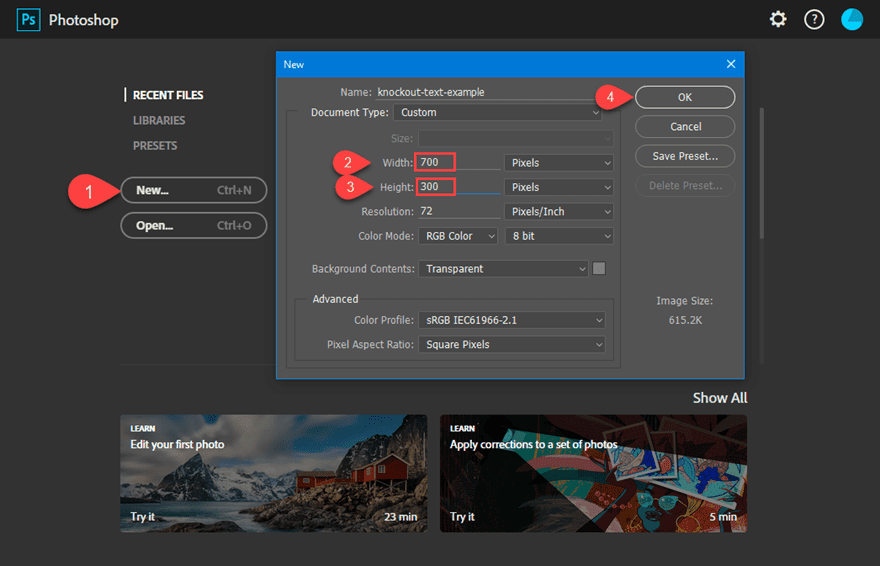
To create a knockout text image in Photoshop, first create a new document and set the dimensions to a 700px width and a 300px height.
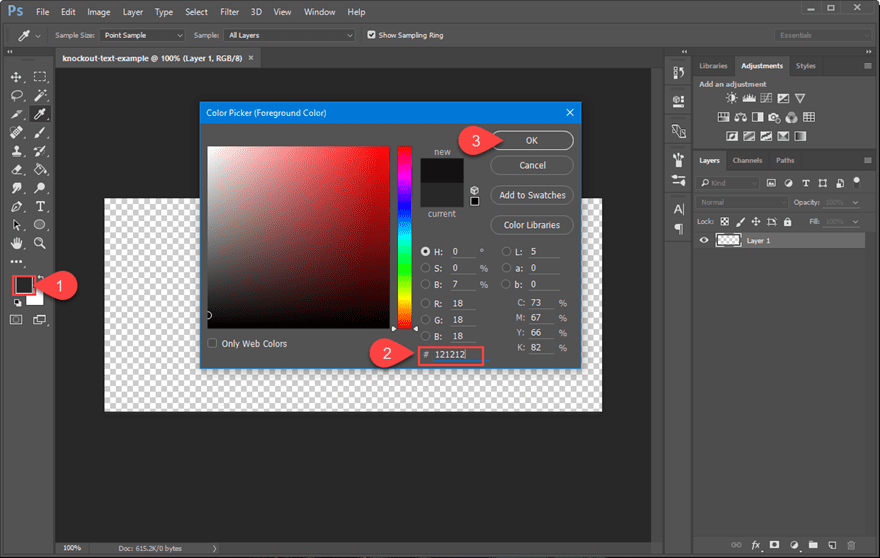
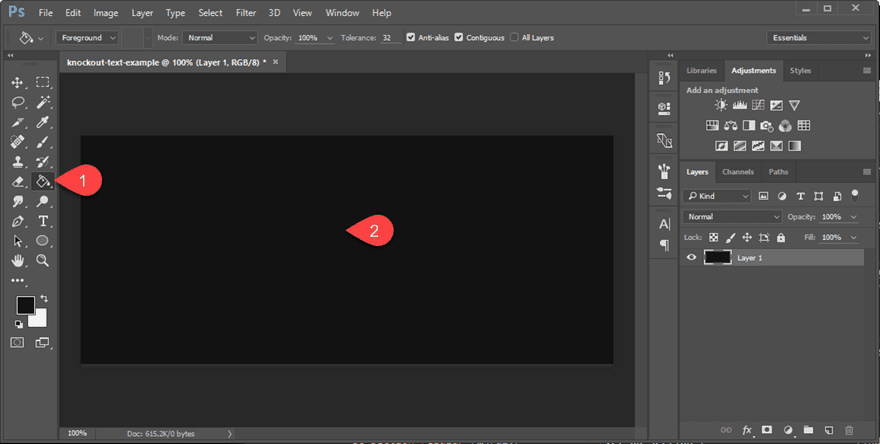
Next, click on the foreground color (or eyedropper tool) and set the foreground color to #121212.
Use the paint bucket tool to color the entire layer. This will serve as the background color of the image.
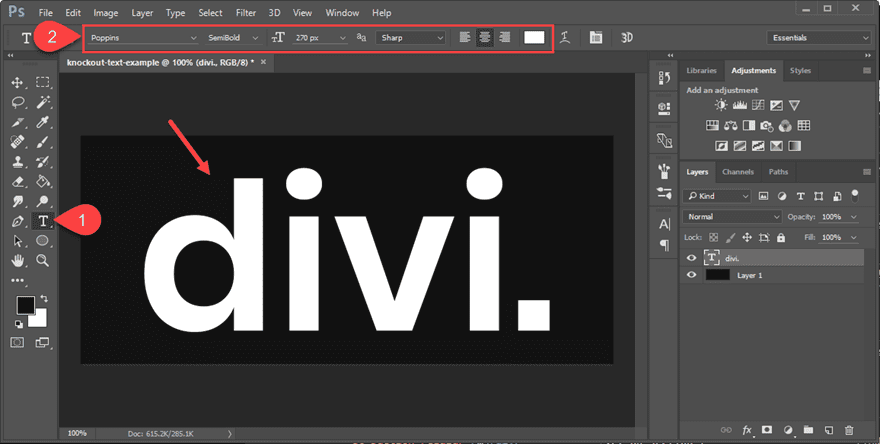
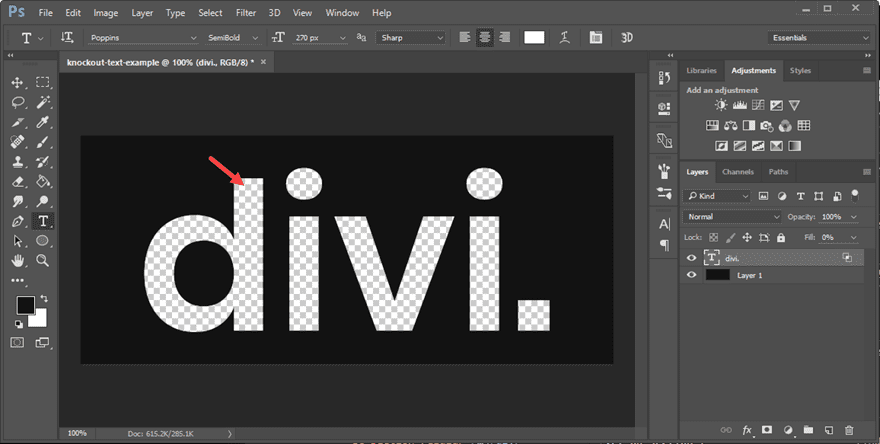
Now it is time to add our text to the image. Use the Horizontal Type Tool to add a new text layer over the background layer. You can design the text however you want using the text options at the top. For this example, I’m using the following:
Font: Poppins
Font Weight: semi-bold
Color: #ffffff (this can be anything because the text will become transparent)
Text size: 260px
Text Alignment: center
Then type in the text you want (I’m using “Divi.”) and center the text box over the background layer.
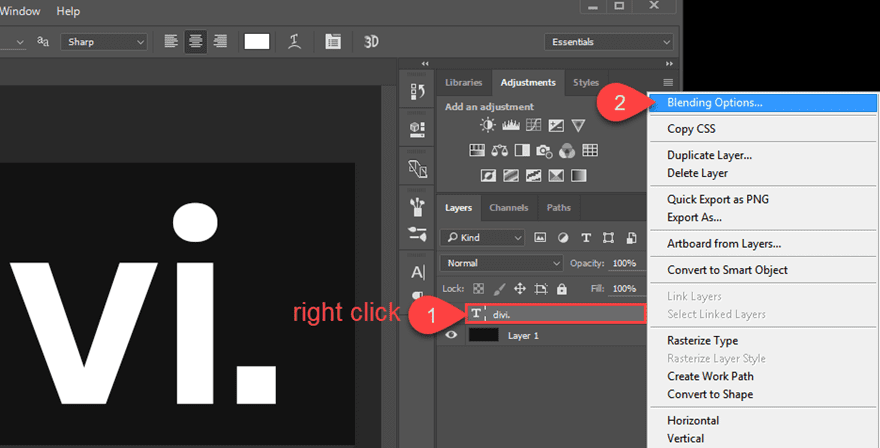
Right click on the layer with the text and select “Blending Options” from the right click menu.
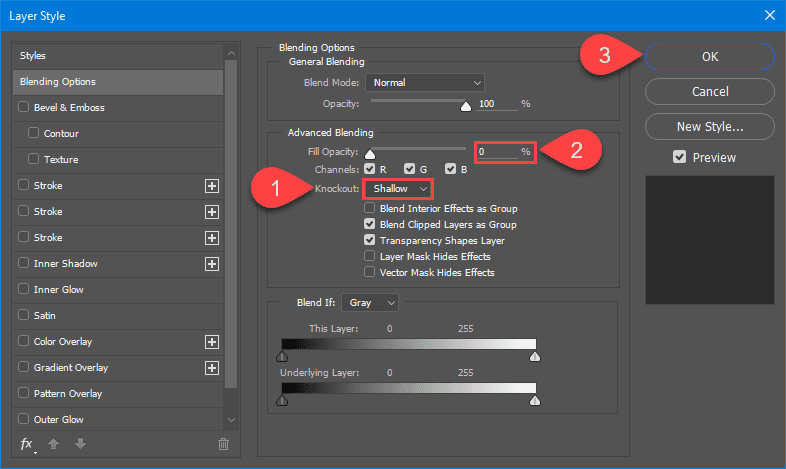
Under the Advanced Blending section, find the knockout option and select Shallow from the dropdown menu.
Then set the Fill Opacity option to 0%.
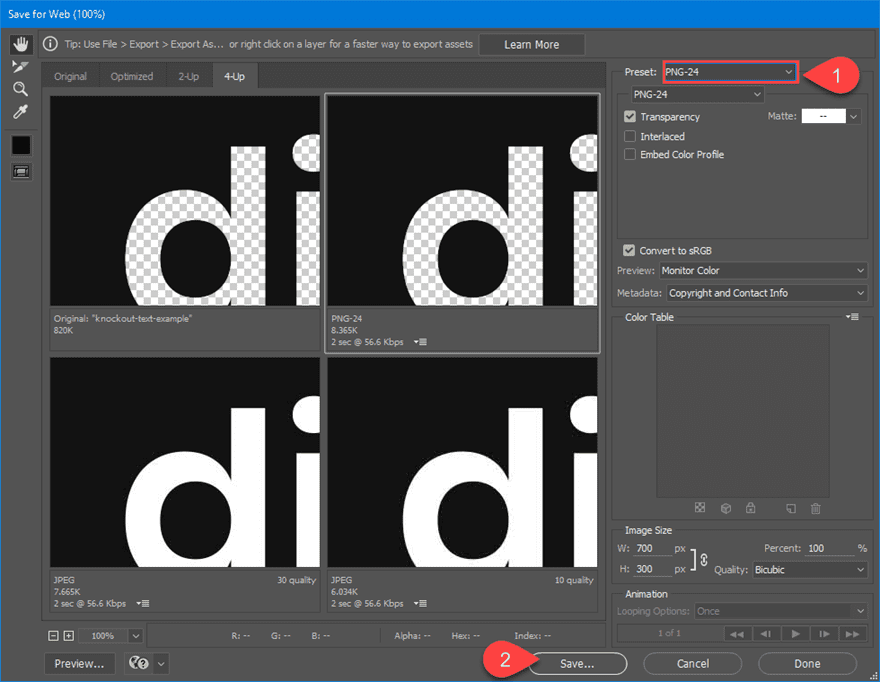
Export the file by selecting File > Export > Save for Web (Legacy).
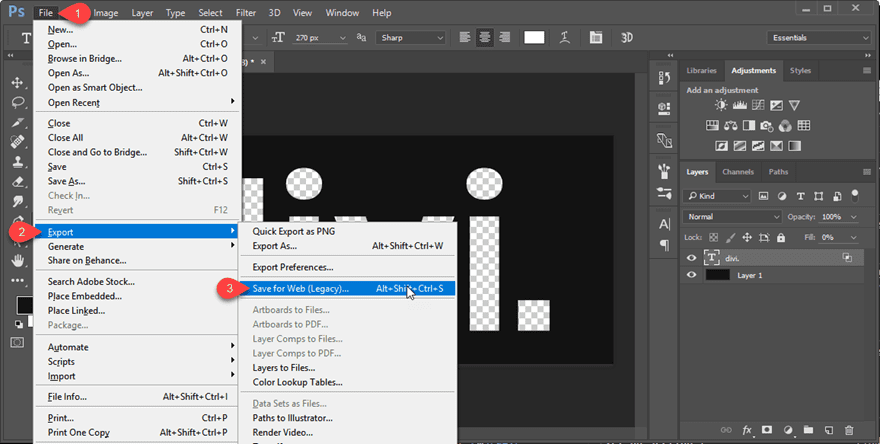
Make sure you save the file as a png in order to preserve the transparency in the image.
Using the Knockout Text Image to Create a Header in Divi
Now that your image is ready, you can begin designing you header in Divi.
Create a New Page
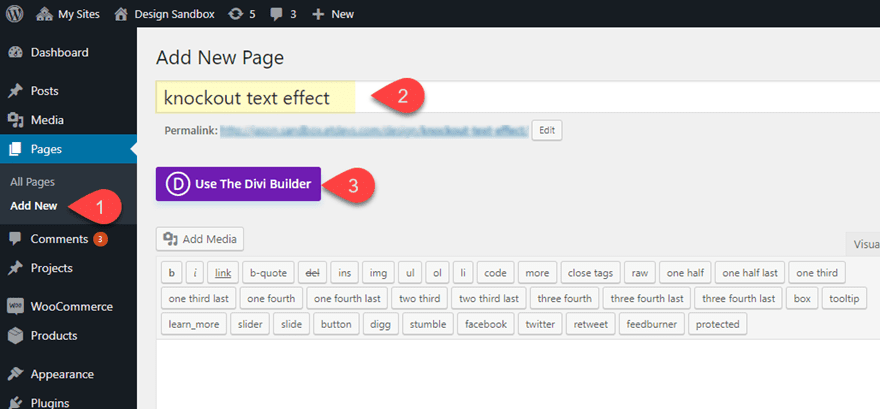
First, create a new page. Give your page a title and click to use the Divi Builder.
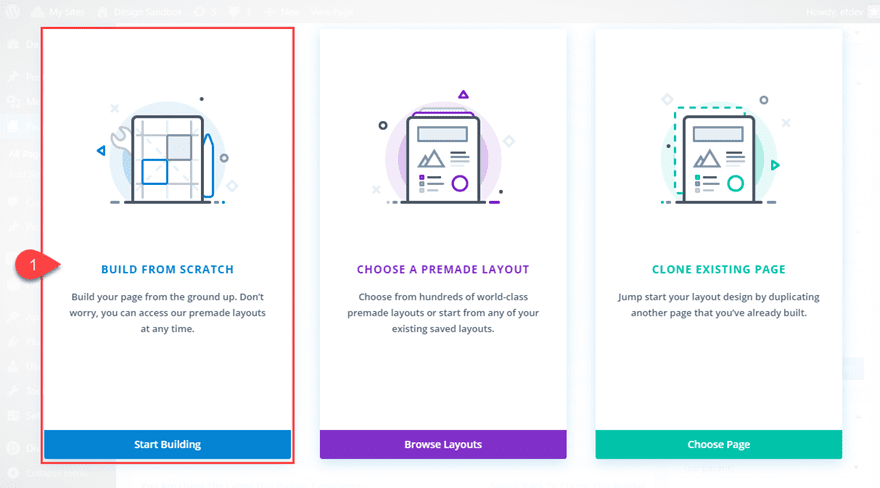
Select the option to “Build From Scratch”.
Create the Header Design
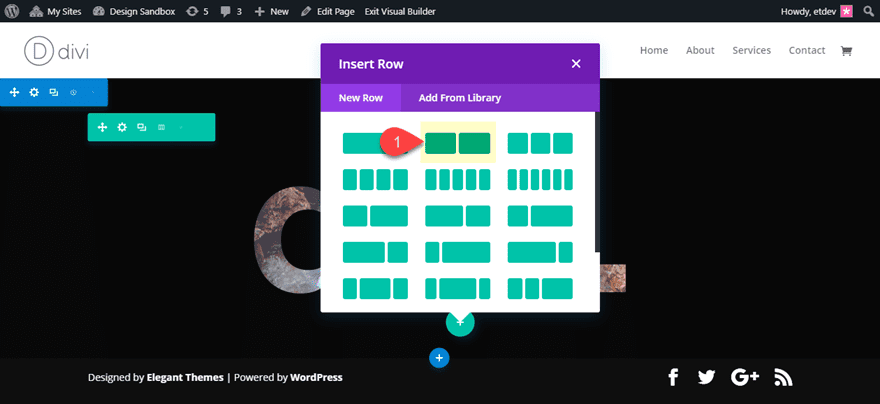
Then, create a regular section with a one-column row.
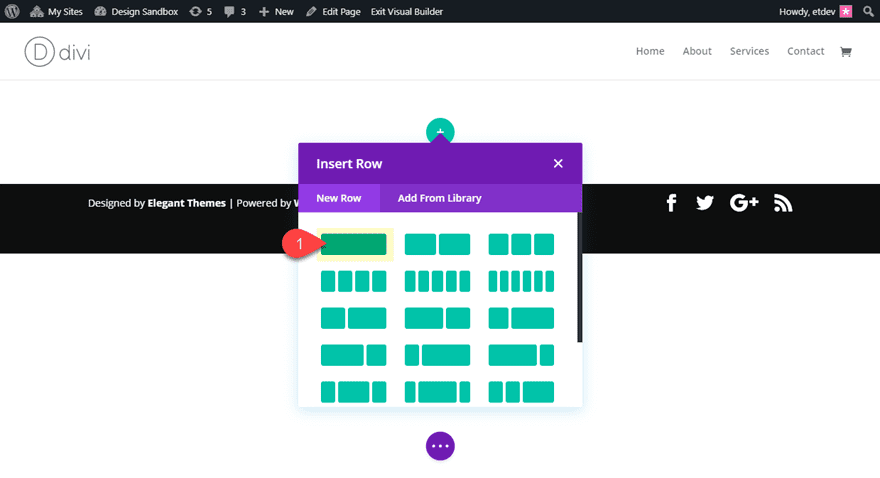
After that, add an image module to the row.
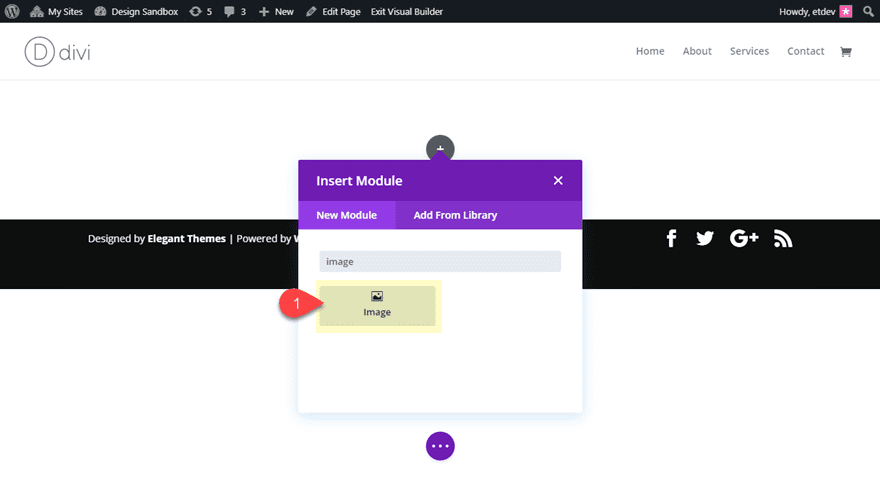
Upload the knockout image you just created to the image module.
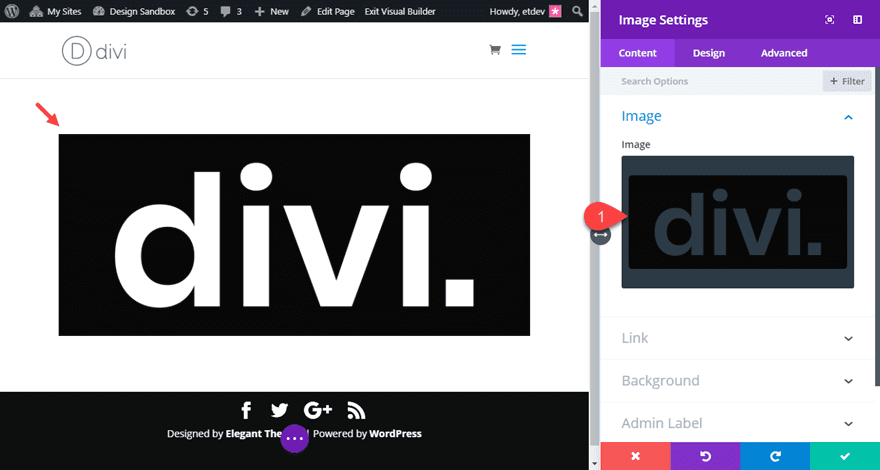
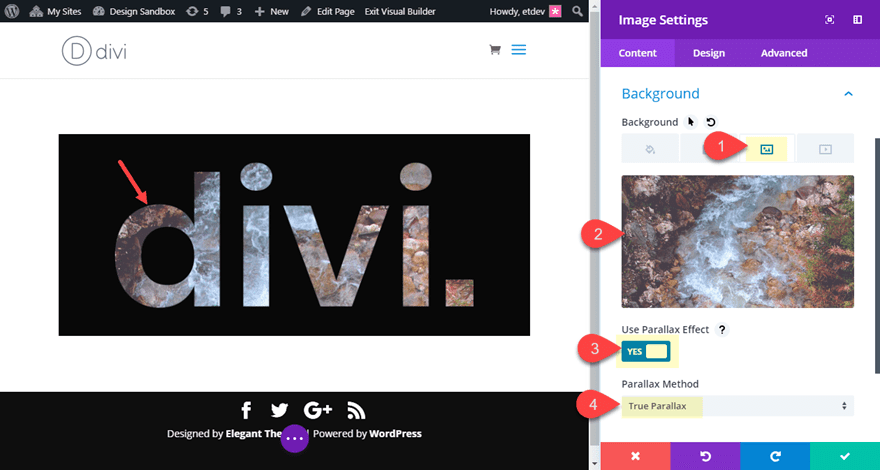
Next, add a background image to the image module with a parallax effect (True Parallax or CSS).
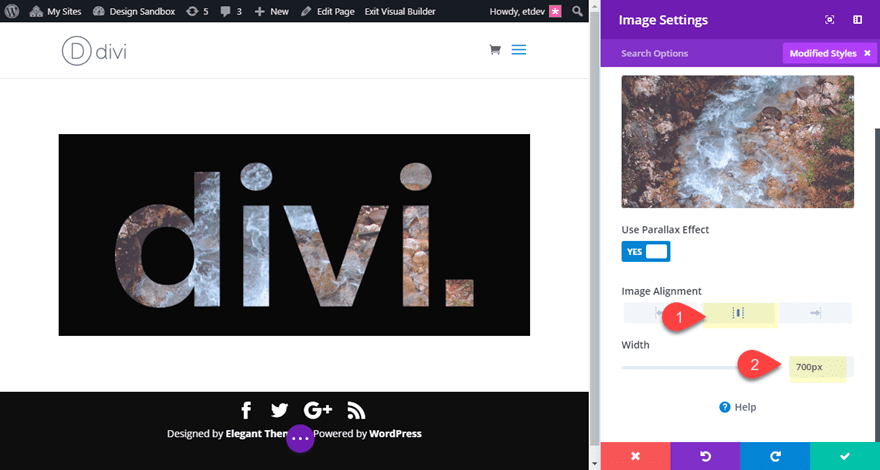
Make the image center aligned and give the image a custom width that matches the width of the actual image.
- Image alignment: center
- Width: 700px
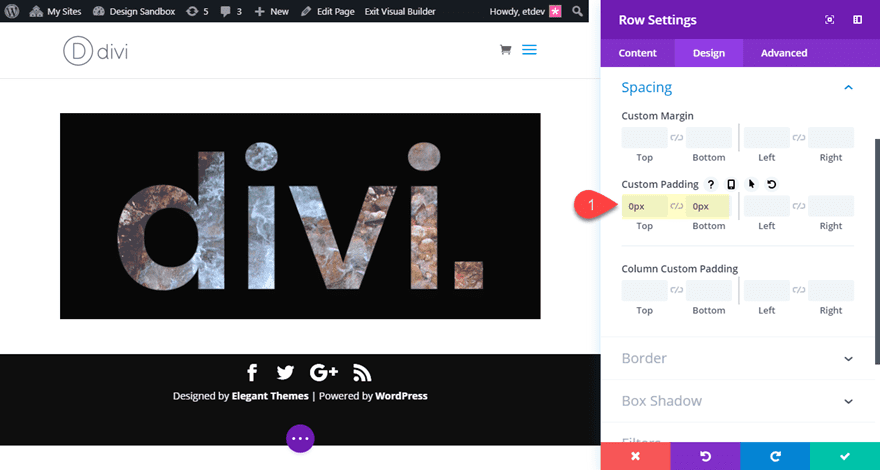
Update the row settings as follows:
- Custom Padding: 0px top, 0px bottom
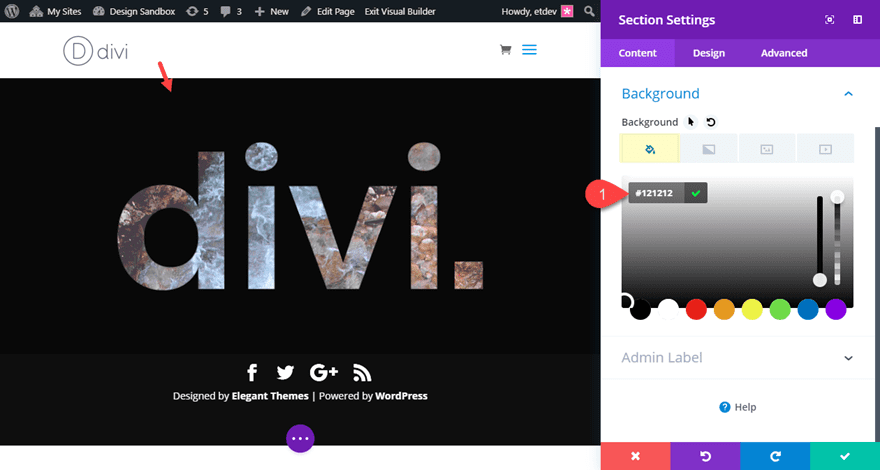
Give the section the same background color you used when creating the knockout image. Open the section settings and update the following:
- Background Color: #121212
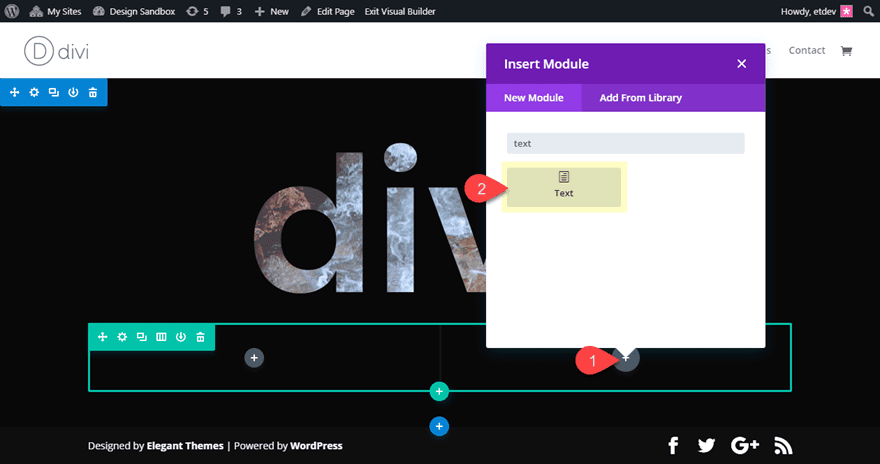
To add some additional header text, first add a new two-column row.
Then, add a text module to column2.
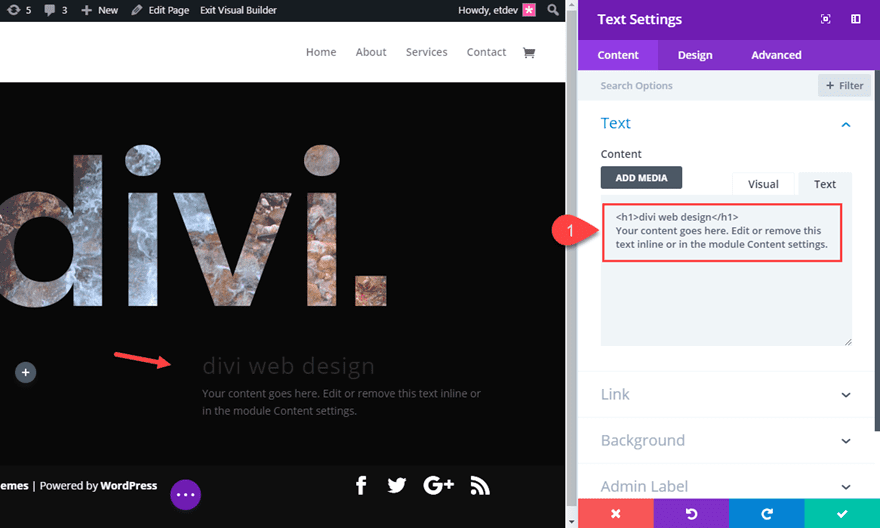
Update the Text Module Content as follows:
<h1>divi web design</h1>
Your content goes here. Edit or remove this text inline or in the module Content settings.
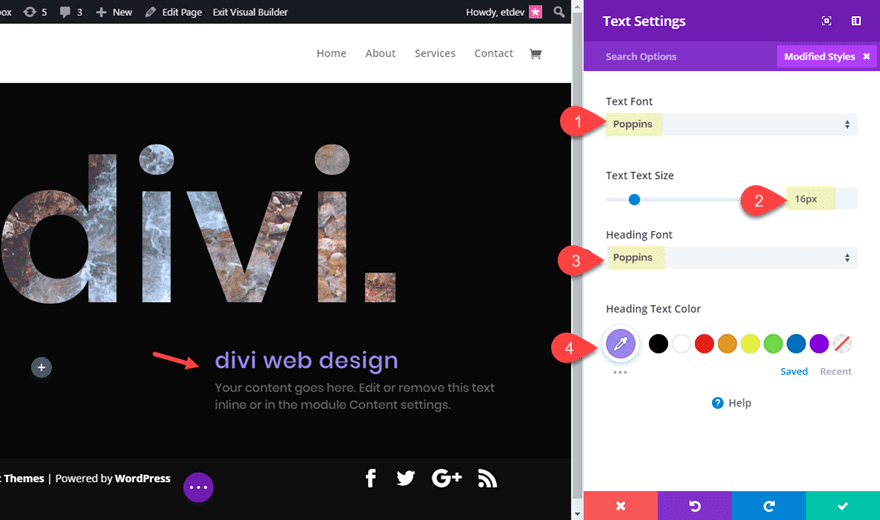
Then update the design settings as follows:
- Text Font: Poppins
- Text Text Size: 16px
- Heading Font: Poppins
- Heading Text Color: #9b89f4
The text font matches the font used for the knockout text image.
That’s it! Now you have a unique header design with a knockout text effect.
Final Result
Here the final design with the true parallax effect set for the image module background image.
Here the final design with the CSS parallax effect set for the image module background image.
Here is what it looks like on mobile.
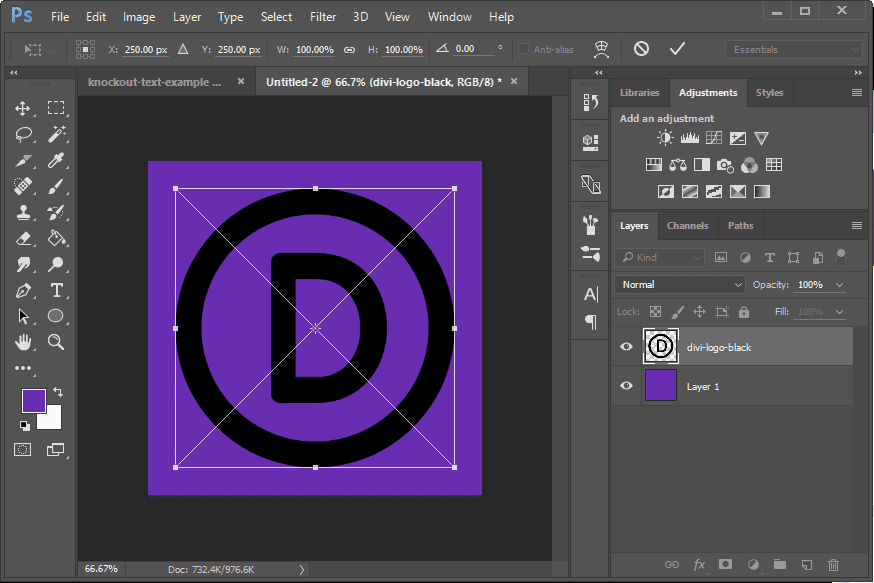
Creating a Knockout logo image in Photoshop
The knockout effect can also be applied to images as well. For example, you can create a knockout logo image. To do this, create a new document in Photoshop. Give you base layer the color of your choice. Then drag your logo into the document to create a new layer. Make sure your logo is a png with a transparent background. Then center the logo within the document.
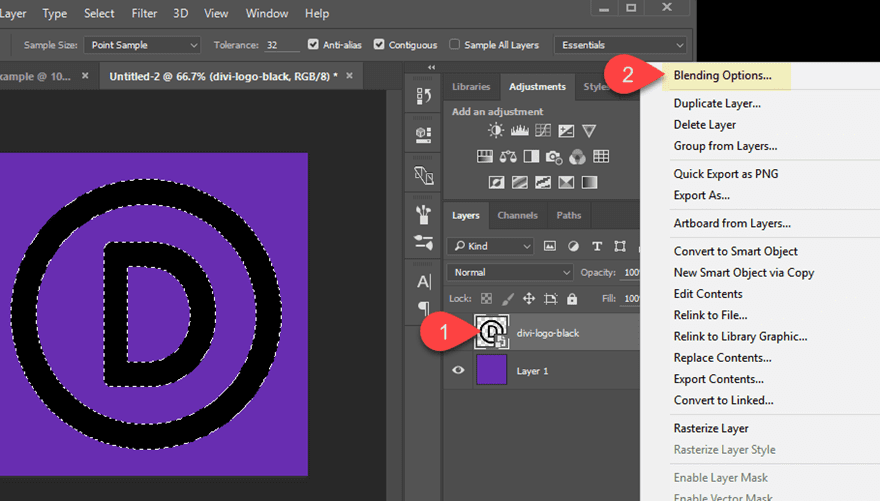
Choose the Magic Wand Tool. Then hold shift and click on the different elements that make up your logo.

With the elements selected, right click on the logo image layer and select “Blending Options”.
Under the Advanced Blending section, find the knockout option and select Shallow from the dropdown menu.
Then set the Fill Opacity option to 0%.
Export the file as a png. Then follow the same steps to add the knockout logo image to you page header using the Divi Builder.
Here is an example of what a knockout logo will look like.
Final Thoughts
Creating a knockout text or logo image is really not that hard to do with a photo editor like Photoshop. And, once you have that knockout image, you can use it to create a unique header for your Divi website. Divi has so many built-in options for adding custom backgrounds that will show through your knockout image transparency. I hope this will help inspire you to create some beautiful designs for your next project.
I look forward to hearing from you in the comments.
Cheers!


I can’t for the life of me think why you’ve shown this, Divi does this using the text and blend modes.
You don’t need to mess about with Photoshop to achieve this, it’s all here: https://www.elegantthemes.com/blog/divi-resources/how-to-recreate-the-color-filters-effects-blend-mode-examples-with-divi-part-2
Simple and very effective! Thank you for sharing this trick
That is a great effect, clever thinking like always. Thanks
Hiii Jason!!
Great Article for Divi Headers , thanks for sharing.
Great & easy tut. 🙂 Thanks ..
It is possible to have the same affect with ‘live’ text created in Divi? I have had a go trying to it but couldn’t work it out.
This may give you a couple of ideas.
https://www.elegantthemes.com/blog/divi-resources/how-to-recreate-the-color-filters-effects-blend-mode-examples-with-divi-part-2
Cheers
Unfortunately I don’t know of a way to do this with live text. Is there something I could maybe explain better?
The knockout effect is looking amazing on my site. It was a great experience but it takes a lot of time to learn. Thanks to you man for that.
Glad to hear you got it working!
Methinks that Jason’s Divi sites don’t look anything like mine 🙂
Thanks for taking the time to share – this is great…
You are most welcome, Chris. Thanks for taking the time to comment.
Nice knockout effect. Unfortunately this will not appear as shown above on mobile since divi disables parallax on mobile devices. Unless there is a workaround that you can share with us
Chris,
Correct. I should have mentioned that in the article. Divi disables parallax on mobile because of the lack of support for parallax on mobile devices. I haven’t looked very hard for a workaround, but you can check out the comments in this article:
https://www.elegantthemes.com/blog/divi-resources/ultimate-guide-to-using-parallax-with-divi
And this one too…
https://stackoverflow.com/questions/23236158/how-to-replicate-background-attachment-fixed-on-ios
Great idea, cool feature! Thanks!
Glad you liked it Edgar!
Hi Jason,
Great Article on making image in Photoshop. But the thing is most people find it hard to find features that help editing any picture in photoshop. Even I could not make any logo for my blog in first attempt.
But with right guide ( as you published one ) one can easily make by following step one by one. I did same and I think I made it this time.
Thanks, Ravinder. Photoshop is powerful but can be difficult. I don’t pretend to know all the magical things it can do. Like most, I rely on tutorials 🙂
can’t we do a text with an overlay image?
Not sure what you mean, kenny. Can you explain? Thanks
nice. thanks for this good post, divi is good.