
Showcasing any app or product on your website doesn’t have to be limited to static images or graphics. With Divi and its scroll effects, you can bring app illustrations to life by adding subtle and effective animation that engage visitors. In this tutorial, we are going to uncover a simple way to create an expanding-layers scroll effect in Divi. All it takes is three images (or screenshots) with the same dimensions and all the built-in magic of the Divi builder.
Let’s jump right in and get started.
Sneak Peek


Download the Layout for FREE
To lay your hands on the designs from this tutorial, you will first need to download it using the button below. To gain access to the download you will need to subscribe to our newsletter by using the form below. As a new subscriber, you will receive even more Divi goodness and a free Divi Layout pack every Monday! If you’re already on the list, simply enter your email address below and click download. You will not be “resubscribed” or receive extra emails.

To import the layout to your page, simply extract the zip file and drag the JSON file into the Divi Builder.
Let’s get to the tutorial, shall we?
What You Need to Get Started

To get started, you will need to do the following:
- If you haven’t yet, install and activate the Divi Theme.
- Create a new page in WordPress and use the Divi Builder to edit the page on the front end (visual builder).
- Choose the option “Build From Scratch”.
After that, you will have a blank canvas to start designing in Divi.
Creating the Expanding Layers Scroll Effect for an Engaging App Illustration in Divi
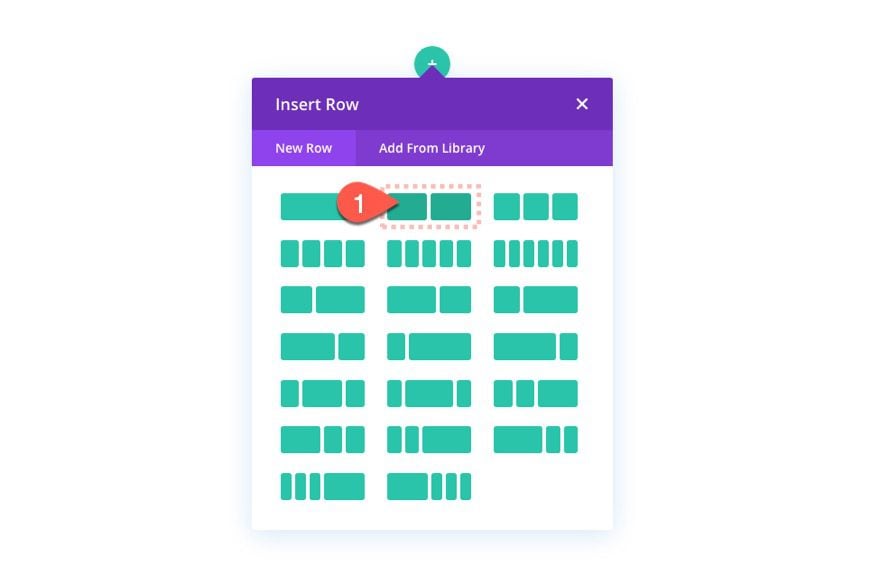
Add Row
Let’s start by adding a 2 column (one-half one-half) row.
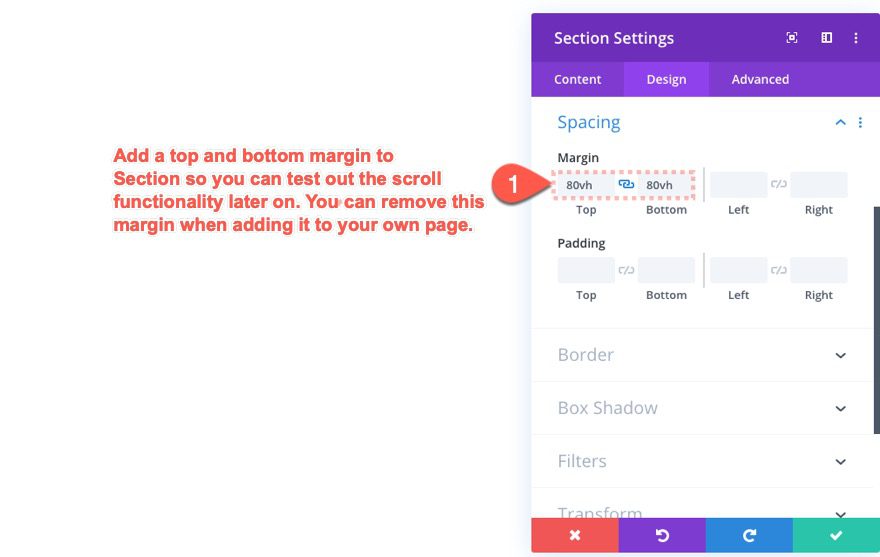
Add Temporary Margin to Section
To be able to preview the scroll effects later, add some top and bottom margin to the section as follows:
- margin: 80vh top, 80vh bottom
Add 3 Images as Layers
We are going to create three images that will serve as three layers of the app illustration. The idea is to use three images (or screenshots) of the app’s features that are the same size/dimensions so that the images will fit perfectly on top of each other. Then we will move the three layers using Divi scroll effects.
Let’s start with the first image.
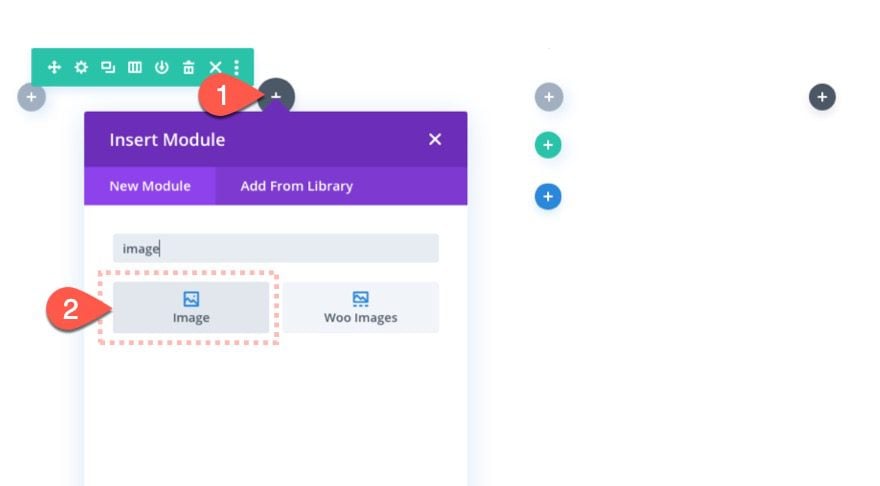
Create Image 1
Add an image module to the left column.
Then upload the first image to the module. Remember to make sure all three images will have the same dimensions. This one is 500px by 1050px.
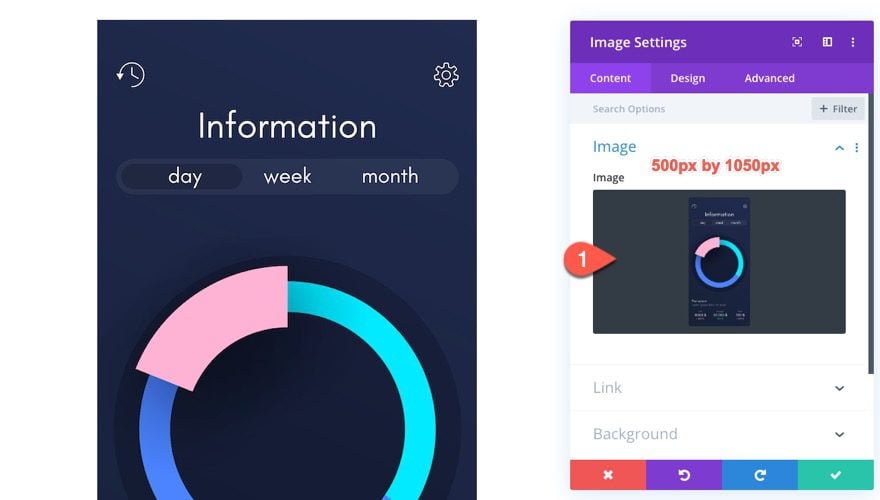
Image 1 Settings
Open the image module settings and update the following:
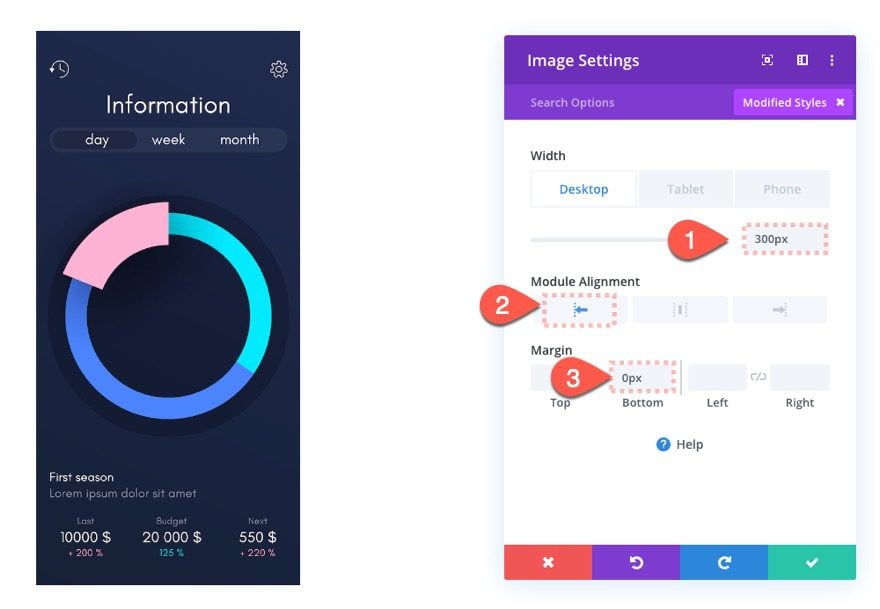
Width and Margin
- Width: 300px (desktop and tablet), 150px (phone)
- Module Alignment: left
- Margin: 0px bottom
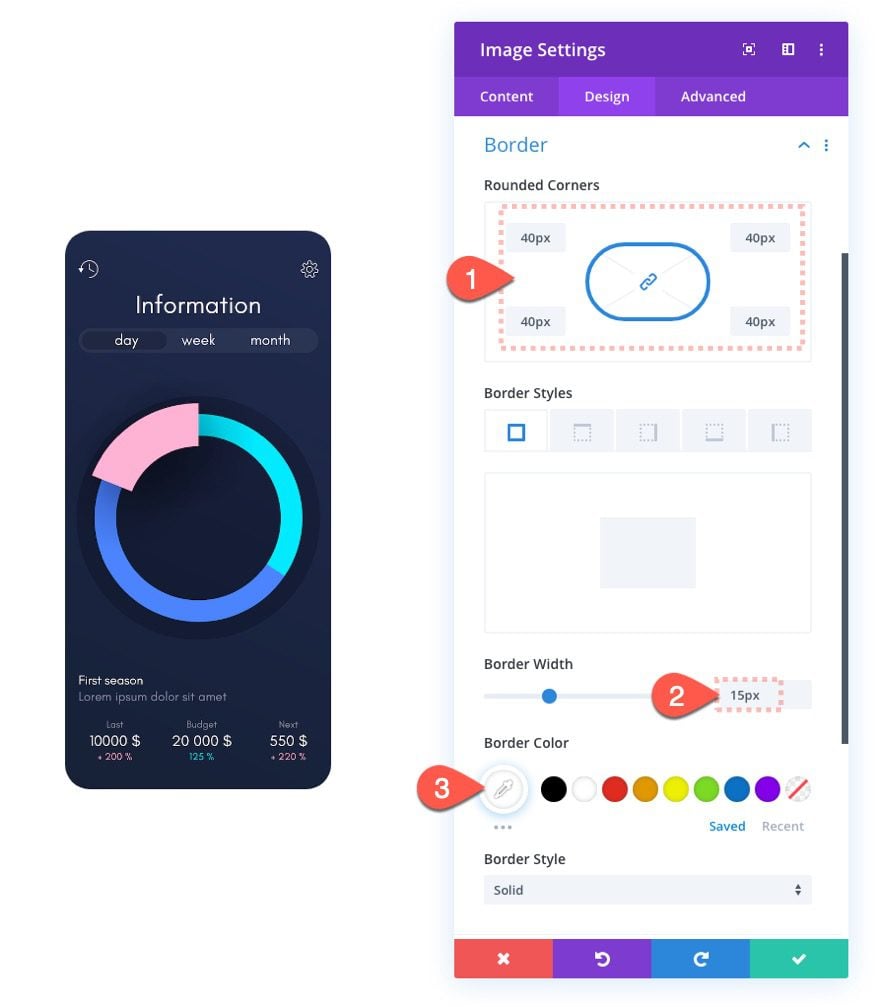
Border
- Rounded Corners: 40px
- Border Width: 15px
- Border Color: #ffffff
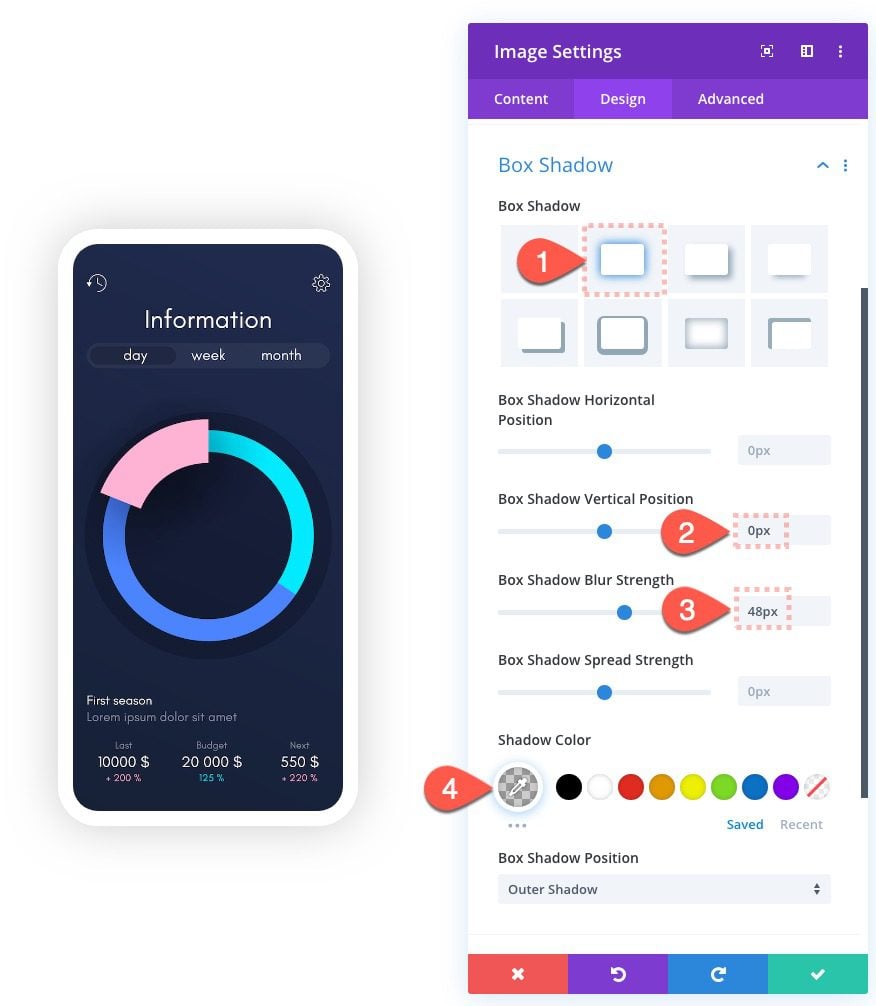
Box Shadow
- Box Shadow: See Screenshot
- Box Shadow Vertical Position: 0px
- Box Shadow Blur Strength: 48px
- Shadow Color: rgba(0,0,0,0.2)
Create Image 2
To create image 2, duplicate image 1.
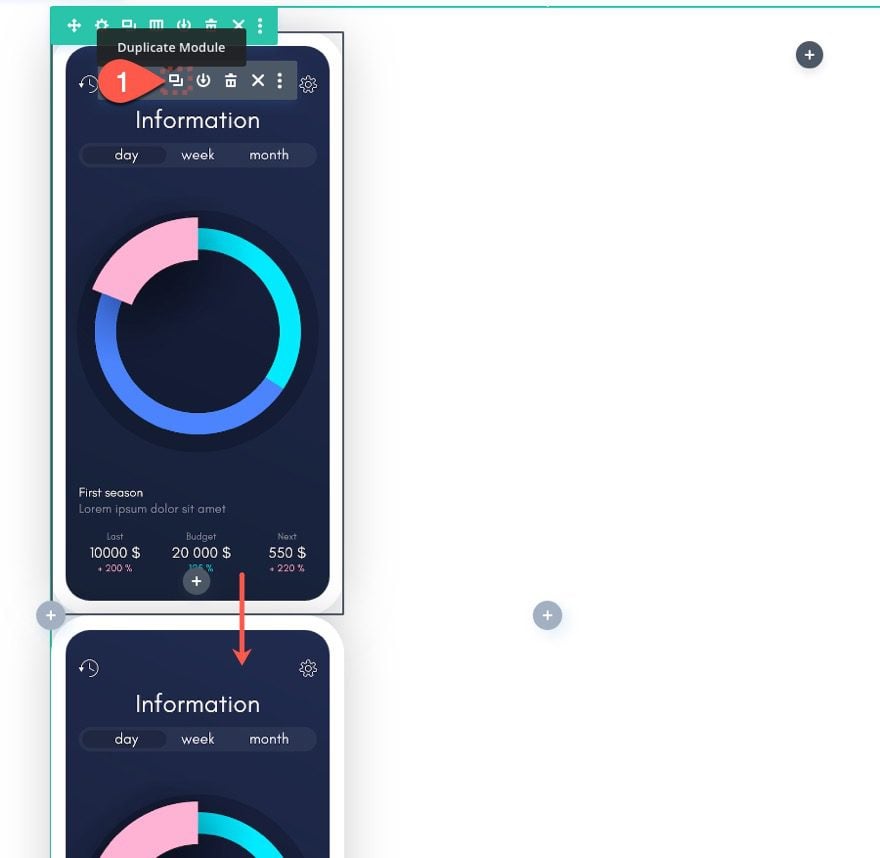
Then update the duplicate image module with a new image that is the same dimensions (500px by 1050px).
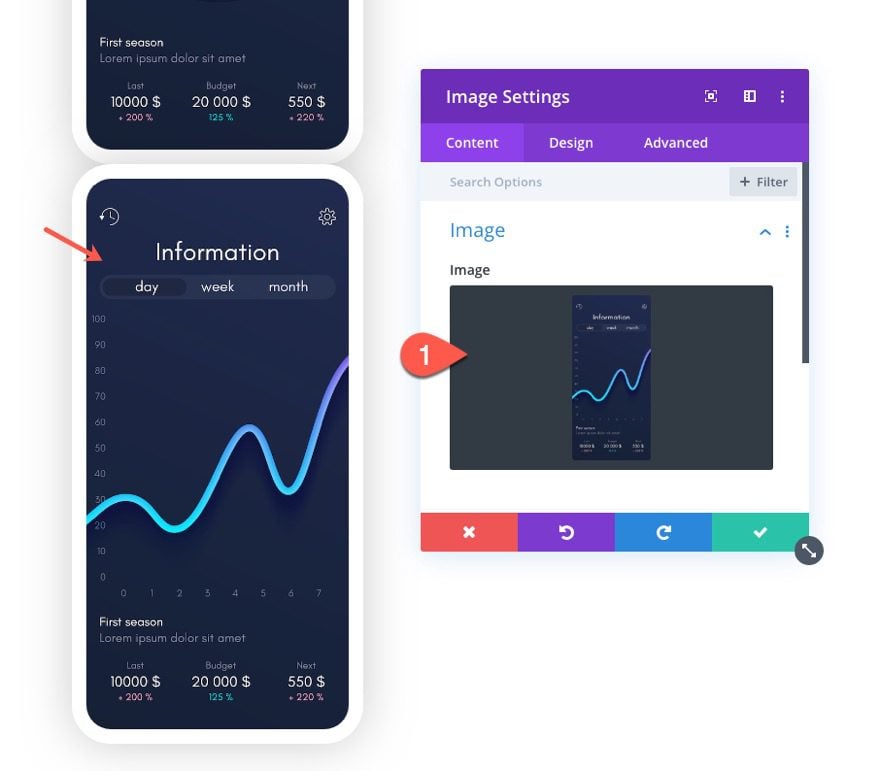
Image 2 Settings
Then take out the border by updating the following:
Border
- Border Width: 0px
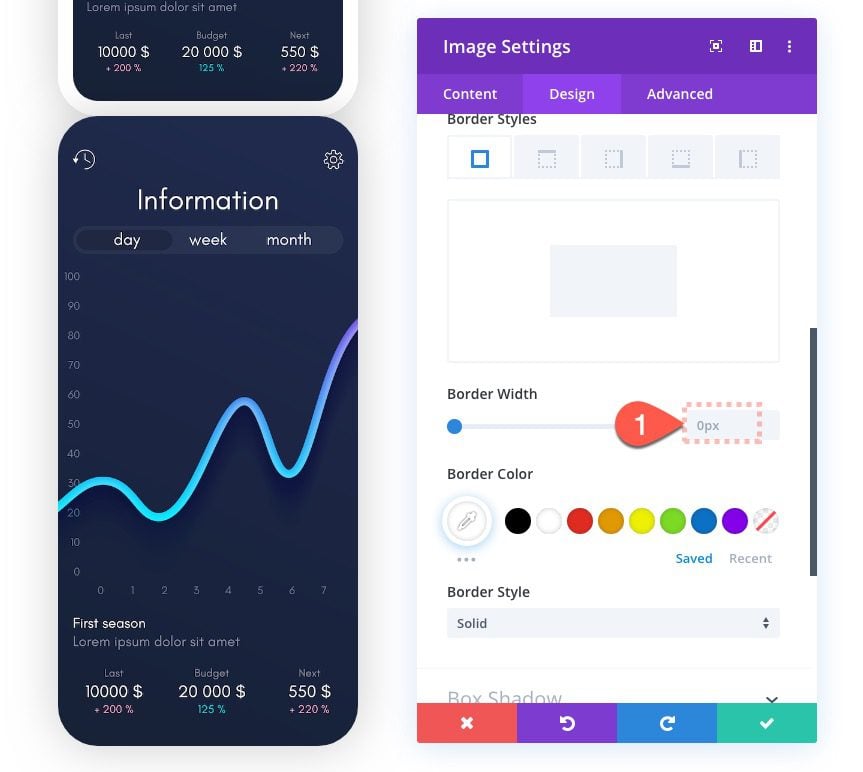
We don’t need a border for this image, but we do need to replace the border-spacing with padding to make sure the images stack seamlessly.
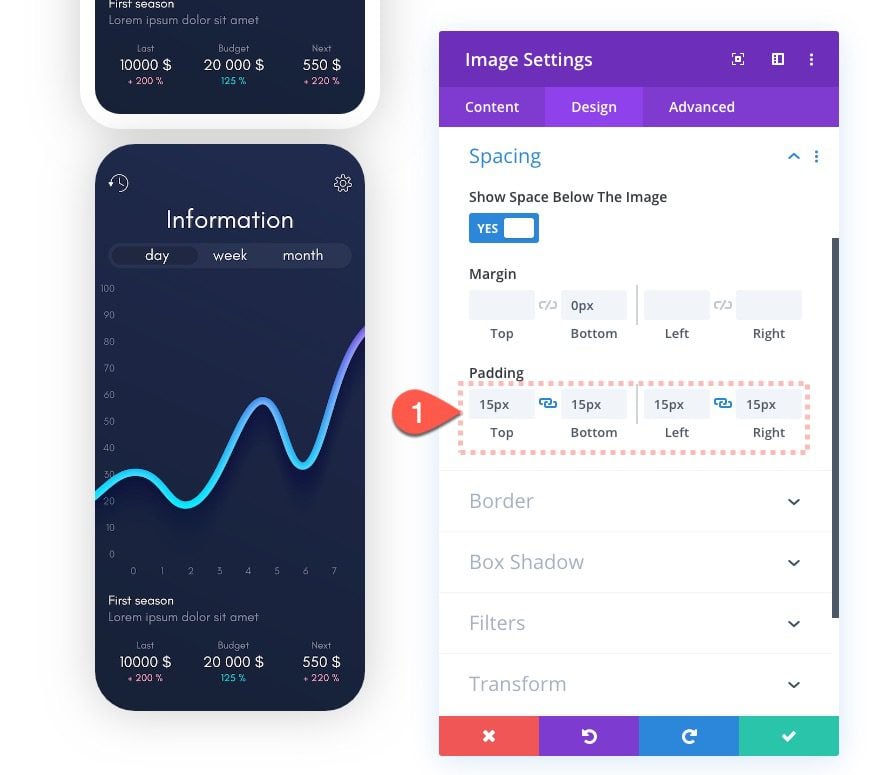
Padding
- Padding: 15px top, 15px bottom, 15px left, 15px right
Position
Then update the position for image 2 to Absolute. This will make the image overlap image 1 perfectly.
- Position: Absolute
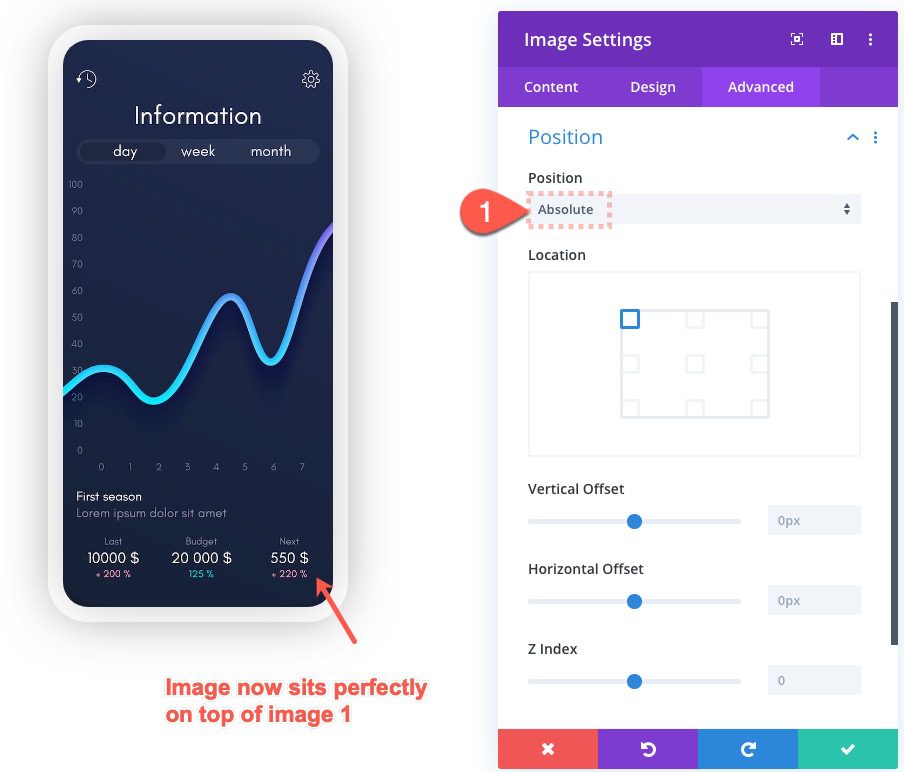
For more info, check out our full post on how to use the absolute position in Divi.
Scroll Effects
Now it is time to add the scroll effect that moves our layer (image 2) when scrolling down the page.
Update the scroll effects as follows:
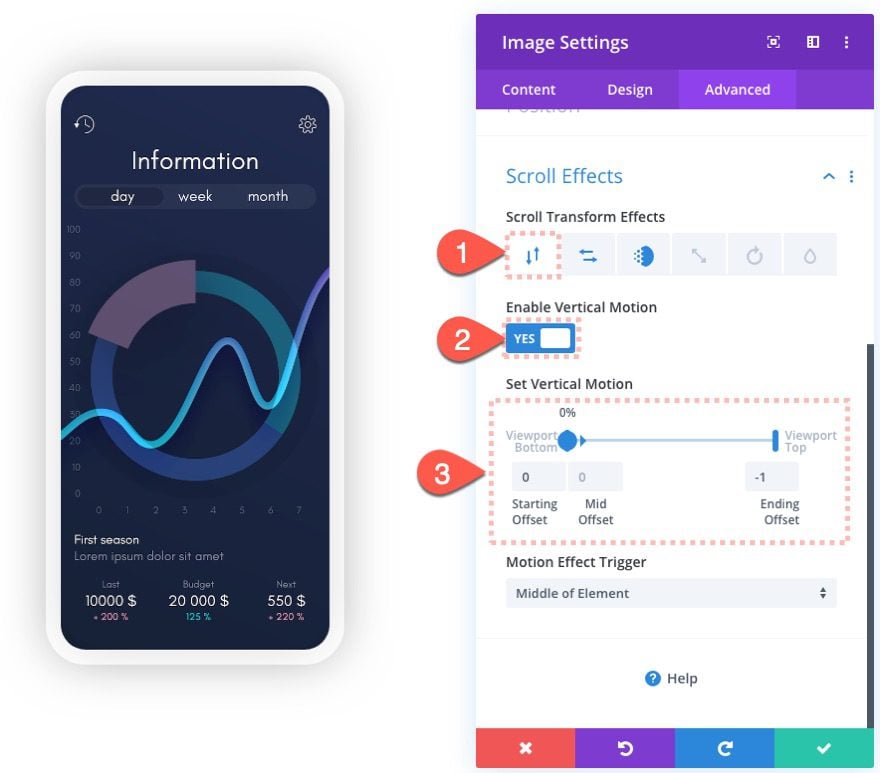
Under the Vertical Motion tab…
- Enable Vertical Motion: YES
- Starting Offset: 0 (at 0% viewport)
- Mid Offset: 0 (at 0% viewport)
- Ending Offset: -1 (at 100% viewport)
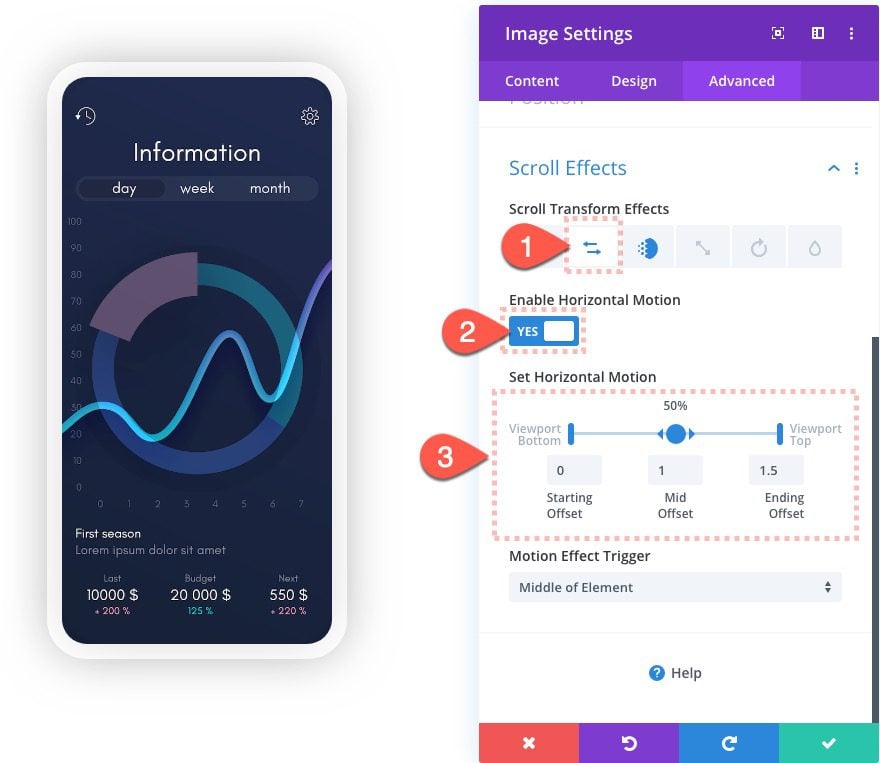
Under the Horizontal Motion tab…
- Enable Horizontal Motion: YES
- Starting Offset: 0 (at 0% viewport)
- Mid Offset: 1 (at 50% viewport)
- Ending Offset: -1.5 (at 100% viewport)
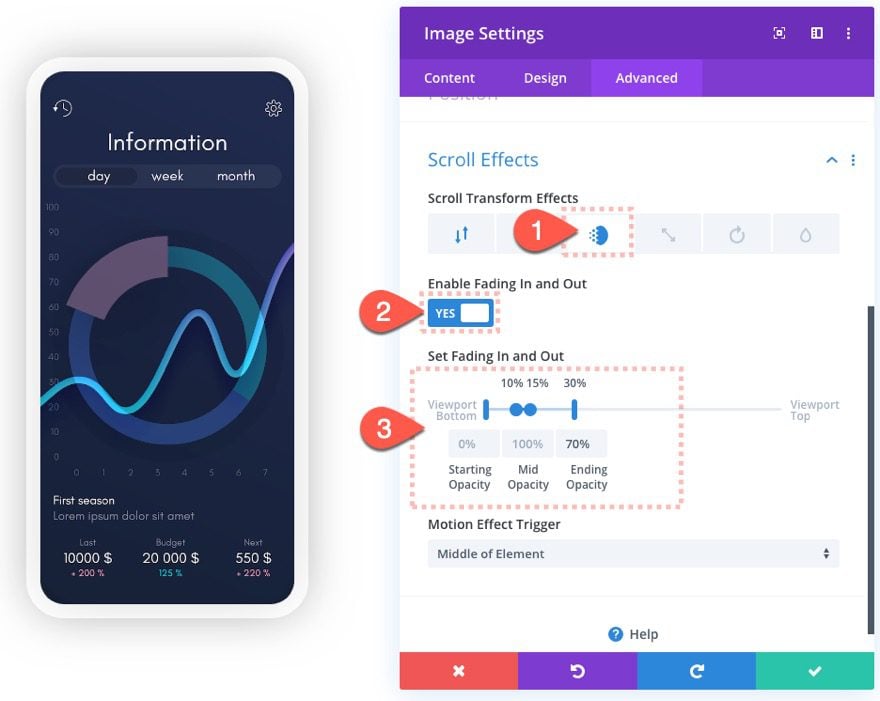
Under the Fading In and Out tab…
- Enable Fading In and Out: YES
- Starting Opacity: 0% (at 0% viewport)
- Mid Opacity: 100% (at 10%-15% viewport)
- Ending Opacity: 70% (at 30% viewport)
Create Image 3
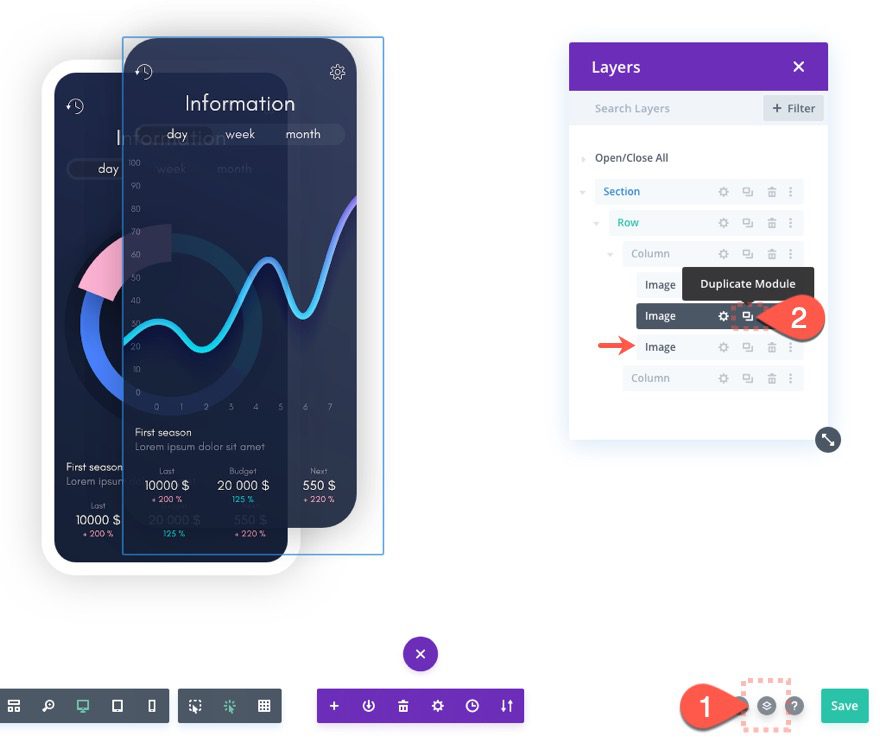
Once all the scroll effects have been added to Image 2, we are ready to create image 3.
Open the settings menu at the bottom of the builder and select the Layers button to deploy the layers popup. Then duplicate image module 2 inside column 1 to create image 3. Using the layers feature for this is helpful since it is difficult to select overlapping modules.
Now open the settings for the duplicate image (image 3) and upload a new image. Make sure to keep it the same dimensions (500px by 1050px).
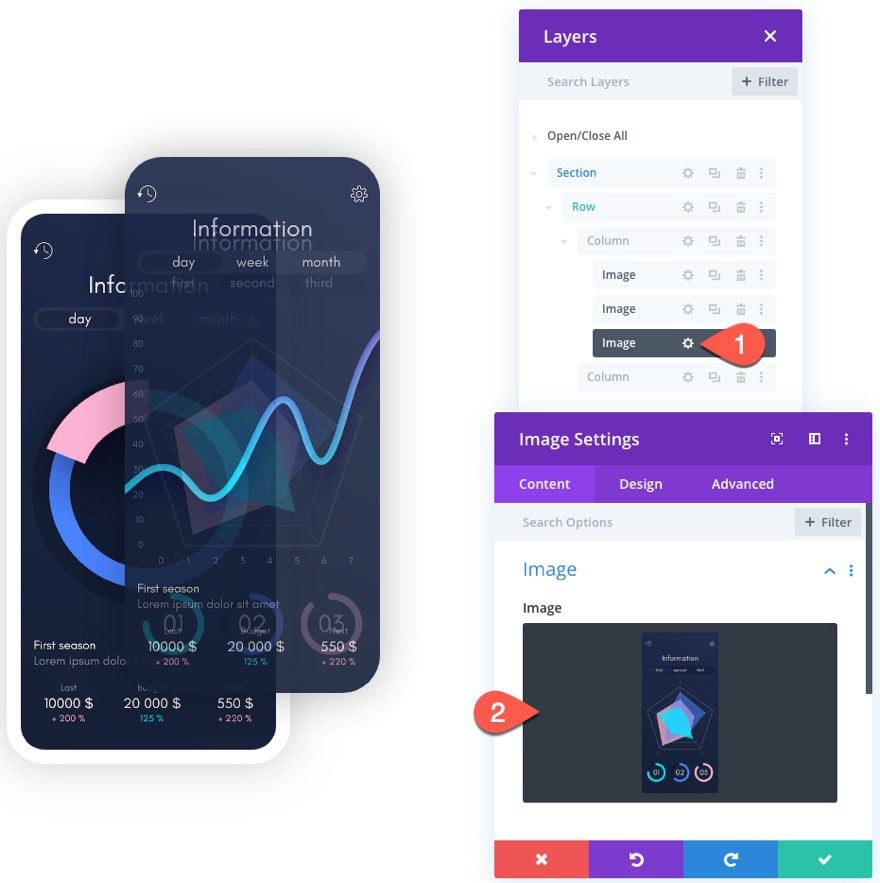
Image 3 Scroll Effects
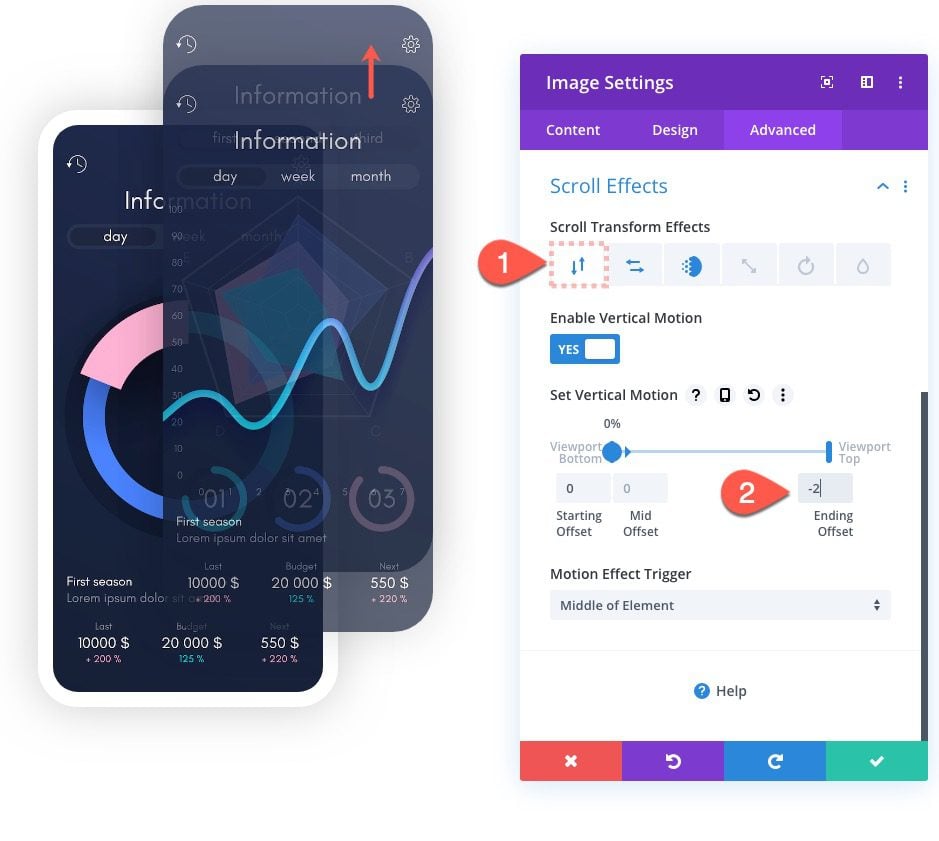
Under the Advanced tab, update the scroll effects options for image 3.
Under Vertical Motion tab, update the vertical motion offset as follows:
- Ending Offset: -2 (at 100% viewport)
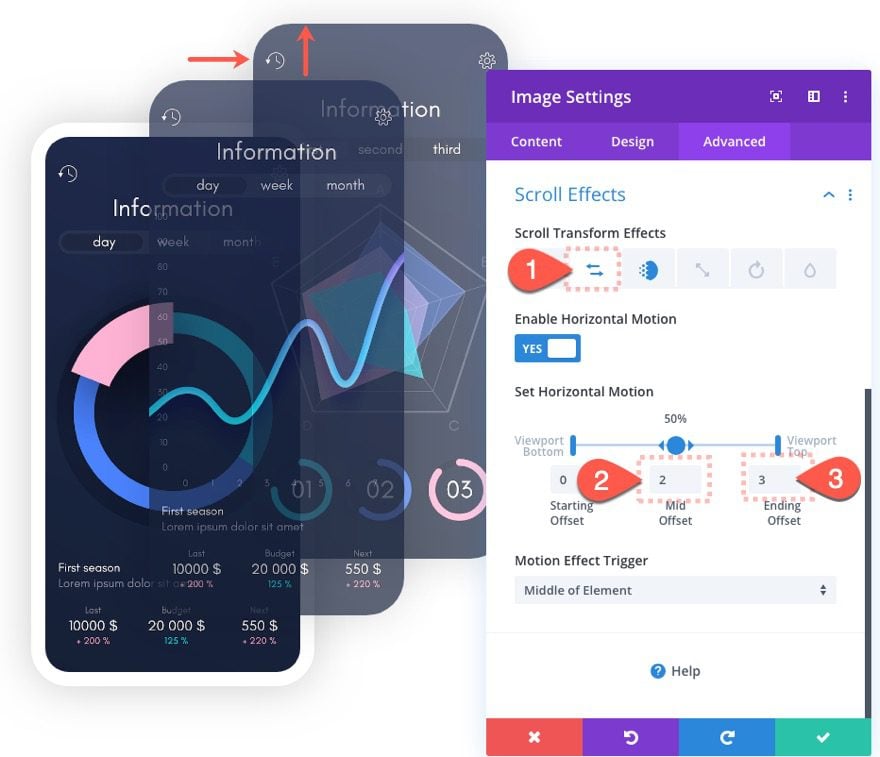
Under the Horizontal Motion tab, update the Horizontal Motion as follows:
- Mid Offset: 2 (at 50% viewport)
- Ending Offset: 3 (at 100% viewport)
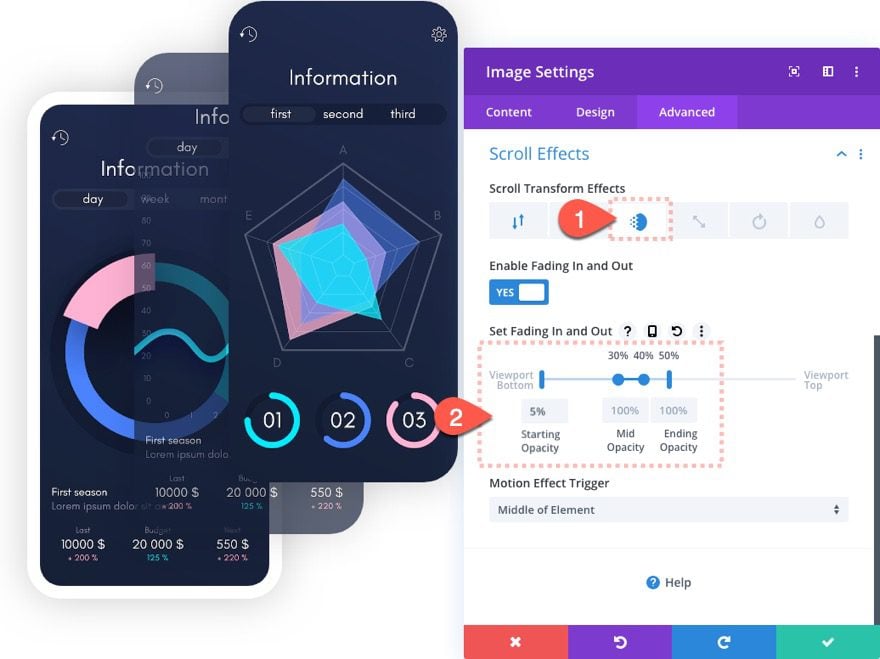
Under the Fading In and Out tab, update the Fading In and Out settings as follows:
- Starting Opacity: 5% (at 0% viewport)
- Mid Opacity: 100% (at 30%-40% viewport)
- Ending Opacity: 100% (at 50% viewport)
Result
Check out the result so far.

Add Transform Skew to Column 1
This is a great looking effect as it stands, but we are going to skew the column to create more of a 3D effect.
Open the settings for column 1 and add a transform skew as follows:
Transform Skew (X and Y axis): 8deg
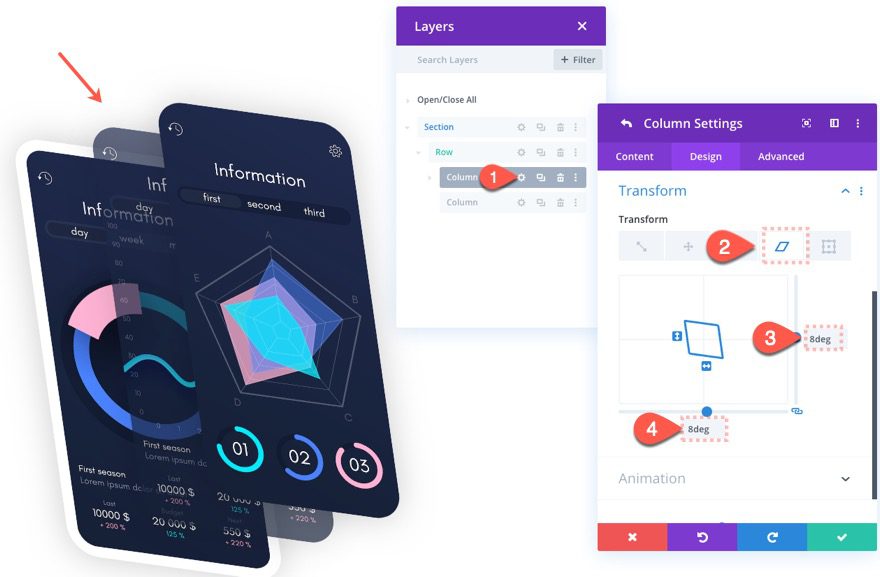
This will create a nice 3d effect on the expanding layers.
That’s it!
Optional: Add CTA to Column 2
Now we can add any title and button (or any CTA) to the right column with some complimentary scroll effects. Check out the free download of this layout above to get the same CTA in this illustration.
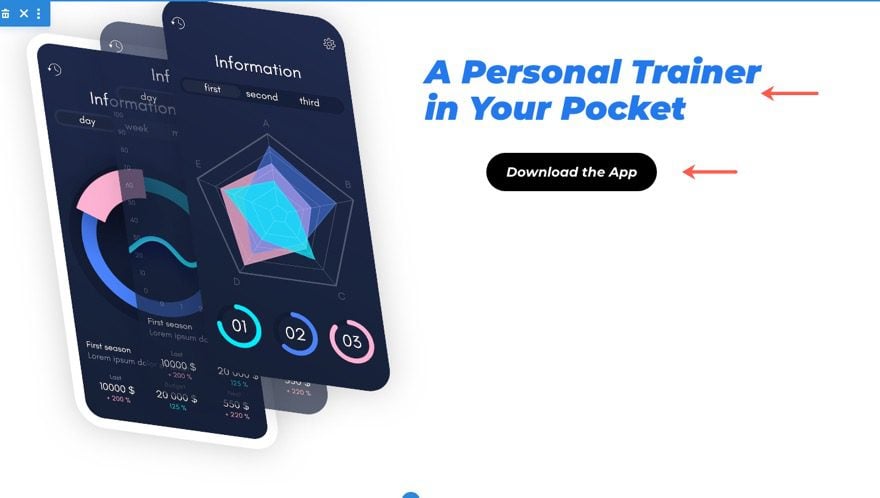
Final Result
Here is the final result.
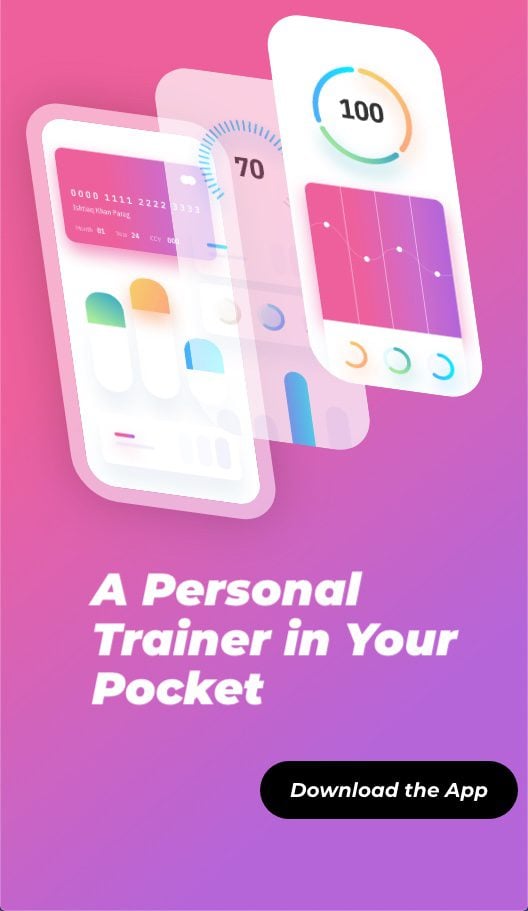
And here is how it stacks on tablet and phone.


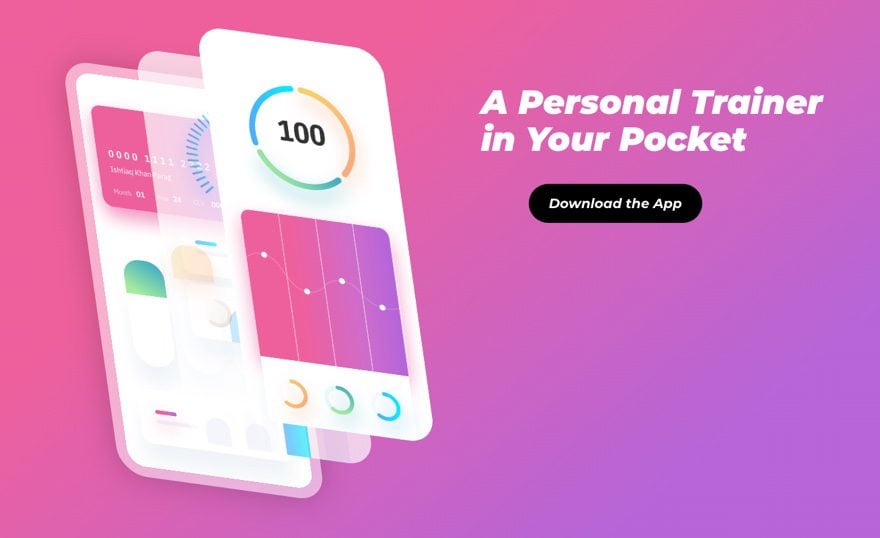
Using Images from a Divi Layout Pack
The images used from this tutorial are mock images from Shutterstock and are also featured on our scroll effects demo page.
To change up the design to fit your own needs, you can use images from our free layout packs or create your own screenshots. Here is an example design using the images from the Mobile App Layout Pack. I’ve also added a gradient background to compliment the light images used for the expanding layers.
In a few minutes, we have a completely different design!
Final Thoughts
The expanding layers scroll effect is an elegant solution for showcasing apps or products without having to resort to more complicated CSS techniques or Photo Editing. And, you can use this same technique to illustrate just about anything. I love how easy it is to switch out the images for your own and skew the entire collection of images/layers with one simple option in Divi. Hopefully, this gives you some inspiration that will empower you to create amazing Divi designs.
I look forward to hearing from you in the comments.
Cheers!


I can’t keep the layers aligned on the tablet and mobile version… A problem with “absolute” or something else?
Sorry, I realize I didn’t clean this up on mobile as much as I needed to. I would check on an actual live page on a phone. The Divi builder seems to have trouble with the tablet/phone view of this design. Also, make sure to add overflow hidden to the section so the elements don’t push the browser window to the right on scroll. You can also cut the offset values in half for all of the scroll effects on tablet/phone to decrease the distance each layer moves. Hope that helps.
that was very helpful Jason champagne
Excellent. good to know, I love this!
this is the unique information you have shared, thanks for that.
Great! You’re welcome.
This is awesome!