
A promo video is a wonderful marketing tool for promoting your products and services to all those visitors who would rather just watch a video than explore your page for information. And, if you are confident that your video will help boost conversions, it is a good idea to keep the video available to users as much as possible. With this in mind, a sticky promo video (a video that stays fixed at the top of the page) could be a valuable asset to your website.
In this tutorial, we are going to show you how to create a sticky promo video with a show/hide toggle in Divi. The idea is to show the full-size version of the video initially above the fold. Then as the user scrolls down the page, the video sticks to the top of the page for easy access and/or viewing while the user explores the rest of the content on the page. Of course, this can be a bit intrusive for some visitors. So we will also show you how to add a toggle button to give users the ability to show or hide the video whenever they want.
Let’s get started!
- 1 Sneak Peek
- 2 Download the Layout for FREE
- 3 Download For Free
- 4 What You Need to Get Started
- 5 How to Create a Sticky Promo Video with a Show/Hide Toggle for Your Sales Page
- 6 Final Result
- 7 Easily Add Additional Modules to the Sticky Column to Compliment the Video
- 8 Easily Add Your Own Custom Video Options with this Sticky Video Layout
- 9 Easily Change the Column Structures as Well!
- 10 Issue with YouTube videos/embeds Using the Divi Overlay Image Option
- 11 Final Thoughts
Sneak Peek
Here is a quick look at the design we’ll build in this tutorial.
This the sticky video without the toggle.
Here is the same sticky video with the toggle button.
Here is a closer look at the toggle functionality.
And here is what it looks like on mobile.
Download the Layout for FREE
To lay your hands on the designs from this tutorial, you will first need to download it using the button below. To gain access to the download you will need to subscribe to our newsletter by using the form below. As a new subscriber, you will receive even more Divi goodness and a free Divi Layout pack every Monday! If you’re already on the list, simply enter your email address below and click download. You will not be “resubscribed” or receive extra emails.

To import the section layout to your Divi Library, navigate to the Divi Library.
Click the Import button.
In the portability popup, select the import tab and choose the download file from your computer.
Then click the import button.

Once done, the section layout will be available in the Divi Builder.
Let’s get to the tutorial, shall we?
What You Need to Get Started
To get started, you will need to do the following:
- If you haven’t yet, install and activate the Divi Theme.
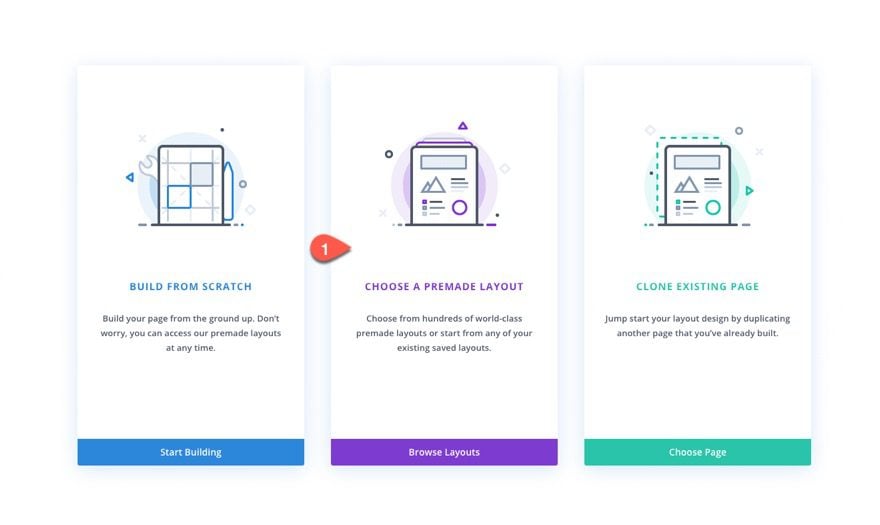
- Create a new page in WordPress and use the Divi Builder to edit the page on the front end (visual builder).
- Select the option “Choose a Premade Layout”.
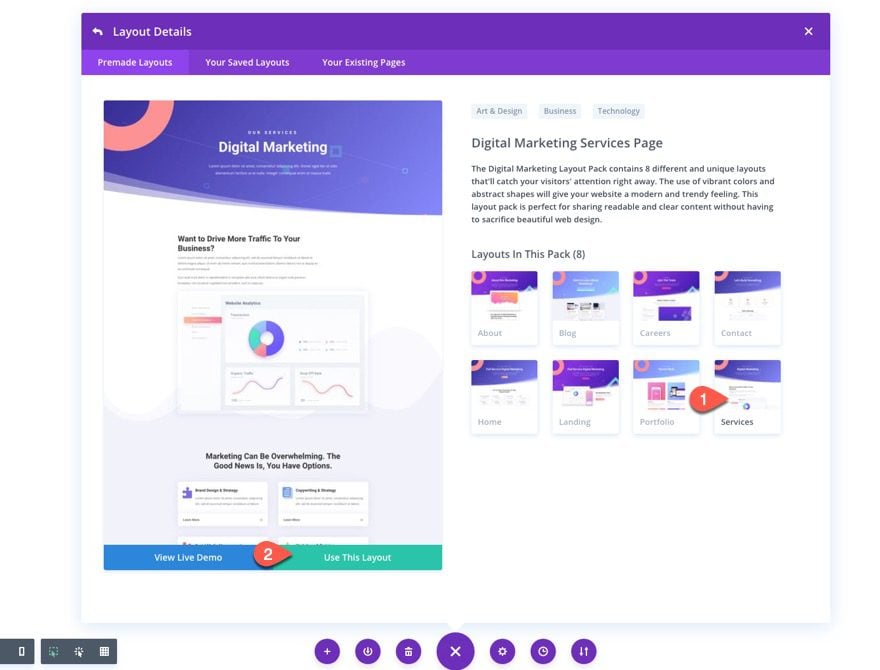
- Upload the Digital Marketing Services Page Layout.
How to Create a Sticky Promo Video with a Show/Hide Toggle for Your Sales Page
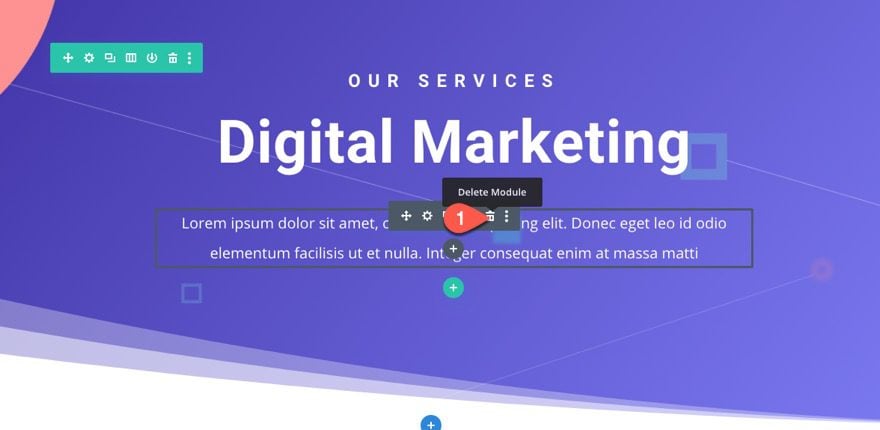
Adding the Row for the Sticky Video
To get started, we are going to delete the second text module in the row of the first/top section of the layout.
Under the existing row of the top section, add a new one-column row.
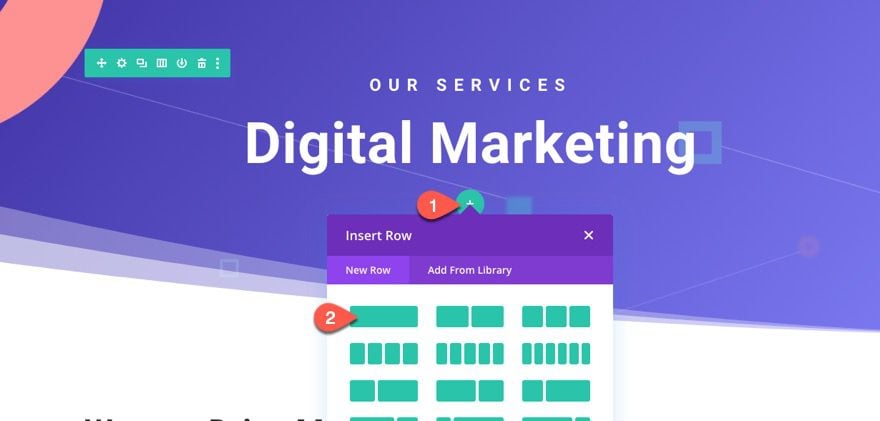
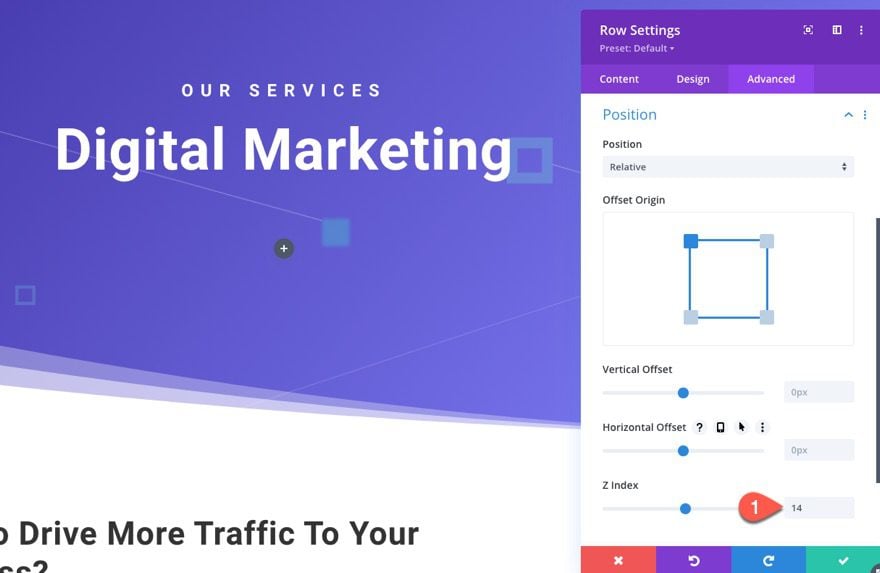
Open the row settings for the new row and, under the Advanced tab, update the Z Index as follows:
- Z Index: 14
This will make sure the video we add to the row will stay above the other content on the page when stuck during page scroll.
Adding the Video
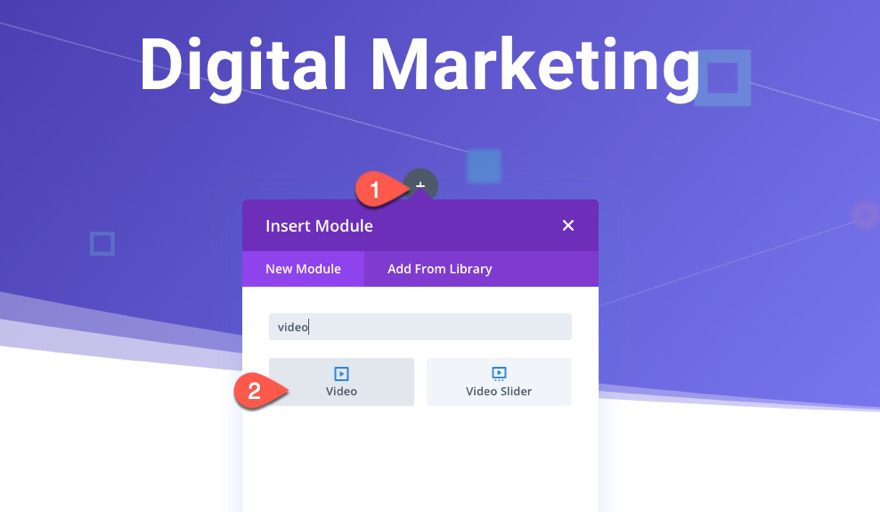
Inside the column of the row, add a new video module.
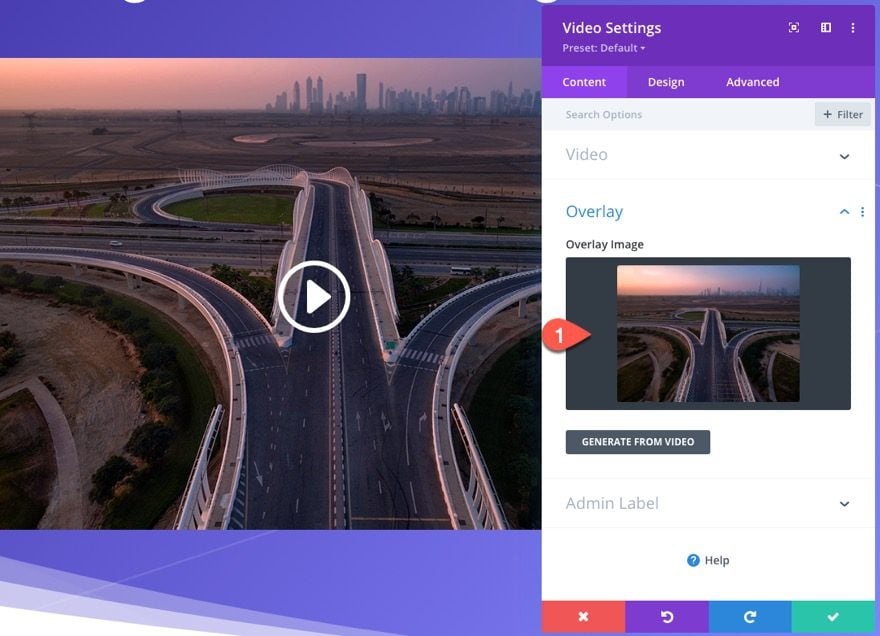
Open the video settings and upload the mp4 and webm formats for the video of your choice.
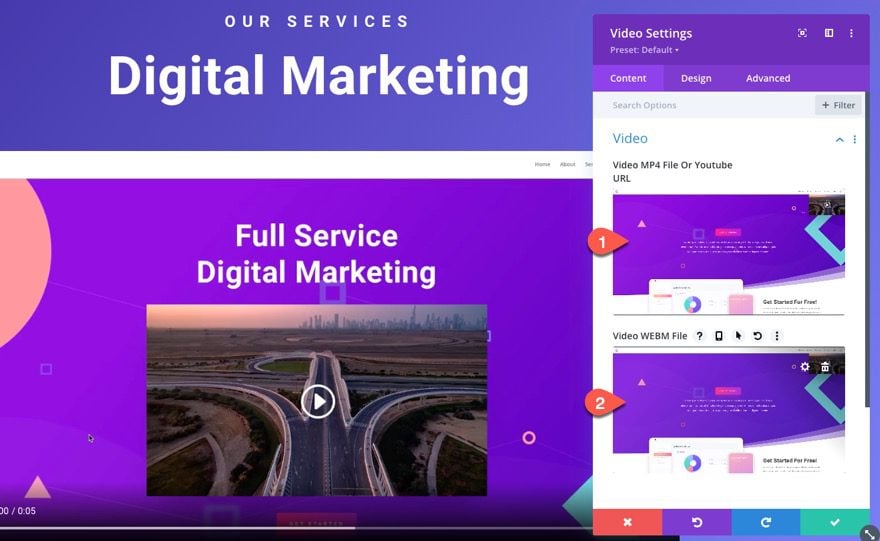
If you want, add an overlay image to the video.
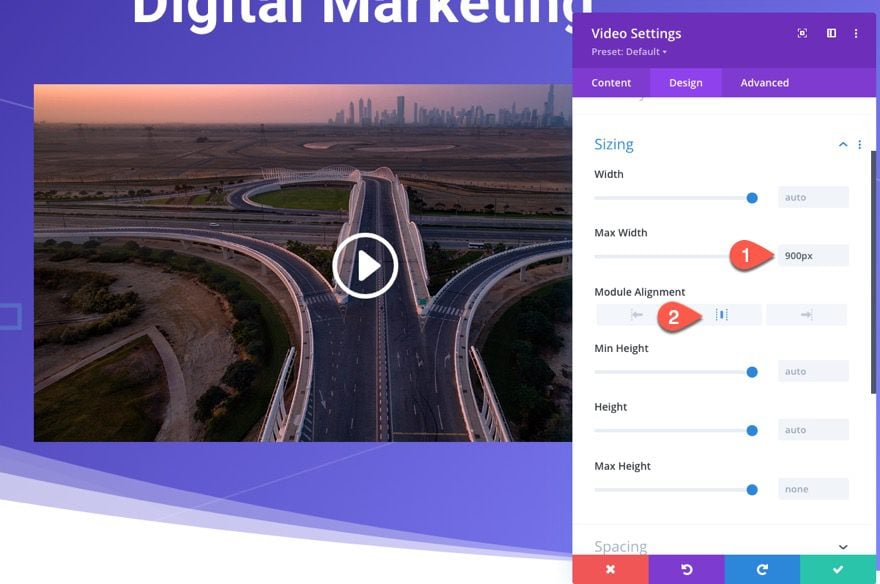
Under the Design tab, update the following sizing options:
- Max Width: 900px
- Module Alignment: center
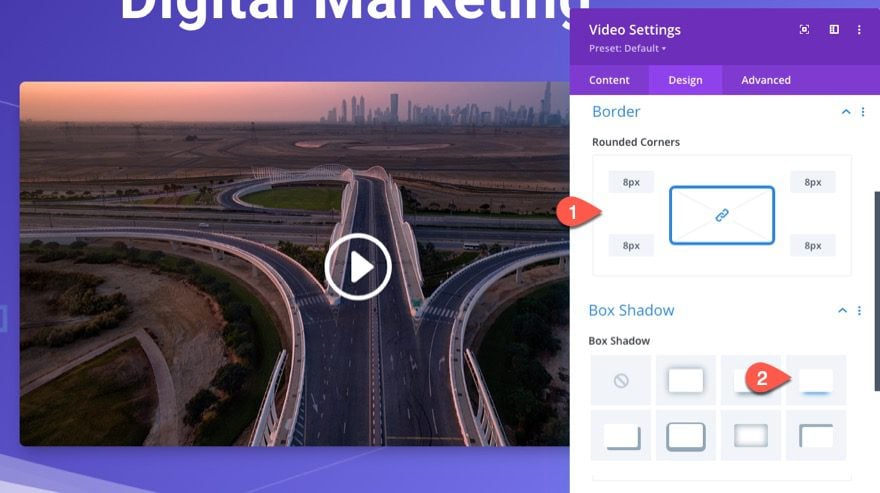
- Rounded Corners: 8px
- Box Shadow: see screenshot
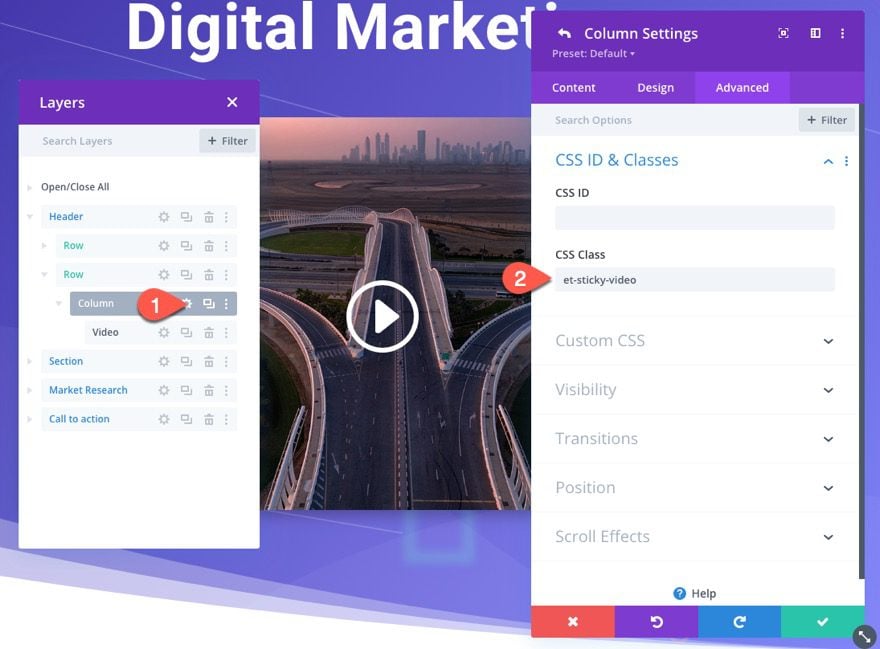
Making the Column Sticky
Open the settings for the column containing the video and add the following CSS Class under the Advanced tab:
- CSS Class: et-sticky-video
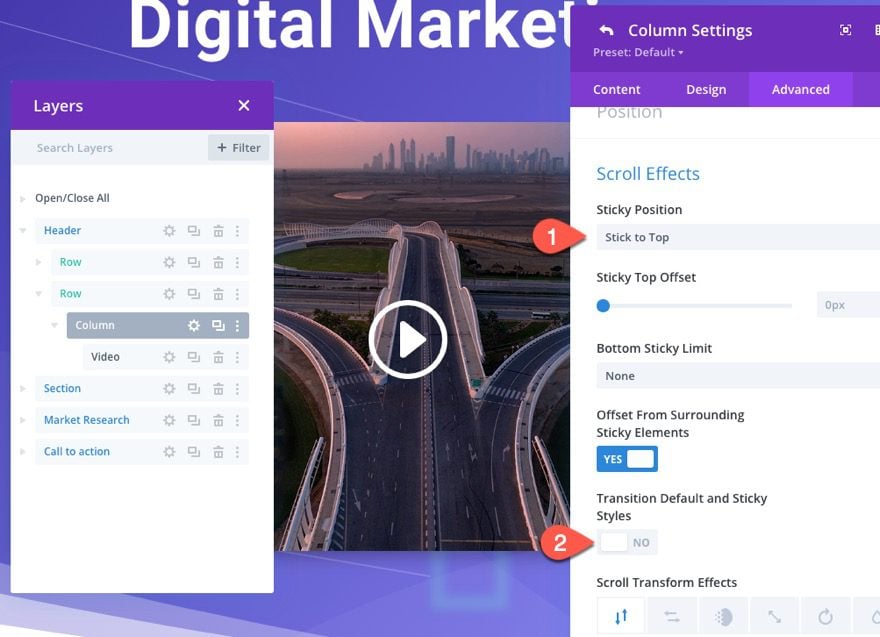
Then update the stick position as follows:
- Sticky Position: Stick to Top
- Transition Default and Sticky Styles: NO
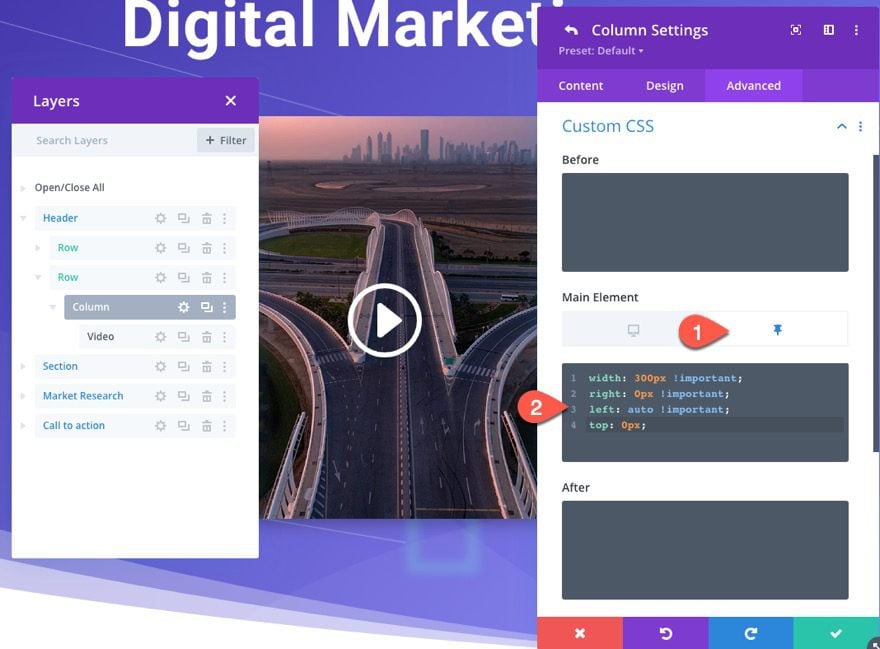
Now that the sticky position is in effect, add the following custom CSS to the Main Element for the Sticky State:
width: 300px !important;
right: 0px !important;
left: auto !important;
top: 0px;
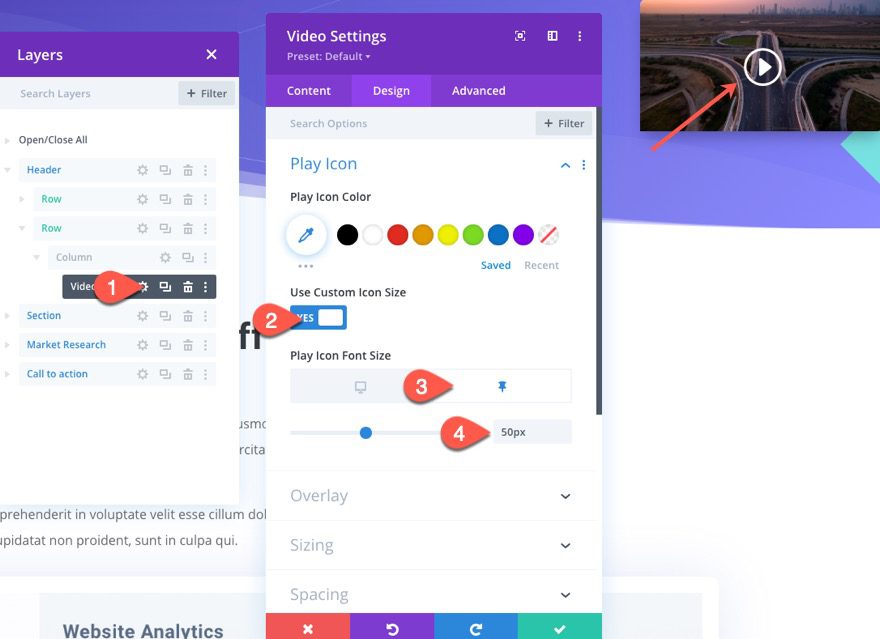
Update Video Play Icon Size in Sticky State
Next, open the video settings again and update the play icon font size in the sticky state as follows:
- Use Custom Icon Size: YES
- Play Icon Font Size (sticky): 50px
Result so far
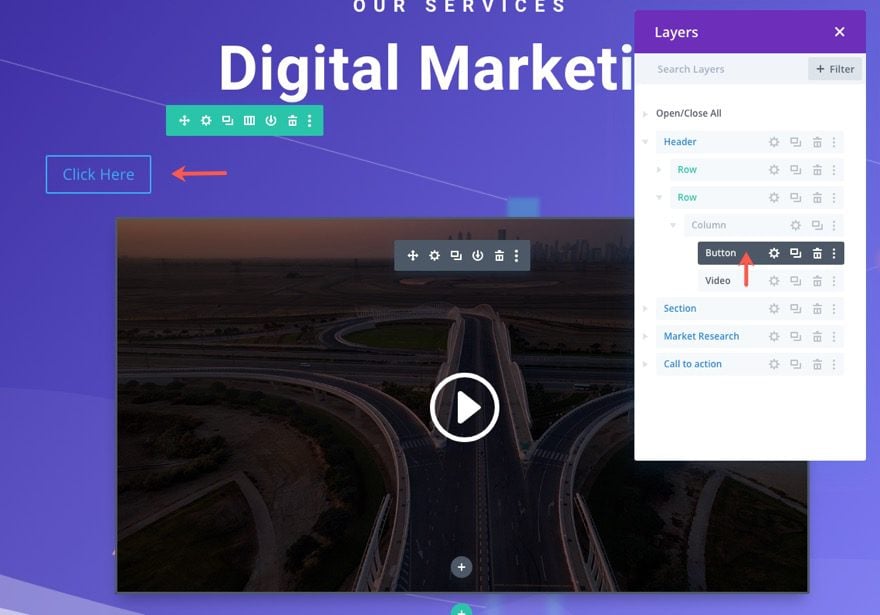
To create the sticky video toggle button, create a new button module under the video module.
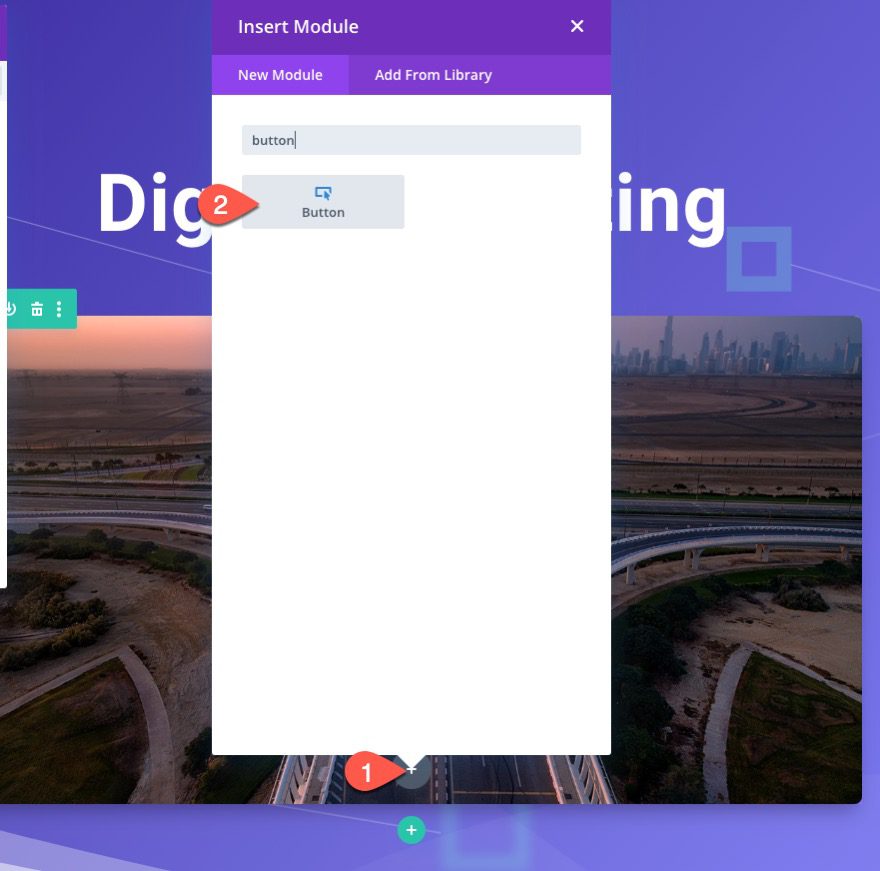
Then move the button above the video module.
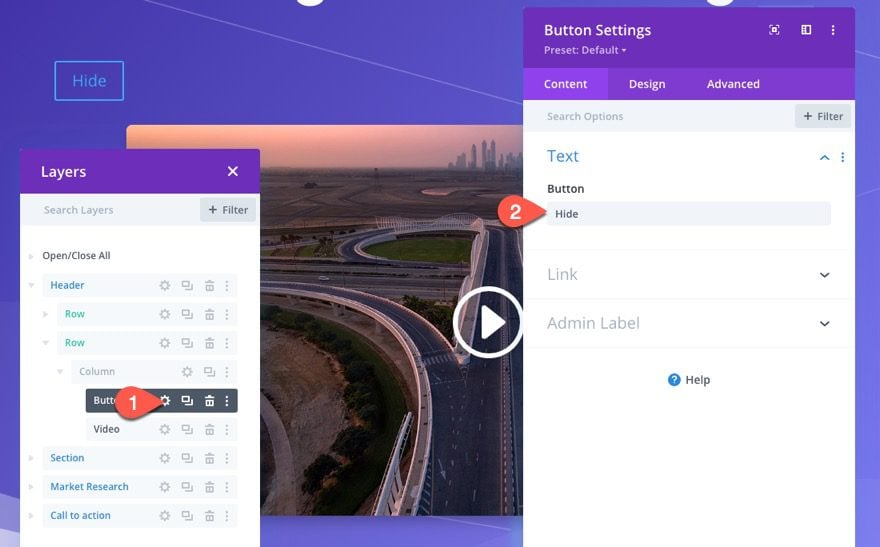
Open the button settings and update the button text as follows:
- Button Text: Hide
(NOTE: This text will be replaced/toggled with the word “Show” when clicking the button when we add our code later.)
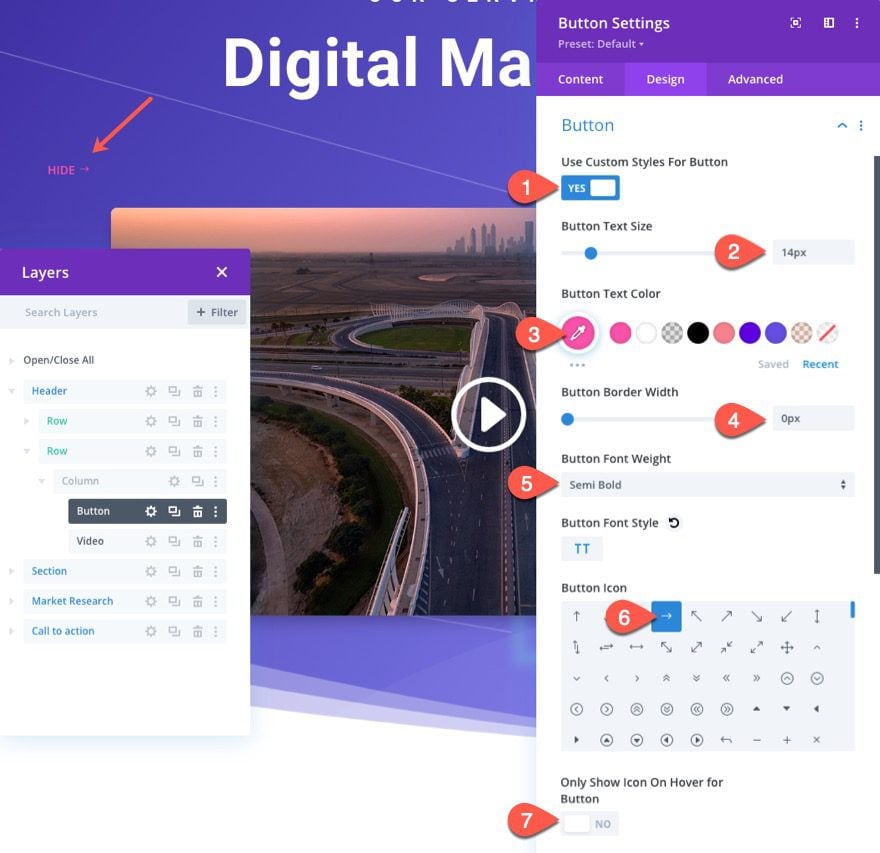
Under the design tab, update the following:
- Use custom styles for button: YES
- Button Text Styles: 14px
- Button Text Color: #fa50a9
- Button Font Weight: Semi Bold
- Button Font Style: TT
- Button Icon: right arrow
- Only Show Icon On Hover for Button: NO
(NOTE: the button icon you choose will be rotated 180 degrees when clicking the button when we add the code layout for a more intuitive better user experience.
Update the spacing for the button as well:
- Padding: 0.5em top, 0.5em bottom, 1em left, 1.7em right

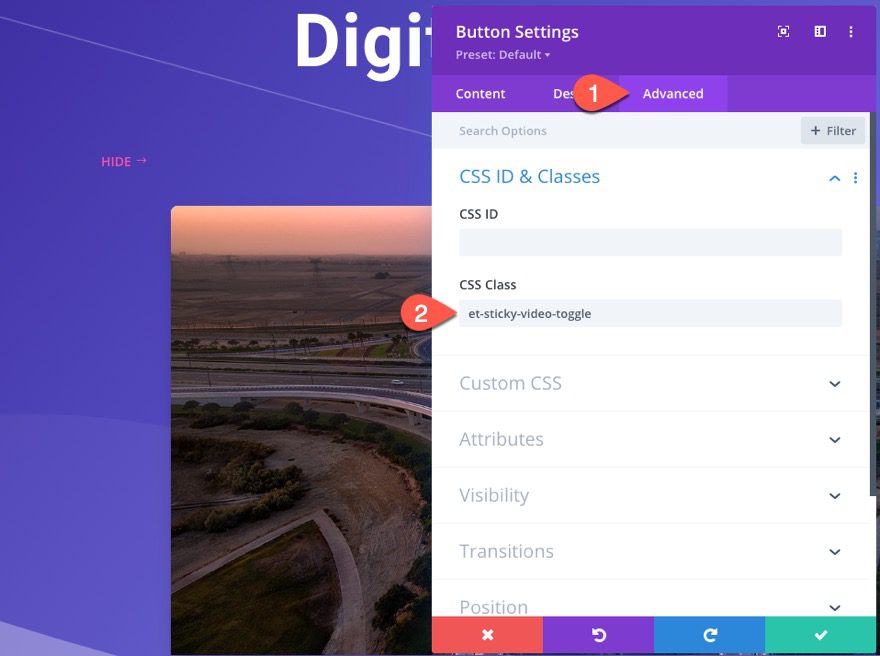
Under the Advanced tab, add the following CSS Class to the button:
- CSS Class: et-sticky-video-toggle
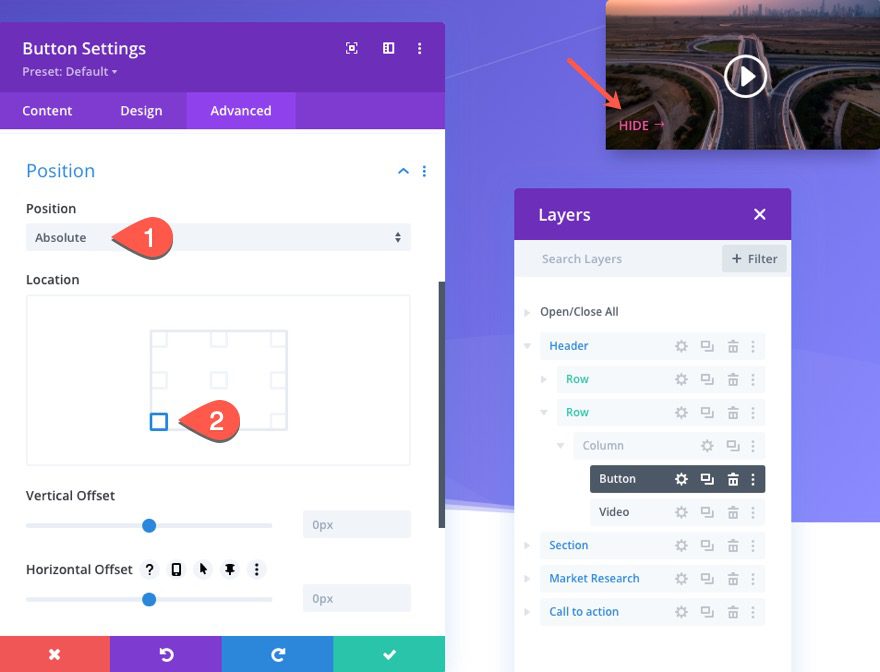
Under the Advanced tab, update the position option:
- Position: Absolute
- Location: bottom left
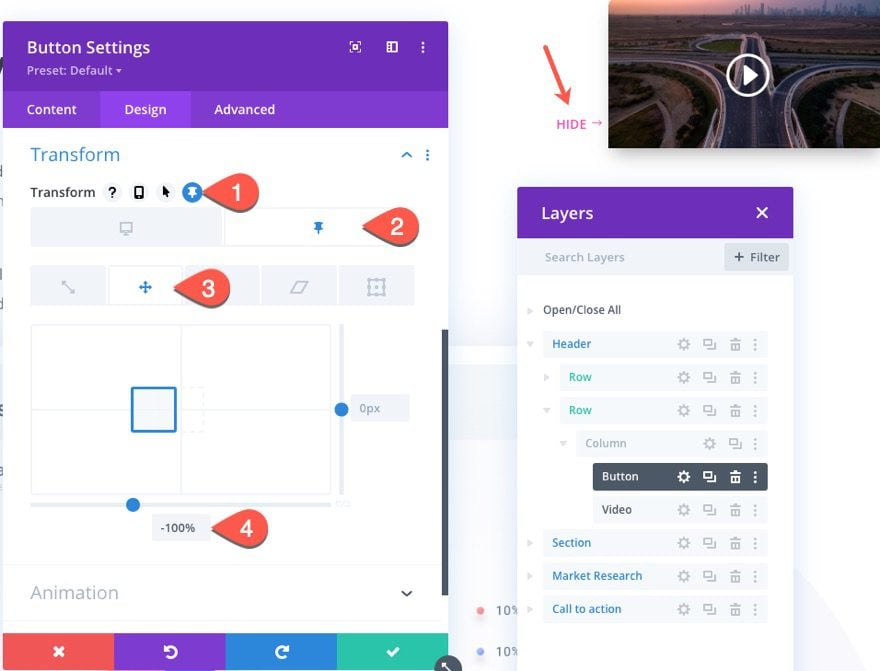
Now move the button outside of the column/video to the left by updating the transform translate option in the sticky state as follows:
- Transform Translate X Axis (sticky): -100%
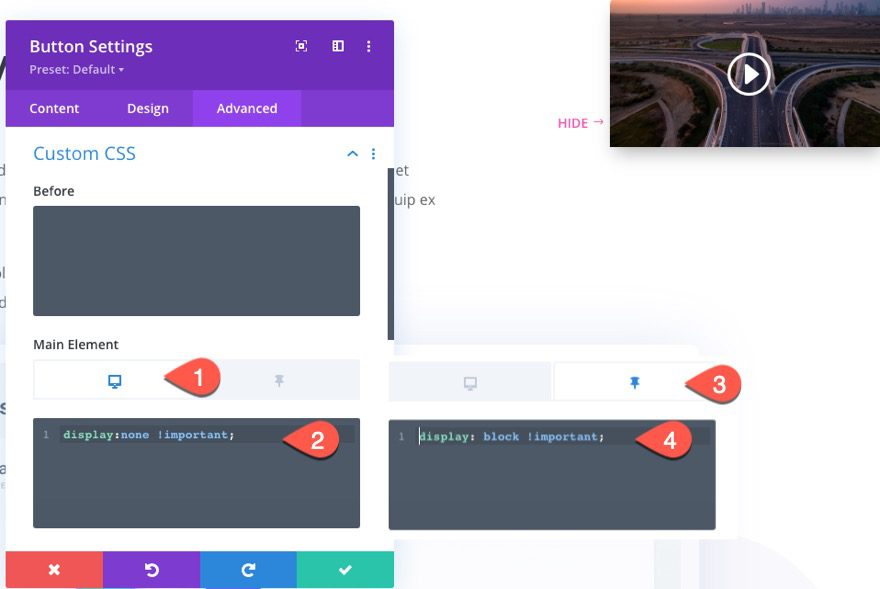
To finish off the design of the button toggle, we need to hide the button until it reaches the sticky state. To do this, update the custom CSS to the main element for the desktop and sticky state as follows:
For the Main Element on Desktop…
display:none !important;
For the Main Element on Sticky…
display:block !important;
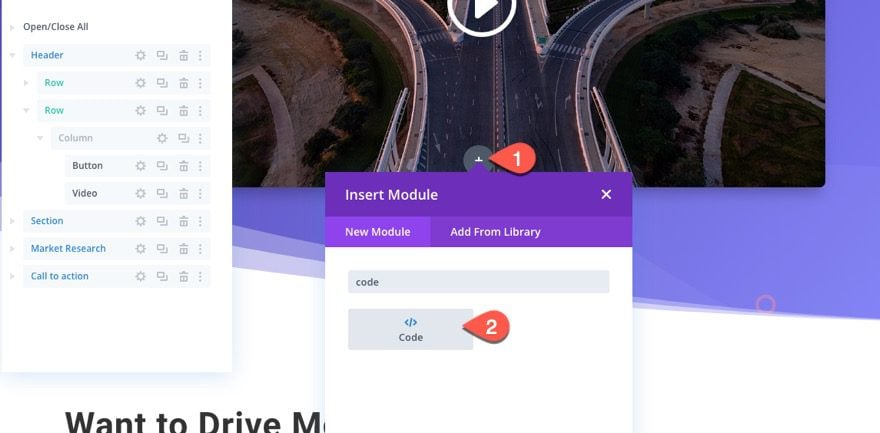
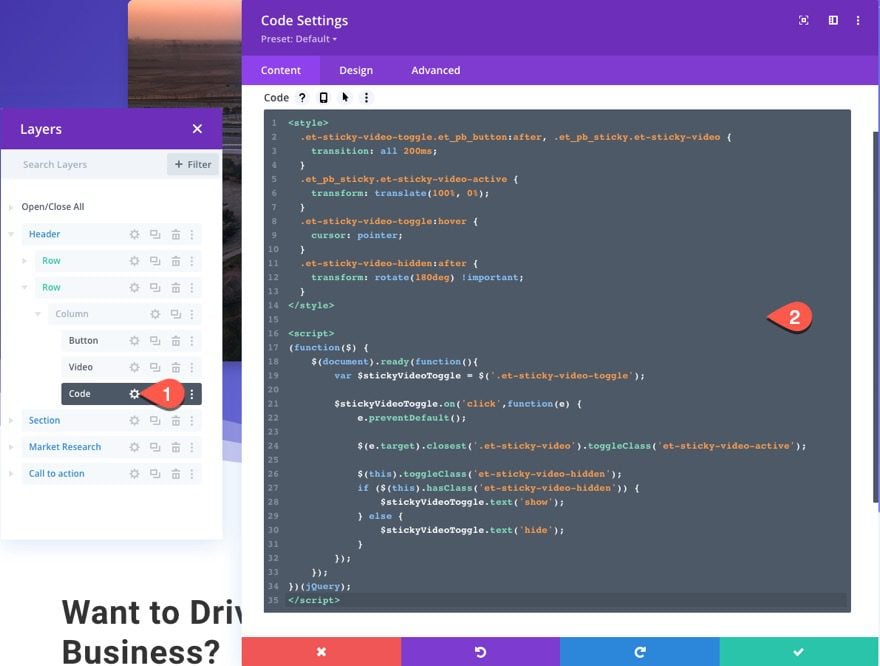
Adding the Custom Code for the Toggle Functionality
To get the toggle working how we need it to, we will need to add a code module under the video module.
Custom CSS
In the content tab, past the following custom CSS making sure to wrap it in the style tags.
.et-sticky-video-toggle.et_pb_button:after, .et_pb_sticky.et-sticky-video {
transition: all 200ms;
}
.et_pb_sticky.et-sticky-video-active {
transform: translate(100%, 0%);
}
.et-sticky-video-toggle:hover {
cursor: pointer;
}
.et-sticky-video-hidden:after {
transform: rotate(180deg) !important;
}
Custom JQuery
Then under the CSS with the style tags, add the following JQuery wrapped in the script tags.
(function($) {
$(document).ready(function(){
var $stickyVideoToggle = $('.et-sticky-video-toggle');

$stickyVideoToggle.on('click',function(e) {
e.preventDefault();

$(e.target).closest('.et-sticky-video').toggleClass('et-sticky-video-active');

$(this).toggleClass('et-sticky-video-hidden');
if ($(this).hasClass('et-sticky-video-hidden')) {
$stickyVideoToggle.text('show');
} else {
$stickyVideoToggle.text('hide');
}
});
});
})(jQuery);
That’s it!
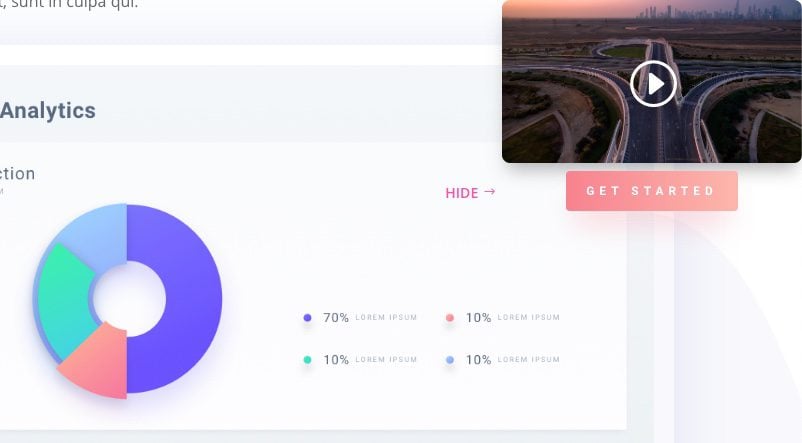
Final Result
Now view the live version of the page to see the results for yourself.
This the sticky video without the toggle.
Here is the same sticky video with the toggle button.
Here is a closer look at the toggle functionality.
And here is what it looks like on mobile.
Easily Add Additional Modules to the Sticky Column to Compliment the Video
Because the sticky position is added to the column (not the video), feel free to add additional modules/content to compliment the video.
For example, you could include a button at the bottom of the video in the same sticky column.

Then it will stay under the video in the column’s sticky state.
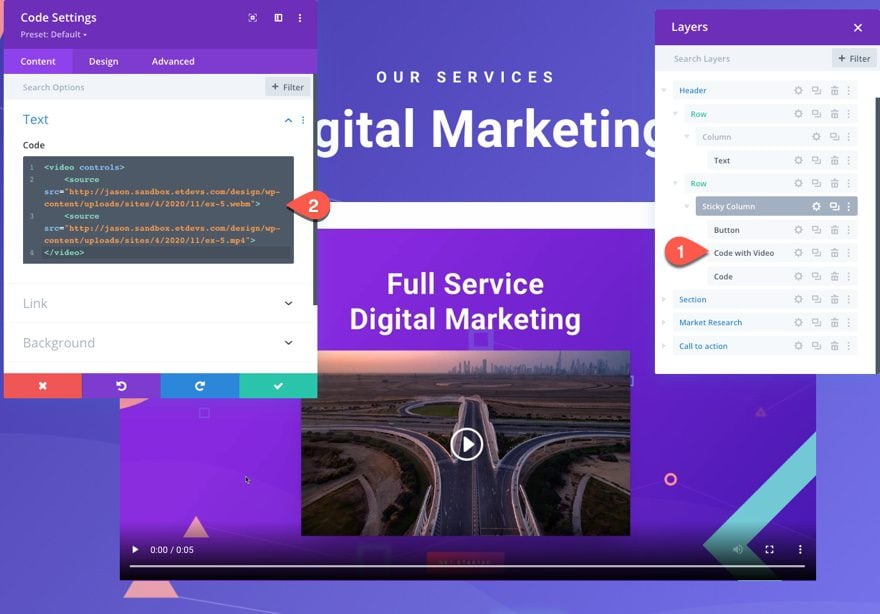
Easily Add Your Own Custom Video Options with this Sticky Video Layout
Having the sticky position applied to the column (not the video) also comes in handy for adding custom video embeds or HTML (using a text or code module) inside the column. The sticky video functionality will still work.
For example, you can add an HTML5 video to a code module within the same column.
Easily Change the Column Structures as Well!
Also, you can easily change the row to any column structure you want to display your video with adjacent content. For example, you may a two-column layout with the sticky video initially in the right or left column. Just make sure the column containing the video content will have the same CSS Class and sticky styling as explained in this tutorial. The sticky functionality will work the same way.
For example, using our existing design, we can add a new column using the layers view and fill that new column with the main heading text.
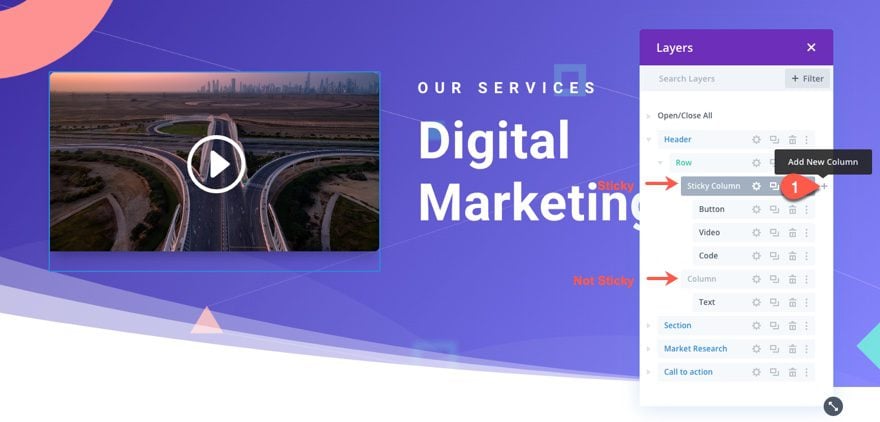
The sticky column will still function seamlessly while the adjacent column/content remains in the normal flow of the document.
Issue with YouTube videos/embeds Using the Divi Overlay Image Option
If you are using a YouTube URL to embed a video with the Video Module like in this design, it is best not to use Divi’s built-in overlay image (with play icon) option. This will cause the video audio to autoplay from the beginning in the sticky state causing duplicate audio playing at different intervals. So if you want to use Divi’s overlay image and play icon with the Divi Video Module, you should add the mp4 and WebM video files/URLs instead.
Final Thoughts
Building a sticky promo video with a show/hide toggle for your page opens the door for new ways to promote your products and services. Not only can you keep those high converting videos at the forefront, but you can also easily include complimentary information or CTAs above or below the video just by adding it to the same column in Divi.
In fact, you don’t even have to include a video at all, just fill the sticky column with any info you want to stick to the top of the page on scroll!
I look forward to hearing from you in the comments.
Cheers!


Hi! This is precisely what I need for a site I’m working on, and it works great, except on mobile, specifically iOS Safari. Have you run into that issue, and/or have a potential fix? I appreciate any help!
Perfect, thanks for a great tutorial! Makes it very easy to implement.
Hi, great tutorial. I noticed a little mistake in the text when you talk about hiding/showing the button with CSS.
You have: “display:none !important;” for both Main Element CSS on Desktop and Main Element CSS on Sticky however the Sticky CSS should be: “display:block !important;”. The CSS text in images are correct its just in the article text/code snippet box.
I fixed it. Thanks Andy.
Hello thanks for the info! I have a problem while using this and also using a sticky header.
When I write the custom CSS of the column, suddenly that is applied to my sticky video but also to my sticky header BUT just in the divi builder, if I go and see the live website everything seems to be working fine.
So it´s not a big deal, but it’s a little bit annoying to continue editing the site in the divi builder always watching my header broken.
Even if it’s not broken in the live site I’m always worried if my header is going to break in the live site too.
I hope that I made myself clear, english is not my first language.
Do you know any workaround?
If you can’t replicate my problem, try using the sticky header used in this tutorial https://www.youtube.com/watch?v=FUy6bdCMPQ8
Thanks!
Sorry for the late response, Jorge. That is a weird glitch. You can take out the custom css added to the main element on sticky for the column (in the Divi Builder Settings) and then add the following to the CSS in the code module:
.et_pb_sticky.et-sticky-video { width: 300px !important; right: 0px !important; left: auto !important; top: 0px; }wonderful! Thank you sooo much.
Quick observation. Best to leave the Button Position in the Middle, rather than bottom. Seems that the -100% offset blocks interaction with a youTube video’s Play/Pause and Mute functions, which are the approximate space occupied by the show/hide button.
Thanks David! This can also be solved by giving the video module a higher z index than the button so that button space isn’t overlapping the video. Great observation.
Hi! Thank you for the video!
How can I get to know about the upcoming streams?
If you subscribe to your youtube channel and click the bell to receive notifications, you should get a notification whenever we go live. https://www.youtube.com/elegantthemes
Thanks! You can just subscribe to our YouTube Channel and then click the bell to get notifications. https://www.youtube.com/elegantthemes
Hi,
Thanks for share this information process of putting sticky video
You’re welcome, deepthi!