
This post is part 2 of 5 in our mini series titled 5 Impressive Ways to Style Divi’s Countdown Timer Module. Stay tuned this week for all five unique examples of Divi’s countdown module, with a tutorial on how to achieve each one!
I hope you’ve been following along with our mini series up to this point! Today is day _ of teaching you how to create impressive countdown timers for your Divi website. As we discussed during day 1, countdown timers can be a very effective way to build anticipation for a new product, website, event, etc.
Like any part of your website though, the countdown timer shouldn’t just be a boring element that is only there to serve it’s functional purpose. It can also be a beautiful part of the page that further brands the company. Unlike yesterday’s bold & colorful countdown timer that is meant to jump off the page, today’s customized countdown timer is meant to beautifully blend right into the page like it’s part of a piece of artwork; almost as if it’s part of the background image itself.
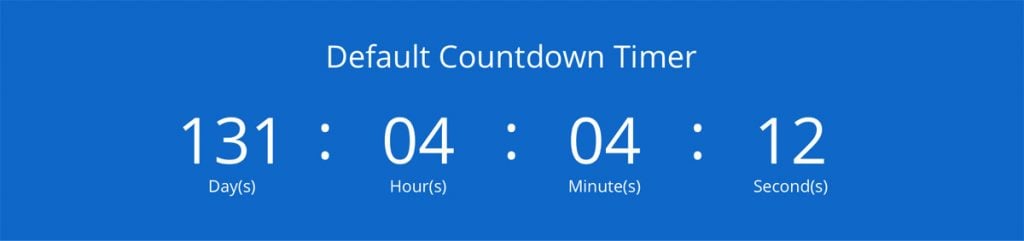
The Divi Countdown Module: Before & After
Since this mini series is all about pushing Divi further with customizations, it’s important to see the starting point. Or, the countdown timer in it’s default state.
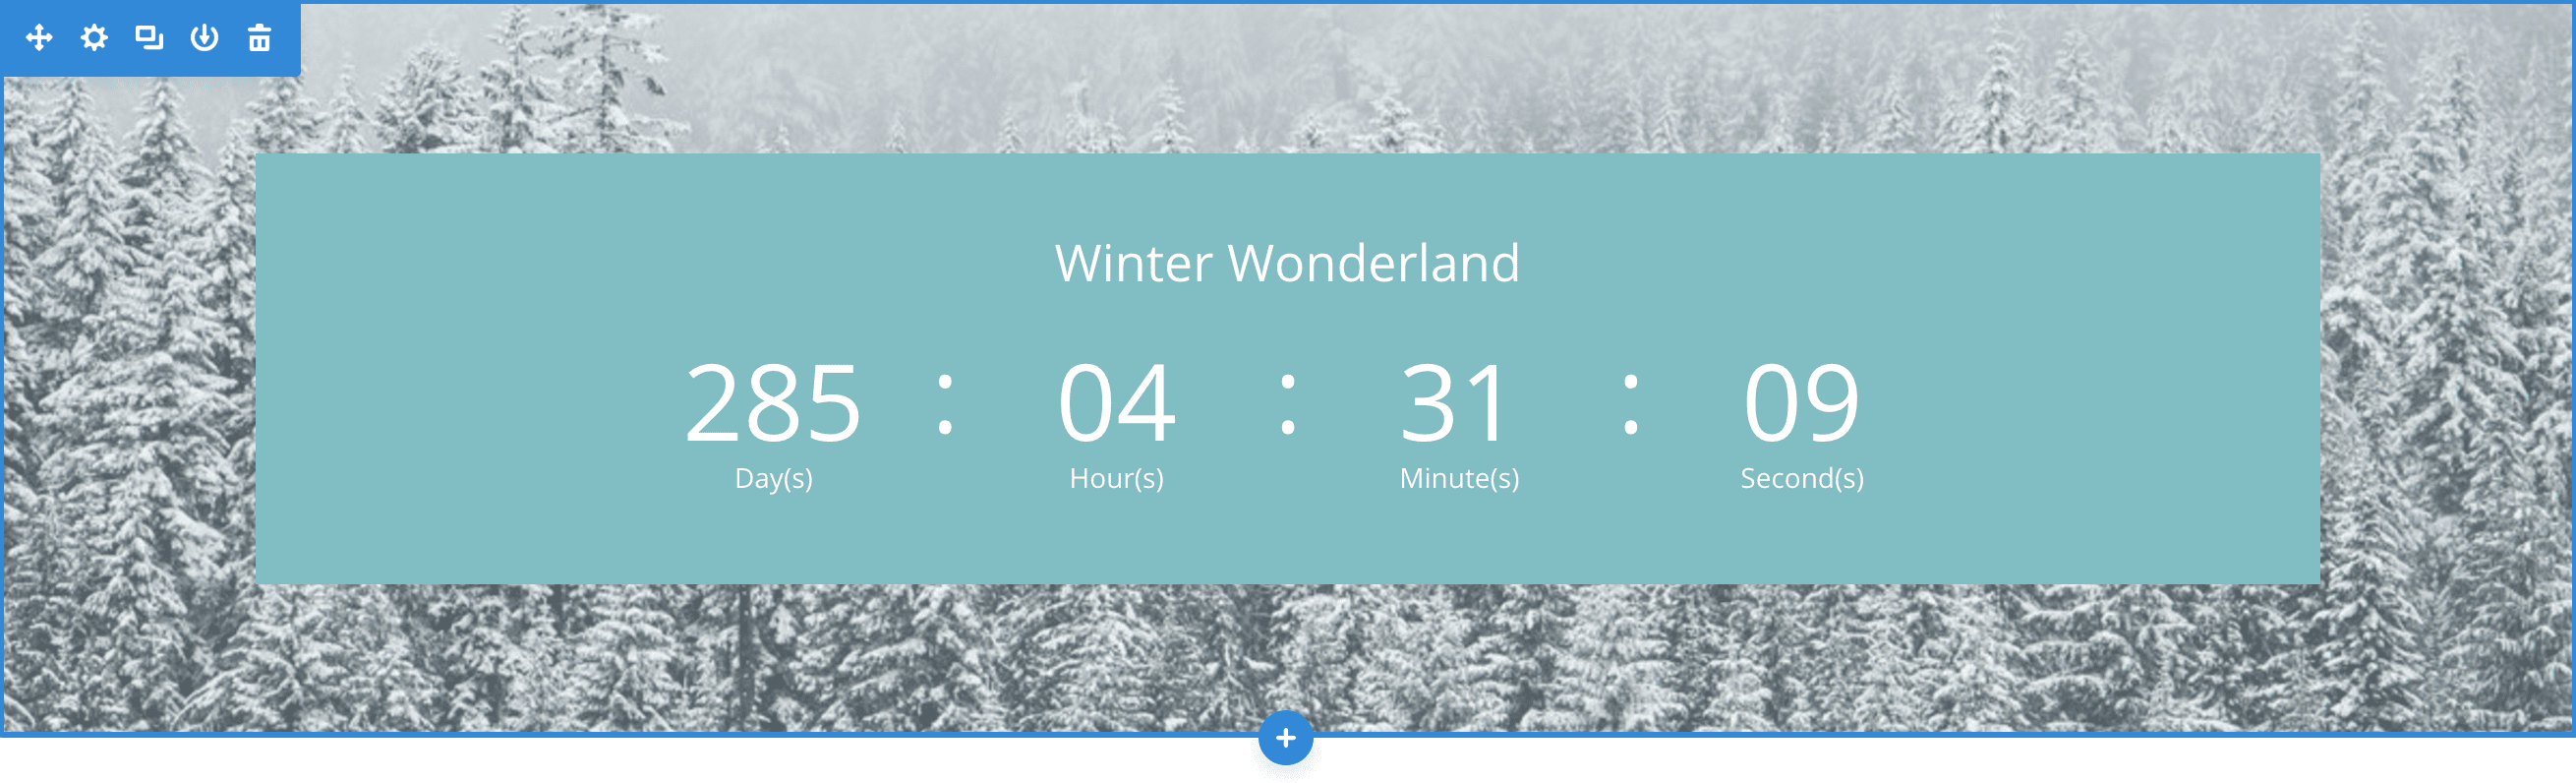
Now, let’s take a look at what we’ll be creating today.
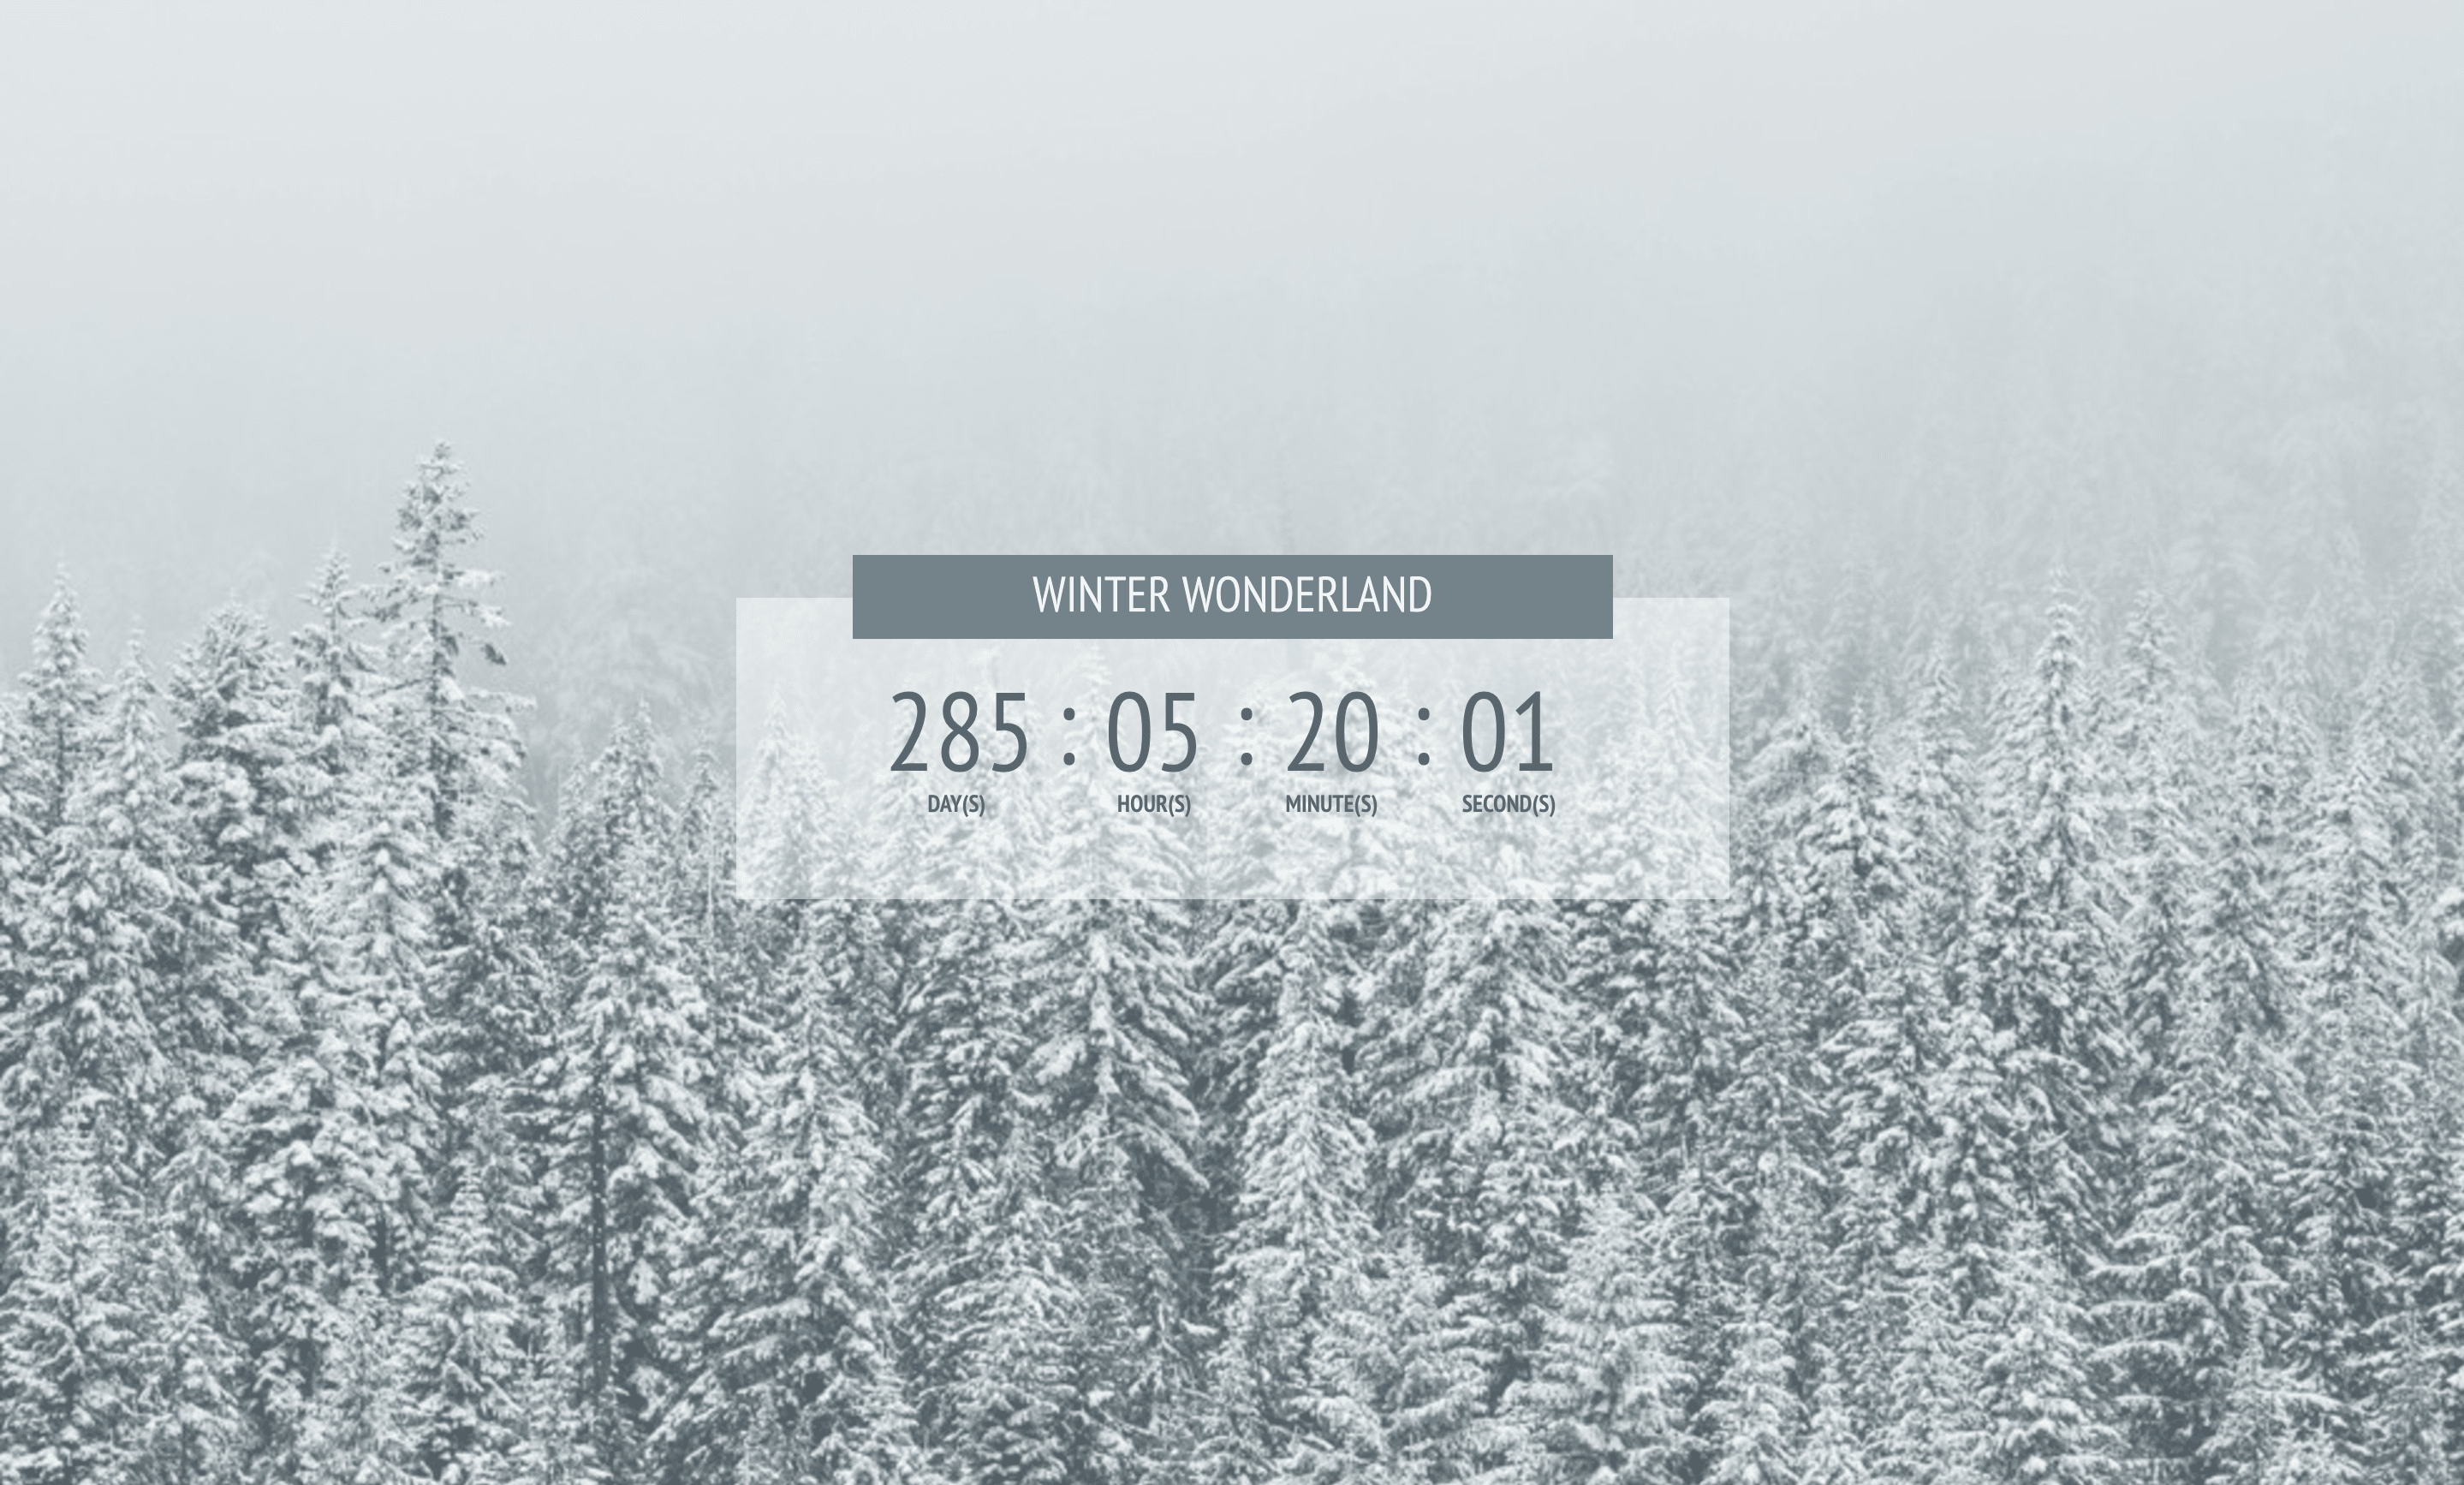
Similar to the first countdown timer we created on day 1 of the series, this countdown timer utilizes a full screen background image. In order for it to live up to being “gorgeous” as our post title suggests, it needs to start with a gorgeous background photo. We’ll talk more about that in a bit.
The transparency of the countdown background color gives it the “frosted glass” look that adds to the winter effect as well as allowing the background image to show through which helps blend the countdown timer into the image. Lastly, the color utilized in the countdown timer numbers as well as the background of the title, is the same color of the trees in the photo. Again, this helps the countdown timer look like it’s supposed to be part of the image.
Creating the “Gorgeous Transparent” Divi Countdown Timer Module Design
Subscribe To Our Youtube Channel
Preparing the Design Elements
The only design element we have to prepare is the background image. The rest of the countdown timer is created through Divi’s built in controls, as well as custom CSS.
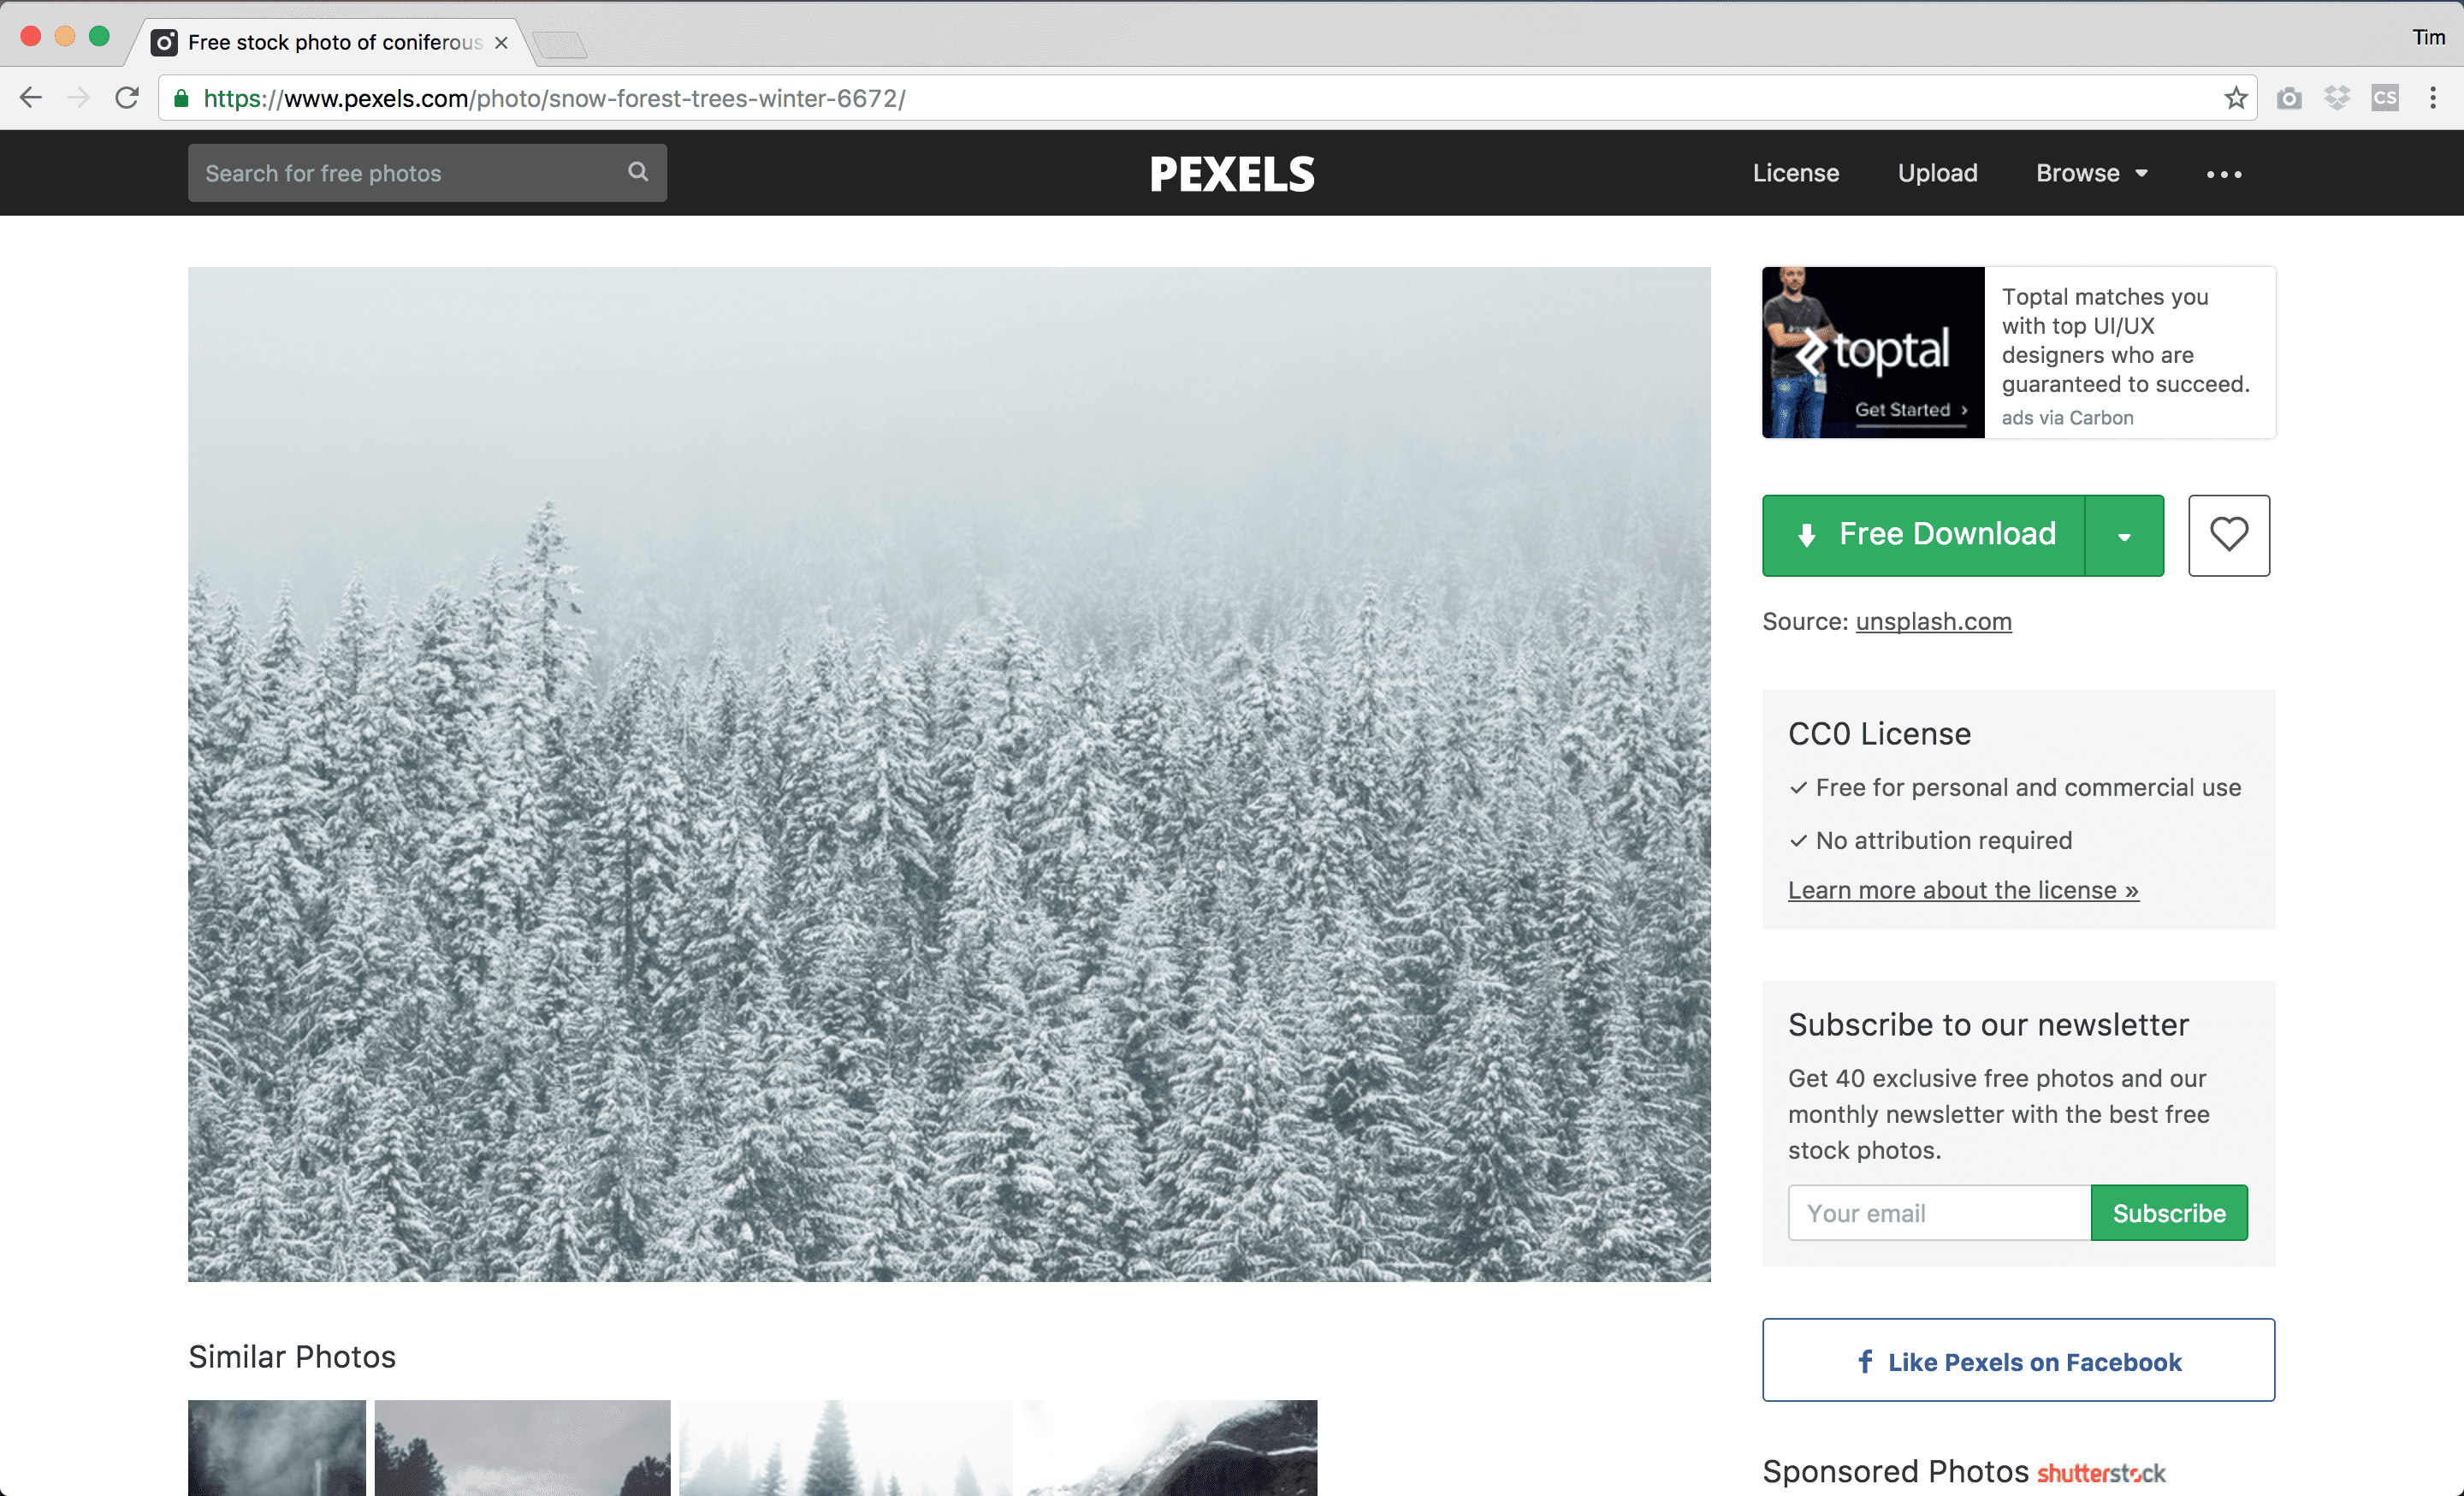
The image we’re going to use can be downloaded for free from Pexels and used without attribution. #526771
Go ahead and click on the link above, and click the giant green “Free Download” button.
The last thing we need to do to prepare the design element before heading to Divi is getting the right color to use. As I mentioned above, one of the reasons this design works is we’re taking the color that is found in the trees in our image, and putting it in our countdown timer. This helps it blend nicely. So to do that, I’m going to use Photoshop, however there’s many other tools you can use to grab a color from an image, including the developer tools (inspector) that is found in the Chrome browser.
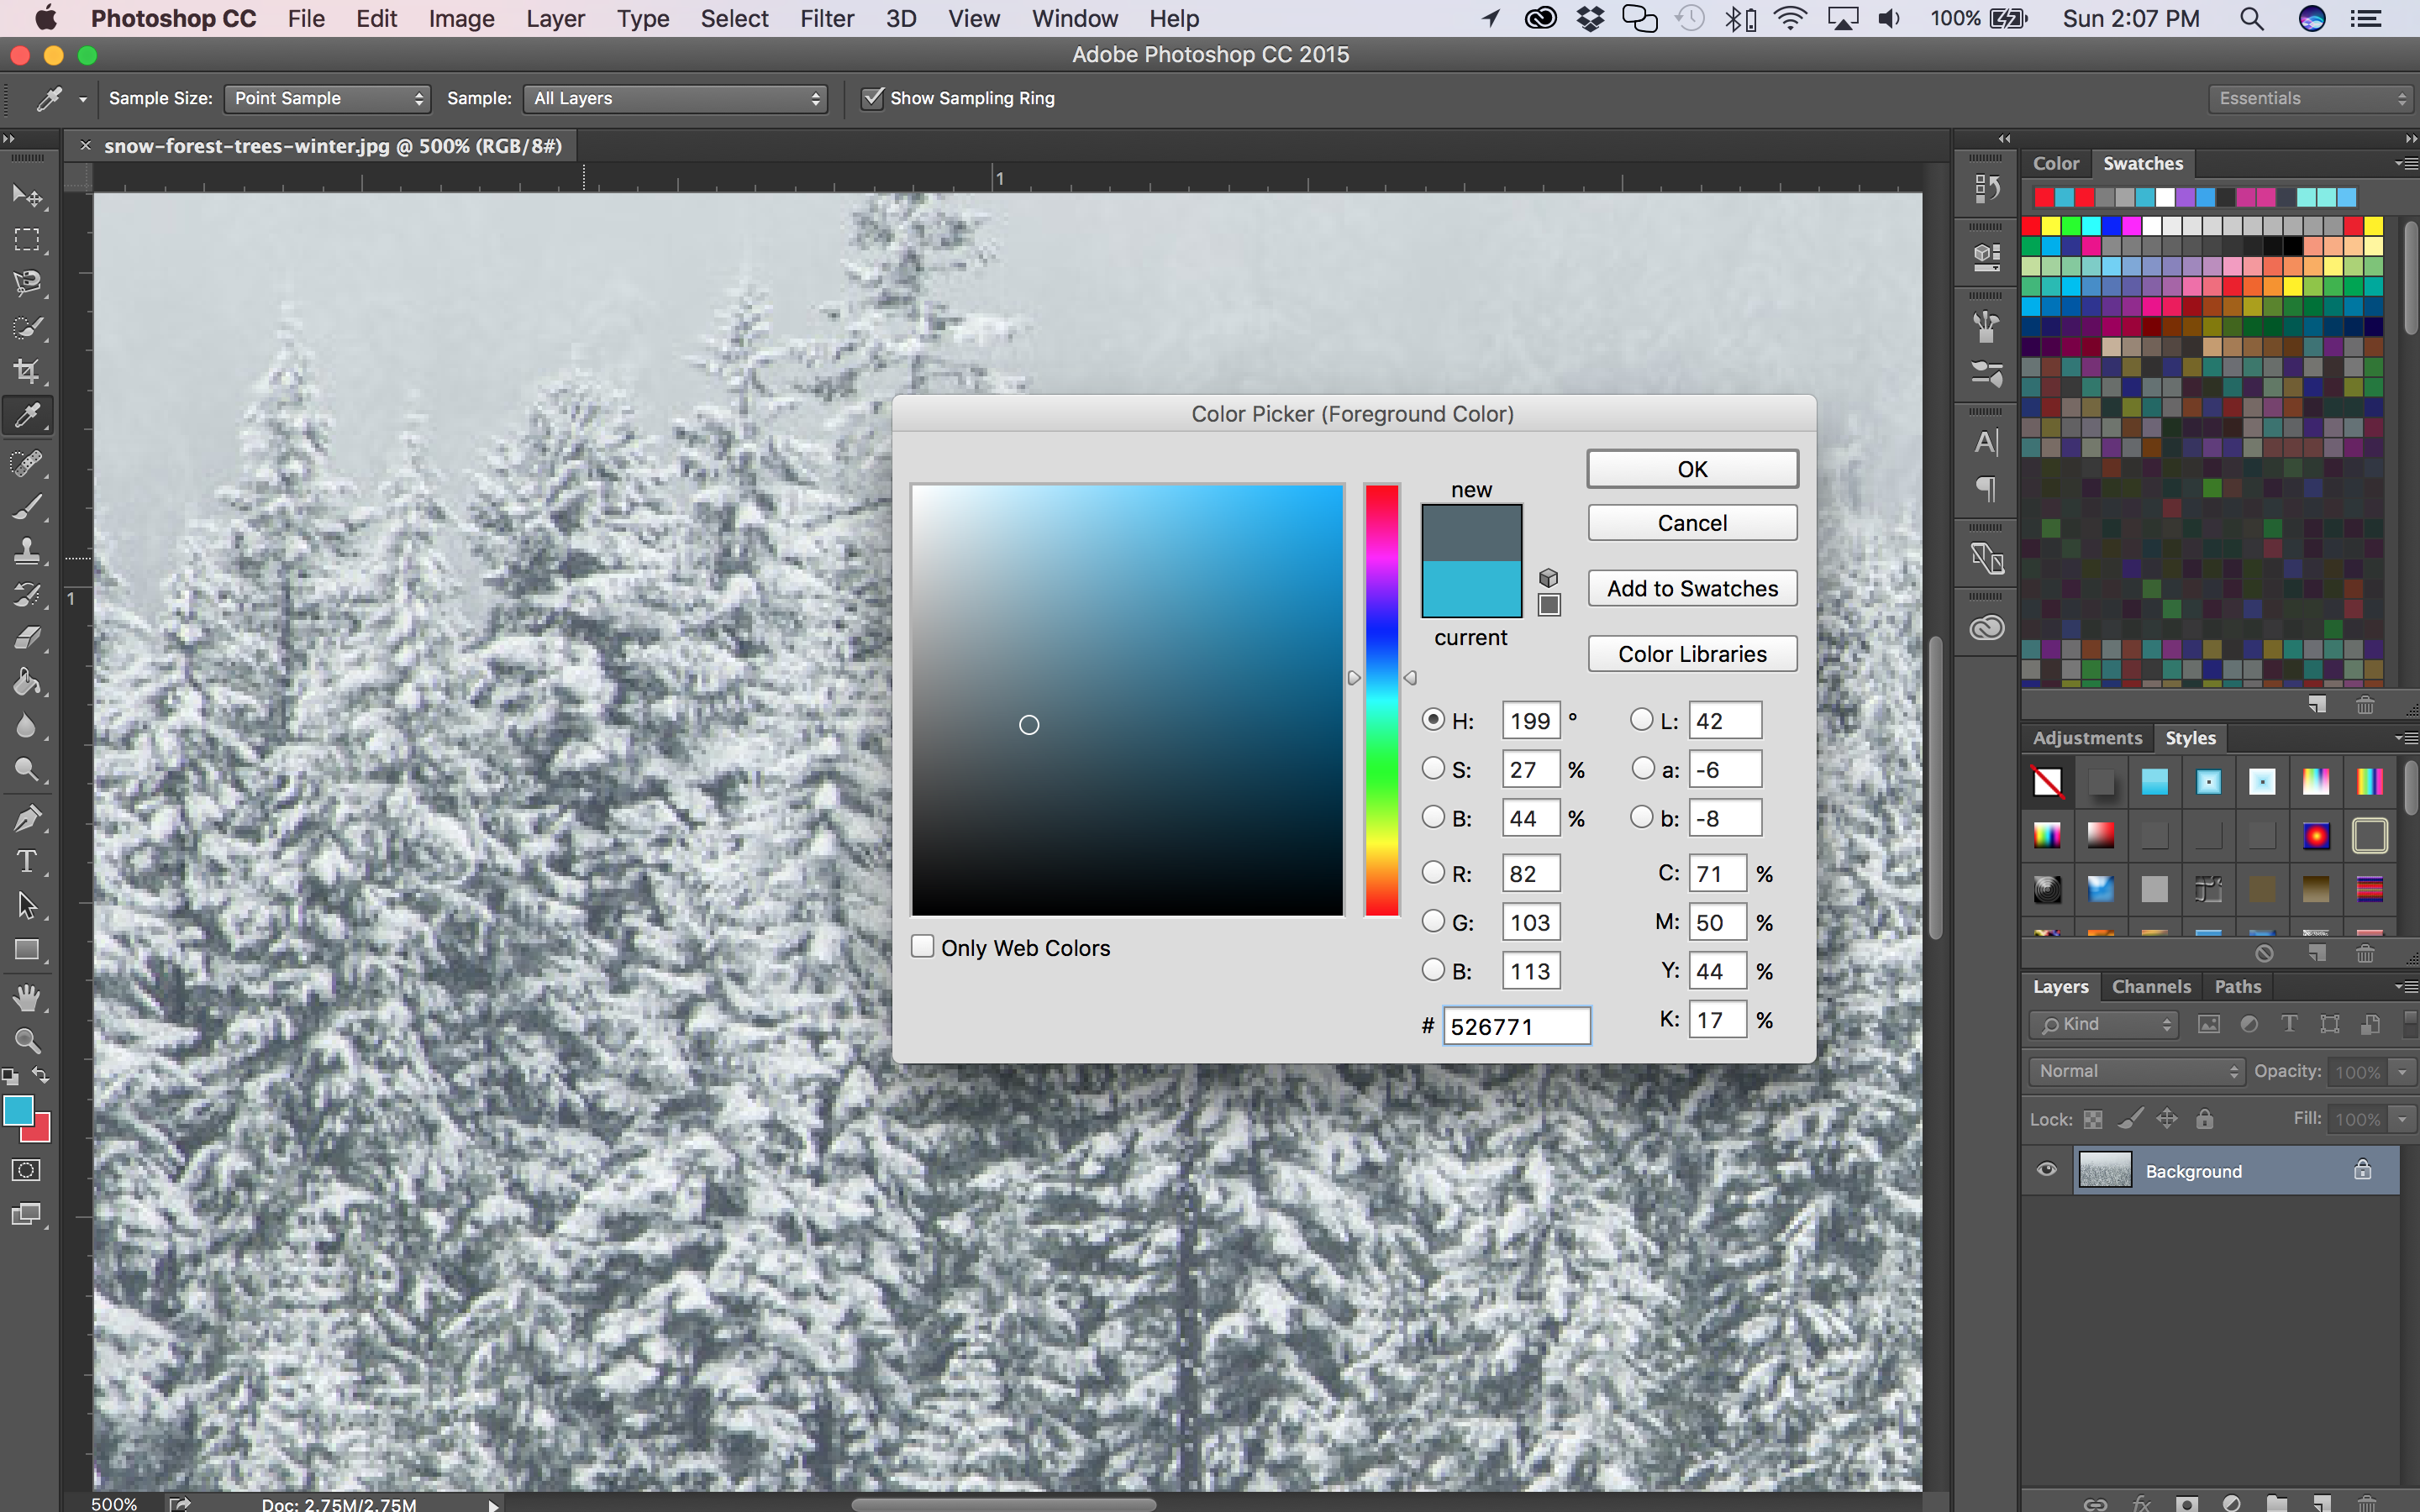
What makes this particular background image easy to blend with, is the fact that it really only has two colors in various shades: white and the grayish dark green. If you’re going to choose a different image to use as a background image, I would recommend looking for an image that similarly has minimal colors.
Implementing the Design with Divi
Alright, our image has been downloaded, and we know what color to use. Now it’s time to head over to Divi. This countdown would look great as an entire landing page or “under construction” page, however, you can also add it to an existing page if you’d like. For this tutorial though, I’m going to walk you through adding it to a new page, but you can still easily follow along if you’re adding it to an existing page. So, I’m going to create a new page, give it a title, enable Divi, and click the blue “Use Visual Builder” button.
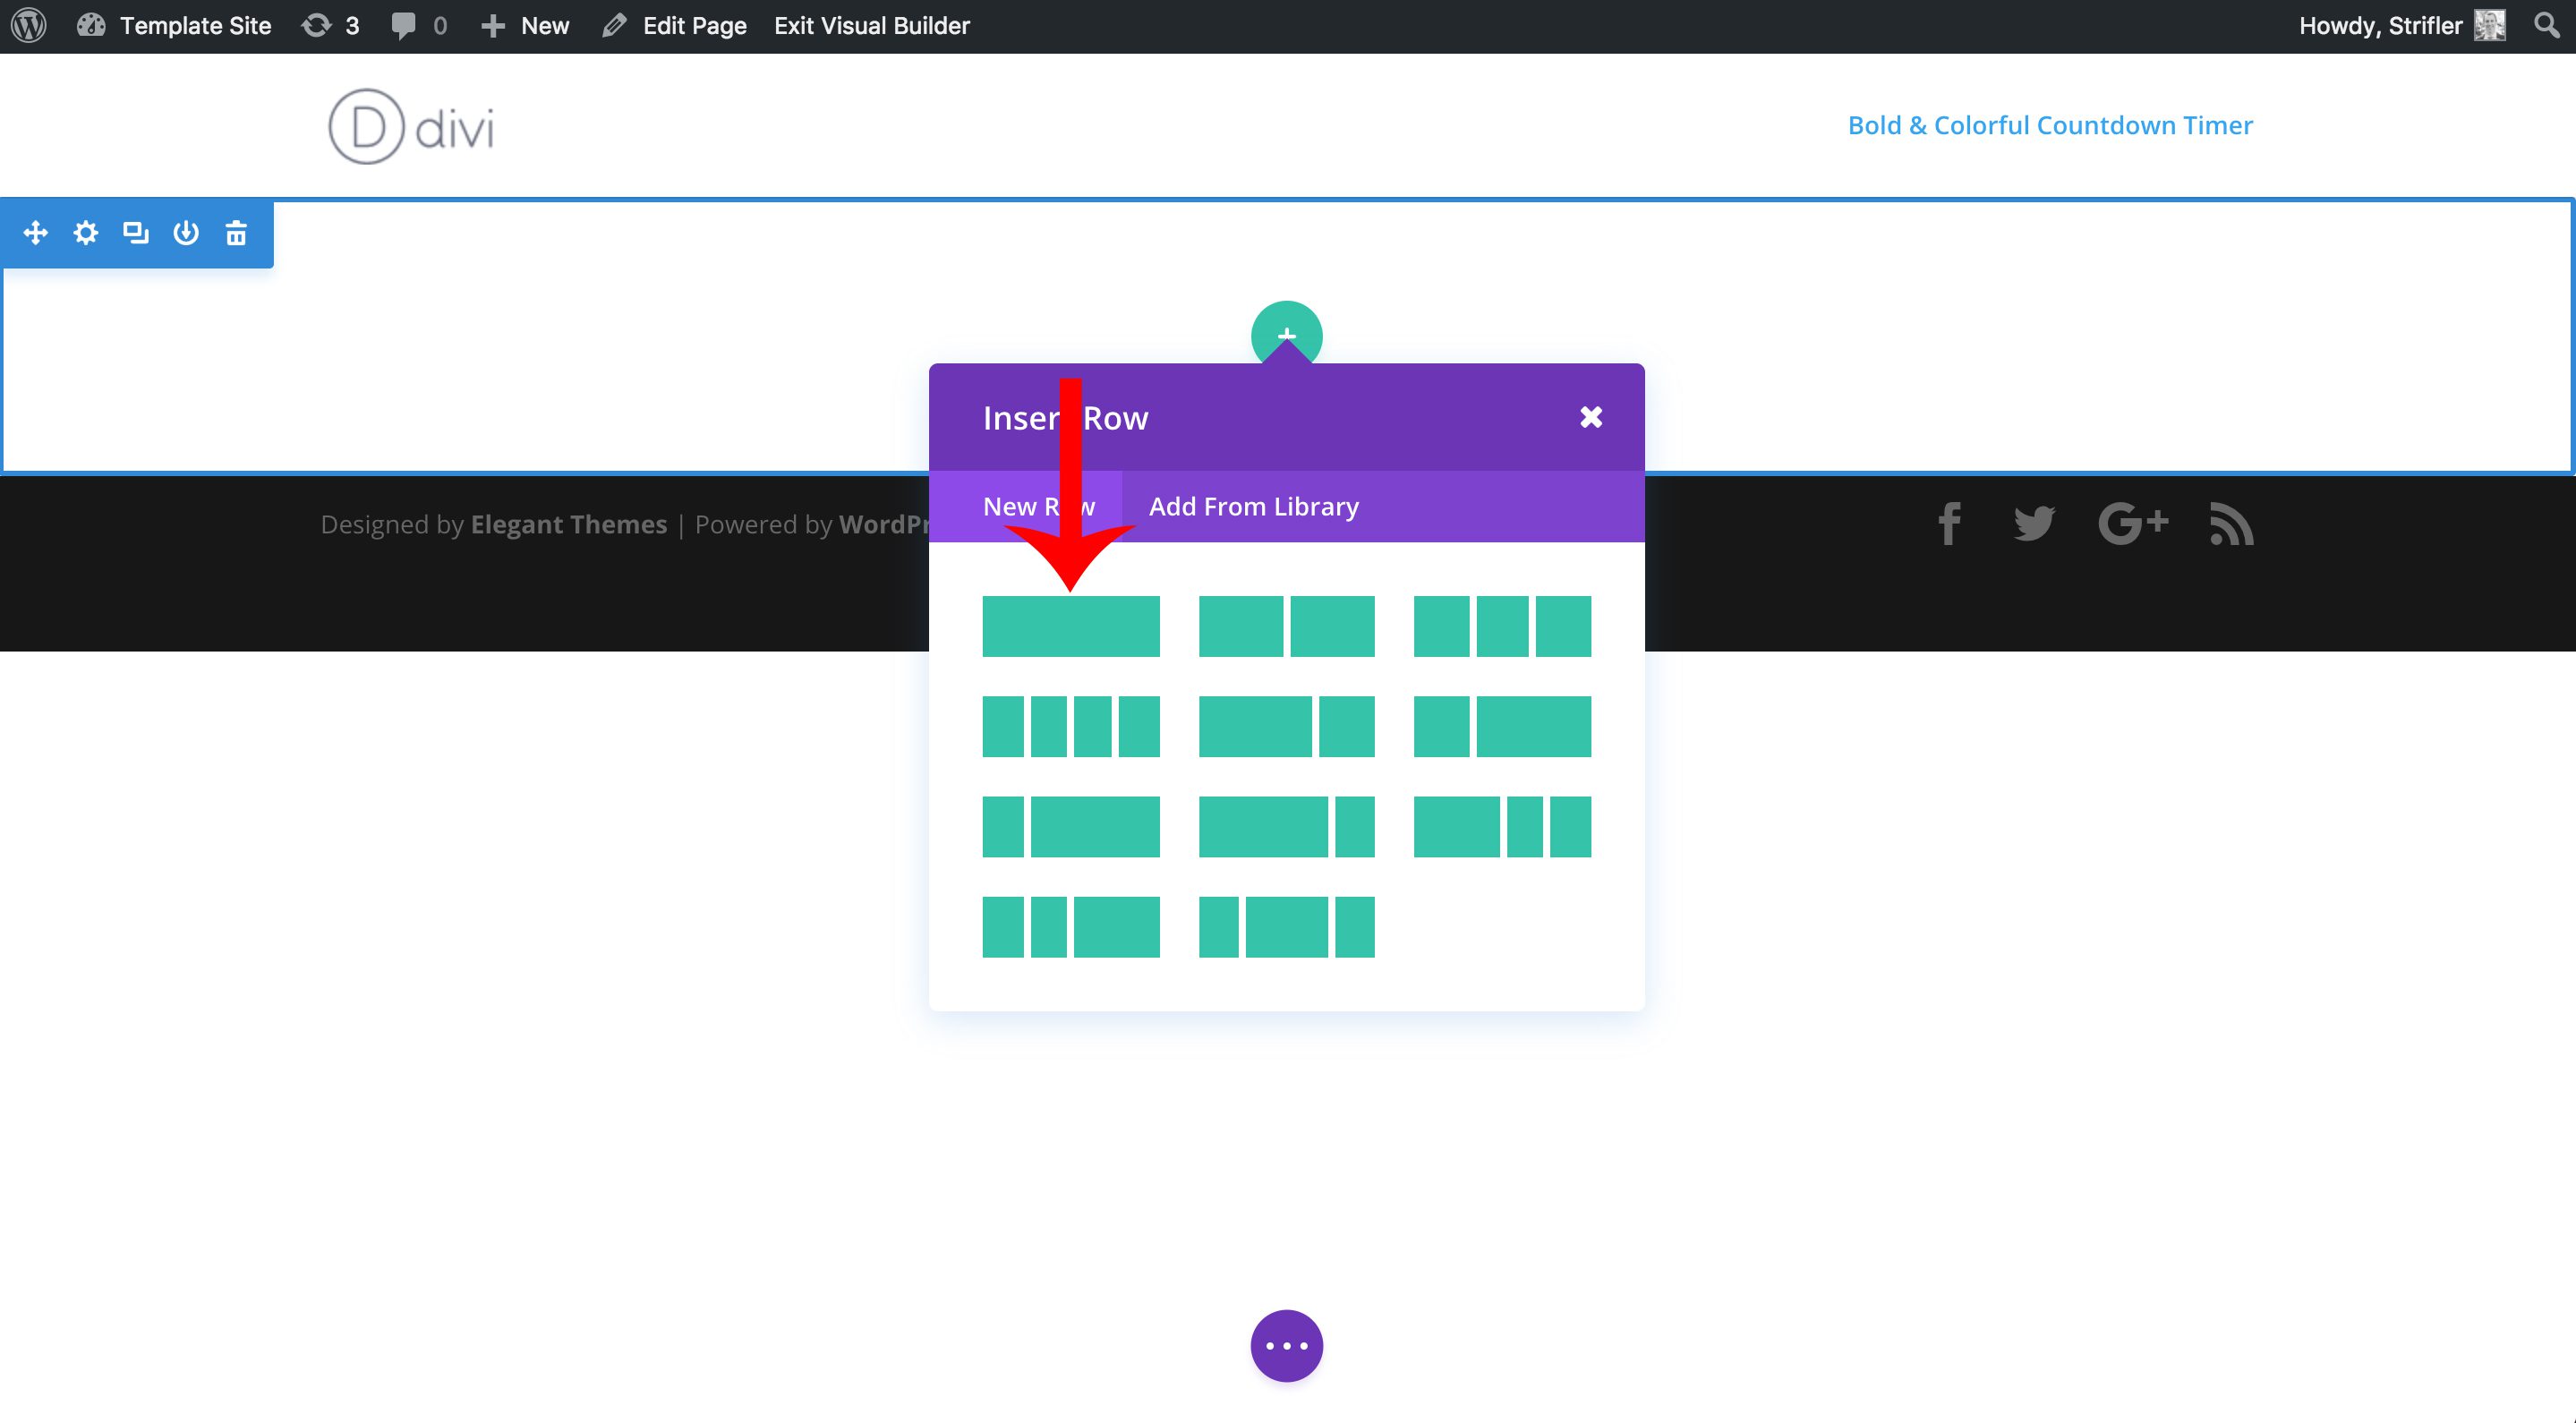
If you’re creating a new page like I am, then there’s already a blank section in place. Now we’re going to add a row by clicking on the green (+) circle icon, then click on the icon for the one column row as indicated by the red arrow in the screenshot below.
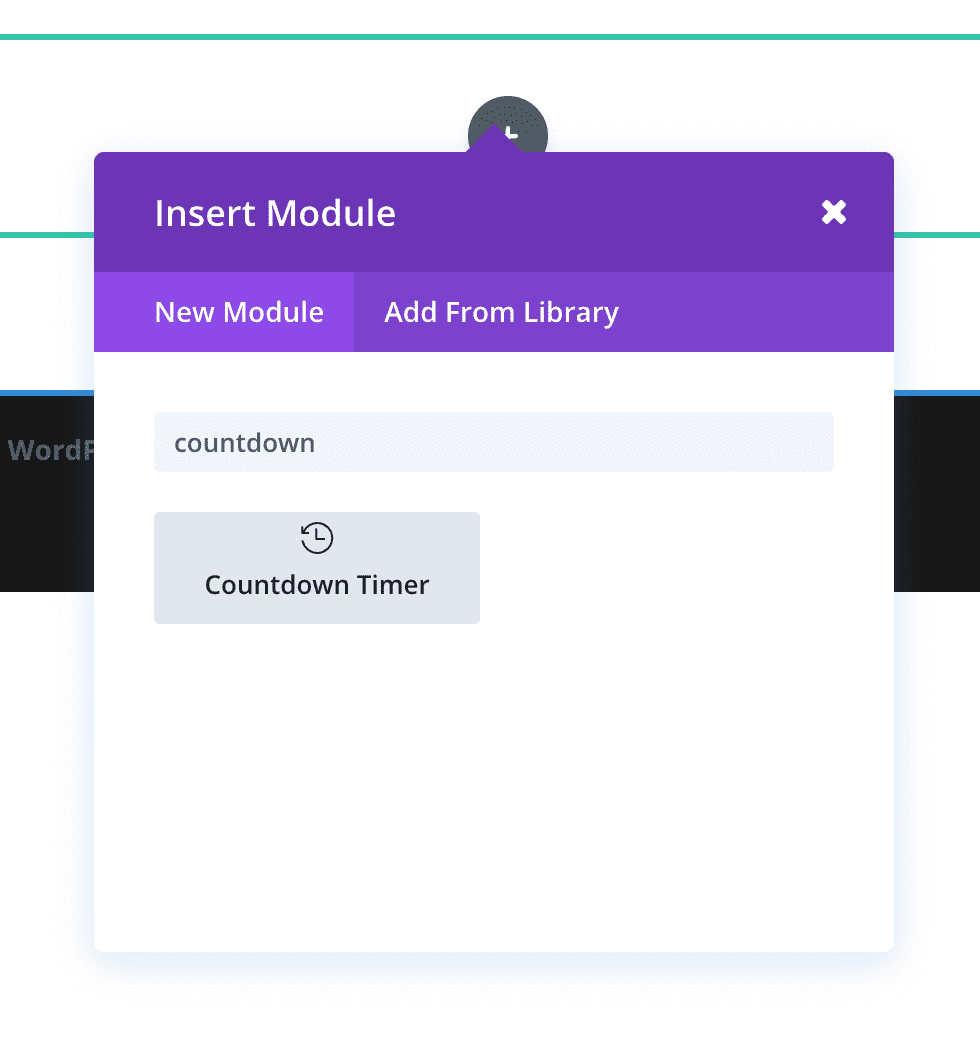
Divi will automatically prompt you to choose a module from the list. Divi will automatically filter the modules as you start type “countdown.” Then click on Countdown Timer to add it to the page.
You can go ahead and add a Countdown Timer Title, as well as choose a date. Just for fun, I chose my birthday 🙂
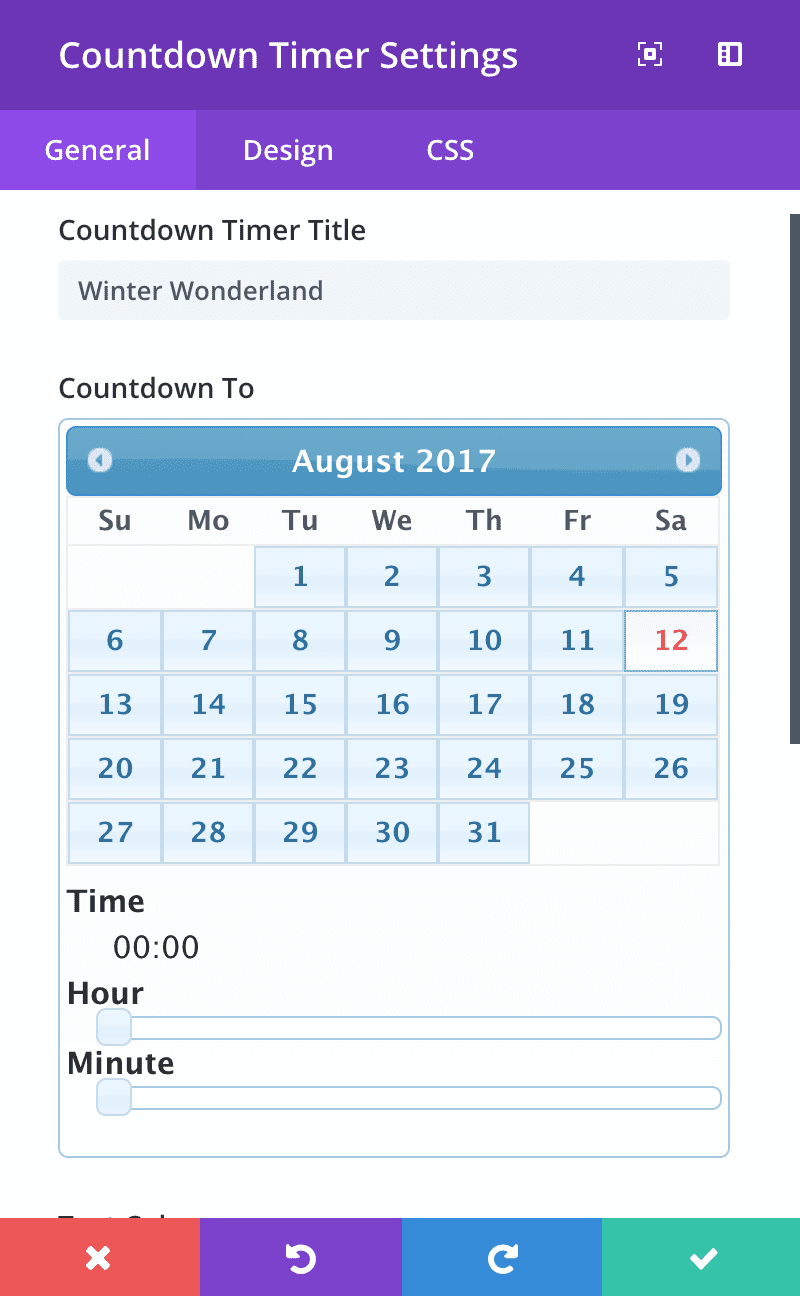
We’ll be back to the module settings in a bit, but for now go ahead click the green checkmark button to save the module and close the settings.
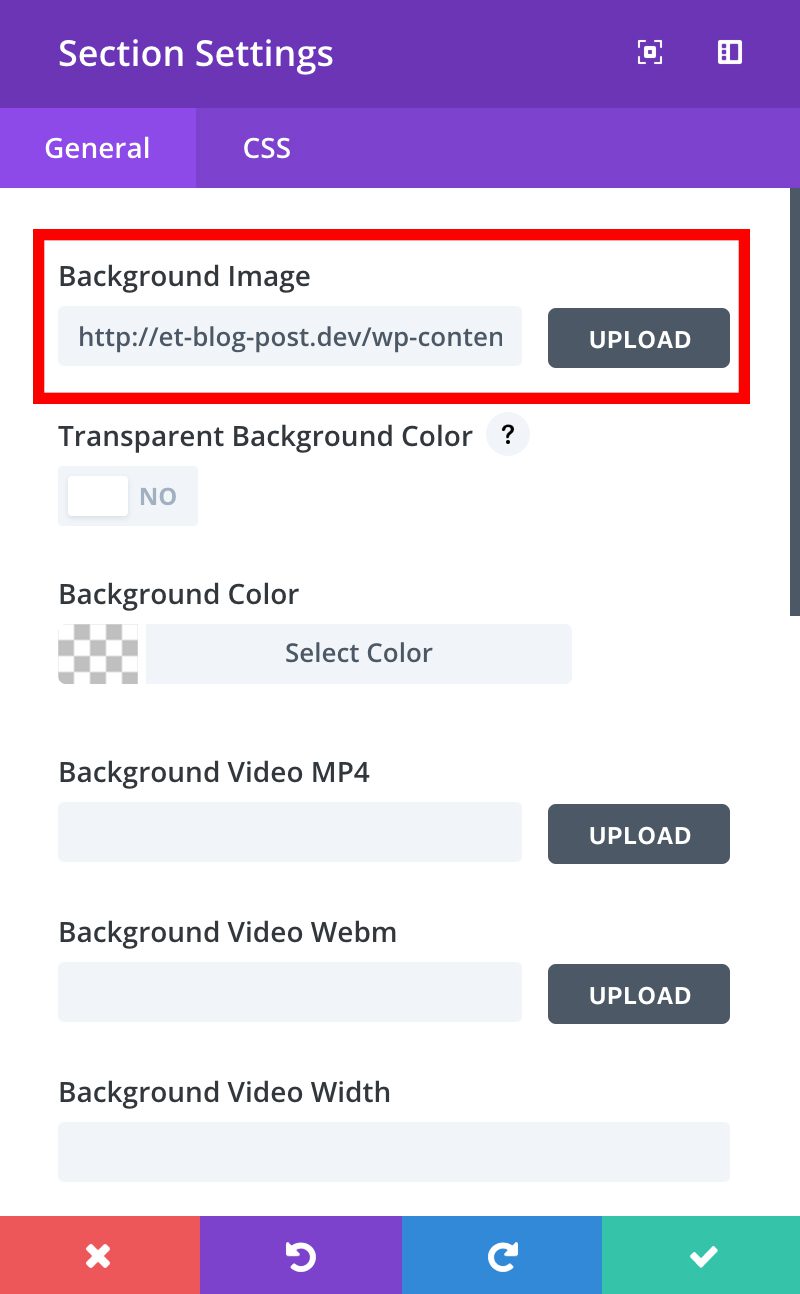
Next, we’re going to add our background image to the section. To do this, hover over the section until you see it outlined in blue. Then, in the upper left, click on the gear icon to open up the section settings.
Then, upload your image as the background image by clicking the upload button as shown in the screenshot below.
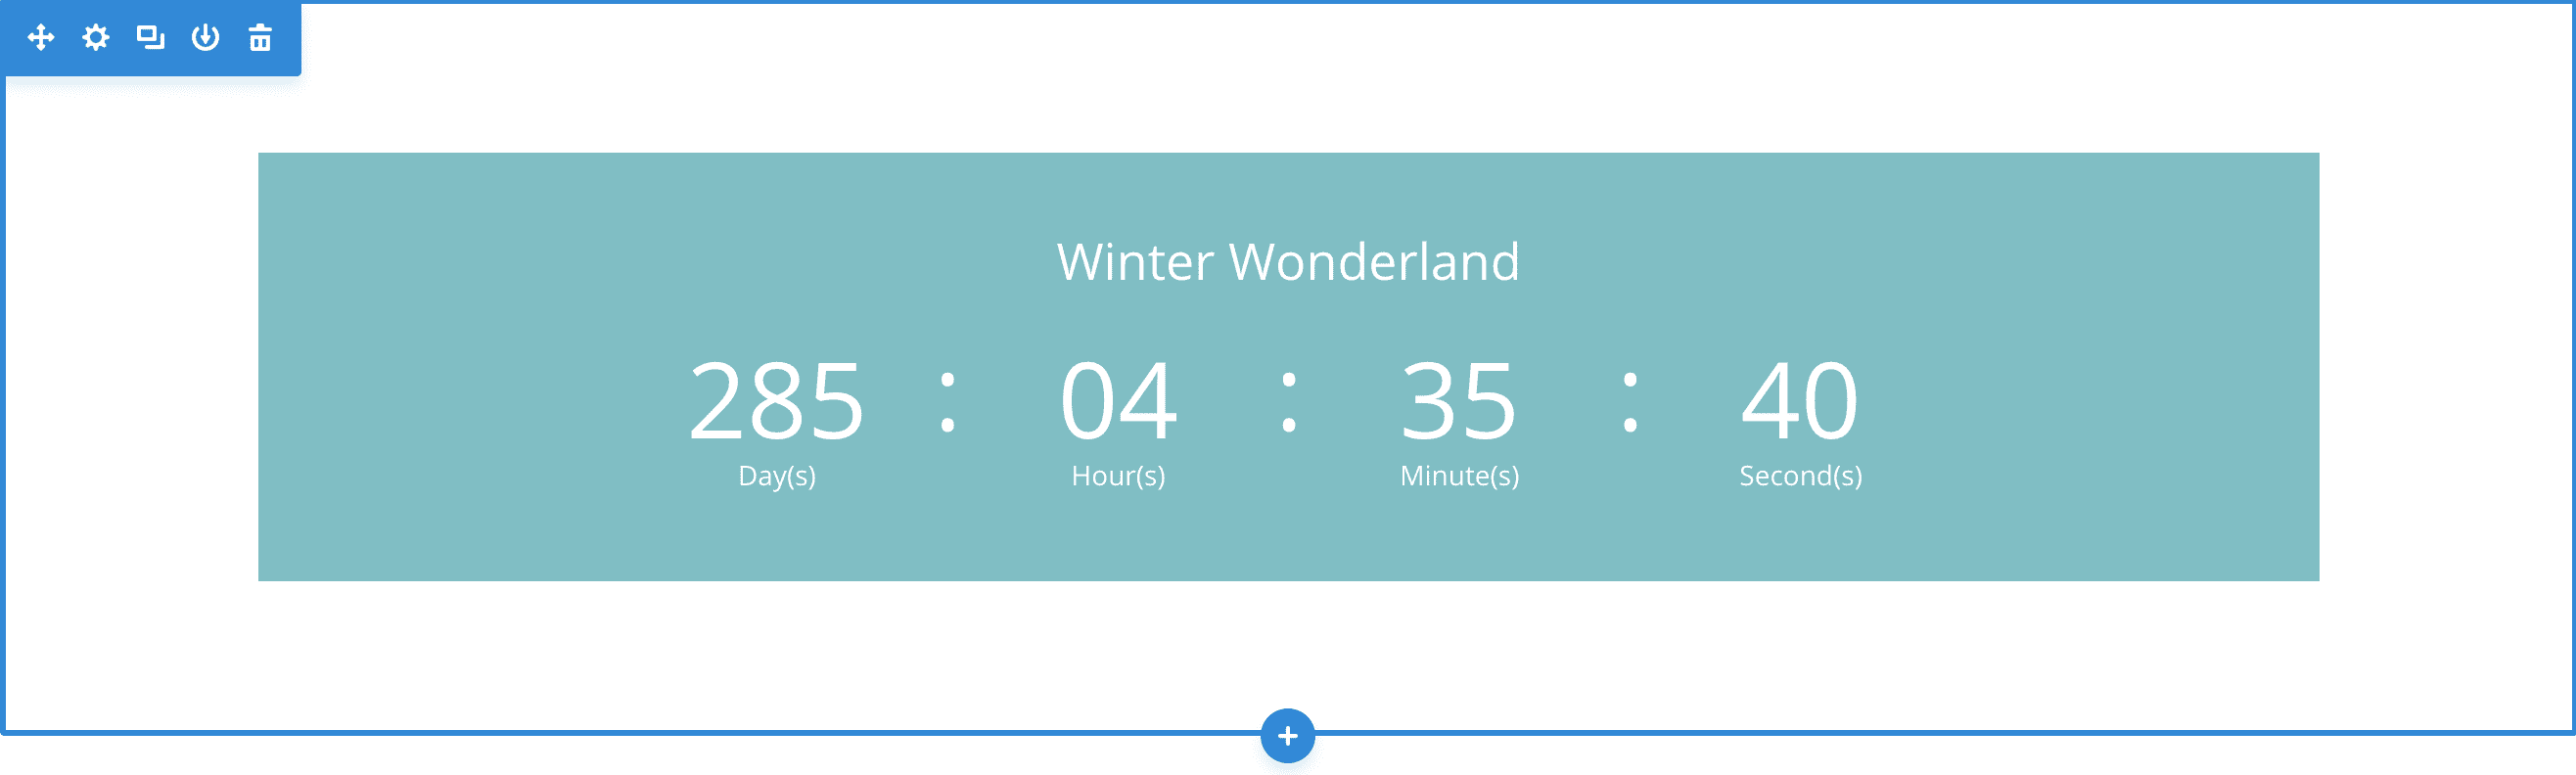
Assuming you’re using the same image as me, here’s what your countdown should be looking like so far.
We’re making progress!
Adjusting the Module Settings
Now it’s time for us to start digging into the countdown timer settings. Hover over the countdown timer and open up the Module Settings (click on the gear icon in the dark gray set of controls that appears when you hover over the countdown timer).
Below you’ll find the settings we’ll be changing. If there’s a setting that is not mentioned, then you can just leave it as default.
In the General settings tab:
- change background color to: rgba(255,255,255,0.5)
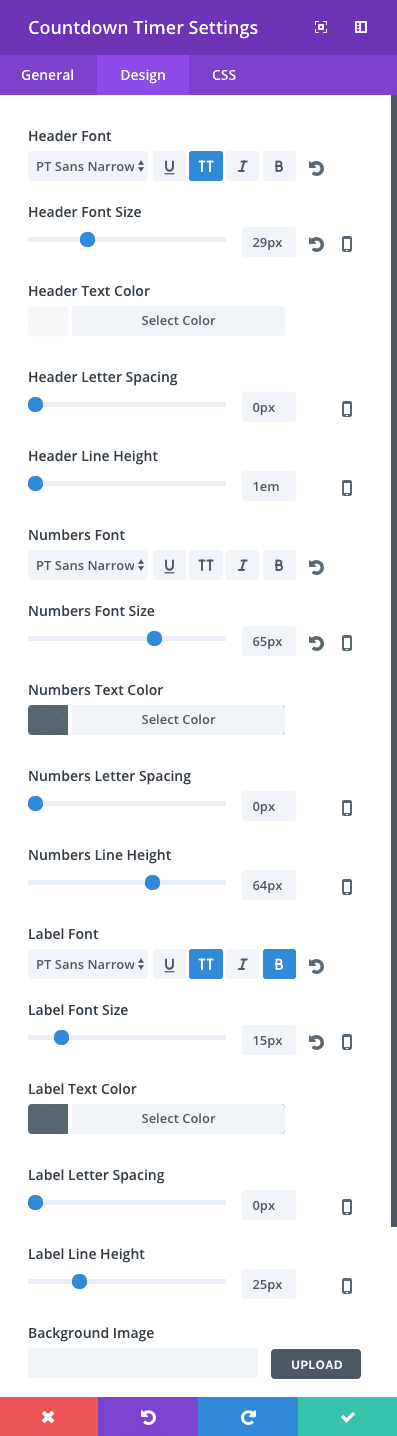
In the Design settings tab:
- change all fonts to ‘PT Sans Narrow’
- change the Header Font to all caps (TT icon)
- change the Labels Font to bold and all caps (TT icon)
- change the Numbers and Labels Text Color to #526771
- change the Header Font Size to 29
- change the Numbers Font Size to 65px
- change Labels Font Size to 15px
Adding the Custom CSS
The last thing we need to add is a little custom CSS magic! Just like the last two days of this series, you can optionally choose to add the custom CSS to either the Divi Theme Options custom CSS box, or the individual page settings custom CSS box. The difference is the individual page settings will only load the CSS for that page, while adding it to the Divi Theme Options will load the CSS on every page. Either one will work, it just depends on if you’d like to use the same countdown on another page. If so, then go ahead and add it to Divi Theme Options.
You might be wondering why we’re adding the CSS to one of the two options mentioned above, instead of directly in the CSS tab of the module section or row. The reason is Divi has pre-targeted CSS areas in the CSS tab of the settings for modules, rows, and sections, however it doesn’t target every single CSS class that is available in the Divi stylesheet. So we’ll need to take things a step further and add our own CSS.
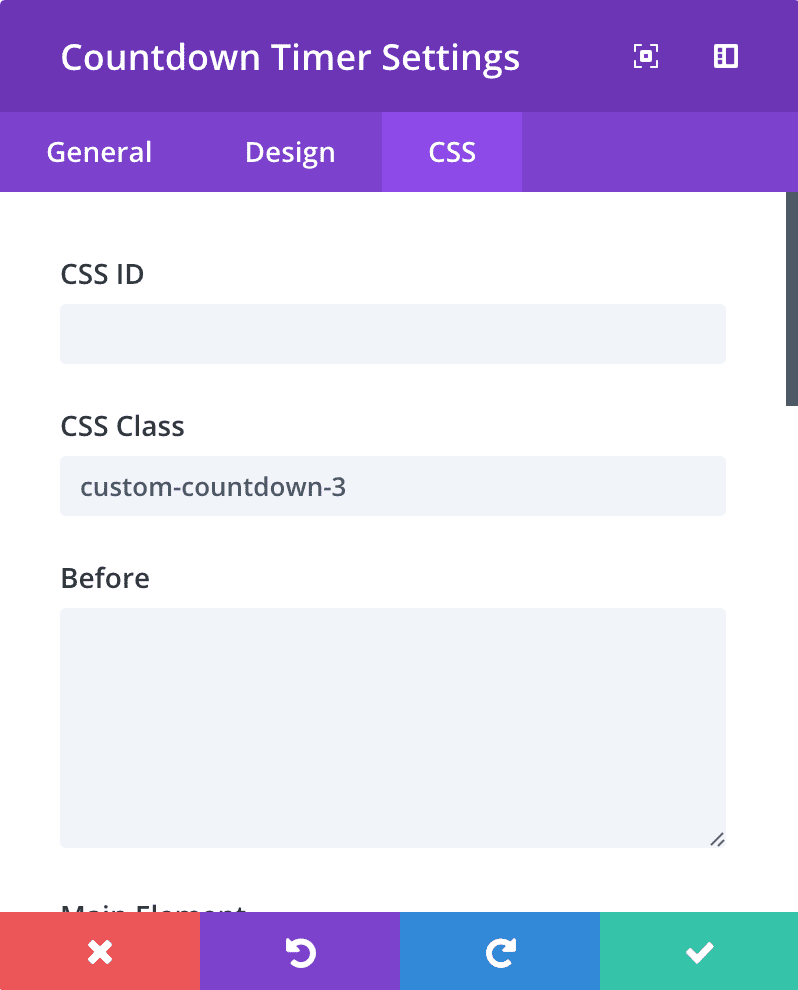
Before we can start adding our CSS though, we’ll need to add our own custom classes so that we’ll only customize the CSS of the module we’re working on now, and not ALL countdown timers that are on the site or will be on the site.
Open up, the module settings, and click over to the CSS tab of the module settings, and add custom-countdown-3 as the CSS class.
Now we’re ready to add our custom CSS!
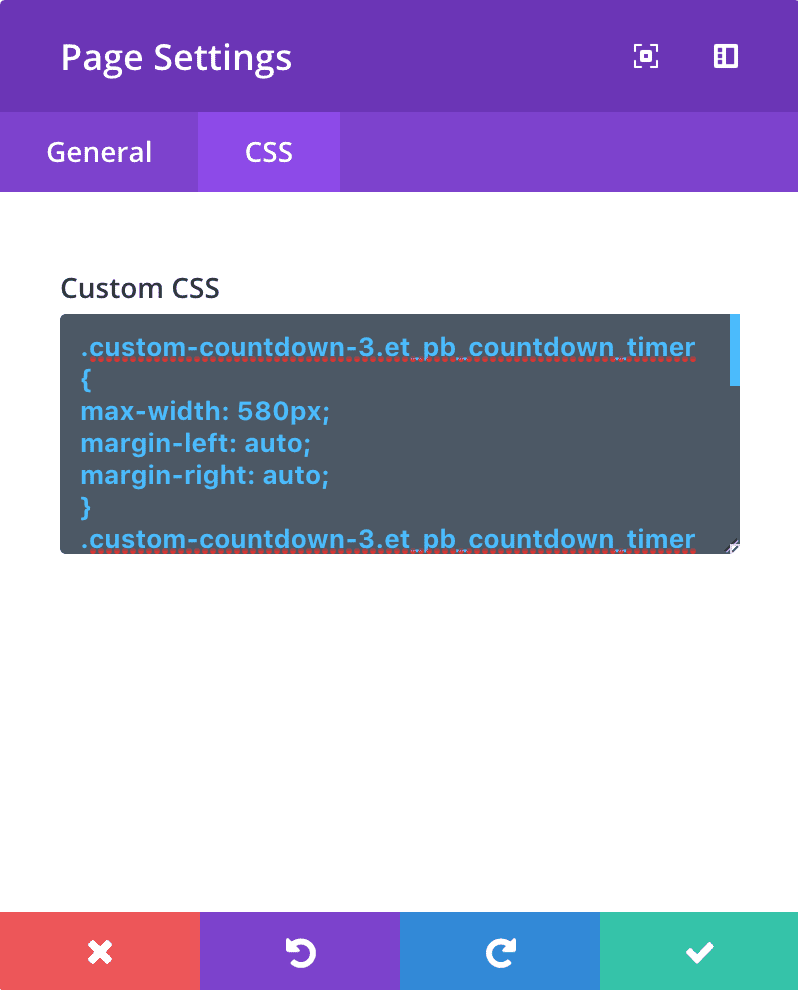
If you decide to add the CSS just to the one page then you’ll need to open up the Divi page settings. To do so, click on the purple gear icon at the bottom of your screen. If you don’t see the gear icon, click the purple button that you do see to expose the rest of the menu. Then, click on the CSS tab and paste the below CSS into the box.
.custom-countdown-3.et_pb_countdown_timer {
max-width: 580px;
margin-left: auto;
margin-right: auto;
}
.custom-countdown-3.et_pb_countdown_timer .title {
 background-color: #6f848d;
 padding-top: 10px;
 padding-bottom: 10px;
 width: 90%;
 margin-left: auto;
 margin-right: auto;
 margin-top: -68px;
}
.custom-countdown-3 .et_pb_countdown_timer .sep {
color: #969696;
}
.custom-countdown-3 .days { margin-right: 12px;
}
If you chose to put the custom CSS in the individual Divi page settings like I did, then you probably noticed that the countdown drastically changed instantly. That is of course thanks to the live updating that is part of Divi’s new visual builder. This live updating is great for a lot of reasons but in this example, with the CSS, it allows you to see exactly what the CSS does. That’s why I recommend pasting the CSS in several chunks. That will help you learn how the CSS is working. 🙂
Lastly, be sure to save your changes! You’re going to need to save the changes in the page settings, as well as for the entire page. Now we’re done!
Now go ahead and give yourself a pat on the back for what you just created. It should look something like this:
Tomorrow: How to Create a Bold (Yet Elegant) Colorful Countdown Timer
I hope you were inspired by this tutorial to create your own truly unique and impressive countdown timers on your Divi website! Don’t forget, this is only part 1 of 5 in our mini series. Come back tomorrow where I will be showing you how to create a “bold and colorful” countdown timer!
Be sure to subscribe to our email newsletter and YouTube channel so that you never miss a big announcement, useful tip, or Divi freebie!


Love this but having a problem. Does this work on Divi 2.7.5? I cannot get bg color on counter module to change and the one time I did, the bg image of forest disappeared. Any thoughts? Thanks.
Nice video! Very helpful!
Thanks for this, with the settings you’ve given I seem to lose the (s) after days, hours etc when viewing on mobile. Any tips?
Amazing. Thanks Tim!
You’re welcome 🙂
Wouah.. Magnifique.
Really nice. But how can I translate the timer to german?
Looks great! Nice work. 🙂
Thanks Ryan 🙂
That looks great! Would there be any way of adding some animated snowflakes?
Hi Paul,
There’s a few plugins in the repository that come up when you search for “animated snowflakes.” I’d start there. 🙂
Thanks for this
You’re very welcome!