 Colorful Countdown Timer Module With Divi")
This post is part 3 of 5 in our mini series titled 5 Impressive Ways to Style Divi’s Countdown Timer Module. Stay tuned this week for all five unique examples of Divi’s countdown module, with a tutorial on how to achieve each one!
In yesterday’s post, I discussed some of the various benefits of using a countdown timer on your WordPress website, and I also showed you how to restyle Divi’s countdown timer module with “simple elegance.” In today’s post, I’m going to continue the tutorial series and show you how to use Divi’s countdown timer module to create a bold and colorful website countdown. Let’s get started!
The Divi Countdown Module: Before & After
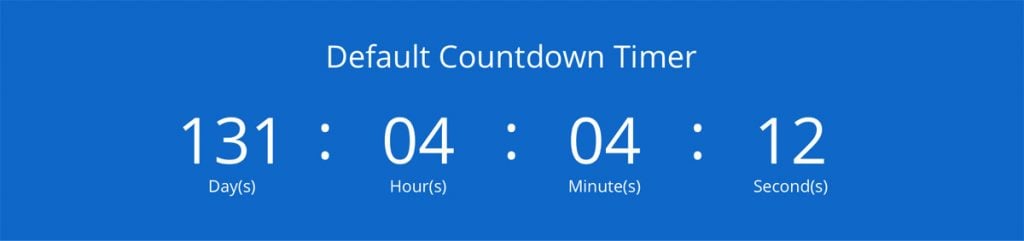
Just like we did in yesterday’s post, let’s take a look at our starting point. Below is a screenshot of the Divi countdown module with the default settings.
Now, let’s take a look at where we’re going.

As the title of this post suggests, this countdown timer is designed to be bold. It’s designed to grab the attention of the website visitor and make sure they know something big is coming.
The great thing about this countdown styling is it can be used on any type of website. It’s modern and minimal design allow it to blend nicely with any style of page, while it’s bold color will snag the user’s attention. Not a fan of the red? Don’t worry, I’ll show you to change it to match any website’s color palette further down in this tutorial.
Creating the “Bold & Colorful” Divi Countdown Timer Module Design
Subscribe To Our Youtube Channel
Preparing the Design Elements
Another great benefit of this countdown timer styling is there is actually no design elements to prepare! Everything is done with the power of CSS (and the built in Divi controls too of course!).
Implementing the Design with Divi
Since there’s no design elements to prepare, we can head straight to Divi. For the sake of simplicity, I’m going to create a new page for this tutorial, however you can easily follow along if you’d like to add this to an existing page. So I’m going to create a new page in WordPress, enable Divi, and then head on over to the gorgeous new visual builder.
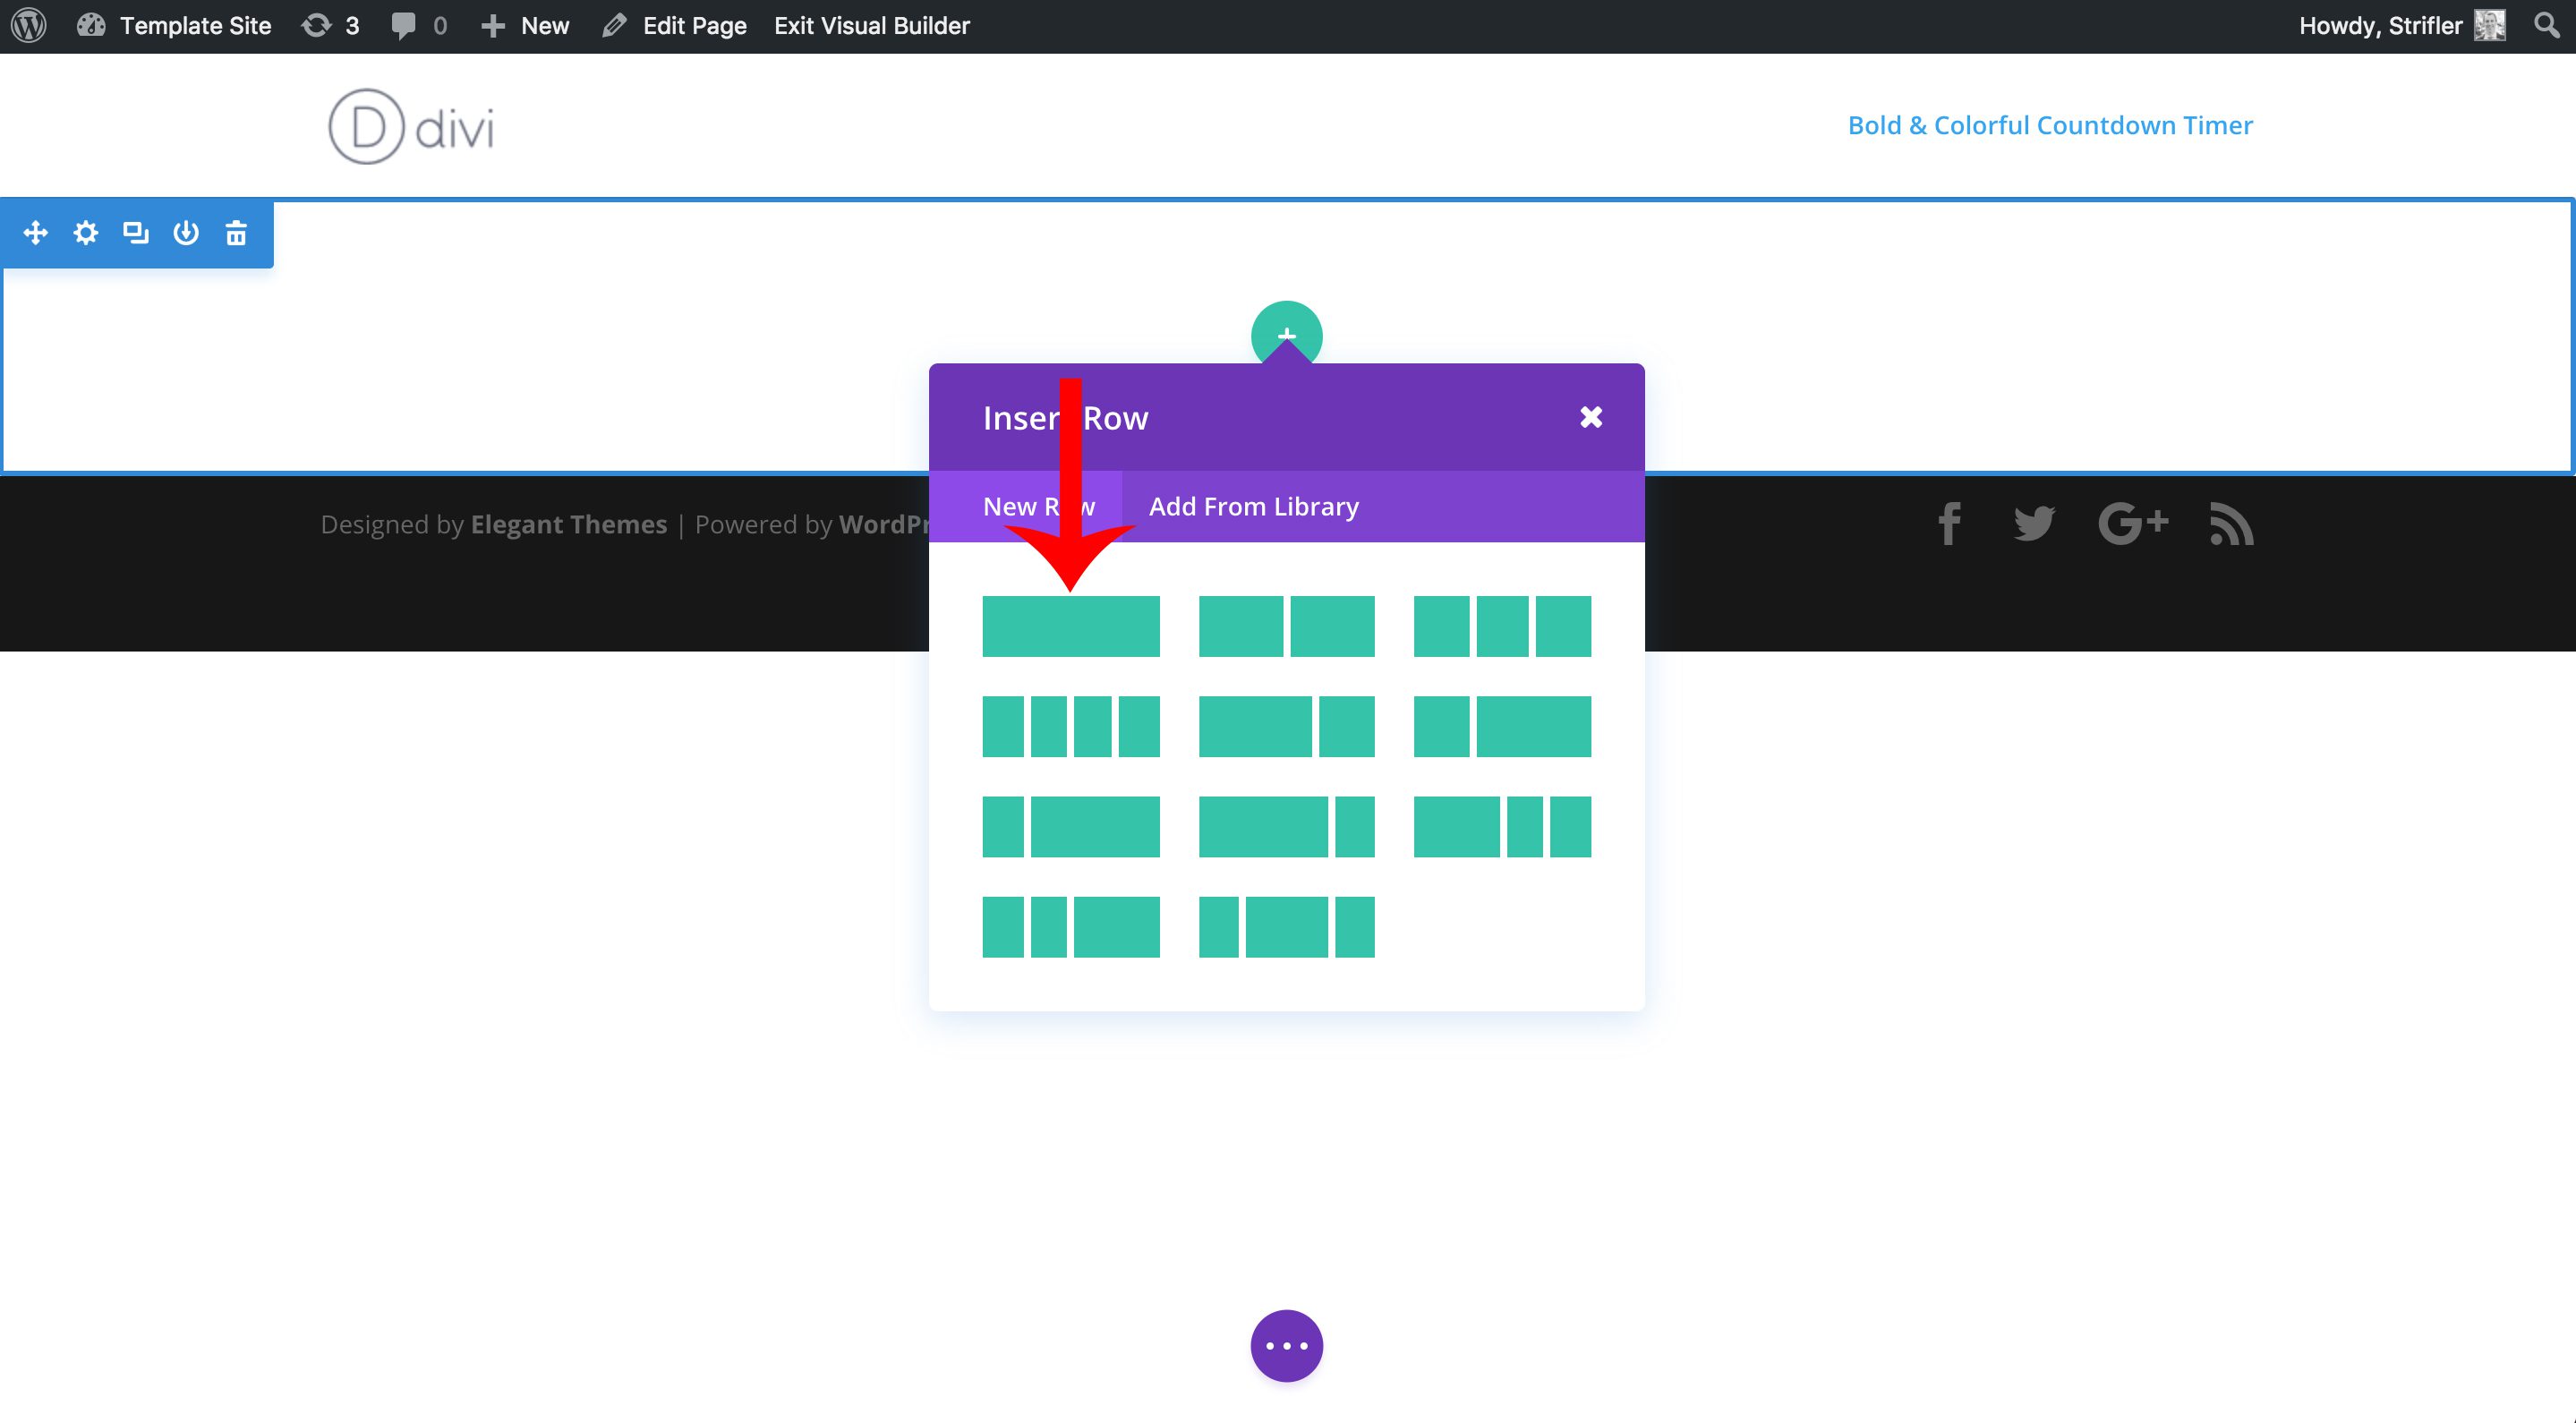
If you’ve created a new page like I have, then there’s already a blank section in place for us. Otherwise, create a new section if you’re adding this to your existing Divi page.
Now we’re going to add a row by clicking on the green (+) circle icon, then click on the icon for the one column row as indicated by the red arrow in the screenshot below.
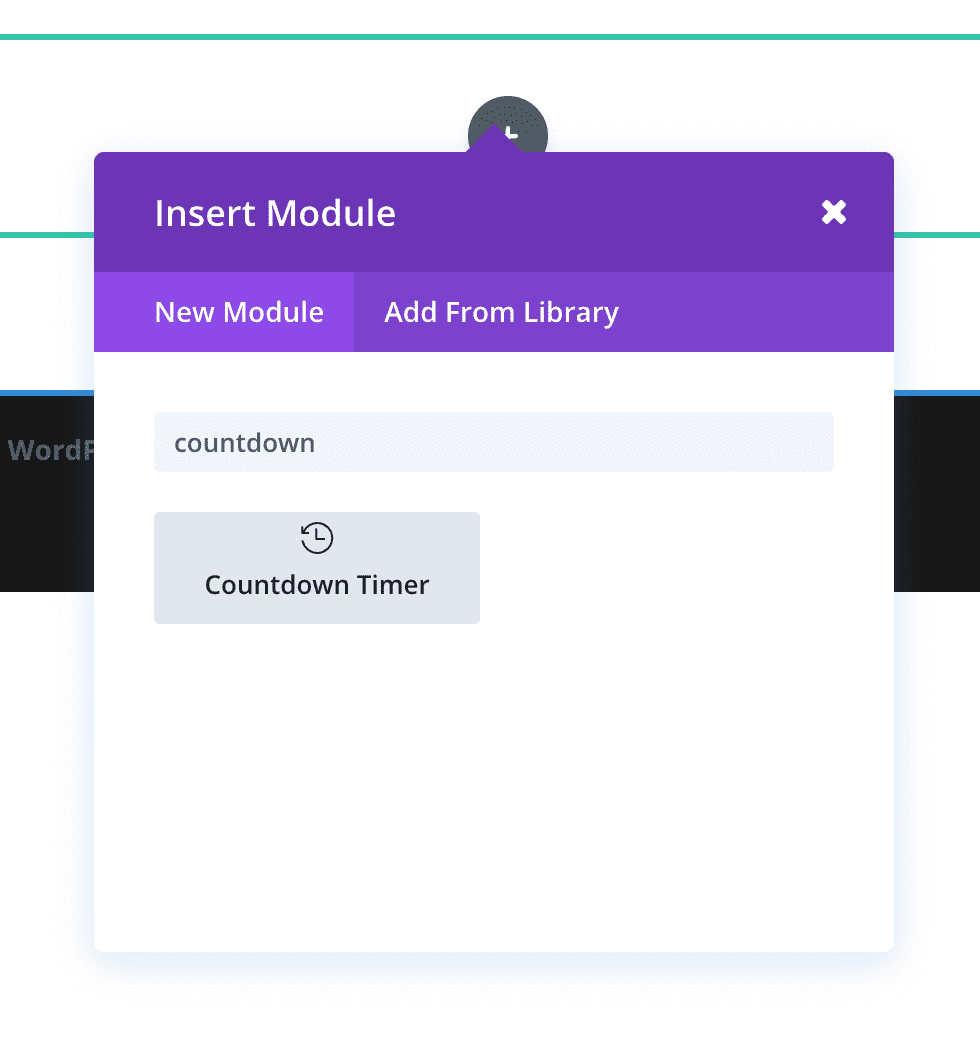
Next, Divi will automatically prompt you to choose a module from the list. Yep you guessed it, select the countdown timer.
Adjusting the Module Settings
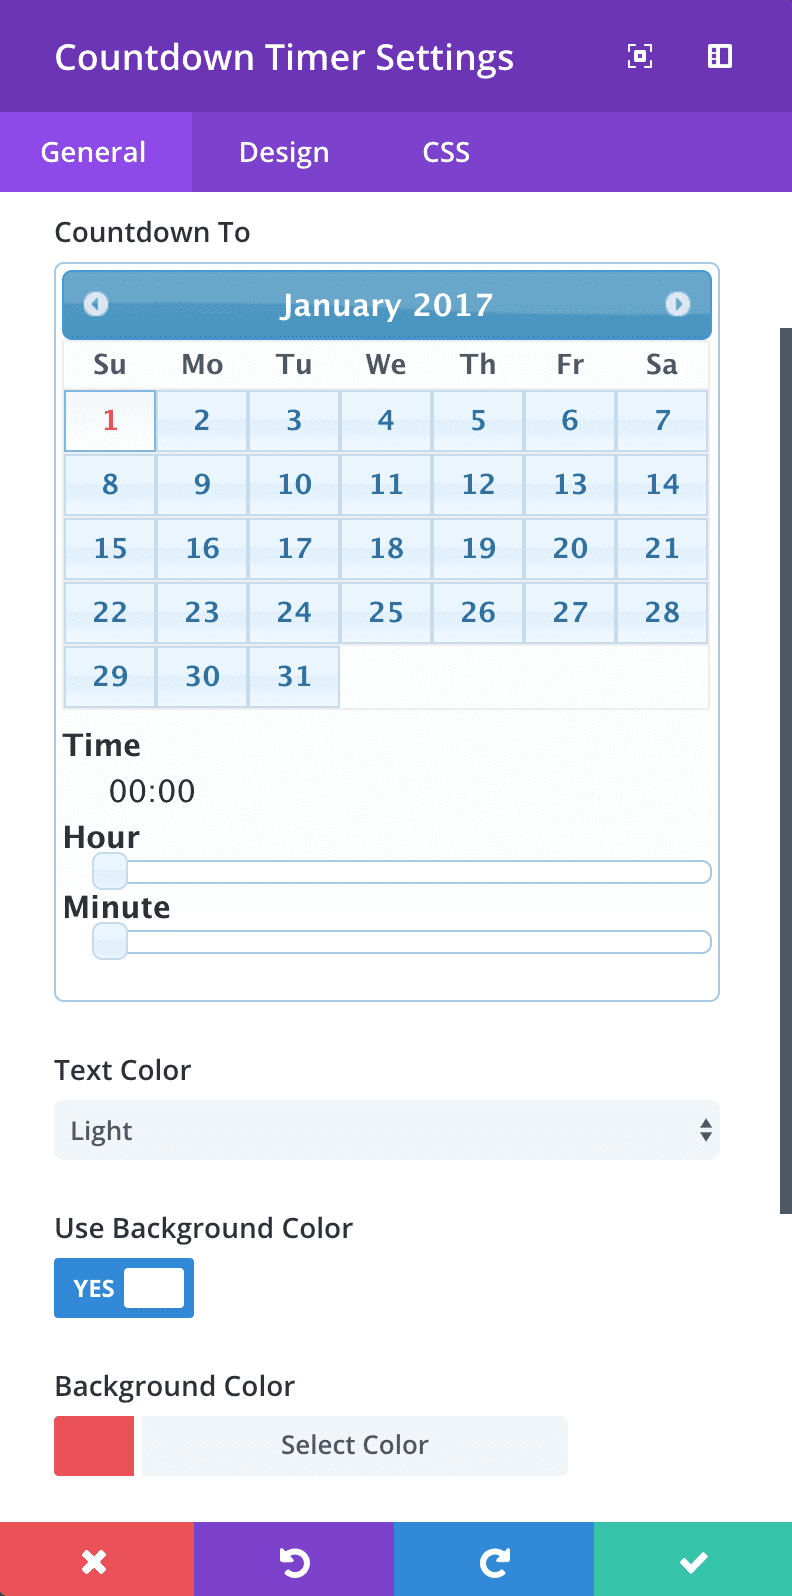
Now it’s time to start digging into the countdown timer settings. The settings modal for the countdown timer should automatically open once you’ve added the module, however if you already closed it, then hover over the countdown timer then click on the gear icon in the dark gray set of controls that appears.
Now, here’s the settings we’ll be changing. If there’s a setting that is not mentioned below, then leave it as default.
In the General settings:
- choose a date to countdown to (I chose January 1st)
- change background color to #e6434d
Here’s what the General settings should look like:
Next, click the tab for the Design settings:
- change all fonts (Header, Numbers, and Labels) to ‘Oswald’, with uppercase (TT icon) and bold
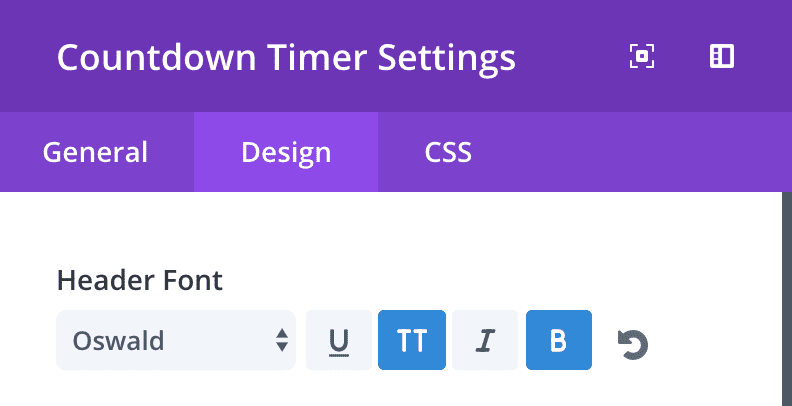
Now click save! Here’s what your countdown module should look like so far:

Not bad! Now for the CSS to finish things off!
Adding the Custom CSS
The last thing we need to do is add a little custom CSS magic to take us the rest of the way there!
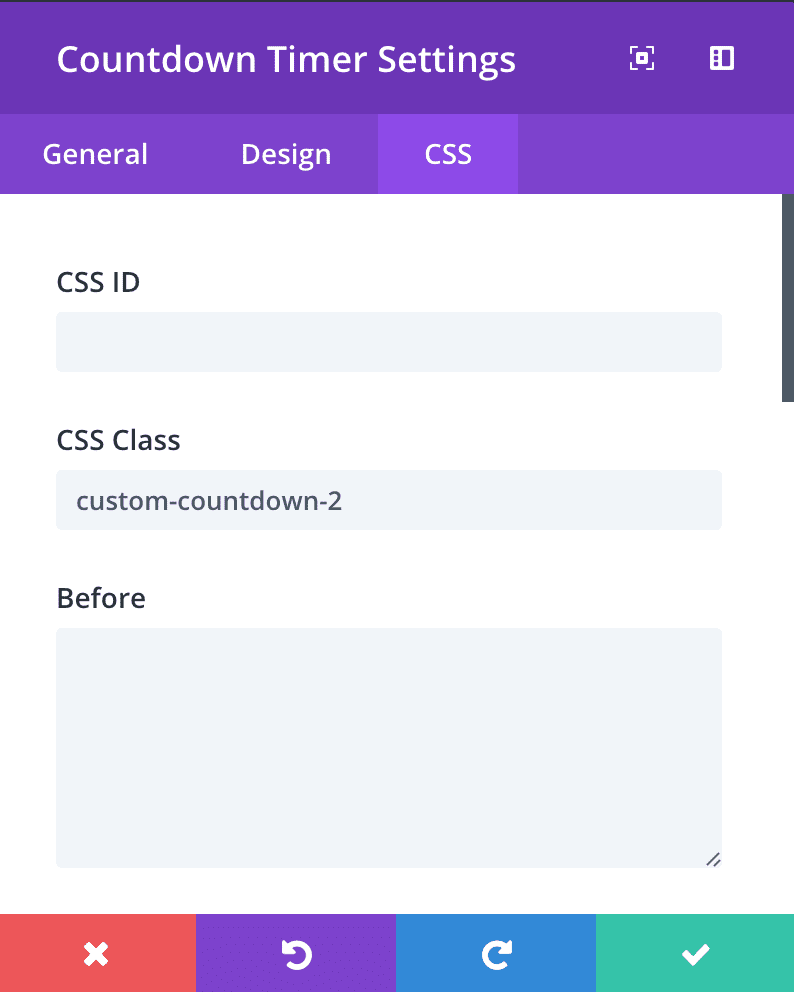
Before we can start adding the custom CSS though, we’ll need to add our own custom CSS classes so that we’ll only customize the CSS of the single countdown timer module we’re working on now, and not ALL countdown timers that are on the site or will be on the site.
Open up, the module settings, and click over to the CSS tab of the module settings, and add custom-countdown-2 as the CSS class. You can of course name the CSS class whatever you’d like, but you’ll have to also rename the classes in the below CSS in order for it to work.
Okay, now we’re ready to add the custom CSS. You’ll have the option of adding the custom CSS to the Divi Theme Options custom CSS box, or the custom CSS box on the individual page settings. The difference is the custom CSS box in the page settings will only add the CSS to the one page, while adding it to Divi Theme Options will add it to every page of the site.
If you think you’ll be adding more countdown timers later with this same styling to other pages, then add the CSS to the Divi Theme Options panel. Otherwise, you can add it to the page settings custom CSS box.
To open up page settings, click on the purple gear icon at the bottom of your screen. If you don’t see the gear icon, click the purple button that you do see to expose the rest of the menu.
![]()
Then, click on the CSS tab and paste the CSS below into the box like so.
.custom-countdown-2 {
 max-width: 620px;
 margin-left: auto;
 margin-right: auto;
 border-radius: 8px;
 box-shadow: 6px 4px 74px #b36e6e;
}
.custom-countdown-2 .value {
letter-spacing: 6px;
background-color: #dc2d43;
padding: 30px 6px !important;
padding-left: 11px !important;
width: 89px !important;
}

.custom-countdown-2 .days {
margin-right: 37px;
}

.custom-countdown-2 div.sep.section p {
display: none;
}

.custom-countdown-2.et_pb_countdown_timer .section.values {
width: 18%;
}
.custom-countdown-2 .days .value {
 width: 129px !important;
}
If you used the custom CSS box within the individual page settings, then you should have seen it update in real time, thanks to the live updating in Divi’s new visual builder. For learning purposes, it may be helpful to paste the above CSS one chunk at a time. That will help show you what CSS is controlling which element of the countdown timer. This can be a great learning experience if you’re new to CSS.
Be sure to save your changes within the page settings box after pasting the CSS, as well as the page itself.
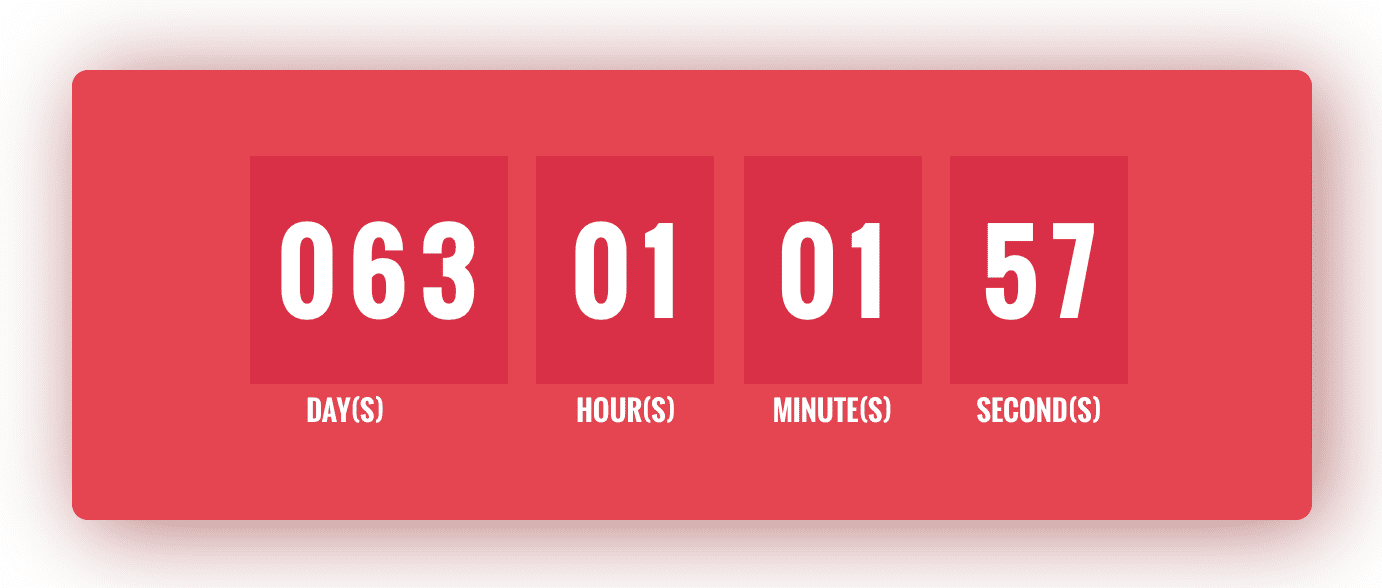
Now, let’s admire what we created!
Tomorrow: How to Create a Countdown Timer with a Animated Gradient Background
I hope you enjoyed today’s countdown timer tutorial. We still have two days left of out miniseries! So check back tomorrow to learn how to add a beautiful animating gradient background to your countdown timer in Divi!
Be sure to subscribe to our email newsletter and YouTube channel so that you never miss a big announcement, useful tip, or Divi freebie!


Impressive, very useful thank you Tim
I’m glad you found it useful, Denis!
Nice looking! Thank you!
Thank you, Jordan 🙂
Wow, that’s an awesome tutorial Tim. This alone can change the way we do landing pages on WordPress ( the landing pages are also thanks to Divi’s Magic).
The urgency thing we use for marketing comes in perfect with the countdown timer. I can’t wait to go put this to use.
Thank you for taking all the effort, Tim.
Nice design and thanks for guidance 😀
Would like to have an evergreen timer option
This is some thing i way looking for . Congrats team great utility.
We need really good pop-ups now, Look some hack related to it in near future.
Thanks
The design looks great but isnt mobile responsive – any suggestions?
ANyone know what happened to the rest of the post slider tutorials?
Great post and useful design, Thank You
Thanks, and you’re welcome 🙂
Amazing! Thank you!!
Thanks, Johnson. I’m glad you like it.