
Using CSS Parallax with Background Images in Divi allow us to create hover effects that are surprisingly unique. Parallax is one of many ways we can add life to our websites. And when combining parallax with Divi’s vast array of hover options, we bring content to life even more.
In this tutorial, we’ll show you can quickly and easily design unique CSS parallax background hover effects in Divi. No plugin or custom coding needed!
Let’s get started.
Sneak Peek
Here is a quick look at the css parallax background hover effects we will design in this tutorial.
Download the Layout for FREE
To lay your hands on the designs from this tutorial, you will first need to download it using the button below. To gain access to the download you will need to subscribe to our newsletter by using the form below. As a new subscriber, you will receive even more Divi goodness and a free Divi Layout pack every Monday! If you’re already on the list, simply enter your email address below and click download. You will not be “resubscribed” or receive extra emails.

To import the layout to your page, simply extract the zip file and drag the json file into the Divi Builder.
Let’s get to the tutorial shall we?
What You Need to Get Started
To get started, you will need to have the following:
- The Divi Theme installed and active
- A new page created to build from scratch on the front end (visual builder)
- Images to be used for mock content
After that, you will have a blank canvas to start designing in Divi.
Part 1: Creating a Breakout Parallax Hover Effect in Divi
First, create a regular section with a one column row.
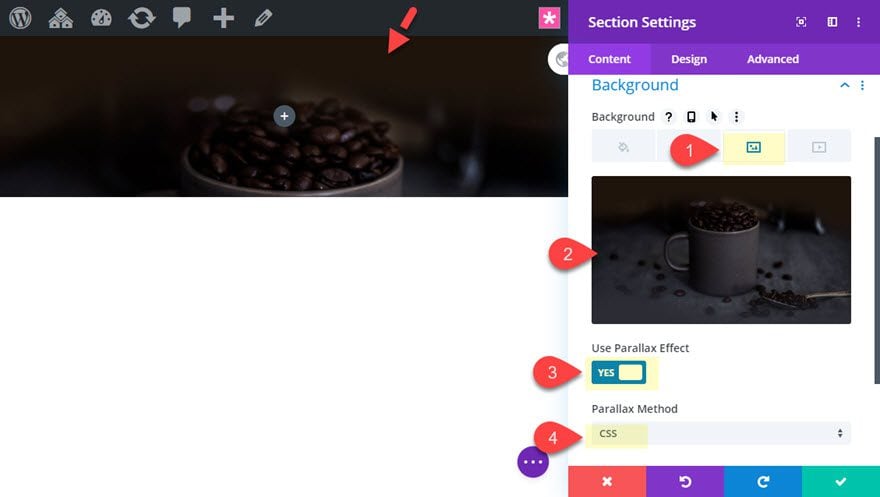
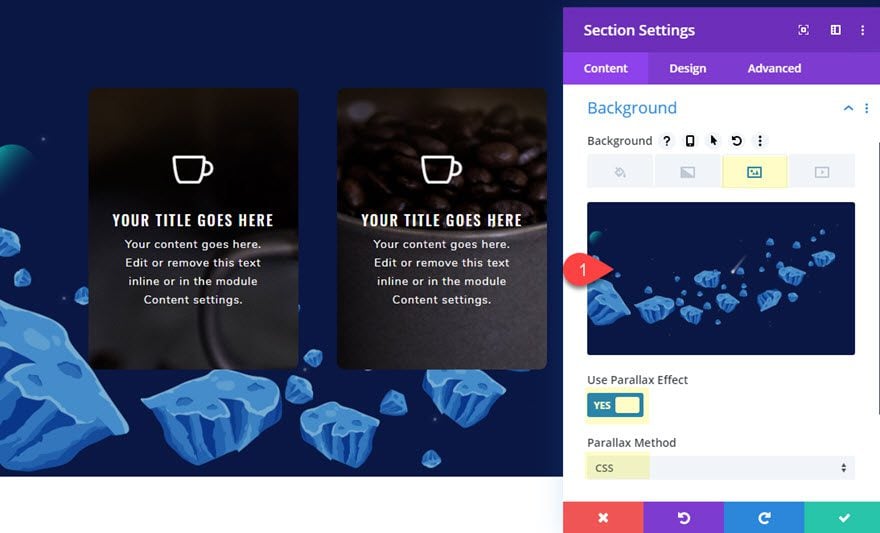
Before adding a module, open the section settings and add a background image using CSS parallax.
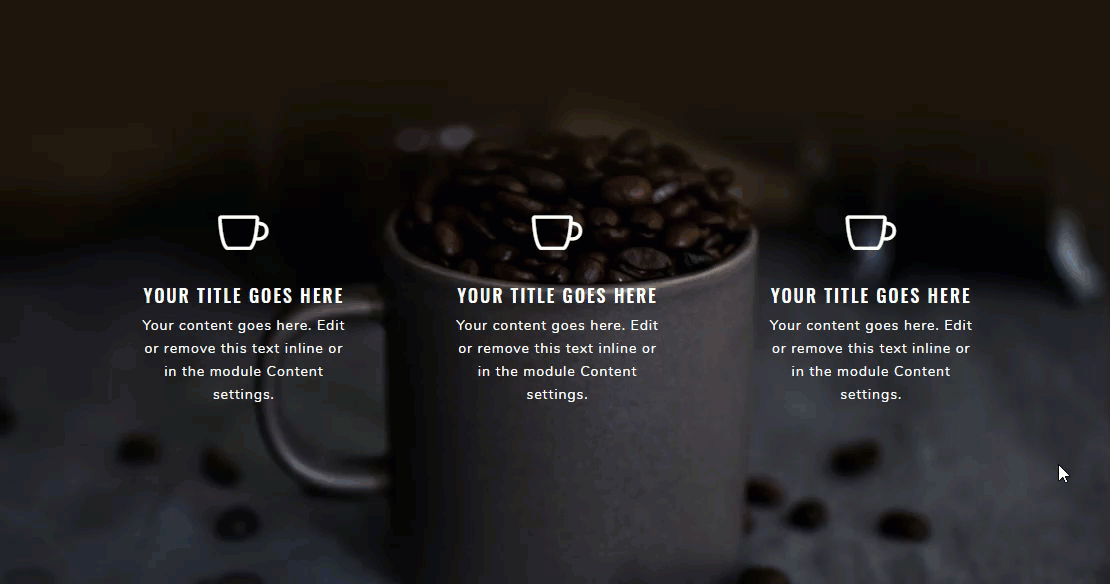
Make sure the image is at least 1920px wide. The design works well with a darker background image with a lot of texture. I’m using one from our Coffee Shop Layout Pack which is available from the Divi Builder.
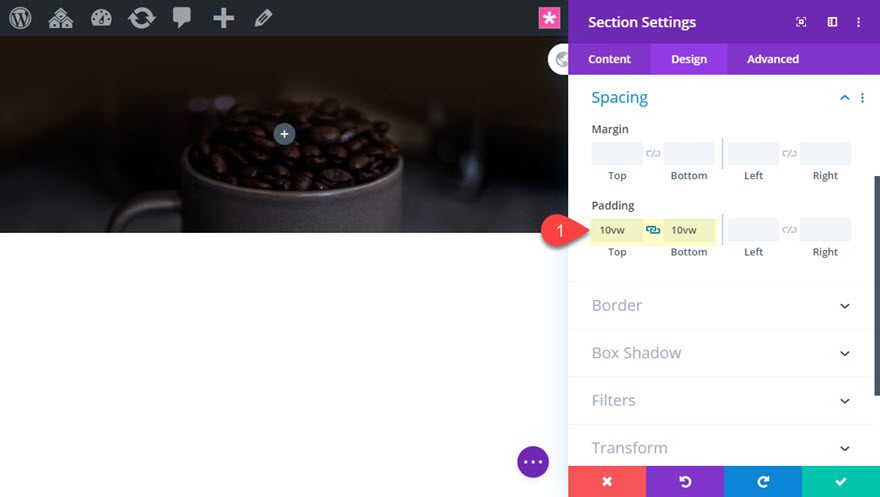
Then add some padding to the section as follows:
Padding: 10vw top, 10vw bottom
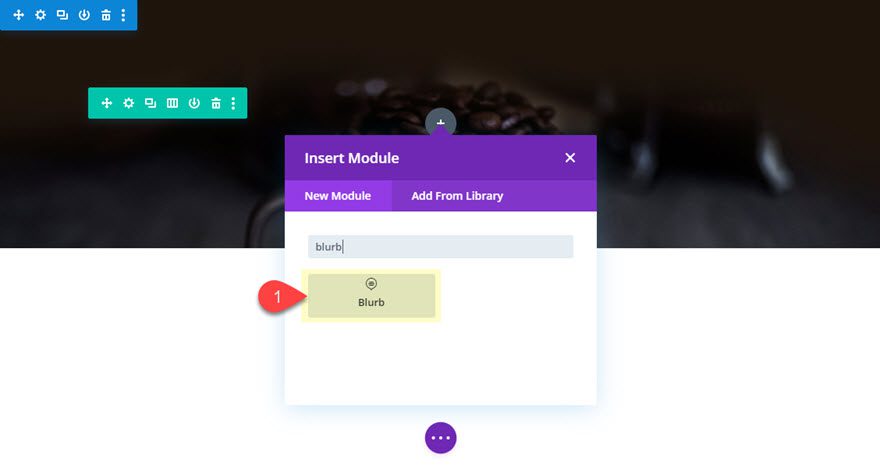
Add a Blurb Module
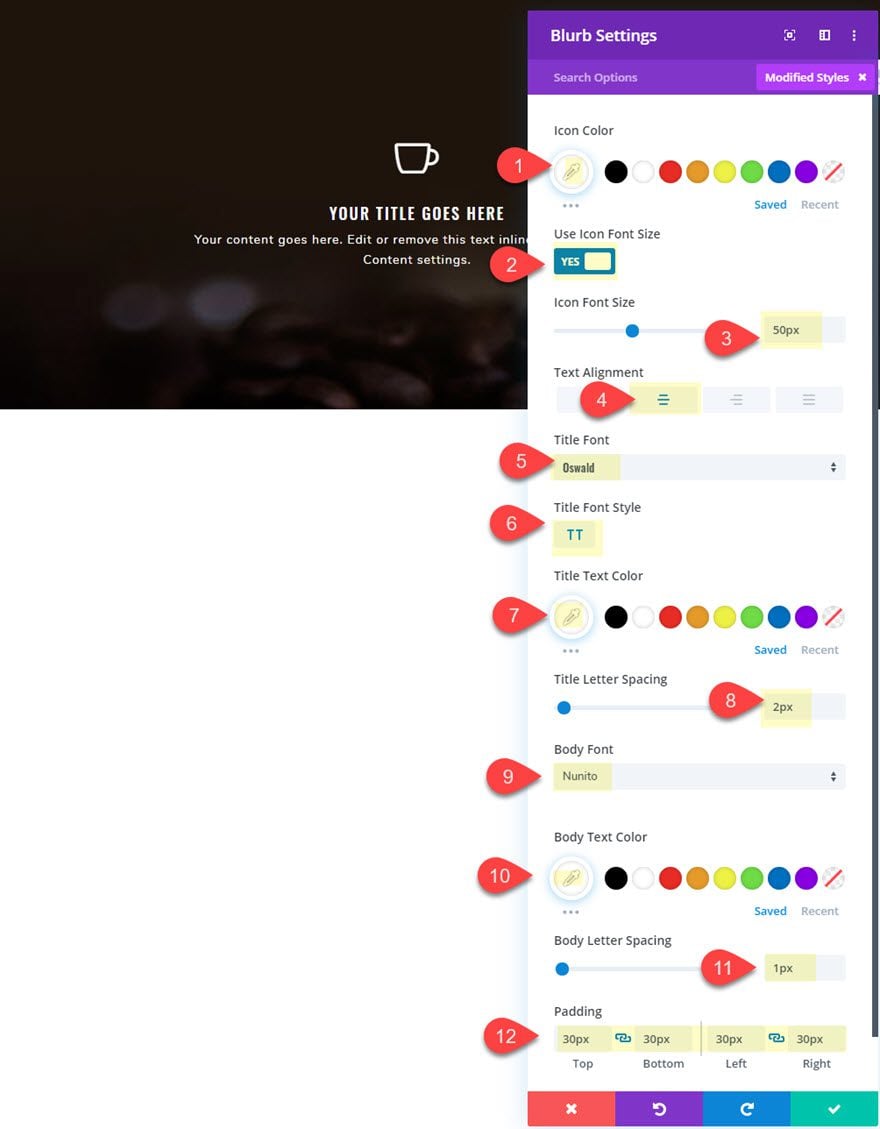
Once the section background and padding are in place, add a blurb module to the row.
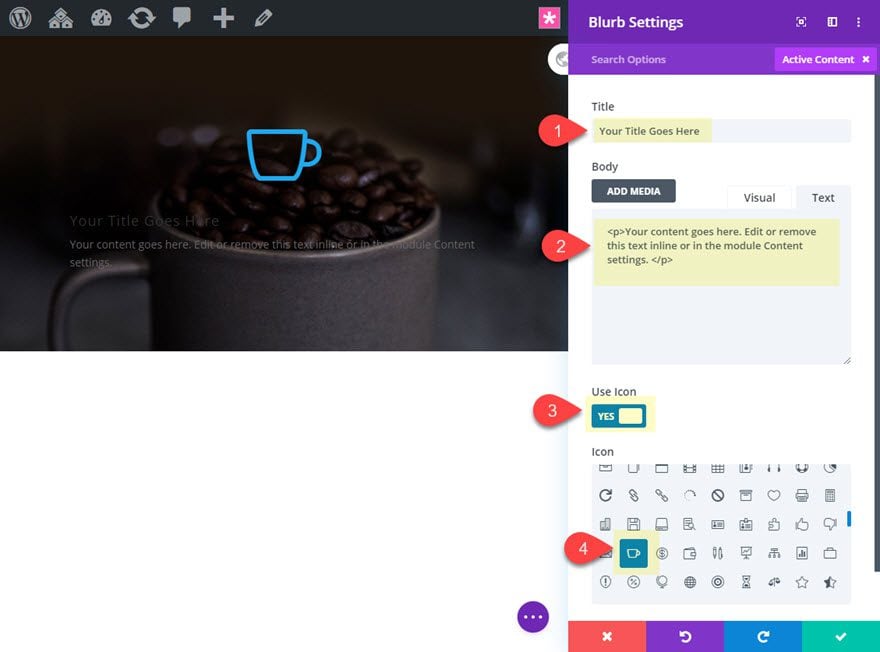
Then update the blurb content with a few sentences of body text. You can keep the default title there.
Then click to use an icon and select the coffee icon for the blurb.
After the content is ready, update the design settings as follows:
Icon Color: #ffffff
Icon Font Size: 50px
Text Alignment: center
Title Font: Oswald
Title Font Style TT
Title Text Color: #ffffff
Title Letter Spacing: 2px
Body Font: Nunito
Body Text Color: #ffffff
Body Letter Spacing: 1px
Padding: 30px top, 30px bottom, 30px left, 30px right
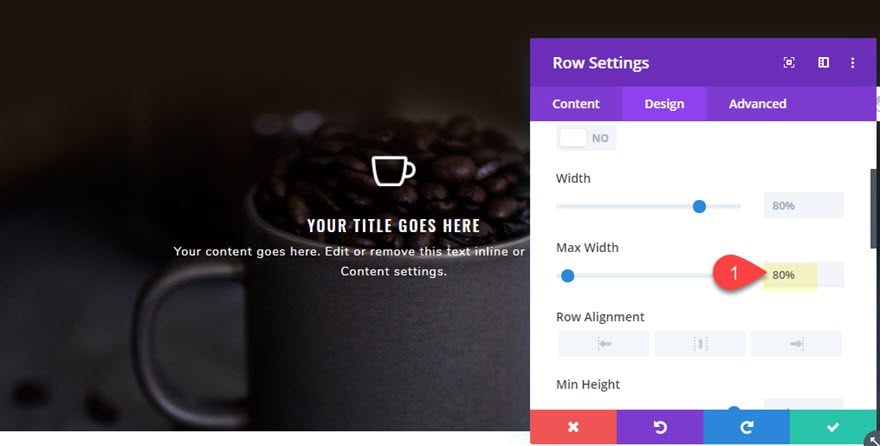
Adjust Row Width
After the blurb is designed, jump over to the row settings and adjust the max width.
Max Width: 80%
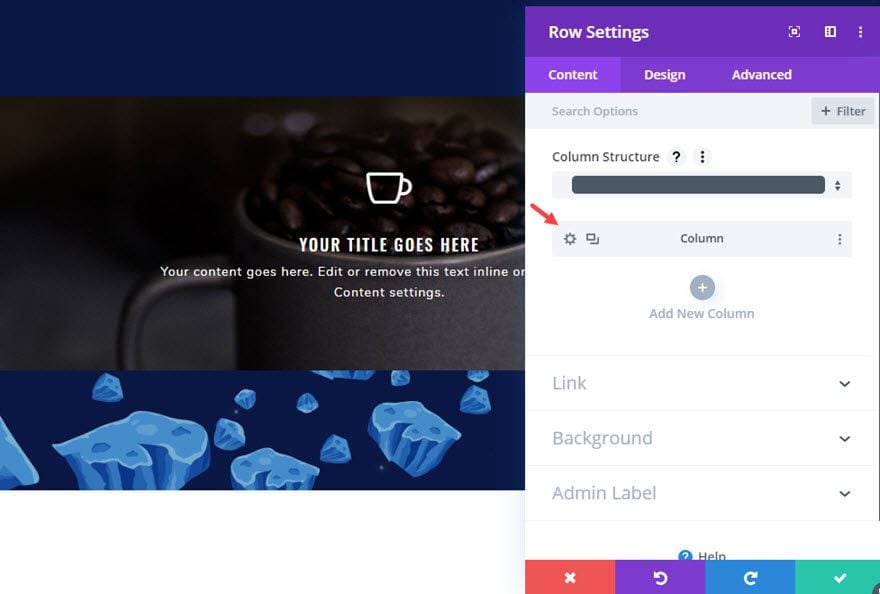
Column Settings
For this example, we are going to activate the hover effect at the column level. This allows you to use multiple modules to build the content, even though we are just using a single blurb module for now.
For this parallax hover effect to work, we need to add the same background image to the column that we used in our section. We will also need to use the same CSS parallax method on the column background image as well.
Open the column settings and add that same background image using CSS parallax.
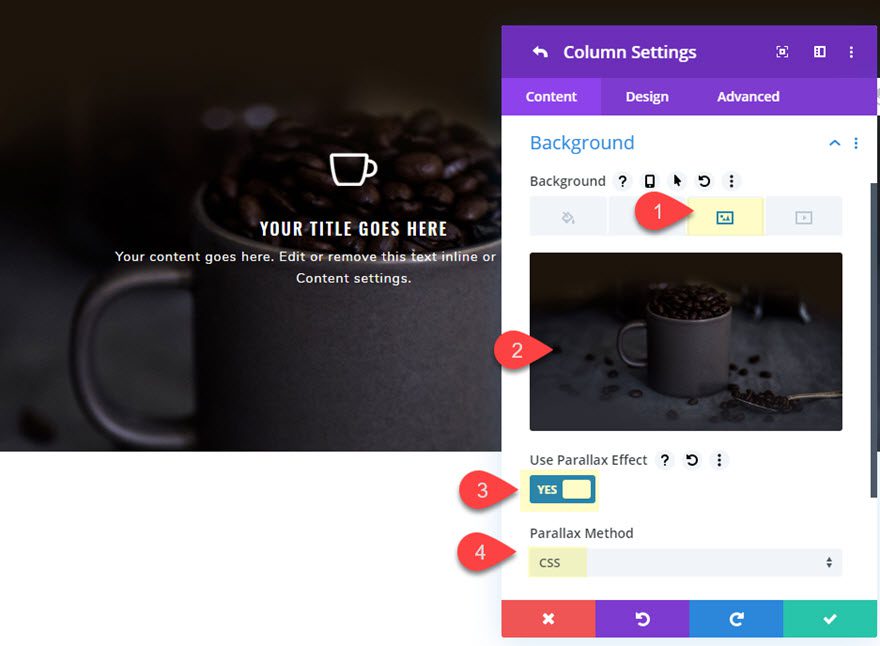
You won’t be able to see any difference between the column background image and the section background image because they are both using CSS parallax which essentially fixes the image in the exact same place on the web page. However, you will see the difference once the hover effect is in place.
Continue to update the column design settings as follows:
Padding: 4vw top, 4vw bottom
Rounded Corners: 10px
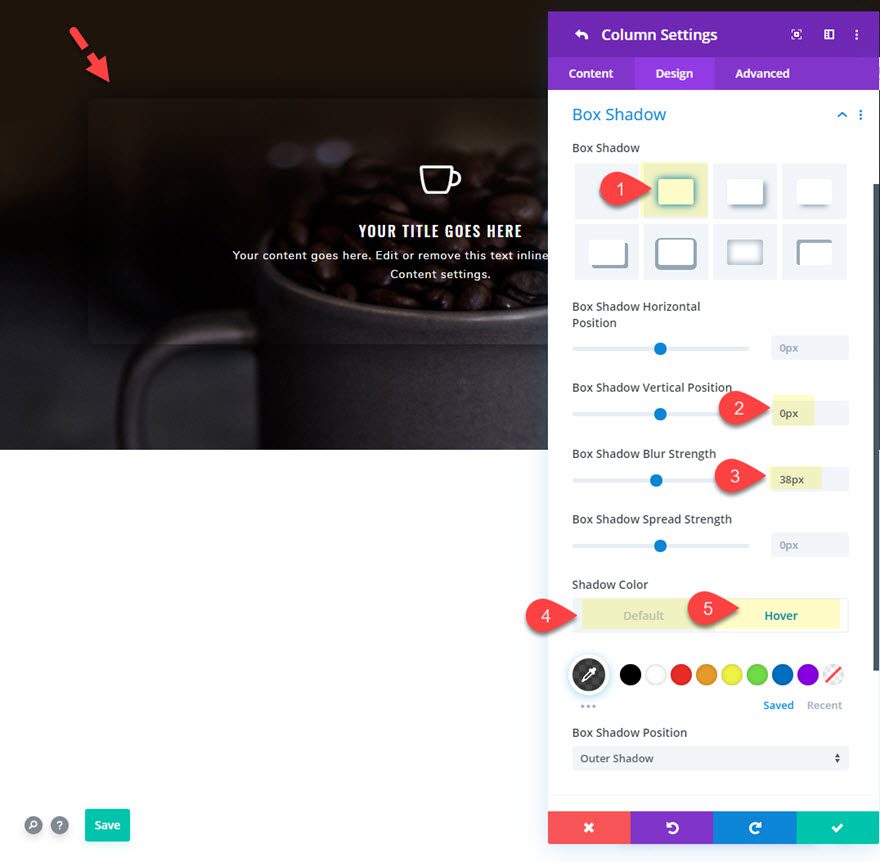
Then give the column a box shadow that only shows on hover as follows:
Box Shadow: see screenshot
Box Shadow Vertical Position: 0px
Box Shadow Blur Strength: 36px
Shadow Color (default): rgba(0,0,0,0)
Shadow Color (hover): rgba(0,0,0,0.72)
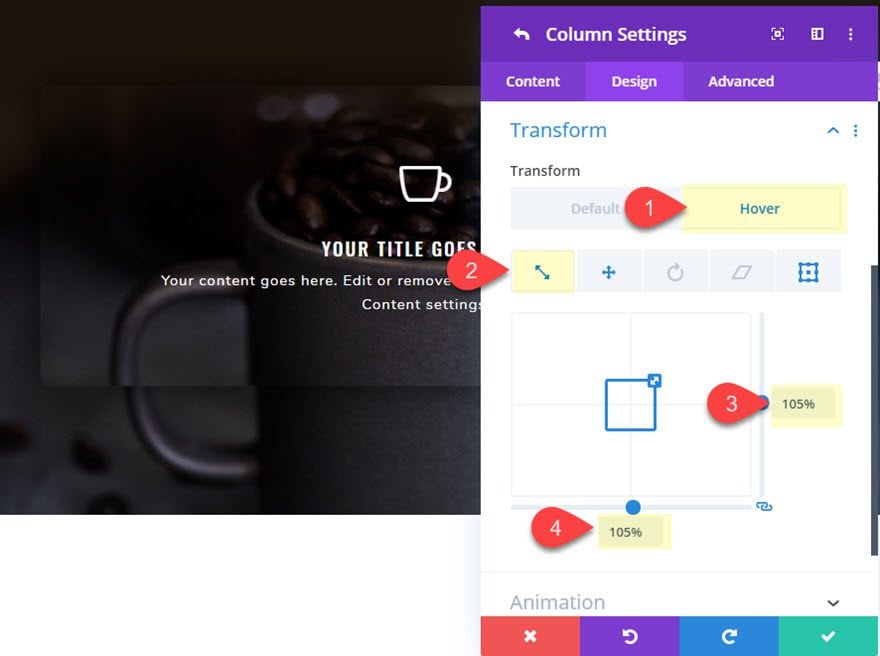
Now let’s go to the transform options and update the following transform styles on hover:
Transform Scale (hover): 105%
This will enlarge the column (and it’s contents) slightly to create the effect of slightly popping out of the background image.
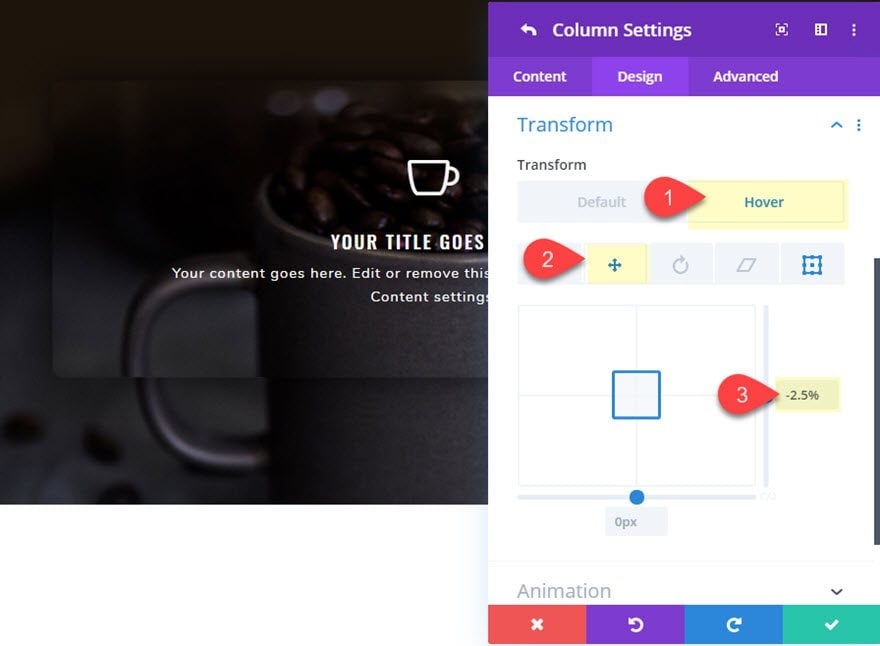
Transform Translate Y Axis (hover): -2.5%
This moves the column up slightly on hover to create a slight asymmetrical displacement.
Transform Origin: 100% 50% (bottom center)
This begins the scaling effect from the bottom center origin which, when combined with the translate value, resembles a subtle hinge effect.

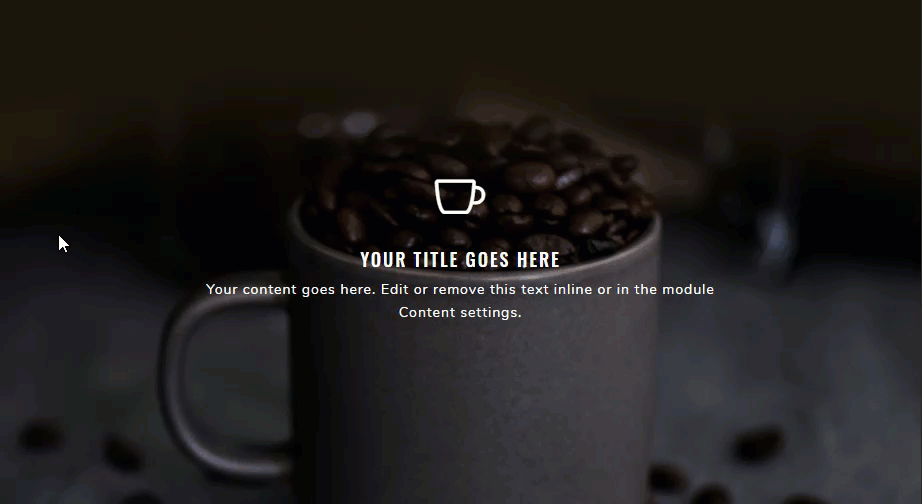
Here’s the css parallax hover effect so far.
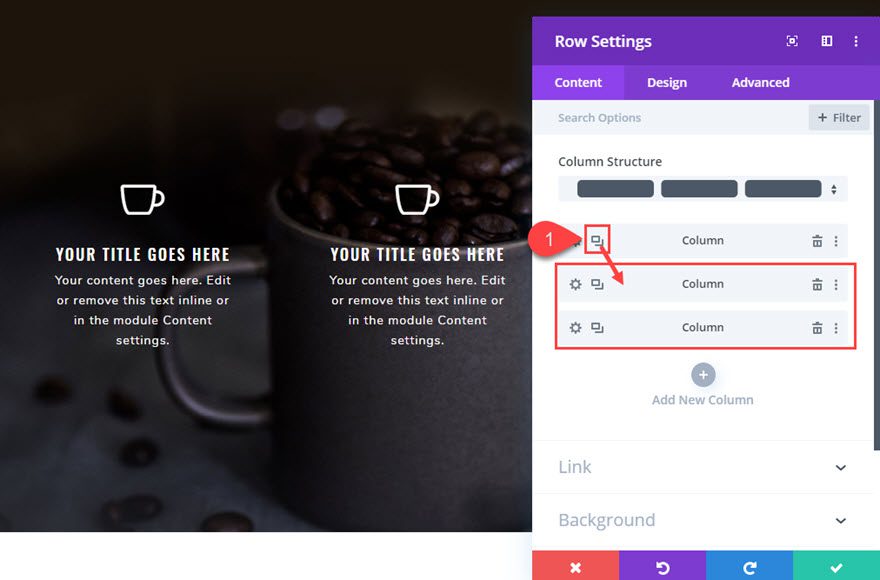
Now open the row settings and duplicate the column twice to create a total of three columns each with the same blurb and hover effects in place.
Final Result
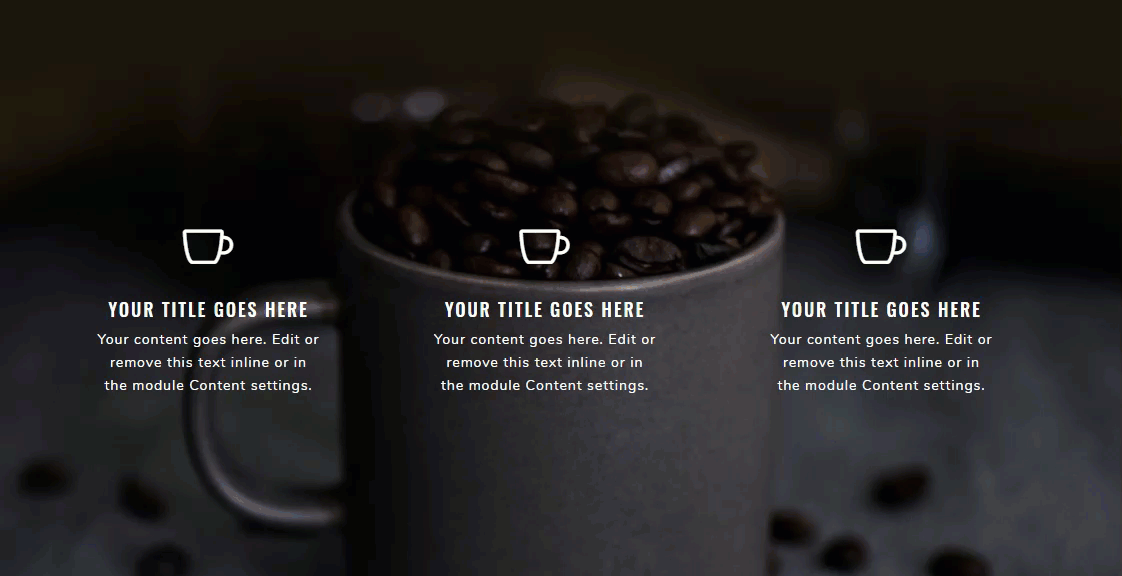
Here is the final design. Notice how the parallax background images are hidden by default when scrolling down the page. Then they appear when hovering over each of the column as they pop out. You can also see the parallax still functions on the column when scrolling down the page while hovering over the column. It is a subtle, yet extremely unique, hover effect.
Adding Rotation to the Hover Effect
We can also add a rotation to the css parallax hover effect which adds a nice touch to the design. Simply open each of the column settings and update the following:
Transform Rotate Z Axis (on hover): 5deg
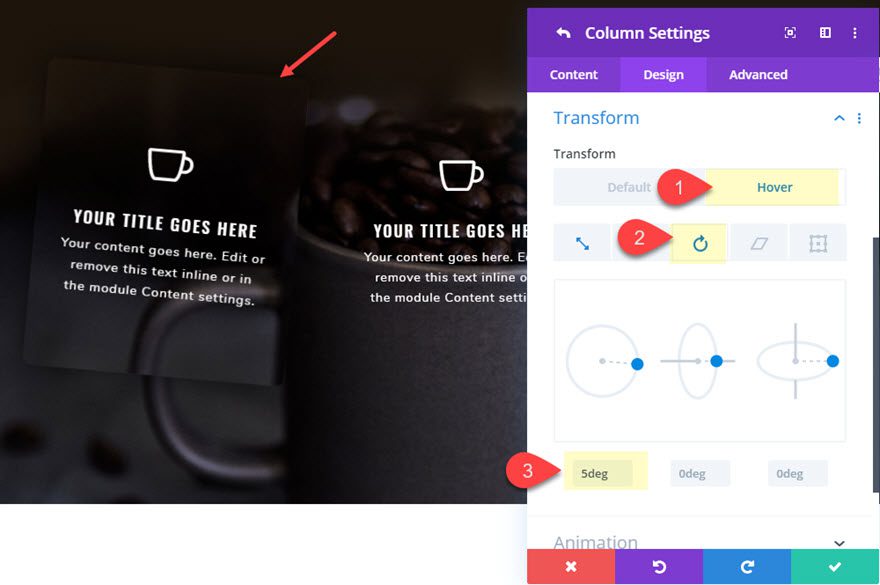
If you want to mix it up, you can give the middle column a -5deg rotation.
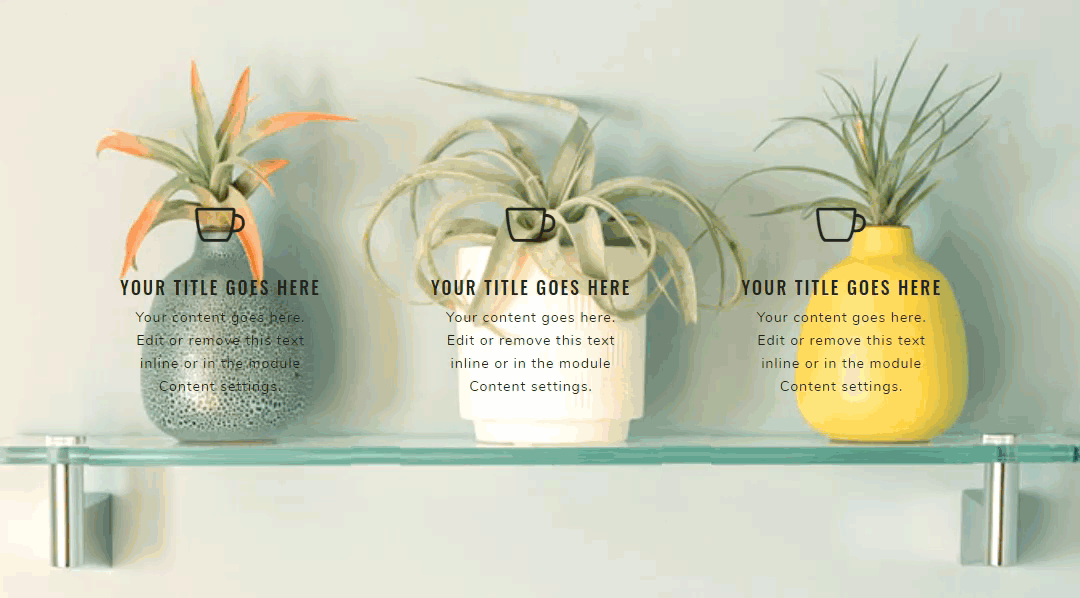
Here is the final result.
And here is same design with a lighter background image and darker text.
Part 2: Creating a Magnifying Glass Parallax Hover Effect in Divi
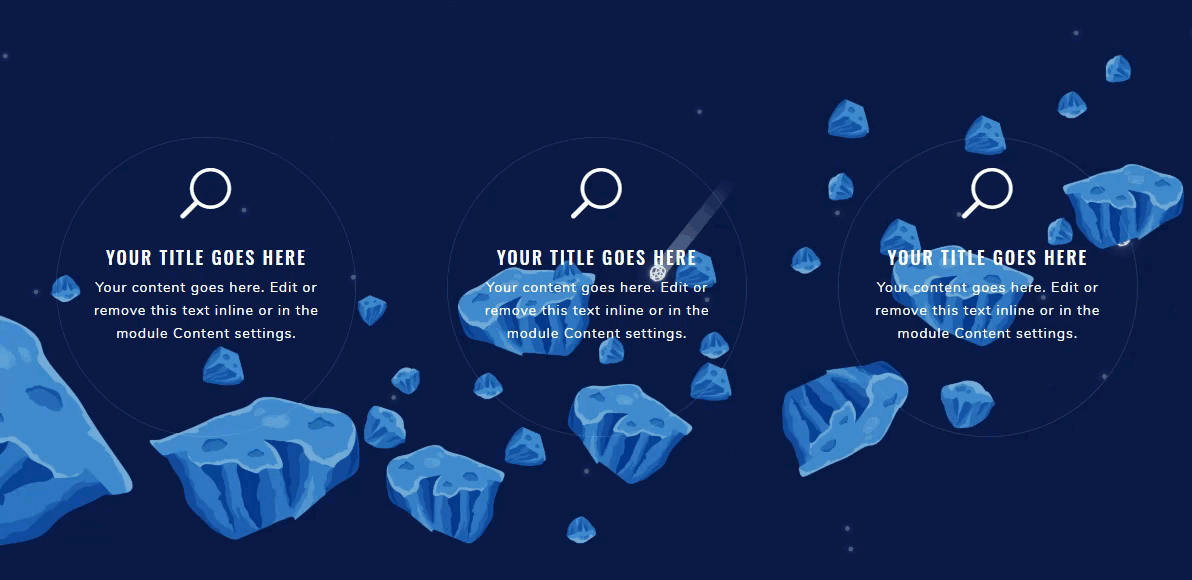
Duplicate the section from the first design and then open the section settings and replace the background image with a new one. I’m using the one from our Video Game Layout Pack because it really highlights the magnification parallax hover effect.
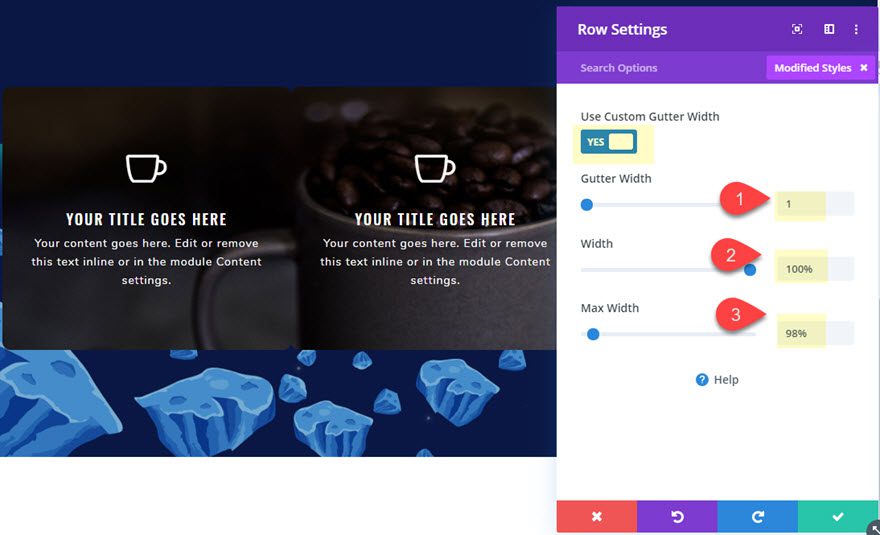
Update Row Settings
We are going to need some extra room for this design so open the row settings and update the following:
Gutter Width: 1
Width: 100%
Max Width: 98%
After that, jump over to the content tab and delete two of the columns so that only one remains.
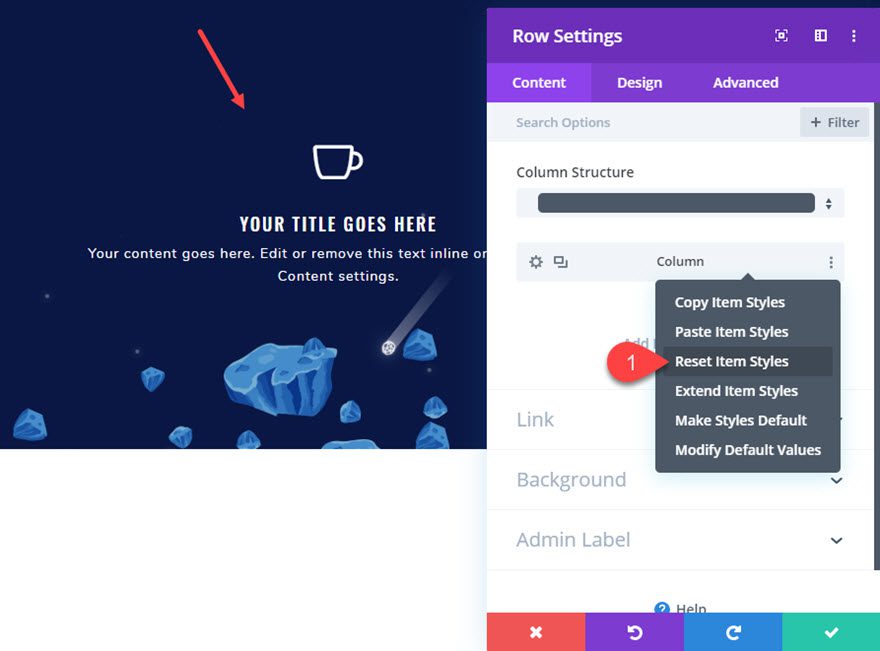
Column Settings
For this design, we need to apply the hover effect at the module level instead of the column level, so we need to reset the default styles for the column. To do that, right click on the column item and select “reset item styles”.
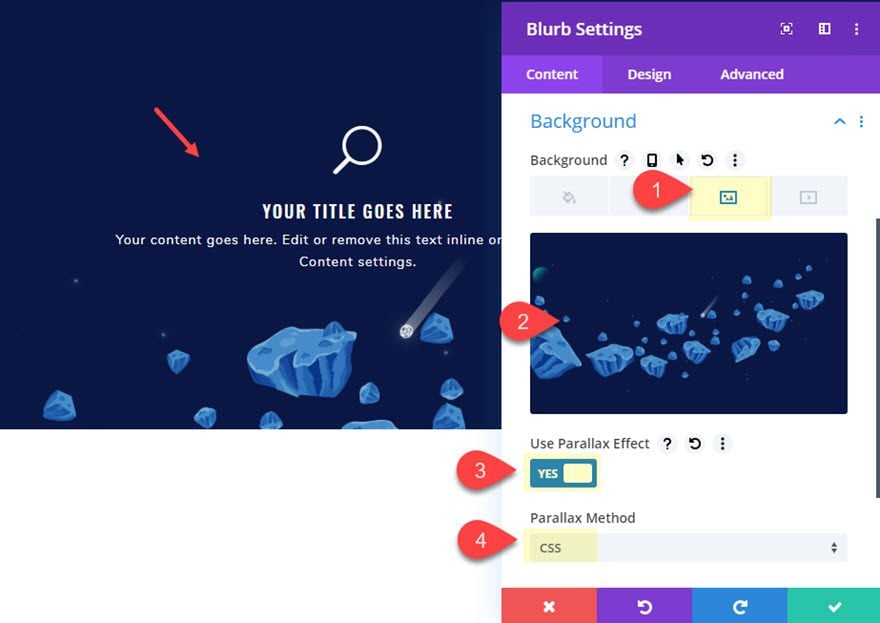
Update Blurb Module
After the column settings are restored to the default styles, open the blurb module settings and add the same css parallax background image that was added to the section.
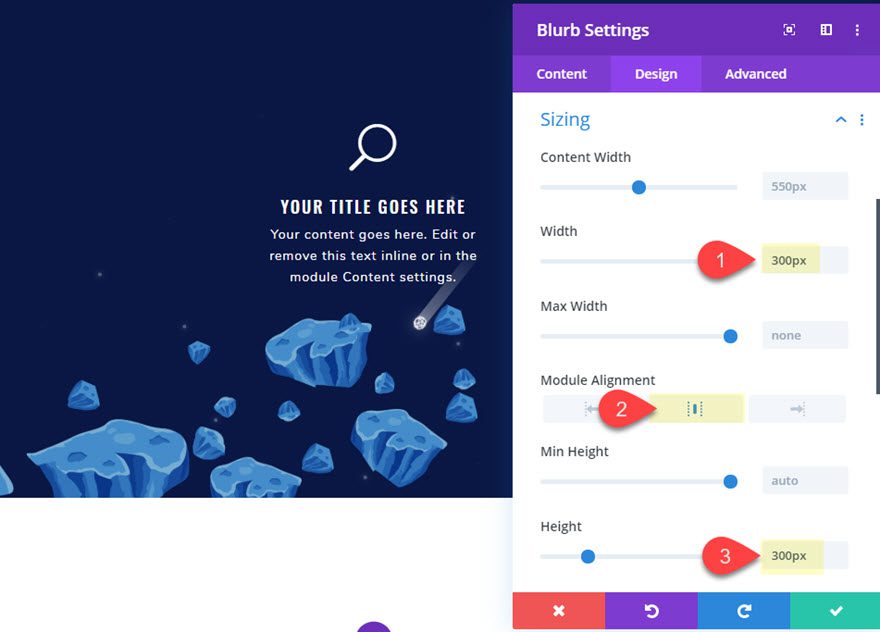
Sizing
In order to create a circular module, first we need to give it a matching width and height as follows:
Width: 300px
Module Alignment: center
Height: 300px
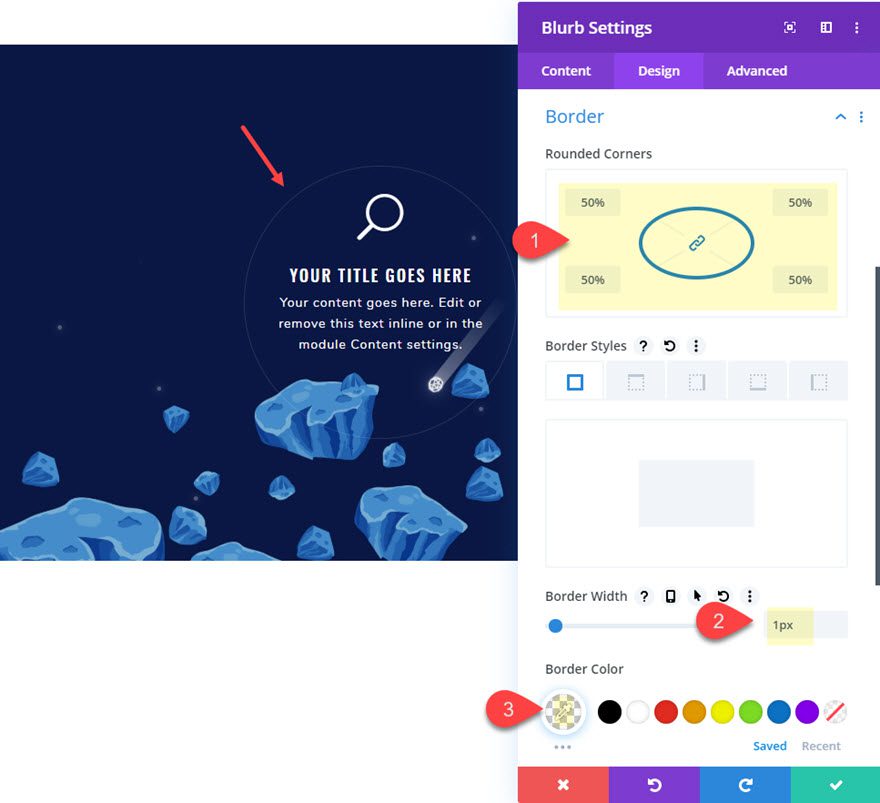
Border
To complete the circular effect, we need to update the rounded corners and give it a slight border.
Rounded Corners: 50%
Border width: 1px
Border Color: rgba(255,255,255,0.12)
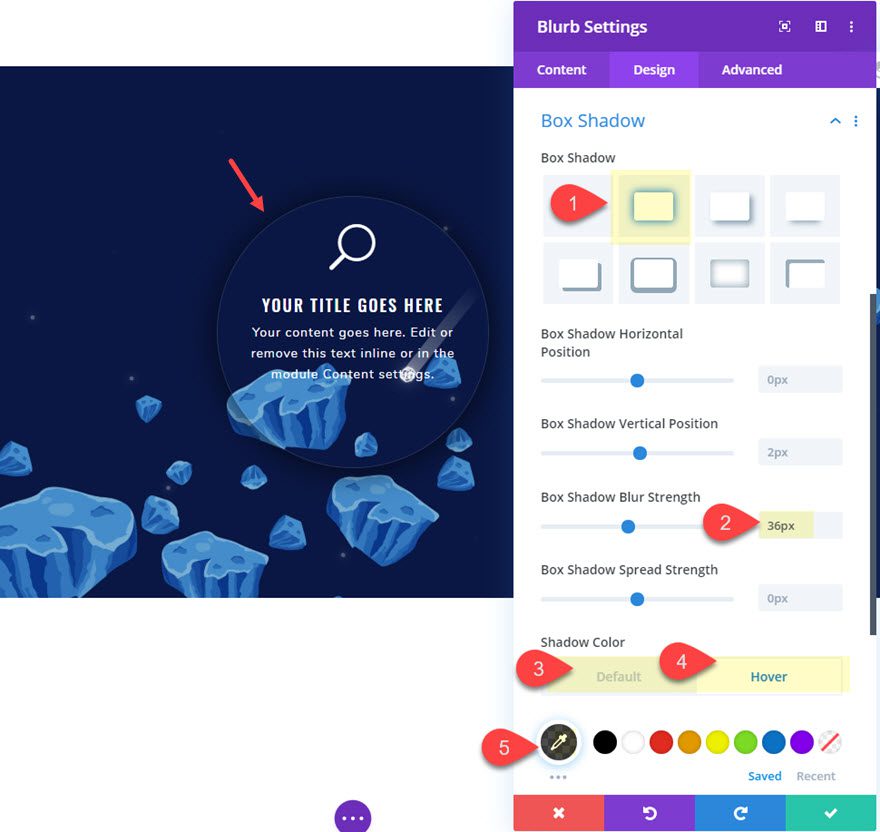
Box Shadow Hover Effect
Next, give the blurb a box shadow on hover as follows:
Box Shadow: see screenshot
Box Shadow Blur Strength: 36px
Shadow Color (default): rgba(0,0,0,0)
Shadow Color (hover): rgba(0,0,0,0.7)
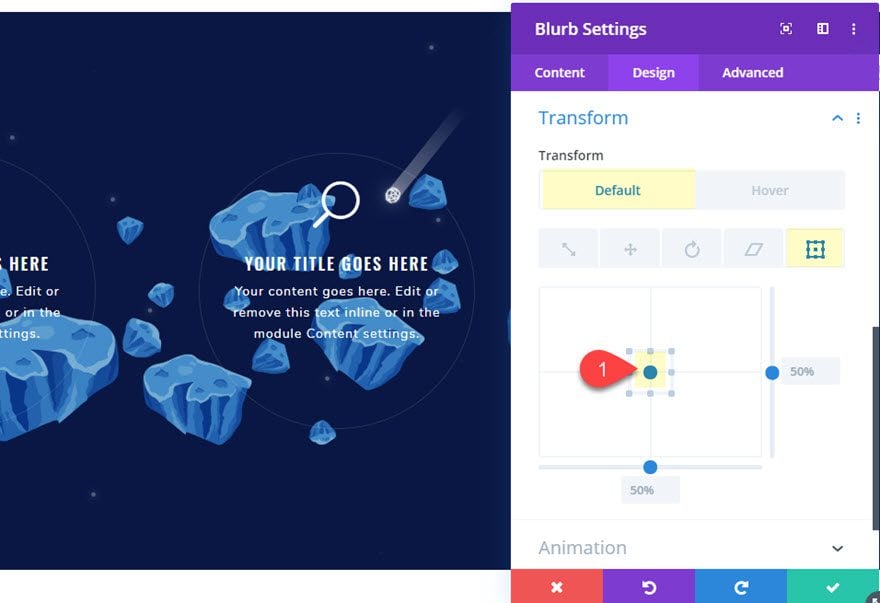
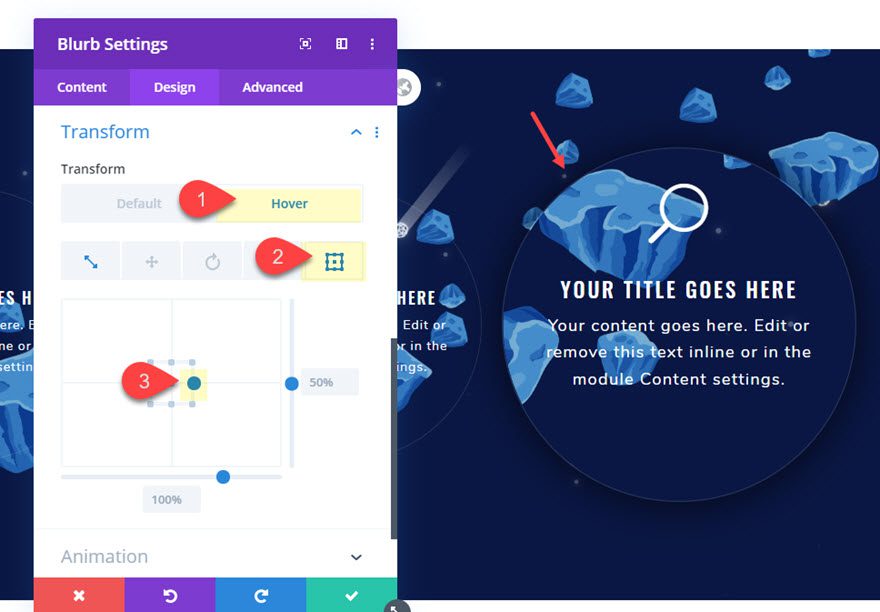
Transform Hover Effects
Once your box shadow is in place, update the transform options as follows:
Transform Origin (default): 50% 0% (center left)
This will make sure the blurb won’t extend outside the page once it is placed on the far left of the three column row.
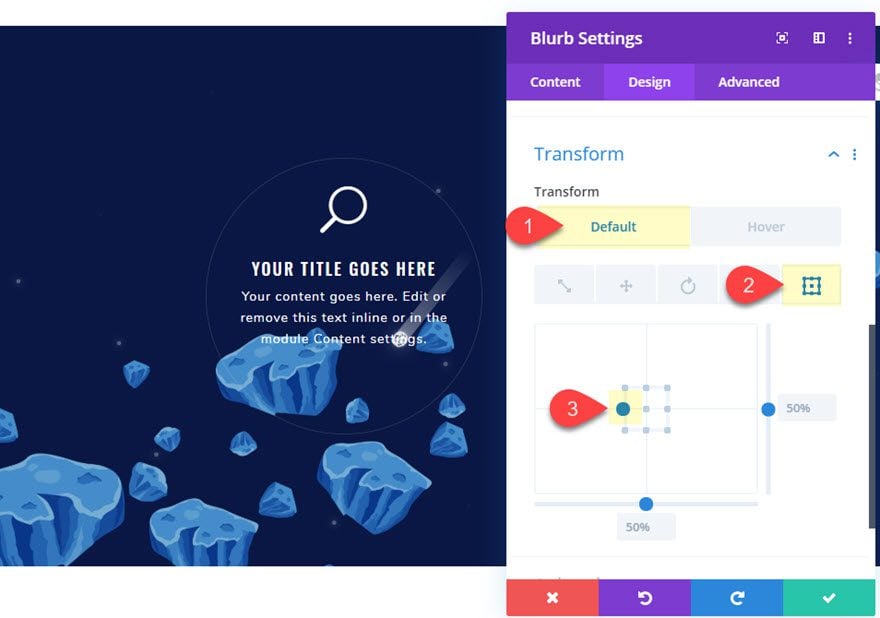
Transform Scale (hover): 130%
This will enlarge the blurb and really magnify the parallax background image for a cool hover effect.
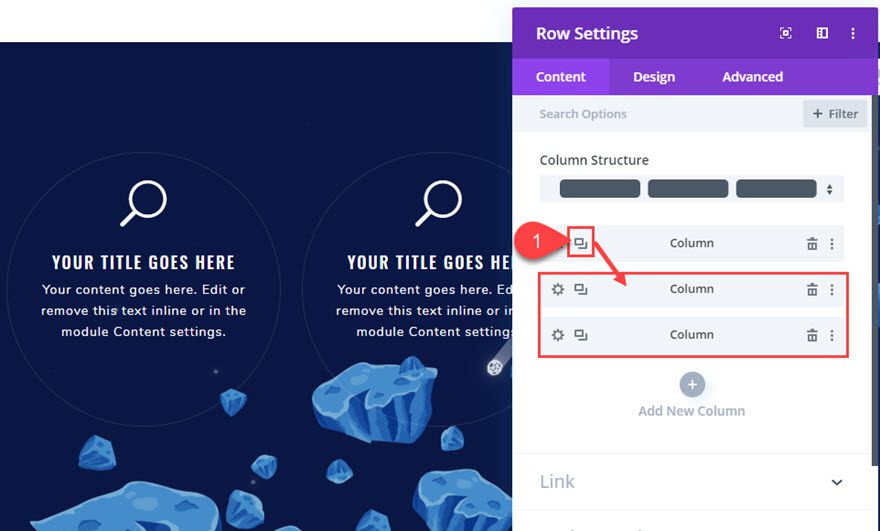
Duplicate the Column
Once the blurb is done, we can duplicate the column to create three columns, each with the same blurb module.
Open the row settings and duplicate the column twice for a total of three columns.
Update Transform Origin
Since our blurb modules all have the transform origin set to “center left”, we need to adjust this for the blurbs in the center and right column so that they scale from the appropriate position.
Open the settings for the blurb module in column 2 and update the following:
Transform Origin: 50% 50% (center center)
Then open the settings for the blurb module in column 3 and update the following:
Transform Origin: 50% 100% (center right)
Final Result
Now check out the final result. Notice how the effect really magnifies the css parallax background image behind the blurb. And when you scroll down while hovering over the blurb, it looks resembles the effect of a magnifying glass.
In fact, this is so cool we might want to leave it as the default style instead of just in the hover state.
Final Thoughts
I hope the examples in this post have gotten your creative juices flowing a bit so you can explore even more cool designs and hover effects to combine with css parallax. The setup process is really simple, but the possibilities are seemingly endless.
I look forward to hearing from you in the comments.
Cheers!


Good afternoon
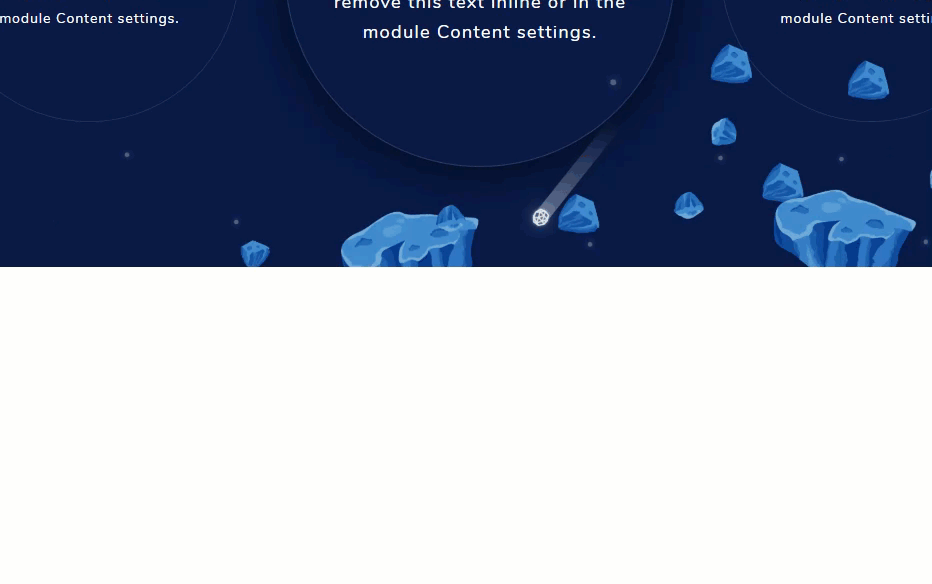
I would like to know how I decrease the height of the white band between the images
It doesn’t work on Firefox or Internet Explorer.
Is there afix?
Hello,
Enjoyed reading the article above, really explains everything in detail,the article is very interesting and effective. Thank you and good luck for the upcoming articles.
I tried to do that, but on hover image is loaded whole image is loading in miniature in moziila (chrome is ok),
Same here, anyway to change the hover image ? It’s loading the whole image
Holy smoke! This effect is gonna be great! As always it is damn much appreciated how much at the front you guys are.
Really looking forward to applying this effect to one of my pages!
Great to hear, Anders. I appreciate the comment and support.
I have download this layout…..its great
Nice effect. Thanks!
Glad you liked it, Carolyn.
Nice effect, I’ll have to download the layout and try it out! Thanks!
It would great if you started putting live versions of what you’re describing in these posts. I like to see things work to decide if I want to use them in a project or not, and unfortunately 9/10 times I ignore these posts because I can’t see a functional example.
John,
Thanks for the honest feedback. We are working on doing this hopefully in the near future.
I cant agree more, John 🙂
The layout won’t load in either a page or the Divi library using the import/export option in Divi portability.
David,
I tested the download and it seems to be working fine on my end when importing the json file to a page via the Divi Builder. Are you still having trouble?
The layout won’t load in either a page or the Divi library using the import/export option in Divi portability.
the same, not working ‘This file should not be imported in this context.’
The file needs to be loaded onto the actual page vs import from side WP menu. Click on the up/down errors when you are on a page and you can import it that way