

Divi’s Layout Block can be used as a reusable image layout block for adding Divi-styled images to Gutenberg blog posts. This combines the powerful design options and functionality of Divi (for creating beautiful images) with the convenience of writing posts (and adding blocks) with Gutenberg.
In this tutorial, we will demonstrate how to use the Divi Layout Block to design a few stunning image layouts. Then we will add those layouts as reusable blocks in Gutenberg. With this technique, we will be able to add just about any Divi design feature to our images (backgrounds, lightbox, filters, animations, scroll effects, and much more). Then we can use that fabulous design as a convenient image template for adding images to future posts created with Gutenberg.
Let’s get started!
- 1 Sneak Peek
- 2 Download the Reusable Image Layout Blocks for FREE
- 3 Download For Free
- 4 You have successfully subscribed. Please check your email address to confirm your subscription and get access to free weekly Divi layout packs!
- 5 What We Need to Get Started
- 6 Part 1: Creating the Fullwidth Image with Caption Reusable Divi Layout Block
- 7 Part 2: Creating the Left Image with Caption Reusable Divi Layout Block
- 8 Part 3: Creating the “Right Image with Caption” Reusable Divi Layout Block
- 9 Part 4: Using the Reusable Image Layout Blocks on a Post.
- 10 Final Result
- 11 Final Thoughts
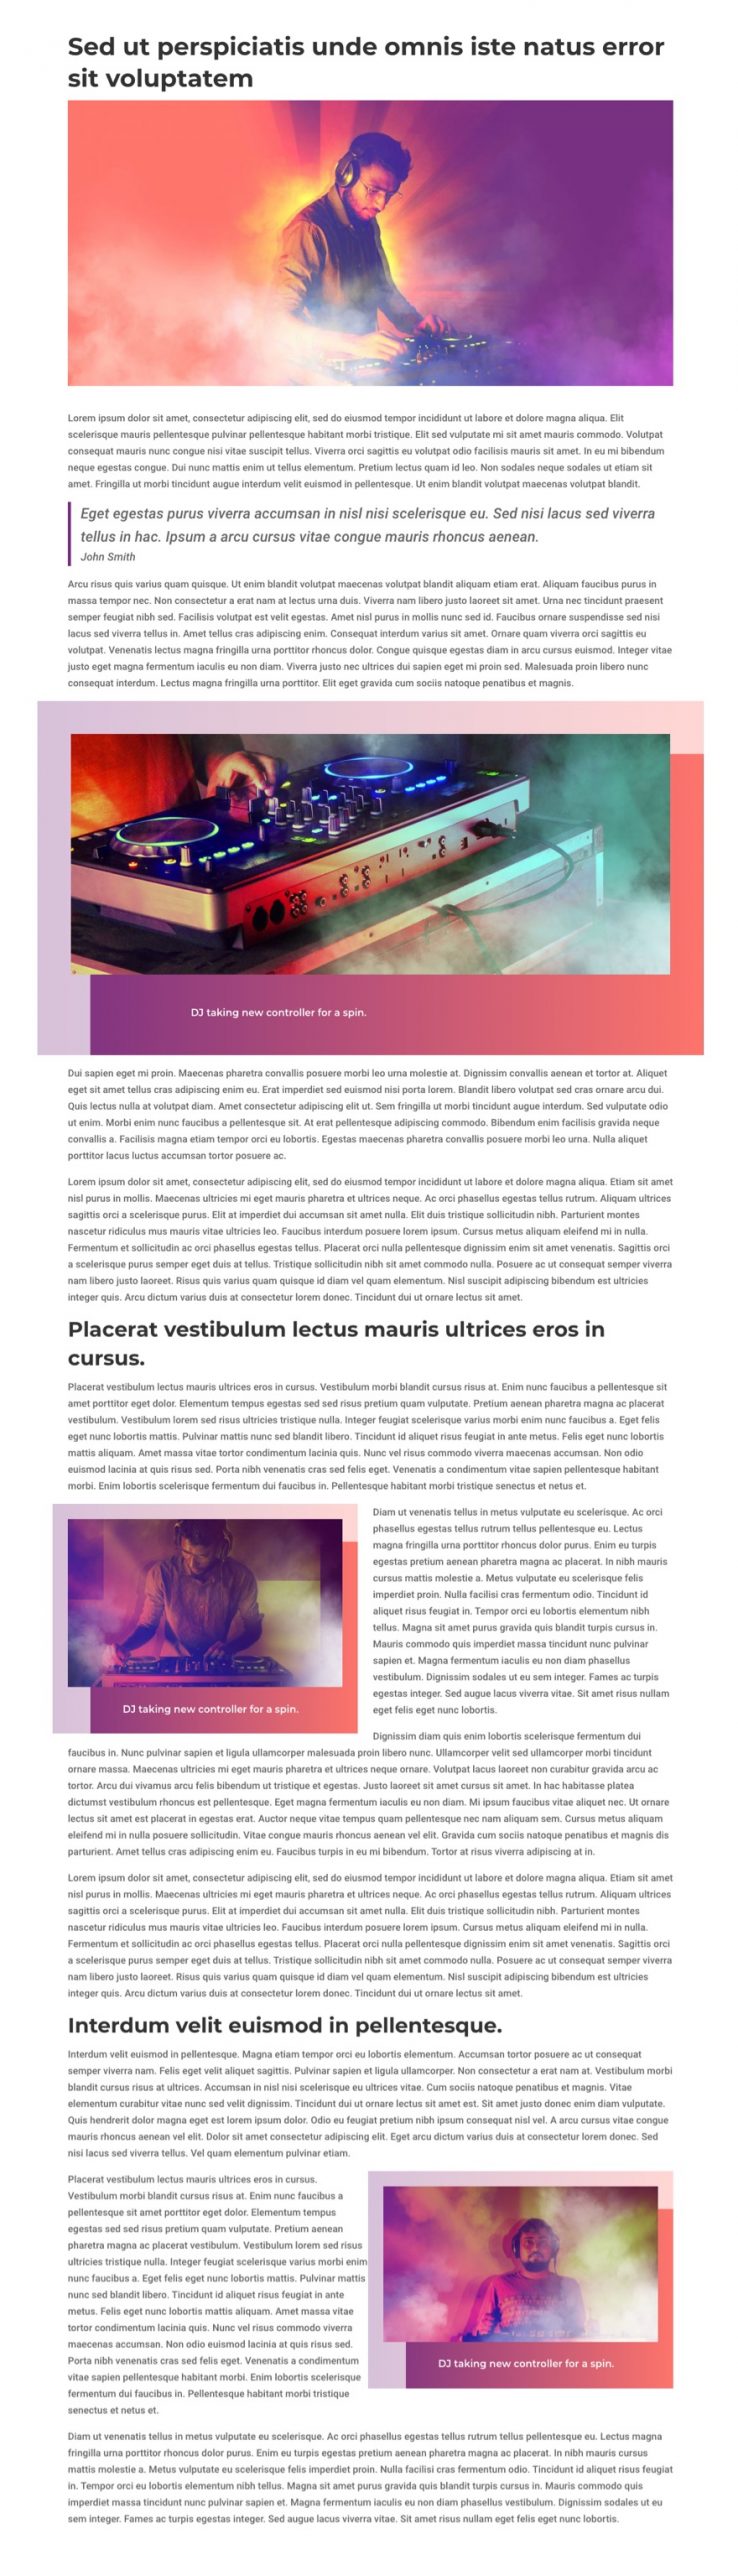
Sneak Peek
Download the Reusable Image Layout Blocks for FREE
To lay your hands on the layout blocks from this tutorial, you will first need to download them using the button below. To gain access to the download you will need to subscribe to our newsletter by using the form below. As a new subscriber, you will receive even more Divi goodness and a free Divi Layout pack every Monday! If you’re already on the list, simply enter your email address below and click download. You will not be “resubscribed” or receive extra emails.

How to Use the Download to Import these Layout Blocks on Your Site
To import these reusable Divi Image Layout Blocks to your site, first, you need to unzip the download file. There you will find the three JSON files you will need to import to your site.
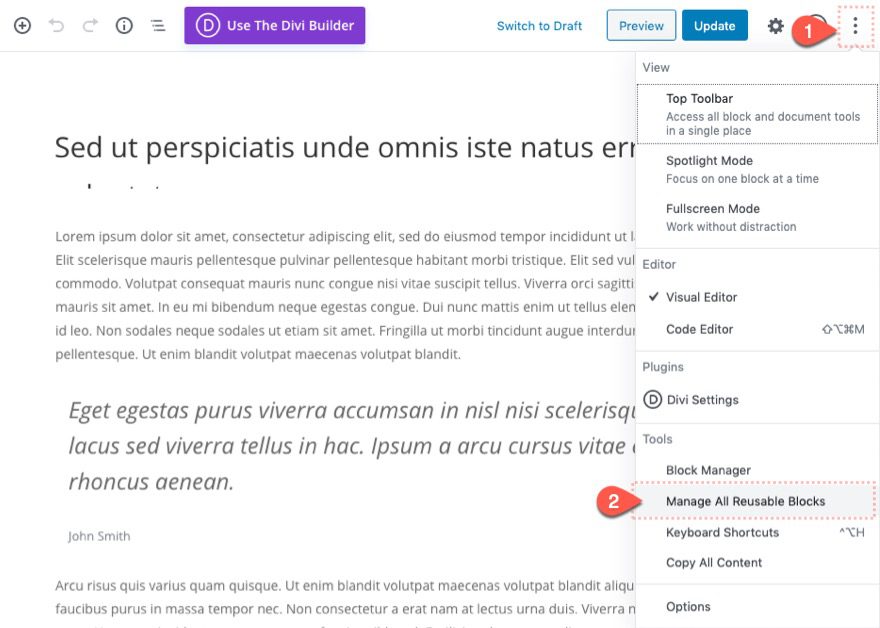
Go to edit a post using the default editor (Gutenberg). Open the “More Tools & Options” menu at the top right of the page and select “Manage all Reusable Blocks”.
Then click the Import from JSON button. Choose one of the JSON files from the download folder and click the import button.
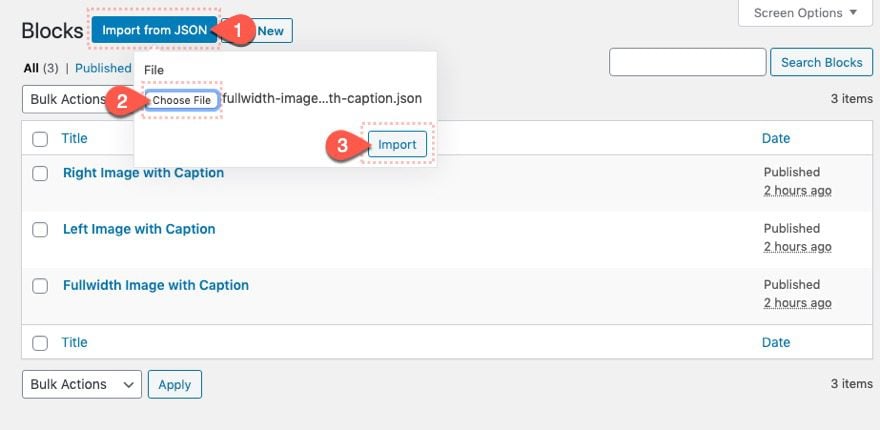
Repeat this process to import all three JSON files.
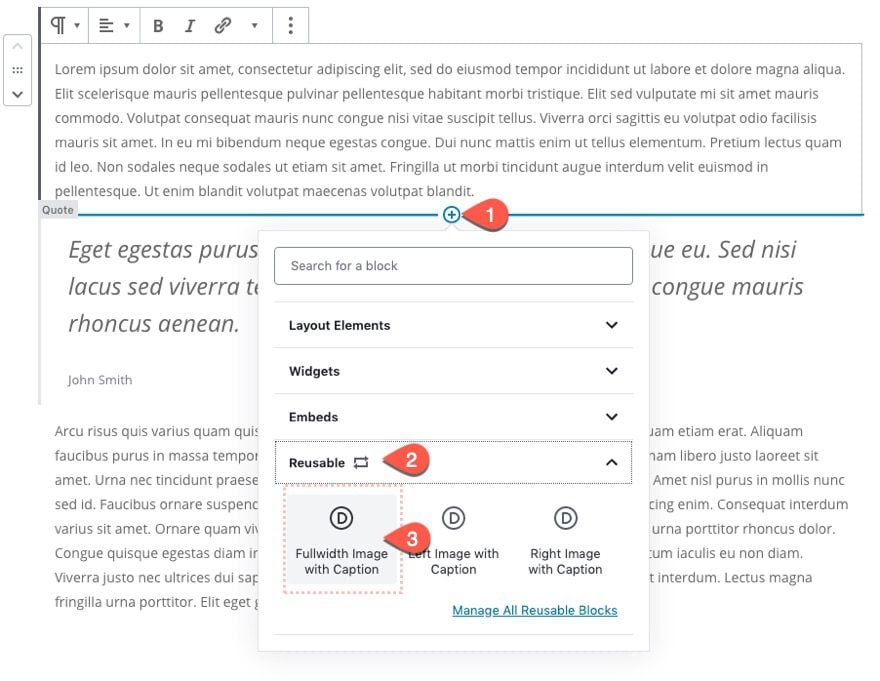
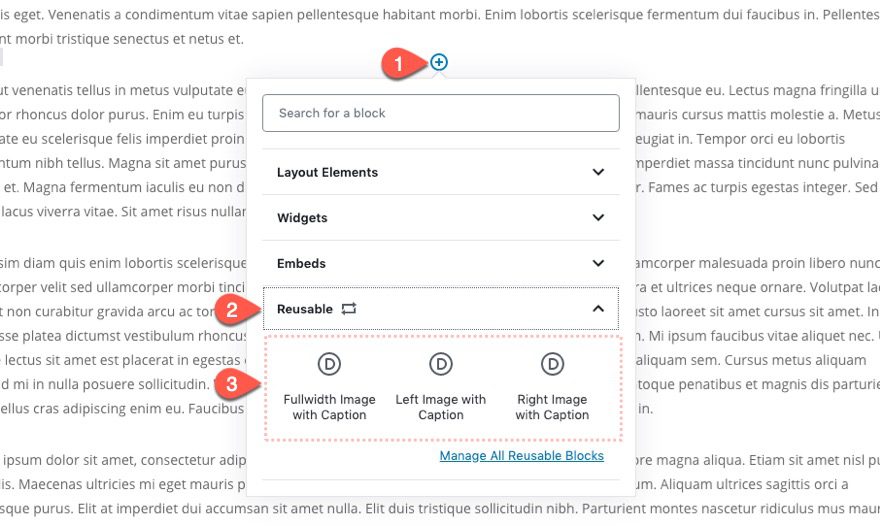
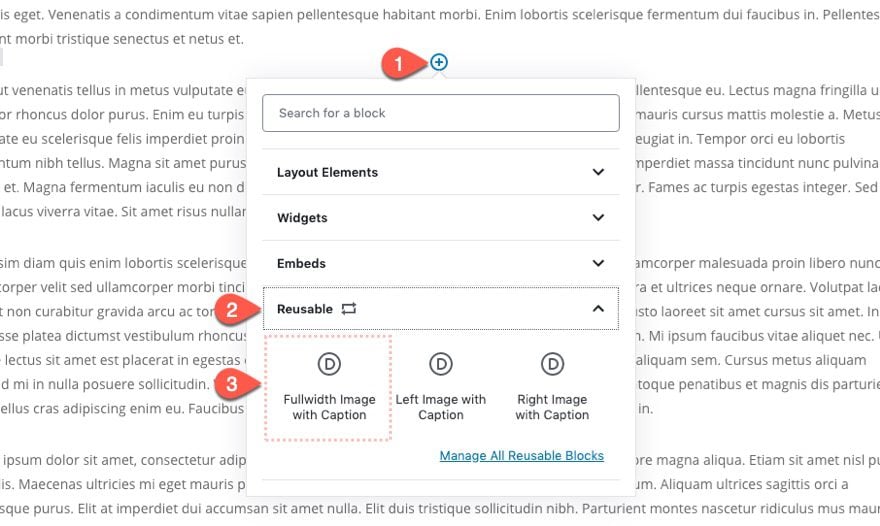
Once done, add a new block within Gutenberg. We will be able to find the imported Reusable layout blocks under the Reusable option toggle. Simply click the one you want to add it to your post.
That’s it!
Let’s get to the tutorial, shall we?
What We Need to Get Started
To get started, we will need to do the following:
- If you haven’t yet, install and activate the Divi Theme.
- Create a new post in WordPress and use the default editor (Gutenberg) to add some mock content (title, headings, paragraphs, featured image, etc.). Basically we need a test post to build the Divi styled image layout blocks.
After that, we are ready to start.
Part 1: Creating the Fullwidth Image with Caption Reusable Divi Layout Block
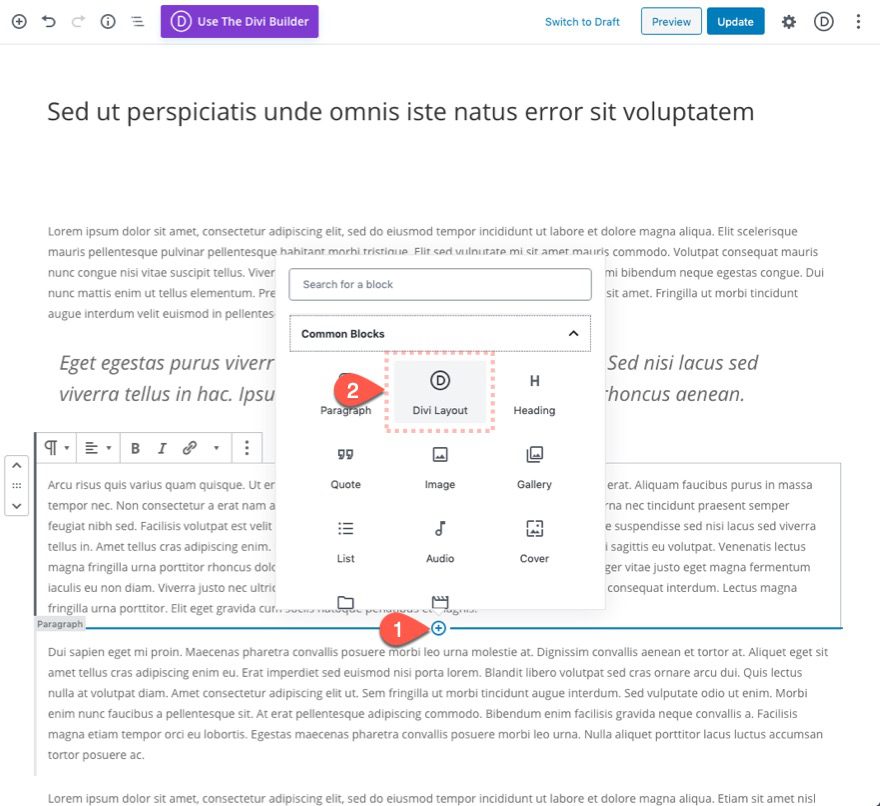
Add Divi Layout Block
To start, add a Divi Layout Block to your post.
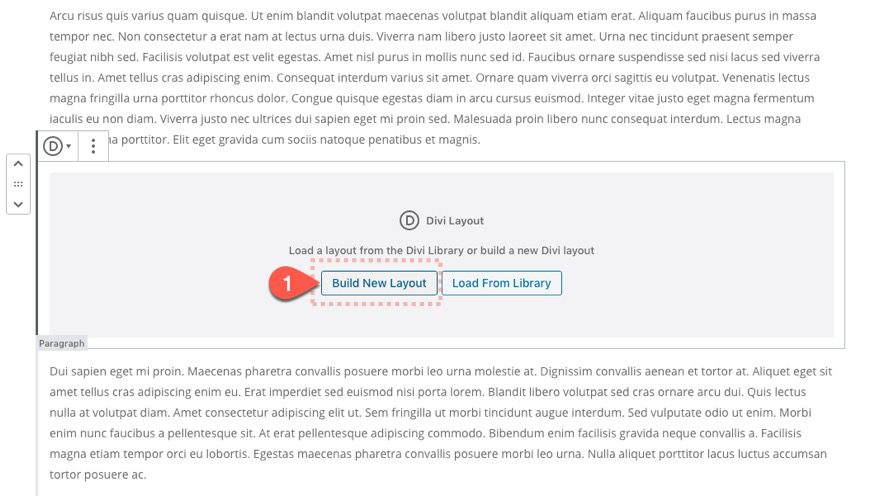
Then click “Build New Layout”.
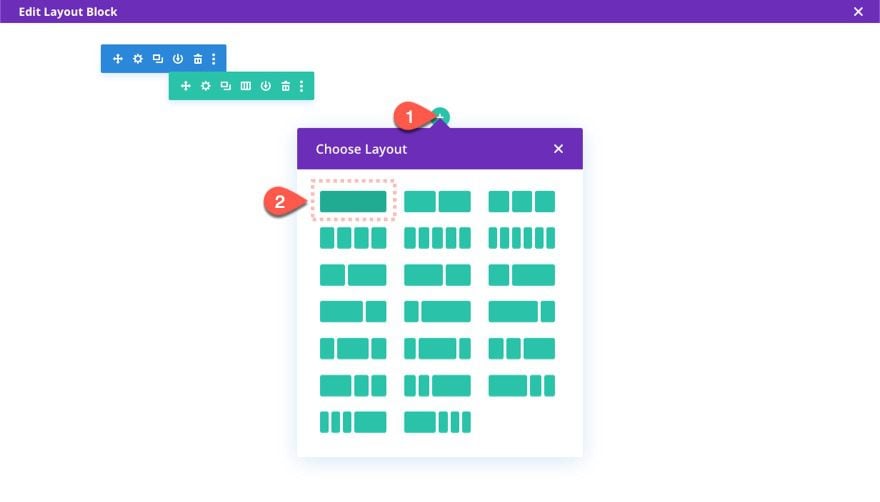
Designing the Divi Image Layout
In the Layout Block Editor, begin designing the layout by adding a one-column row.
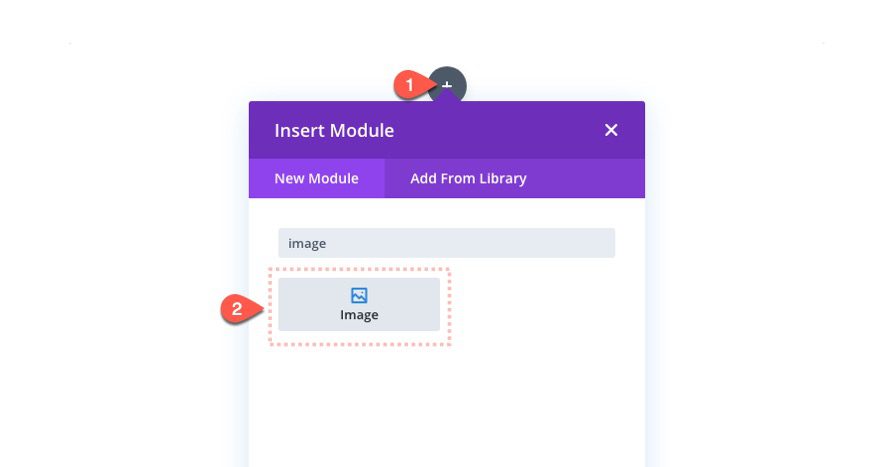
The Image Module
Add an image module to the row.
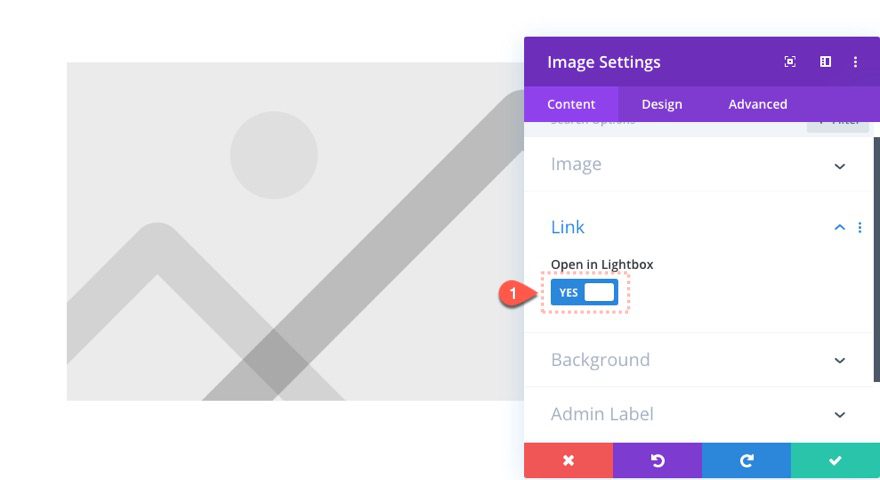
Then update the settings as follows:
- Open in Lightbox: YES
This will allow our image to show in a lightbox on click.
- Image Overlay: ON
- Overlay Icon Color: #ffffff
- Hover Overlay Color: rgba(120,47,130,0.57)

To create some space around our image, update the row settings as follows:
- Use Custom Gutter Width: YES
- Gutter Width: 1
- Width: 90%
- Max Width: 90%
- Padding: 5% top, 5% bottom
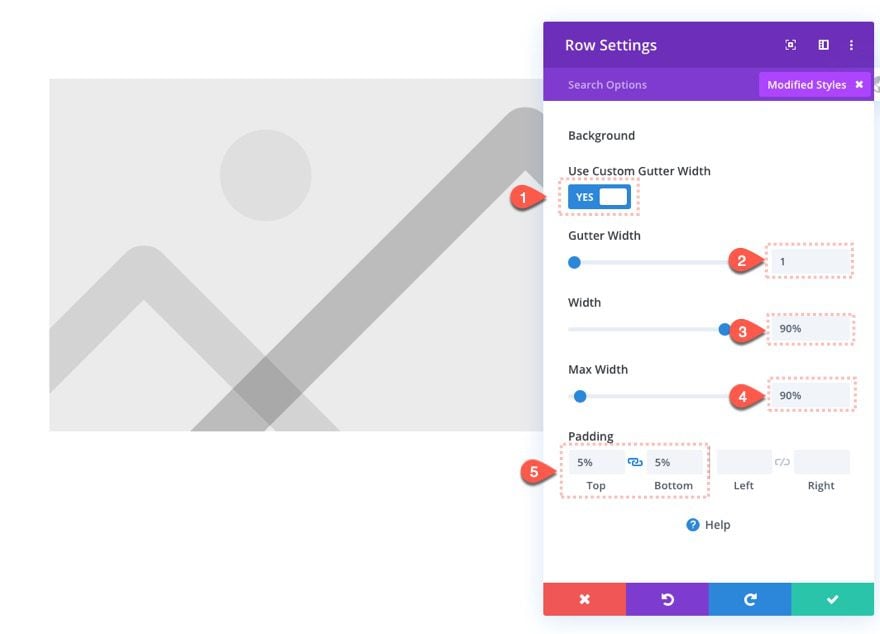
This will give us 5% of spacing around the image. This will also be the space that will display the background gradient we will add to the section.
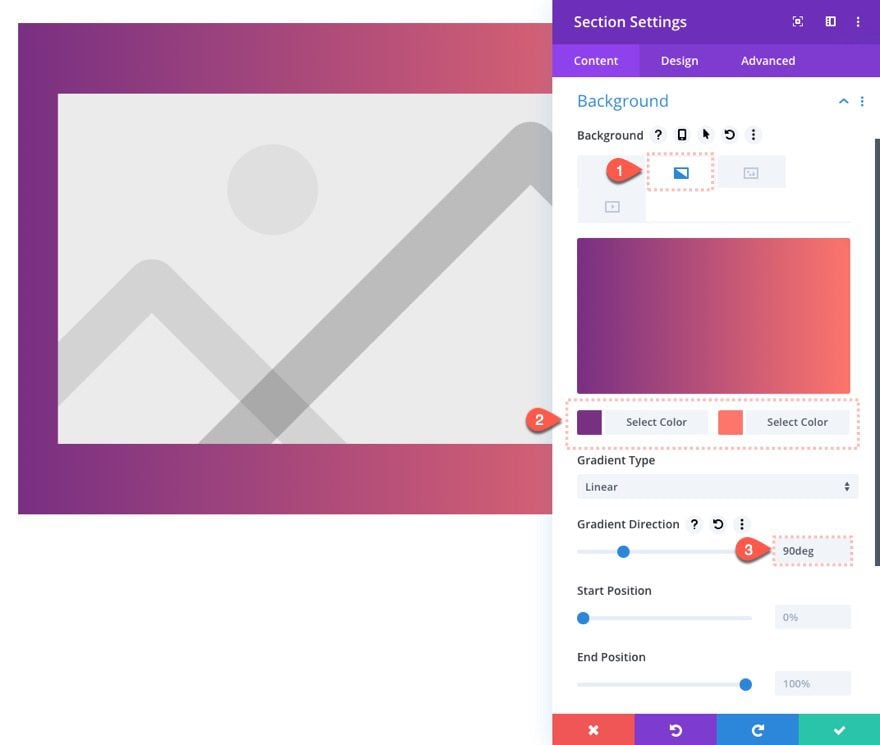
Open the section settings and update the design with a background gradient as follows:
- Gradient Background Left Color: #782f82
- Gradient Background Right Color: #fe756b
- Gradient Direction: 90deg
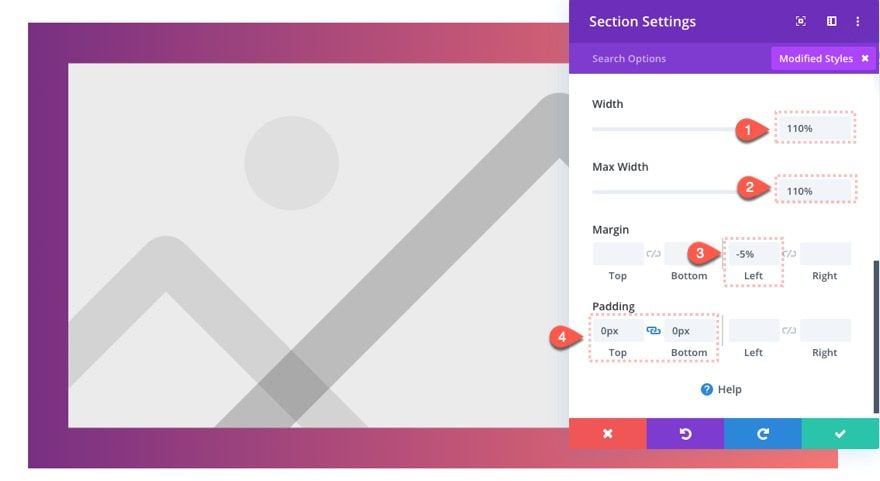
To make the image extend beyond the blog post content container a little, we can give the section a custom width as follows:
- Width: 110%
- Max Width: 100%
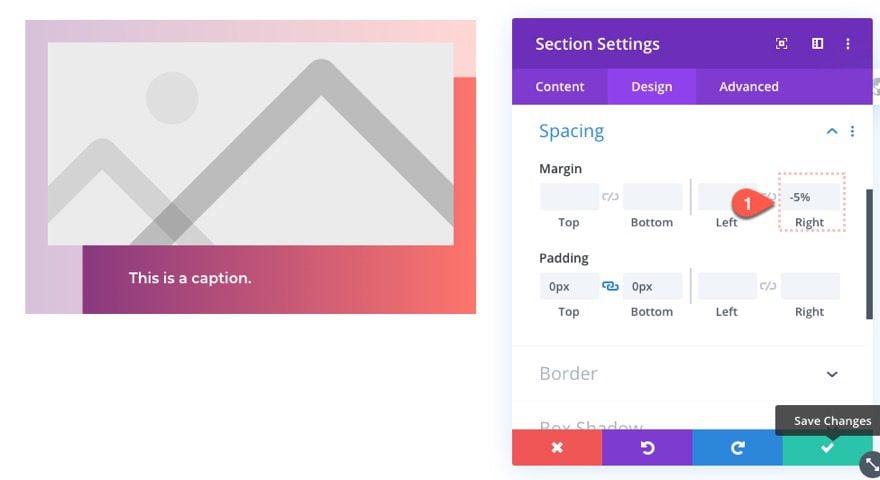
- Margin: -5% left
- Padding: 0px top, 0px bottom
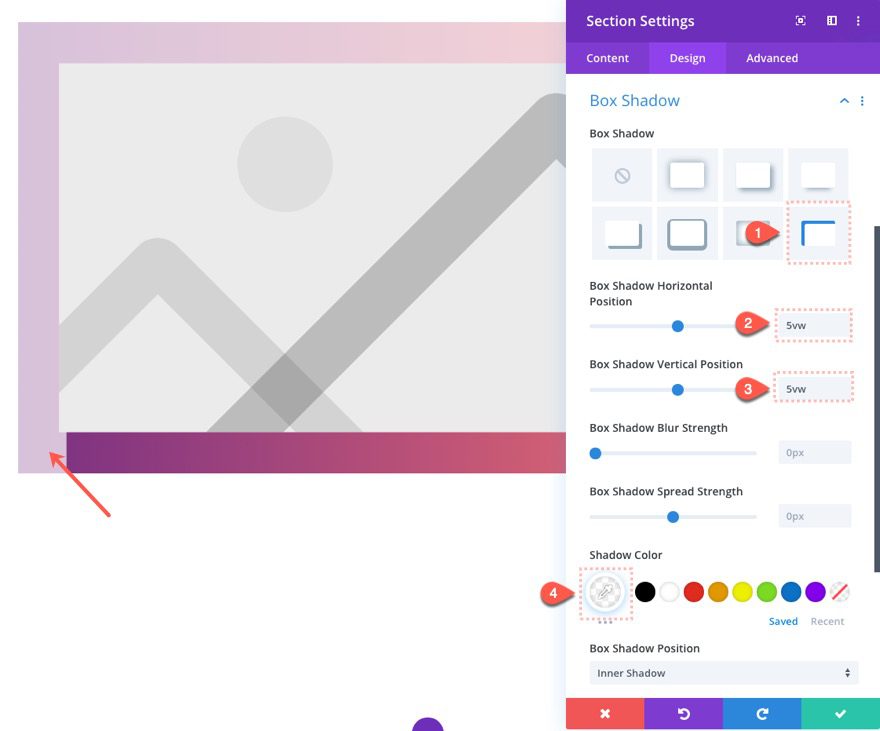
Finally, give the section a creative touch by adding an inner box-shadow as follows:
- Box Shadow: see screenshot
- Box Shadow Horizontal Position: 5vw
- Box Shadow Vertical Position: 5vw
- Shadow Color: rgba(255,255,255,0.7)
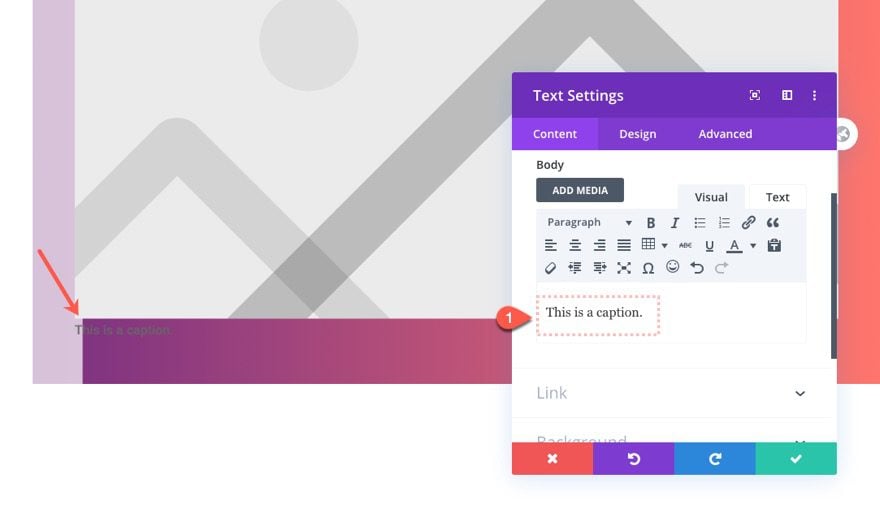
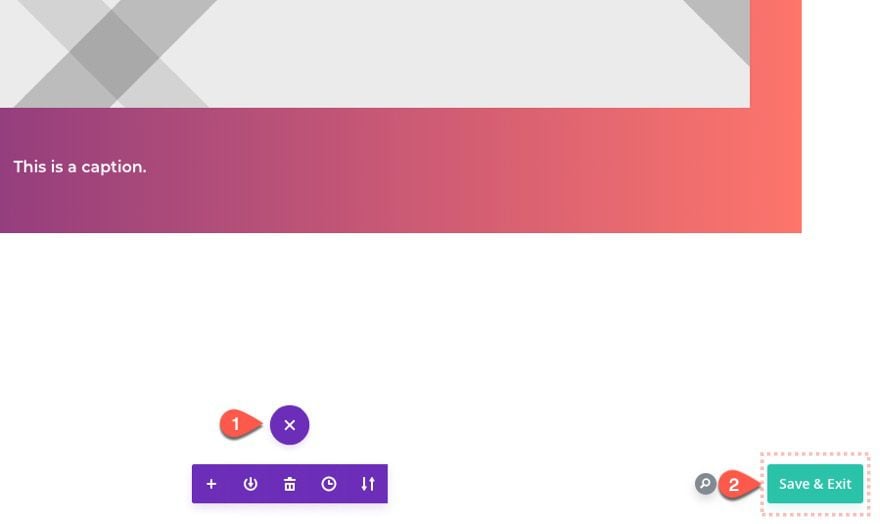
If we want to have an image layout without a caption, we can stop here, but to add a caption to the image layout, add a text module below the image.
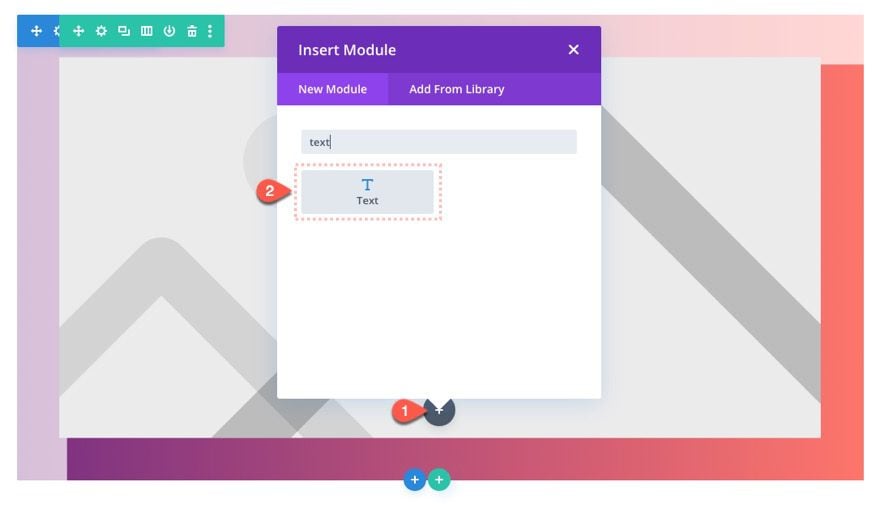
Then add some filler content to serve as the caption text.
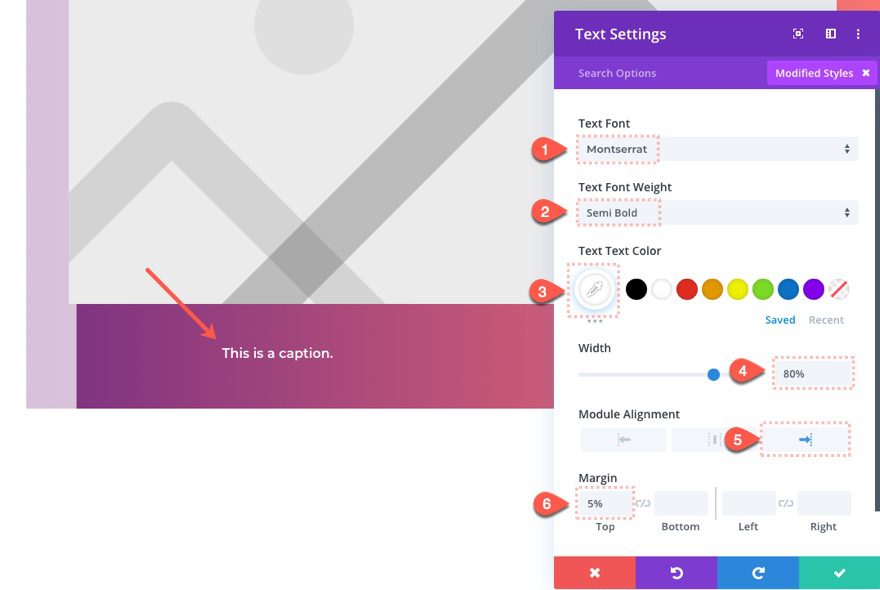
Then update the following text settings:
- Text Font: Montserrat
- Text Font Weight: Semi Bold
- Text Text Color: #ffffff
- Width: 80%
- Module Alignment: right
- Margin: 5% top
When finished, make sure to save the layout with Ctrl + S or open the settings bar at the bottom and click “Save & Exit”.
Adding the Image Layout to Reusable Blocks
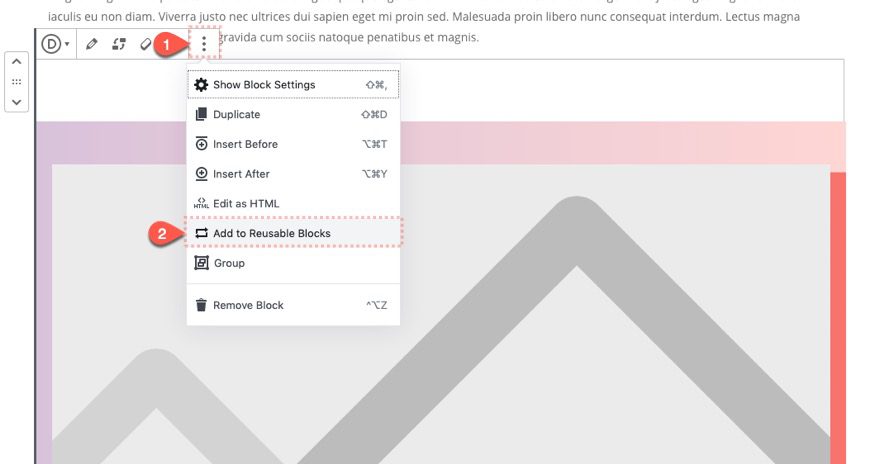
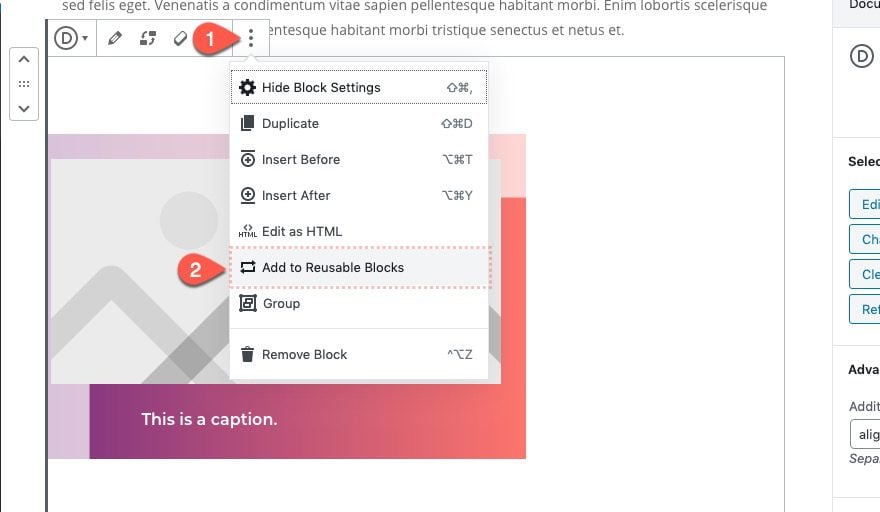
To add the layout to reusable blocks, click the “More Options” menu above the block and select “Add to Reusable Blocks”.
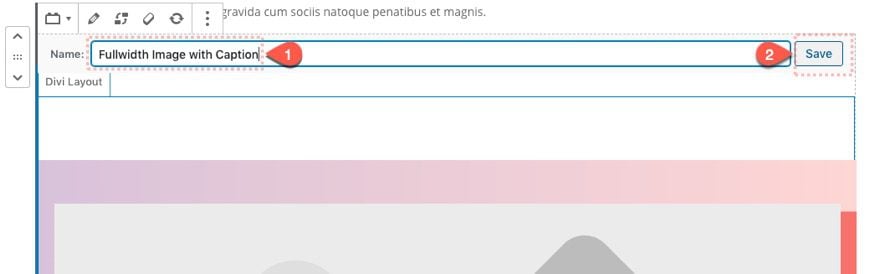
Give the reusable block a name and click “Save”.
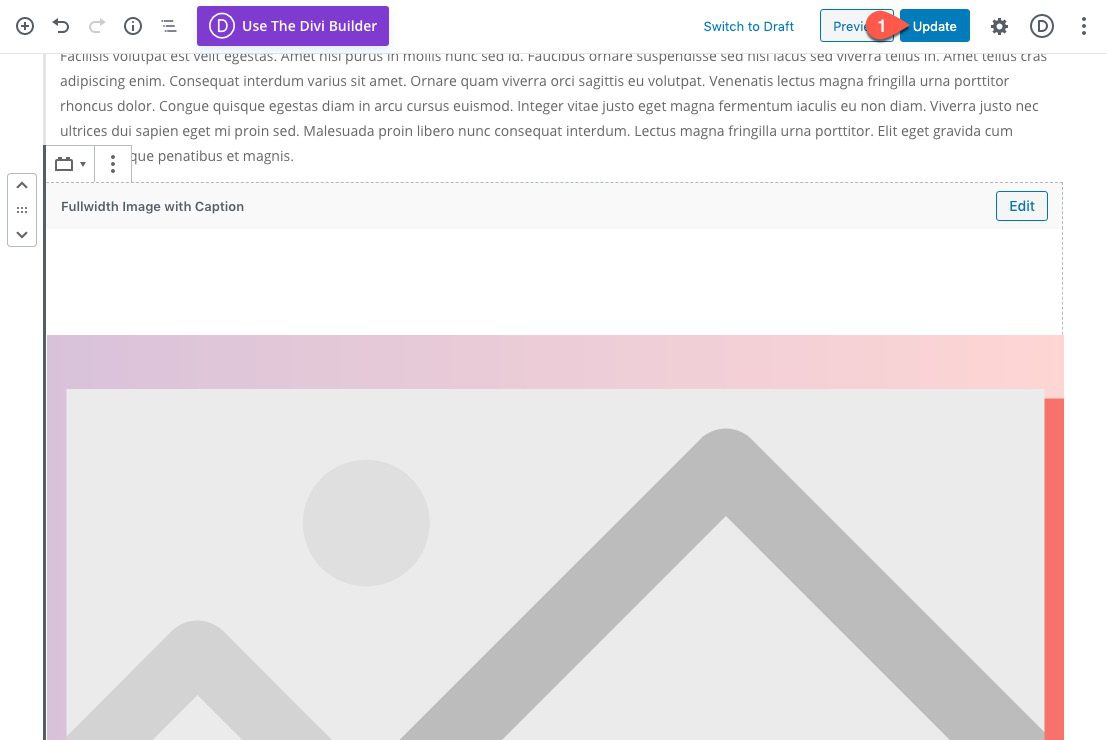
Now the fullwidth image with caption layout has been added to reusable blocks and will be available from the block list when building a post.
Don’t forget to update/save the post to save the changes.
Part 2: Creating the Left Image with Caption Reusable Divi Layout Block
Now the fullwidth image with caption layout has been added to reusable blocks, we can use that block to create our left image with caption layout.
Convert Reusable Block to Regular Block
To start, open the “More Options” menu at the top of the reusable block containing the fullwidth image layout. Then select “Convert to Regular Block”.
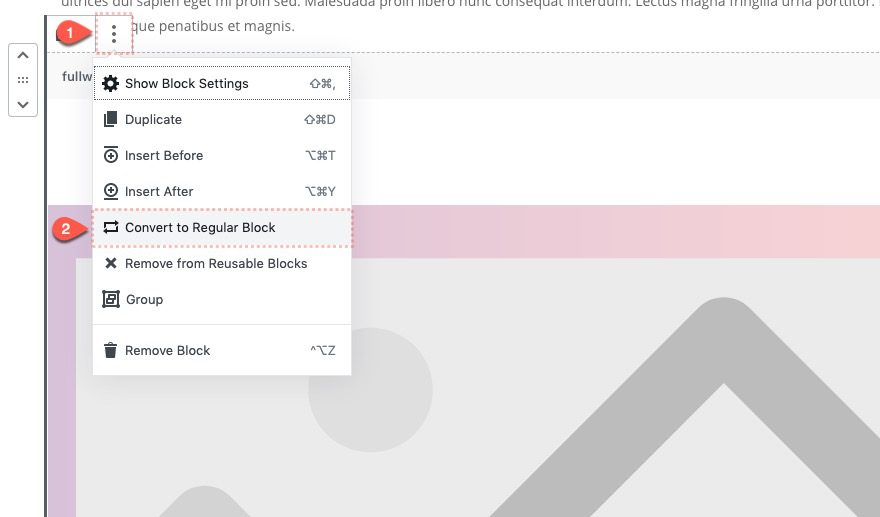
Don’t worry, this won’t remove the layout block we just created from reusable blocks (there is an option for that though). This will simply make the reusable block a regular block so that we can edit and use the block for a single instance.
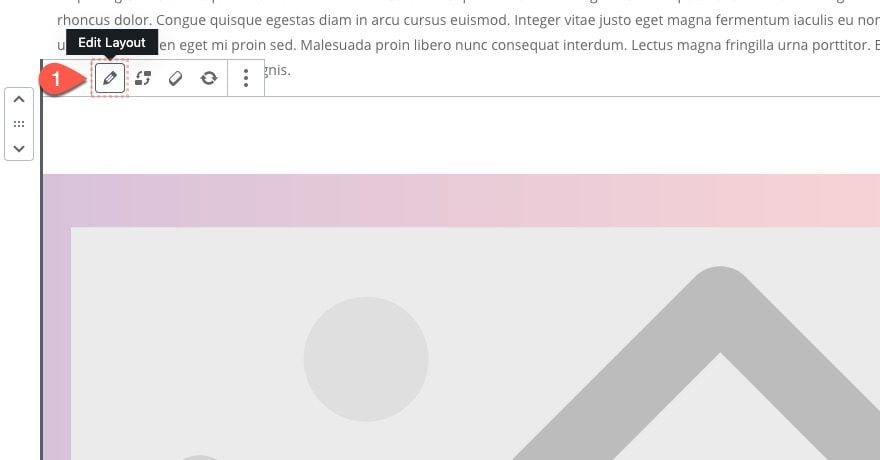
Update Layout
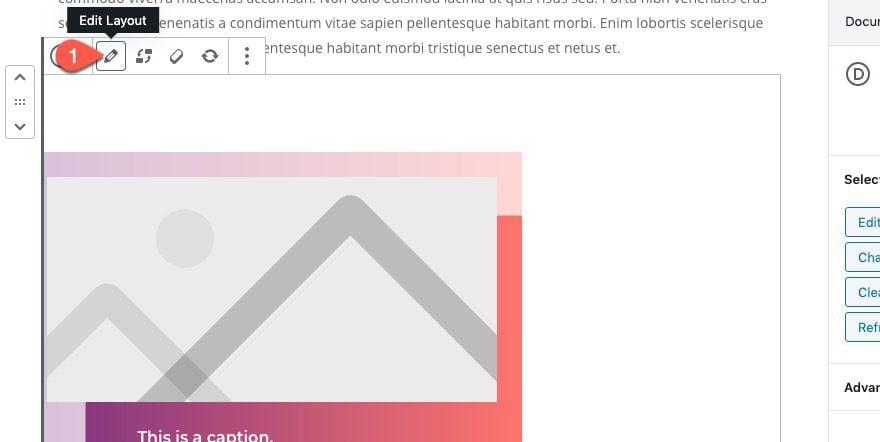
Once the block is regular, click the Edit Layout button above the block.
In the layout editor, open the section settings and update the width as follows:
- Width: auto
- Max Width: 500px
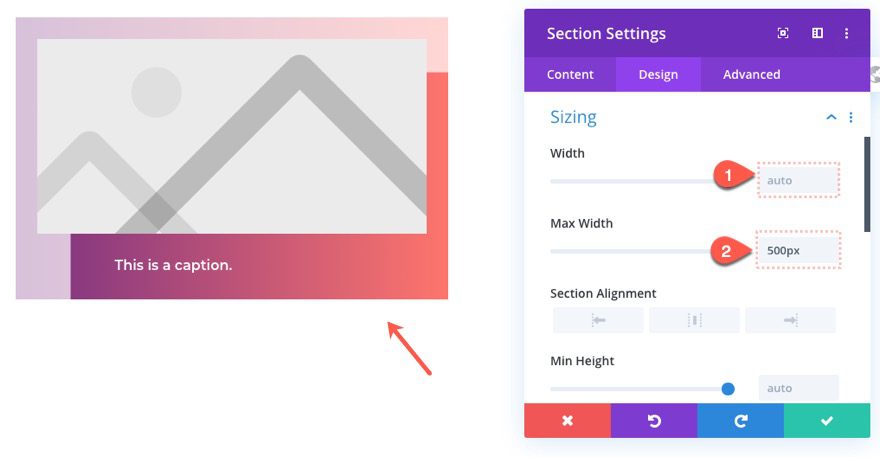
That’s all we need to do inside the layout editor. Make sure to save and exit the layout.
With the block selected, open the main settings sidebar and select the block tab to show the block settings. Under the advanced toggle, add the following class:
- Addition CSS Class: alignleft
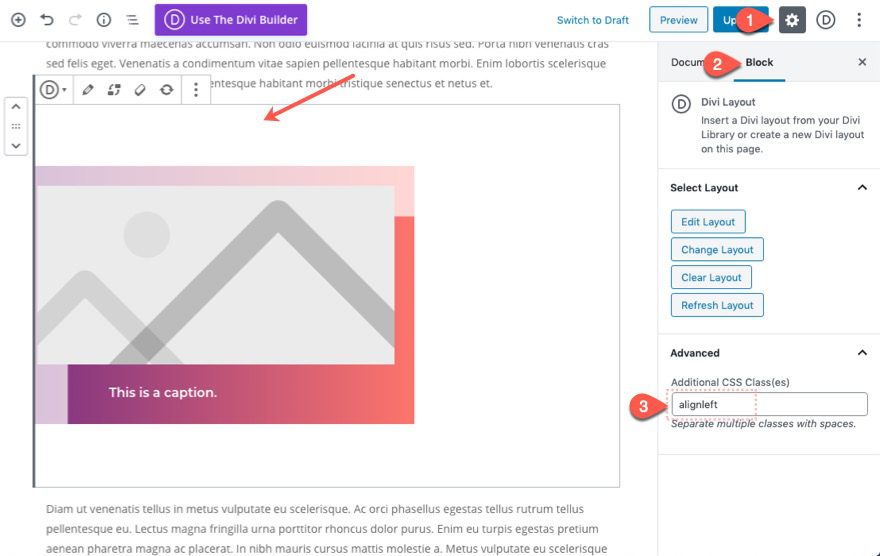
This class is native to WordPress and it will float the block to the left which will also float our image to the left of the content inside our post.
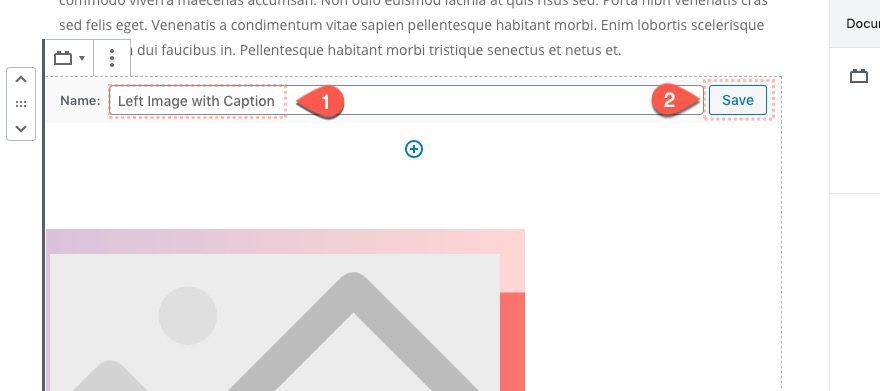
After the class has been added, open the block’s “More Options” menu and click “Add to Reusable Blocks.
Give the Reusable block a name (ie. “Left Image with Caption”) and click save.
Now the Left Image with Caption layout block has been added to the list of reusable blocks for easy access.
Part 3: Creating the “Right Image with Caption” Reusable Divi Layout Block
So far we have a fullwidth image with a caption layout block and a left image with caption layout block. Now we can add the right image with the caption layout block.
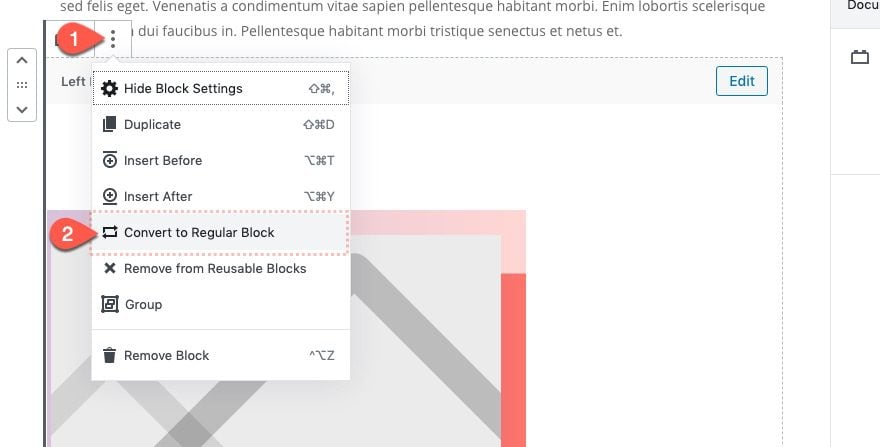
Convert Reusable Block to Regular Block
To do this, open the “More Options” menu on the left image with caption reusable block. Then select “Convert to Regular Block”.
Update Layout
Once the block is a regular layout block, click to edit the layout.
Then open the section settings and take out the left margin.
Save and exit the layout editor.
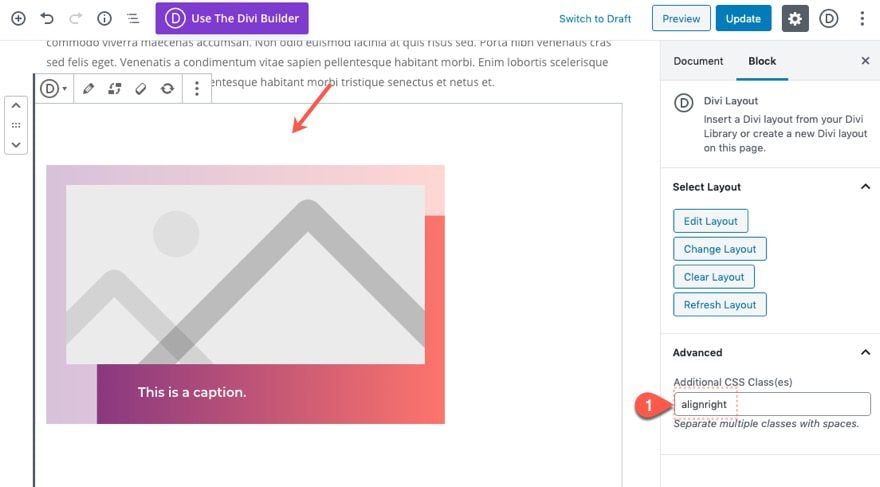
Then update the block’s additional CSS class with the following:
- Additional CSS Class: alignright
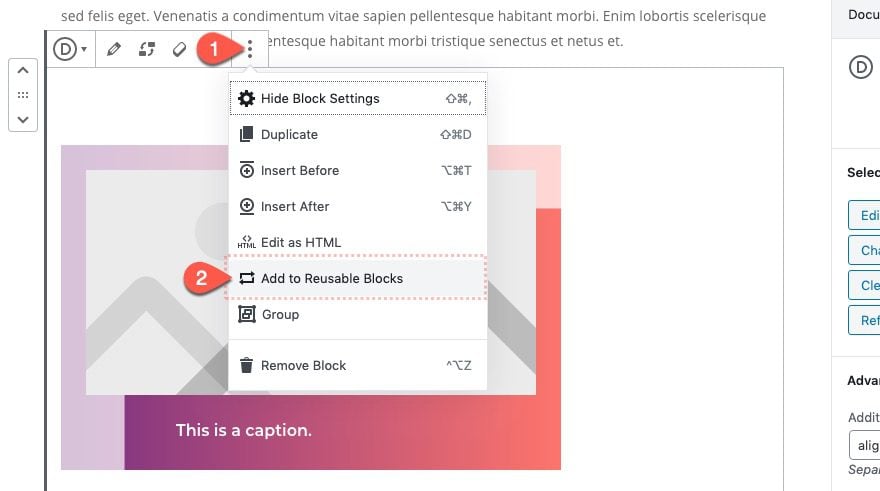
After the Class has been added, add the layout block to Reusable Blocks.
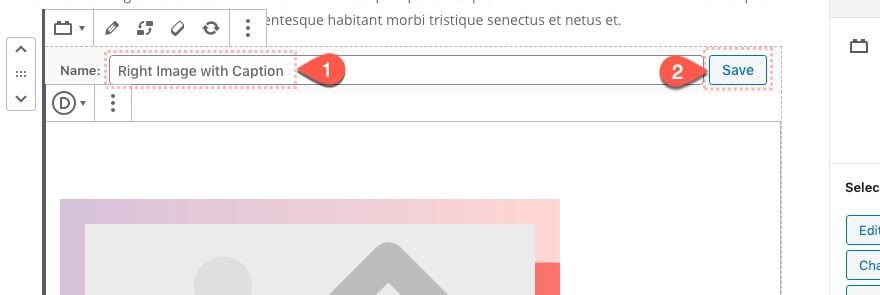
And give the Reusable Block a name (ie. “Right Image with Caption”) and Save it.
Now click one of the blue plus icons under a block in the post to add a new block. Then in the block list popup, open the Reusable toggle. We now have our three reusable image layout blocks ready to be used.
Part 4: Using the Reusable Image Layout Blocks on a Post.
Although we have our Image Layout Blocks created, they exist (for our purposes) only as a template to jumpstart the process of adding an image to a post. Therefore, each time we want to add an actual image to a post using these layout blocks, we will need to first convert it to a regular block before adding the image and caption to the layout.
Here’s how to do it.
Step 1: Add the Reusable Layout Block
Add one of the Reusable Divi Image Layout Blocks to the post.
Step 2: Convert it to a Regular Block
The open the “More Options” menu and select “Convert to Regular Block”.
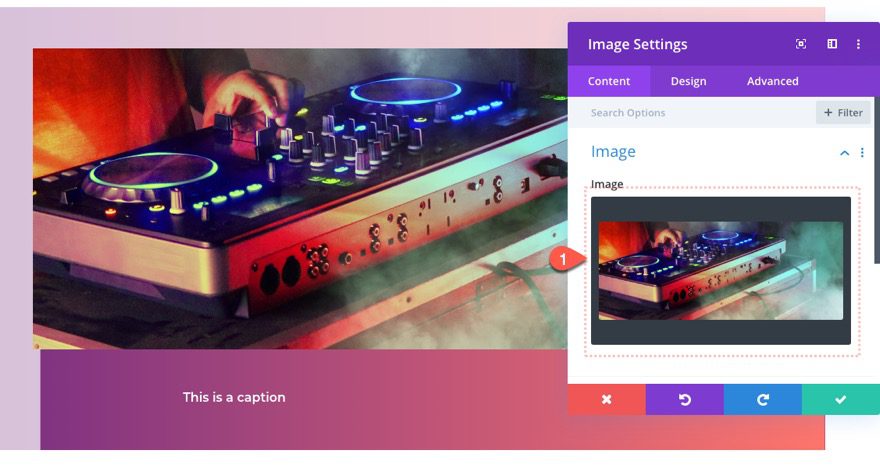
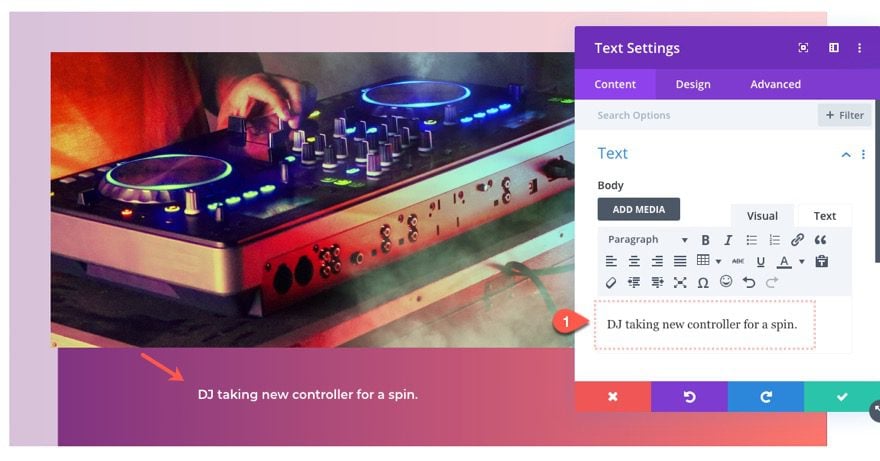
Step 3: Edit the Layout Block with a new Image and Caption
Once the block is regular, click to edit the layout.
Update the layout with an image of your choice.
Then update the caption text within the text module.
Step 4: Save the Layout Block
Once finished, save and exit the layout editor.

Continue this same process to add the other two image layouts to the post.
Final Result
Final Thoughts
Once we get the hang of using the Divi layout block, it becomes obvious just how valuable it can be to the life of our blog. In this post, we covered how to use the layout block to add some pretty cool Divi-styled images to a Gutenberg blog post. The trick is to save the layouts as a reusable block first. Then when we are ready to add images to a blog post, we can easily convert the reusable block into a regular block so that we can add our image and caption.
Hopefully, this will provide some inspiration to take your blog images to a whole new level.
I look forward to hearing from you in the comments.
Cheers!


That’s awesome! But I can’t afford to have an left or right image and text aligned on the left or right.
Can you help me please
Glad to help. Can you be more specific? Are you saying you don’t want the images to be floated to the left or right? If that’s the case, simply leave out the CSS Class “alignleft” or “alignright”.
No, in the final result there is the image on the left and a text on the right of the image or vice versa.
And for me, when I add the block, my text is written down the block and not on the right or left of the image
Everything fine doesn’t need to reply. thanks 🙂
Thanks Jason for this amazing tutorial. Had no idea on how to use Reusable Blocks in Gutenburg earlier. It’s really good, specially when it comes to creating tables and columns. Saving a lot of time.
Awesome! Yeah I can see it being really useful for tables and columns as well. Glad it helped.
Thanks for such good information
I really like the techniques you describe it is a really good theme for me i will try this. Great work.
Thanks, Emma. Glad you liked it.
I like their creativity. I will like this environment.
Great!
wooow! Thats an amazing tutorial! Thank you so much
So glad you like it, Edward. Thanks
i really like the techniques you describe it is a really good theme for me i will try this and will share the result with you in comment
Nice! Yes, please share.