
Showcasing real estate property listings on your website is a big project, but it doesn’t have to be a difficult one. With the helpful design of Divi’s Real Estate Layout Pack and the functionality of IDX plugins or real estate plugins like WordPress Property Listings (WPL) by Realtyna, you will be amazed at how easy it is to get your real estate site up and running.
The WPL plugin is catered to Divi in that it even has 8 built-in Divi Modules to make it easier to use their shortcodes. And because the plugin shortcodes work within Divi Modules, you can use the Divi Builder to customize the design of the page.
Let’s get started.
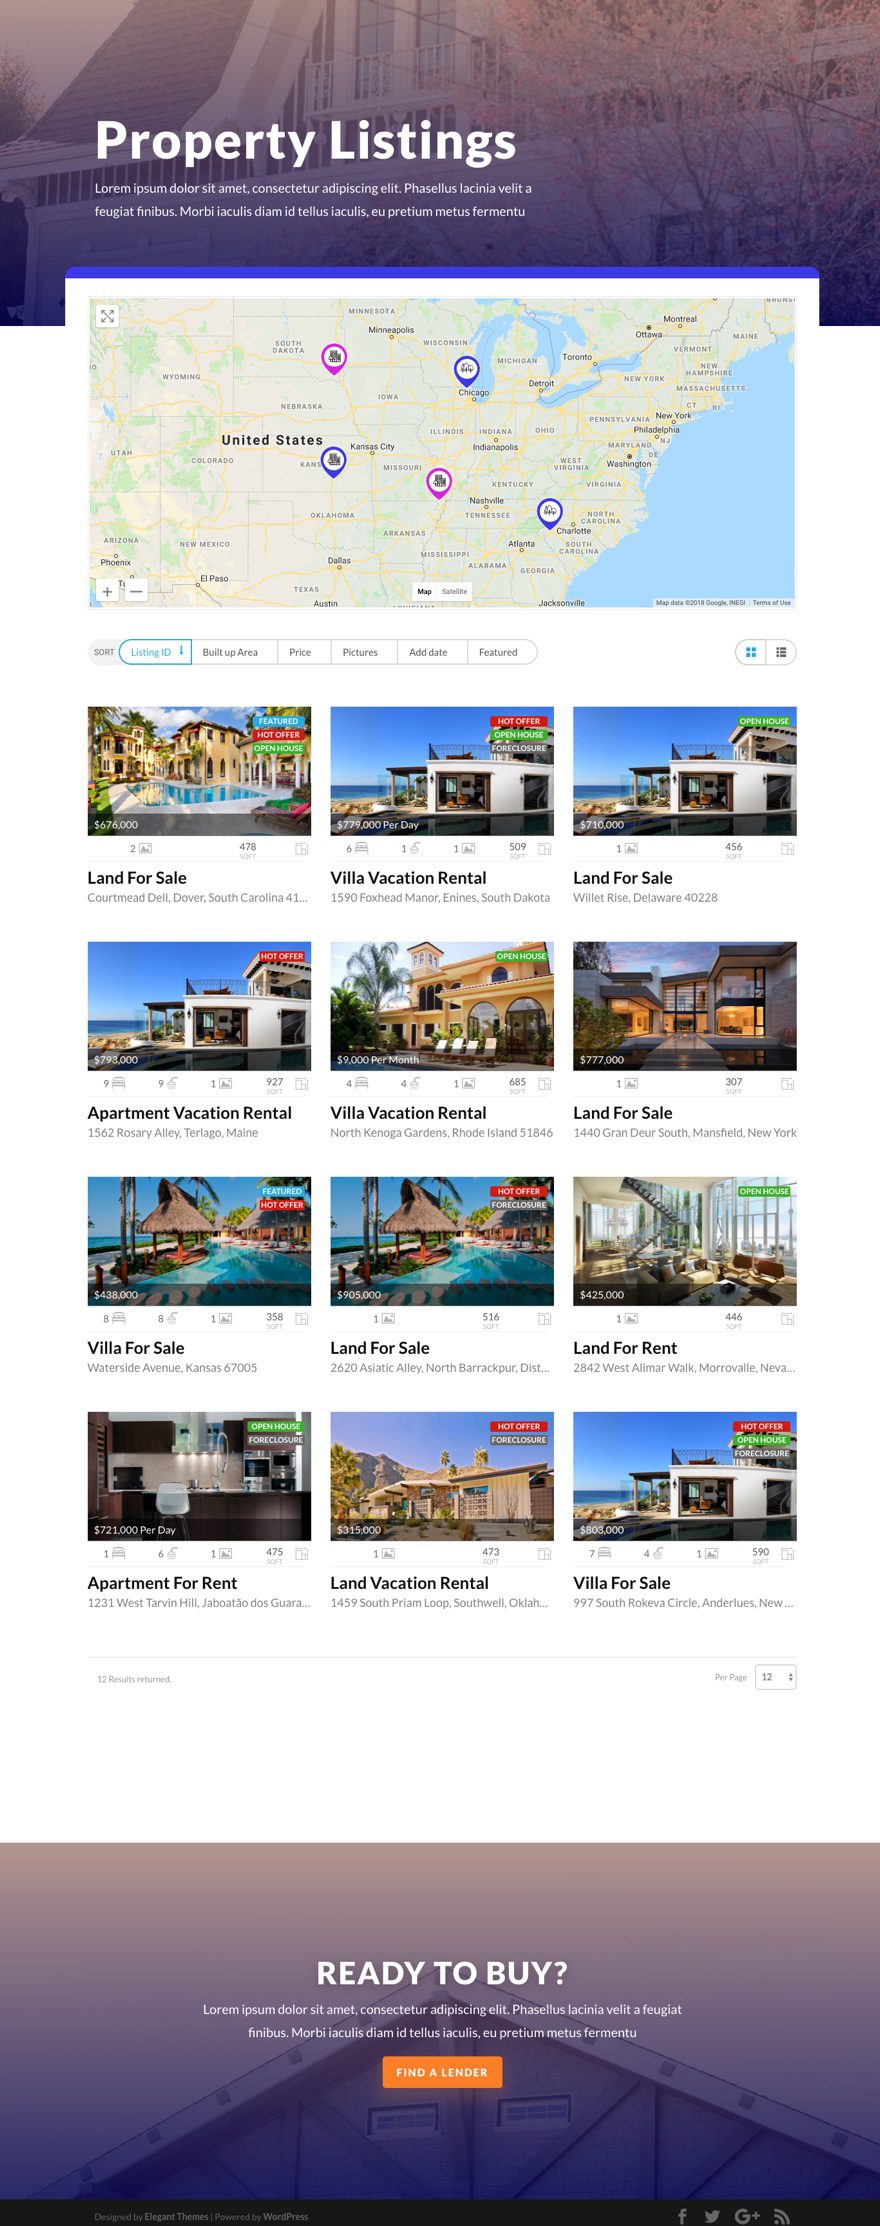
Sneak Peek
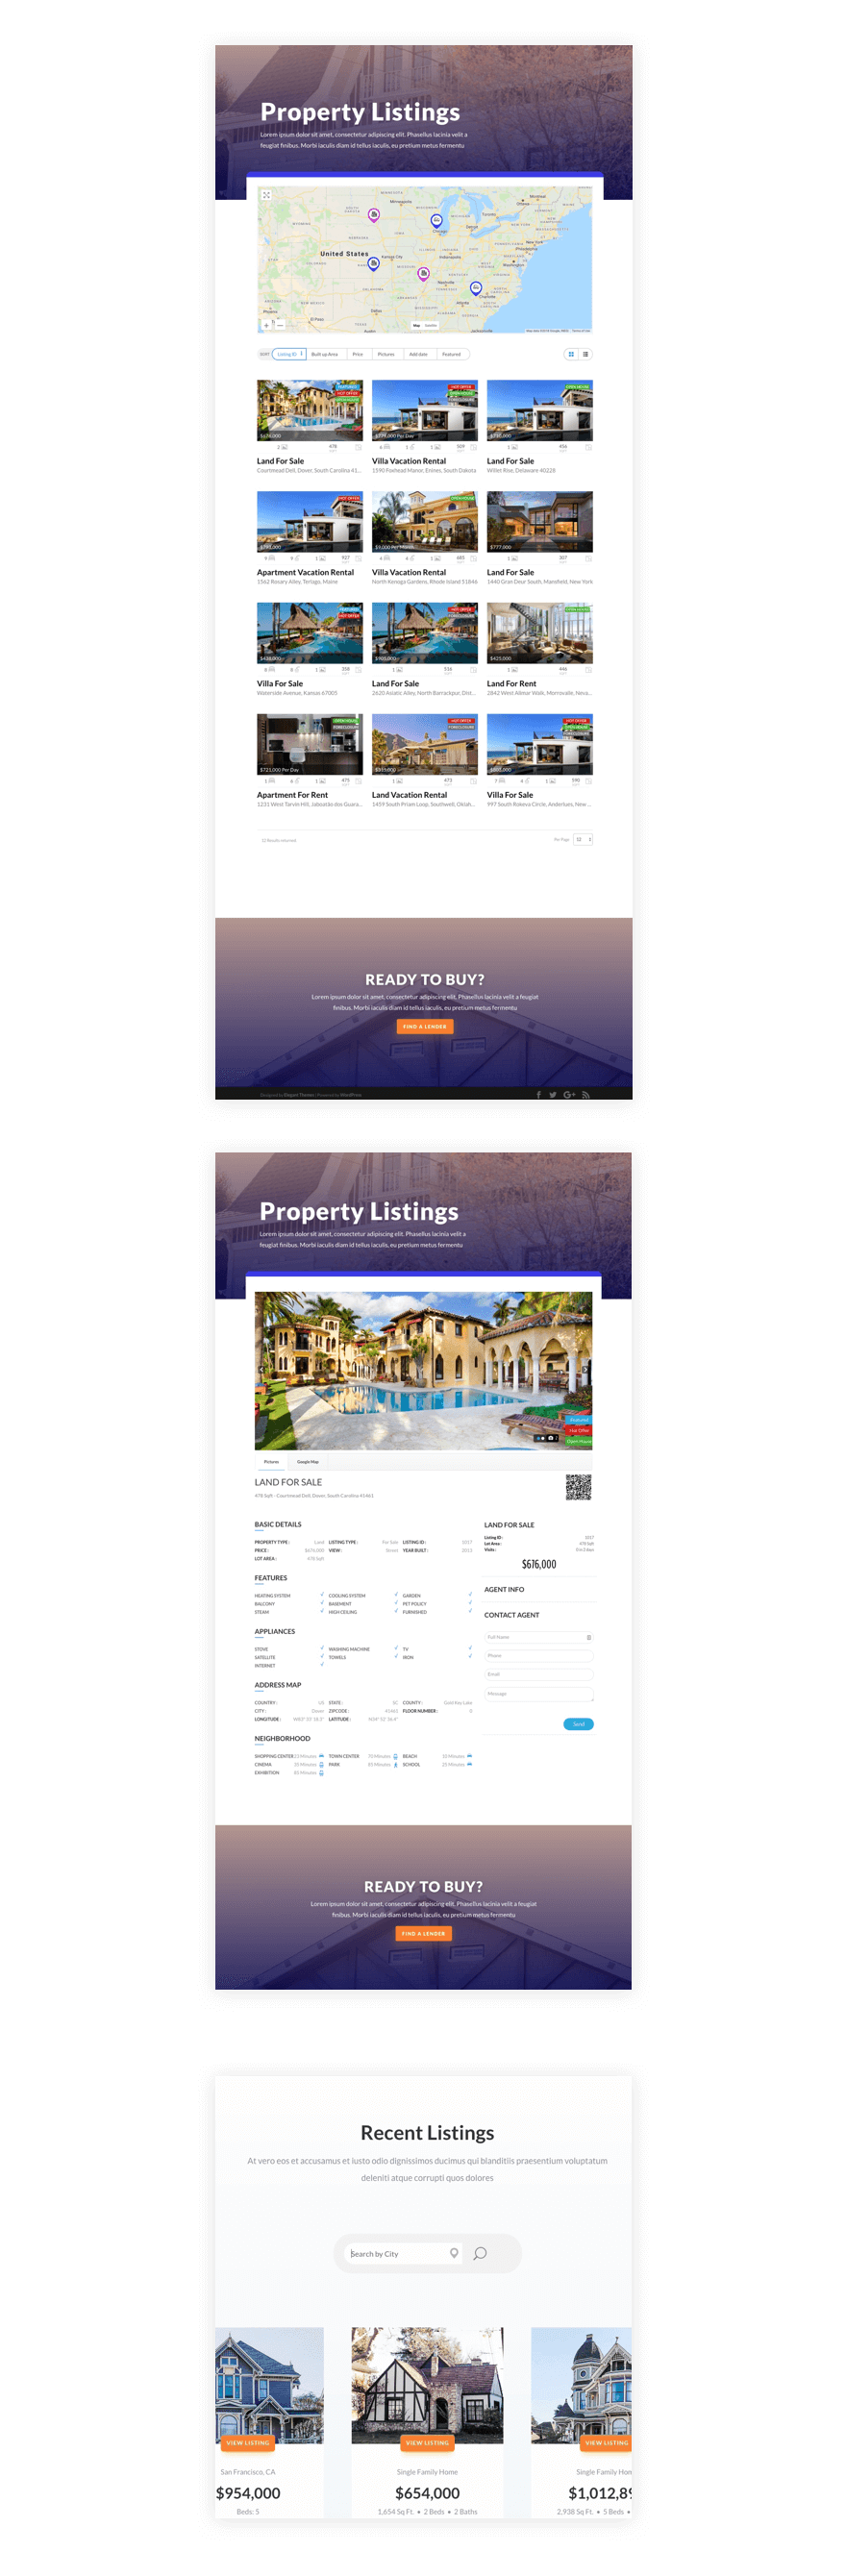
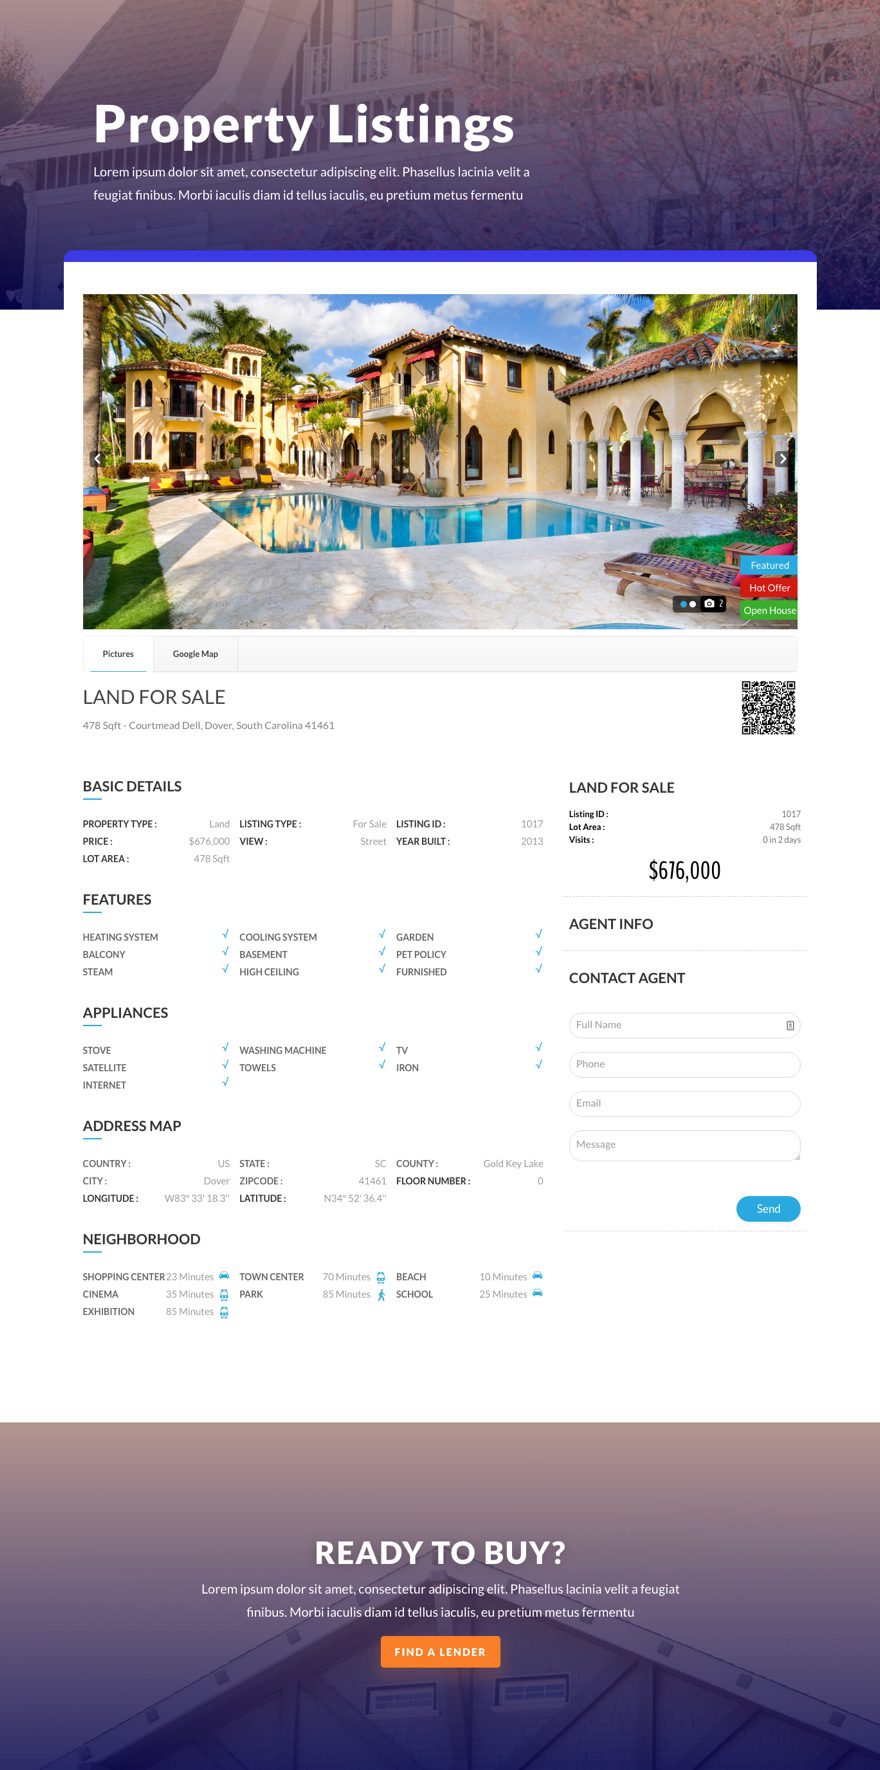
Here is a sneak peek of the property listing pages and search bar we will be creating.
What you Need
- Divi Theme
- Real Estate Layout Package
- WordPress Property Listings (WPL) Plugin by Realtyna – I’ll be using the free version of the plugin but their is also a pro version.
About the WPL Plugin
The WordPress Property Listing (WPL) Real Estate plugin is great for real estate agencies looking to run a real estate website with Divi. The database management on the back end is robust and flexible. And the front-end functionality works surprisingly well with the Divi Builder. There are a number of modules that have been built specifically for the Divi builder plus many shortcode options that will allow you to add property listing features within your Divi layouts. They even have a Divi demo site to see the plugin in action.
WPL Settings
General Settings
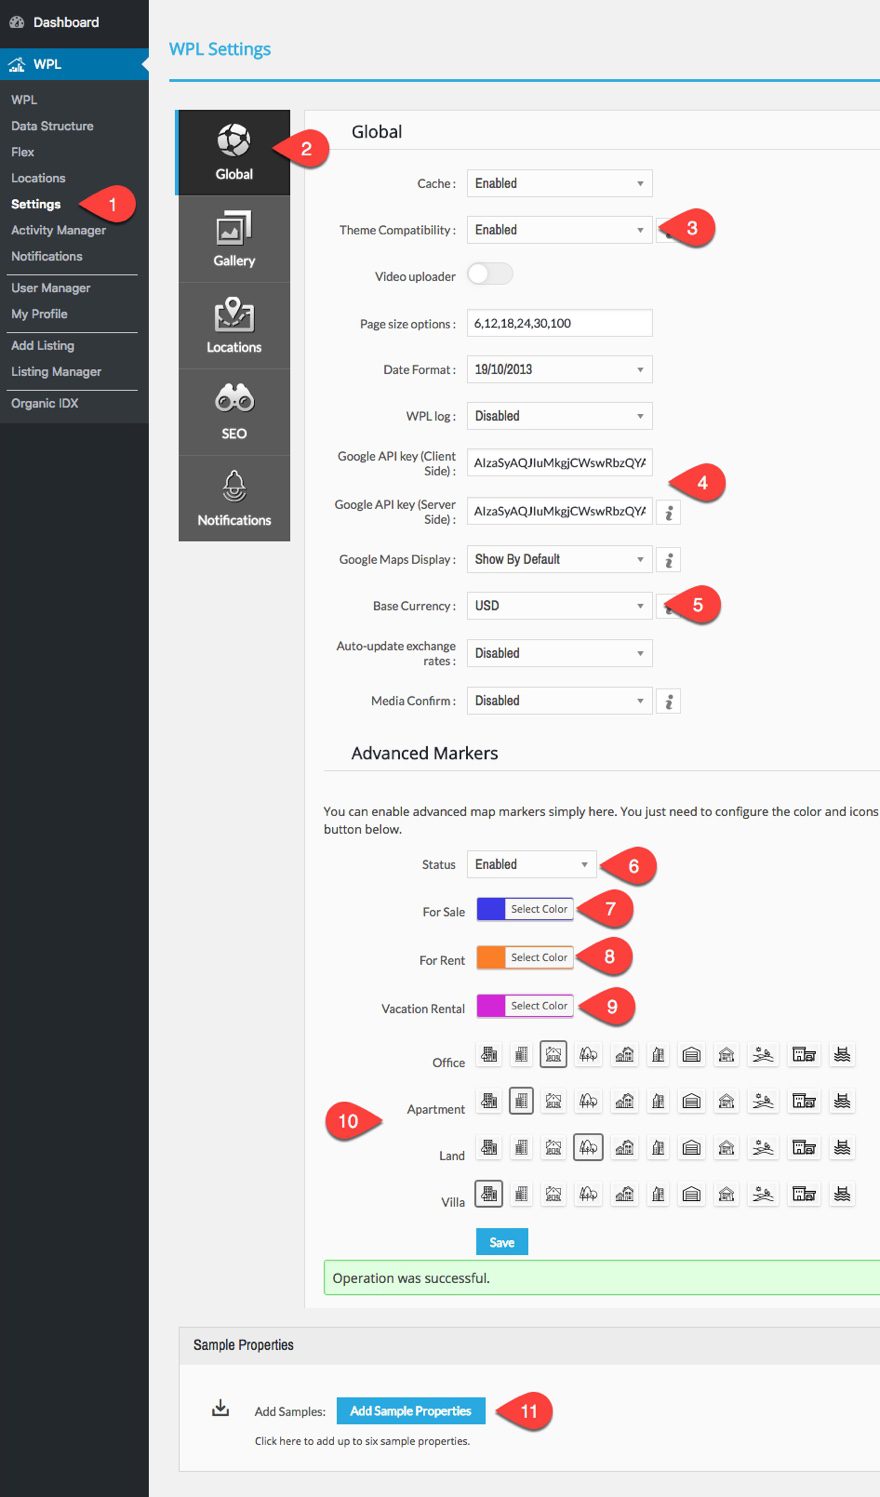
First, let’s set up our settings for the plugin. Navigate to WPL > Settings from the WordPress Dashboard.
From the General tab, you will see a list of options to customize the plugin to your needs. Update the following options:
Set the Theme Compatibility option to “Enabled”. This is very important because it will help the plugin inherit design and functionality from the Divi Theme. This is a refreshing feature, as most plugins don’t have this feature specifically for Divi.
Then create and enter a Google API Key so that the maps will show on your property listings.
Set you base currency.
Scroll down to the Advanced Markers sub category and select the status to “enabled”. This will give your tabs a nice custom icon and color to display on the google map.
Then set your colors for each of the listing types as follows:
For Sale: #3c39e6
For Rent: #fa7f28
Vacation Rental: default
You can also select a custom icon for each type as well.
Don’t forget to click Save.
If you want to get some sample properties up and running for testing, you can click the “Add Sample Properties” button to deploy six properties. You can click it more than once for more properties. This is a great way to get a headstart on the setup process.
Gallery, Locations, SEO, and Notification Settings
For the most part, you can leave the default settings for the rest of the WPL Settings. The Gallery options are useful for setting up how you want to resize images throughout your property listing displays. The Locations options are useful for setting up location keywords. The SEO options help you customize your permalink structures. And the Notifications options allow you to set your sender name and email for notification emails.
Once done, you are ready to start adding your listings.
Add Your Listings
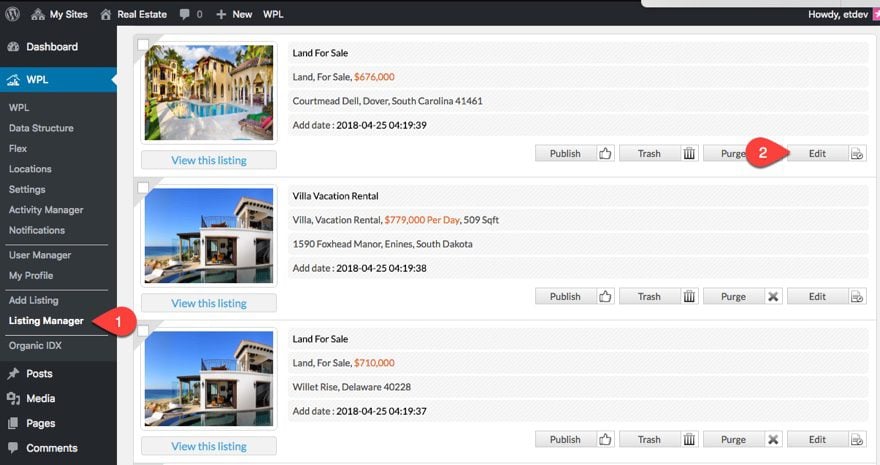
If you chose to add sample properties for your listings under settings, you will already have some listings to work with. To see those listings, you can navigate to WPL > Listing Manager and click to edit any one of the sample listings to see how it is setup.
To add a new listing from scratch, go to WPL > Add Listing. Under the Basic Details tab, update all the options that apply to your listing. The following options are required:
- Property Title (this is what is displayed when the property is displayed within the page content throughout your site)
- Property Page Title (this is the title of the single property page designated for that specific property)
- Property Type
- Listing Type
- Price
- View
- Bedrooms
- Bathrooms
- Square Footage
Features and Appliances
Continue setting up your listing with any features and appliances in the Features and Appliances tabs.
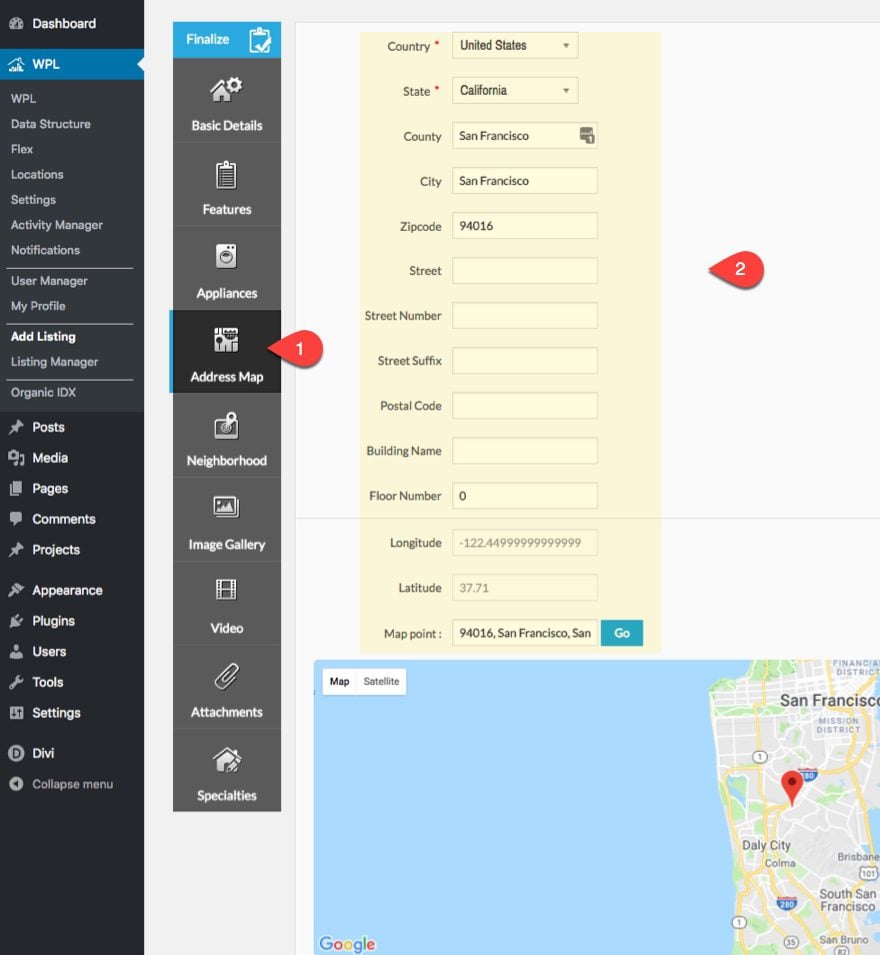
Address Map
Under the Address Map tab, you can enter the location information for your listing. This info will be displayed on your listing as well as generate map coordinates for displaying the locating pin on google maps.
Neighborhood
The neighborhood options allow you to show neighborhood related features for your listing.
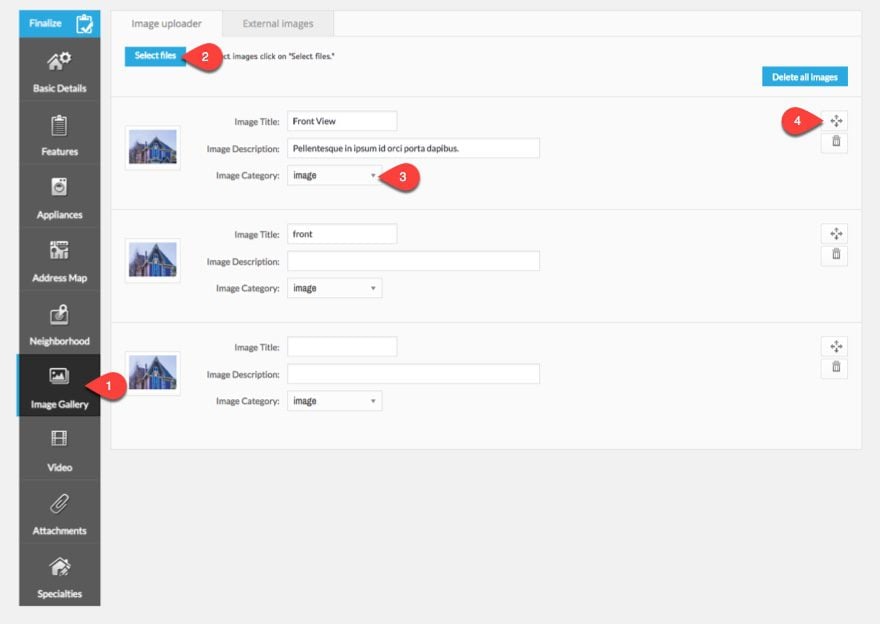
Image Gallery
Under the image gallery tab, you can upload all the images you want to display for your listing. You these images will be used to generate images for your listing through your site (ie. a thumbnail for your property listing page and slider images for the single property page).
You can even designate the image category as image or floor plan and organize the order of images by dragging the move icon to the right.
Video, Attachments, and Specialties
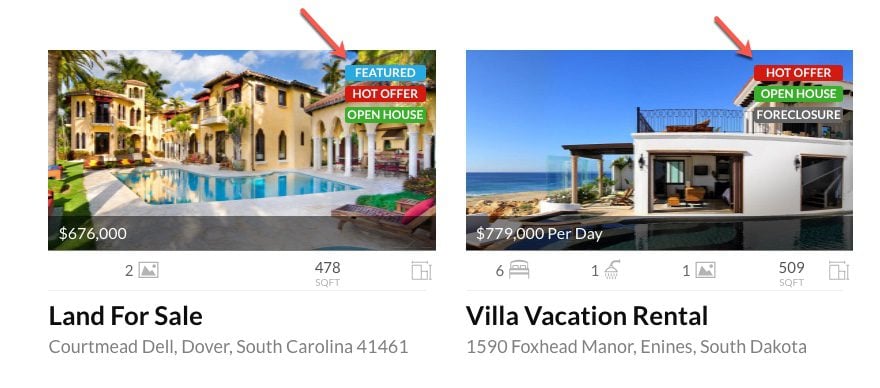
You also have the option of adding a video for your listing via an embed code under the Video tab. You can also add any other files you want as attachments under the Attachments tab. The Specialties tab allows you to assing a special tag to your listing (ie “Featured”, “Hot Offer”, “Open House”, “Foreclosure”. These tags can be helpful because you can choose to show them on your listing’s thumbnail for a better user experience.
Here is an example of what those tags will look like.
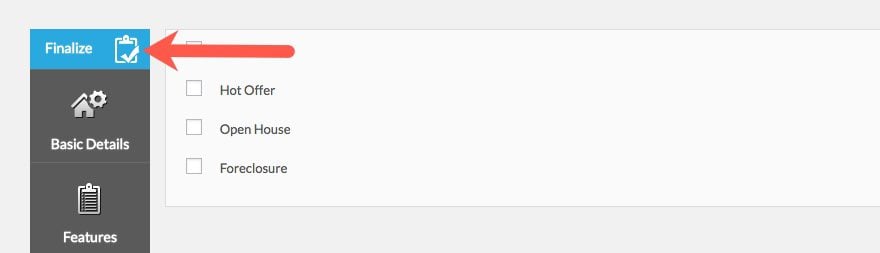
IMPORTANT: Don’t forget to click the blue Finalize button at the top of the listing menu tabs to publish your listing.
Once you have enough listings created (at least 6 should do it), it’s time to create our Property Listing Page.
Design Properties Page
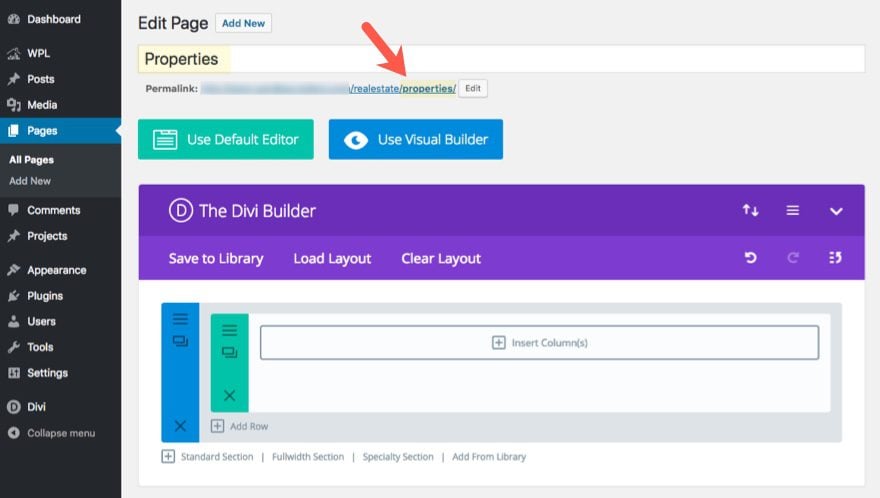
The plugin automatically creates a few pages for you. One of the pages has the title “properties” and is the WPL main page for displaying your property listings (it’s the one with the /properties permalink in the url). Find that page in your WordPress Dashboard under Pages and then click to edit the page. Next click to use the Divi Builder then the Visual Builder.
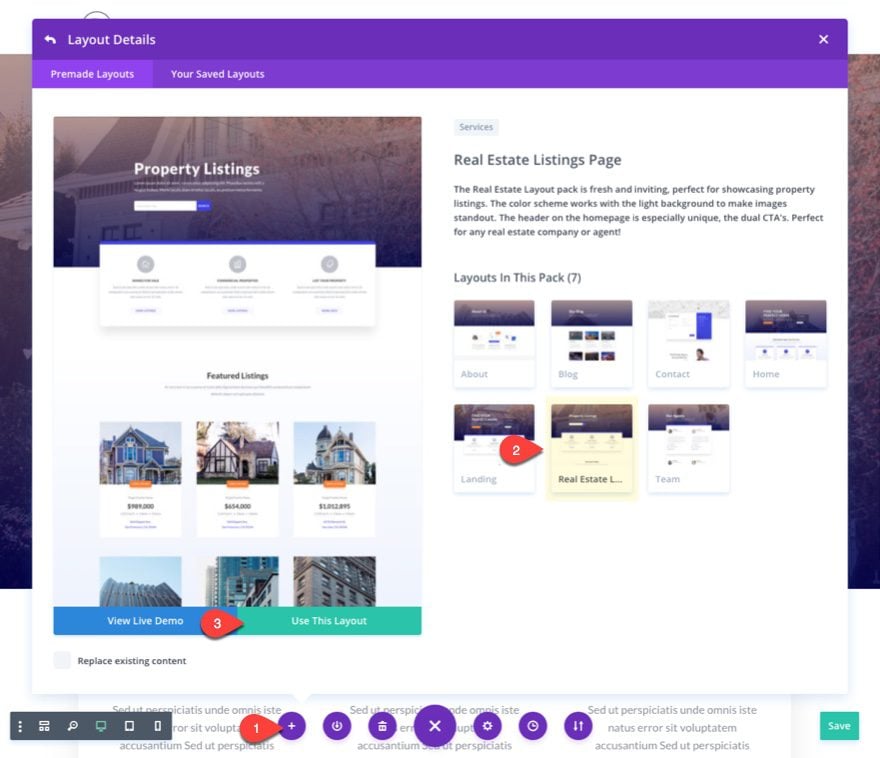
Import the Listings Page Layout
Import the Listings Page Layout that comes with the Real Estate Layout pack by clicking Load Layout and selecting the page layout from the Premade templates tab in the popup.
From the visual builder, delete the search bar in the header. Then in the section below the header, delete all the modules in the three column row. Then update the row column structure to have one column.
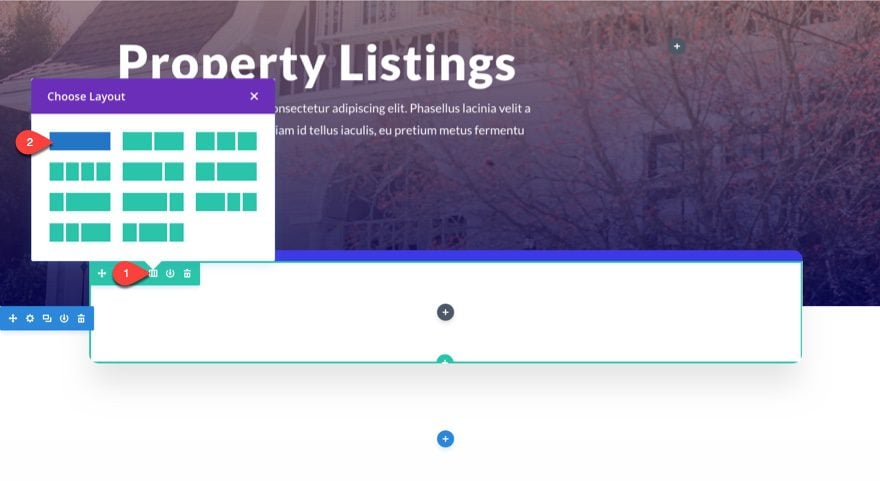
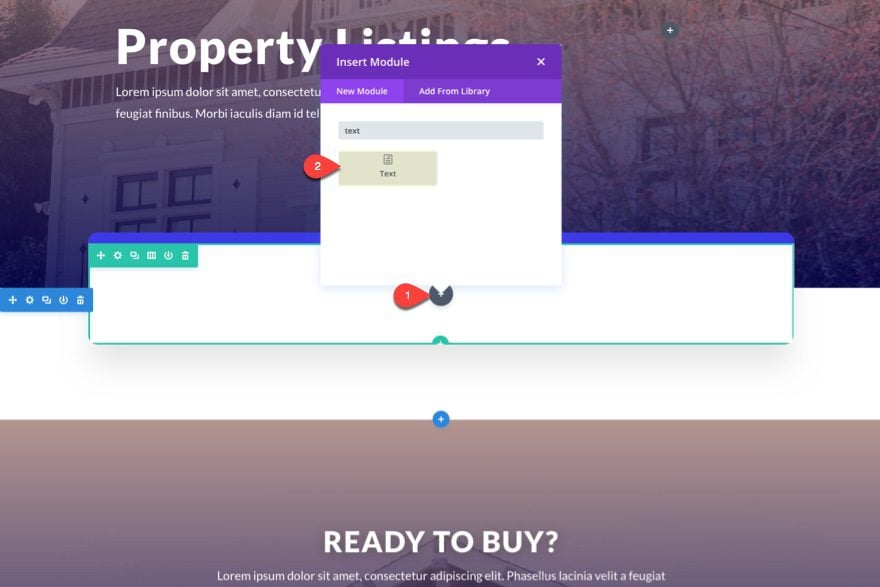
Then add a text module to the row and delete all the other sections below in the layout you don’t need.
The plugin is designed to work well with Divi’s back-end builder so we will be using it to add shortcodes to the layout.
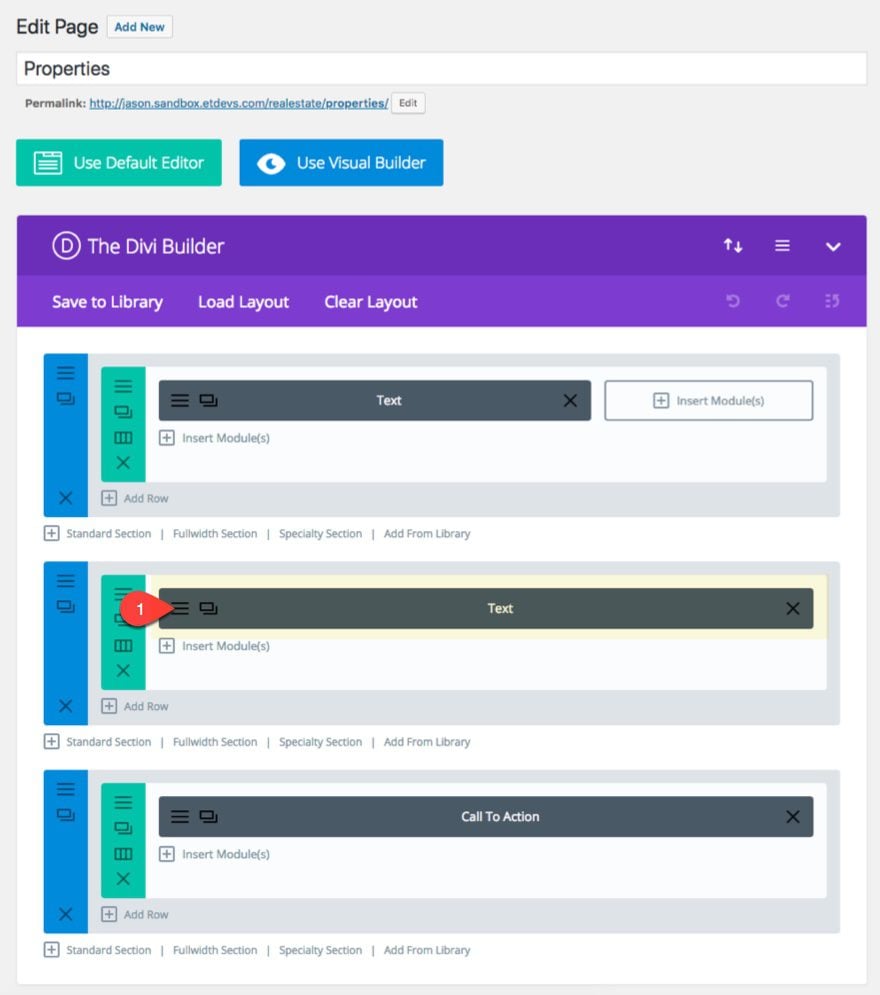
Save your settings and click to edit the page using the back-end builder. Then click to edit the text module you just added.
Add the Property Listing Shortcode
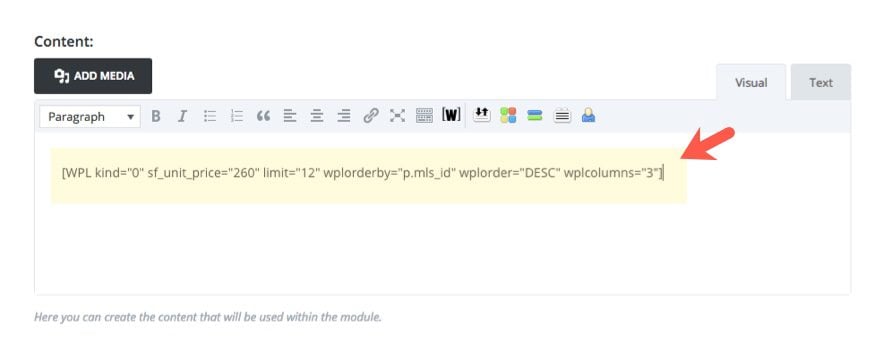
In the content editor of the text module settings, select the WPL Shortcode Generator icon then leave the options to their default (which should list all properties in 3 columns) and click the Insert button.
This is what the shortcode that is generated looks like:
Update Text Module Settings
At this point you can deploy the visual builder and make some adjustments to the text module that contains your shortcode. This is a great way to customize the text display of your property listing.
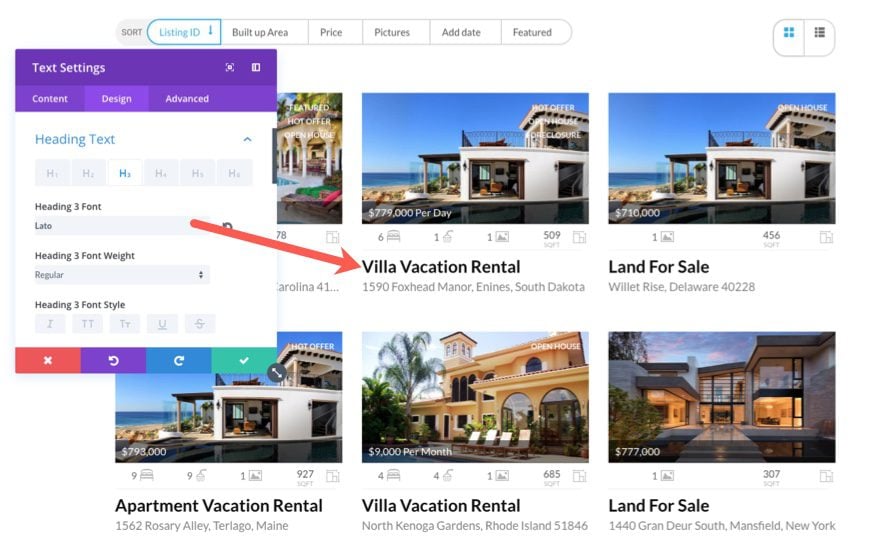
Update the following in the text module settings:
Text Font: Lato
Unordered List Font: Lato (for the sort menu)
Heading 3 Font: Lato (Heading 3 controls the property titles)
Heading 3 Text Size: 26px;
Note: You should probably set your default theme font in the theme customizer to whatever you want the plugin to use. This may simplify the process.
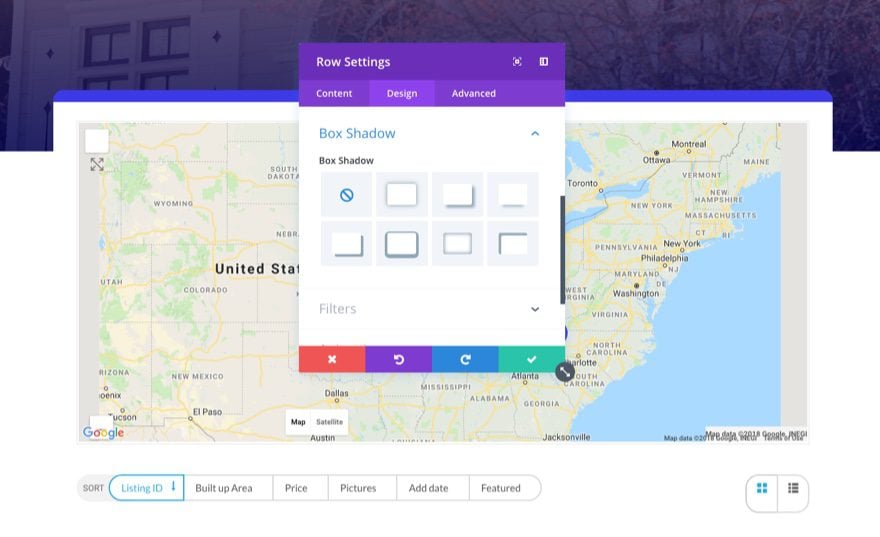
Update the Row Settings
Now make some adjustments to the row that contains your text module so that it will look better on mobile. Here is what I changed under the Row settings design tab.
Custom Padding: 15px Top, 2% Right, 60px Bottom, 2% Left
Column Custom Padding: default
Box Shadow: None
Now save your settings and your page and look at the live version of the page.
NOTE: Don’t set the Properties page as the default wordpress home page because this creates problems with the plugin. If you want this as a homepage, you must do this same process on a page with a permalink other than “/properties”.
Now check out the single property page that shows whenever you click on a property.
Use the Activity Manager to Control How Your Content is Displayed
One of the powerful features of WPL is the ability to customize minor details to get your content displaying how you want. The way that you make these customizations is through creating activities throughout the Activity manager.
Here is an example. Let’s say you want to customize the listing gallery of thumbnails that show on your property listing page. To do this you would need to first select the listing_gallery activity from the dropdown at the top right of the page and then click the plus icon to add it to the list.
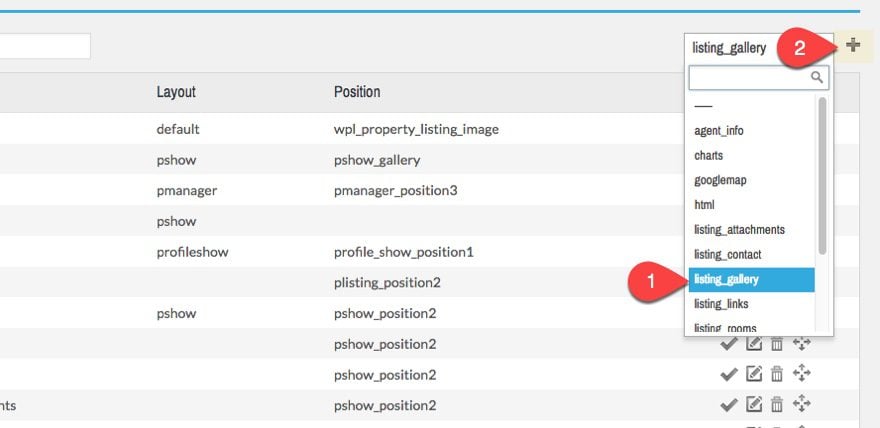
Enter the Position of the activity with the following:
wpl_property_listing_image
This tells the plugin to use these setting to update the images specifically at the location of the property listing content.
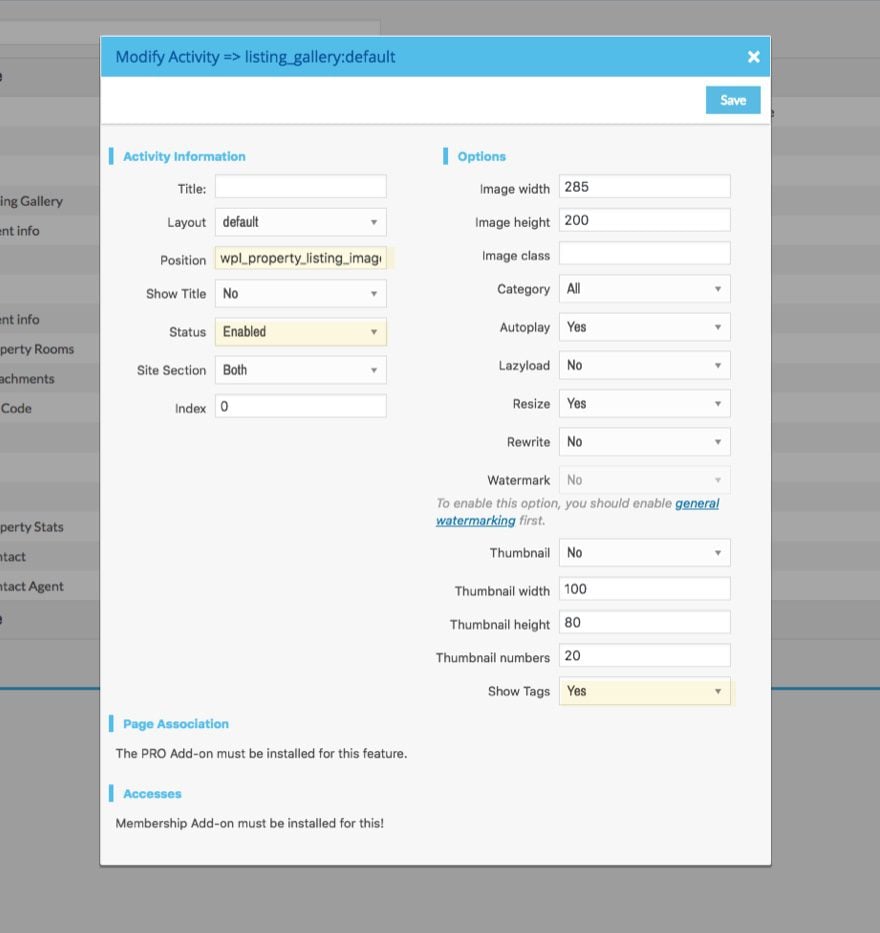
Then you can update the rest of the options to customize what or how content is displayed.
For example, this is where you would select to show tags on the thumbnails.
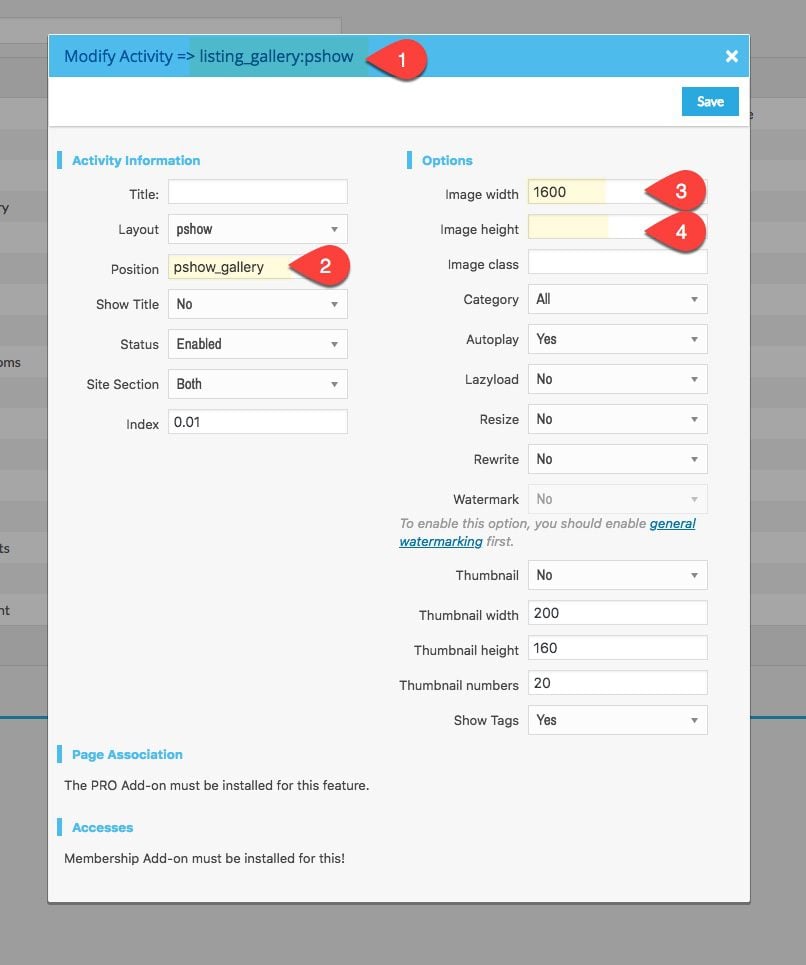
You may also find that you need to adjust the way images are displayed on your single property listing page. To do this you will need to customize the listing_gallery activity with the pshow_gallery position. Then you can update the image dimensions to fit your needs. One trick I learned is to set the image width but not the image height. That way the image doesn’t get skewed.
Add Search Widget to your Homepage
The WPL plugin has widgets that can be used to add plugin content/functionality to any page using the Divi builder. One of the widgets you can use is called the WPL Search widget. This will allow you to create a custom search bar on your homepage.
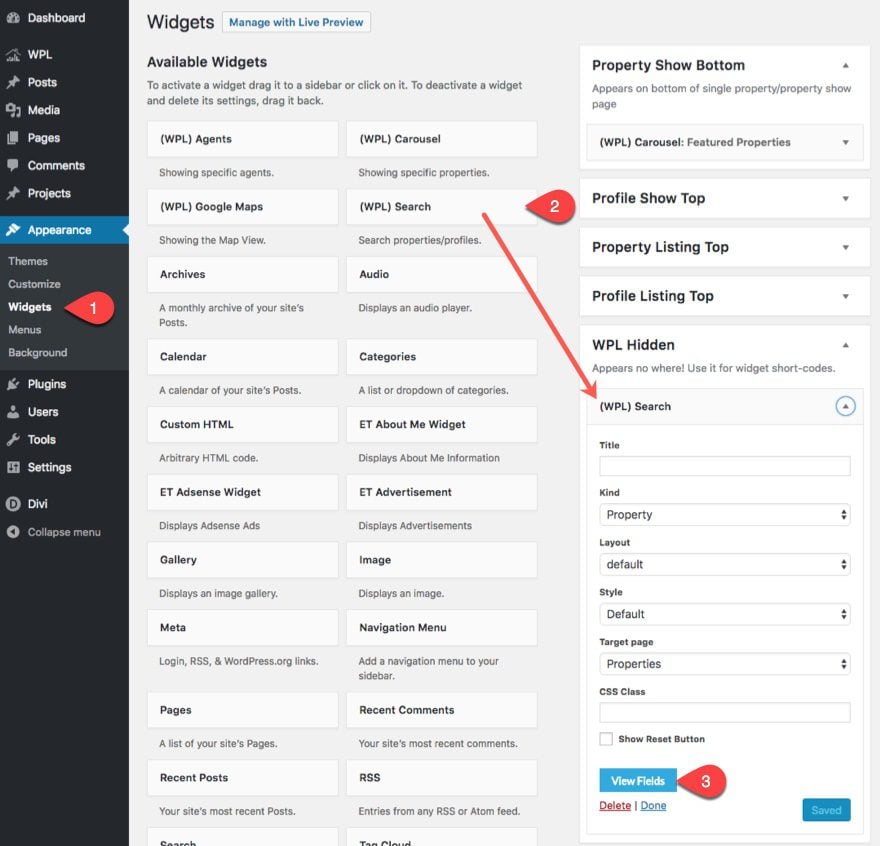
Navigate to Appearance > Widgets and drag the WPL Search widget into the WPL Hidden widget area. Then click the view fields button.
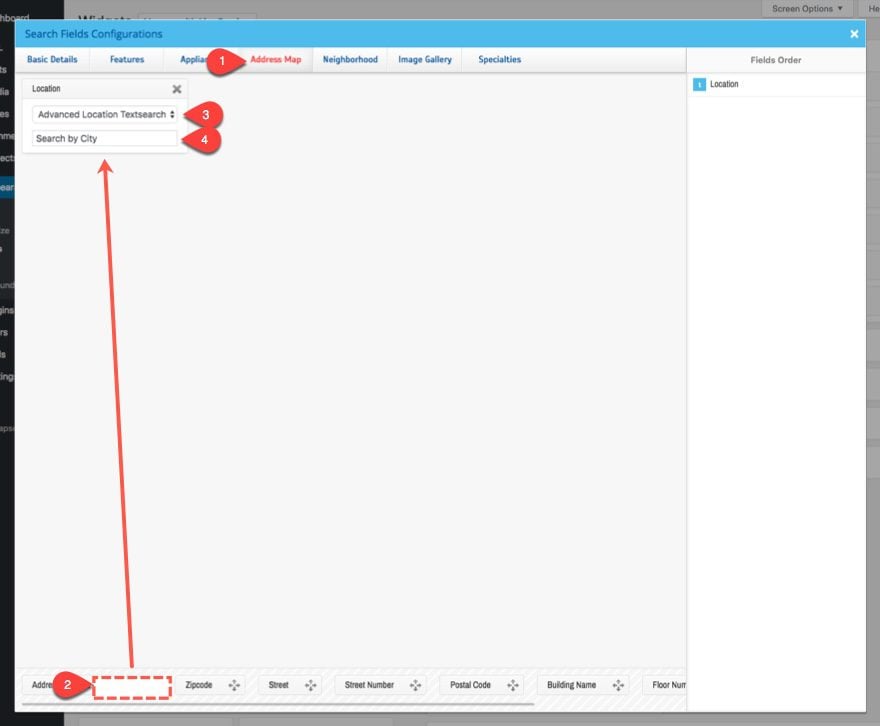
In the Search Fields Configurations popup, select the Address Map tab and drag in the Location field from the bottom of the popup. This select Advanced Location Textsearch option from the dropdown within the text field options. Then update the location-placeholder to have the text “Search by City”.
This will create a simple search bar with a text input field that will pull up search options dynamically as you type into the search input field.
Add Widget to Home Layout
Now go to page that has your Real Estate Home Page Layout and edit the layout using the Divi Builder.
Find section you want to place the search widget and add a row with a custom width of 400px. This will make sure the search bar doesn’t span the full width of the page.
Then click to add a new module to the row.
This is where things get exciting. You will notice that you have 8 WPL modules in the list of Divi modules!
NOTE: The modules that are custom to WPL may not work completely (especially in the Visual Builder) or have all the design options you would want, but at least this makes it easy to add widgets and shortcodes to your pages.
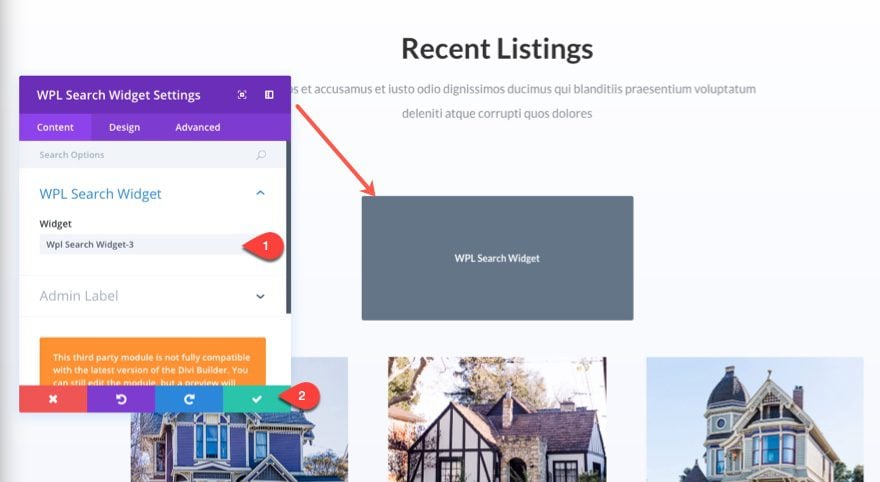
Select the WPL Search Widget module to add it to your row. Then in the settings modal, select the widget from the dropdown and save settings.
Now check out the live page.

Final Thoughts
The free version of the WPL plugin actually works surprisingly well with Divi out of the box. Although they are limited in design options, the plugin even has custom modules built specifically for Divi! This makes things a lot easier on the backend. And, the pro version of the plugin seems to have a ton of great upgrades as well if you are interested. Realtyna also has a wide range of solutions for real estate, including live MLS integration.
All in all, I think you will like the final result. The property listings are easy to match the design of the Real Estate layout pack, but most importantly, you will have a functioning platform for displaying and managing your property listings.


This is better than any documentation that Realtyna gives clients. Be warned… Realtyna is not a US based company as they pretend to be. If you are planning on using Realtyna and Divi, use the build process here and Divi real estate theme. We wanted to use the build Realtyna provides for their demo site and just discovered they don’t provide the JSON files or build instructions. They only deliver the Divi core plugin which most people here will not need.
Hi, thanks for this great article. I am new here, so just a question:
On the Listings page of the Real Estate Layout you also find a few listings. They have a nicer design than the WPL plugin. Can these listing only be put in manually and is it therefore a better option to use the WPL plugin?
Also is it possible to translate the WPL plugin?
Many thanks!
Really clear step by step guide, keeping it simple and interesting.
I love this and it is saving me a ton of time so thank you Elegant Themes. One problem I am having is getting the listing images to display properly in the slide. Can this be changed to a gallery view to avoid the stretching problem?
Thanks jason for screen shots and each step is very clear and easy to understand.
This step-by-step guide is awesome. It would be very beneficial if the actual layout was available for download as well. This goes for all these types of posts.
Was looking for something like this, wicked!
Excellent job Jason, it can be one of the best Elegant Themes tutorial. Thank you very much.
Oh my god, it is fantastic and I want to use this my own website 🙂
Have used this (free version only). Was a nightmare trying to add listing as Auction. Maybe this is addressed in Pro version.
Looks like an excellent post. Bookmarked and will have a go mocking up a real-estate site in the next few days.
Hi Jason, good video. !! But i have a question? The plugin wpl, work with property in Chile, or Spanish ?
Thanks.
Will be trying this out. Thanks for the detailed post.
Quick question:
Does this plugin support maps other than Google Maps?
In certain countries, Google maps are not available, but Bing map is.
I didn’t see any support for other maps. Sorry.
It is super difficult and frustrating compared with other services out there. I had a 15 minutes chat with the rep of WPL. He piled up information and numbers, which lead to no solution, because you need a RETS data feed which may or may not work with multilingual websites flawlessly, based on what he advised. He failed to provide me with sample websites (which by itself smells bad) and he was impatience and misinformed me, which is also a big warning sign. My past experience with real-estate websites is – pay a lot to get a robust solution done for you, instead of under quoting customers and spending a lot of your time to the point you lose the project.
To use the RETS feed, first you should know what is that and the nature of RETS.
RETS is simply meaningless with Multi Language, because it’s an XML (one-directional) property feed. You don’t have any control of such XML feed content to be able to translate it. (Unless you use automated translate which is useless in most of the cases).
In general what you are trying to achieve (Mixing RETS and Multi Language) doesn’t make sense at all and it’s vague. No wonder, why you received a vague answer.
So, use a real estate plugin. Got it 🙂
Bookmarking this! Thanks for the step-by-step guide too.
This looks excellent Jason. Is it possible to use WPL for map based searches other than Real Estate ie a music venue directory? Also, do you think it’s possible to change the destination so the properties details go to a page made in divi rather than the listings page set by WPL? Many thanks for any input.
Paul,
I’m not sure about the map based searches. Might be possible but not sure if it would be worth going against the grain of the plugin like that.
I don’t think you can change the destination of the single property listing page when clicking on a property in the main property listings page. But, you can create custom pages for single listings using a shortcode on any page you want. Then you can just link to that page from anywhere.
Hope that helps.
Much appreciated Jason
Great Jason! Was looking for something like this a few weeks ago. Will try this asap…!