
Adding CSS backdrop-filter effects is a fun and unique way to boost the design of a sticky header menu. What makes the backdrop-filter CSS property so unique is that it allows you to apply filter effects to the area behind an element. This is a perfect option for sticky headers because the design of your page can be magically changed behind the header while scrolling down the page. You may have seen this effect used on popular sites like apple.com.
In this tutorial, we are going to show you how to add CSS backdrop-filter effects to a sticky header in Divi. First, we’ll explain the simple process of adding backdrop-filter effects to an existing header which involves 3 easy steps. After that, we’ll break down how to build the entire header from scratch.
Let’s get started!
Sneak Peek
Here is a quick look at the design we’ll build in this tutorial.
Notice the blur and saturation filter effects applied to the elements behind the header as you scroll.
For a simple live demo of this backdrop-filter effect added to a header, check out this codepen.
Download the Global Header Template for FREE
To lay your hands on the designs from this tutorial, you will first need to download it using the button below. To gain access to the download you will need to subscribe to our newsletter by using the form below. As a new subscriber, you will receive even more Divi goodness and a free Divi Layout pack every Monday! If you’re already on the list, simply enter your email address below and click download. You will not be “resubscribed” or receive extra emails.

How to Upload The Template
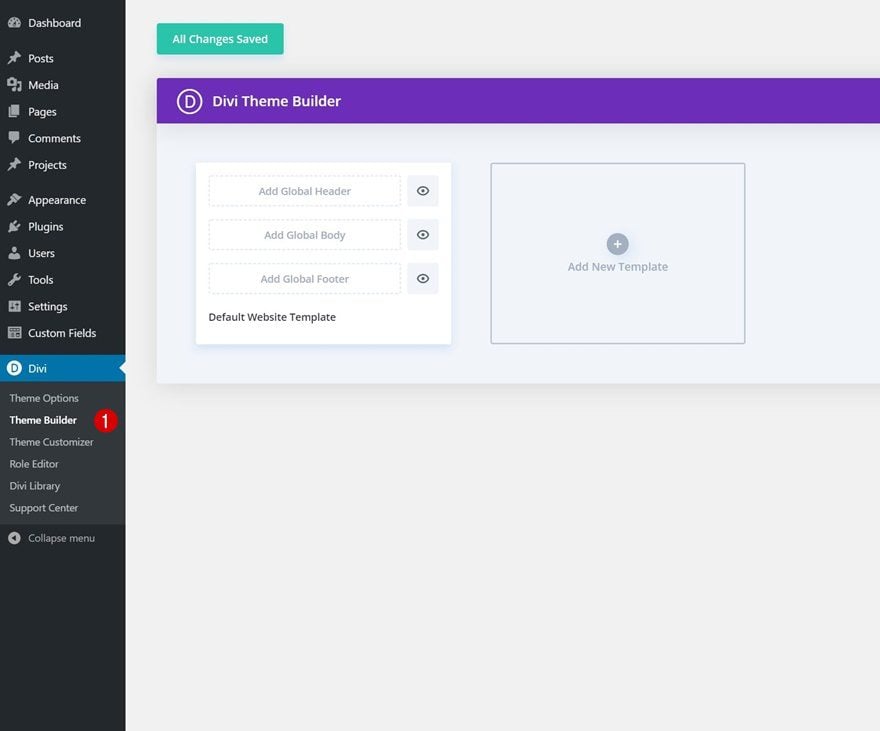
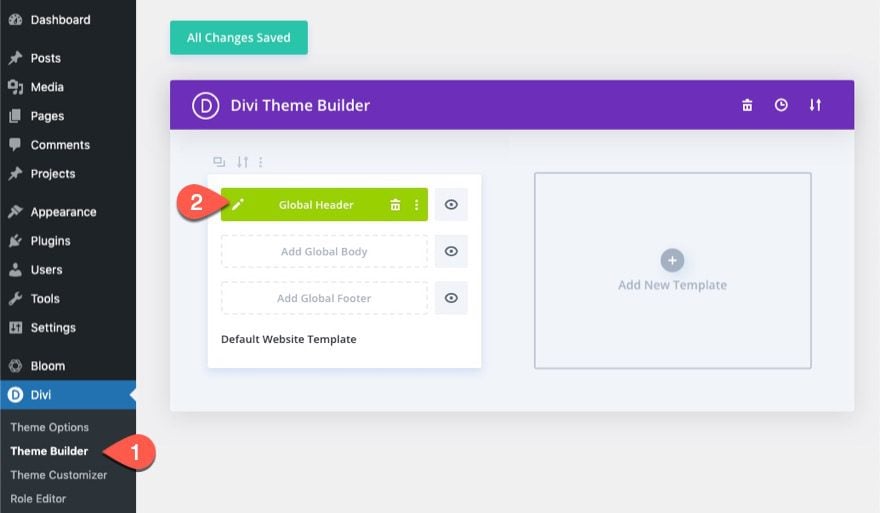
Go to Divi Theme Builder
To upload the template, navigate to the Divi Theme Builder in the backend of your WordPress website.
Upload Global Default Website Template
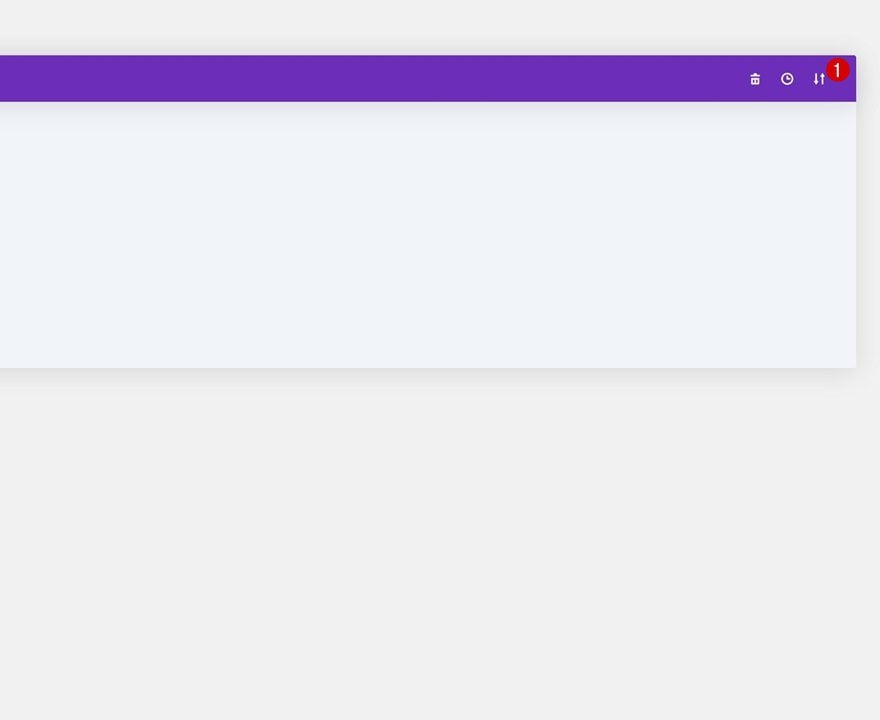
Then, in the top right corner, you’ll see an icon with two arrows. Click on the icon.
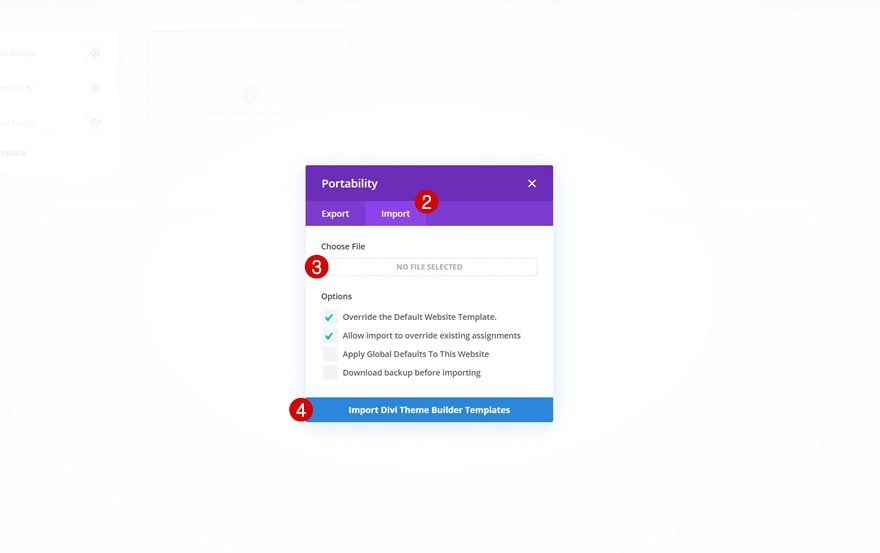
Navigate to the import tab, upload the JSON file which you were able to download in this post and click on ‘Import Divi Theme Builder Templates‘.
Save Divi Theme Builder Changes
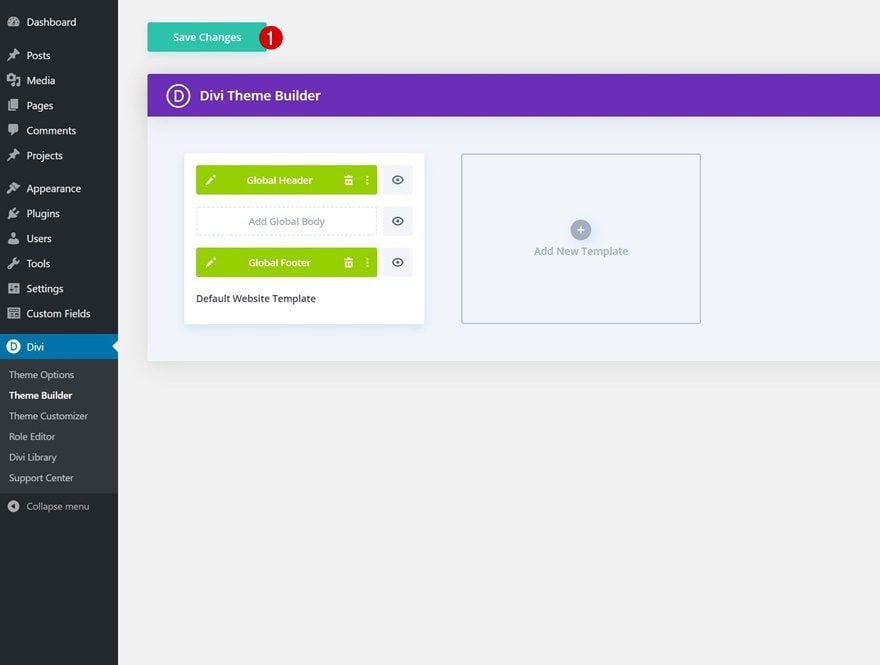
Once you’ve uploaded the file, you’ll notice a new global header and footer in your default website template. Save the Divi Theme Builder changes as soon as you want the template to be activated.
Let’s get to the tutorial, shall we?
Adding CSS Backdrop Filter Effects to an Existing Header
The simplest way to demonstrate the process is to add CSS backdrop-filter effects to an existing header in Divi. Really, it boils down to these three easy steps:
- Add a Semi-Transparent Background Color to the Header Section
- Add the backdrop-filter Custom CSS to the Header Section
- Add a Sticky Position to the Header Section
Here’s how to do it in Divi.
Edit Header in Theme Builder
Navigate to the Theme Builder and click to edit the existing Header template.
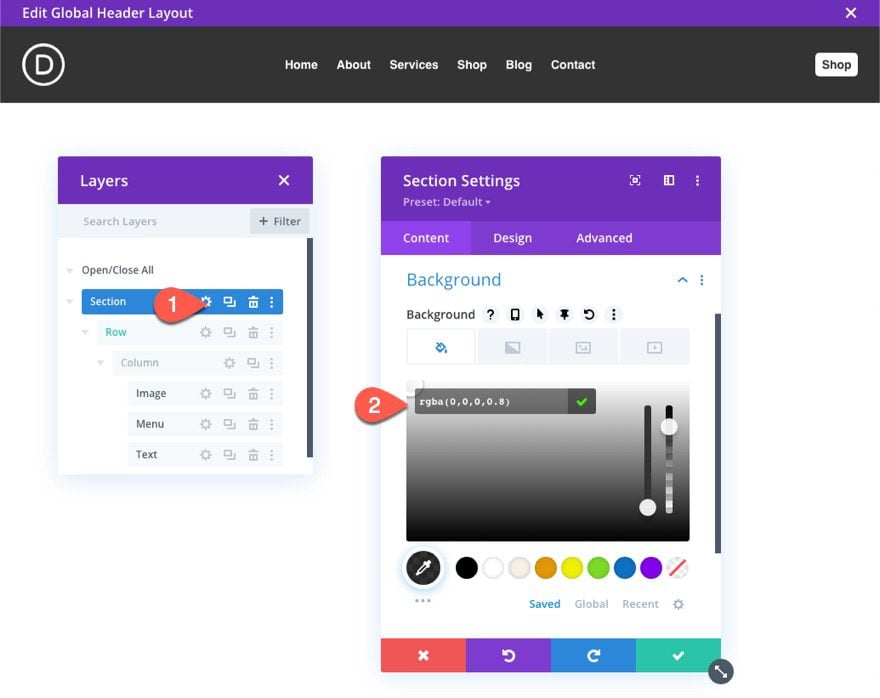
Add Semi-Transparent Background Color to Section
Open the settings to the section containing the header menu elements. Then add a semi-transparent background color to the section. In this example we give the section the following background color:
- Background Color: rgba(0,0,0,0.8)
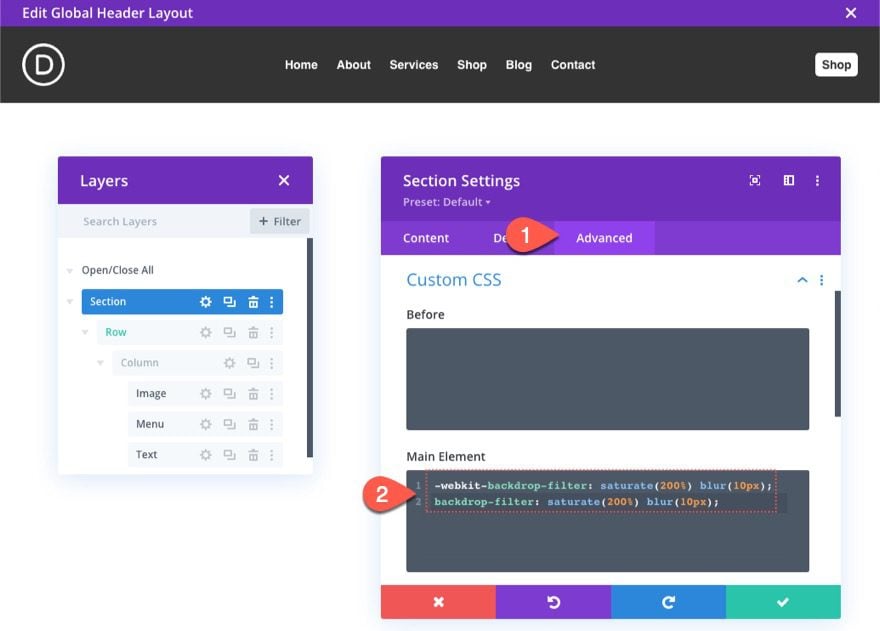
Add Backdrop Filter Custom CSS
Next, we can add the backdrop-filter effects (using the backdrop-filter CSS property) with a snippet of custom CSS in the Section’s Main Element. Under the advanced tab, paste the following CSS to the Main Element:
-webkit-backdrop-filter: saturate(200%) blur(10px);
backdrop-filter: saturate(200%) blur(10px);
These filter effects are similar to the filter effects built-in to all Divi elements. The main difference is that backdrop-filter add the effect to element(s) behind it, while Divi’s built-in filter effects add the effect to the element itself.
Here we are using 2 filter effects (saturate and blur) which will apply the filter effect to any design elements behind the section.
Feel free to explore adding other filter-function values (or a combination of these) to create your own unique design. The most useful of these include:
- blur()
- brightness()
- contrast()
- grayscale()
- hue-rotate()
- invert()
- sepia()
- saturate()
Add Sticky Position to Header
Finally, make sure to give the header section a sticky position.

Final Result
Here is a look at the final result on a live page. Notice the blur and saturation filter effects applied to the elements behind the header as you scroll.
Building a Header with CSS Backdrop Filter Effects from Scratch
If you want to build the entire header with CSS backdrop-filter effects from scratch, here’s how to do it.
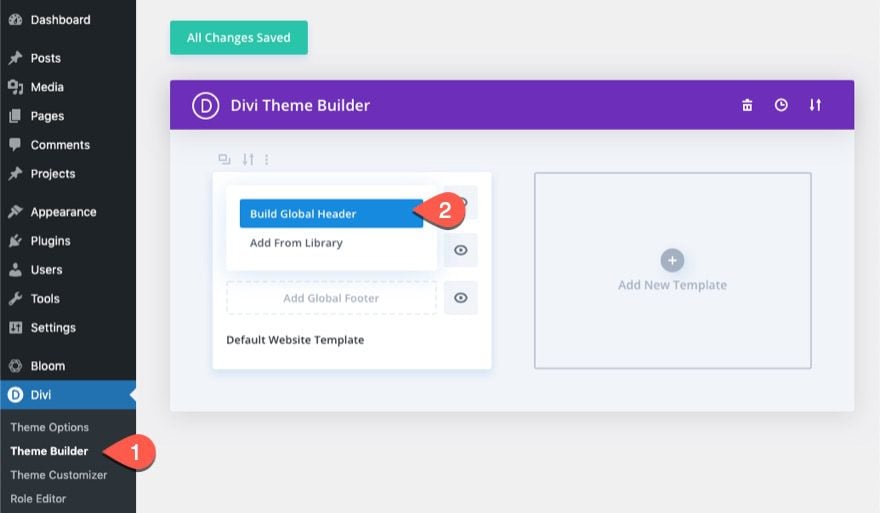
Build Global Header in Theme Builder
Navigate to the Theme Builder and click to Build a new Global Header.
Creating a Sticky Section with CSS Background Filter Effects
Let’s start by creating a sticky section with the CSS background filter-effects like we did in first part of this tutorial.
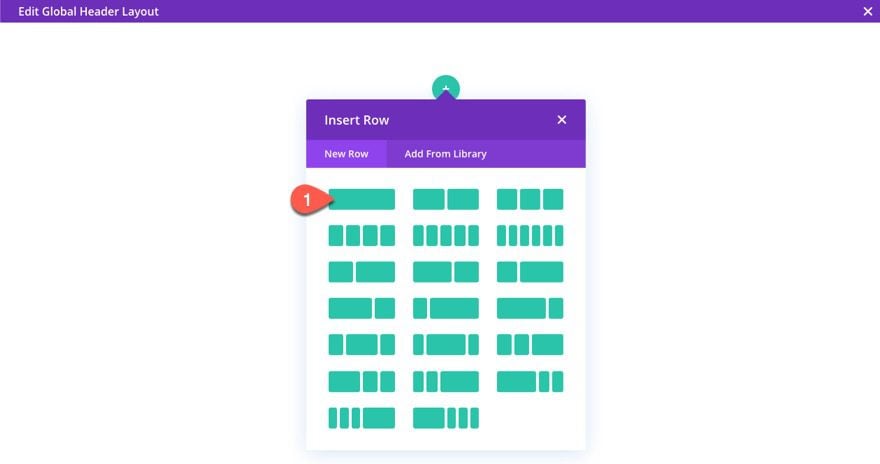
In the Global Header Layout Editor, add a one-column row to the section.
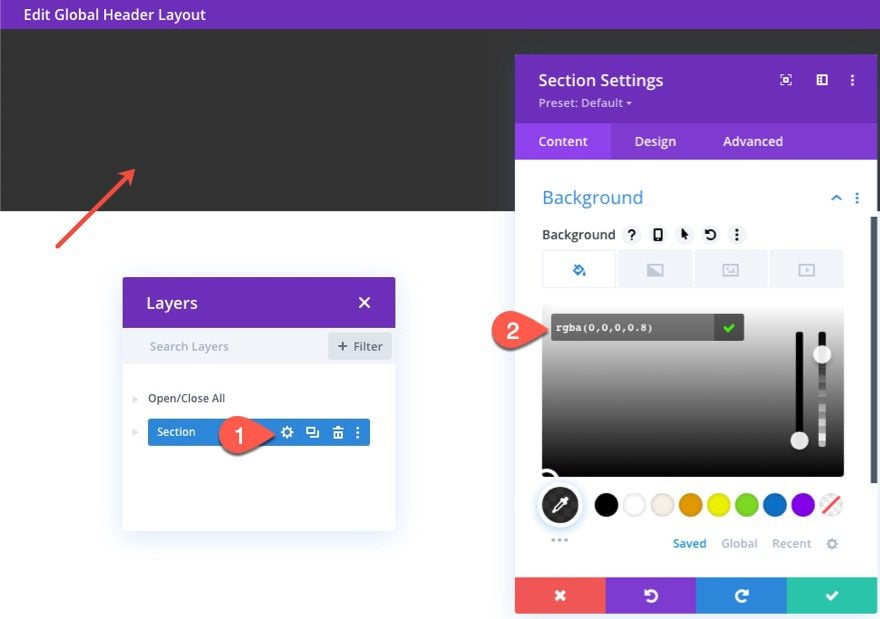
Open the settings of the section. Then add the following semi-transparent background color to the section:
- Background Color: rgba(0,0,0,0.8)
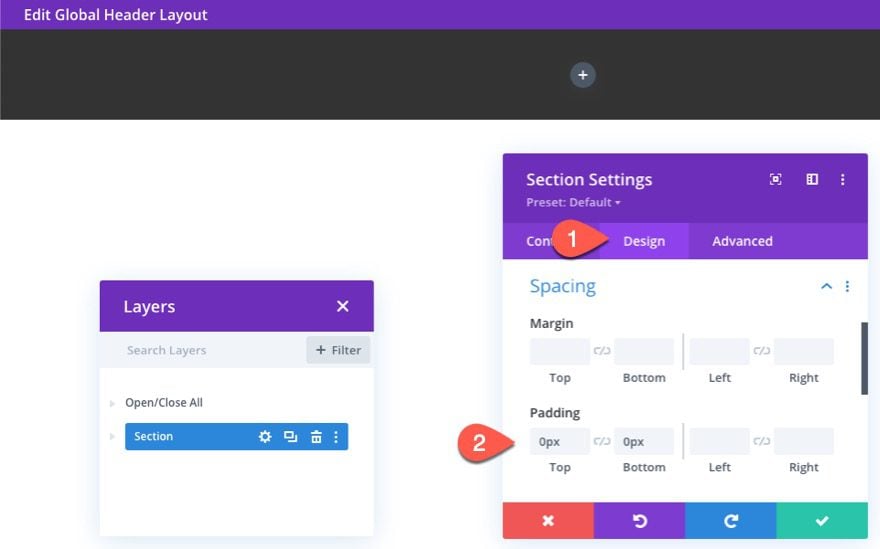
Update the padding as follows:
- Padding: 0px top, 0px bottom
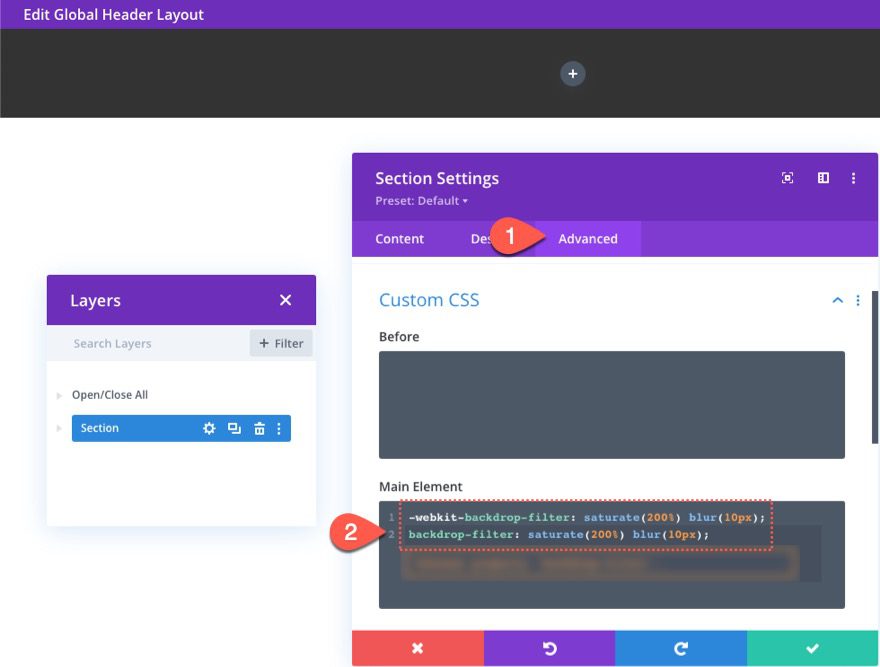
Next, we can add the backdrop-filter effects (using the backdrop-filter CSS property) with a snippet of custom CSS in the Section’s Main Element. Under the advanced tab, paste the following CSS to the Main Element:
-webkit-backdrop-filter: saturate(200%) blur(10px);
backdrop-filter: saturate(200%) blur(10px);
Finally, make sure to give the header section a sticky position.
- Sticky Position: Stick to Top

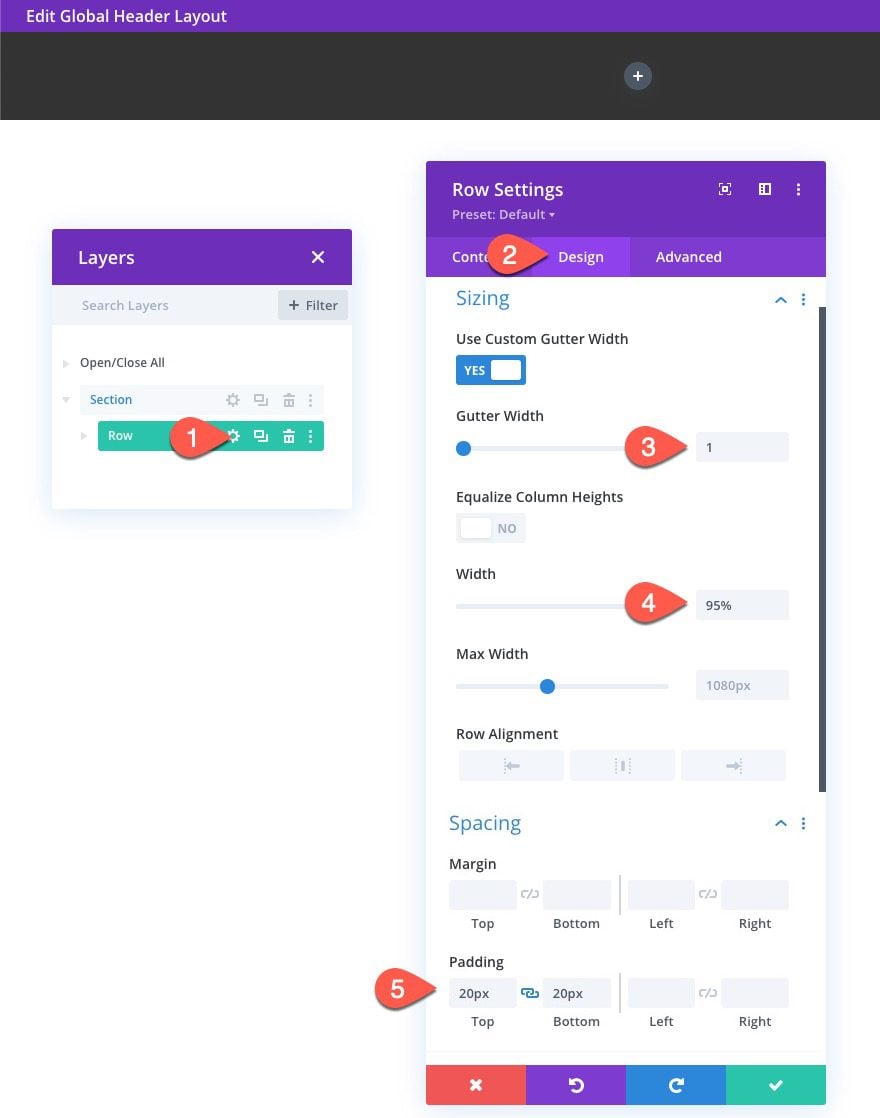
Edit Row Settings
Now that the section is finished, open the row settings and update the following:
- Gutter Width: 1
- Width: 95%
- Padding: 20px top, 20px bottom
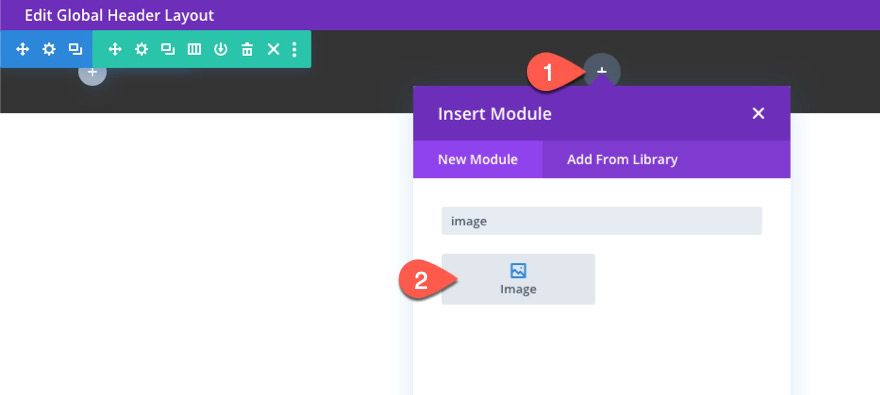
Add Logo Image
After the row settings are updated, add an image module to the row/column to create the logo.
Upload the logo image to the image module.

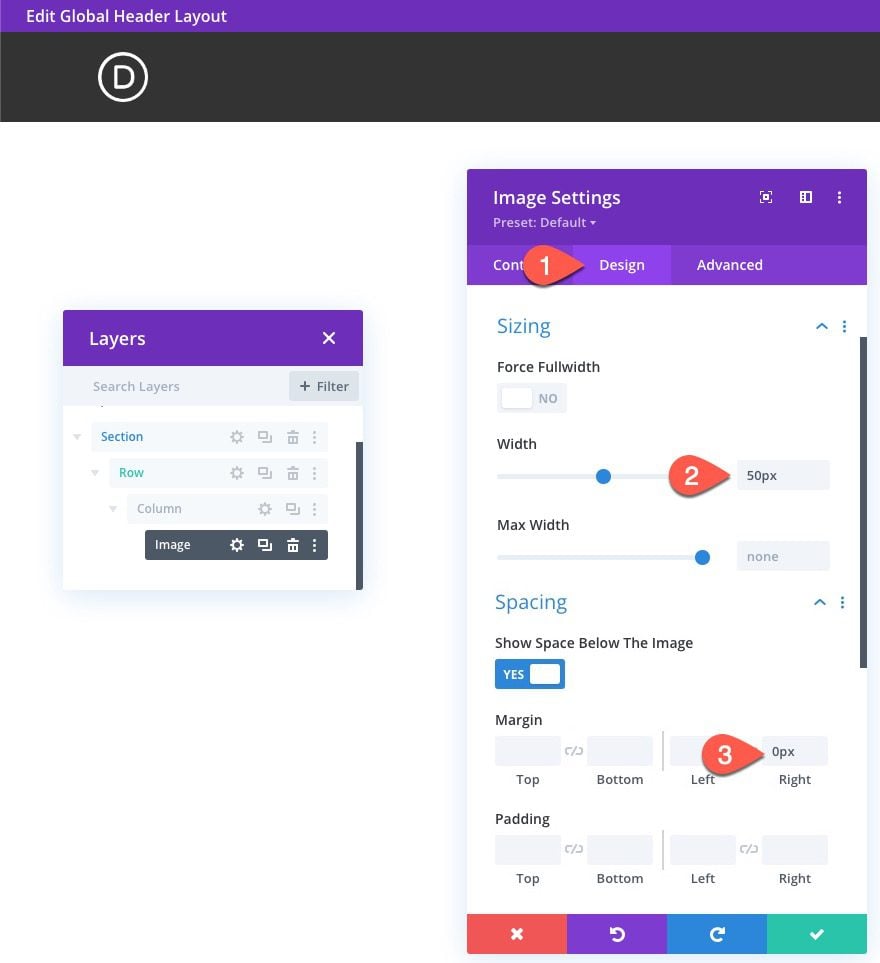
The update the image design settings as follows:
- Width: 50px
- Margin: 0px right
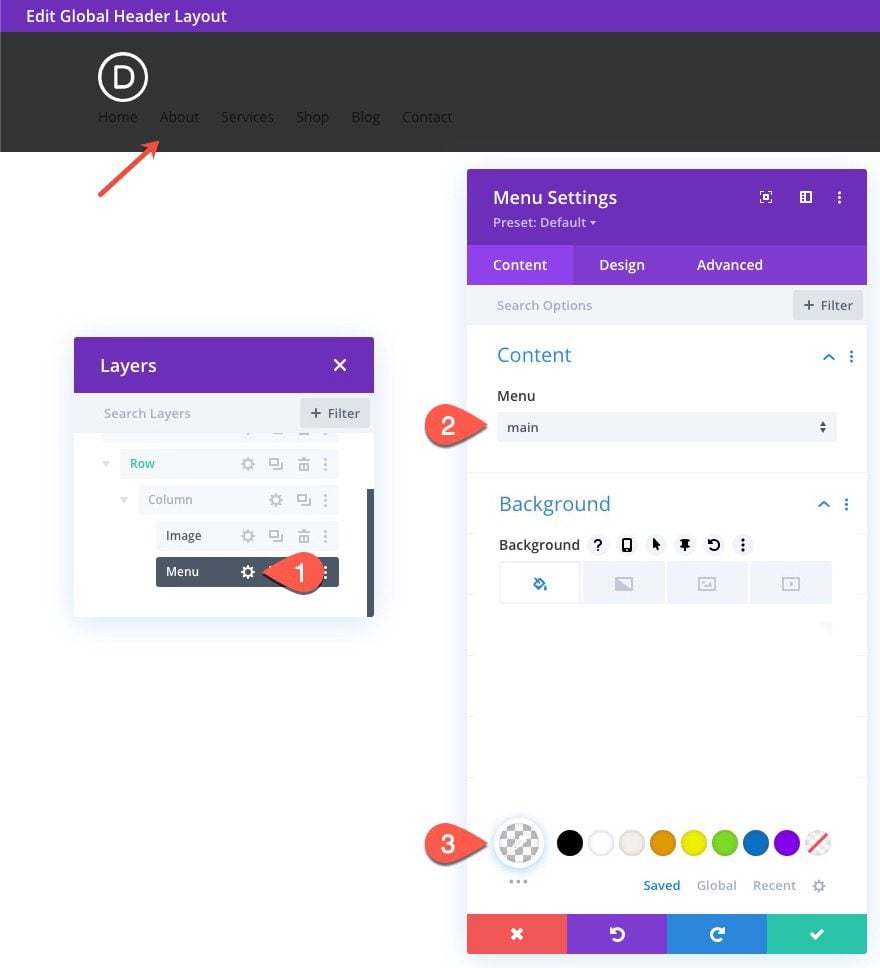
Next, add a menu module under the image module.
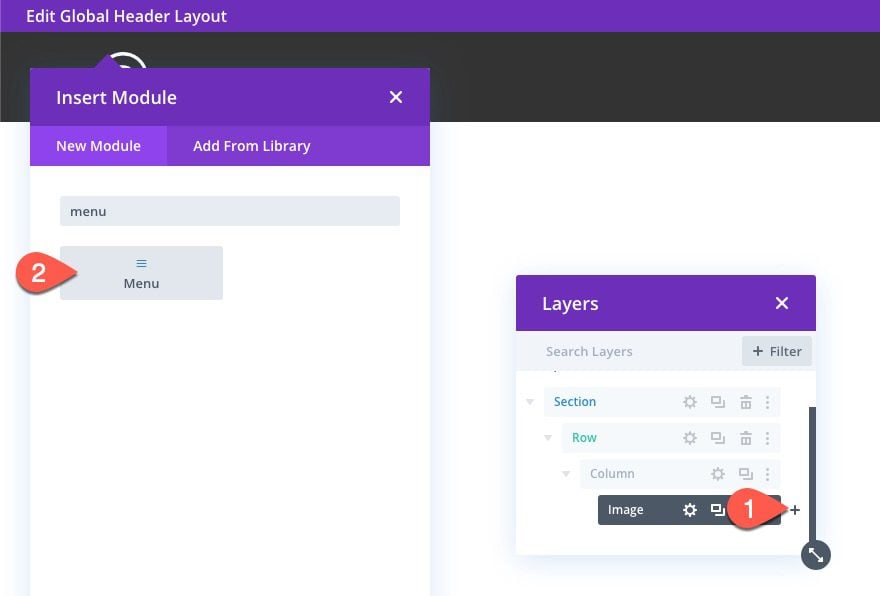
Under the content tab, select a menu and give the menu a transparent background color.
- Background Color: rgba(0,0,0,0)
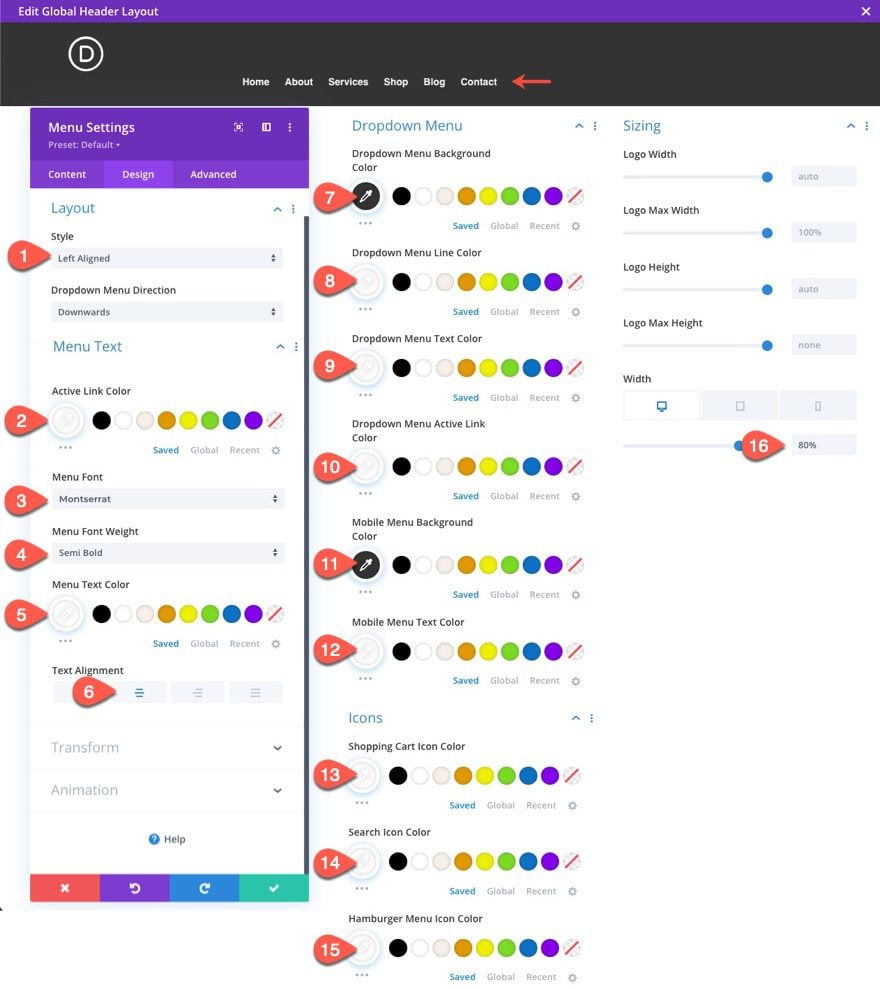
Under the design tab, update the menu design settings as follows:
- Style: Left Aligned
- Active Link Color: #fff
- Menu Font: Montserrat
- Menu Font Weight: Semi Bold
- Menu Text Color: #fff
- Text Alignment: Center
- Dropdown Menu Background Color: #333
- Dropdown Menu Line Color: #fff
- Dropdown Menu Text Color: #fff
- Dropdown Menu Active Link: #fff
- Mobile Menu Background: #333
- Mobile Menu Text Color: #fff
- Shopping Cart Icon Color: #fff
- Search Icon Color: #fff
- Hamburger Menu Icon Color: #fff
- Width: 80% (desktop and tablet)
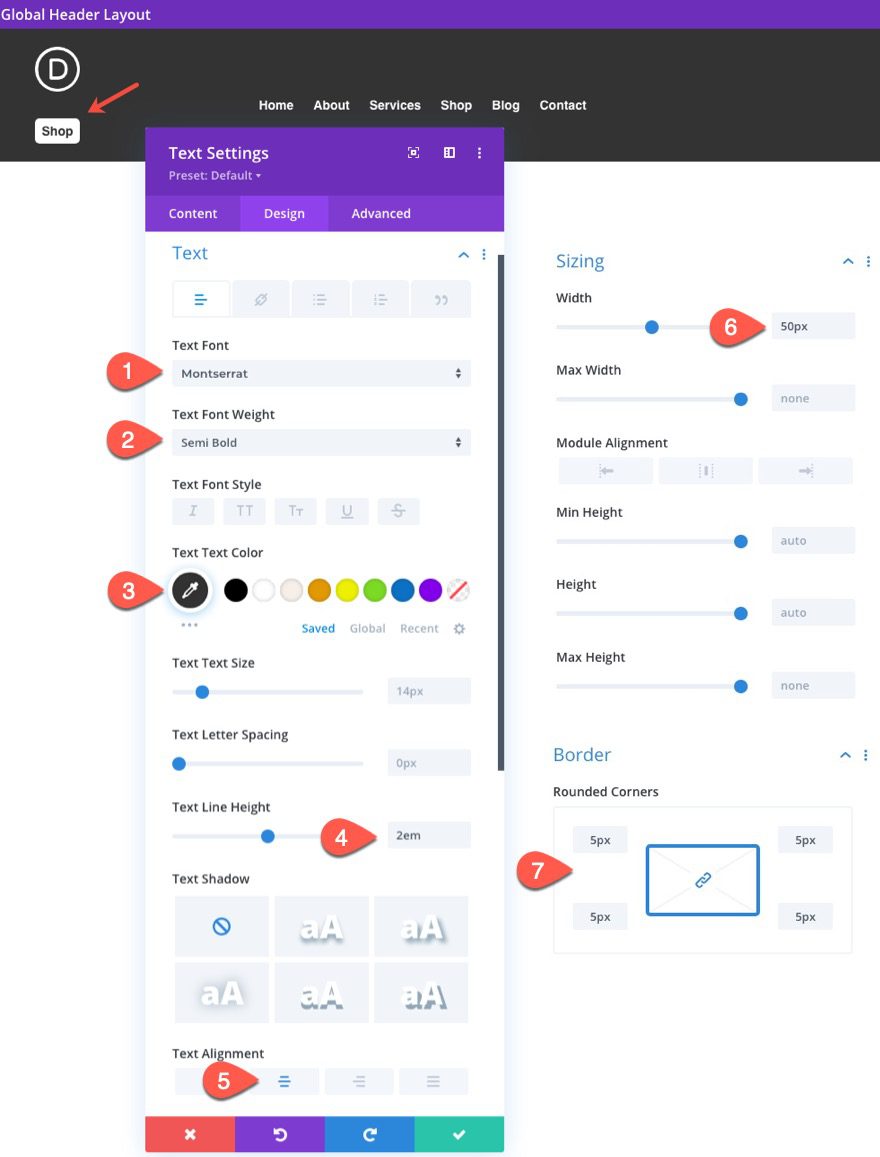
To create the small button for the header, we are going to use a text module. Add a text module under the menu.
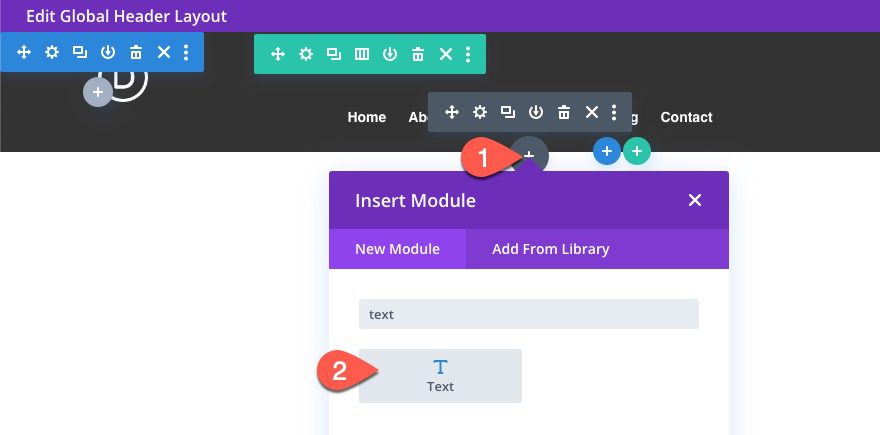
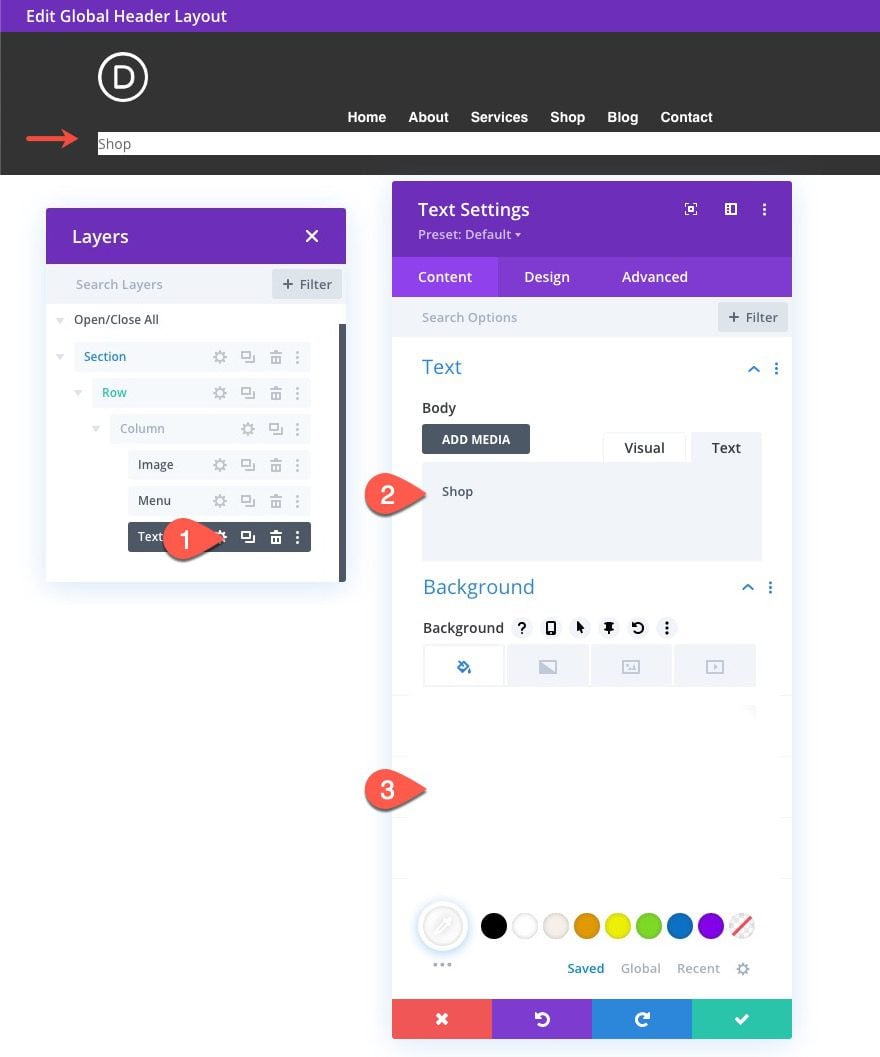
Update the body content with the work “Shop”. Then give the text module a white background color.
- Body Text: “Shop”
- Background Color: #fff
Under the design tab, update the following:
- Text Font: Montserrat
- Text Font Weight: Semi Bold
- Text Text Color: #333
- Text Line Height: 2em
- Text Alignment: Center
- Width: 50px
- Rounded Corners: 5px
Here the text module has the same width as the logo image. This will help with aligning the items perfectly when we use the flex property on the column with custom CSS.
Align Modules in Column with CSS Flex Property
Once the logo, menu, and text module have bee added to the column, open the column settings and paste the following custom CSS to the main element:
display:flex;
flex-wrap: nowrap;
justify-content: space-between;
align-items:center;

Save Header Layout and Template
Once done, make sure to save the layout and the template.
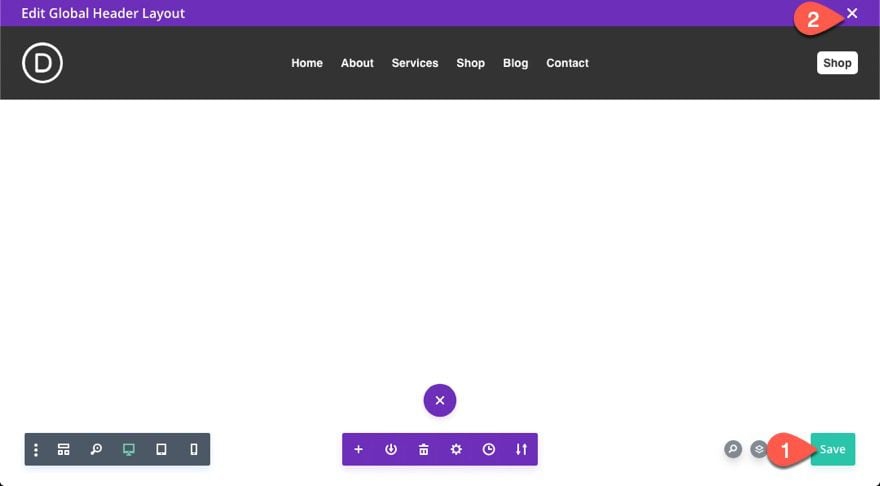
Final Result
Here is another look at the final design. Notice the blur and saturation filter effects applied to the elements behind the header as you scroll.
Browser Support
Unfortunately, the backdrop-filter CSS property currently does not work well on IE and Firefox. However, the fallback will be the semi-transparent background color given to the section, which still works and looks great.
Final Thoughts
Hopefully, your next project will benefit from a header with a nice backdrop-filter effect. It really is easy to add to any header in Divi and fun to explore all the different filter function values that are available.
I look forward to hearing from you in the comments.
Cheers!


Hi, this effect should be visible in the visual builder? I don’t see it, but I do see it in chrome using Private Window (as a logged off user).
Also, every time I write backdrop-filter in the custom css of a module, an alert is shown saying “Unknown property ‘backdrop-filter’.”
Is this going to be fixed anytime soon? thanks
Thanks for the tutorial but doesn’t work on Mozilla 😔
I’ve checked Codepen link, it doesn’t work there as well. However, it works well on Safari and Chrome.
Is there a way to fix on Mozilla?
Thanks
Right. I mentioned that at the end of the post. Unfortunately, it isn’t supported on Firefox and I couldn’t find a fix for this yet. But the semi-transparent background fallback still works so still worth it in my opinion.