
If you’re hosting a podcast website with Divi, chances are high you’re using the built-in Audio Module already. Now, if you’re looking for a special way to put your latest episode in the spotlight, you’re going to love this tutorial. Today, we’ll show you how to include a fixed latest episode audio bar in your Divi header. We’ll include a Text Module loop animation to draw attention to the audio bar and you’ll be able to download the global header template, including the audio bar, as well!
Let’s get to it.
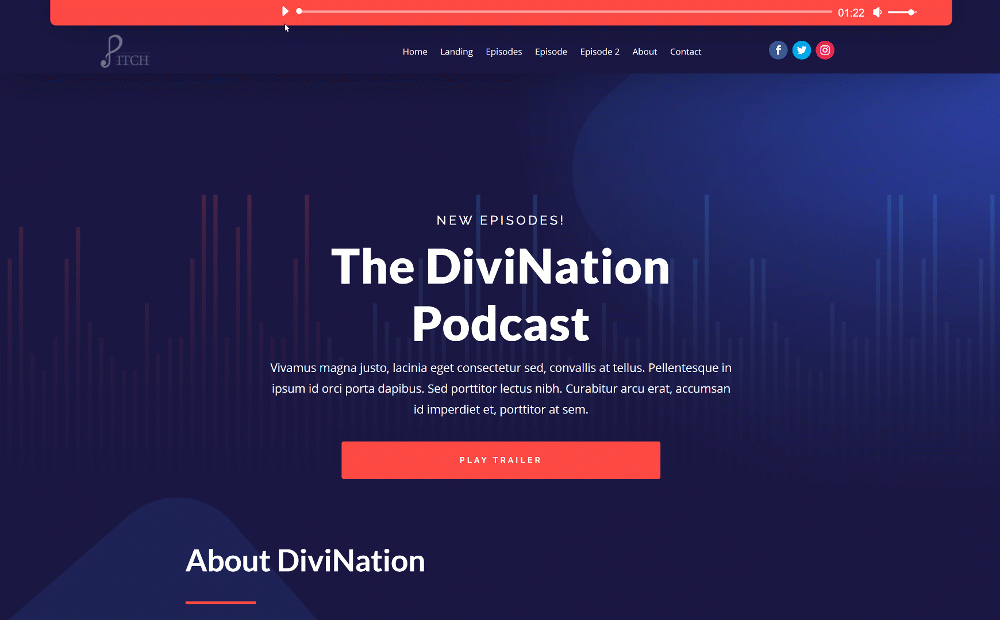
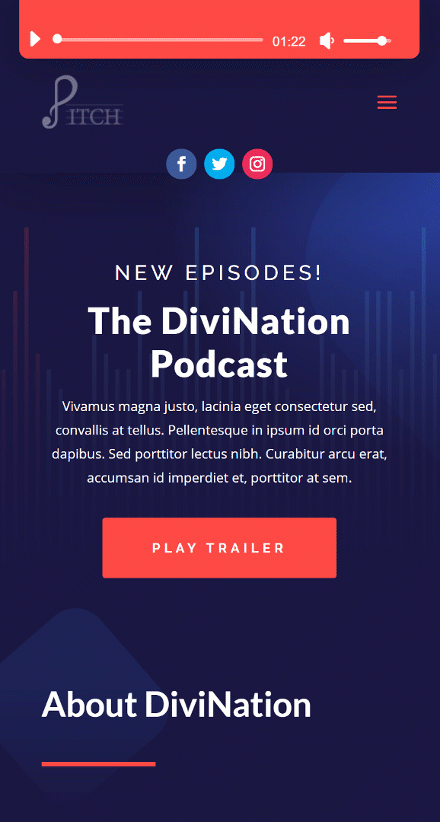
Preview
Before we dive into the tutorial, let’s take a quick look at the outcome across different screen sizes.
Desktop
Mobile
Download The Audio Bar Header Template for FREE
To lay your hands on the free audio bar header template, you will first need to download it using the button below. To gain access to the download you will need to subscribe to our newsletter by using the form below. As a new subscriber, you will receive even more Divi goodness and a free Divi Layout pack every Monday! If you’re already on the list, simply enter your email address below and click download. You will not be “resubscribed” or receive extra emails.

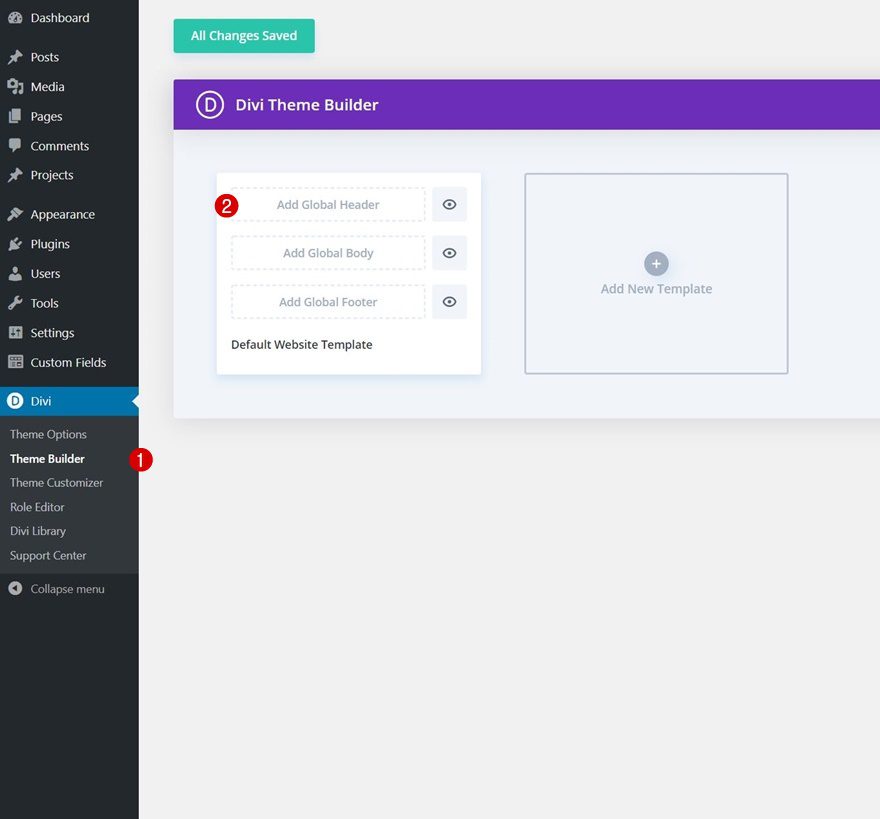
Go to Divi Theme Builder & Start Building a Global Header
Go to Divi Theme Builder
Start by going to the Divi Theme Builder in the backend of your WordPress website.
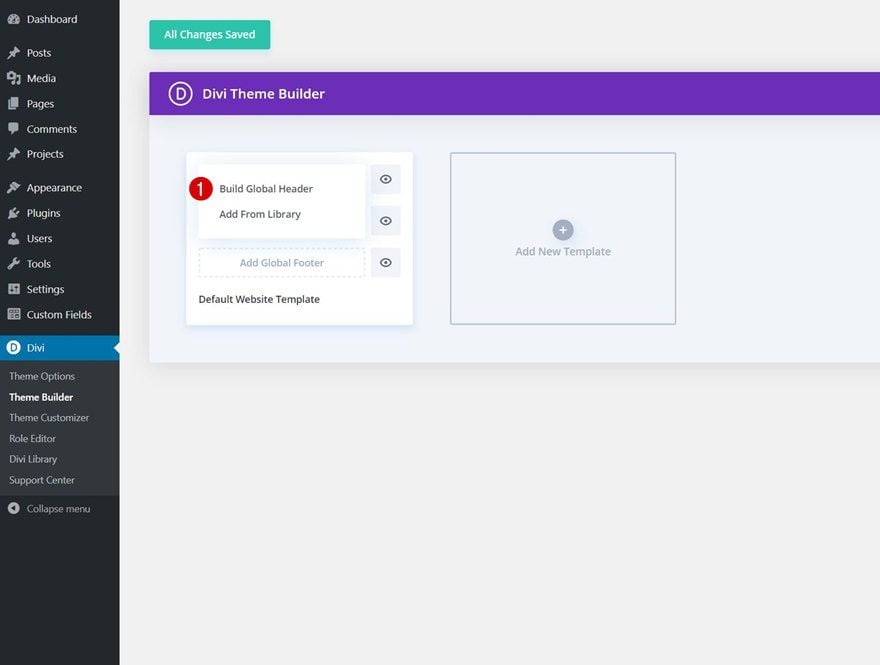
Start Building Global Header
Then, start building a global header.
Create Global Header with Latest Episode Audio Bar
Section Settings
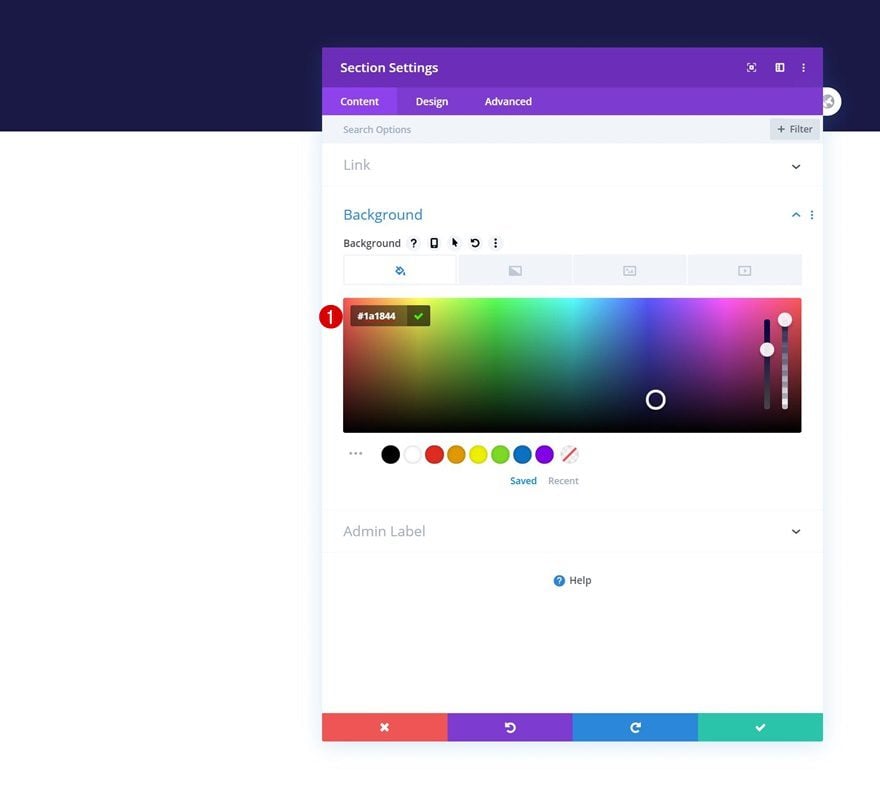
Background Color
Once inside the template editor, you’ll notice a section. Open that section and change the background color. We’re matching this global header to the Podcast Layout Pack but feel free to use any other kind of design style of your choice.
- Background Color: #1a1844
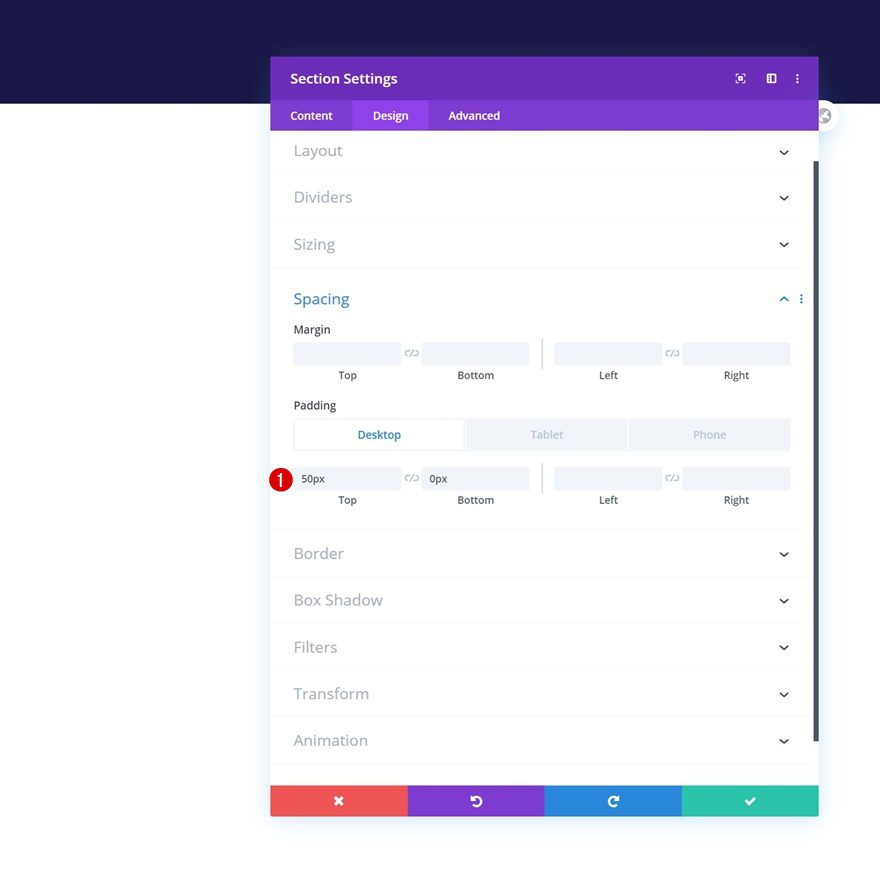
Spacing
Then, move on to the design tab and add some custom padding values across different screen sizes.
- Top Padding: 50px (Desktop), 80px (Tablet & Phone)
- Bottom Padding: 0px
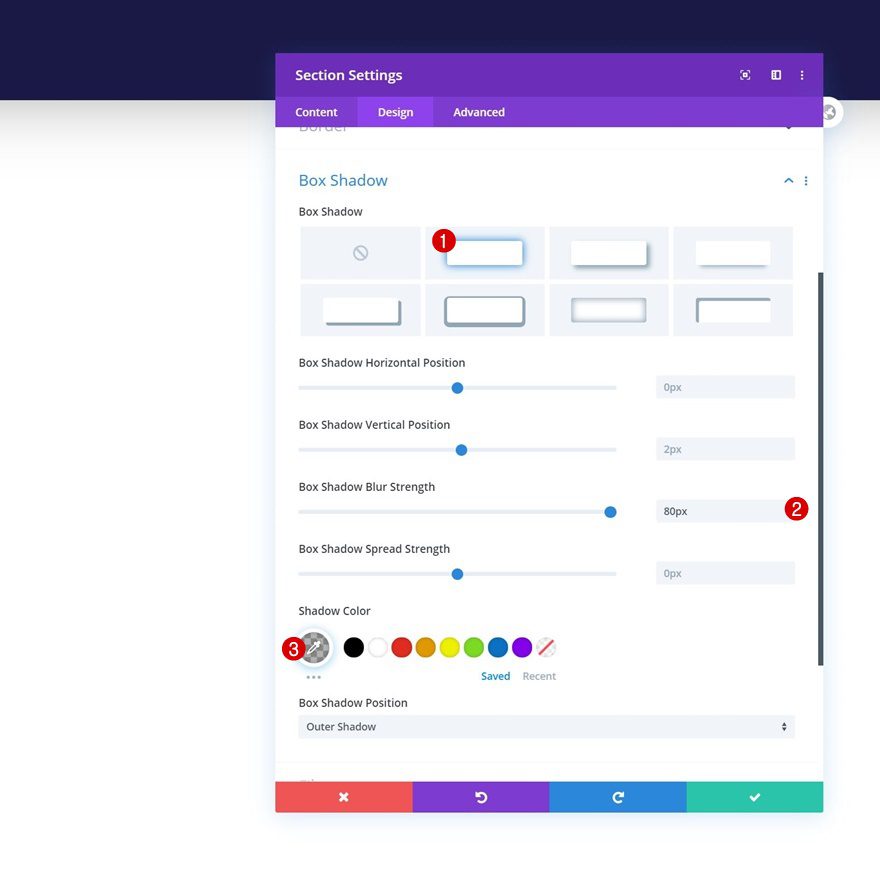
Box Shadow
To separate the header from the page/post content, we’ll add a box shadow to our section as well.
- Box Shadow Blur Strength: 80px
- Shadow Color: rgba(0,0,0,0.3)
Add Row #1
Column Structure
Continue by adding a first row to your section using the following column structure:

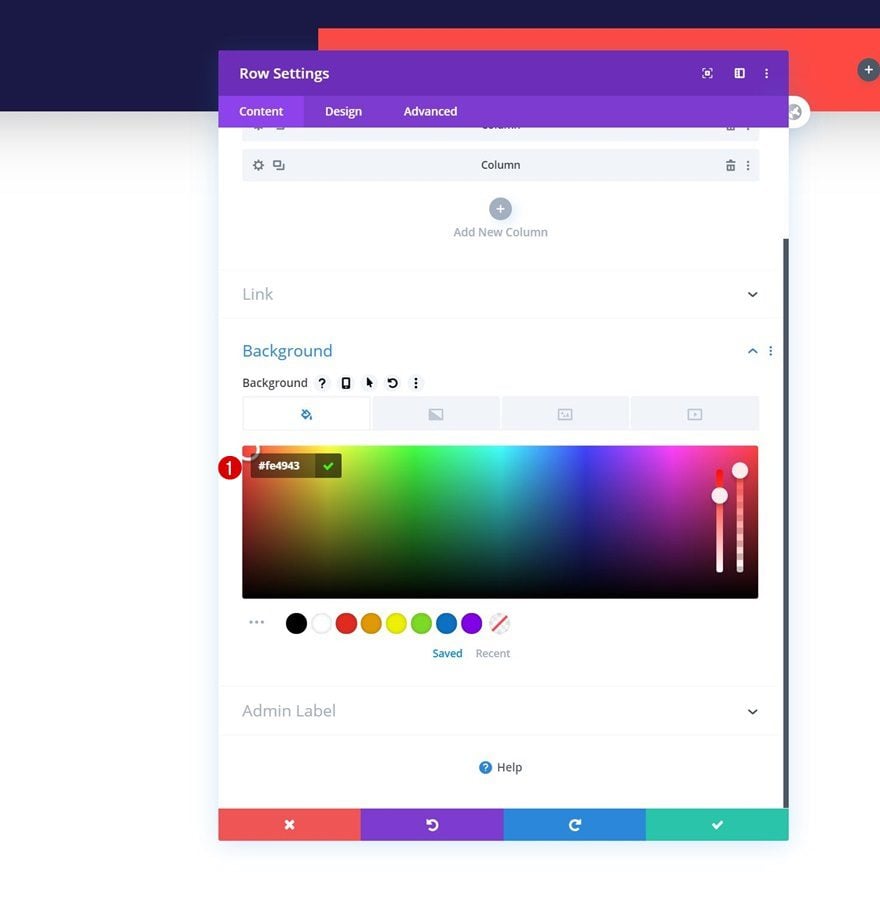
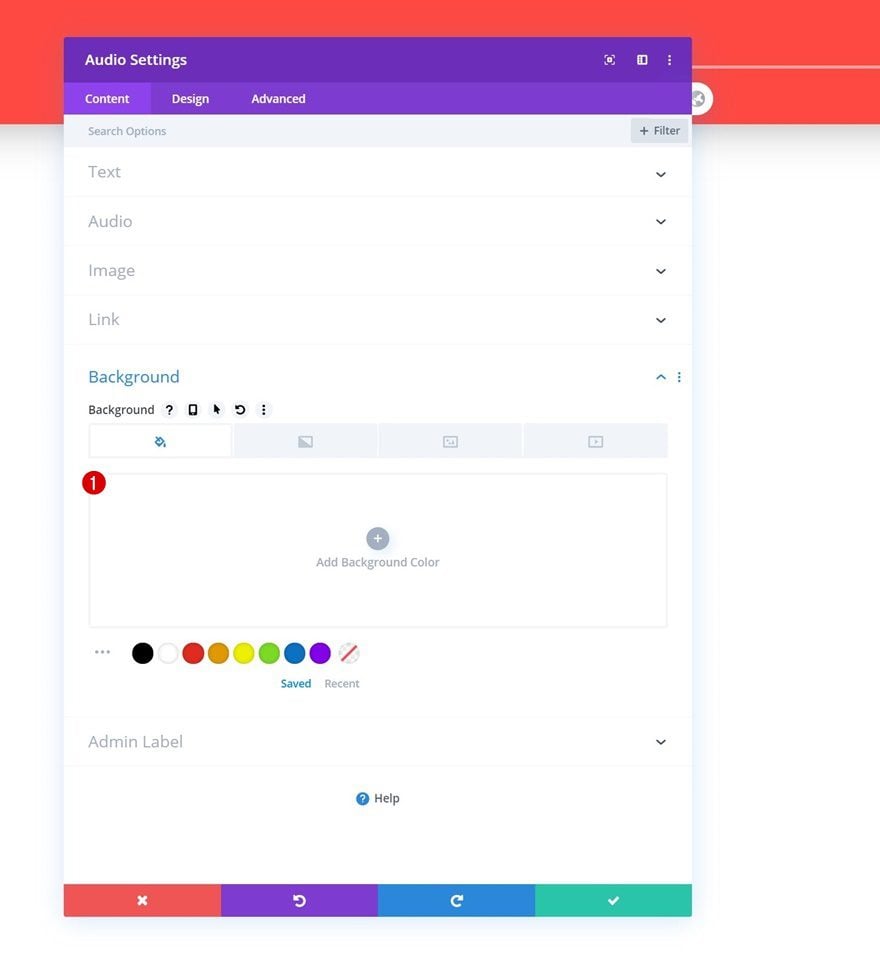
Background Color
This entire row will be dedicated to our latest episode audio bar. But before we get to that, open the row settings and change the background color.
- Background Color: #fe4943
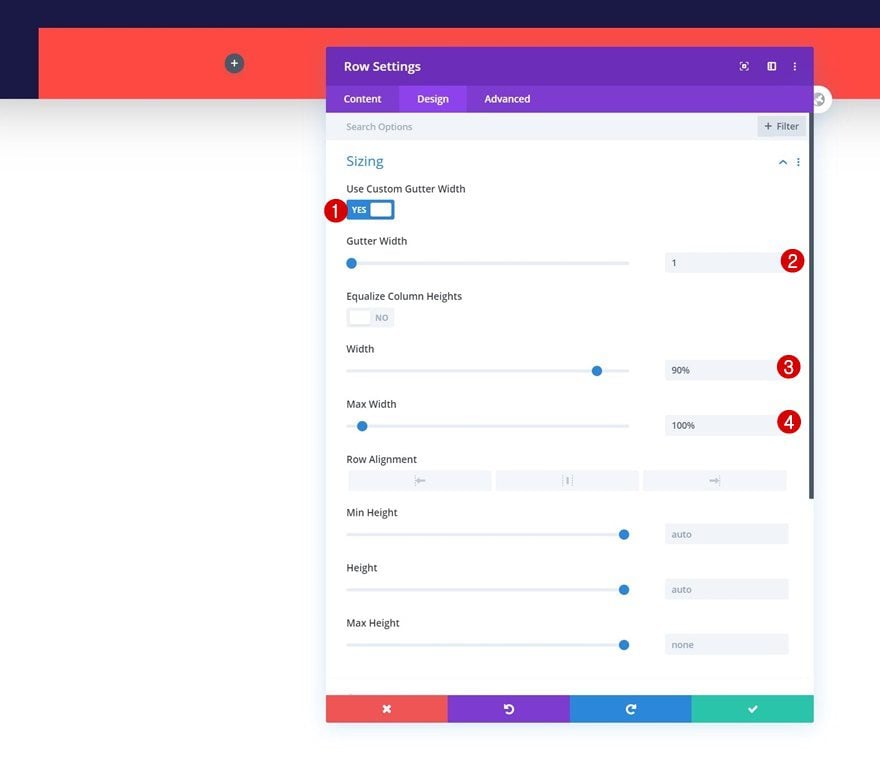
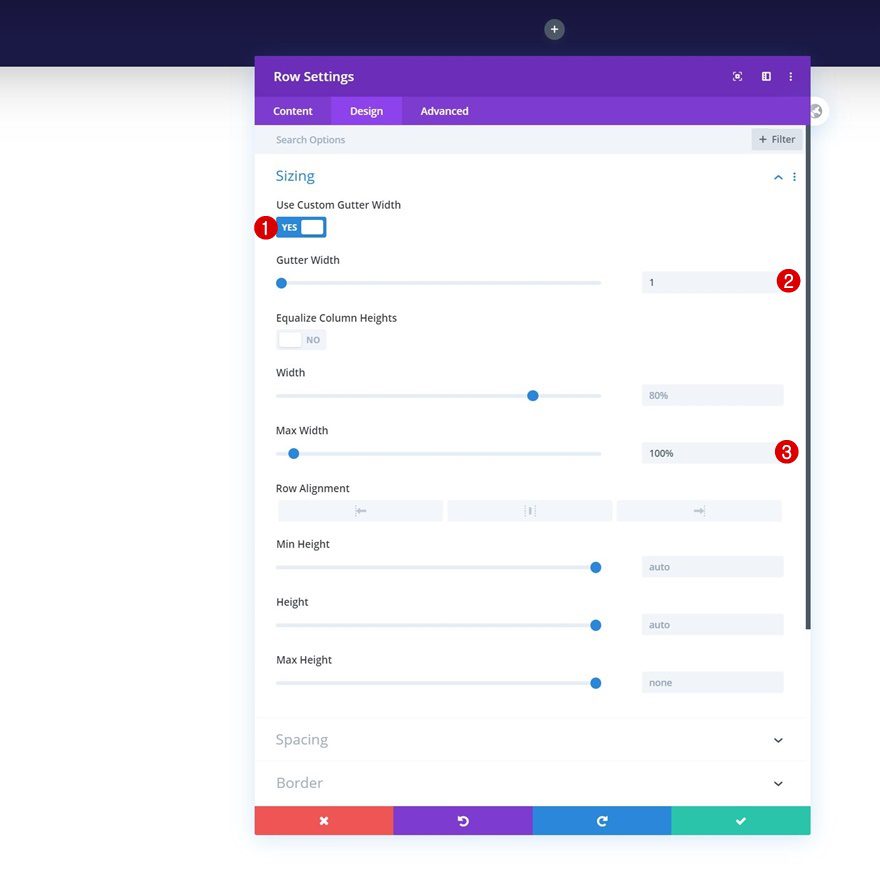
Sizing
Move on to the row’s design tab and change the sizing settings next.
- Use Custom Gutter Width: Yes
- Gutter Width: 1
- Width: 90%
- Max Width: 100%
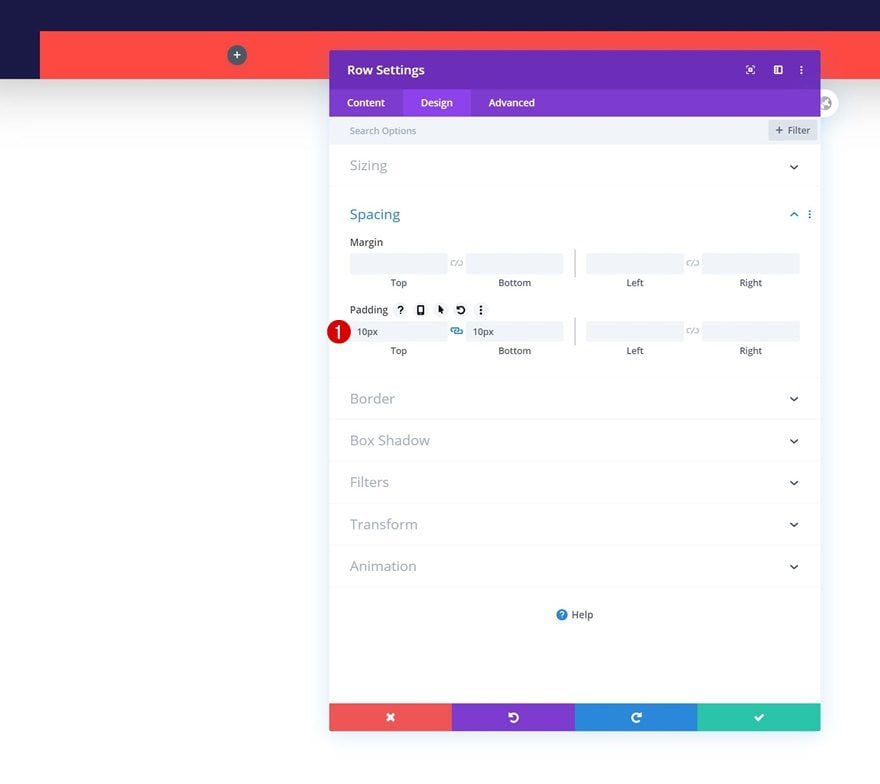
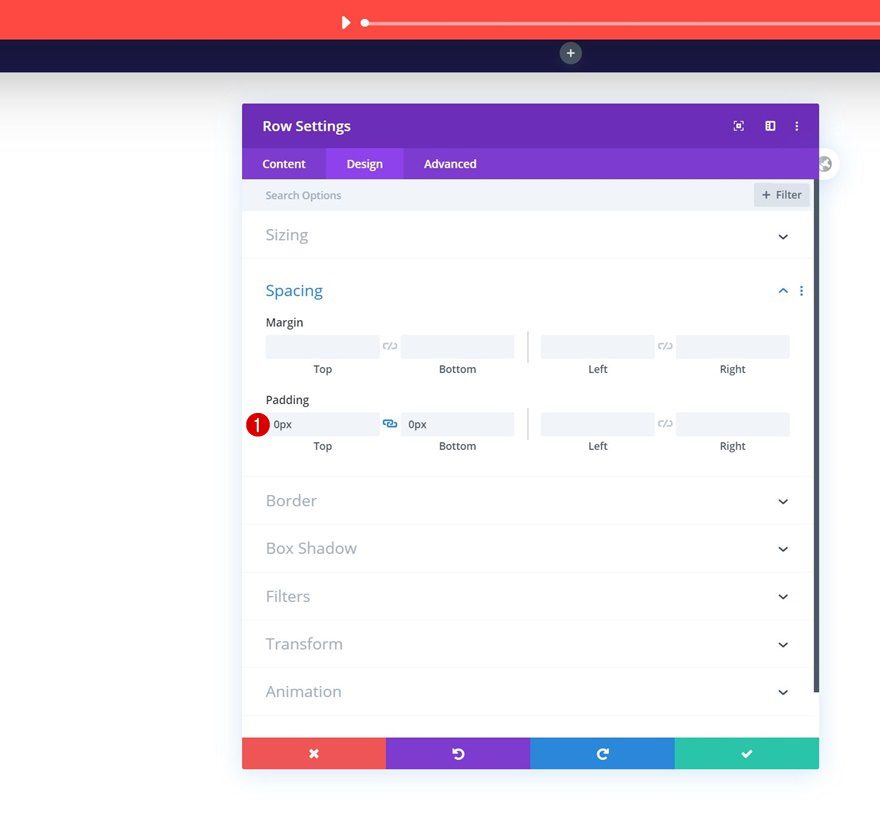
Spacing
We’re adding some custom top and bottom padding too.
- Top Padding: 10px
- Bottom Padding: 10px
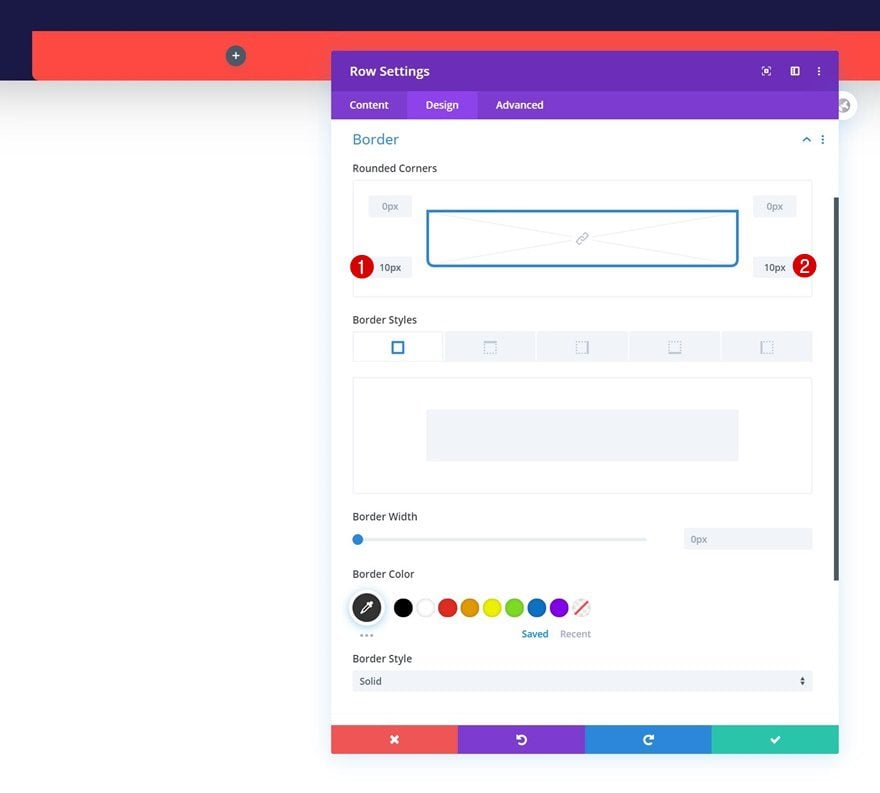
Border
Then, we’ll go to the border settings and we’ll add some rounded corners.
- Bottom Left: 10px
- Bottom Right: 10px
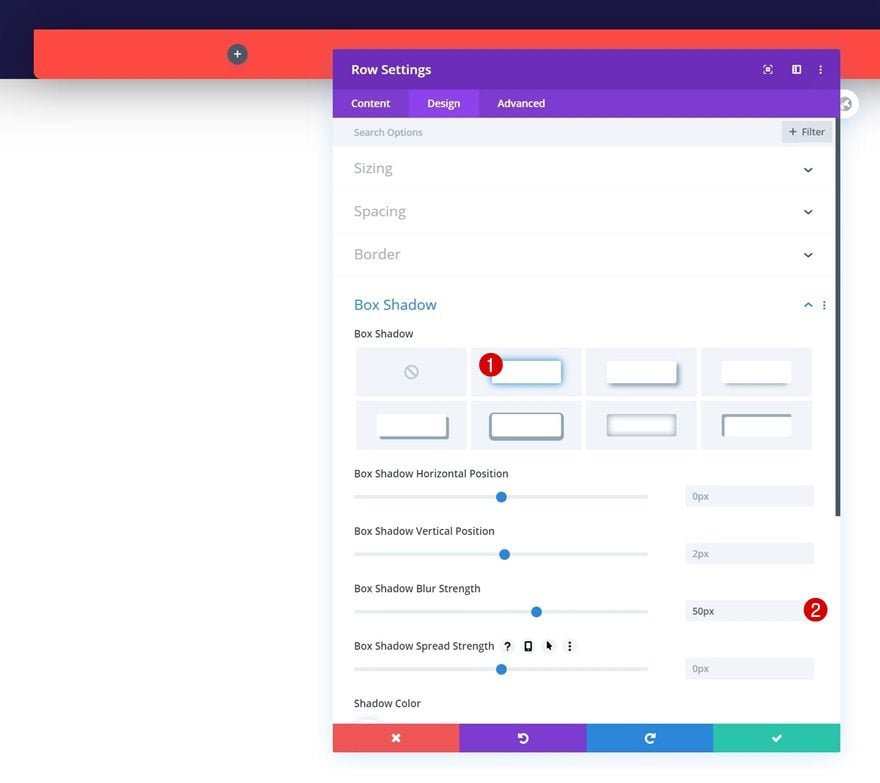
Box Shadow
We’re including a box shadow as well.
- Box Shadow Blur Strength: 50px
- Shadow Color: rgba(0,0,0,0.3)
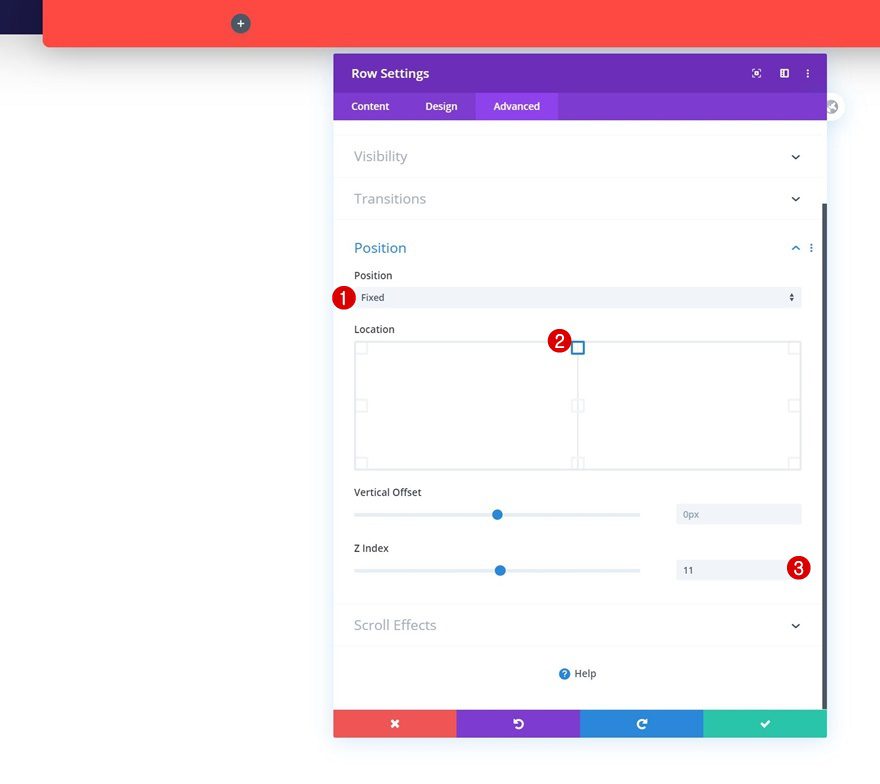
Position
Next, we’ll go to the advanced tab and make the entire row fixed. We’ll increase the row’s z index too to make sure it overlaps the second row we’ll add to our section.
- Position: Fixed
- Location: Top Center
- Z Index: 11
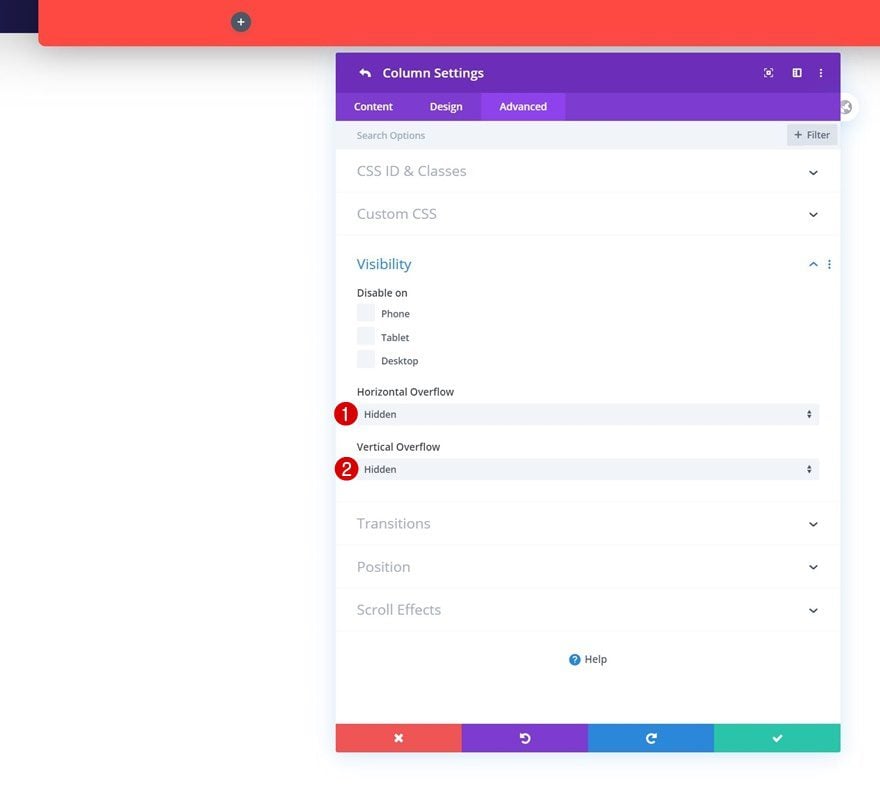
Column 1 Visibility
Complete the row settings by setting the column 1 overflows to hidden. This will help with the text animation which you were able to notice in the preview of this post. By setting the overflows to hidden, we’ll make sure the animation is hidden beyond the column container.
- Horizontal Overflow: Hidden
- Vertical Overflow: Hidden
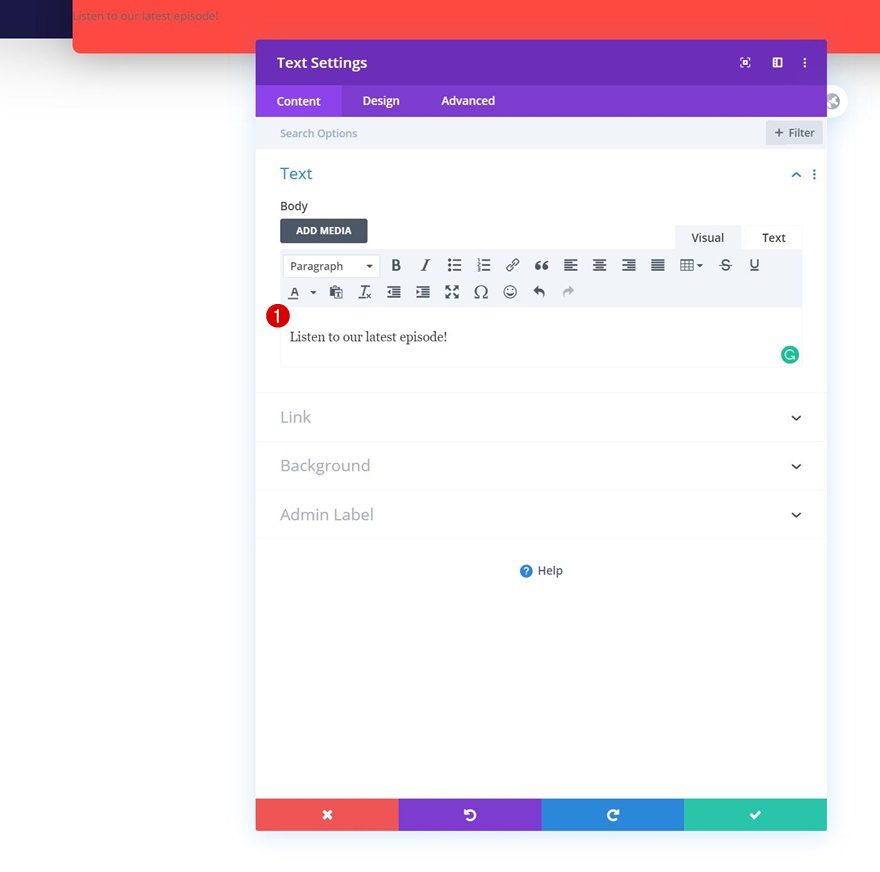
Add Text Module to Column 1
Add Content
Time to add modules, starting with a Text Module in column 1. Add some copy of your choice.
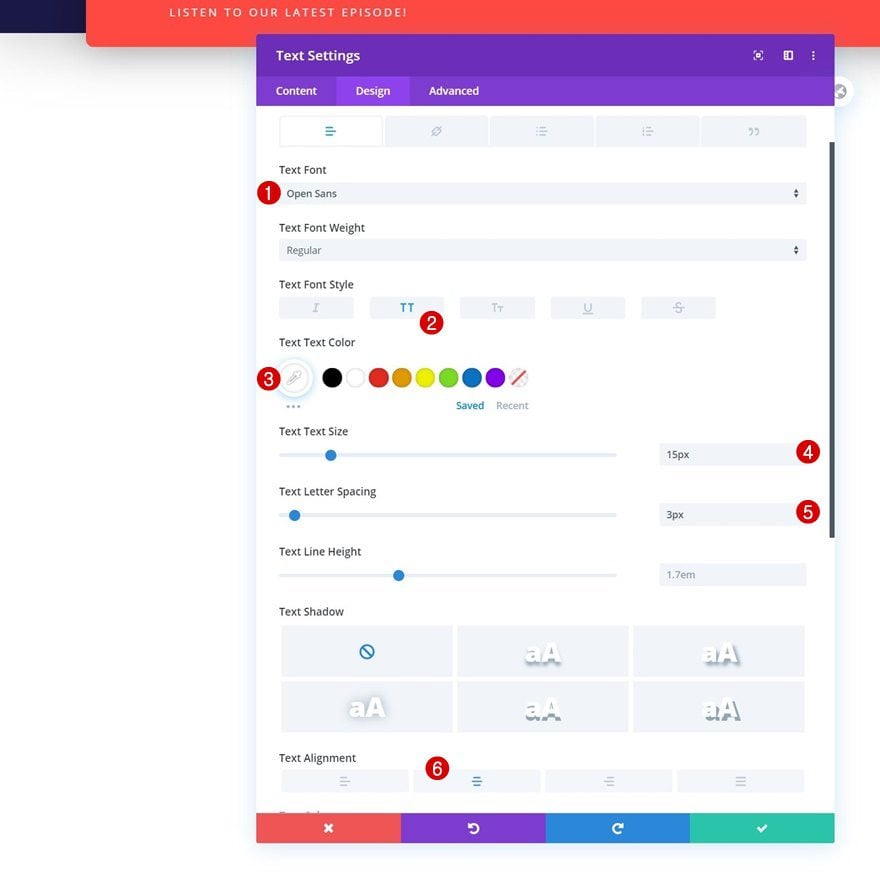
Text Settings
Move on to the module’s design tab and change the text settings accordingly:
- Text Font: Open Sans
- Text Font Style: Uppercase
- Text Color: #ffffff
- Txt Size: 15px
- Text Letter Spacing: 3px
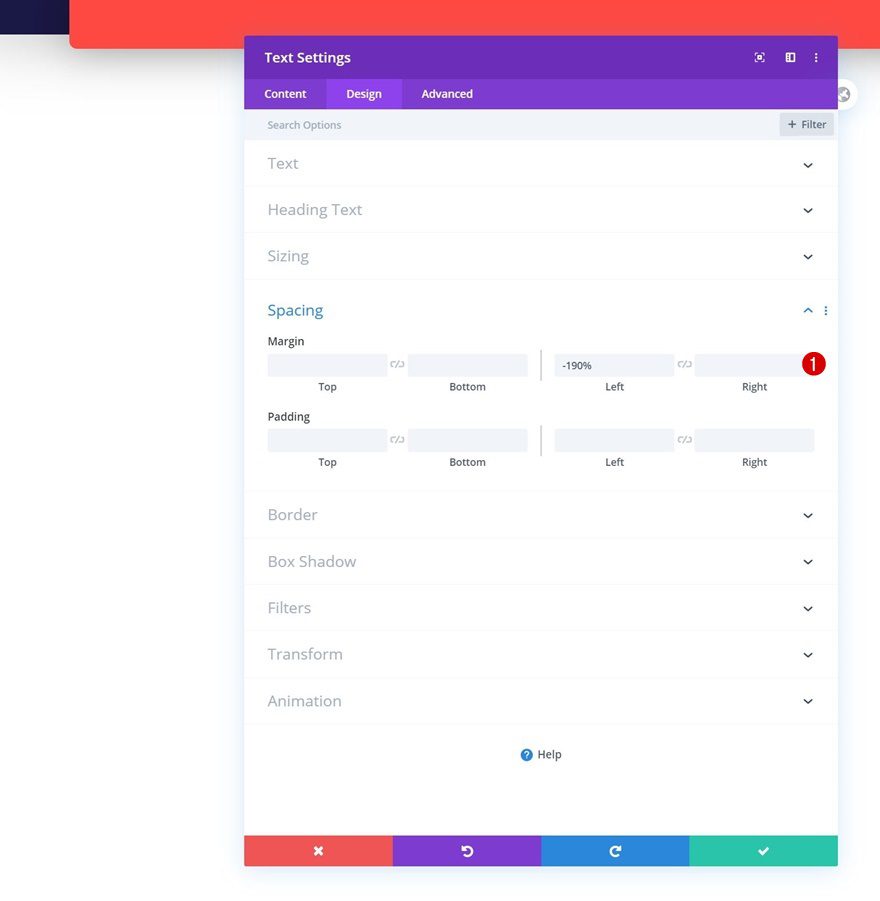
Spacing
We’ll add some negative left margin to our module as well. This will help with our loop animation.
- Left Margin: -190%
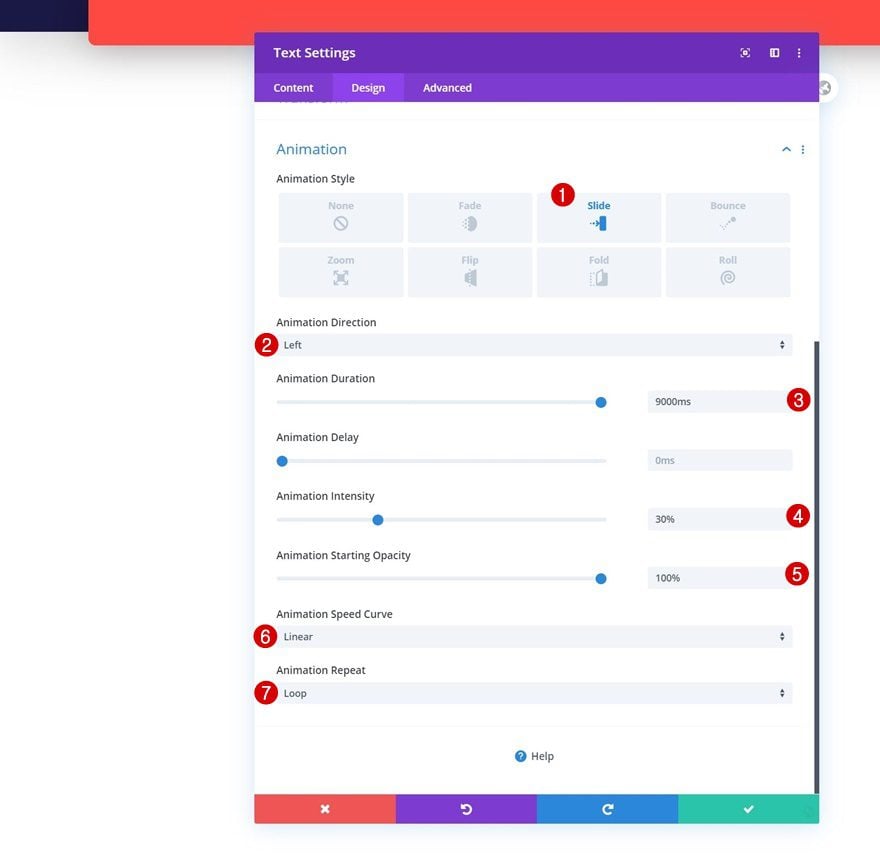
Animation
Last but not least, add the following loop animation to your Text Module:
- Animation Style: Slide
- Animation Direction: Left
- Animation Duration: 9000ms
- Animation Intensity: 30%
- Animation Starting Opacity: 100%
- Animation Speed Curve: Linear
- Animation Repeat: Loop
Add Audio Module to Column 2
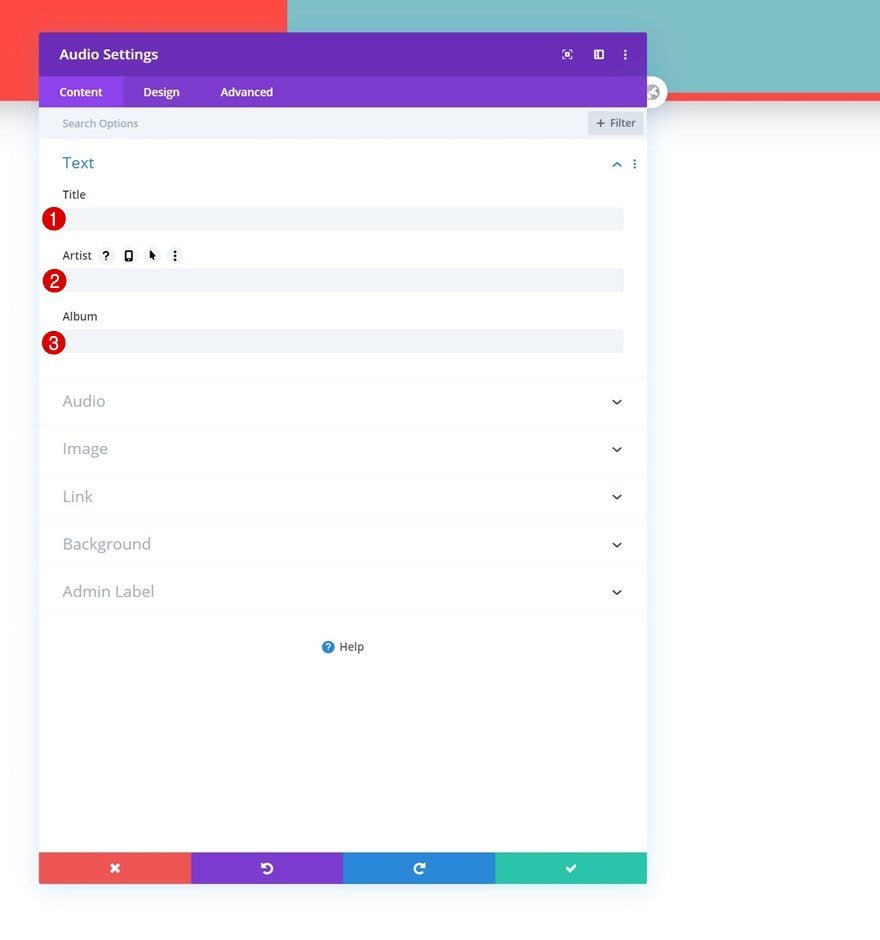
Remove All Content
In column 2, the only module we need is an Audio Module. Make sure the content is removed.
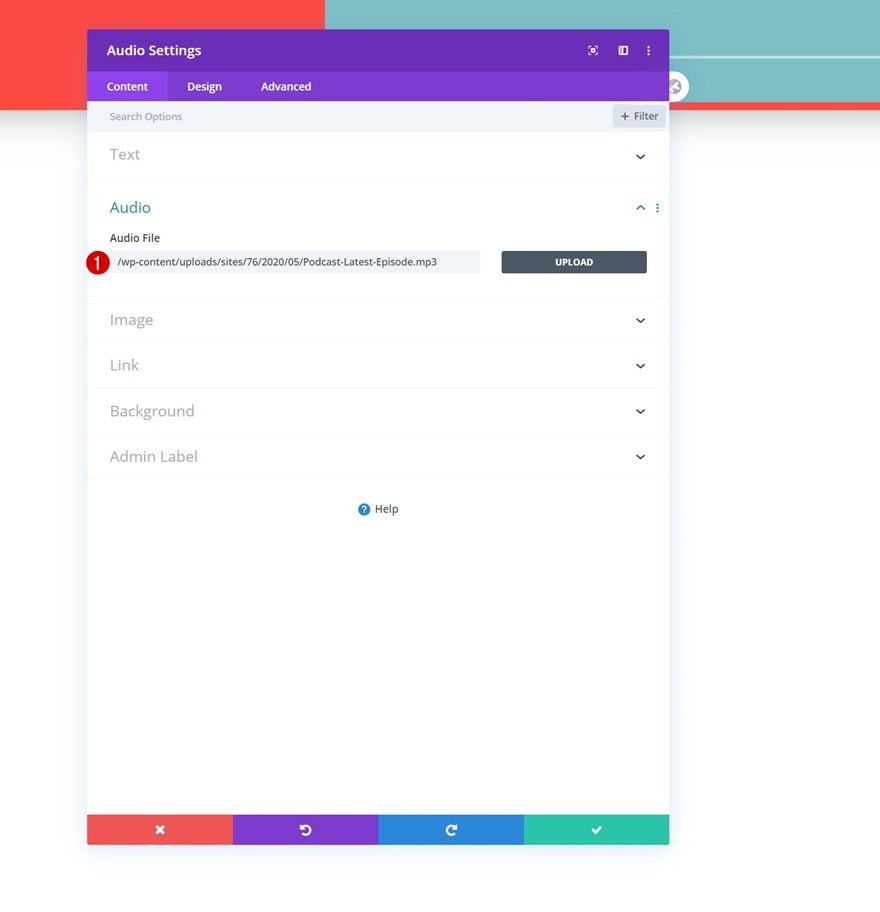
Upload Audio File
Then, upload an audio file containing your latest episode.
Remove Background Color
Remove the module’s background color next.
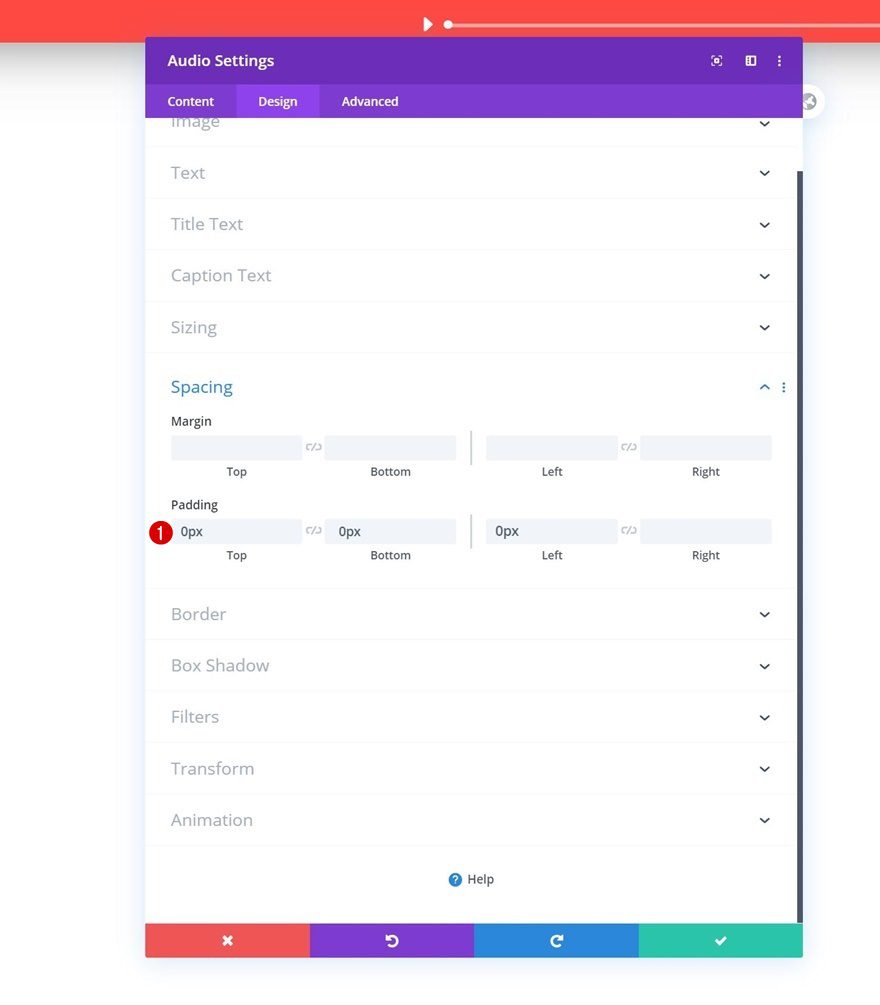
Spacing
Then, move on to the design tab and remove some default padding values by adding ‘0px’ to them.
- Top Padding: 0px
- Bottom Padding: 0px
- Left Padding: 0px
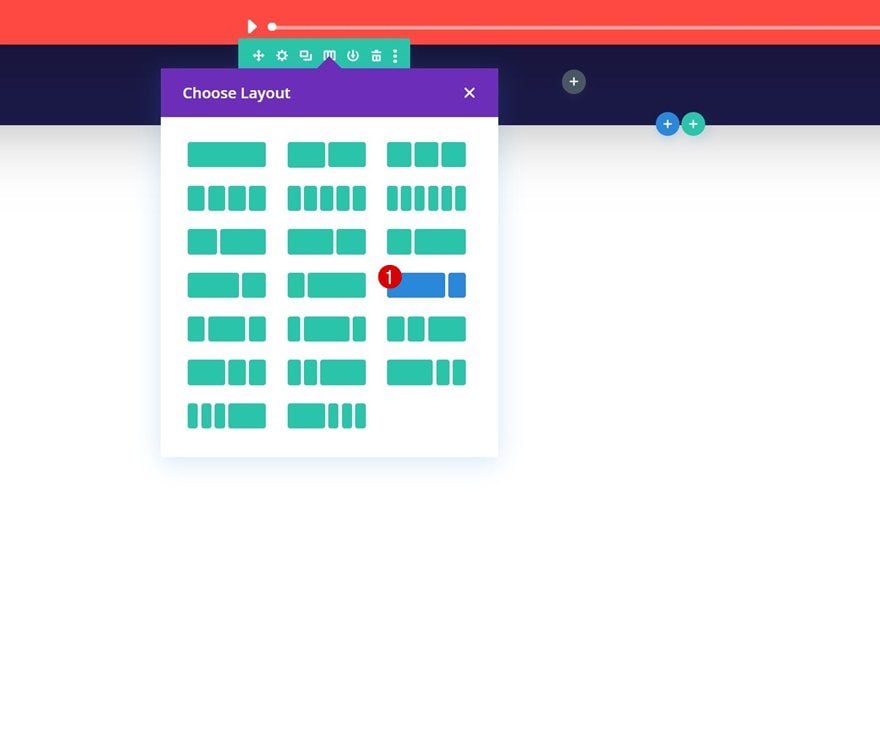
Add Row #2
Column Structure
On to the next row. This row will contain our logo, menu and social media icons. Choose the following column structure:
Sizing
Without adding modules yet, open the row settings and modify the sizing settings accordingly:
- Use Custom Gutter Width: Yes
- Gutter Width: 1
- Max Width: 100%
Spacing
Remove all default top and bottom padding next.
- Top Padding: 0px
- Bottom Padding: 0px
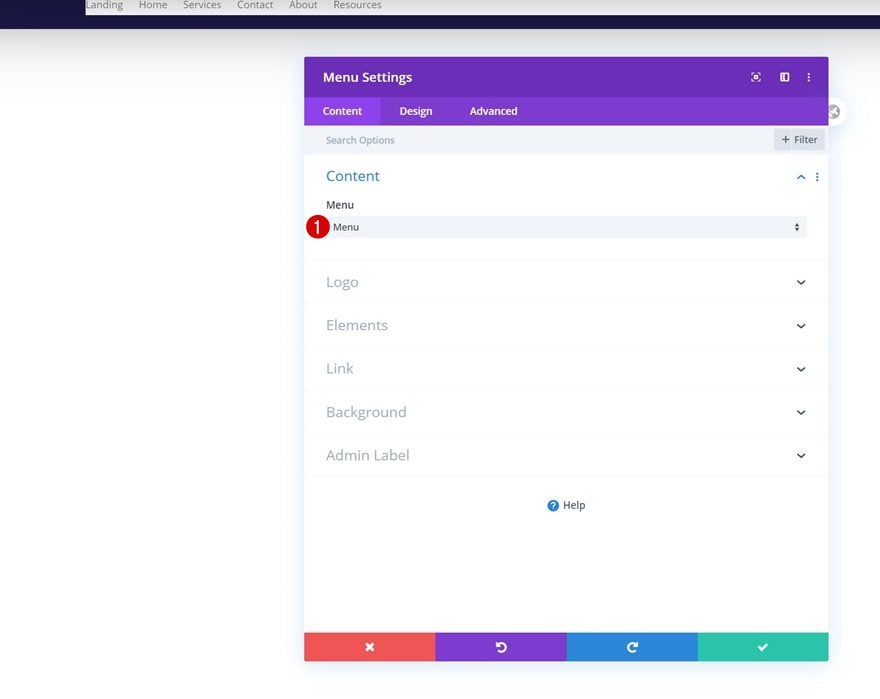
Select Menu
Then, add a Menu Module to column 1 and select a menu of your choice.
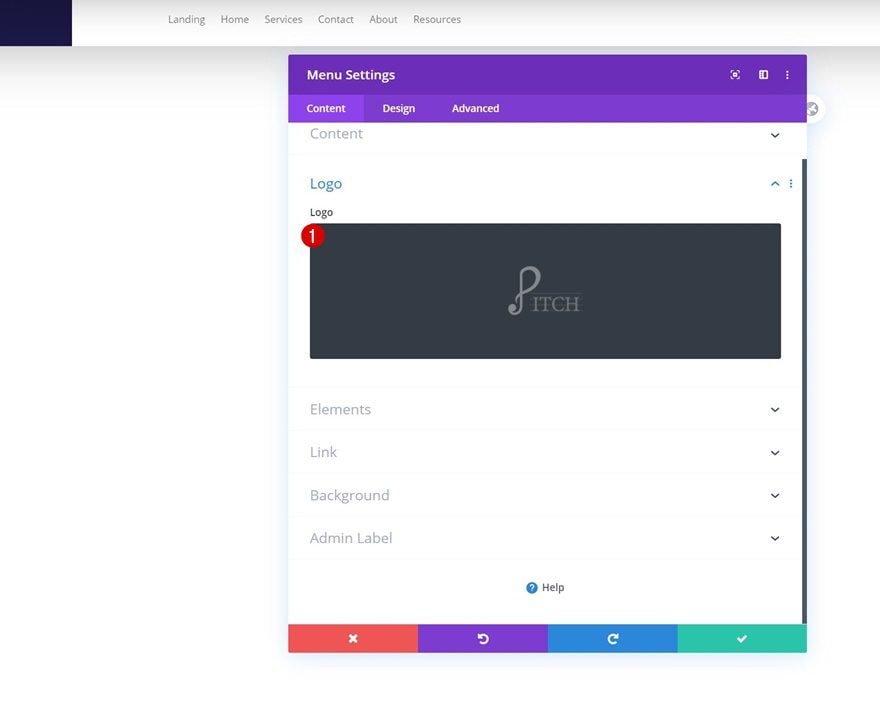
Upload Logo
Upload a logo next.
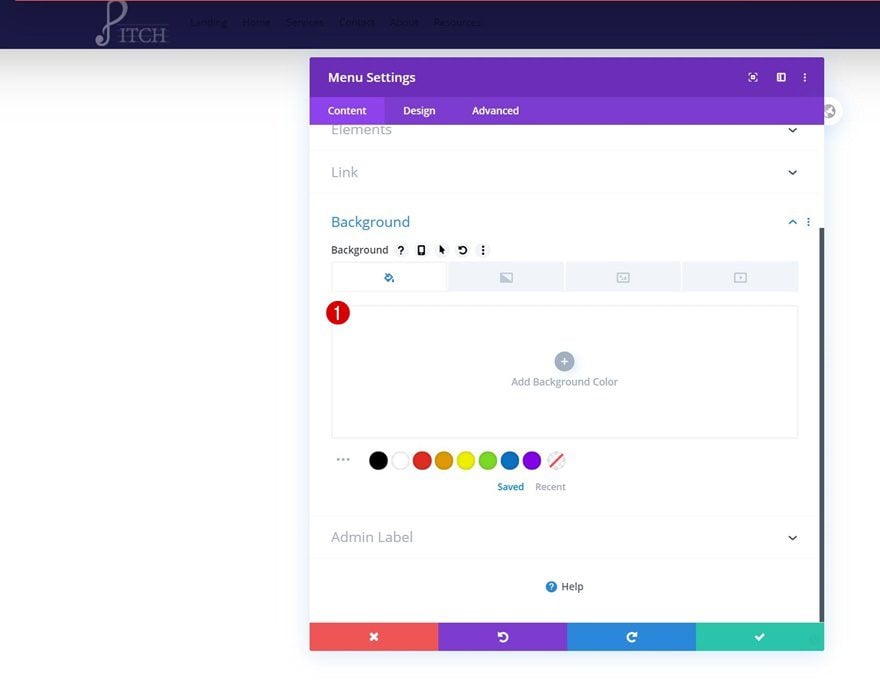
Remove Background Color
Then, remove the default white background color.
Menu Text Settings
Move on to the design tab and change the menu text settings as follows:
- Menu Font: Open Sans
- Menu Text Color: #ffffff (Desktop), #1a1844 (Tablet & Phone)
- Menu Text Size: 15px
- Text Alignment: Right
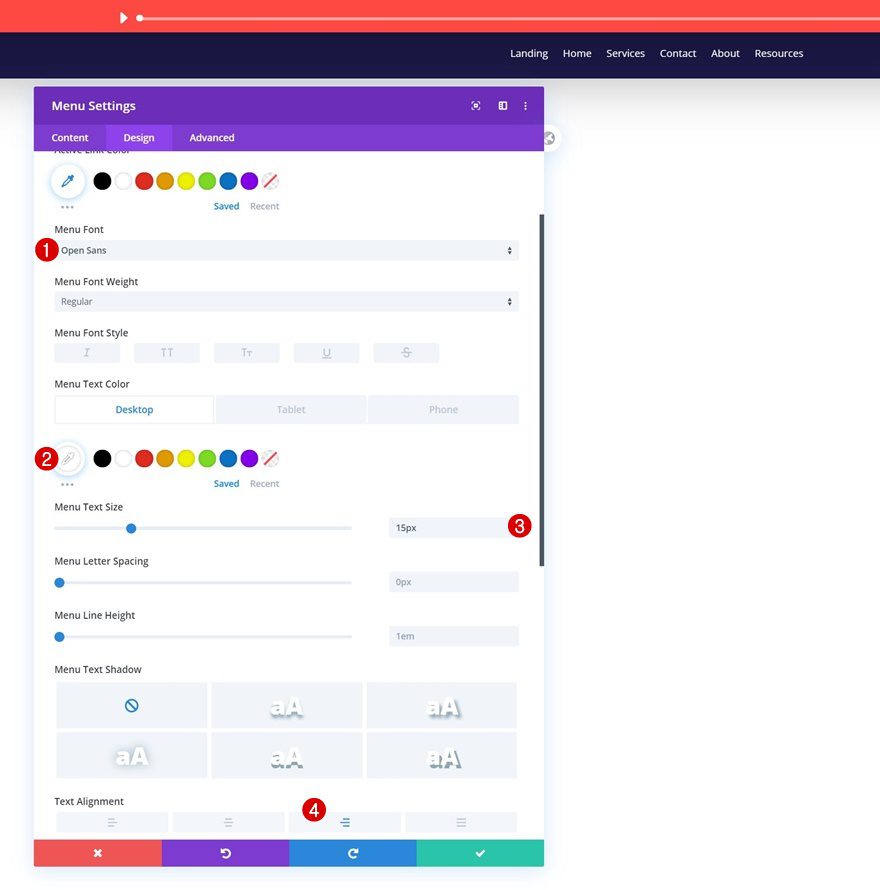
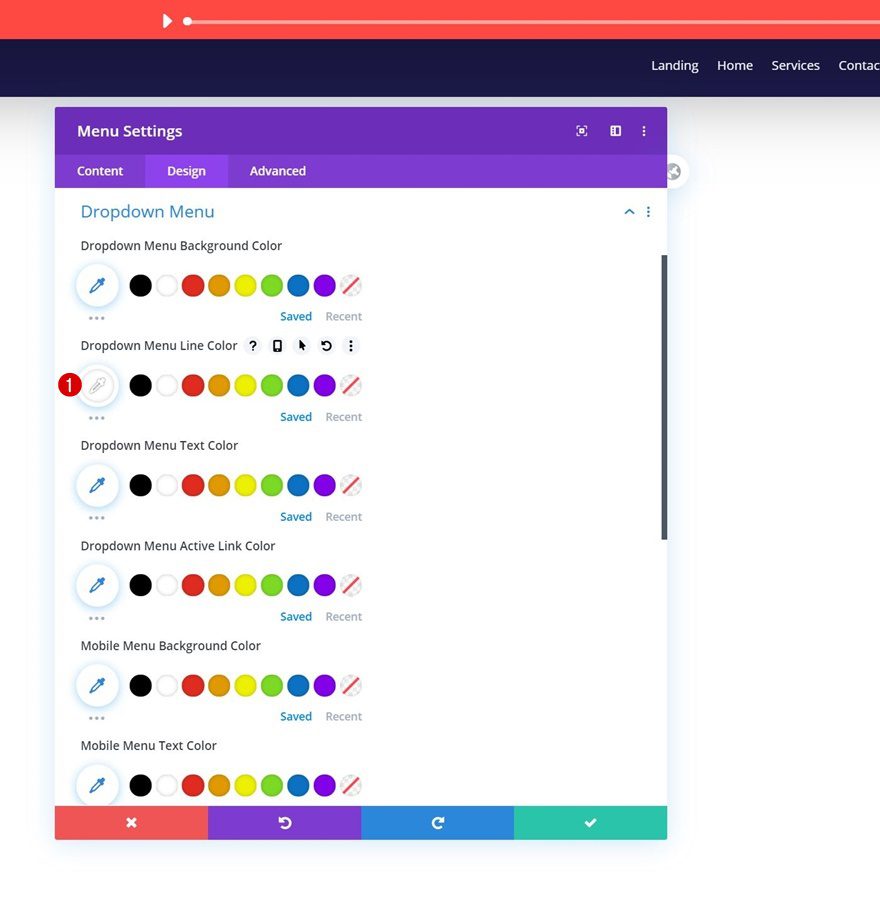
Dropdown Menu Text Settings
We’re changing the dropdown menu line color in the dropdown menu settings too.
- Dropdown Menu Line Color: #ffffff
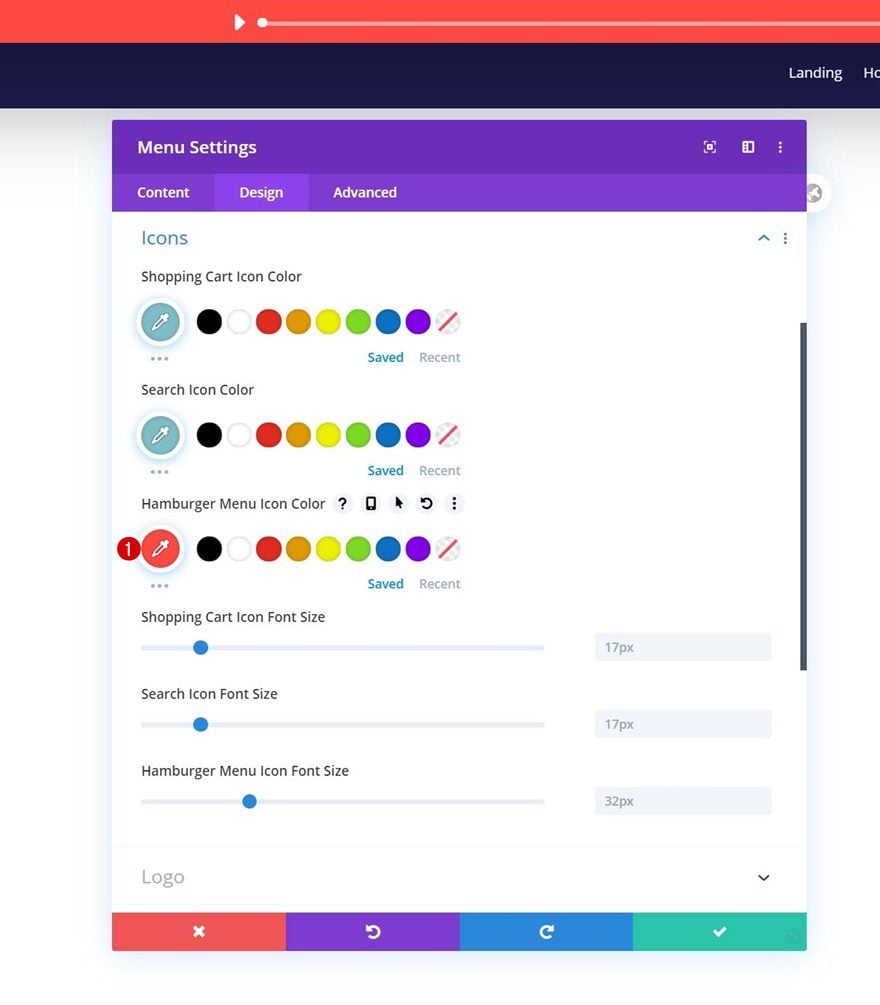
Icons Settings
Along with the hamburger menu icon color in the icons settings.
- Hamburger Menu Icon Color: #fe4943
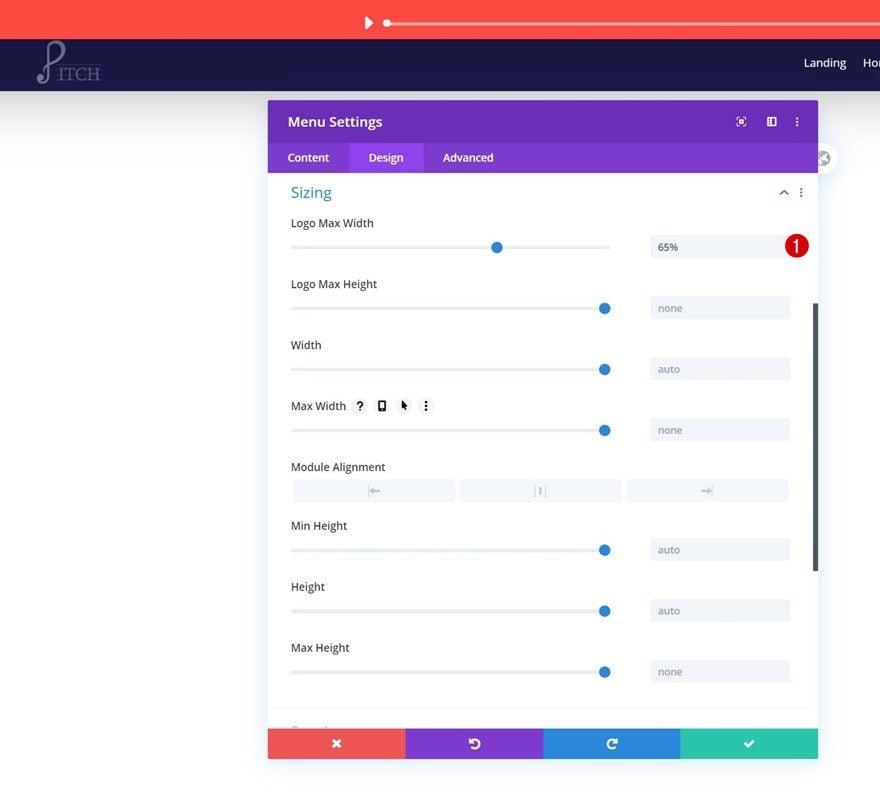
Sizing
And we’ll complete the module settings by assigning a logo max width in the sizing settings.
- Logo Max Width: 65%
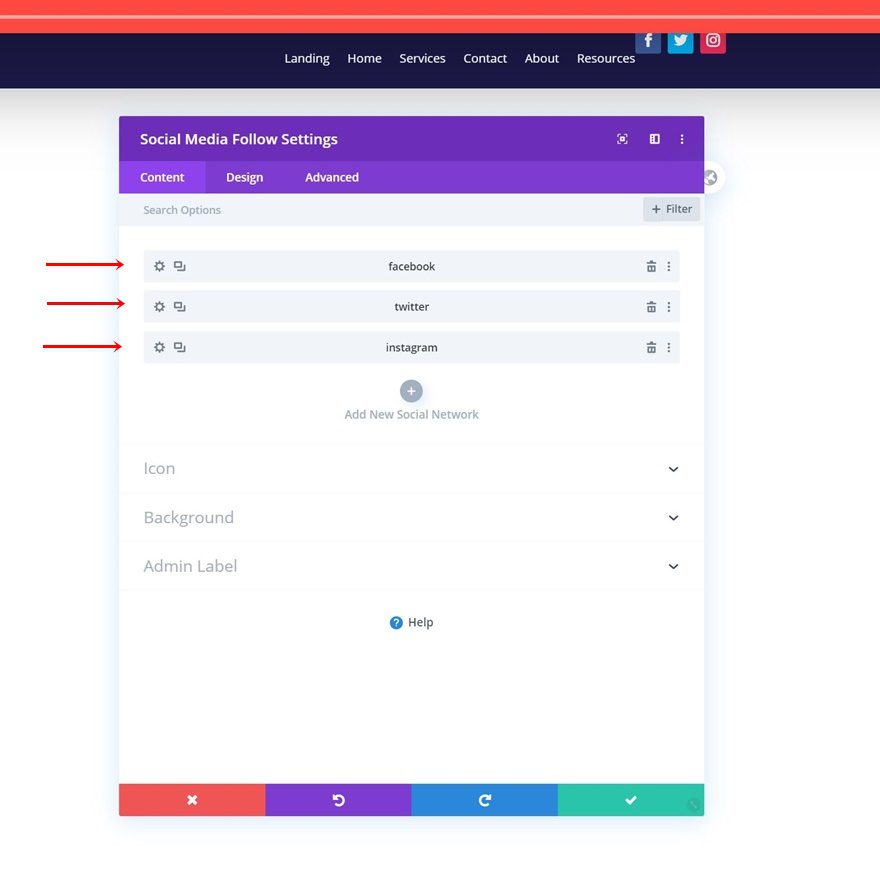
Add Social Networks
In the second column of our second row, we’ll need a Social Media Follow Module. Add the social networks of your choice.
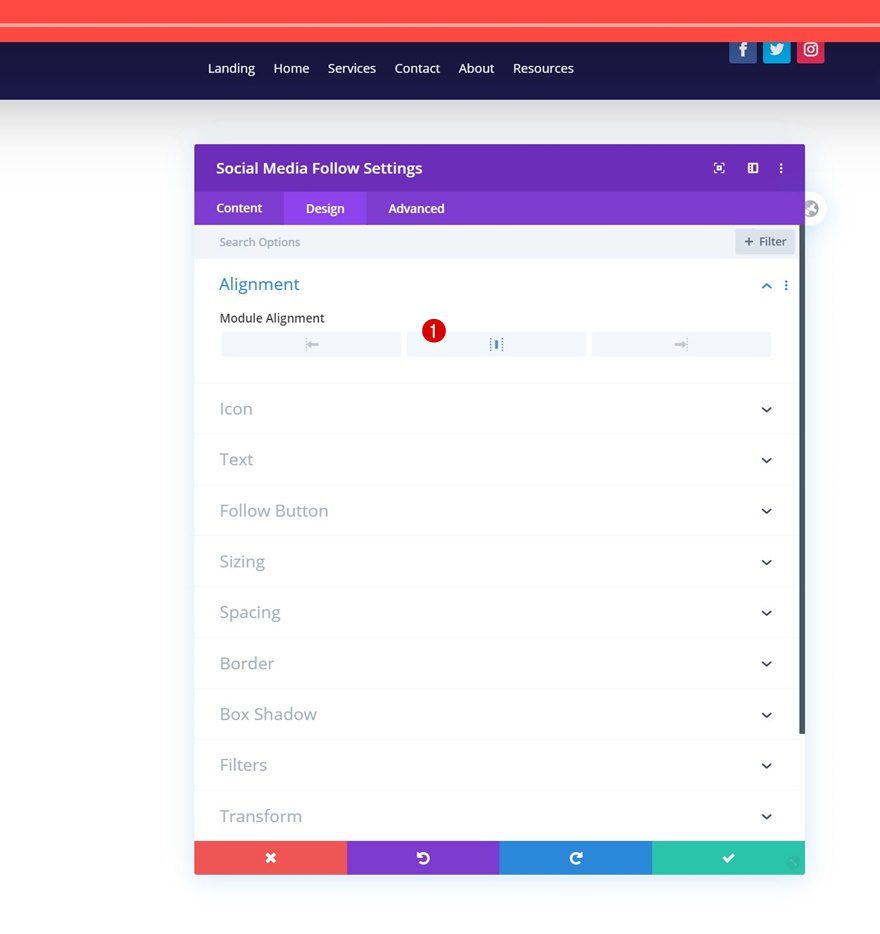
Alignment
Move on to the module’s design tab and change the module alignment.
- Module Alignment: Center
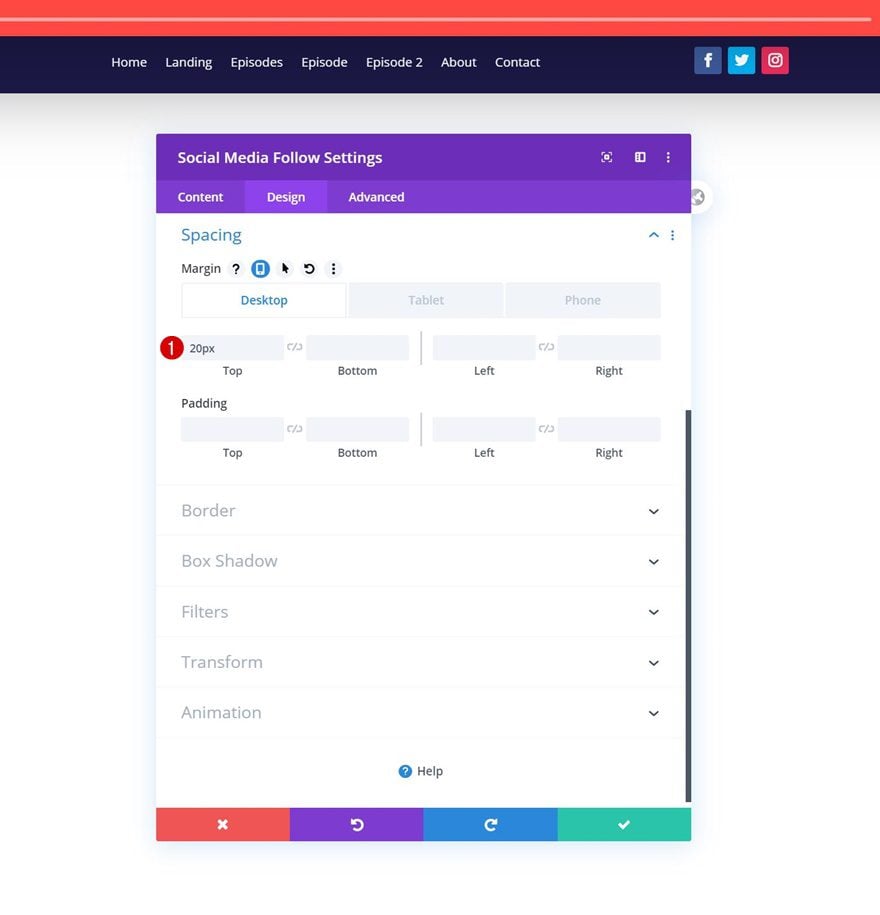
Spacing
Add some custom margin values next.
- Top Margin: 20px
- Bottom Margin: -4% (Tablet & Phone Only)
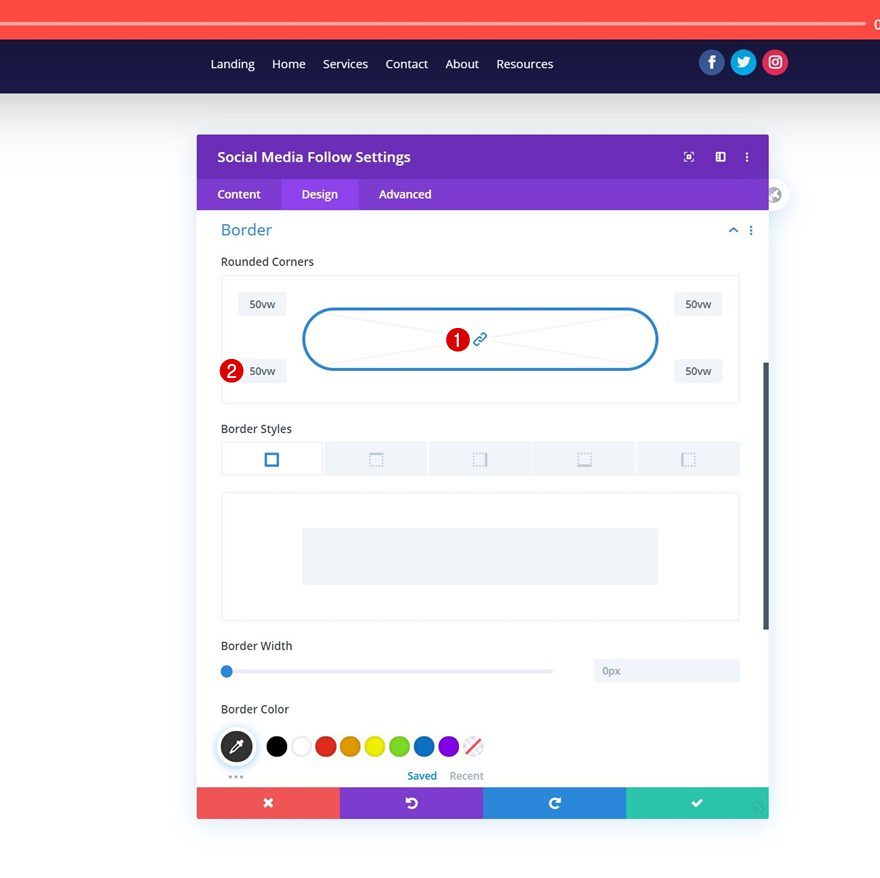
Border
And complete the header by adding some rounded corners to the module’s border settings. Once you’ve completed the global header, make sure to save all Divi Theme Builder changes and view the outcome on your website!
- All Corners: 50vw
Preview
Now that we’ve gone through all the steps, let’s take a final look at the outcome across different screen sizes.
Desktop
Mobile
Final Thoughts
In this post, we’ve shown you how to get creative with Divi’s built-in Audio Module. More specifically, we’ve shown you how to include a fixed audio bar in your custom-built global header. This is a great way to emphasize your podcast’s latest episode. You were able to download the JSON file for free as well! If you have any questions or suggestions, feel free to leave a comment in the comment section below.
If you’re eager to learn more about Divi and get more Divi freebies, make sure you subscribe to our email newsletter and YouTube channel so you’ll always be one of the first people to know and get benefits from this free content.


Love it, before trying it, is it possible to because i use a 2 menu theme, one for home / etc… and one for contact, copyright etc…
so is it possible to put this played in the 2nd menu and still copying the links i have on it (so creating a 2 column menu , and have the player on the left, and the links on the right ?
Will this design only work if I’m hosting my site with Divi?
No, you can do this with any Divi website. Divi Hosting does not affect what you can do with your website design, it just means that your hosting is configured to be optimized for Divi speed and performance.
OK, then, I had already gone through the entire layout design (I didn’t upload the zip folder, I just followed the directions in the post above) but since my podcast is not hosted on my own site, I put in the link to the latest episode on Acast… but the audio link didn’t show up in the header section, only the link to the audio file. But I haven’t saved it all yet so you can’t see it.
Amazing..
Cool stuff! Hope to use of it some time
Thanks For This