
The way you show images on your website can really make a difference in the overall design you’re creating. With Divi and its built-in options, you can already apply various design settings that’ll help you display images in a stunning way, think of borders and box shadows, for instance. But if you’re looking to give your images a more unique shape, this post will help you out. We’re going to share 9 FREE shaped image overlays that you can download and use on any website you create. After sharing these shaped image overlays, we’re also going to show you how to take advantage of them while building a website with Divi. We hope this tutorial will inspire you to create your own kind of shaped image overlays as well.
Let’s get to it!
Preview
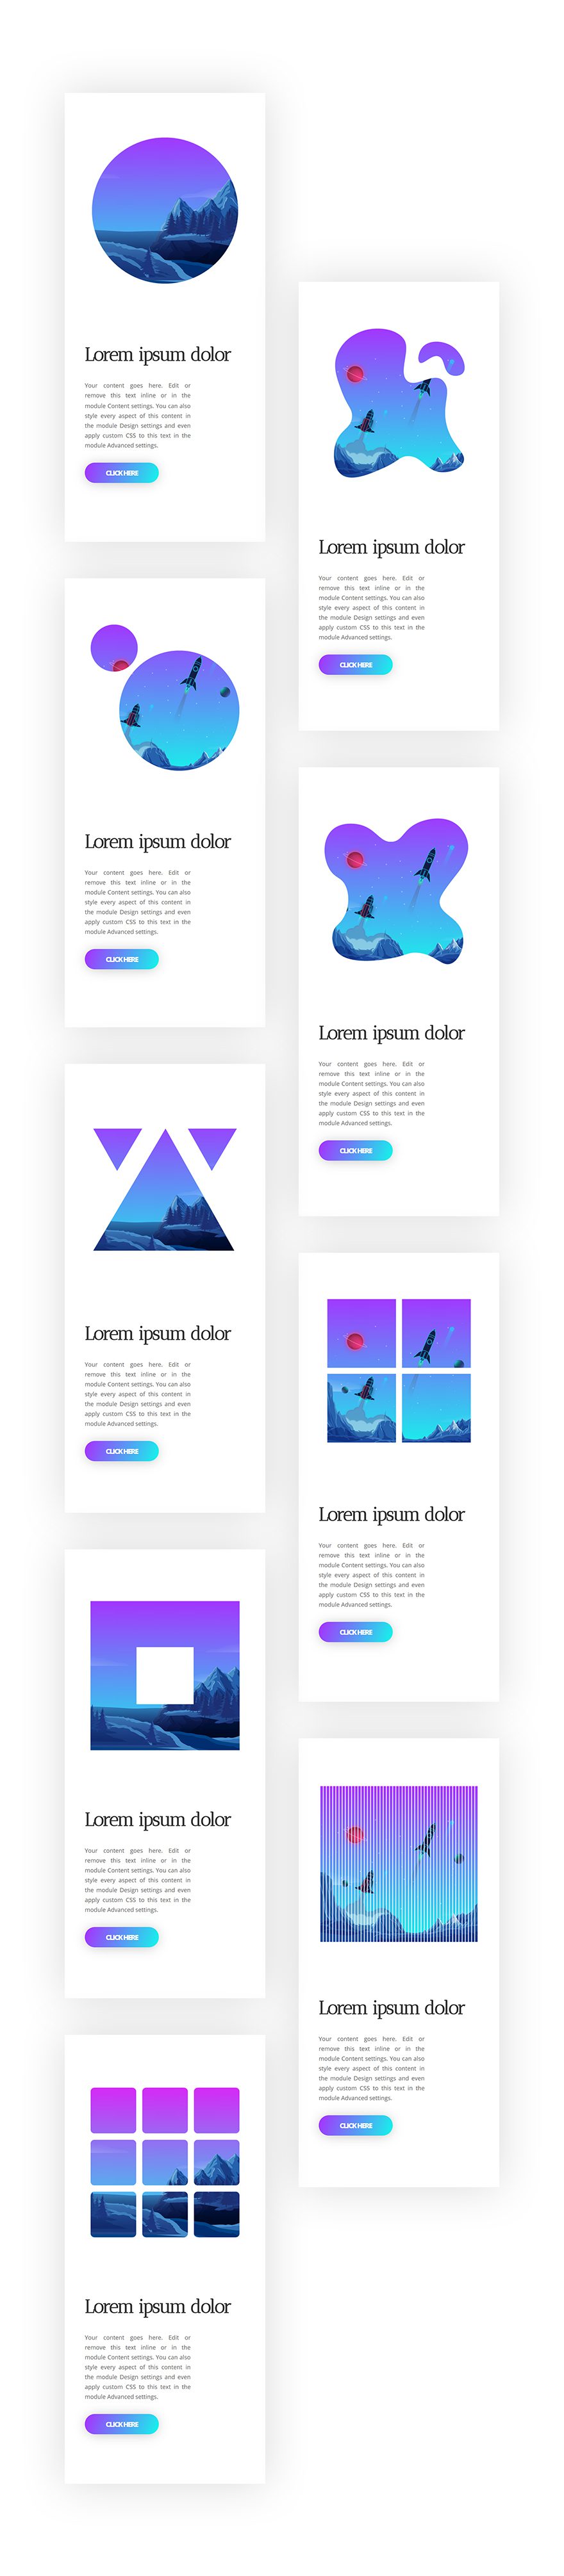
Before we dive into the tutorial and download, let’s take a quick look at the outcome you can expect across different screen sizes.
Desktop
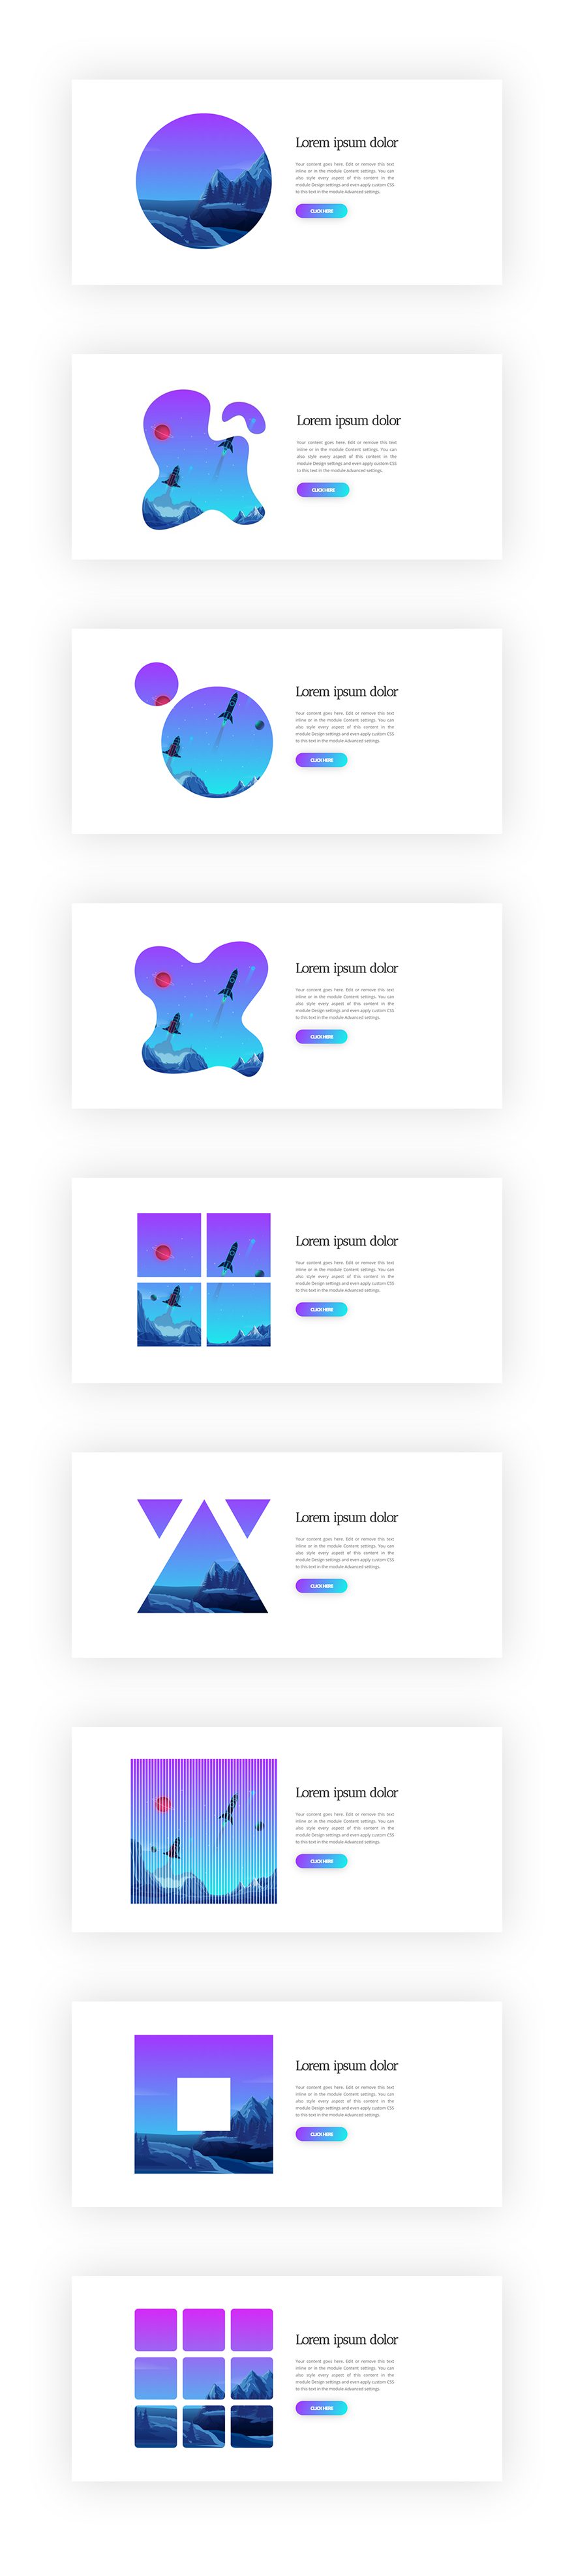
Phone
Download The Shaped Image Overlays for FREE
To lay your hands on the shaped image overlays, you will first need to download them using the button below. To gain access to the download you will need to subscribe to our newsletter by using the form below. As a new subscriber, you will receive even more Divi goodness and a free Divi Layout pack every Monday and Friday! If you’re already on the list, simply enter your email address below and click download. You will not be “resubscribed” or receive extra emails.

Approach
- The shaped image overlays that you can find in the download folder are ready for use if you’re combining them with a white row and/or section background color
- If you want to adjust the shaped image overlays according to another background color, you’ll need to export the shaped image overlays in another color using the illustrator file that is included in the download above
- We’ll show you how to change the shaped image overlay color in the first part of the tutorial (using Adobe Illustrator)
- Then, we’ll move on to Divi and upload one of the shaped image overlays to an Image Module
- We’ll also add a background image and gradient background to the Image Module that’ll show through the shaped image overlay
Modifying Shaped Image Overlays to Section Background Color with Adobe Illustrator
Open the Illustrator File in Download Folder
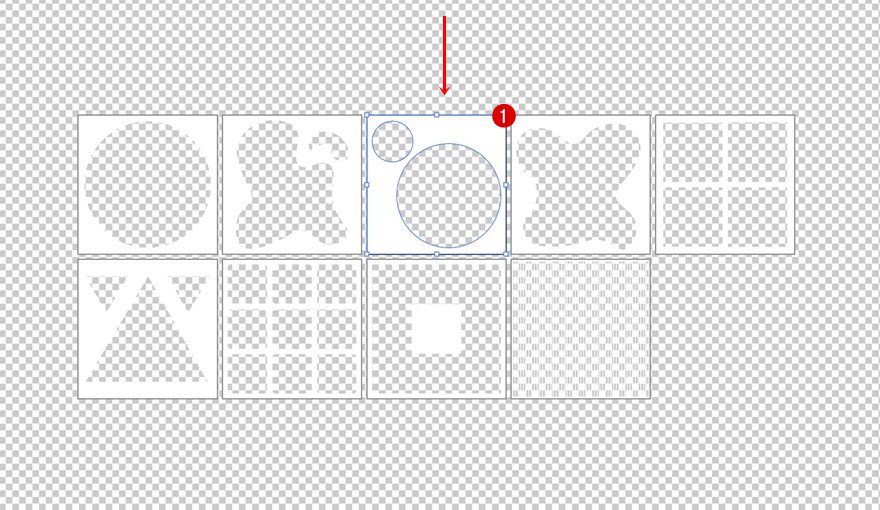
As mentioned in the approach section of this post, if you want to use the image shaped overlays on a white background, you’re ready to go by just using the PNG files that you can find in the download folder. However, if you want to use the shaped image overlays on a different row and/or section background color, you will need to change the color manually using the Adobe Illustrator file that is included in the download folder as well. Changing the color takes little to no time and allows you to use the shaped image overlays on literally any website you build, so let’s go through the steps. First of all, you will need to open the Adobe Illustrator file.
Select Image Shape Overlay of Choice
Once you’ve opened the file, you’ll find 9 different artboards with the shaped image overlays that you are free to use for any kind of purpose. Select the one you want to edit.
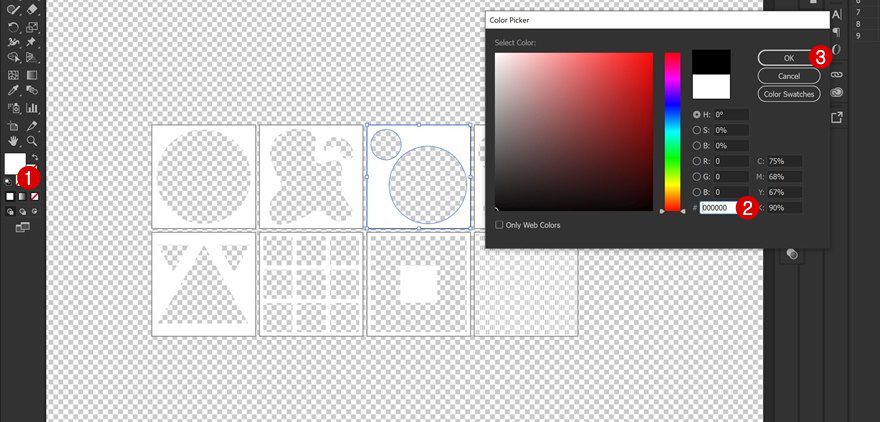
Change Color to Match Section Background Color
Continue by changing the color of the shape into the same background color you’re planning on using for your row and/or section.
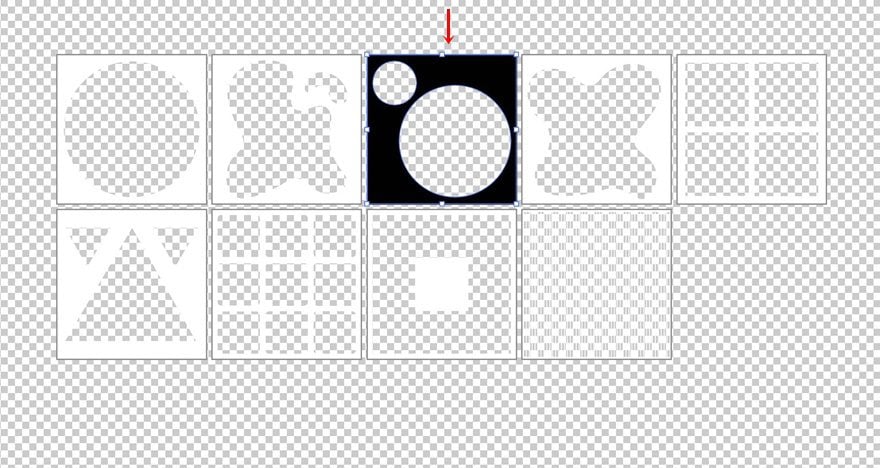
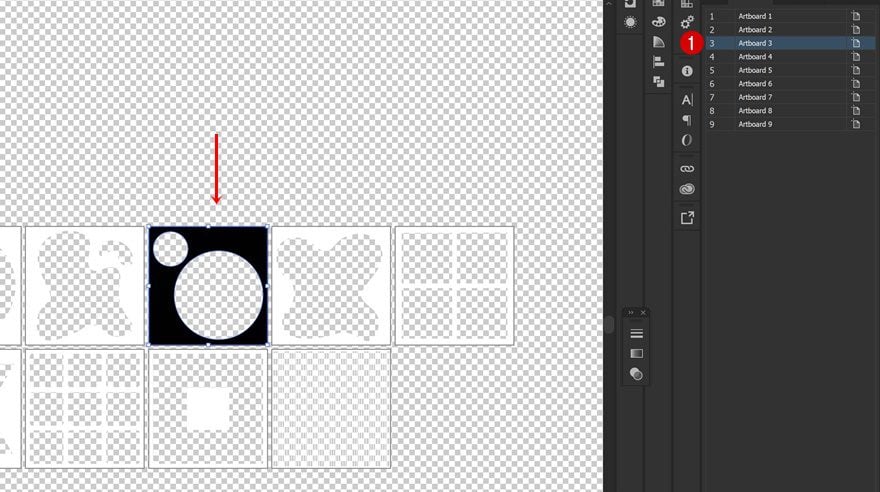
Select Artboard
Once the color is modified, you can select the entire artboard containing the shaped image overlay.
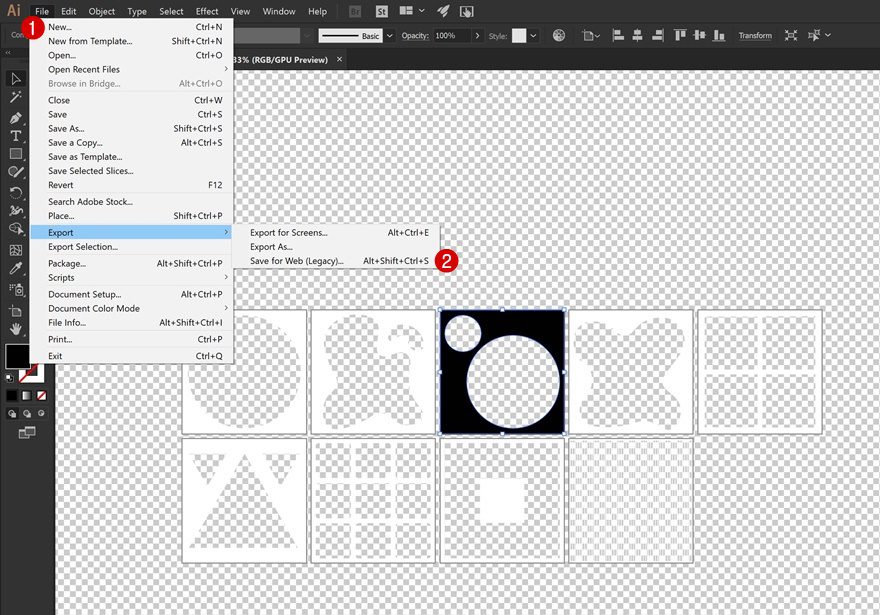
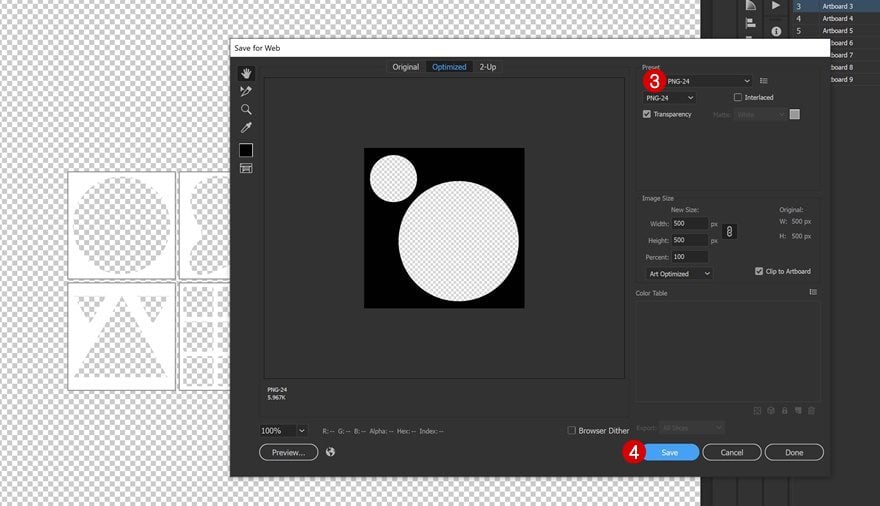
Save PNG Shaped Image Overlay for Web
And save it as a PNG image file for web by going to File > Export > Save for Web.
Let’s Start Creating!
Subscribe To Our Youtube Channel
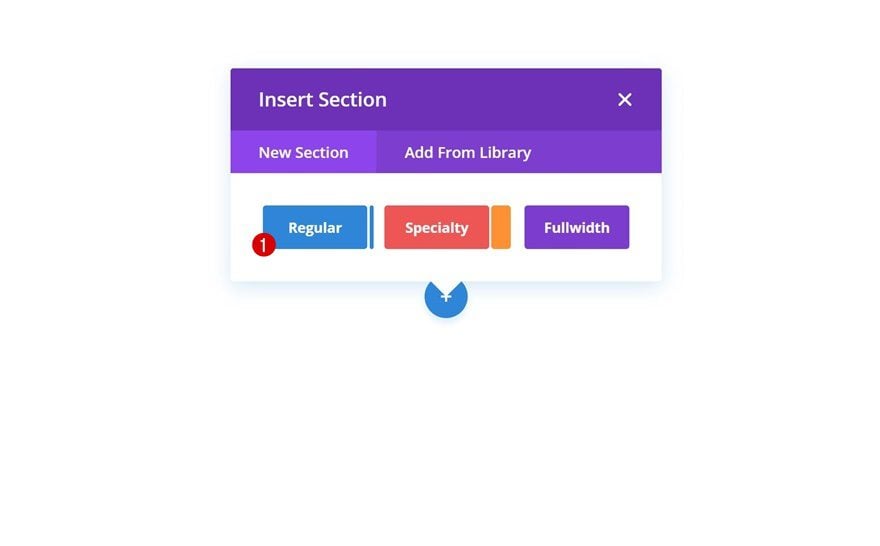
Add New Section
Time to switch over to Divi and create the outcome! Create a new page or open an existing one and add a new regular section.
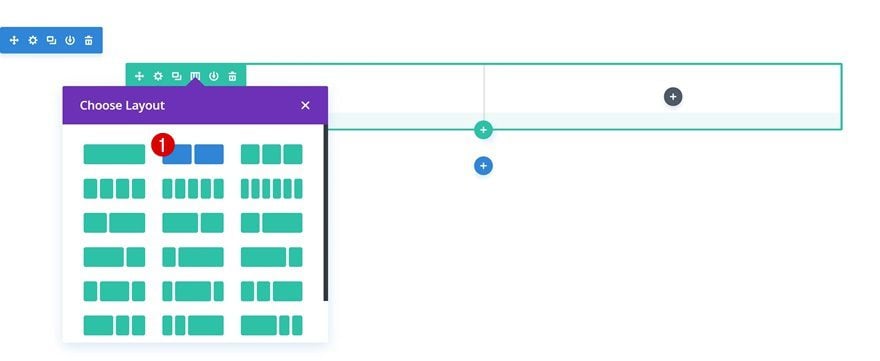
Add New Row
Column Structure
Continue by adding a new row to the section using the following column structure:
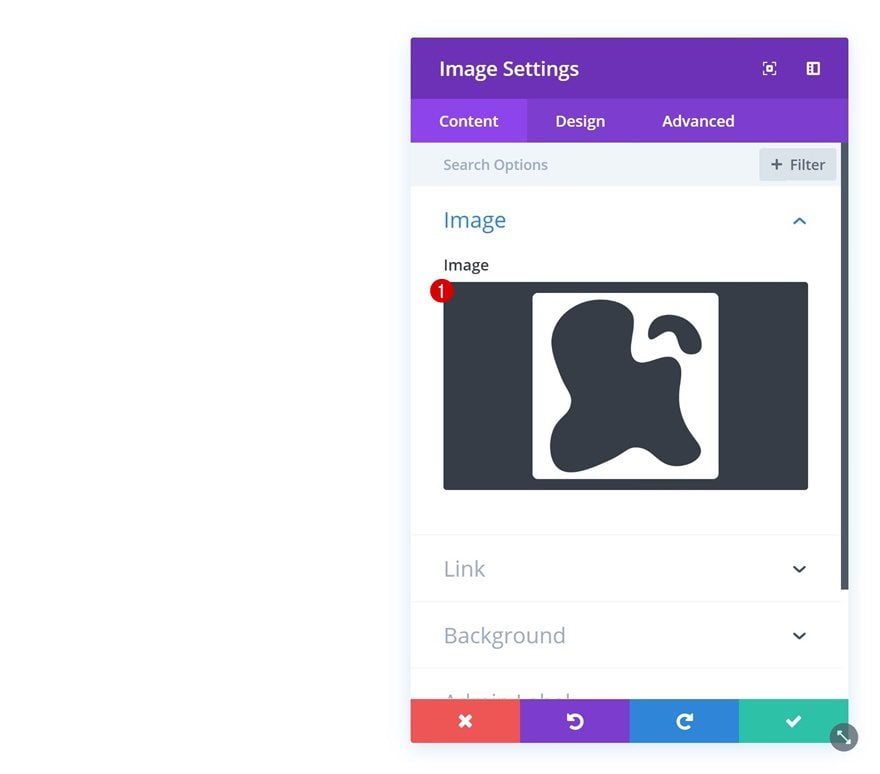
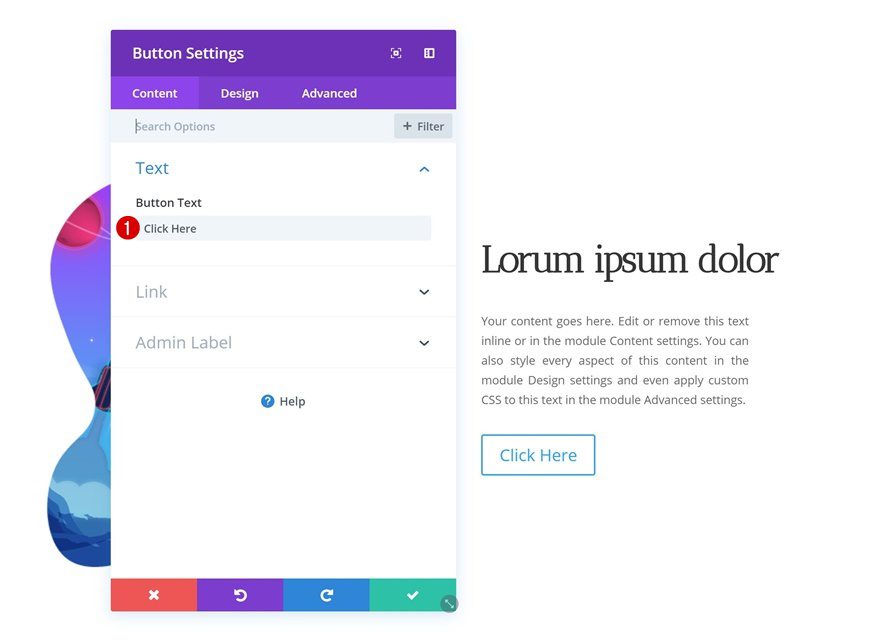
Add Image Module to Column 1
Upload Shaped Image Overlay
The only module we’ll need in column 1 is an Image Module. This is where all the magic will happen. We’ll start off by uploading the shaped image overlay. You’ll notice that one part of the image is completely transparent. This will allow the background image and gradient background to show through in the upcoming steps.
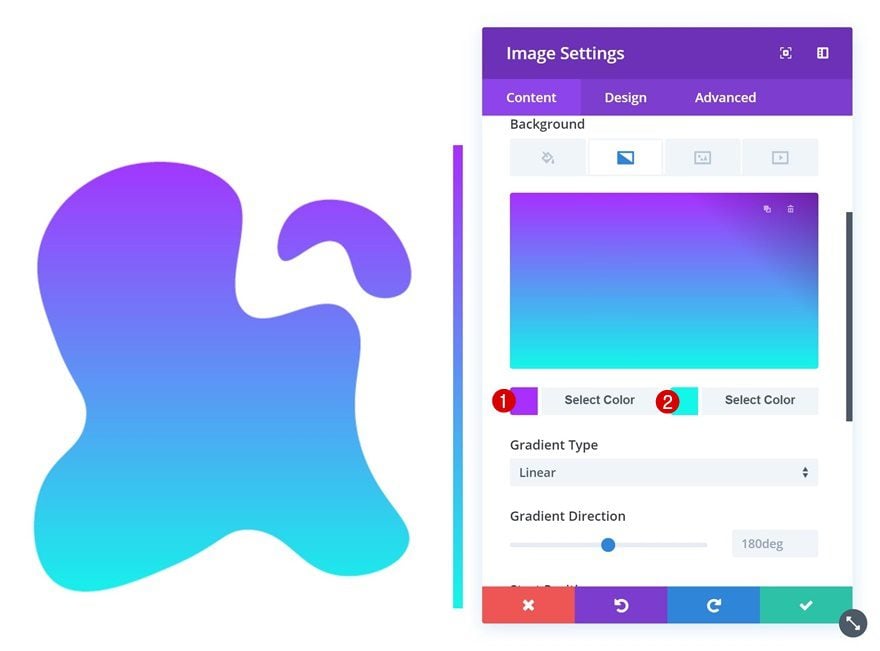
Gradient Background
Go ahead and add a gradient background of your choice next.
- Color 1: #aa2bff
- Color 2: #09f7eb
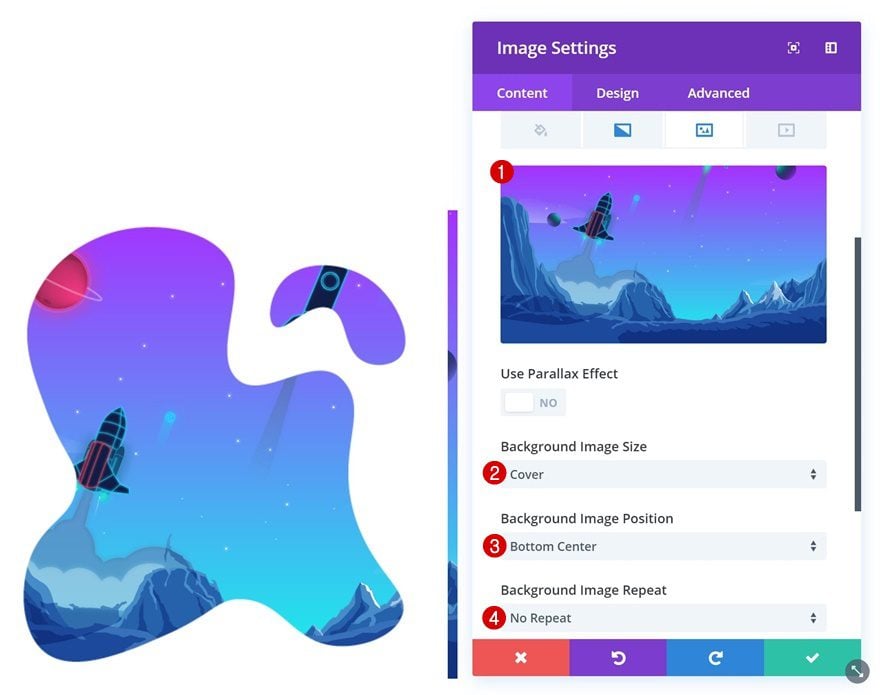
Background Image
And upload a PNG background image, or just a regular one if you don’t want the gradient background to show through. You can also download the illustrations that we’re using by going to the following post we’ve created on how to change a gradient background on hover.
- Background Image Size: Cover
- Background Image Position: Bottom Center
- Background Image Repeat: No Repeat
Sizing
Another important step to make this tutorial work is enabling the ‘Force Fullwidth’ option in the sizing settings of the Image Module. This will make sure the gradient background and background image will only show through the transparent area of the shaped image overlay.
- Force Fullwidth: Yes

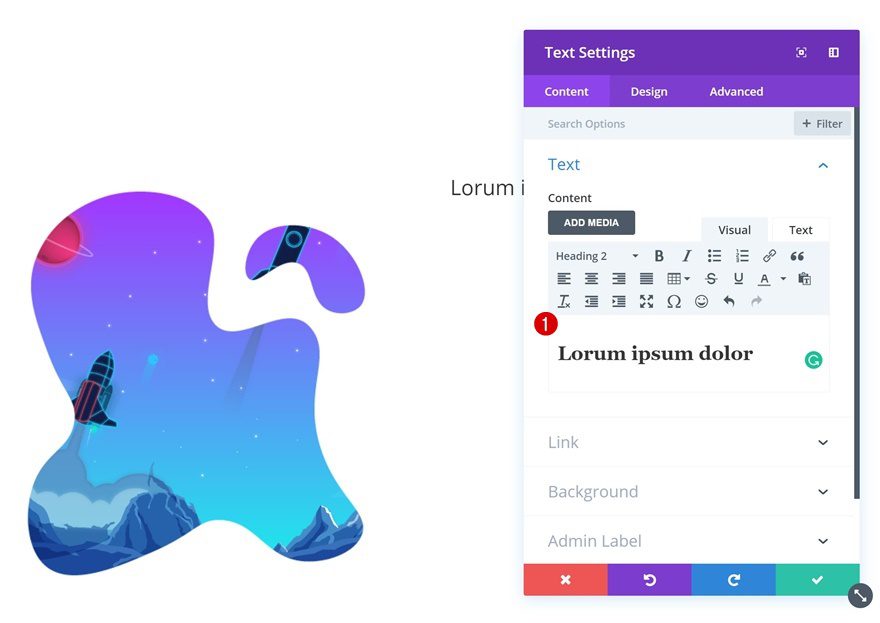
Add Title Text Module to Column 2
Add Content
Let’s move on to the second column. Here, the first module we’ll need is a title Text Module. Add some content of choice.
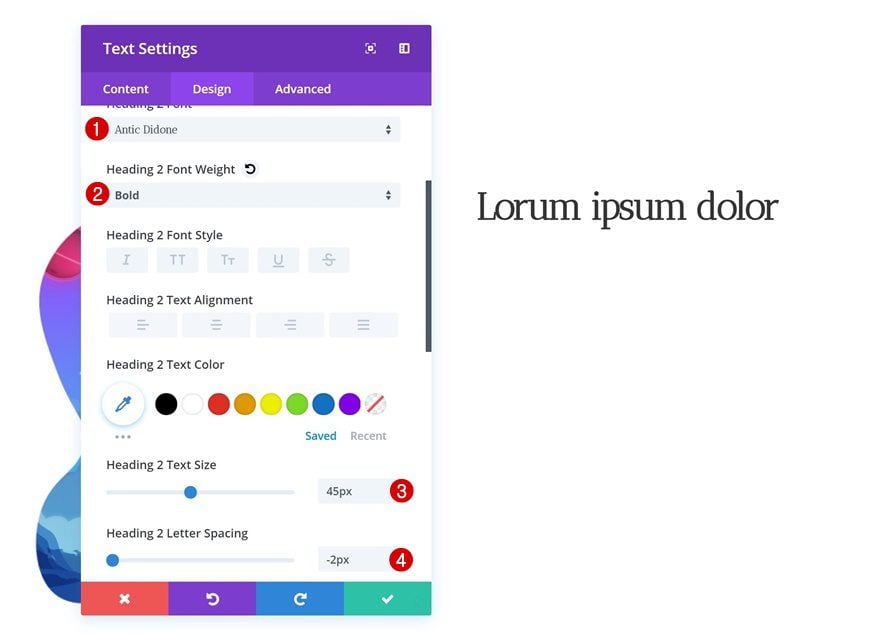
Text Settings
Then, go to the heading text settings and make some changes.
- Heading 2 Font: Antic Didone
- Heading 2 Font Weight: Bold
- Heading 2 Text Size: 45px
- Heading 2 Letter Spacing: -2px
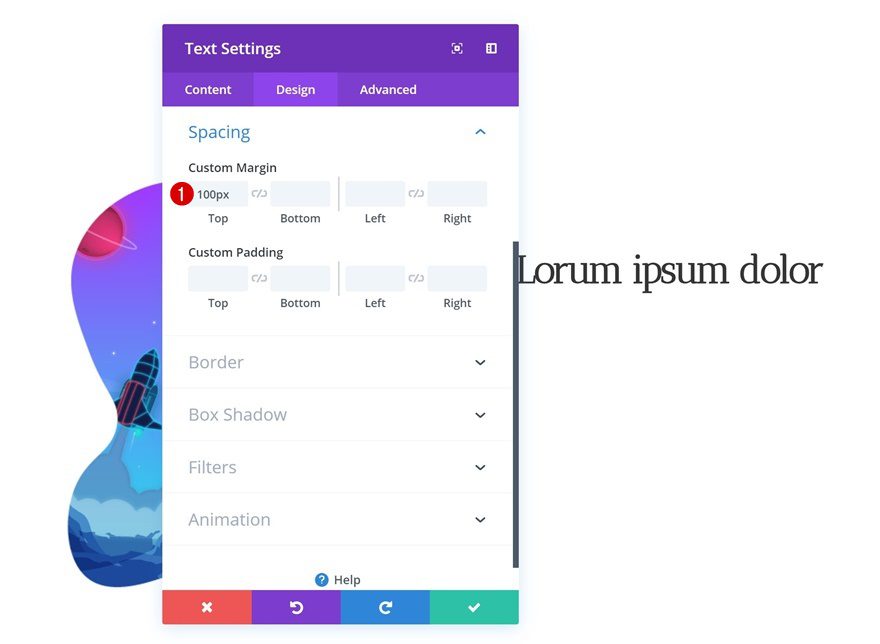
Spacing
Add some custom top margin as well.
- Top Margin: 100px
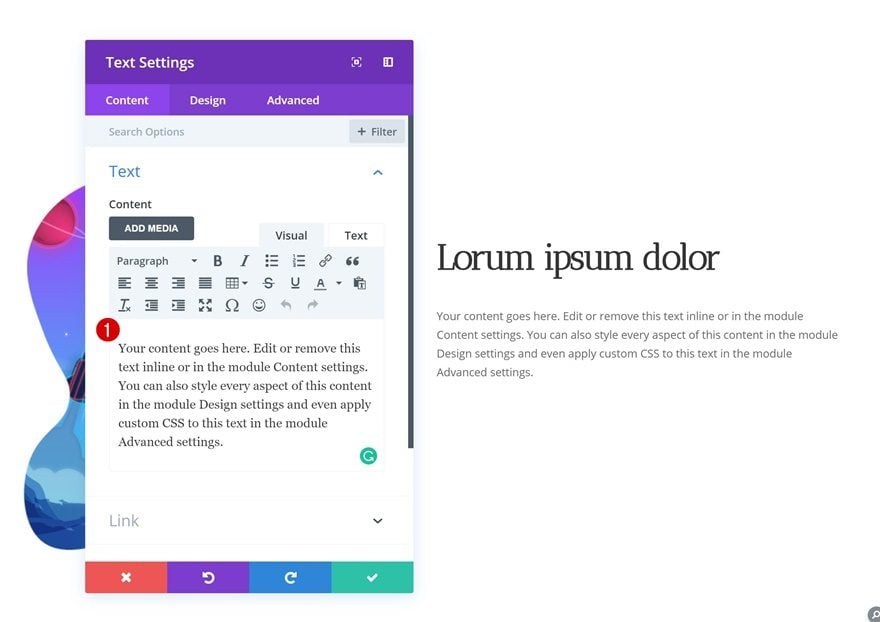
Add Description Text Module to Column 2
Add Content
The second module we’ll need is a description Text Module. Enter some content of choice.
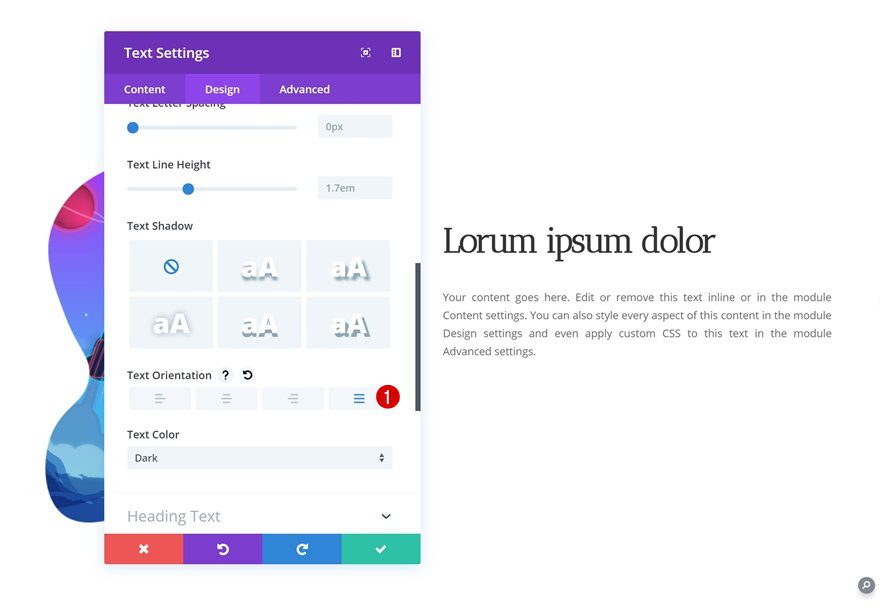
Text Settings
Then, go to the text settings and change the text orientation of the module.
- Text Orientation: Justify
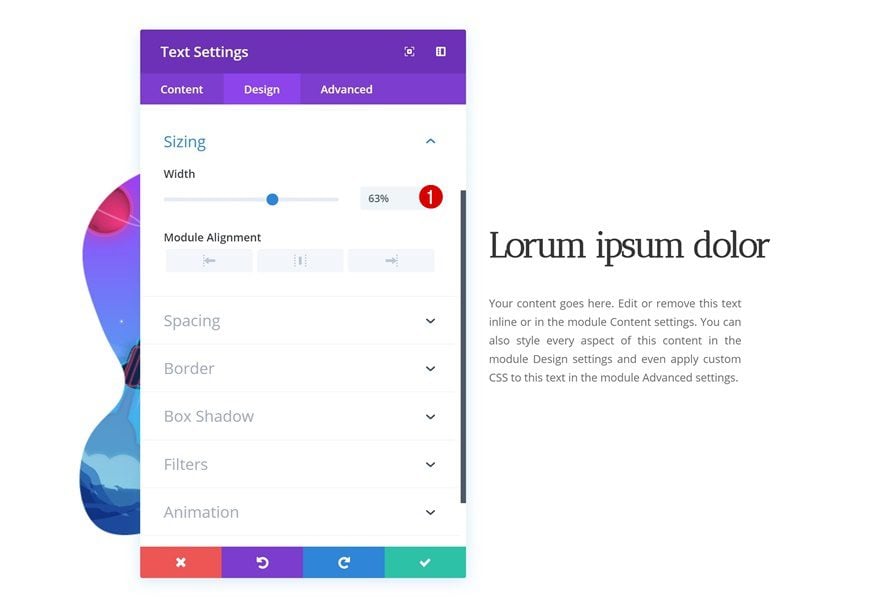
Sizing
Change the width in the sizing settings as well.
- Width: 63%
Add Copy
The next and last module we’ll need is a Button Module. Enter some content of choice.
Button Settings
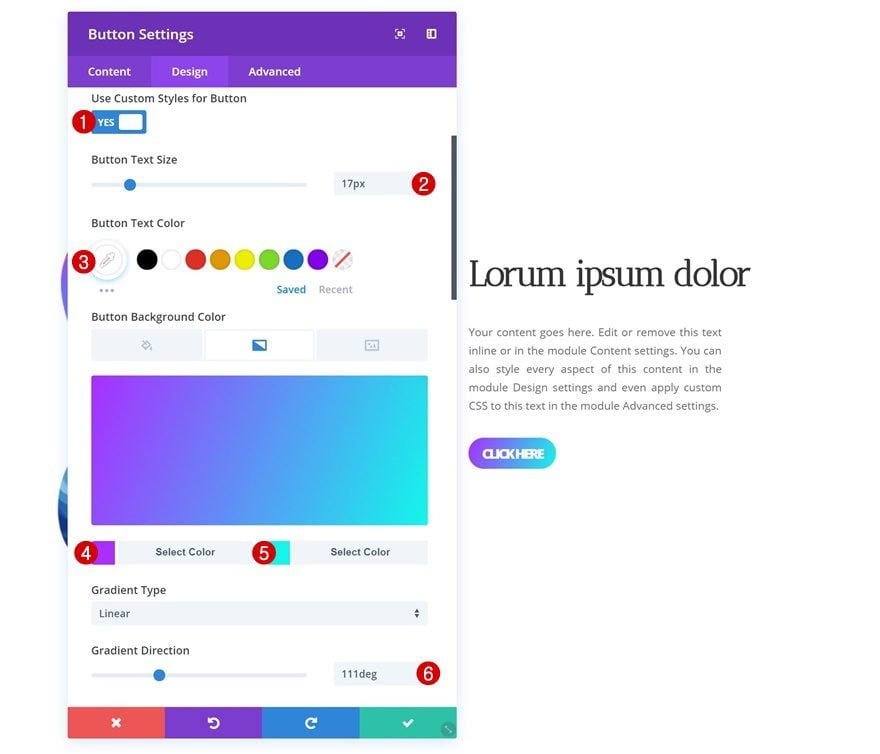
Continue by going to the button settings and changing the appearance of the button.
- Use Custom Styles for Button: Yes
- Button Text Size: 17px
- Button Text Color: #ffffff
- Gradient Color 1: #aa2bff
- Gradient Color 2: #09f7eb
- Gradient Direction: 111deg
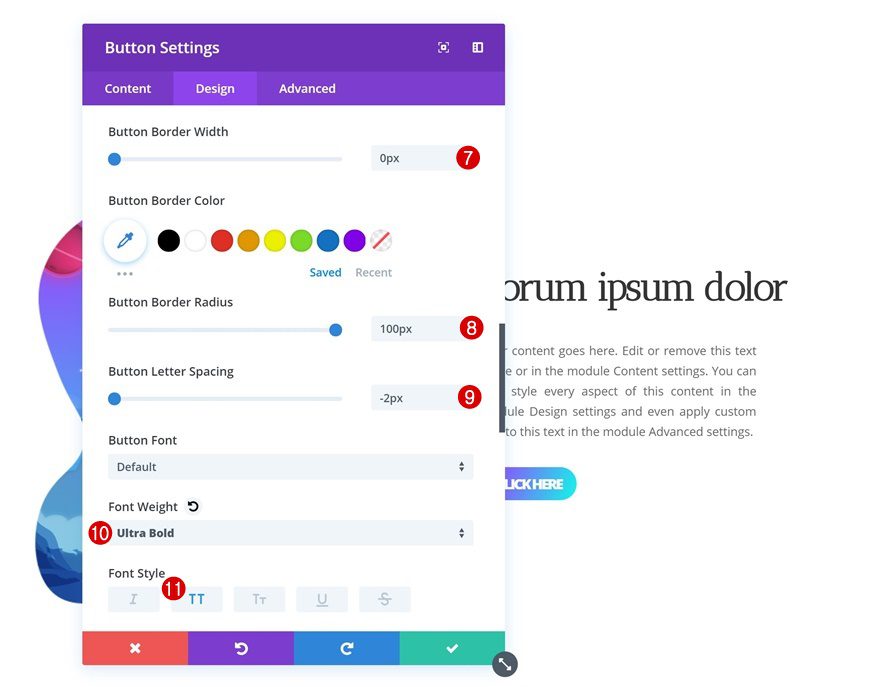
- Button Border Width: 0px
- Button Border Radius: 100px
- Button Letter Spacing: -2px
- Font Weight: Ultra Bold
- Font Style: Uppercase
Spacing
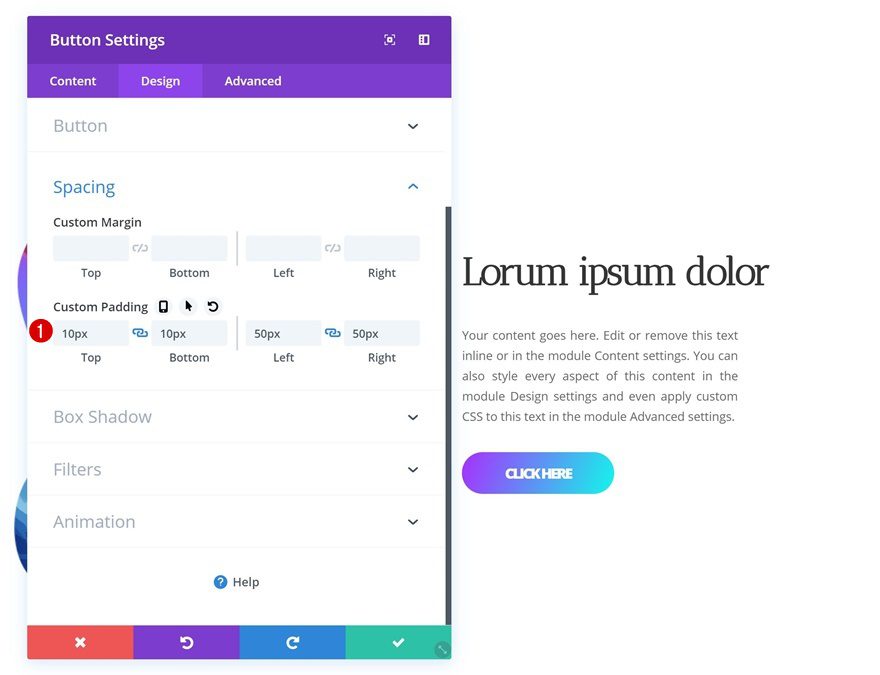
Add some extra custom padding to the button as well.
- Top Padding: 10px
- Bottom Padding: 10px
- Left Padding: 50px
- Right Padding: 50px
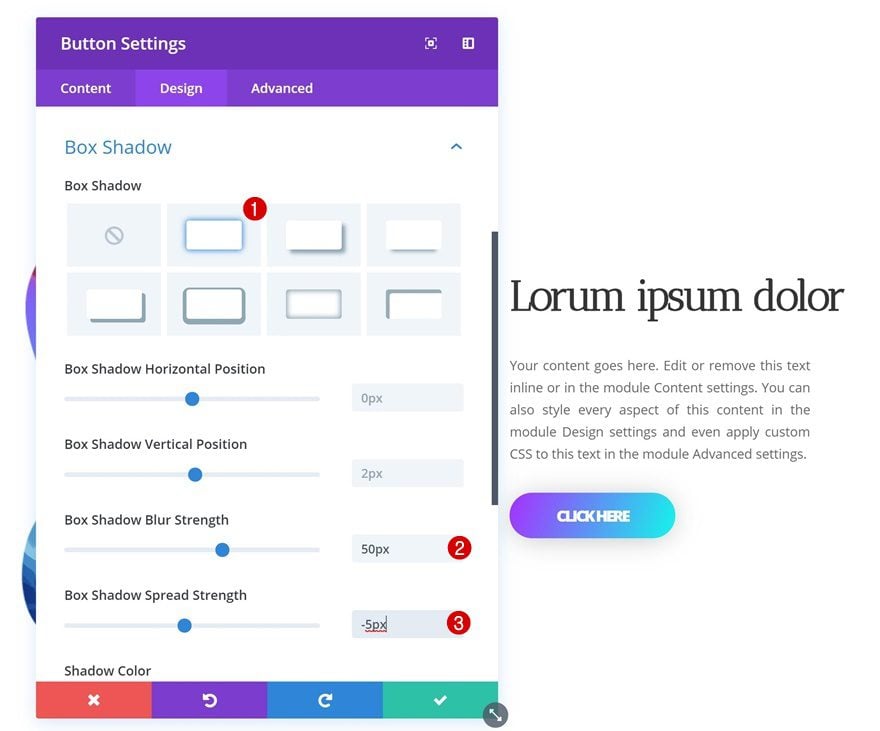
Box Shadow
Last but not least, complete the design by adding a subtle bow shadow to the button.
- Box Shadow Blur Strength: 50px
- Box Shadow Spread Strength: -5px
Preview
Now that we’ve gone through all the steps, let’s take a final look at the outcome across different screen sizes.
Desktop
Phone
Final Thoughts
In this post, we’ve shared 9 FREE shaped image overlays for Divi that you can use for any kind of website you’re building. We hope this tutorial inspired you to create your own unique shaped image overlays that you can constantly reuse. If you have any questions or suggestions, make sure you leave a comment in the comment section below!


Awesome! I have another question… How can we create an opt-in where our readers enter their email for a download? 😀
Thanks. Quite innovative tips on overlays.
Looks great. I’m signed in to Divi but I don’t see a download for the overlay files.
If you put your email address in the opt-in type box under the Download The Shaped Image Overlays for FREE part of the blog, the download button will appear.
They look great. I’m looking forward to trying them out!
Very nice! Thank you for offering these!
They look really awesome, I have to try them out. Thanks so much.
I’d never thought to use overlays like this so thanks very much, such a quick and easy way to create a great effect 🙂
Design looks so nice, I will try this one for sure. Thanks for sharing.
Information on Divi is always fresh to read. The design looks so cool and i will surely try this one on my site soon. Thanks for sharing.
Excellent Job
These are one of my favorite ET post lol. Thanks for the goodies ET design team!
I’m signed in, but once again there is no download button on this page, and when in the main DIVI catalog page there is no “image overlay” download either.
Why do you guys make this so difficult?
brilliant idea!
Thanks very much – what a great surprise. I can see this changing the personality of my site immediately and can’t wait to implement it. Good job!
Sorry. I don’t think I explained that right. So again
__
WHY do you link your BLOG TIPS, just like with the layouts, not additionally with the real page, so that we get a real impression of the result
I don’t understand this. I don’t understand this.
Even less do I understand your ignorance of not answering this question, which has already been asked several times. Are you really already so off the beaten track? Maybe you should think about the fact that people like me were the ones who have been loyal to you since the very beginning.
I also did not understand that. 100% agree with you
WHY don’t you link your BLOG TIPS, as well as the layouts, to the real page, so that we can get a picture of the result? With the layouts you do the same.
I don’t understand that.
Even less do I understand your ignorance of not answering this question, which has already been asked several times. Are you really already so off the beaten track? Maybe you should think about the fact that people like me were the ones who have been loyal to you since the very beginning.
…. Eric
Good. Appreciate the Illustrator help. I can develop my own shapes using this. I can’t agree with your text spacing on the button.
¡AWESOME!
That looks awesome! Looking forward to trying out on my site in a few days.