
It’s always great to have extra resources that you can use when building a new website for yourself or for a client. That’s why we’re making sure you receive new layout packs every week. But there are other resources that may come in handy as well, such as “border images” or images that you can use along one side or another of a Divi design element to add a stylistic flourish. Using Divi’s built-in options along with these border images can bring stunning results. In this post, we’ve provided you with 5 different border images which you can download for free below. We’re going to explain how you can use these border images to your advantage and create a stunning end result.
Let’s get to it!
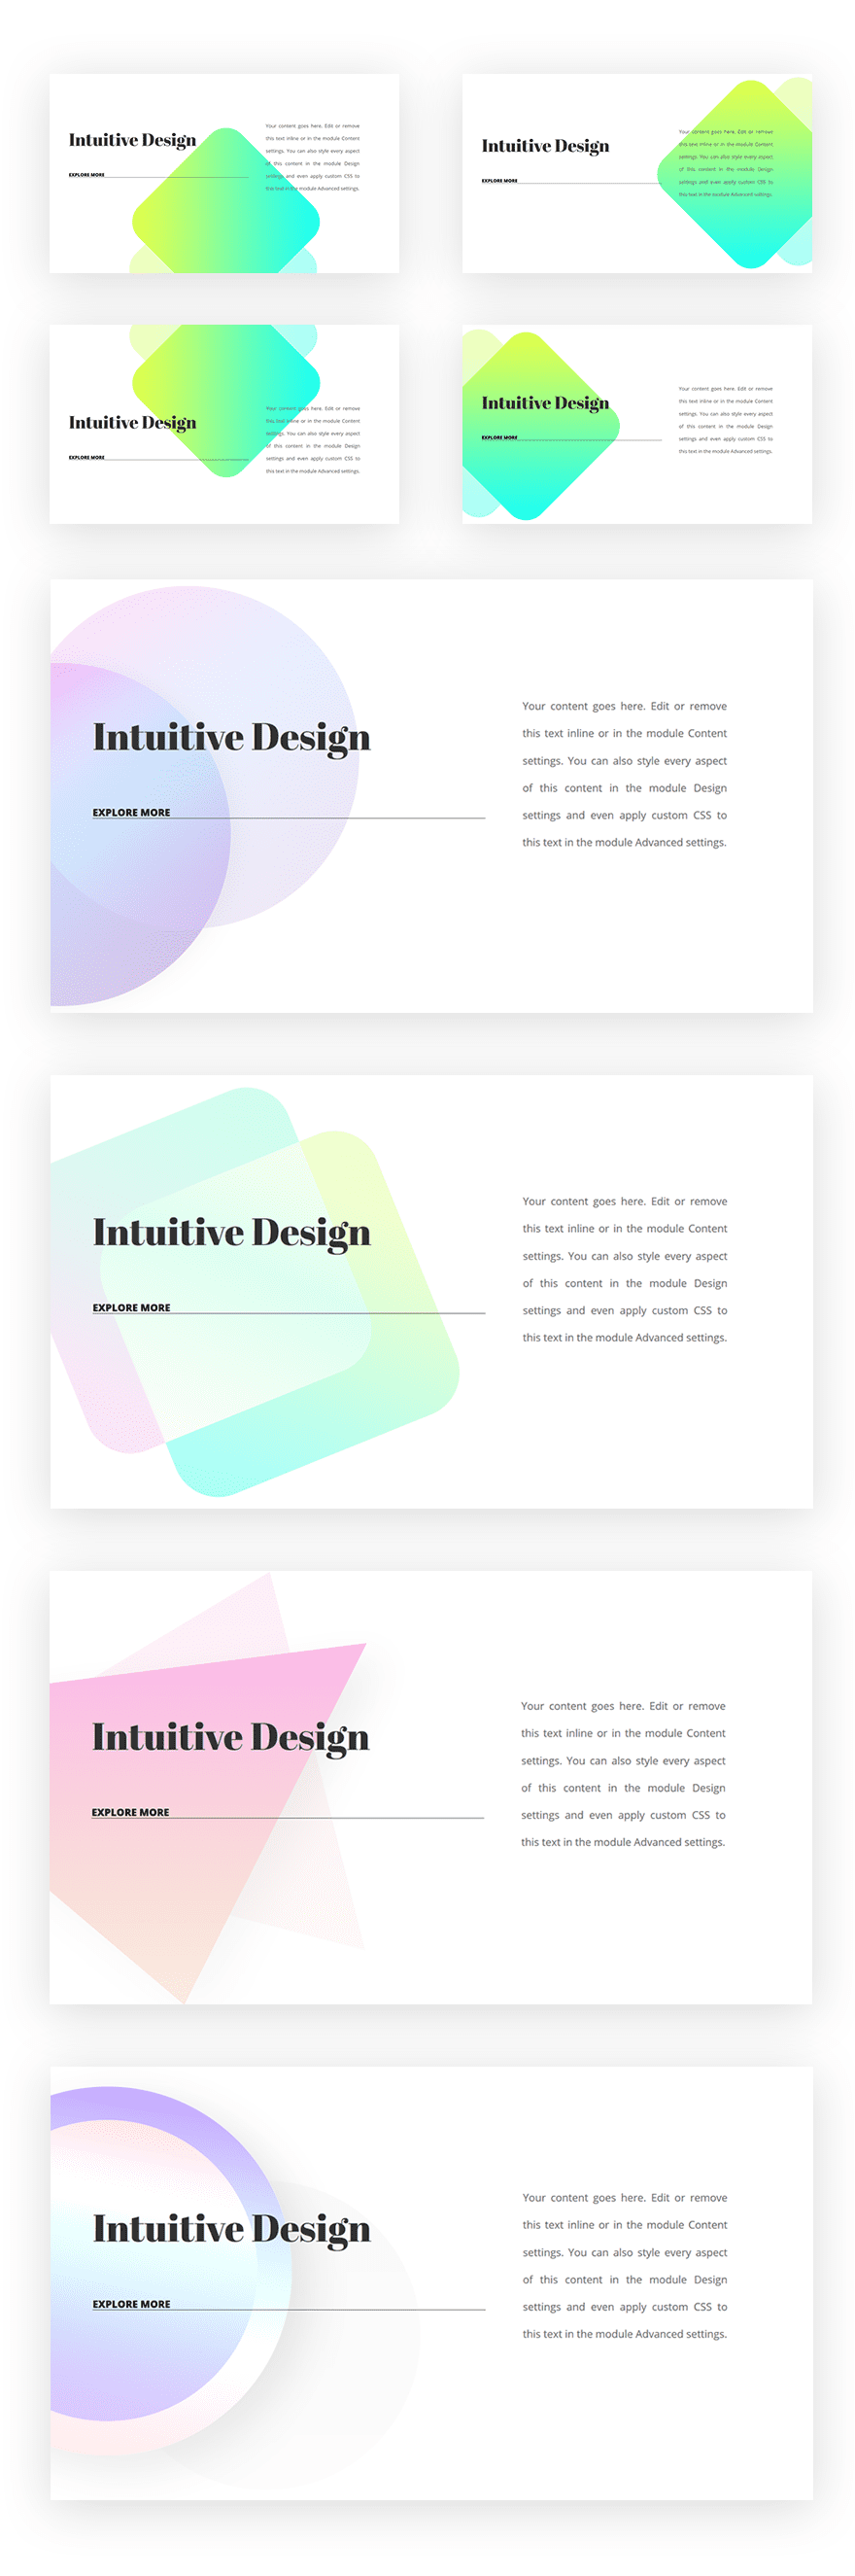
Preview
Let’s take a look at the different border images you’ll be able to download further down this post. For each one of the shapes, you’ll find 4 versions: a top, bottom, left and right one. These images will allow you to achieve the exact same result as shown in the first four images below:
Download The Image Files for FREE
To get your hands on the free border images, you will first need to download it using the button below. To gain access to the download you will need to subscribe to our newsletter by using the form below. As a new subscriber, you will receive even more Divi goodness and a free Divi Layout pack every Monday! If you’re already on the list, simply enter your email address below and click download. You will not be “resubscribed” or receive extra emails.

Approach
- Once you download and unzip the folder containing all 5 border images, you will find 4 subfolders: top border, bottom border, left border and right border
- This means that there’s a total of 20 images files available for you to use
- Later on this post, you’ll find the accompanying settings that match each one of the border sides
- To top it off, you can combine the border images with gradient overlays
- These color overlays will help you make the images appear as vibrant or subtle as you want
- You are free to use these border images without any restrictions, even for commercial purposes
Creating the Overall Design
Add New Section
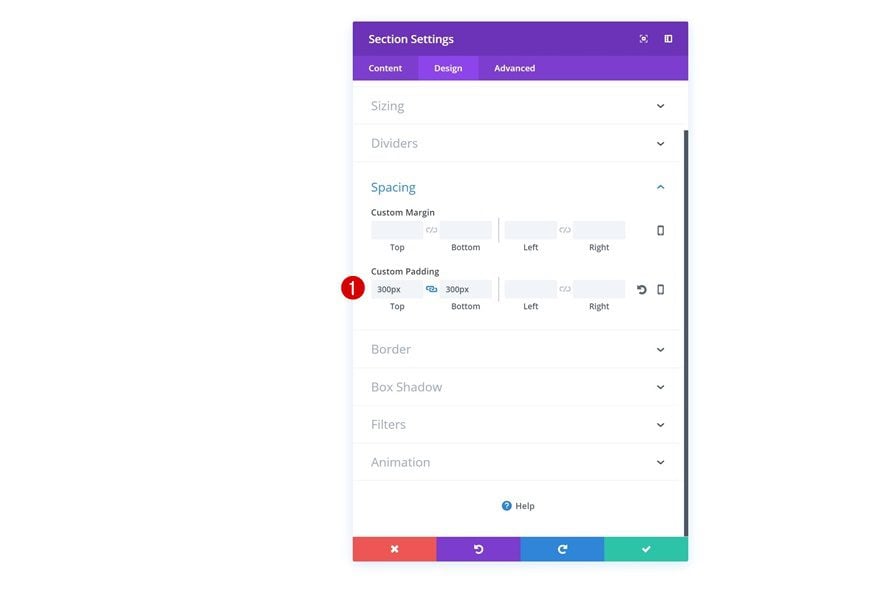
Spacing
Let’s start by creating the overall design we’ve used to showcase the border images. Open a new or existing page, add a new regular section and add some custom padding:
- Top Padding: 300px
- Bottom Padding: 300px
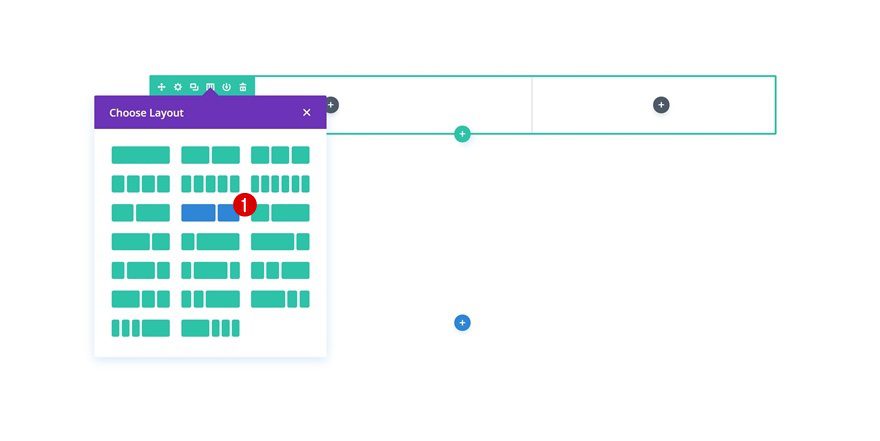
Add New Row
Column Structure
Continue by adding a new row to your section using the following column structure:
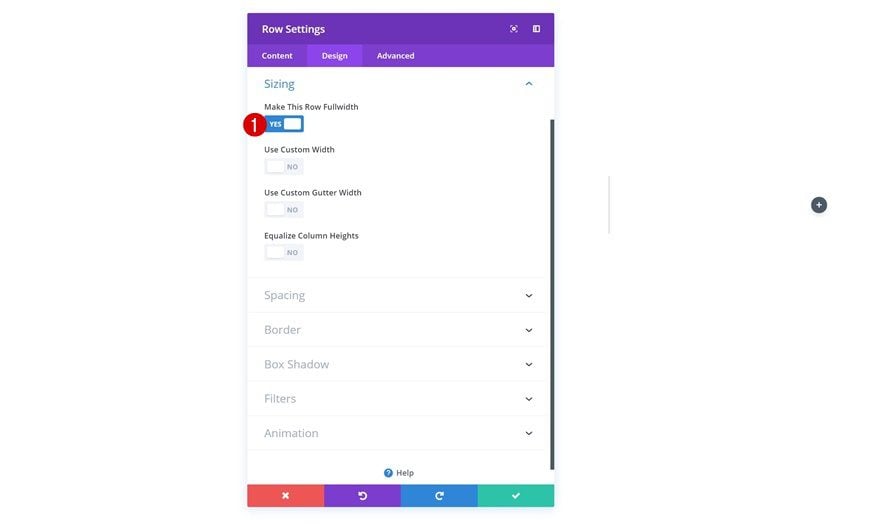
Sizing
Without adding any modules yet, open the row settings, go to the Sizing settings and make the row fullwidth.
- Make This Row Fullwidth: Yes
Add Title Text Module to Column 1
Add H2 Content Box
Let’s start adding some modules! The first module that’s needed is a Text Module. Add one to the first column and add your H2 copy of choice to the content box.

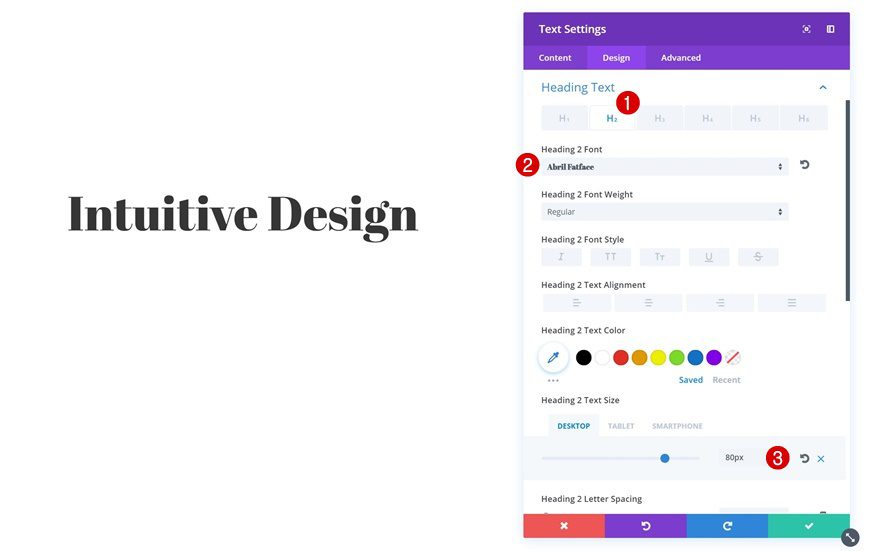
Heading Text Settings
Then, make some changes to the H2 text settings in the Design tab.
- Heading 2 Font: Abril Fatface
- Heading 2 Text Size: 80px (Desktop), 70px (Tablet), 50px (Phone)
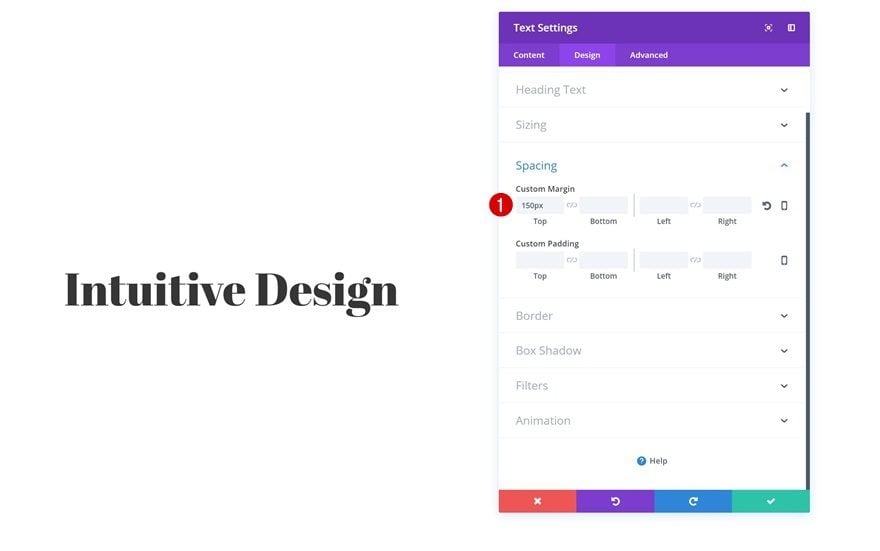
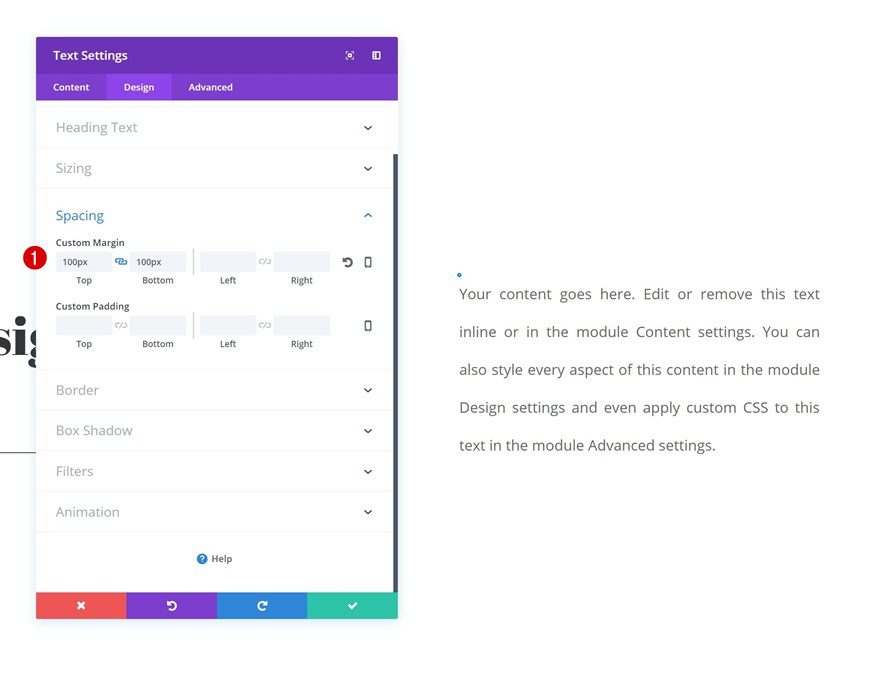
Spacing
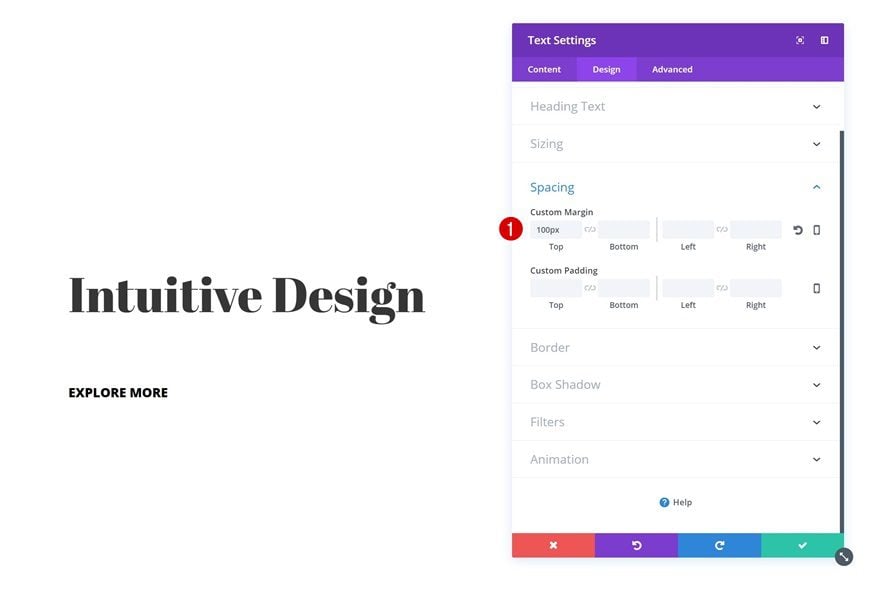
Continue by adding some margin to the top of this Text Module.
- Top Margin: 150px
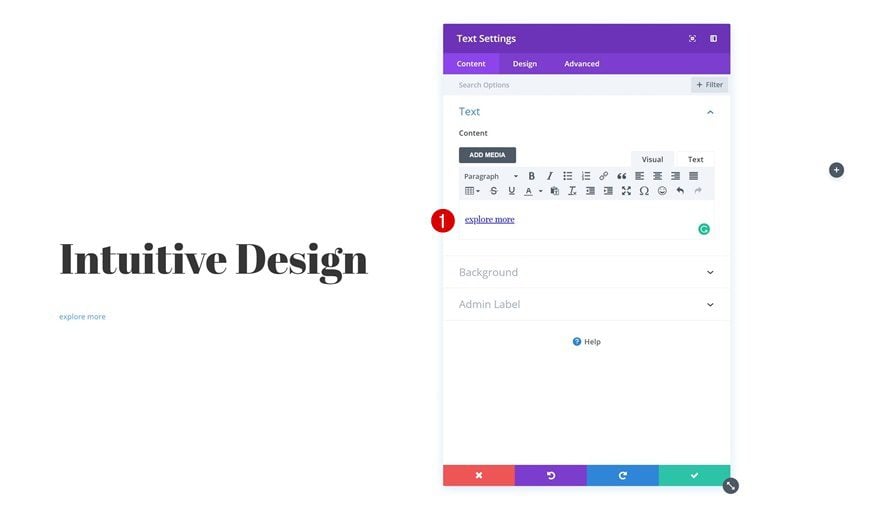
Add Link Text Module to Column 1
Add Link to Content Box
Right below the title Text Module you’ve just added, go ahead and add a new Text Module. We’re using this Text Module as a button so make sure you add a link to the CTA.
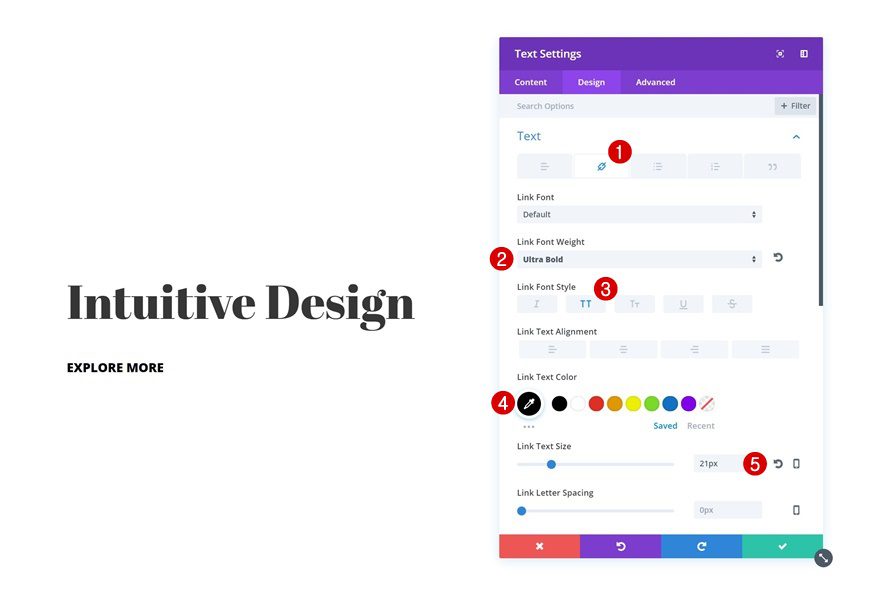
Link Text Settings
Next, change the link text settings in the Design tab.
- Link Font Weight: Ultra Bold
- Link Font Style: Uppercase
- Link Text Color: #000000
- Link Text Size: 21px
Spacing
Add some top margin to create space between this Text Module and the previous one as well.
- Top Margin: 100px
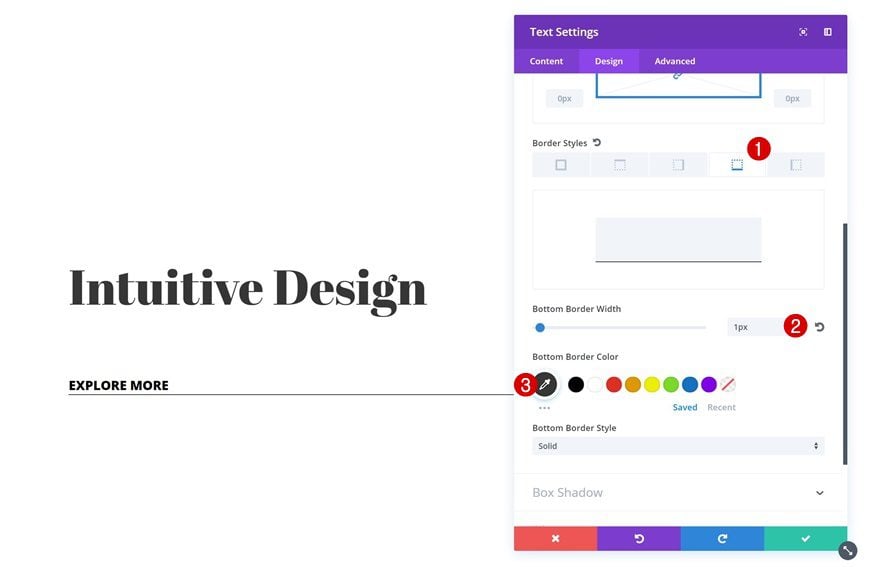
Border
Lastly, add a subtle bottom border to the link Text Module.
- Bottom Border Width: 1px
- Bottom Border Color: #333333
Add Description Text Module to Column 2
Text Settings
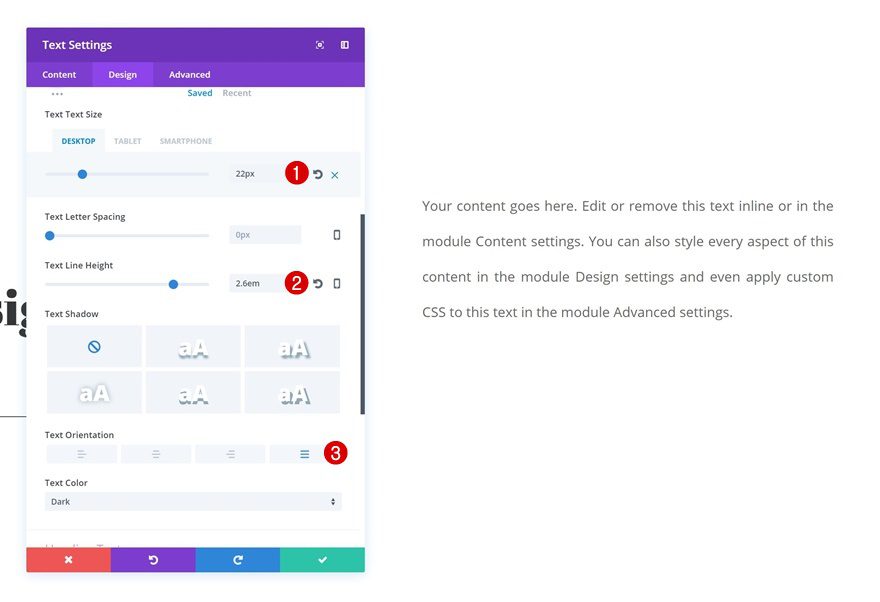
The second column needs a description Text Module only. After adding content to the content box, apply the following text settings:
- Text Size: 22px (Desktop), 20px (Tablet), 18px (Phone)
- Text Line Height: 2.6em
- Text Orientation: Justify
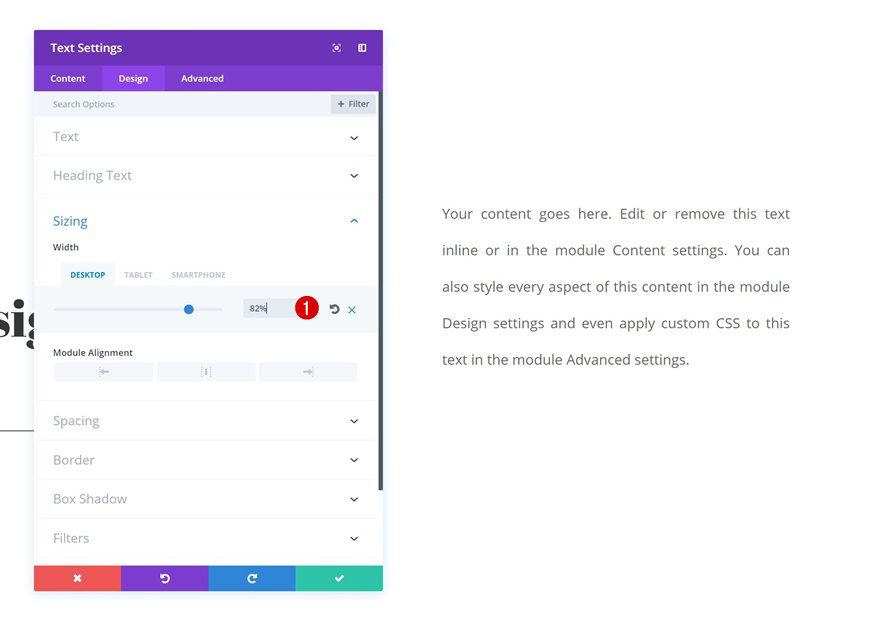
Sizing
Make the Sizing settings match different screen sizes as well:
- Width: 82% (Desktop), 100% (Tablet & Phone)
Spacing
And lastly, add some top and bottom margin.
- Top Margin: 100px
- Bottom Margin: 100px
Adding the Border Shapes
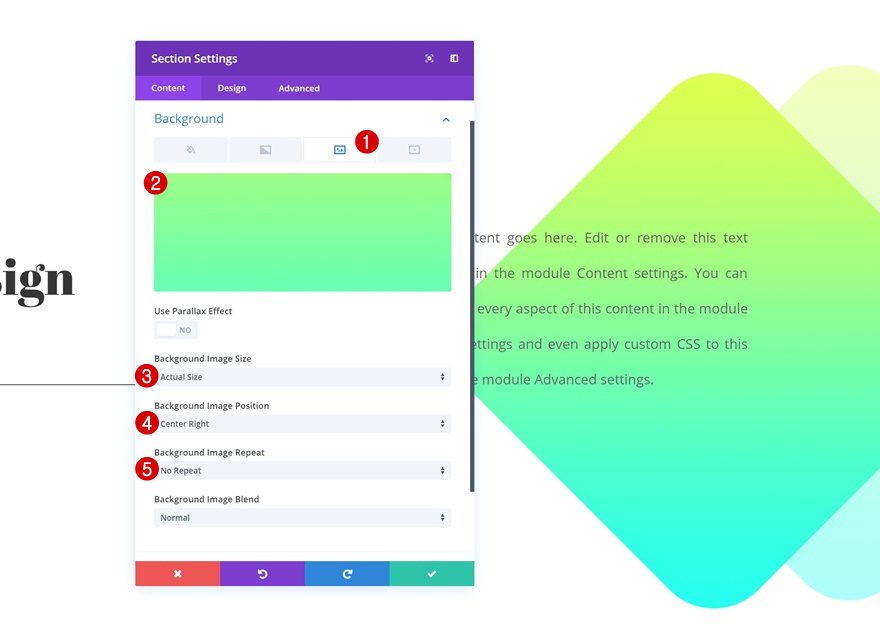
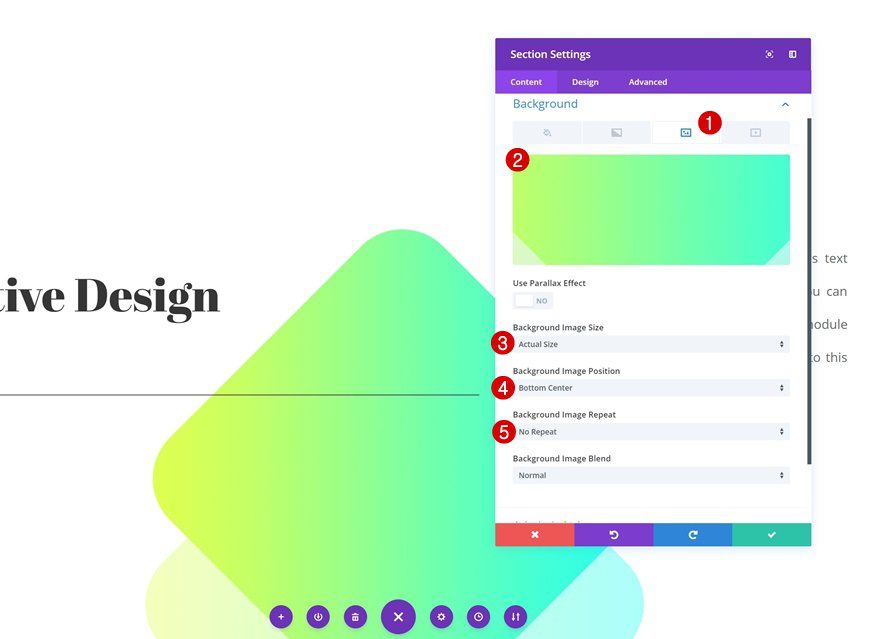
Left Border Background Settings
Now that we’ve completed the overall design, we can start adding the border images! We’ll start off with the left border side. Find your border image of choice in the ‘Left Border’ folder and upload it as the section background image. Then, apply the following background image settings:
- Background Image Size: Actual Size
- Background Image Position: Center Left
- Background Image Repeat: No Repeat
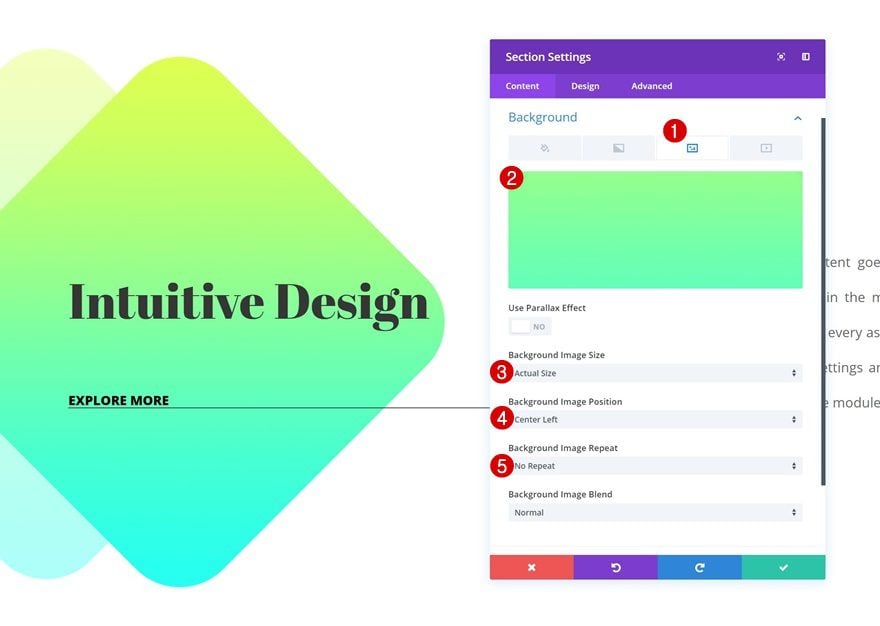
Right Border Background Settings
Or, you can find your border image of choice in the ‘Right Border’ folder and add it as the section background using the following settings:
- Background Image Size: Actual Size
- Background Image Position: Center Right
- Background Image Repeat: No Repeat
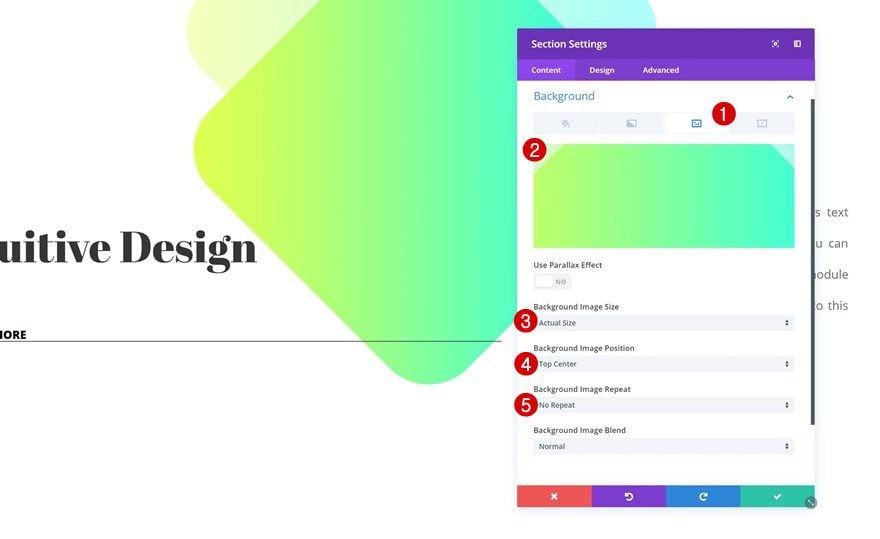
Top Border Background Settings
The same thing goes for the top border image, but instead, use the following background settings:
- Background Image Size: Actual Size
- Background Image Position: Top Center
- Background Image Repeat: No Repeat
Bottom Border Background Settings
Or, last but not least, you can find the bottom border images in the ‘Bottom Border’ folder and combine it with these section background settings:
- Background Image Size: Actual Size
- Background Image Position: Bottom Center
- Background Image Repeat: No Repeat
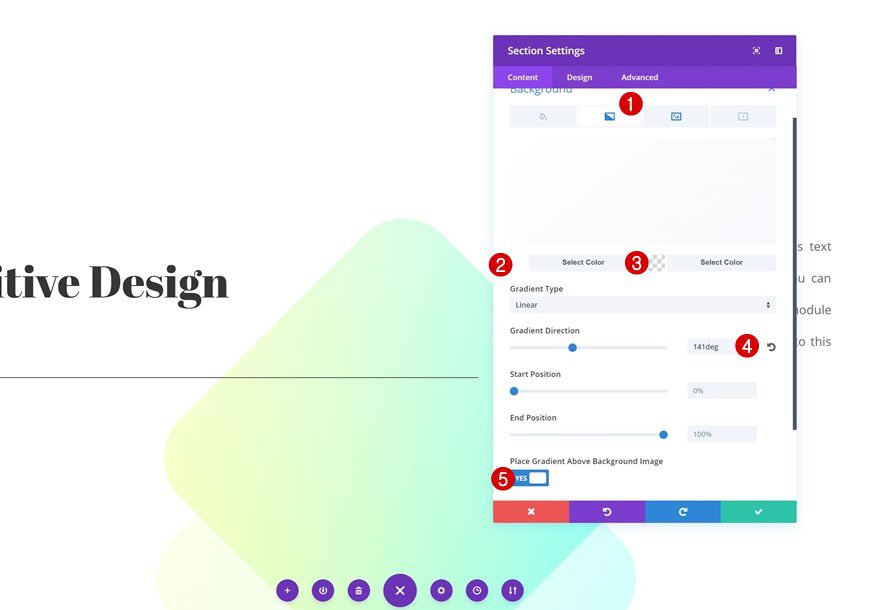
Blend Colors Using Semitransparent Overlay
For each one of the included border shapes, you can decide to add a color overlay as well. This overlay helps you make the border images look more subtle. To add an overlay, go to your section settings and add a gradient background on top of the border background image.
- Color 1: #ffffff
- Color 2: rgba(255,255,255,0.36)
- Gradient Direction: 141deg
- Place Gradient Above Background Image: Yes
Preview
Now that we’ve gone through all the steps, let’s take a final look at some potential designs you can achieve using these free border images.
Final Thoughts
In this post, we’ve shared 5 different border images which you can download for free. You can use these border images for any website you’re working on without any restrictions. We encourage you to try all of them out and create stunning designs. If you have any questions or suggestions, make sure you leave a comment in the comment section below!


SORRY, I AM A NEWBIE. WHAT DO YOU MEAN WITH “CTA” ? We’re using this Text Module as a button so make sure you add a link to the CTA.
CTA = Call to Action
Really beautiful Donjete, thank you for making them available to download and thank you for the tutorial too. Very helpful. 🙂
Thank you, Liz. Happy you like them!! 🙂
Nice tutorial! Implemented this technique in my website. Keep up the good work!
Thanks, Louie! Nice to hear you’ve made use of the tutorial already! 🙂
I see downloads is back, nice.
We’ll keep them coming!
As a member where do I get the images? Or do create them?
Oops. I was wrong, you only need to subscribe to the newsletter
If you have a Divi membership (of any kind) just submitting your email will trigger the download
You can download them in this post, there’s a download section where you have to enter your email address and once you do, a download button will appear. Enjoy! 🙂
Ok i was trying to avoid getting more emails as I am already subscribed. I will just unsubscribe after.
If you are already subscribed, you won’t get extra emails
thanks!
Thank you so much for providing the tutorial and the images. That’s very helpful.
You’re welcome! Glad you like them 🙂
thanks for providing such a important information and border images for divi. 🙂
You’re welcome!! 🙂