")
Contact forms are an essential part of any website — whether you want to capture more leads, keep track of inquiries, build your email marketing list, or simply be able to communicate on-demand with your users. Divi’s contact form module makes it easy to communicate with and gather important data from your website’s visitors.
Let’s explore what fields are available in Divi’s contact form module and when to use them. We’ll be using the contact form from the Wedding Photographer Layout Pack available with your Elegant Themes subscription.
Divi’s Contact Form Module Options
Divi’s robust contact form module consists of the following fields: input, email, textarea, checkboxes, radio buttons, and the select dropdown field. These fields can be used in a number of ways to build your business. Before we address each field and its uses, let’s go over how to select the type of field you want to use in the contact form module.
- The first step is to give your field a field ID. This helps you understand which field corresponds with the information filled out in the form.
- Give your field a title.
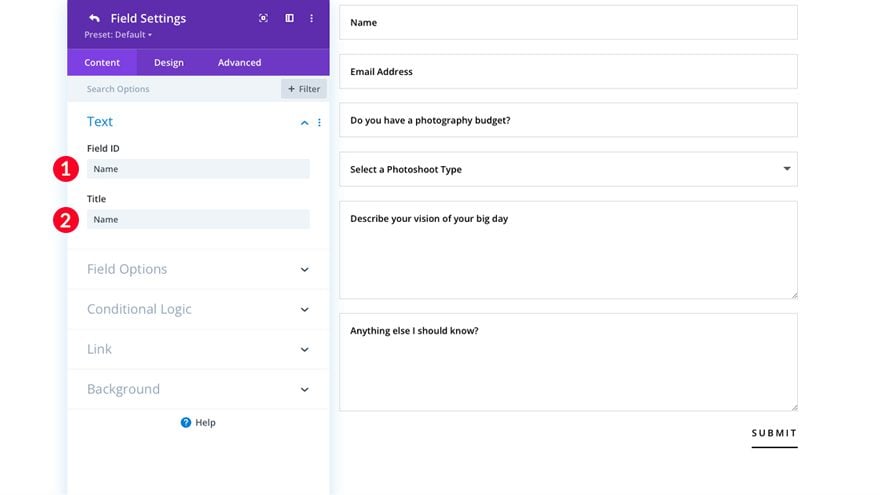
- Choose the field to be displayed. Your choices are input, email, textarea, checkboxes, radio buttons, or select dropdown.

Next, let’s go over each field option in the Divi contact form module. Lately, we’ll discuss how each can be configured to suit your specific needs.
1. The Input Field
The input field is one of the most powerful fields you can use in your contact form. You can capture just about any type of text information. Acquiring a potential customer’s name, business name, physical address, phone number, or various other informational text are options. The possibilities are endless.
When crafting your contact form, remember to ask for the most relevant information you are trying to gather. In the past, people thought a shorter form was a better form. In recent years, the thought processes behind form creation have changed. We are now living in the “information age,” so people have become more accustomed to filling out longer forms than ever before and are willing to do so.
While keeping in mind what goals you’d like to achieve through your form, It’s important to remember to ask the most important questions relevant to your business. The user’s name or business name should be at the top of the list of questions to ask. Names and/or business names are crucial information to acquire, especially in the process of following up with your users. Following the name and business name (if applicable), should be other important contact information such as phone numbers and/or addresses. A few examples of the effective use of the input field are as follows:
- First Name, Last Name, or Full Name
- Address
- City
- State
- Zip Code
- Phone Number
- Business Name
- Subject
- Questions with short answers
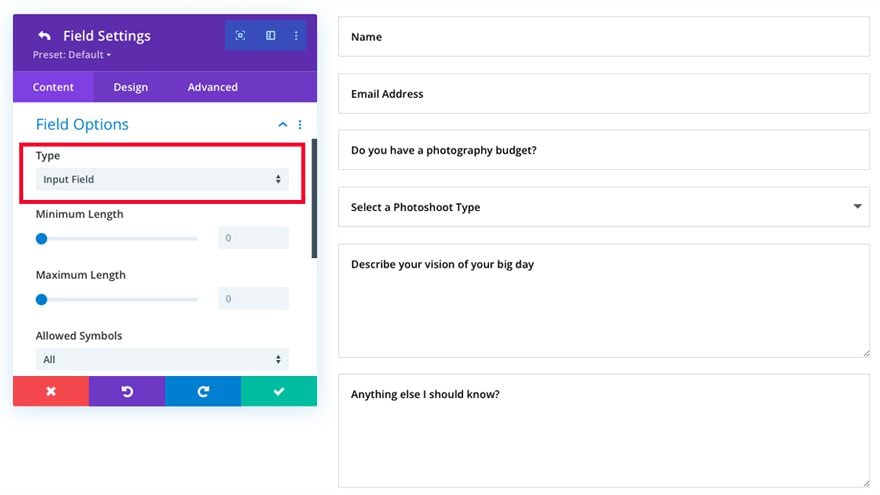
How to Configure the Divi Contact Form Module Input Field
Let’s take a look at how you can modify the input field.
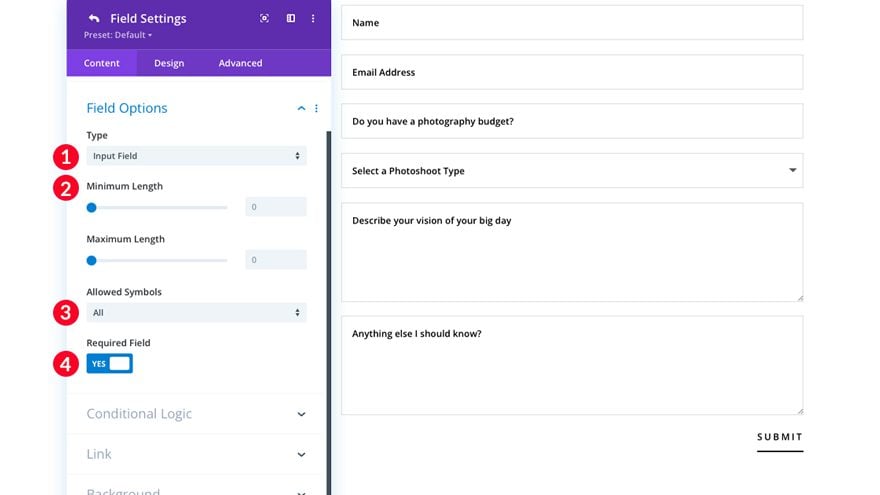
- Select Input as the field type.
- Decide whether to choose a minimum and maximum length of characters to be allowed.
- Next, decide whether to allow all symbols, letters only, numbers only, or alphanumeric characters. For example, if your text input field is being used as a phone number field, assign this option to “Numbers only.” This will disallow any letters from being entered as a phone number, cutting down on user errors.
- Designate whether this field is optional or required.
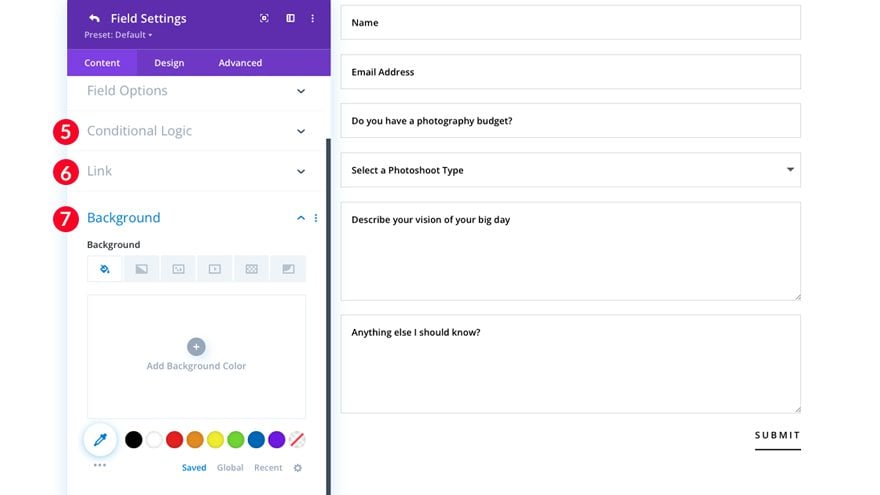
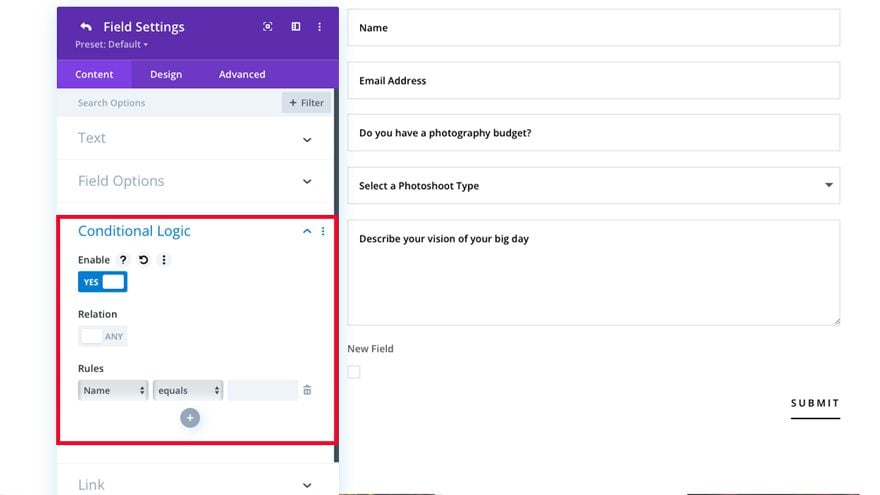
- Enable or disable conditional logic. Conditional logic is useful in a form if you’d like to assign a follow-up question or information to display based on the answer to a certain field. To learn more about conditional logic, read How to Create a Versatile Divi Contact Form with Conditional Logic.
- Choose whether to assign a link to your field.
- Choose whether to assign a background color, gradient, or image to your field.
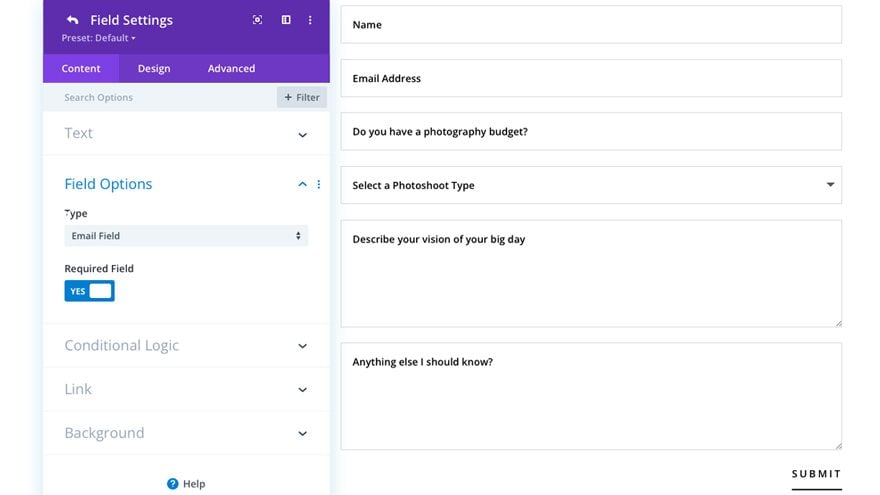
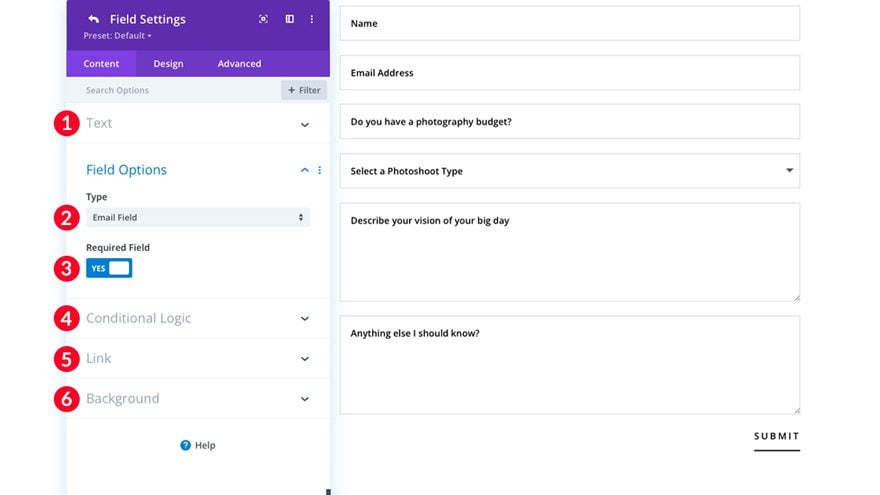
2. The Email Field
In addition to the text field mentioned above, the email field is a crucial piece of information to assist your communication with users. The email field makes it easier to capture leads for your website, add users to a mailing list, and, most importantly, provide an easy way to communicate with your website’s users.
In recent years, everyone agrees that social media has become a valuable tool in business communication, but email is still an extremely relevant and essential tool to grow your business. After all, in order to even have a social media account, one must have an established email address. Keeping that in mind, the email field is critical in successfully communicating with your users. Without the email field enabled on your form, you won’t be able to add that user to a mailing list or reply directly to the form confirmation email received on your website.
Enabling The Email Field
Let’s see how you can enable the email field in Divi’s Contact Form Module.
- Name your field and give it a field ID.
- Select “Email Field” as your field type.
- Choose whether to enable or disable “Required Field”. Note: it is essential to require this as no email information will be captured in your field if your user forgets to fill in their email address.
- Choose whether or not to enable conditional logic.
- If desired, choose a link for your field.
- If desired, choose a background color, gradient, or image for your email field.
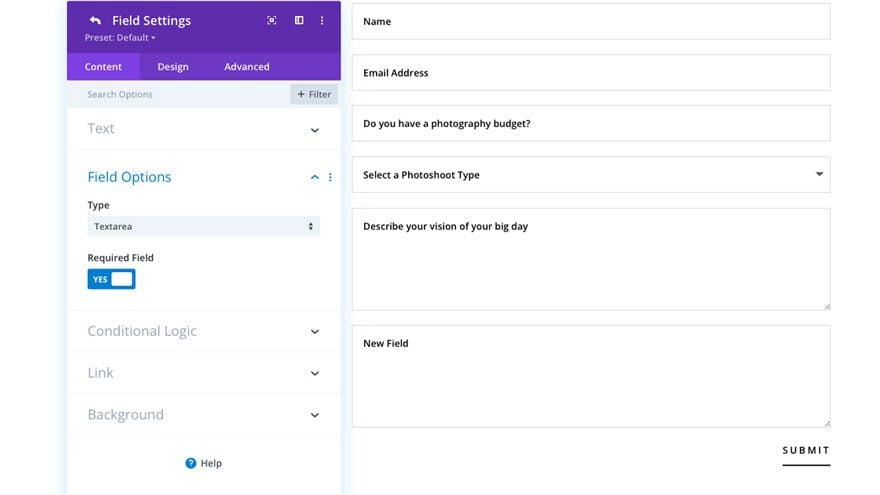
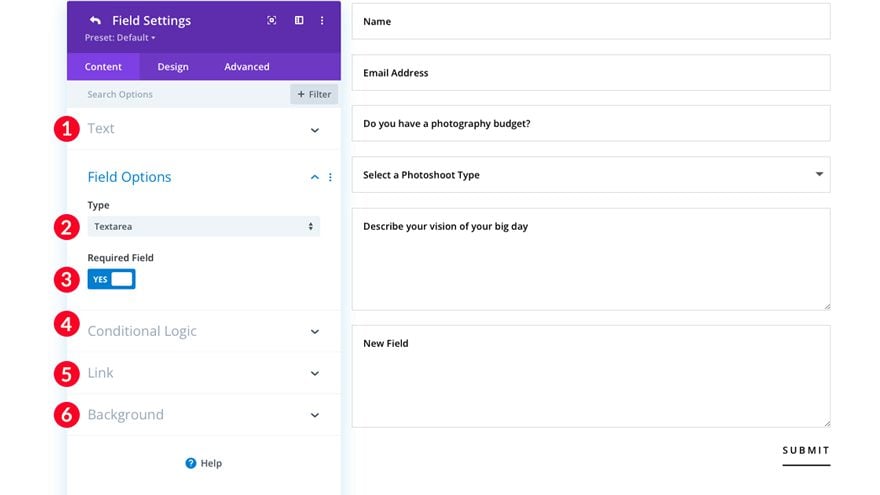
3. The Textarea Field
When creating your form with the Divi contact form module, the textarea field is a great tool to use to gather information from your users – whether it be through asking questions, soliciting input or comments, or accepting larger amounts of relevant information.
An example of this is demonstrated in the Wedding Photographer layout pack. Here, the company asks a few specific questions related to their business. “Do you have a photography budget?”, “Describe your vision of your big day”, and “Anything else I should know?” As in this example, the textarea field is a great way to get to know your users and what services they require from you.
Another example of great use of the textarea field would be utilizing it in an employment application form. You can ask any number of questions with the textarea field such as background information regarding relevant work experience, any personality traits you’d like to be aware of, goals and aspirations of the potential candidate, and much more.
Textarea fields are also useful tools in e-commerce situations. For example, if you have an online shop, you’re probably interested in knowing how your customers feel about their recent purchases. Perhaps you’d like to be able to accept suggestions for future products. With the use of the textarea field, you can easily retrieve that information and use it to your advantage.
Enabling The Text Area Field
Let’s see how you can enable the text area field in Divi’s Contact Form Module.
- Name your field and give it a field ID.
- Select “Textarea” as your field type.
- Choose whether to enable or disable “Required Field.”
- Choose whether or not to enable conditional logic.
- If desired, choose a link for your field.
- If desired, choose a background color, gradient, or image for your email field.
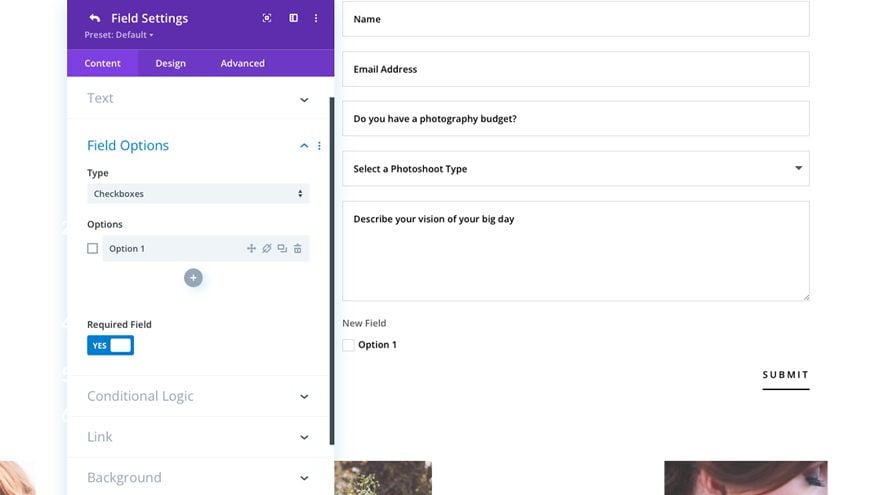
4. The Checkboxes Field
Checkboxes are a great way to showcase options in your form. For example, let’s say you are building a website for your business where you plan to offer several different services to your customers. You can utilize a checkboxes field to ask your customers which of your service offerings they are interested in. Additionally, the checkboxes field is beneficial when you want to ask a follow-up question that will only be displayed when a user selects a specific option in your checkbox field (conditional logic). If you’d like to learn more about conditional logic and how it works, view our post on How to Create a Versatile Divi Contact Form with Conditional Logic.
Checkboxes can be used in forms on your site when you want to gather input from your customers on a specific product or service that you may have in development. You could also use checkboxes in quality assurance survey forms. For example, you could ask your users to let you know how satisfied they are with a product or service that they purchased from you.
Finally, another example of good use of checkboxes in your Divi contact form is to use them to gather information in a questionnaire. Let’s say that you have a website that features recipes. If you want to know more about a person’s likes and dislikes in relation to food, checkboxes would be a great way to ask those questions.
How to Configure the Checkboxes Field
Let’s configure the checkboxes field in Divi’s Contact Form Module.
- In the field options box, choose “checkboxes.”
- Under options, type in your first option. To add more options, click the “+” sign underneath your first option.
- Choose whether or not to have this field be required.
- Add any conditional logic to your field. Click “enable,” then toggle “relation” to assign this checkbox option to a related field. This is useful if you’d like to display a follow-up question or field that is ONLY related to this option in your checkbox field.
- Add a link to your checkbox field (optional).
- Add a background color, gradient, or image to your checkbox field (optional).
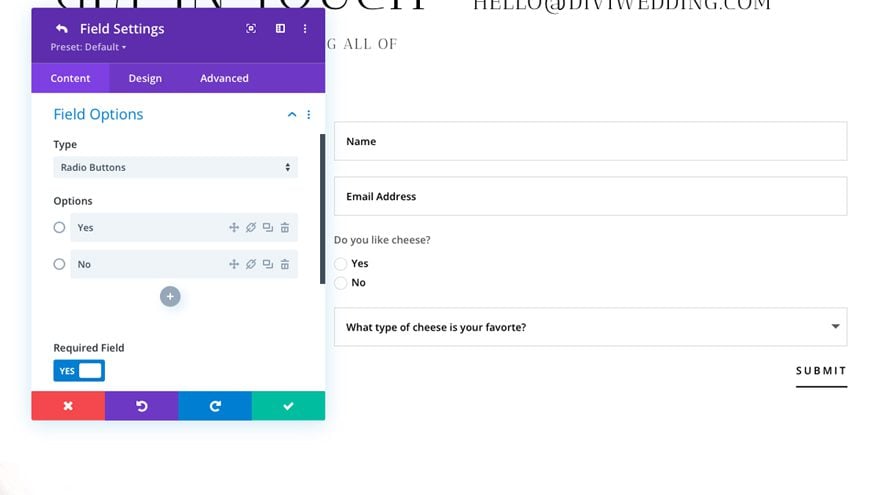
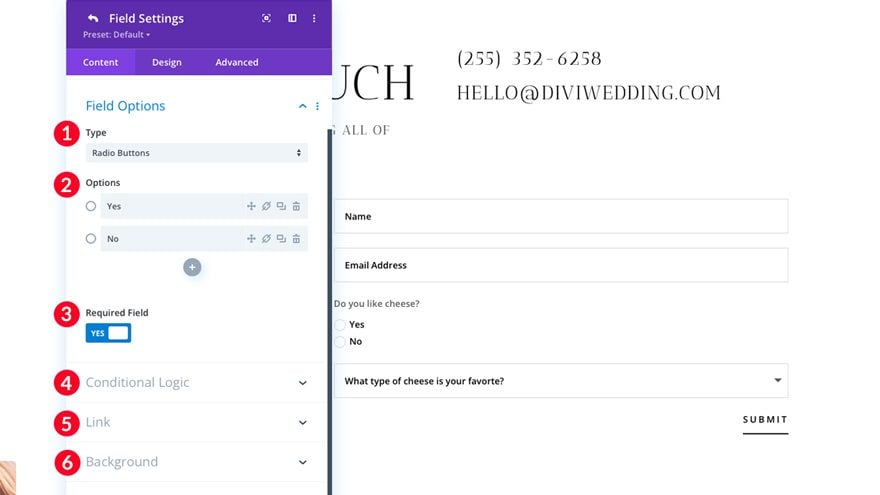
The radio buttons field in the Divi contact form module is most widely used to give users a choice between options in your form. Since only one button can be selected, it’s a great option when asking yes or no questions. For example, you can use radio buttons to ask your user if they like a specific thing. In this example, the question “Do you like cheese” is posed. Your user clicks the yes or no radio button to record their answer.
Radio buttons are quite beneficial in form building because the user is able to view all answers to the question without having to click a dropdown menu. Radio buttons require fewer clicks to complete, making the radio button field an excellent choice for quick and simple form submissions. You should also consider using radio buttons if you want your field’s answers to be emphasized.
Radio options are best used if there are fewer than 5 answers in your field. Using radio buttons for more than five answers should more than likely utilize a select dropdown field, which we will cover in the next section.
Let’s say you have a membership site with three-tier levels and you want your users to easily distinguish between the three. You’d use radio buttons to differentiate between the plans, showing all options to the user so that they can make a decision based on all options available to them at first glance.
Let’s configure the radio button field in Divi’s Contact Form Module.
- Select the Radio Buttons field.
- Under options, add as many radio button field options as desired.
- Choose whether or not to require the field.
- Add any conditional logic to the field.
- Choose an optional link for your field.
- Add a background color, gradient, or background image to your field.
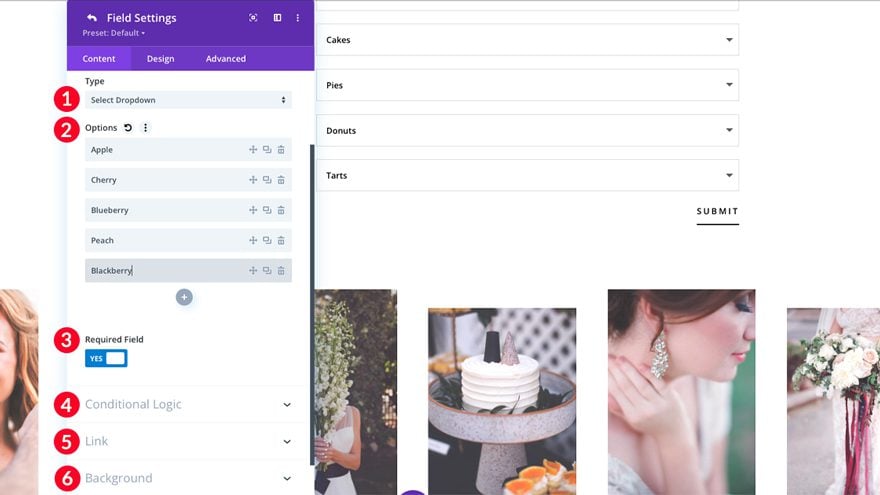
6. The Select Dropdown Field
This brings us to our last field to discuss – the select dropdown field. The select dropdown field is a good option when you have an assortment of options (more than 5) to choose from. For example, if you have an online company that operates in all fifty states, but you want to break down users by state, setting options for all 50 states in an effective way to achieve your desired result.
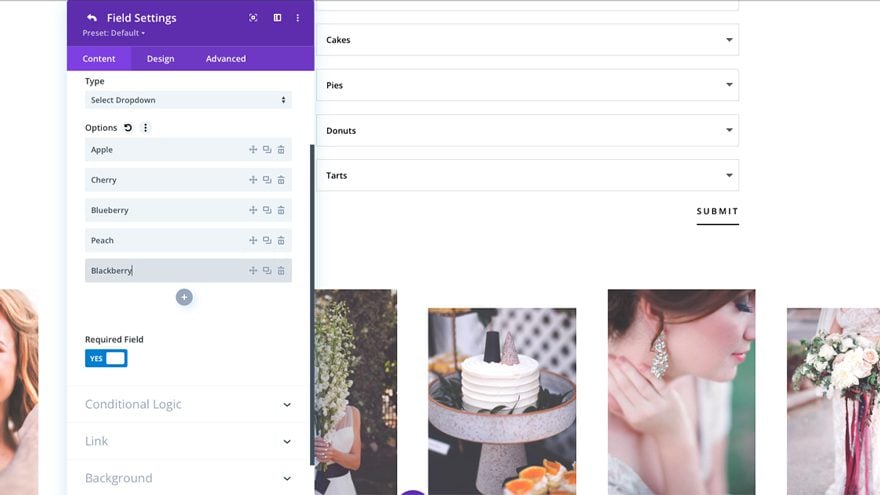
That being said, overuse of dropdown fields can cause validation errors and stress if you give your users TOO many choices. As a rule of thumb, a select dropdown field should be avoided if there are more than 10 options in a dropdown list. For example, if you do business in multiple countries but not ALL of them, a good practice is to only list the countries you do business in.
Another example of when to use a select dropdown field is where multiple fields will be presented. Let’s say you own a bakery distribution company. You have multiple products and options within a category – cakes, pies, donuts, and tarts. You want the user to tell you which of these products they are interested in carrying in their stores. You’d set up a select dropdown field for each category. Next, you’d add options to each field. Radio buttons or checkboxes would be cumbersome and take up a ton of space. Select dropdowns are a much better choice to present that information to the user in an organized way.
How to Configure the Select Dropdown Field
Let’s configure the select dropdown field in Divi’s Contact Form Module.
- Select the Select Dropdown field.
- Under options, add as many dropdown field options as desired.
- Choose whether or not to require the field.
- Add any conditional logic to the field.
- Choose an optional link for your field.
- Add a background color, gradient, or background image to your field.
Wrapping Things Up
Divi’s contact form module is chock full of excellent choices when building a form for your online store, blog, or business. It enables you to choose from many different fields (input, email, textarea, checkboxes, radio buttons, or select dropdown fields) that will help you assess who your customer is, what they want, and how you can help them.
Share your thoughts with us on how you’ve used a contact form on your website by adding your comment below.


Stil nothing related to file uploads – Can you look into this. I am well aware it can be a security issue. But so far not impressed with ninja forms -They opened a can of worms and allowed code to be injected into a large website.
Would be really useful to receive also the page url from which the form was completed, as a parameter.
I want to add more info text above the fields of the Contact Form. I would be grateful if you could write me how to do it.