
WordPress is a highly adaptable Content Management System (CMS). Although it was originally built for blogging, people now use it to create all kinds of websites, including e-commerce stores, portfolios, and more. Depending on your goals, you may find that the default “posts” and “pages” don’t quite fit the type of content your site features. This is why WordPress supports custom post types.
In this article, we’ll introduce you to the concept of custom post types. Then we’ll demonstrate how to create them with a plugin or by manually editing your site’s code.
Let’s jump in!
An Introduction to WordPress Custom Post Types
Post types, in a broad sense, are the various content formats that appear on your website. Out of the box, WordPress includes five:
- Posts. Blog entries meant to be updated regularly. You can use this content type to add articles, news, or announcements.
- Pages. Used for static content that doesn’t change often, including essential information such as your Contact or About pages.
- Attachments. When you upload a media file to your site, its data becomes an Attachment post type with a unique ID, metadata, and more.
- Revisions. Every time you create a new version of a piece of content (for instance, you update your blog post), WordPress saves a revision.
- Navigation menus. WordPress treats items in your navigation menu as a post type. Menu items carry unique metadata, such as where the links lead and where they appear.
Note that the terms “post” and “post type” are not interchangeable. The former is a blog article, whereas the latter is a general content format.
Each post type has its own taxonomies, which are parameters that help you organize content into groups. For instance, you can assign categories and tags to WordPress posts. They also include specific kinds of metadata, such as the publication date and time.
Custom post types, on the other hand, are content formats that are not included in WordPress by default. Like the standard post types, they include their own taxonomies and metadata. The most common example is a WooCommerce product:
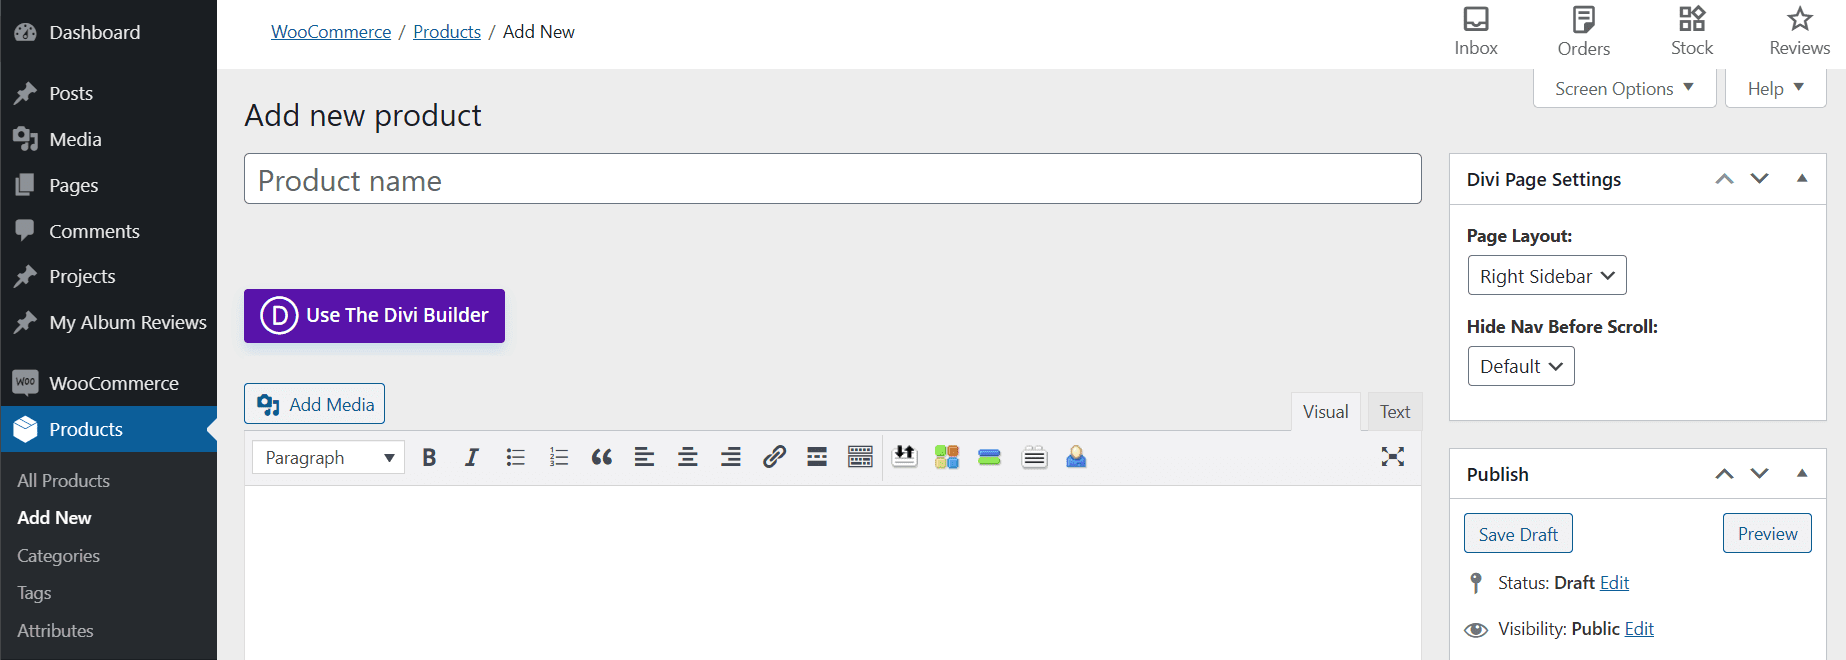
However, you can also add your own custom post types. For example, if your site includes a digital portfolio, you might create a “projects” post type to display your past work. You could use unique taxonomies to categorize your projects and incorporate metadata such as the completion date and client name.
Another example is a “movie review” custom post type. While the content might look similar to a traditional blog post, by creating a new post type you can incorporate metadata such as star rating, director name, and genre.
The Benefits of Using WordPress Custom Post Types
Essentially, custom post types enable you to structure content in ways the default options don’t allow for. While you could work to make posts conform to various formats, creating custom post types for the ones you use regularly will significantly speed up your workflow.
Say you’re running a music blog, and you want to add a separate post type for “album reviews”. This would enable you to create taxonomies to organize your content by artist, genre, and so on. You could even set up metadata fields to fill in album details such as release date, studio name, and more.
If you tried to do the same using the default WordPress posts, you would have to count on remembering to include all that information somewhere in the body text. Even then, it wouldn’t behave like metadata. While you could set up relevant categories and tags, if you also publish other types of articles, your taxonomies will quickly become cluttered.
Custom post types speed up the process of creating and publishing content that must adhere to a specific format. They also help prevent missing data and keep your site organized, especially if you’re running a larger platform.
Custom post types can also be a smart way to increase conversions. Most visitors land on your homepage first. You could create a custom post type and include it in the main navigation menu to draw attention to your latest e-book, testimonials, or other offers you wish to highlight.
How to Create WordPress Custom Post Types (2 Available Methods)
Now that we’ve explained what custom post types are, we’ll show you how to create them in WordPress with or without a plugin. Either method can accomplish your goal, so which option is best just depends on your skills and personal preference.
Method 1: Create Custom Post Types With a Plugin
Using a plugin is the easier way to create custom post types. If you are a complete beginner or you just need a quick solution for your website, you can use tools such as Custom Post Type UI, Pods, or Post Types Order to get the job done without touching a line of code.
In this tutorial, we’re going to use the Custom Post Type UI plugin. After you’ve installed and activated it, head to CPT UI > Add/Edit Post Types:
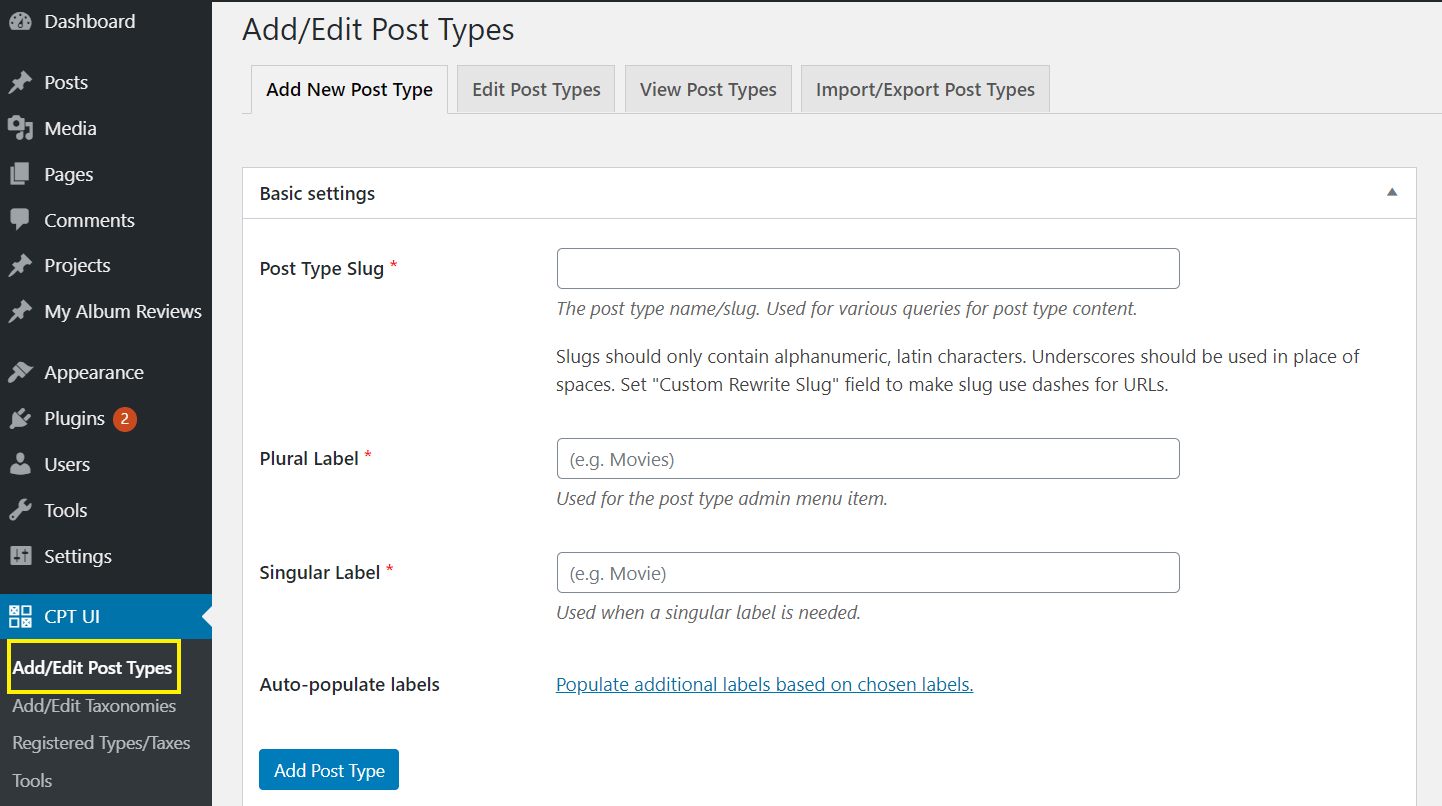
Next, create your custom slug that will appear in the URL – for instance, album-reviews. Then, enter the plural and singular names of your custom post type. In this case, it should be Album Reviews and Album Review, respectively.
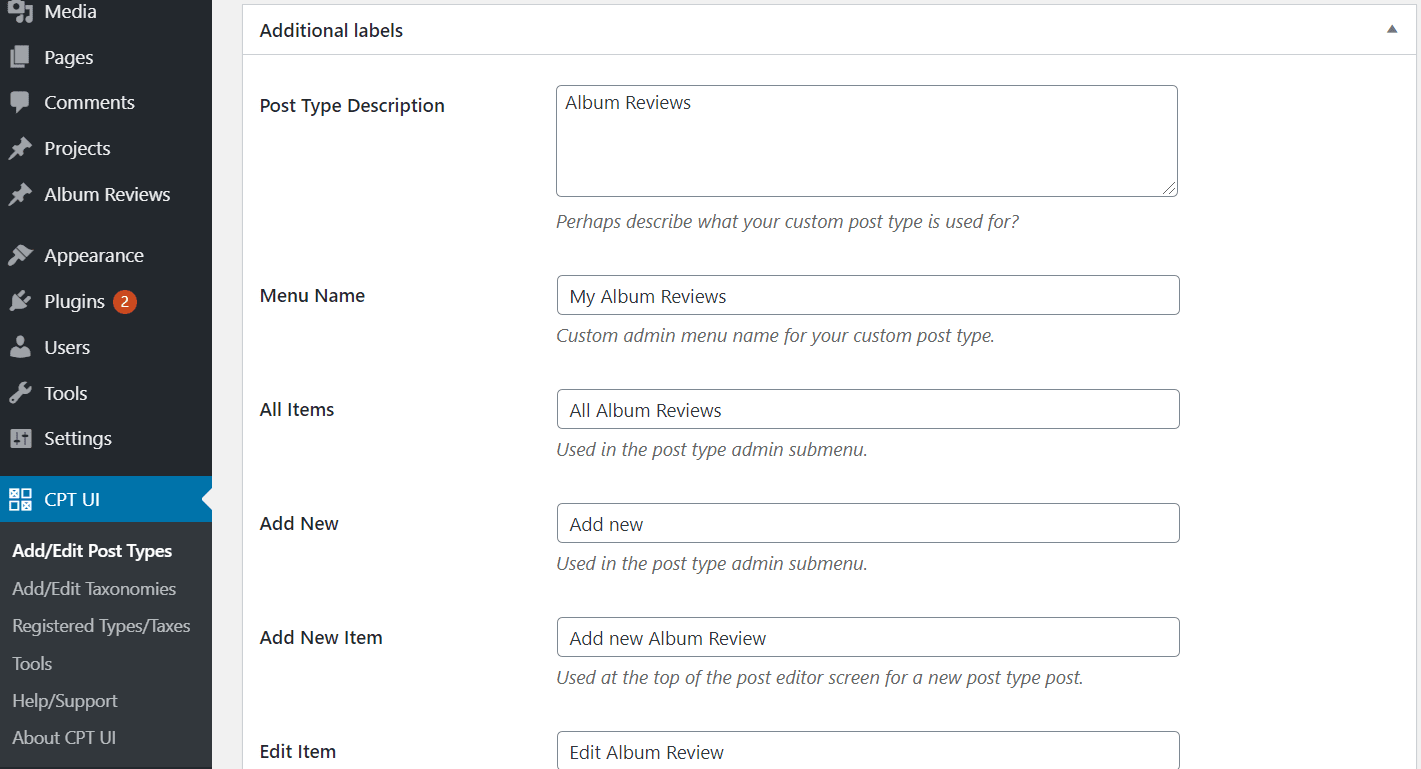
If you want, you can auto-populate the Additional Labels section by clicking Populate missing labels based on chosen labels. These will help you manage your content. You’re free to choose different label names if you prefer:
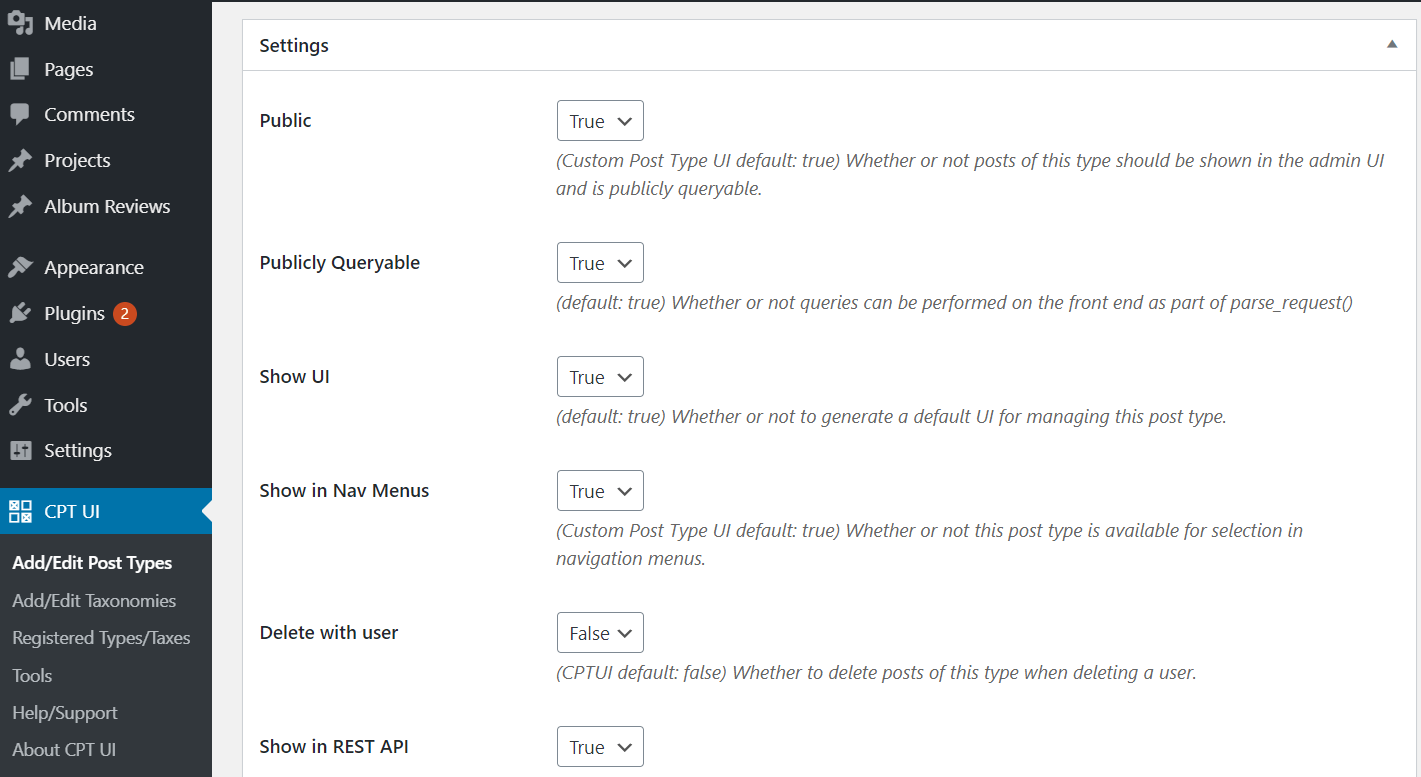
Then, scroll down to Settings, where you can select different attributes for your custom post type. For instance, you can choose whether it should appear in the main navigation menu, or if it should be hierarchical like regular Pages. You can skip this section if you’re happy with the default options:
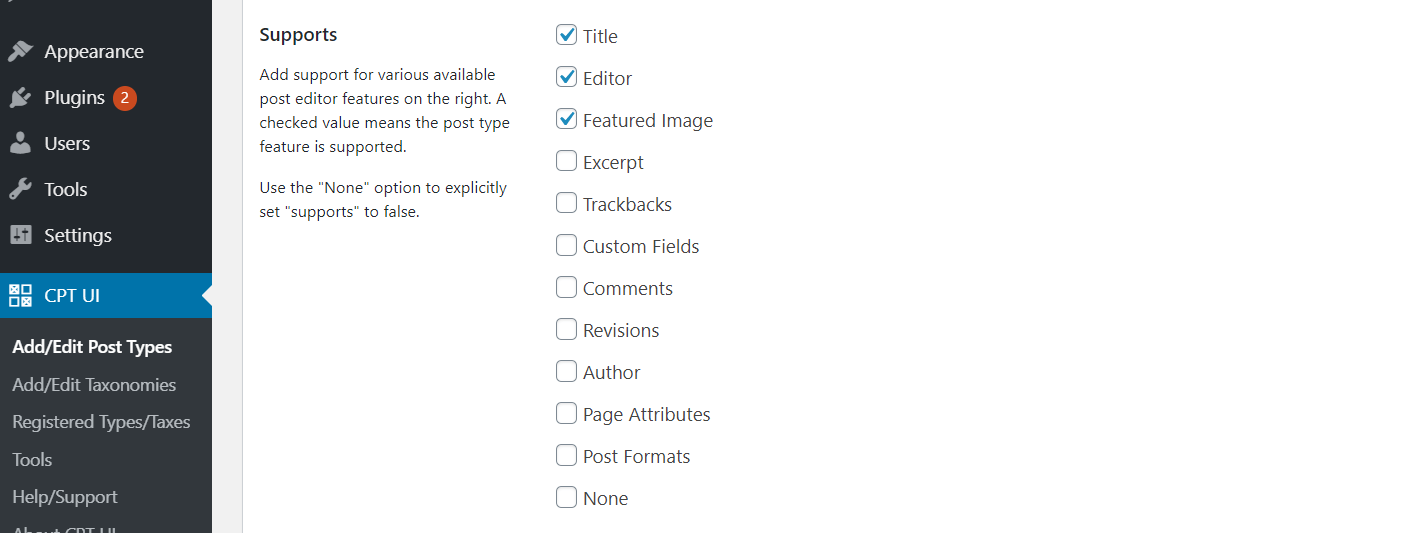
As you scroll down to the Supports section, you can check the functionalities that you want to include in your custom post type. For instance, you can enable comments, display the author, and more:
Finally, check whether you want to use one or all of the default taxonomies. You can also create custom ones in the next step.
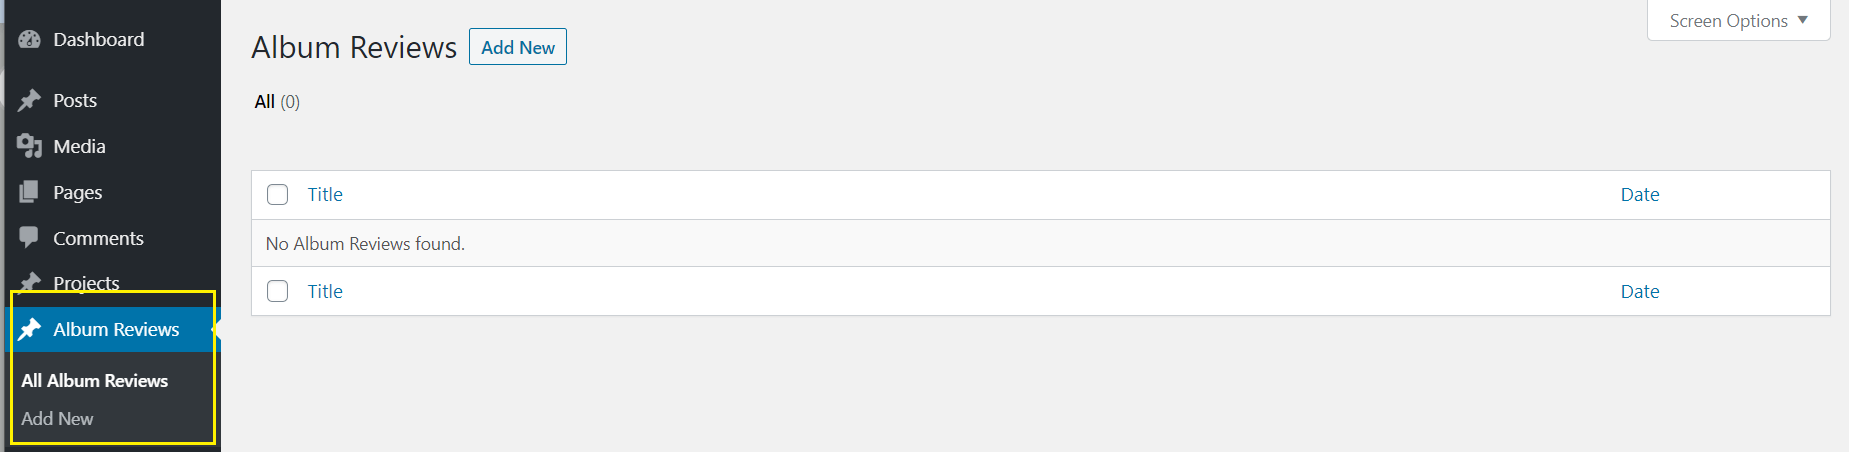
Once you’re happy with your changes, click on Add Post Type. You should now see your newly created custom post type in your dashboard menu:
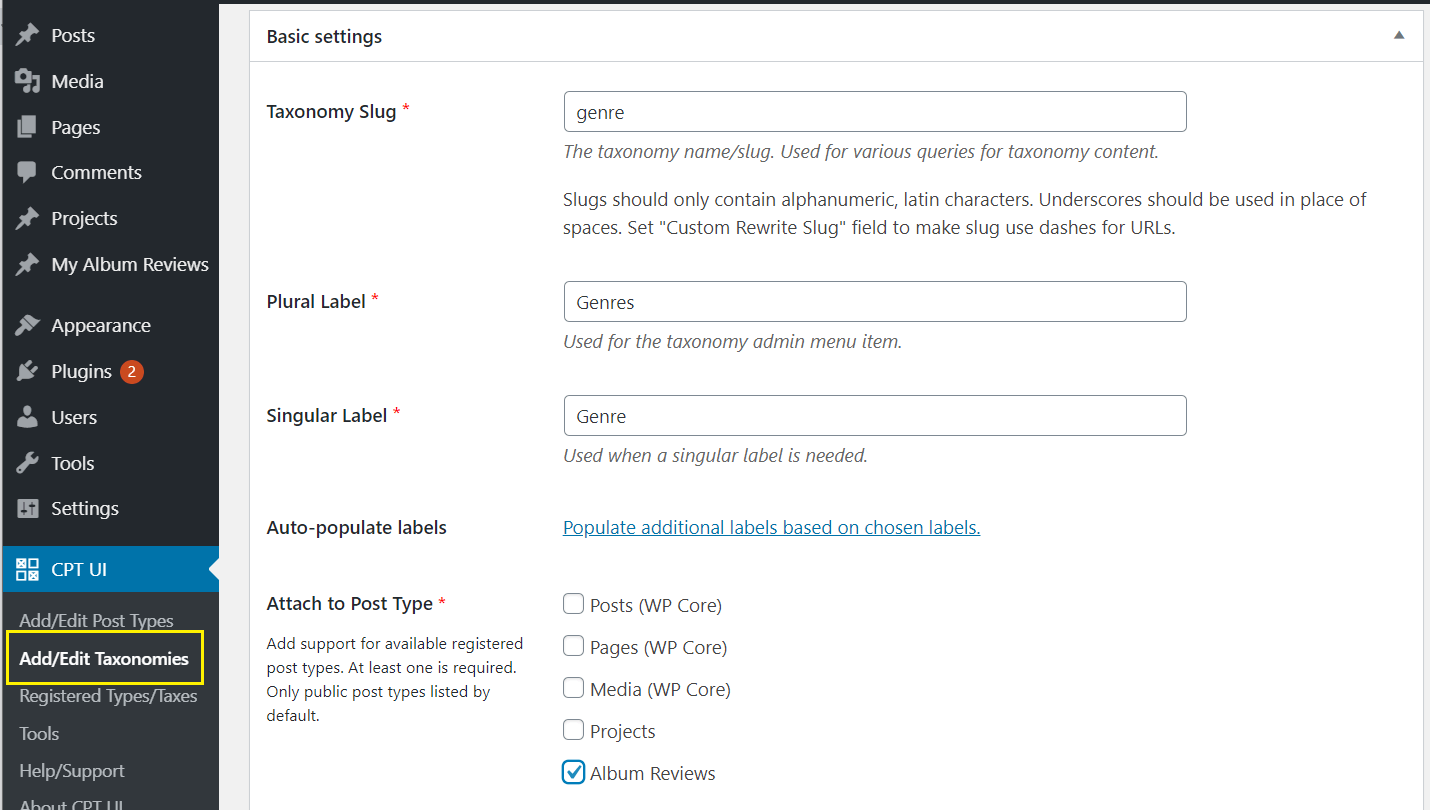
To add a custom taxonomy, navigate to Add/Edit Taxonomies. Populate the fields with your custom URL slug and label names:
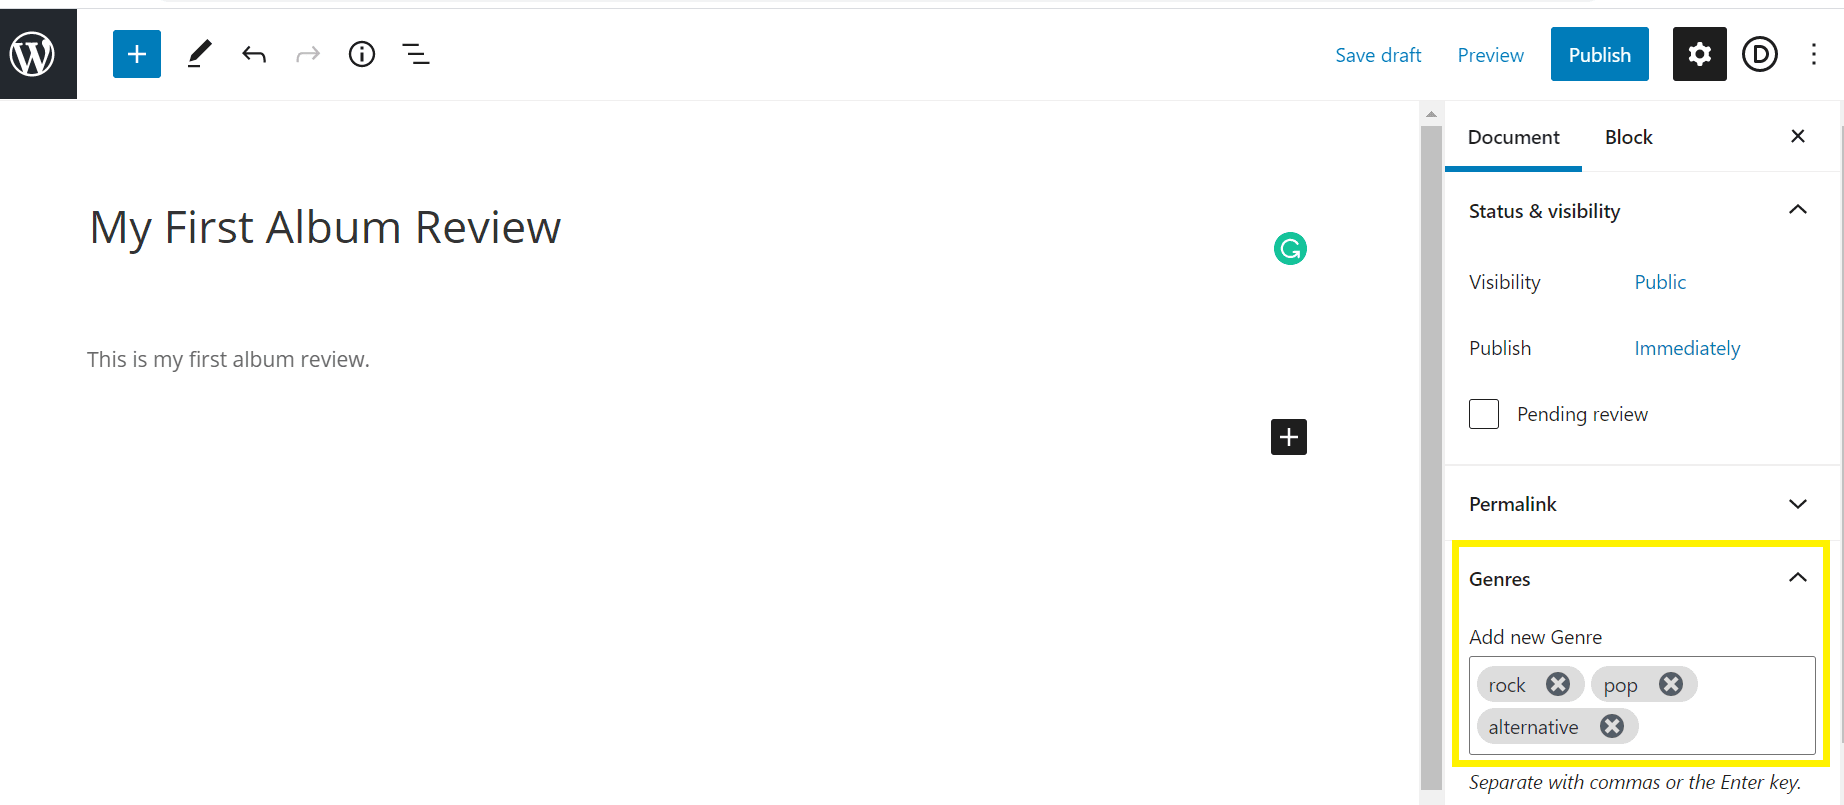
Then, select the post types where your newly created taxonomy should apply, and click on Add Taxonomy. Now, when editing content under your custom post type, you should be able to assign it to your custom taxonomy – in this case, “genre”:
You can repeat this process to add more custom post types if you need to.
Method 2: Add Custom Post Types Manually
While using a plugin is quick and easy, you risk losing your custom post types if you ever need to deactivate it. If you want to be in full control of your content or if you’re already familiar with PHP, then using code and a child theme may be a better solution.
First, open your functions.php file in the WordPress Theme Editor or using File Transfer Protocol (FTP) and an FTP client such as FileZilla. Add the following code and place it inside php tags:
// Creates Album Reviews Custom Post Type
function album_reviews_init() {
$args = array(
'label' => 'Album Reviews',
'public' => true,
'show_ui' => true,
'capability_type' => 'post',
'hierarchical' => false,
'rewrite' => array('slug' => 'album-reviews'),
'query_var' => true,
'menu_icon' => 'dashicons-video-alt',
'supports' => array(
'title',
'editor',
'excerpt',
'trackbacks',
'custom-fields',
'comments',
'revisions',
'thumbnail',
'author',
'page-attributes',)
);
register_post_type( 'album-reviews', $args );
}
add_action( 'init', 'album_reviews_init' );
]
This step will define your custom post type inside your functions.php file. Be sure to substitute “album reviews” with your own label. When you navigate to your WordPress dashboard, you should see a new menu item on the left.
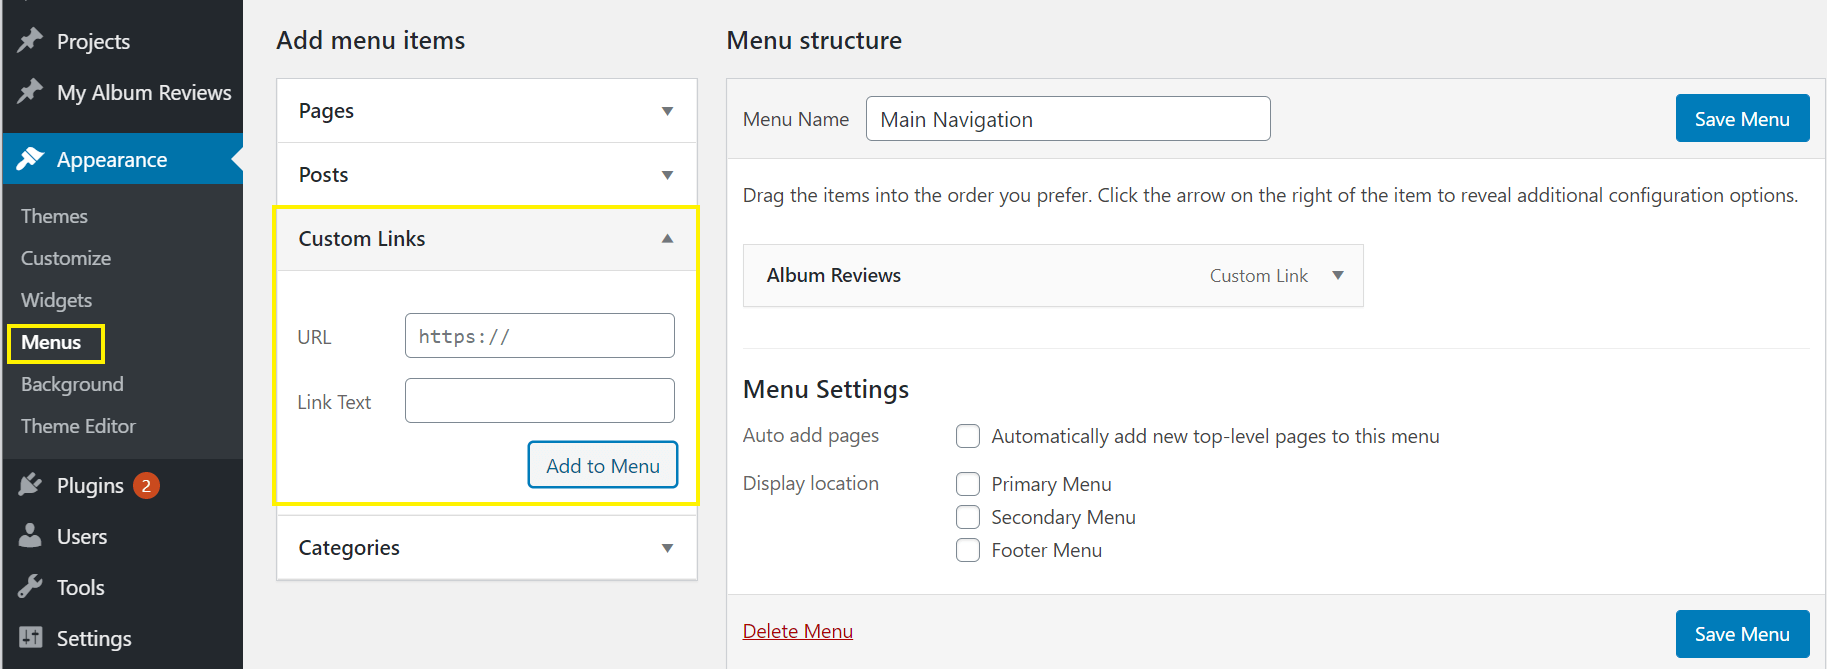
Then, head to Appearance > Menus to add your custom post type link to your navigation menu. Under Custom Links, enter your custom post type’s URL and name:
Next, you’ll need to create a template so that your content can appear on the front end of your site. Using FTP, head to your theme’s folder and create a new file called page-album-reviews.php (replace “album reviews” with your custom post type’s name).
Include the following code so that WordPress recognizes the file as a new template:
/**
* Template Name: Album Reviews
**/
]
For the rest of the file, you can copy the code from page.php to keep the design consistent across your website. Add it to your template, then find the loop inside your page.php code that looks like this:
<?php while ( have_posts() ) : the_post(); ?>
// Your code
<?php endif; ?>
<?php endwhile; ?>
Replace it with the following:
<?php
$query = new WP_Query( array('post_type' => 'album-reviews', 'posts_per_page' => 5 ) );
while ( $query->have_posts() ) : $query->the_post(); ?>
// Your code e.g. "the_content();"
<?php endif; wp_reset_postdata(); ?>
<?php endwhile; ?>
You should now be able to publish content under your custom post type.
Conclusion
Creating custom post types is an excellent way to organize your content and provide a better experience for your visitors. It can also take your blog to a higher level and turn it into a sophisticated publication while simultaneously improving your workflow.
To create your own WordPress custom post types, you can use one of two methods:
- Use a plugin such as Custom Post Type UI.
- Implement custom code to manually add custom post types.
Do you have any questions about creating custom post types in WordPress? Let us know in the comments section below!
Image by vasabii / shutterstock.com


Hi! I am using Extra Theme. How to add in the custom post all the extra features and review tools that I find in articles? Thanks
I would like to build custom layouts (with the divi-builder) for the built-in wordpress attachment page.
I’ve tried to build a CPT with the name ‘attachment’ but that’s not possible (slug already exists).
Do you see a possible solution ?
Thanks.
I was looking for some free Golf Course website layouts and stumbled upon this post here https://www.elegantthemes.com/blog/divi-resources/get-a-free-golf-course-layout-pack-for-divi and I liked this design and through browsing, I found this WordPress custom post types blog. As I have a website in WordPress my 2 issues got resolved. Thanks for sharing this post and also bookmarking this blog for future help.
Happy we could help, Colin!
How would you rate toolset for custom post types?
Hi Alim – I haven’t used Toolset personally, so it’s hard to say. However, based on what I can see, I’d say it would likely be a good solution for custom post types, as long as you were also going to use the plugin for other things. I don’t think I would recommend buying a premium, multipurpose plugin just to use one feature when there are more affordable options that work just as well.
Would be a bit more helpful to see an actual example of a “finished product” custom-post-type example.
Thanks for your input, Thomas! Sorry to hear you found the article a bit lacking.