

The WordPress REST API has been around for a while now, but understanding what it is and why it matters may not be immediately clear to newcomers and non-developers. Even so, this tool is a handy one to know for users of all stripes, as it enables you to utilize the familiar WordPress interface solely as a back end, and develop the front end using other tools and languages.
This post will provide an introduction to what the WordPress REST API is and what it’s capable of. We’ll also share a few steps to help you get started using WordPress as a back end for an app or website.
Let’s get to it!
An Introduction to the WordPress REST API
There are many articles that explain what the WordPress REST API is – we’ve even covered this previously – so we’ll keep this brief to avoid repeating ourselves. Simply put, an Application Programming Interface (API) is what enables connections between various devices, applications, and data.
A helpful analogy is to think of an API as a waiter delivering requests and responses between diners and the kitchen. In this example, you’re the diner, the application or database you’re trying to communicate with is the kitchen, and your ‘meal’ is the data you’re requesting.
Representational State Transfer (REST) is an ‘architectural style’ or type of API. It’s designed to be lightweight and requires minimal bandwidth when used. Using a REST API, you can make four basic types of requests:
- GET: Retrieves data from the device, application, or database you’re communicating with.
- POST: Adds data to the device, application, or database you’re communicating with.
- PUT: Updates already existing data on the device, application, or database you’re communicating with.
- DELETE: Removes data from the device, application, or database you’re communicating with.
The WordPress REST API uses JavaScript Object Notation (JSON) to return data. So, when you put all of this together, you get a lightweight method of communicating GET, POST, PUT, and DELETE requests between WordPress websites and other platforms through the use of JSON.
Understanding What the WordPress REST API Can Do
It may seem like the WordPress REST API isn’t all that useful to you, particularly if you’re not a developer. However, there are many things the API can do that even intermediate WordPress users might want to try, such as:
- Syncing content. You can use the REST API to enable different WordPress sites to communicate with each other. For example, you could test out a website redesign by syncing content between your current site and the redesigned version.
- Syndicating content. On a similar note, you can also combine content from several different websites. Take a business with multiple locations each with their own site – you can syndicate content from all three onto another, comprehensive site.
- Setting up a WordPress data Google Sheet. Using the REST API, you can connect your WordPress site and Google Sheets. This could help you organize your posts in a spreadsheet to stay on top of content updates.
- Creating mobile apps. By connecting your WordPress site to a custom app front end, you can create a mobile app to complement your desktop site. This is handy for situations such as creating an app version of a WooCommerce store.
- Using ‘headless’ WordPress. If the front end display options for WordPress aren’t doing it for you, the REST API enables you to use WordPress for all your content creation and management while serving the content to users on a custom website or web app front end. This is known as ‘headless’ WordPress.
A quick Google search will turn up numerous other ways in which the WordPress REST API is being used. However, for the rest of this post, we’ll focus on using WordPress as a back end for an app or website.
How to Use WordPress as a Back End (In 3 Steps)
There are many ways to use WordPress as a back end. As such, this post is more of a general introduction to doing so using the WordPress REST API, rather than a complete guide to building an app or decoupled website.
While the steps below are simplified to help get you started, this means you’ll likely need to research additional guidance specific to your project. However, knowing these basics will help make the process easier.
Step 1: Load Content Into WordPress and Test the REST API
The first step to using WordPress as a back end is remarkably similar to starting a WordPress website. You’ll need a WordPress installation loaded with all the content you want on your website or app. This could be an active installation or a new one you set up for your project.
You’ll also have to work on creating posts and pages, adding media files, and whatever else your project requires content-wise. Basically, you need to get everything you want to have on your site or app into WordPress, since this will be where you manage content.
Once you’ve got everything set up, you’ll likely want to run a test to see how the WordPress REST API works. Fortunately, you can do this right in your browser. Simply type in your domain followed by wp-json/wp/v2/posts:
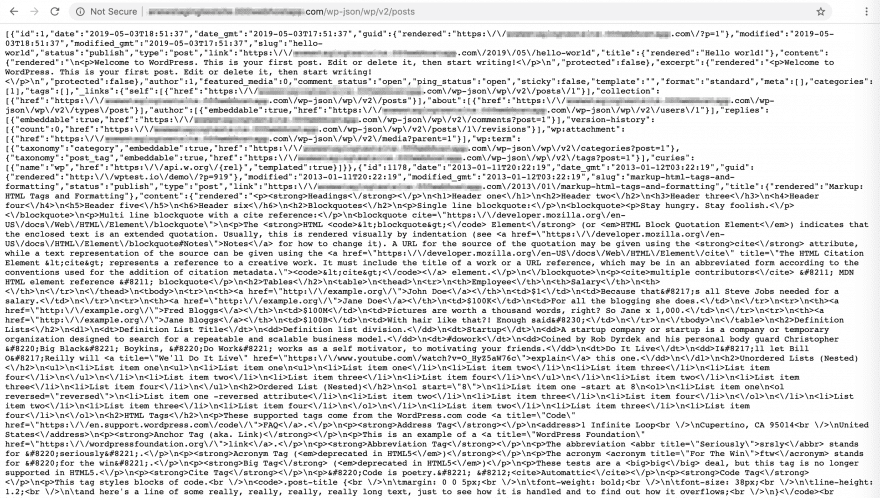
You should see something like the image above, although the amount of JSON that’s displayed will differ depending on how populated the site is. You’ve now successfully used the WordPress REST API to return the data for all your posts. The REST API Handbook contains information on how to do this for other information as well.
To recap this step:
- First, we set up a WordPress installation to serve as the back end for our app/website.
- We created the content we want to display on our project’s frontend within WordPress as posts, pages, etc.
- To see the REST API in action, we returned the JSON for all our posts within the browser.
Once you feel like you have a handle on how all of those pieces are working together, you can move on from the back end of your site to begin work on the front end.
Step 2: Set Up Your App or Website’s Front End Using React
Now you have the ‘behind-the-scenes’ aspects figured out, you’ll need to work on the part of your app or website that users will actually get to see. A popular route for accomplishing this for WordPress users is through React:
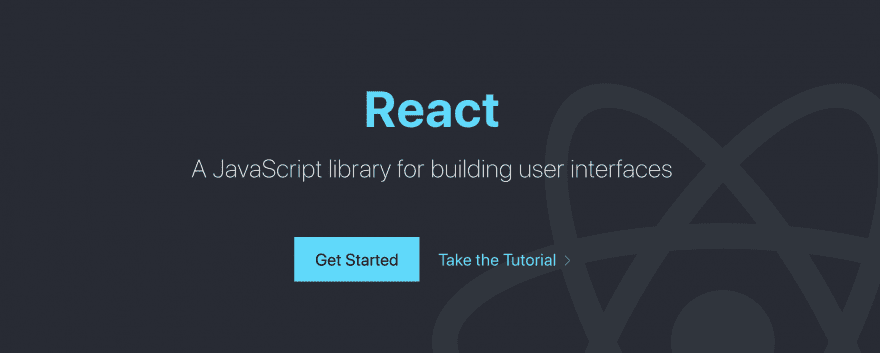
For the uninitated, React is (as the tagline in the image above reads) a JavaScript library for building user interfaces. It enables you to create elements called ‘components’, which become the pieces that make up the front end of your app or website. This might include posts, buttons, images, or any number of other features and functions.
There are also many other platforms you might want to consider for building your project, so shop around before you commit. The complete ins and outs of using React (or similar) are beyond the scope of this article. However, once you’ve settled on a method for creating your front end, take care of any configuration so that you’re ready to start building components.
Step 3: Connect Your WordPress Back End to Your Front End
By now, you should have your WordPress back end and your React (or other) front end. Now, you just need to get them to talk to one another so that the data from WordPress renders in your app or website. This is where the WordPress REST API comes in.
Since you’ve already tested the API out, and have seen that it can return data for your posts and other content, you know it’s working and ready to go. Next you’ll need to create components that use the REST API to retrieve posts from WordPress and display them on your front end.
If you have minimal coding experience, this is where things will get pretty tricky. If you’re hoping to launch your app or website quickly, you’re probably better off hiring a developer to set it up for you. However, if you’re willing to put in some time, you can start slowly working on components and learning as you go.
We’ve written about how to create a React component to retrieve all your WordPress posts and display them in an app in the past. You could use this post as an exercise to get started, or check out some online training courses.
Once you’ve used the WordPress REST API to get all of your content onto your front end, you can begin to create more (and increasingly complex) components, then work on customizing the front end of your site further – all while using WordPress to continue creating and managing content.
Conclusion
There’s definitely a learning curve when it comes to the WordPress REST API, especially if you have minimal coding knowledge. However, once you get the hang of it, this feature can help you expand on your basic foundation to use WordPress as a back end for your own app or custom website.
This post has provided some basic, simplified steps for using WordPress as a back end. Let’s recap them quickly:
- Load content into WordPress and test the REST API.
- Set up your app or website’s front end using React.
- Connect your WordPress back end to your React front end.
Do you have any questions about the REST API or using WordPress as a back end? Ask them in the comments section below!
Article Thumbnail Image Jesus Sanz / shutterstock.com


Why wp-json is not off by default I don’t understand.
It doesn’t sit well with me that any Tom, Dick or Harry can pull my sites’ users via REST.
(there’s curl and Guzzle too, but at least these pull from the front.)
e.g. try this on your site – it doesn’t expose emails, but still, it’s a form of phishing, and a potential risk.
https://mysitename.com/wp-json/wp/v2/users
There are a few ways to disable/control the rest API:
1. Install a security plugin such as iThemes Security / Wordfence (easy + the added benefit of brute force login protection)
2. Install a plugin such as:
https://wordpress.org/plugins/disable-wp-rest-api/
or, https://wordpress.org/plugins/rest-api-toolbox/
3. or, Modify .htaccess (easy way to barf your site if you don’t know what you’re doing)
4. or, add the following snippet to functions.php so it’s only available to logged in users (easy)
(source: https://stackoverflow.com/questions/41191655/safely-disable-wp-rest-api)
add_filter( ‘rest_authentication_errors’, function( $result ) {
if ( ! empty( $result ) ) {
return $result;
}
if ( ! is_user_logged_in() ) {
return new WP_Error( ‘rest_not_logged_in’, ‘You are not currently logged in.’, array( ‘status’ => 401 ) );
}
return $result;
});
Does anyone know offhand how using the REST API or admin_ajax compare to each other (lets say, for logging information from the UI to the backend and also for grabbing basic information from backend to show – custom endpoints)?
I had heard that either of these options will run a lot of admin functions (similar to functions ran if we just access wp-admin area of site) but I am looking for a lightweight way to interact and just pull in some basic data that does not need other filters / hooks run on it.
Will the REST API allow a faster stripped down way for me to interact with that data?
Also if accessed from a logged in user on the front end, is there a straightforward way for me to make sure part of that logged in information passes on to the API side? I was thinking REST was stateless which makes me wonder if there is a way for the “logged in user” information to be accessible when the API is accessed from someone logged in.
Thanks!
Hopefully someone more experienced can chip in with an answer here, Phillip. Your specific query here is just a little beyond my reach. 🙂
I am just starting my journey into iOS apps. This comes at a very good time 🙂
Thank you!
You’re welcome Richard, glad it helps 🙂
I really like this post. Can you recommend learning resources that you know will teach it well? I’d like to learn it. Thank you!
We haven’t tried using the REST API but have some time to try it. Using this idea, would we be able to create a private pricing page for a handful of products in WooCommerce? Seems like it would be client-friendly to have a single page at pricing.domain.com, which could edit product pricing rather than having a client jump into WordPress to update pricing.
If it would work, what general steps would be needed?
Thank you for another great post that seemed to come along at just the right time!
Thanks for your kind words, Kevin. I don’t see why you couldn’t, but as for your specific situation, I wouldn’t be comfortable recommending one specific approach. I think Google will be your friend on this one!
We were previously syndicating news between sites using RSS and it worked ok but we always struggled with featured images. There were workarounds but the images weren’t there by default. Our workaround required modifying the RSS and that approach would break when the WordPress was updated. Using the REST API allowed us better and cleaner syncing and we were able to get to the featured image with just a slight modification in our functions.php file.
Thanks for offering some insight into your workflow, Ryan. I think other readers will enjoy taking a look. 🙂