
A recent update released for Divi will come in handy when designing all kinds of websites. The new filter options, effects and blend options make using Photoshop while designing your next website almost unnecessary. To help you get started with them, we’re going to show you how you can beautify your images within Divi itself by using the new filter options in particular. These options allow you to see, in real time, how your image works with the rest of your website design. Of course, most of the settings will depend on the picture itself and what matches and what doesn’t, but there are some combinations that’ll help you get started. Let’s take a look.
Quick Tips
Every Image is Different; Treat Them Differently
Each image is a different combination of circumstances. Therefore, you’ll have to modify your filter options to your image. Some images need more editing than others do to look the same way. It’s all about trying out the different options and seeing which work for your images and which don’t.
Balance
The next tip you have to keep in mind while editing your images with Divi’s new filter options is: maintain the balance. If you’re using the brightness filter, for instance, never push it too far. Also, try combining different options with one another. When editing pictures, it’s usually better to have a little bit of everything than too much of one thing.
Don’t Make Your Image Look ‘Too Edited’
Another tip is making sure that your image doesn’t look too edited. Beautifying your images is all about finding the right balance and making it look realistic. Adding too much filter effects to your images could make them look forced and overdone.
Maintain Same Editing Style Throughout Your Entire Website
The last tip worth mentioning is: keep the same editing style throughout your whole website. Most probably, you’re using multiple images on your website. Try to find a general editing style that you can apply to all of the images, which at the same time, fit with your website style as well.
Results
Before we dive into the tutorial, let’s take a quick look at the results we’ll be obtaining. We’re using four different images and one illustration that’ll help you get a grip on these new filter options. In most of the cases, we’re using a combination of different filter settings that’ll help you create the exact result you want.
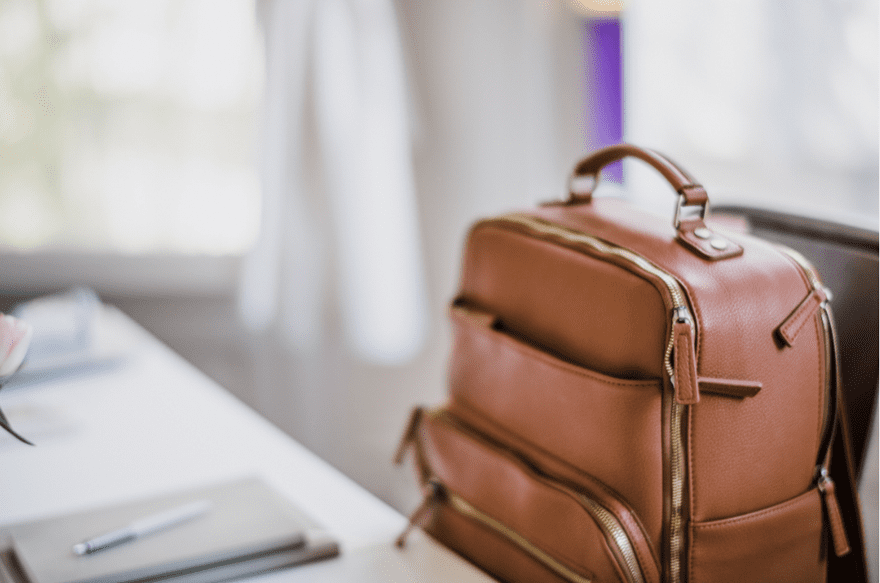
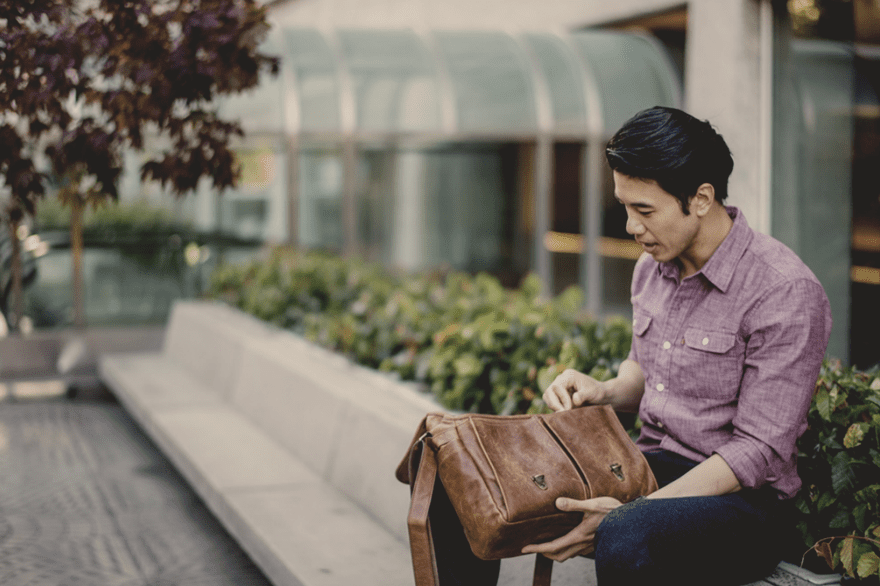
Image #1
Normal
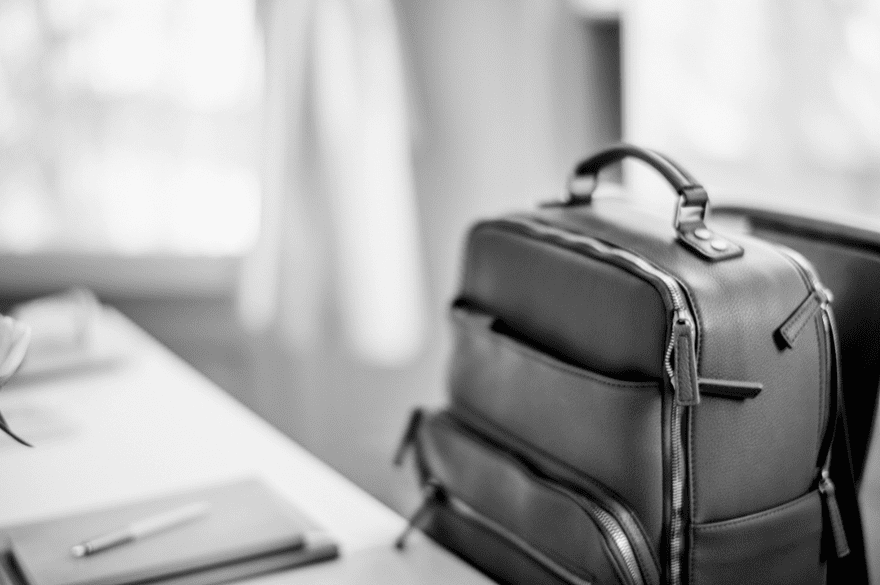
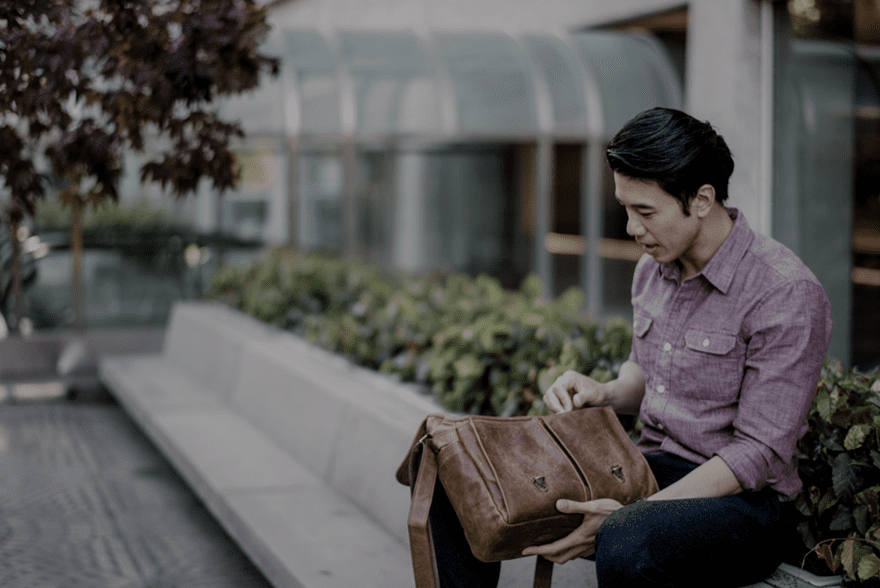
Black & White (Bright)
Black & White (Subtle)

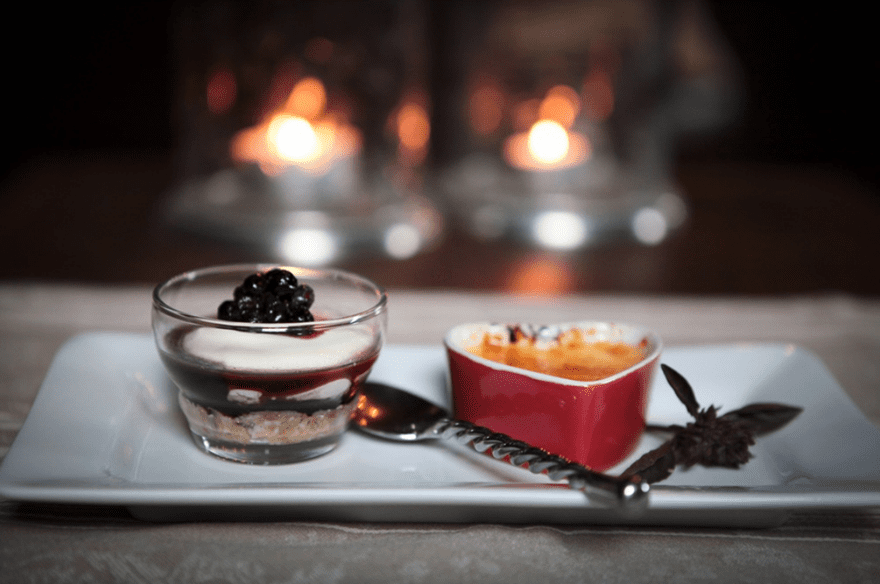
Image #2
Normal
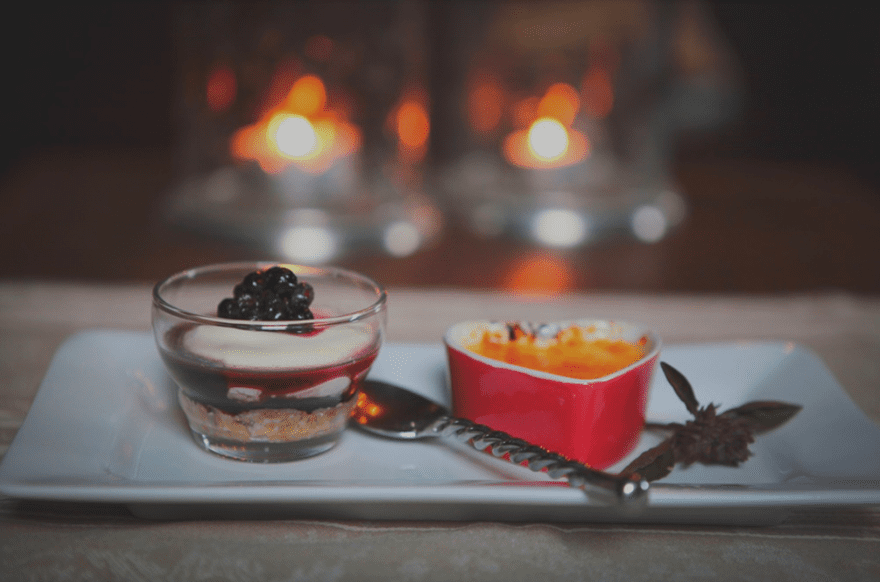
Low Contrast
Color Change
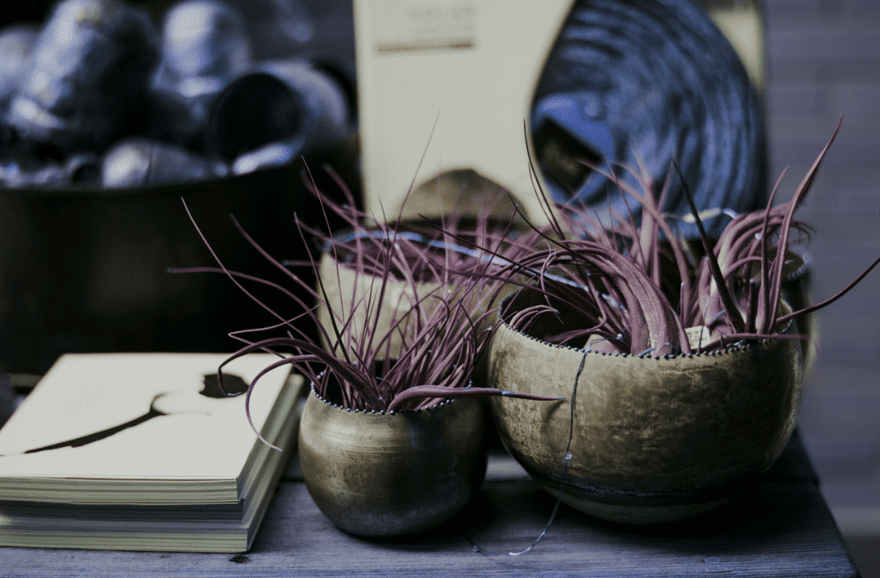
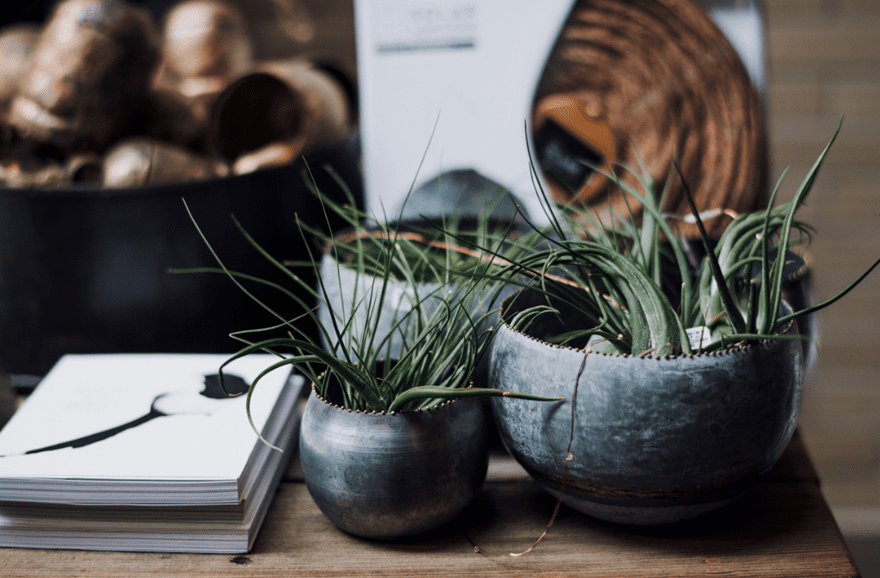
Image #3
Normal
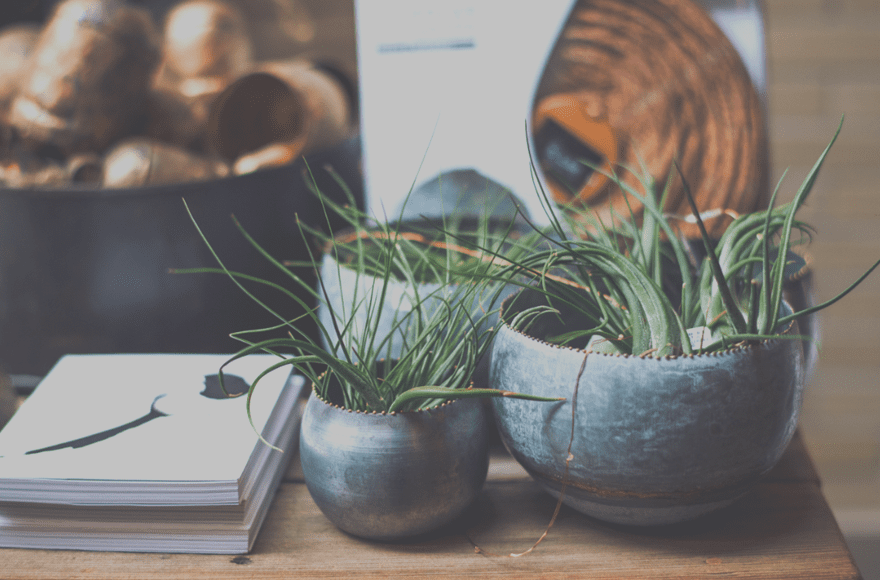
Warmer
Darker
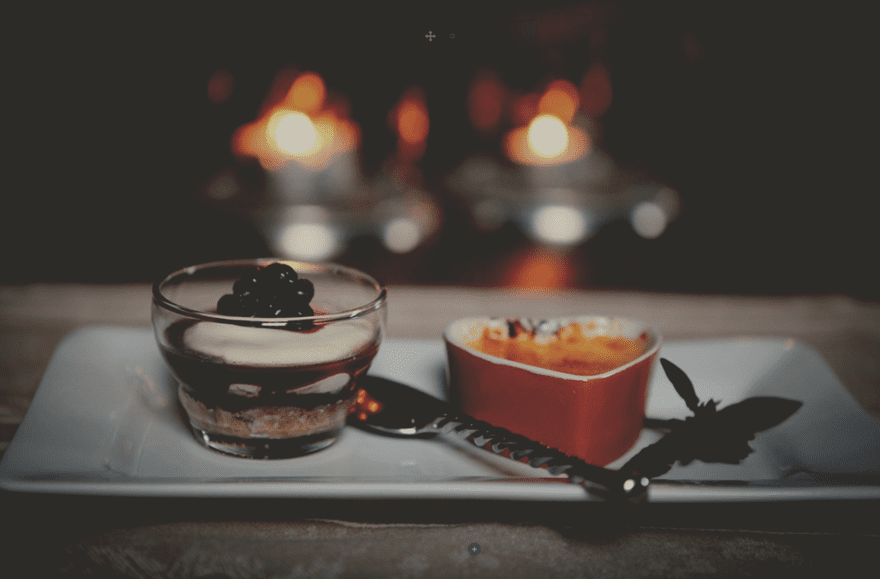
Image #4
Normal

Slightly Sepia
Gray Toned
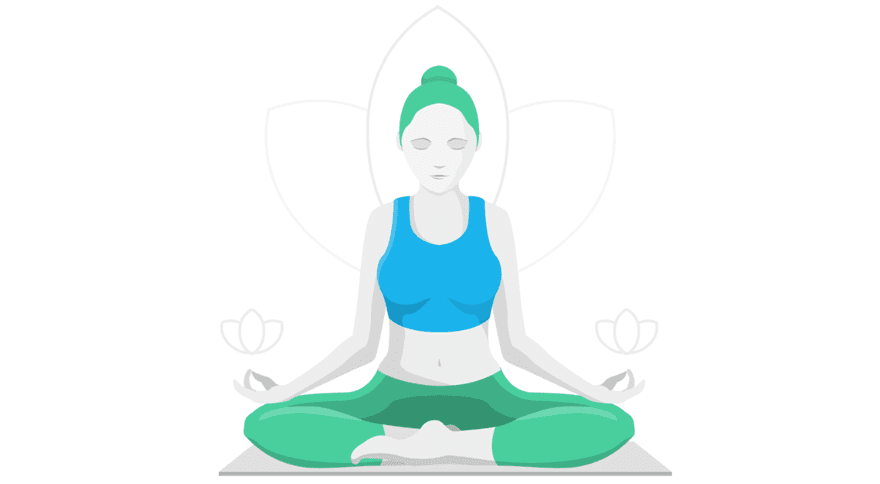
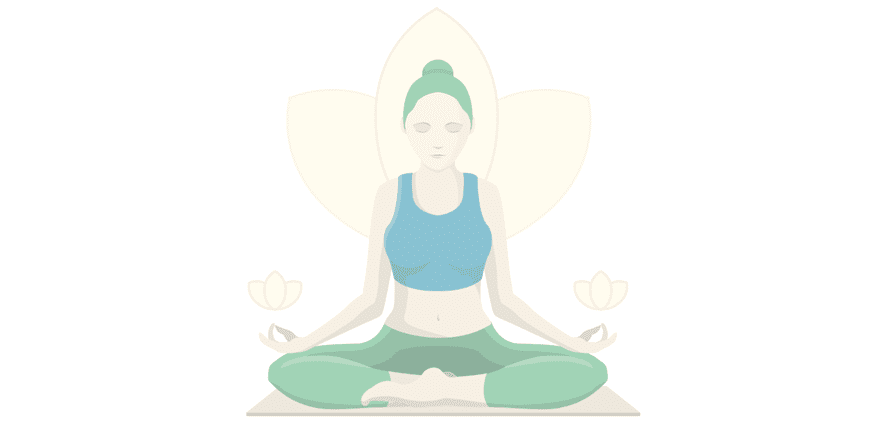
Illustration
Normal
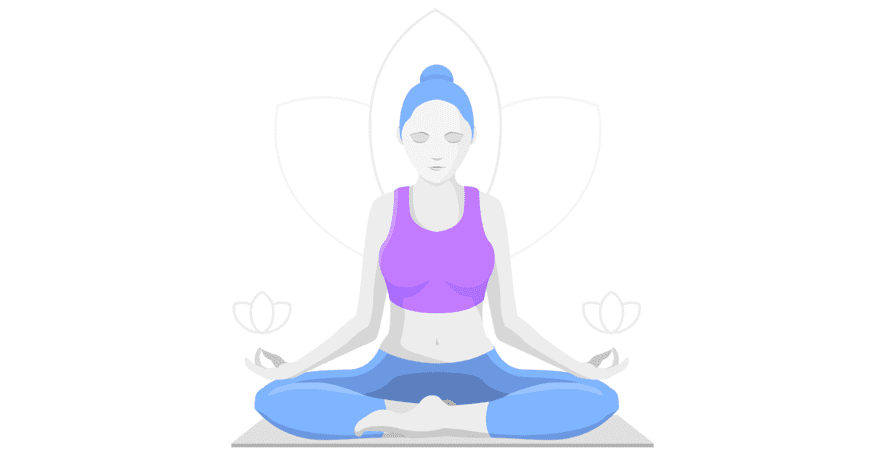
Color Change
Sepia & Semi-Transparent
How to Use Divi’s New Filter Options to Beautify Your Images
Subscribe To Our Youtube Channel
Recreate Image #1 Filter Settings
Normal
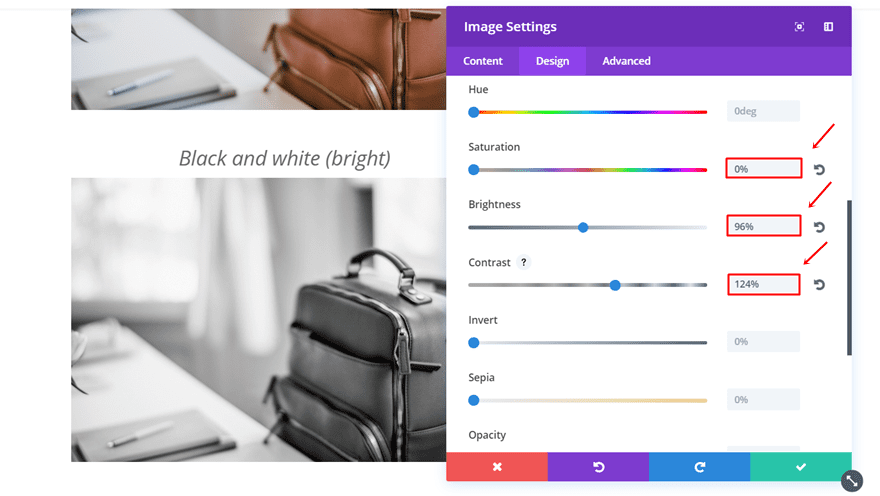
Black & White (Bright)
Filter Options
To obtain a black and white result like the image above has, three things are crucial: saturation, brightness and contrast. The saturation will help you remove all of the colors within your image and leave it black and white. The brightness and contrast, on the other hand, will help you play around with the depth and intensity of your picture. If you’re just removing the saturation, your image will look a bit dull and lose its brightness and contrast. Luckily, you can add these to your image at the same time. To make this work, we’ve used the following settings:
- Saturation: 0%
- Brightness: 96%
- Contrast: 124%
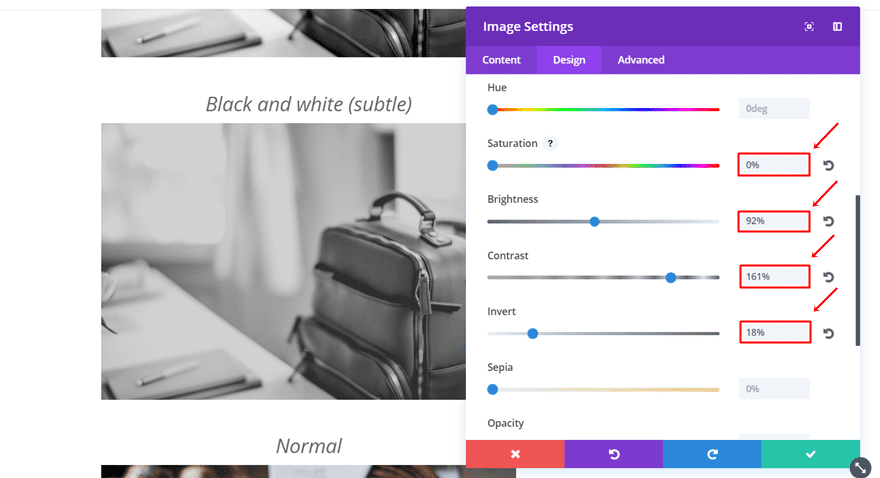
Black & White (Subtle)
Filter Options
The next example we’re going to share with you is also a black and white version. Unlike the previous example, this example has an extra layer of gray within it and gives you the feeling that the image is kind of older. To obtain this result, we’ve used the invert option on top of the saturation, brightness and contrast options:
- Saturation: 0%
- Brightness: 92%
- Contrast: 161%
- Invert: 18%
Recreate Image #2 Filter Settings
Normal
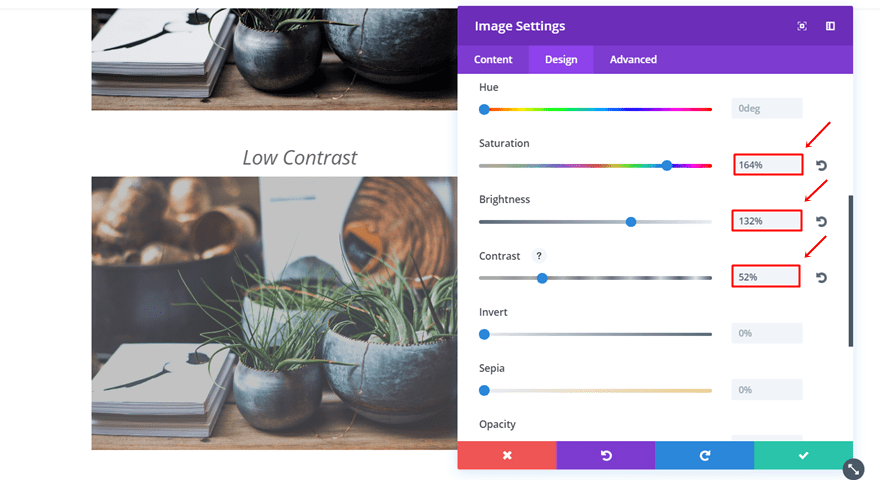
Low Contrast
Filter Options
The result above is a great combination of extra saturation and lower contrast. Along with the higher brightness; the lack of contrast is balanced.
- Saturation: 164%
- Brightness: 132%
- Contrast: 52%
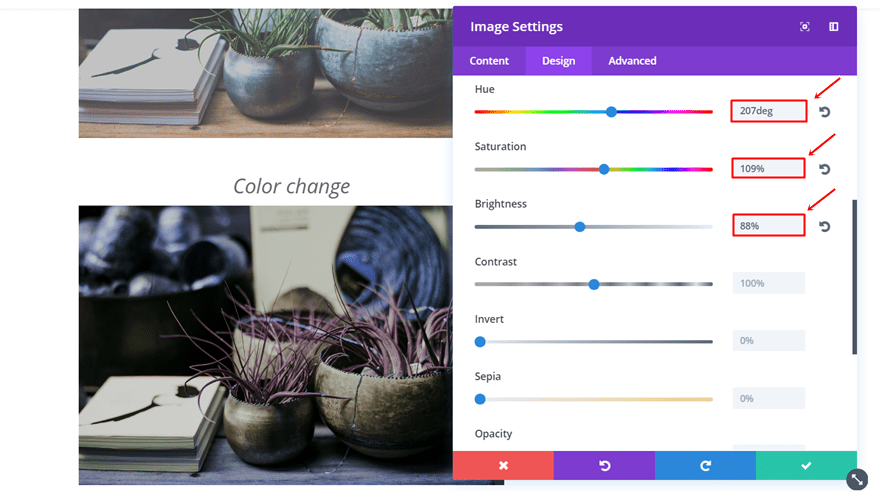
Color Change
Filter Options
The hue option allows you to change the colors of the entire picture to your need. Along with that, we’ve also used some extra saturation to enhance the new colors and decreased the brightness to make the image darker.
- Hue: 207deg
- Saturation: 109%
- Brightness: 88%
Recreate Image #3 Filter Settings
Normal
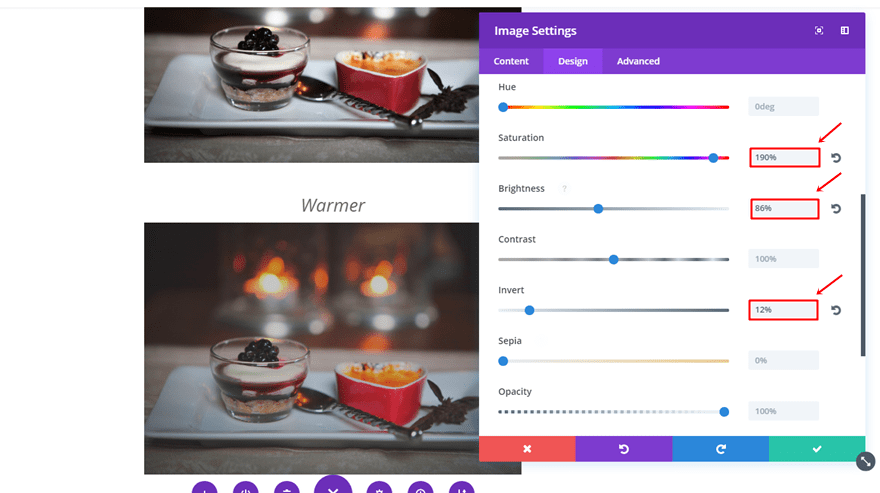
Warmer
Filter Options
The filter effects we’ve applied to the first version of this image has warmer color tones to it, and at the same time, we’ve also added some invert to it that adds a gray layer to our image.
- Saturation: 190%
- Brightness: 86%
- Invert: 12%
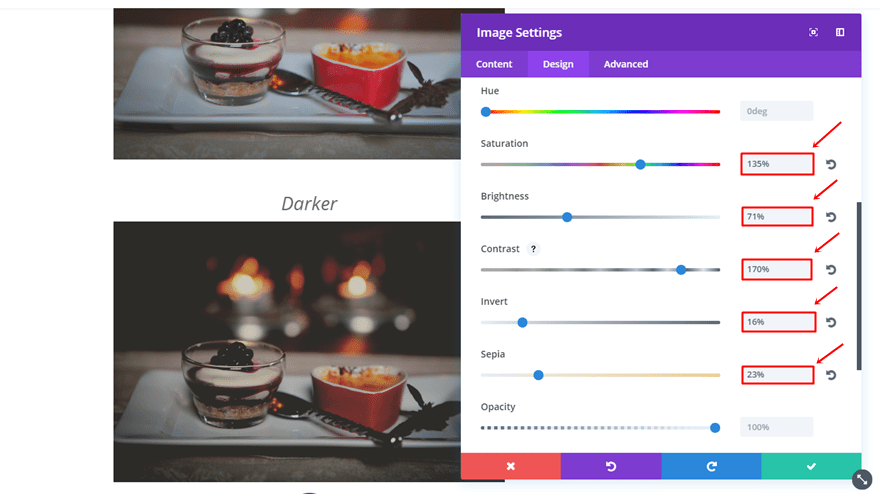
Darker
Filter Options
In contrary to our previous image, we’ve made the following example darker than the original by decreasing the brightness and adding the contrast. We’ve also kept most of the color by increasing the saturation. On top of that, we’ve also added some sepia to change the color tone slightly.
- Saturation: 135%
- Brightness: 71%
- Contrast: 170%
- Invert: 16%
- Sepia: 23%
Recreate Image #4 Filter Settings
Normal
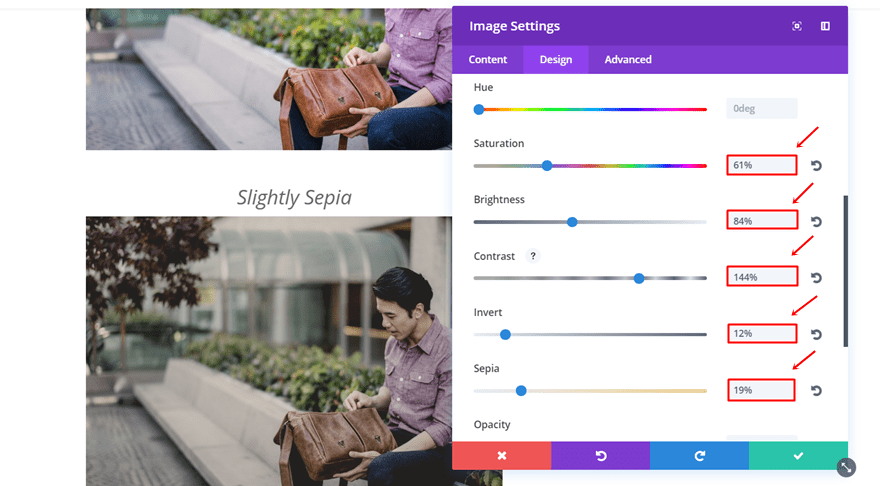
Slightly Sepia
Filter Options
The next image edit takes you back in time, thanks to the sepia filter option. The image also has a reduced saturation and brightness. On top of that, there is some extra contrast present along with a percentage of invert.
- Saturation: 61%
- Brightness: 84%
- Contrast: 144%
- Invert: 12%
- Sepia: 19%
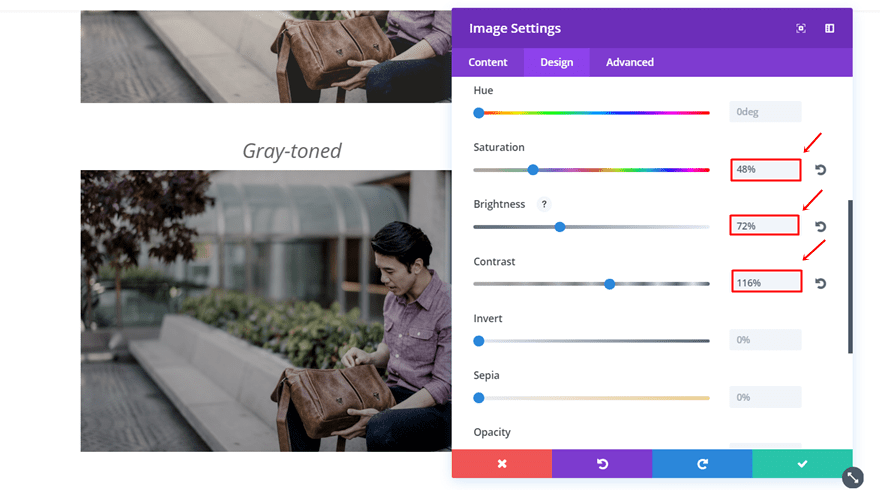
Gray Toned
Filter Options
This example turns a colorful image into an image that has mostly gray tones within it. We reduced the saturation and brightness drastically and added some additional contrast to still maintain the balance.
- Saturation: 48%
- Brightness: 72%
- Contrast: 116%
Recreate Illustration Filter Settings
Normal
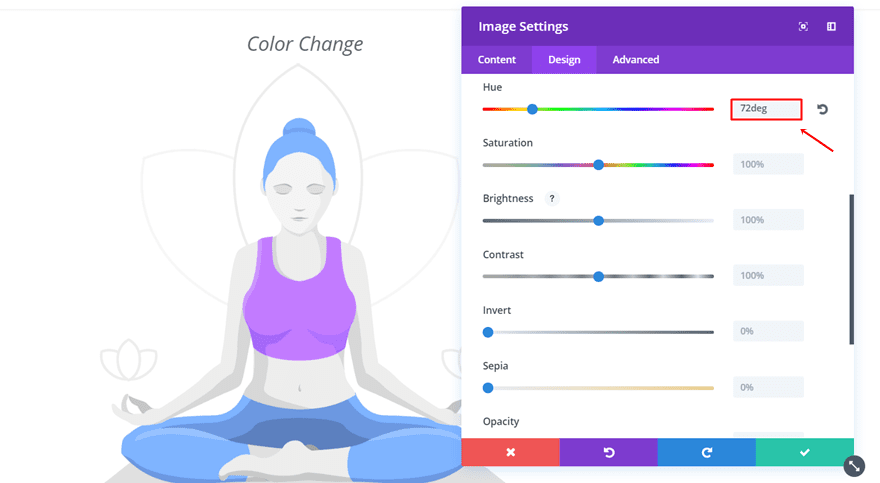
Color Change
Filter Options
The hue option is one of those options that comes in very handy when editing illustrations within your website. Without having to open Photoshop, you can change the colors of your illustrations to match the overall color palette you’re using on your website.
- Hue: 72deg
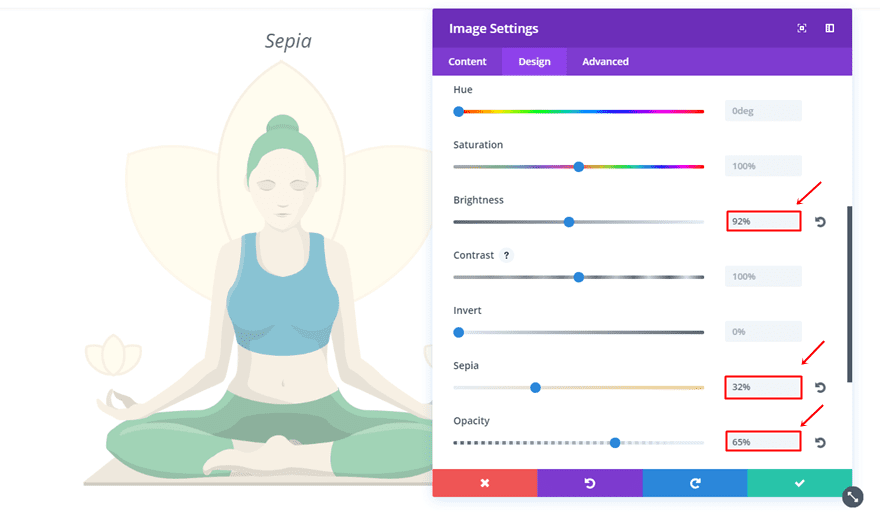
Sepia & Semi-Transparent
Filter Options
For the last example, we’ve decreased the brightness and opacity while adding sepia to the image.
- Brightness: 92%
- Sepia: 32%
- Opacity: 65%
Final Thoughts
Using Divi’s new filter options makes editing your images within the Divi Builder itself a delight. You can immediately observe how well it goes with the rest of your website and change settings as you go. In this post, we’ve shared some tips on using these filter effects and we’ve also shown you some nice filter settings that can help you obtain the exact result you want. If you have any questions or suggestions; make sure you leave a comment in the comment section below!
Featured Image by MSSA / shutterstock.com


Another excellent Post Donjete, The images use some interesting effects, this is going to be very helpful for newer folk and those that’s arn’t adept with Photoshop. I think the Divi builder is doing really well to be able to incorporate these effects so effectively, as it is very useful for speeding up design, tweaking things, and of course it’s a huge step in the right direction for beginners, and our clients on a tight budget, which I have quite a few of.
It saves me many hours not having to get elaborate in Photoshop to achieve the look I want & need for a site. It also saves my clients paying for Photoshop hours!! which most don’t want to pay for anyway as they simply can’t get their head around the time it takes!
I love all of these time saving features, and definitely don’t see any gimmicks here! lol Thank you for explaining and demonstrating the settings, It’s a quick refresher/reminder for me and also saves me the time of having to explain to clients also. It’s a great post, and you explain it so well.
x 🙂
Awesome effect! I have a few ideas to use it on my shop with with hover on product pics.
Effect of Image Filters over Loading Speed:
Hi,
I like the idea of using filters but I’m wondering how they might affecting the loading speed of the resulting image.
Q1: will these filters generate a brand new image file?
Q2: will the resulting image be heavier (in Kb)?
Q3: what if I apply a redimension or online compression (via plugin) of the original image? how will these affecting the altered (filtered) image?
Thanks in advance!
Jose
I’m a bit concerned at some of the new features that are being added as they don’t appear to be supported by all browsers.
I’d prefer having tried and tested options rather than gimmicks!
The browsers will catch up with Divi soon enough, they always do eventually. Improvise until they catch up! 🙂
can we have an image blurred, like the iOS style blur? i’d like that as a background image filtered.
Best option for blur is to do this in Photoshop or similar before uploading the image.
If you wish to do this dynamically (e.g making an image blur on scroll) then a js solution would be needed ideally.
This is a very nice tutorial but please make a similar on about optimizing DIVI (and Extra) for page speed tests. That would be really useful for SEO and besides, some customers require extremely high scores.