
A contact form is a great feature to add to a website. As a business owner, you could use a contact form to allow potential customers to send a message. As an influencer, setting up a contact form on a website can open doors for brand deals. A contact form has a variety of uses from collecting information from website visitors to allowing viewers to connect. Of course, inside Divi, you can find a customizable Contact Form Module that you can use for the websites you build.
Let us go through several things to consider as you embark on setting up a contact form in Divi. We will be using the Contact Page Layout from within the Print Designer Layout Pack.
- 1 Adding Your Fields: Let’s Get Organized
- 2 Deciding Which Fields We Want To Make Mandatory
- 3 Setting up Our Email Address
- 4 Creating a Message Pattern
- 5 Security: How To Prevent Spam
- 6 Adding a Success Message
- 7 Making Sure the Design Matches Your Website
- 8 Ending Thoughts on Setting up Your Divi Contact Form
Adding Your Fields: Let’s Get Organized
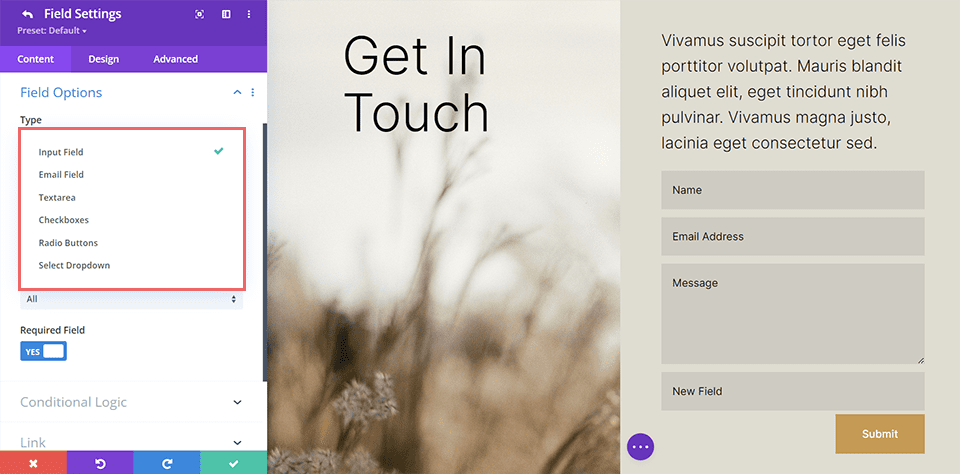
There isn’t a one-size-fits-all solution when it comes to setting up a contact form in Divi. Nevertheless, you do need to have an idea of what the purpose of your form will be. The types of fields that you’ll use within the Divi Contact Form Module will assist you in ensuring that you are collecting the relevant data from your website visitors. The Divi Contact Form Module comes equipped with six (6) field types that you can use within your form.
The Divi Contact Form Module Fields
Input Field: The input field is one of the most common form fields that you will use in your form. It allows users to enter short answers to questions. An example of an input field could be “First Name”.
Email Field: A pretty self-explanatory field, the email field allows you to collect an email address within your form. You may need to add this field to your form if you intend to reach out to the user who submitted the form.
Text Area: Similar to the input field, the text area field allows users to input in text. However, the text area field allows them to write quite a bit more than within an input field. An example of when you might use a text area field might be if you are looking to collect information about a project that a client may want to send to you.
Checkboxes: Checkboxes allow users to make multiple selections from a list of options that you provide. You could use a checkbox field if you needed a custom field to select several different flavors for the cake they will be ordering through your contact form.
Radio Buttons: Like a checkbox, a radio button provides users with a variety of choices to make a selection from. Unlike checkboxes, a radio button allows users to make only one selection out of the options that you have provided for them.
Select Dropdown: A dropdown field allows website users to make a selection from a select list of options. Though checkboxes, radio buttons, and dropdowns all provide users with the option of selecting from a list of items, their uses will depend on the question that you are asking as well as the answer you are hoping to receive from them.
Planning Your Form Offline
Now that you know a little bit about the different types of fields that can be used within the Divi contact form module, it’s time to plan out what your form fields will be. You can use something as simple as pen and paper, or even a Google Doc to first determine the purpose of your form. From your purpose, you’ll be able to plan out what the necessary fields would be for you to add to your form. After that, you’ll need to select the appropriate field for that question.
As an example, you wouldn’t use the text area field to simply collect the name on a form. Similarly, you wouldn’t use the dropdown field to collect someone’s email address. Careful planning with your form will set you up for success when building your website. This will also create a good user experience for potential website viewers.
Deciding Which Fields We Want To Make Mandatory
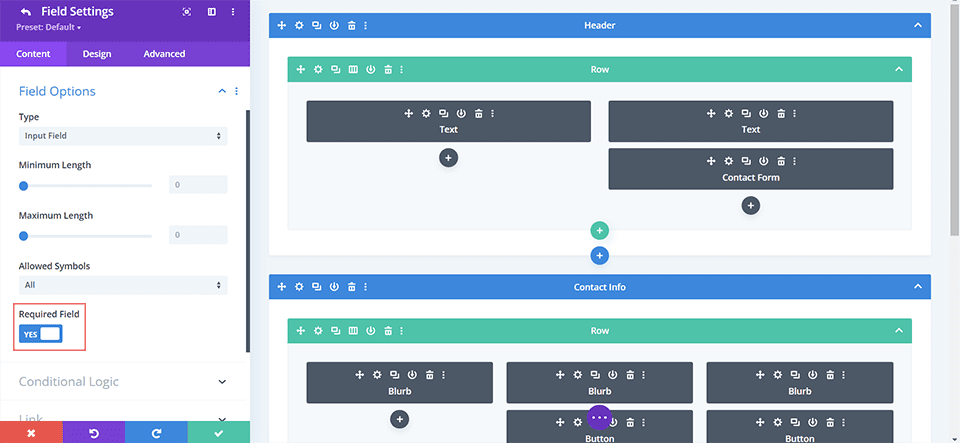
After you’ve decided on the fields that you’d like to add to your form, consider the fields users must fill in to submit your form. Why would you want to make a field mandatory you ask? Let’s go back to our contact form plan that we created with pen and paper. If we are an influencer, we would want to have the name of the person who is reaching out to us. We would want to make the name field mandatory so that we can properly address the person who is sending us a potential brand deal.
Alternatively, we may want to make the email address field mandatory as well. This will allow you to reach back out to this person. However, we may want to make the telephone field optional, in case they have an international number or we don’t want to get too personal and intrusive. In this case, you’d make the name fields and the email address fields mandatory in your form to ensure that you can properly communicate with the person once they have filled out and submitted their form.
Setting up Our Email Address
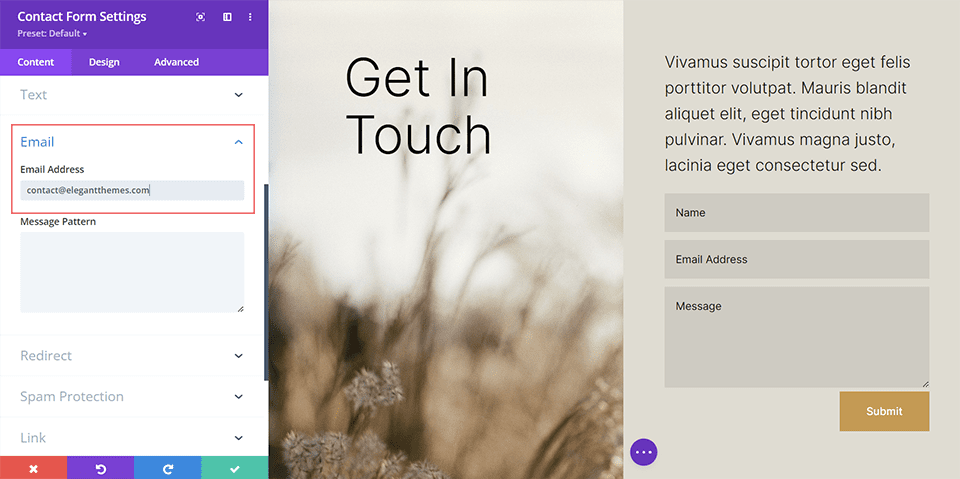
We now know what fields we’ll be using within our form and we know which fields we need to make mandatory so that we can collect the relevant information from users. Next up, we need to set up our email address. By default, all form entries from a Divi contact form will be emailed to the email address that you input within the email section under the content tab. It’s important to have an email address that you’ll easily have access to to collect the entries from this form. You would enter in said email address within the content tab of the contact form module. You can add multiple email addresses to the email field by separating them with a comma.
Creating a Message Pattern
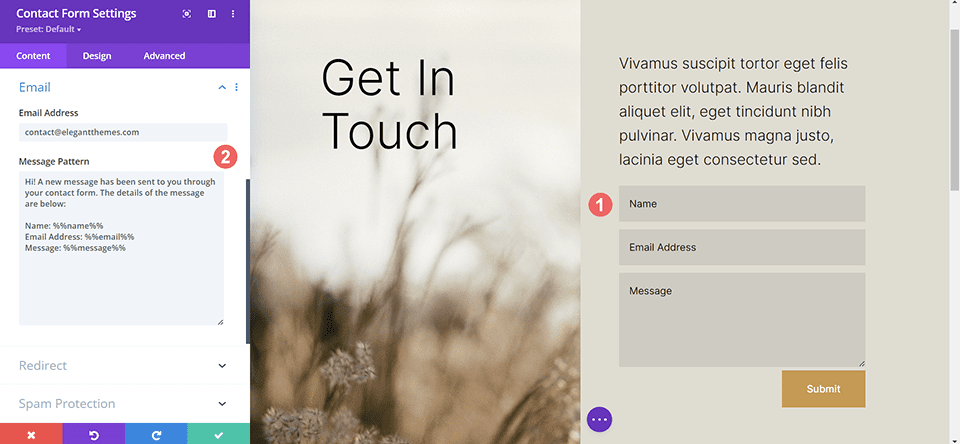
Next, you want to be able to properly read the content of the form submission that was just sent to you. To do this, you’ll need to keep track of the field ID that you used for each of the form fields that you created. You can easily find the field ID of each form field by editing the form field. The message pattern textbox allows you to control the content of the email that you receive as the website owner. Using the field ID, you can craft a clear and coherent message to yourself.
Security: How To Prevent Spam
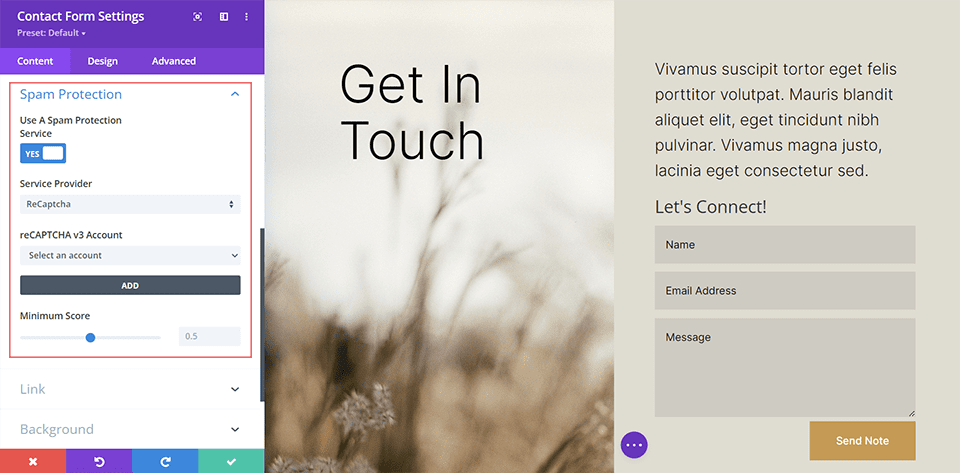
For as long as can be remembered, spam has been a problem on the internet, and your website may get its fair share. However, there are spam protection services available that can help make your life a bit easier. The Divi Contact Form Module is able to integrate into reCaptcha. reCaptcha is an internet service that protects forms and websites from pesky spammers. You can connect your account to the form module. Usually, a small arrow will appear on the frontend of your site to show that your site is protected.
Adding a Success Message
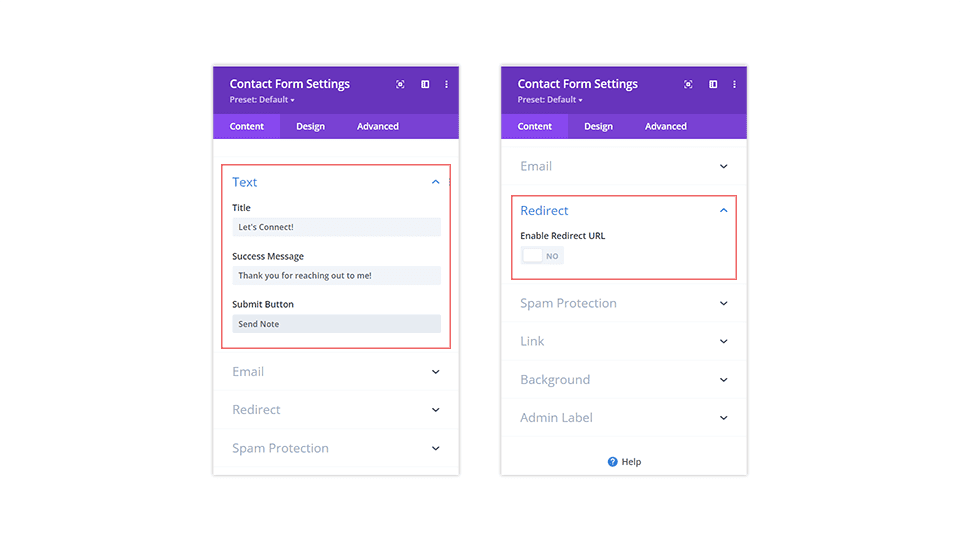
After the form has been submitted, there are several other factors to bear in mind. Firstly, You can decide to have a success message briefly shown to those who have successfully submitted the form. You can determine this message by filling out the success message field within the text dropdown in the content tab. Alternatively, you can enable the redirect URL switch to have the user sent to an entirely different page all together. The choice is yours. Please bear in mind however the overall purpose and use of your form.
Making Sure the Design Matches Your Website
By default, your Divi contact form will come with a white background and will inherit the button style that has been set for it via the Customize tab under Appearance > Customize. However, you shouldn’t let that stop you from having a rad contact form!
Some of the ways that you can make your contact form stand out include:
- Adding a border: Adding a colored border to your form fields can add interest. This can in turn encourage more people to fill out your form. If you’re using your form to collect leads, product orders, etc. This is a great thing!
- Changing the focus color: You can change the focus color of your form fields. When someone clicks into a field, it will now have a different styling. This is another way to build interest in your form.
- Playing with the length of the field
- Adding hover effects to the submit button: It is recommended to style all buttons across your website based on their use and importance. This also applies to your contact forms’ submit button! Don’t neglect to style this field. You can even go a step further and add some hover and animation effects to it!
At the end of the day, it is ideal that you should customize and style your contact form to match the rest of the branding of your website.
If you’d like, you can add a title to your form. This will take on the default heading styling of your website. However, you can use the design tab within the contact form module to style this differently. It’s always a good idea to maintain your branding on the various modules throughout your website. You can also consider changing the wording of the submit button to something other than the word submit.
Ending Thoughts on Setting up Your Divi Contact Form
Having a contact form on your website can greatly encourage your users to interact with you. From taking orders to collecting feedback, your contact form provides a means for communication between you and your site visitors By styling it, correcting, securing it, and making it simple for you to collect information, using the Divi contact form module on your site today can help you have a better website, blog and online store.


Thanks for the post.
I rarely use the contact form module.
There is no way of supplying a custom email subject or let the user provide one. Every time someone fills the form, the respective email delivered has the same subject. As I have gmail id tied to the form, all responses are threaded (same date, same subject).
It means, sometimes I miss some of the messages.
When you can hard-code the subject, why not make it customizable!
Please add this “basic” functionality and the form is more useful.
+1 for this request. Thank you! My clients’ email inboxes are suffering.
+1 for this one by myself too! Very hard to keep the gmail box organized when all emails have the same subject.
Awesome writeup. Question – are you able to have a UTM in the redirect or will that not pass through?
Will there be a GDPR compliant spam protection option? Thanks
is there any way I can configure the email once, and everytime I add a new contact form, it will follow the same email?