
Revealing module content on hover can have some helpful benefits. 1) It can be a great way to have a more compact or elegant design of your web page initially. 2) It saves space. 3) It can entice users to interact with your page. 4) It looks cool :). The basic idea is to show only a portion of the module content (like a teaser) which makes it enticing for visitors to hover over to see more. Once they do hover over the module, the entire content is revealed with a smooth hover effect that opens and closes like a shutter.
In this tutorial, I’m going to show you how you can reveal module content with a shutter style hover effect using the Divi builder.
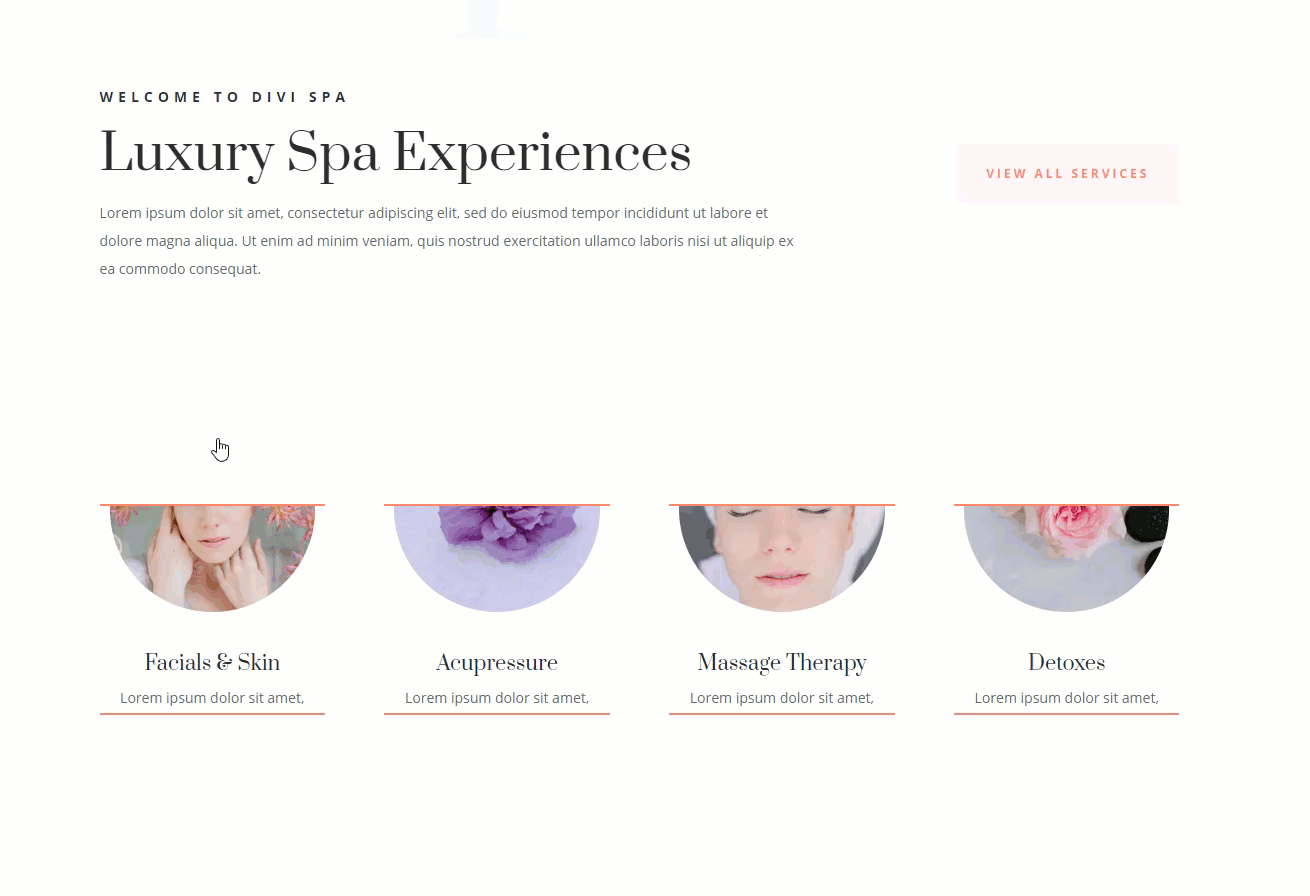
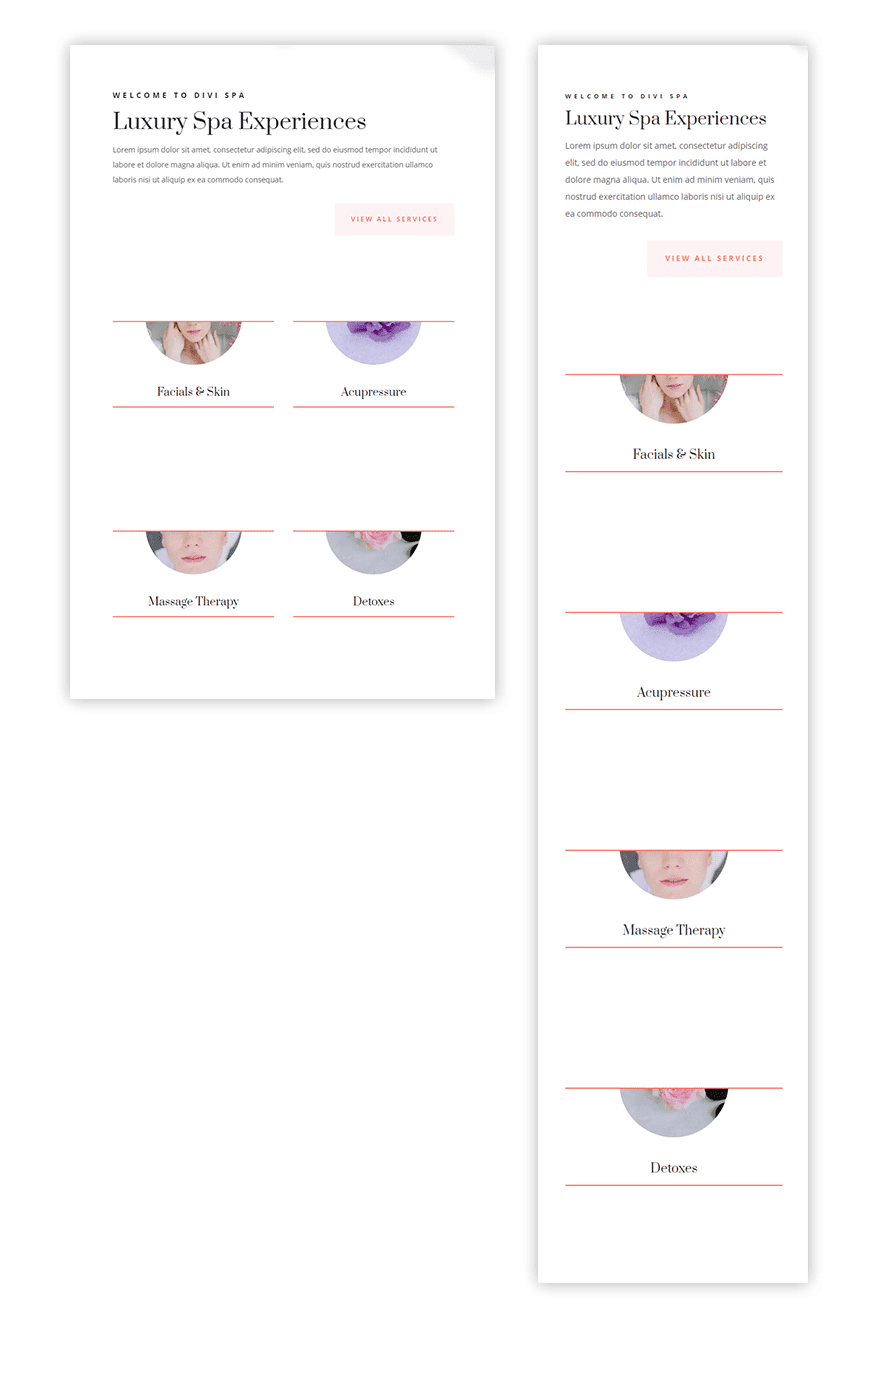
Sneak Peek
Here is a quick look at what we will be building together.
Getting Started
Subscribe To Our Youtube Channel
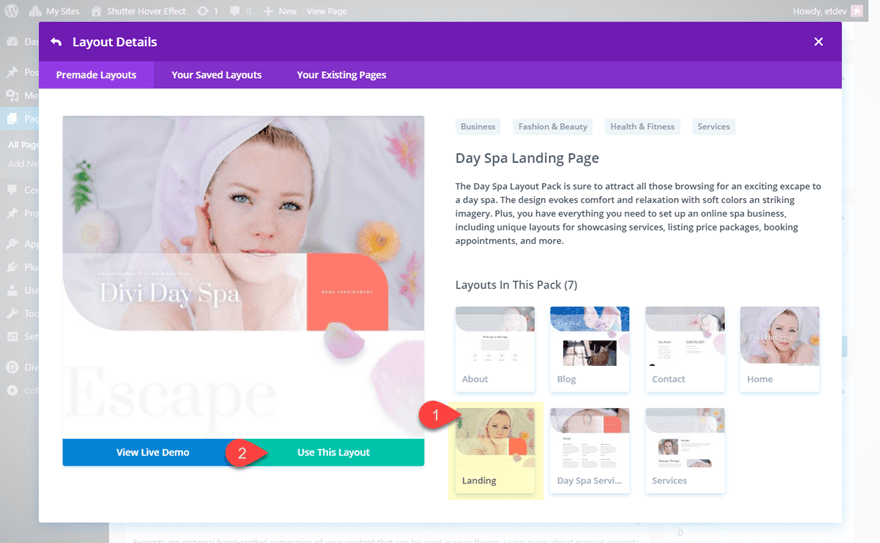
To get started, create a new page, give you page a title and then deploy the Divi Builder to build on the front end. Select the “Choose a Premade Layout” option. Then from the Divi Library popup, select the Day Spa Layout pack and click to use the Landing Page Layout.
Once the layout is loaded onto the page, you are ready to start!
Adding Dividers to the top and bottom of the Blurb
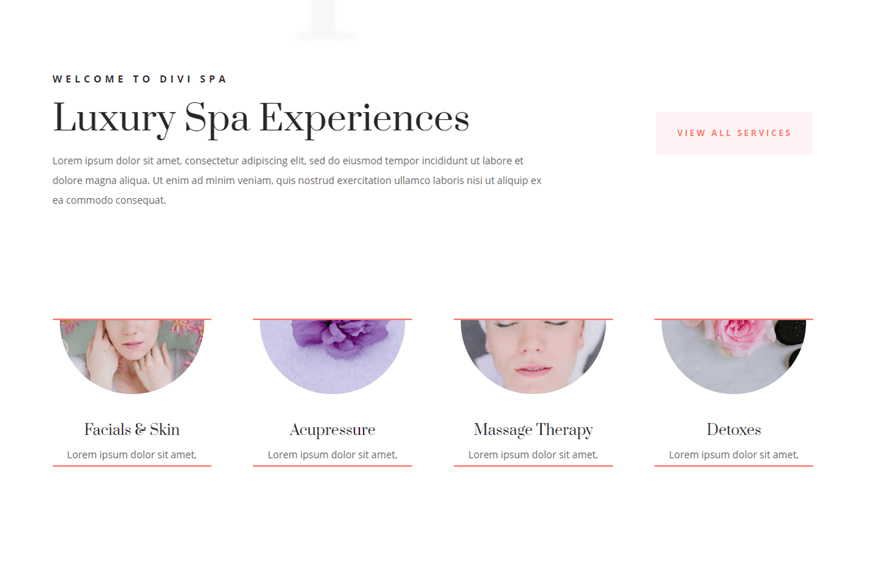
Scroll down the page to the section Titled “Luxury Spa Experiences” with the four blurbs. We will be using the row with the four blurbs to kickstart the design.
Adding the First Divider
Our first step is to add dividers above and below the blurb module in order to hide our blurb content behind. You can think of these dividers as of shutters of a window that will open and close on hover.
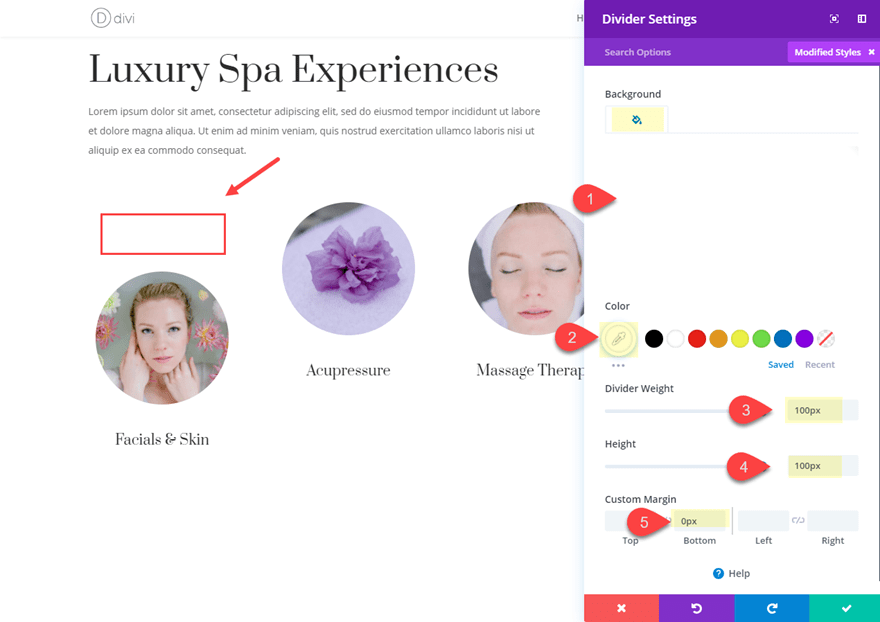
Add a divider module above the blurb in the first column and update the following:
Background color: #ffffff
Color (of divider): #ffffff
Divider Weight: 100px
Height: 100px
Custom margin: 0px bottom
The white background matches the background of our section since we don’t want to see it. Make sure the divider weight and height are the same.
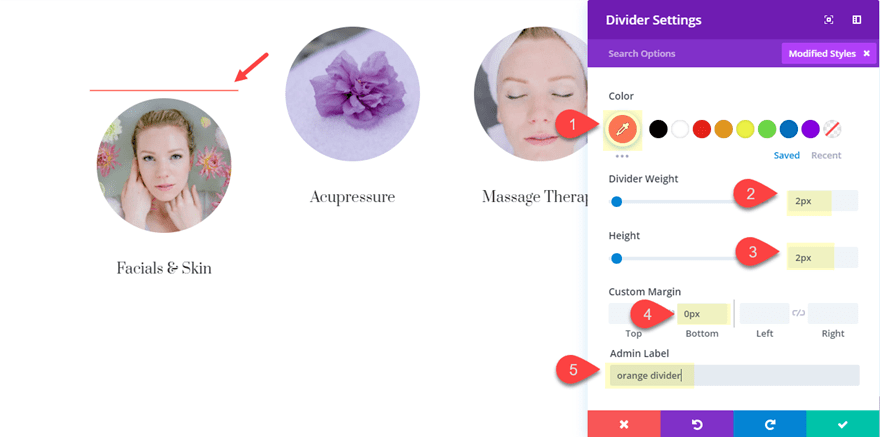
Adding the Second (orange) Divider
Next, create another divider directly under the divider you just created and update the following:
Color: #ff7a6b
Divider Weight: 2px
Height: 2px
Custom margin: 0px bottom
Then jump over to the content tab and give the divider an admin label “orange divider”. This will help distinguish the divider from the previous (white) divider when we use the wireframe mode to copy and paste the divider into the other columns.
Save your page.
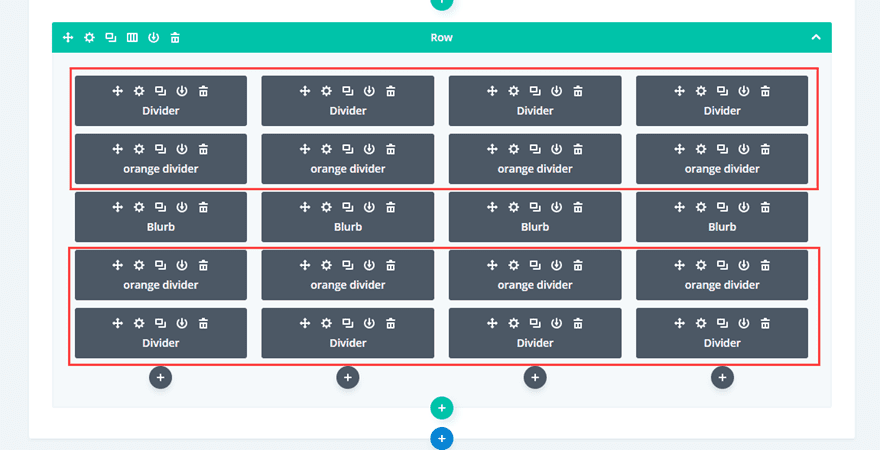
Copying and Pasting the Dividers Around the Blurbs
Now we are ready to copy and paste our dividers above and below each of the blurbs in each of the columns. To make this process a little easier, deploy the wireframe mode by opening the settings menu at the bottom of the page and clicking the wireframe icon. (or use shft + w)
In wireframe mode, find the row containing the blurbs and the dividers we just created. Then copy and paste the divider and orange divider above and below each of the blurbs so that the final result looks like this.
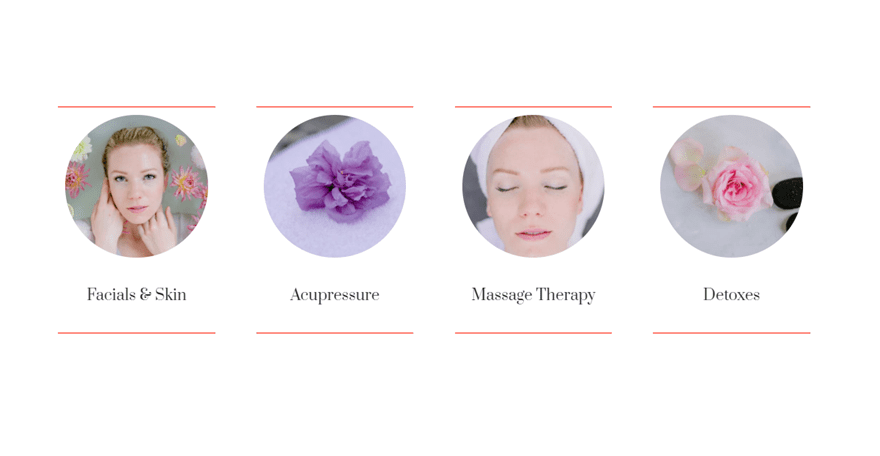
Next, go back to the desktop view (shft + w) to finish the design. You page should look like this.
Customizing the Blurb Modules
Now that you have all of the dividers in place, it’s time to edit our blurb modules with a few style adjustments including a custom margin to create the shutter style hover effect.
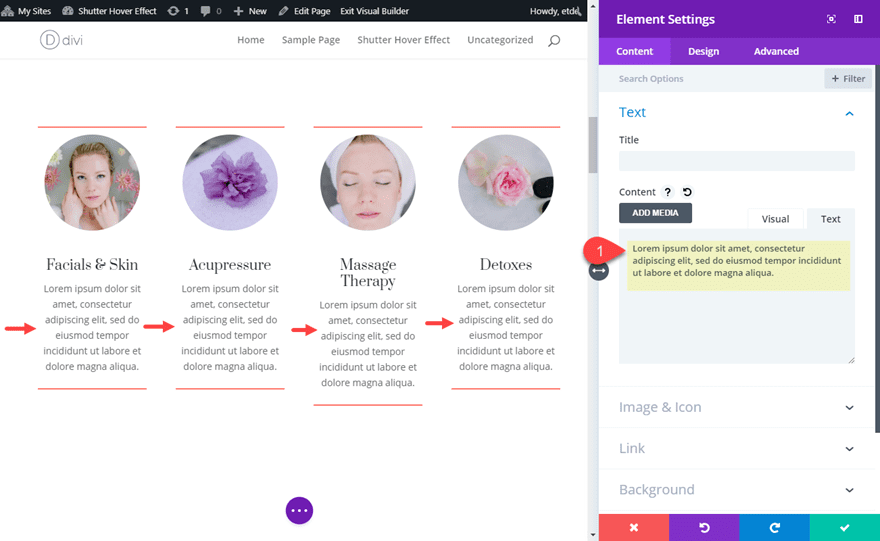
First, use multiselect to select all four blurb modules. To do this simply hold ctrl (or cmd) and click on each module. Then open the settings of one of the modules to deploy the element settings modal.

Under the content tab, add a few lines of mock content.
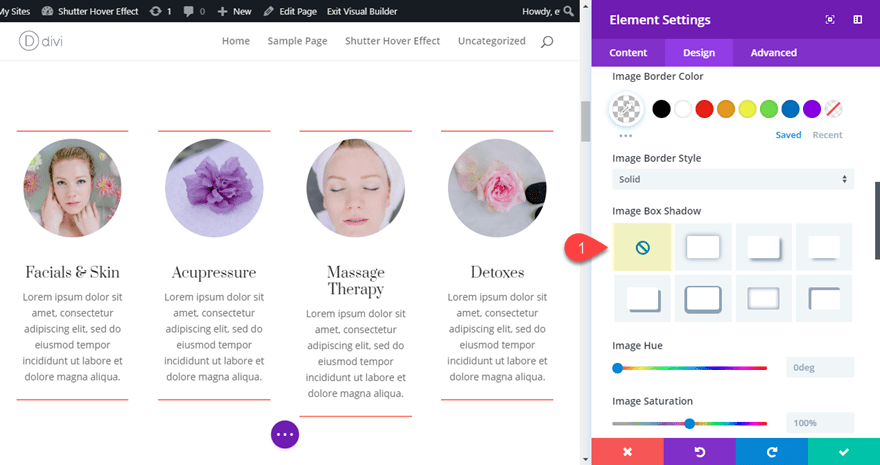
Then disable the image box shadow altogether.
To create the shutter hover effect, we need to add negative top and bottom margins to hide the content behind the dividers by default. Then we set the margins to 0px to reveal the content on hover. To do this add the following spacing.
Custom Margin (default): -100px top, -65px bottom
Custom Margin (hover): 0px top, 0px bottom
Custom Padding (hover): 10px top, 10px bottom
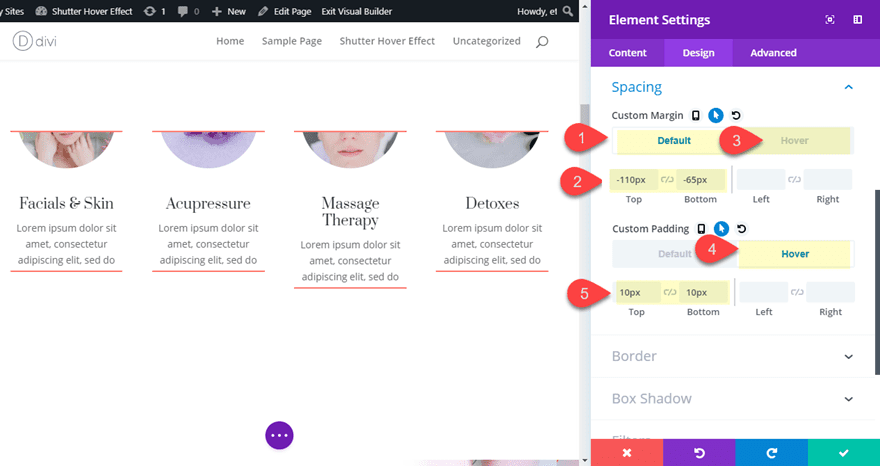
You may need to adjust the negative margin values depending on how much content you have. For example, you may need to have more negative margin for longer text content.
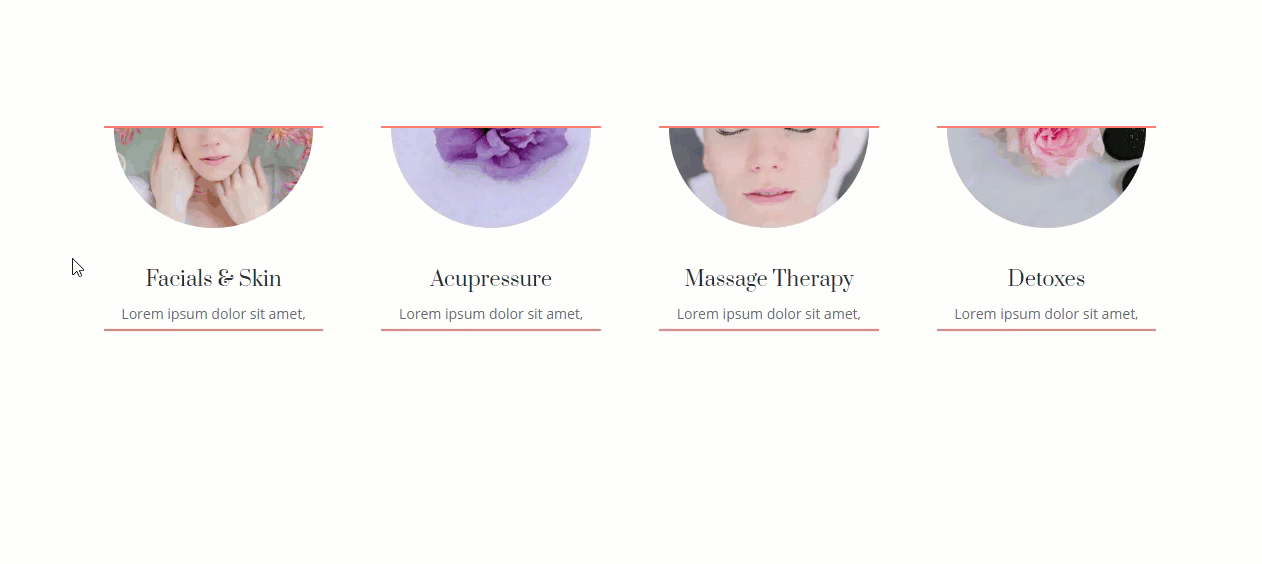
Now check out the result so far.
Notice the top and bottom of each module is hidden behind the dividers until you hover over them.
Cleaning Up the Shutter Hover Effect
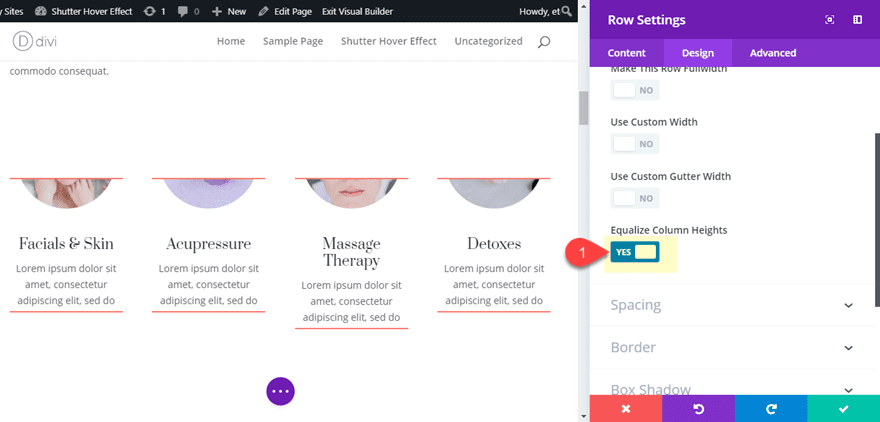
Vertically Centering the Modules
Currently, the shutter hover effect pushes the rest of the content down the page with each hover. This causes some page movement that may be distracting. Plus, the hover action only goes in a downward direction which isn’t a true shutter effect. We want the content to open both upward and downward from the center. To accomplish this we need to do the following:
Open the row settings and equalize the column heights.
Then go to the advanced tab and enter the following custom CSS under the Main Element:
align-items: center;
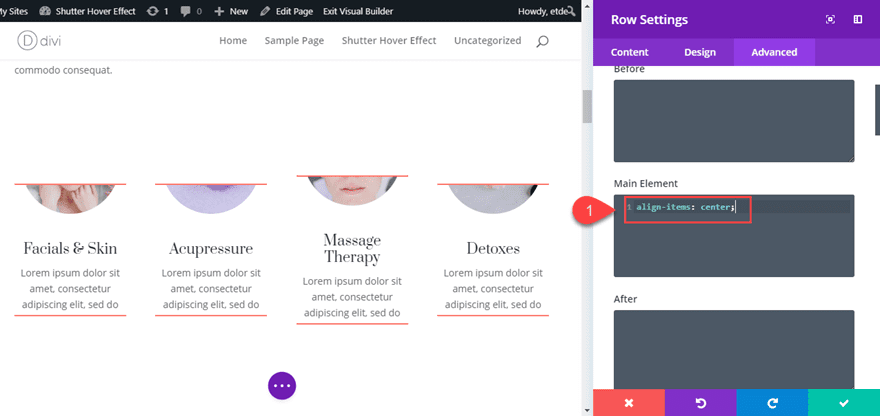
This will make sure the modules stay vertically centered within the column, giving us that upward and downward shutter effect.
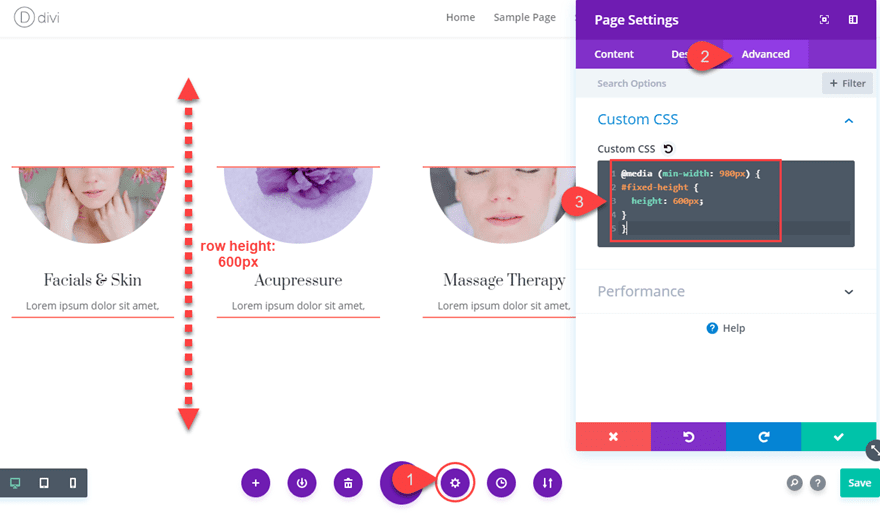
Giving the Row a Fixed Height
To stop the hover effect from pushing down the page content below, we need to stop the row from growing in height with each hover. To do this we must set a fixed height to our row on desktop. Because the height will be fixed, you will need to make sure that the height of the row is high enough to accommodate for the height of the blurb content in its hover state. However, you don’t want to make it too high because you will leave too much blank space above and below the modules. In this example, I’m going to set the row height to 600px. But, since we only want the fixed height set on desktop only, we need to add some CSS to our page settings using a media query.
Here is what you need to do.
First of all, in the row settings, give your row a CSS ID:
CSS ID: fixed-height

Then open the page settings (under the advanced tab) and add the following Custom CSS:
@media (min-width: 980px) {
#fixed-height {
  height: 600px;
}
}
This gives your row a fixed height of 600px on desktop and stops the hover effect from pushing the rest of the page content downward.
That’s it!
The Final Result
Check out the final design.
And here is the shutter hover effect.
It might be a good idea to disable the hover effect on mobile. To do that, all you need to do is set the custom margin for each blurb module as follows:
Custom Margin (tablet): 0px top, 0px bottom
Final Thoughts
This shutter hover effect is a creative way to tease your audience to look for more information about your different services. And with the magic of Divi and a few snippets of CSS, the final result is pretty elegant. I’m sure there are many more applications to this shutter hover effect since you can use any module you want. Feel free to explore some exciting new designs of your own, and don’t hesitate to share them with us. I look forward to hearing from you in the comments.
Cheers!


I was reading one of your posts and now my doubt is cleared when I saw this line ” be sure not to overuse LSI, since that is just as bad as keyword stuffing” I did not see comment box there so I am writing here to say – thanks…. I did not find this information anywhere else and I was doing a mistake. Fortunately, I came to your blog and I learned something new. Keep it up and best wishes for you.
Interesting effect. Could there not be something else covering the upper half of the circles than the white divider? Some text, another image? Thanks!
Yes. You definitely could. However, there may be a need to adjust your z-index value for those elements that will be hiding the content. For example, if you use a text module, the contente will show through the background.
Image -> Reveal Text or the reverse would be great.
Quite interesting!
I have been reading that text hidden in tabs or so, get inferior SEO value. If it is so, do you have any opinion about the SEO value of the text in the module which is hidden behind the dividers until you hover over them?
+1
How this effect con work on mobile if they haven’t the pointer?!
Alessandro,
Most mobile devices will trigger the hover effect when touching the element. But in most cases, I suggest disabling the hover effect on mobile anyway to avoid any problems.
Fantastic !! Thanks Jason 🙂
you are welcome, Matthew!