
Redirecting after filling out a contact form is one of those interactions that’s often overlooked. However, it’s an important interaction. It informs the user that you’ve received their message and what to expect next. Fortunately, redirecting is easy to do with Divi’s Contact Form Module. In this post, we’ll see how to redirect after filling out the Divi Contact Form. We’ll also see an example redirect page to help you build your own.
Let’s get started.
- 1 Preview
- 2 How to Redirect After Filling Out the Divi Contact Form
- 3 How to Choose Where to Redirect the Divi contact Form
-
4
Create a Redirect Contact Form Page with a Custom Message
- 4.1 First Redirect Contact Form Page Section
- 4.2 First Row
- 4.3 Title
- 4.4 Second Redirect Contact Form Page Section and Row
- 4.5 Redirect Contact Form Page Description Text Title
- 4.6 Redirect Contact Form Page Description Text Body
- 4.7 FAQ Text Title
- 4.8 FAQ Text Body
- 4.9 Redirect Contact Form Page Button
- 5 Results
- 6 Ending Thoughts
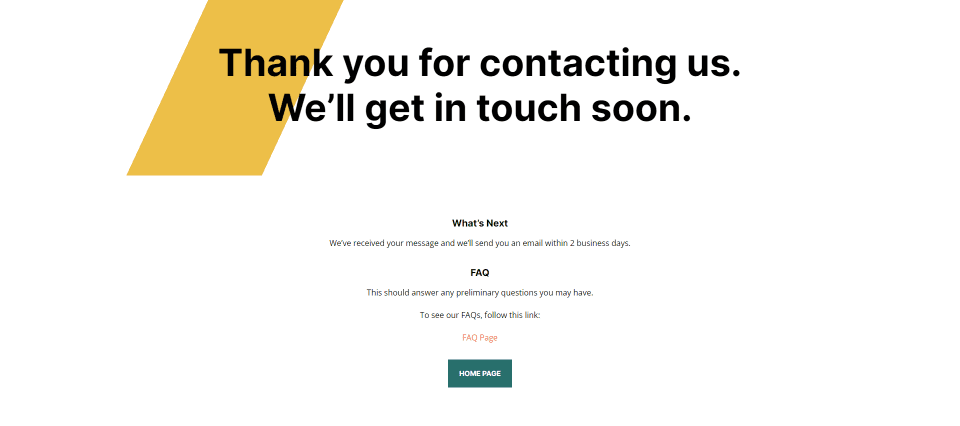
Preview
Desktop Redirect Contact Form Page with a Custom Message
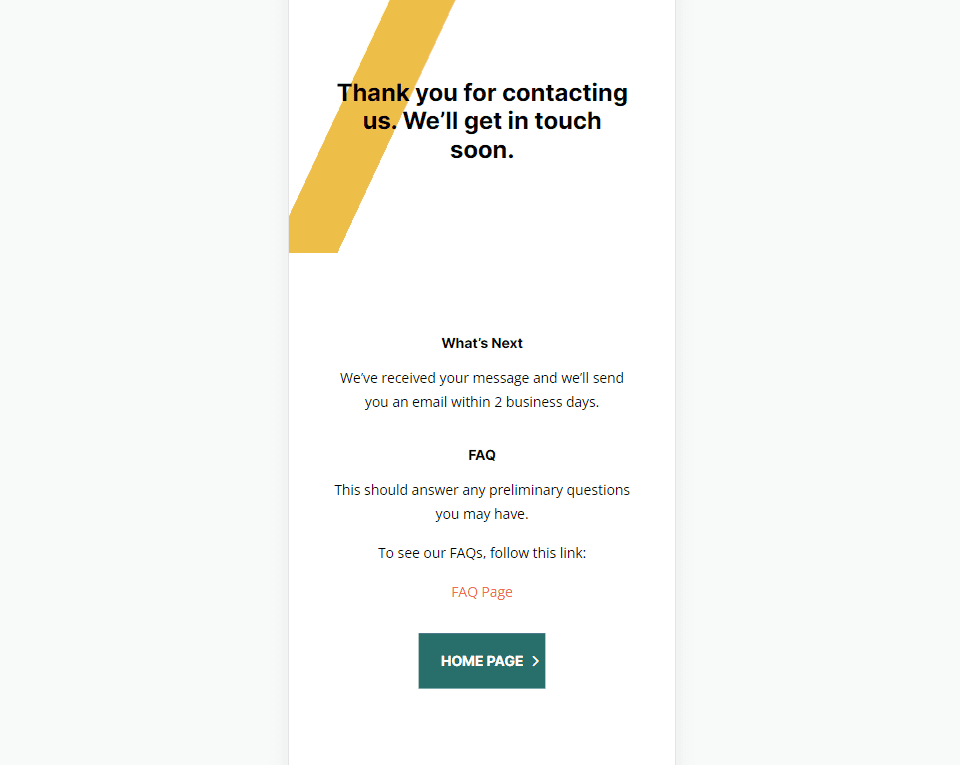
Phone Redirect Contact Form Page with a Custom Message
How to Redirect After Filling Out the Divi Contact Form
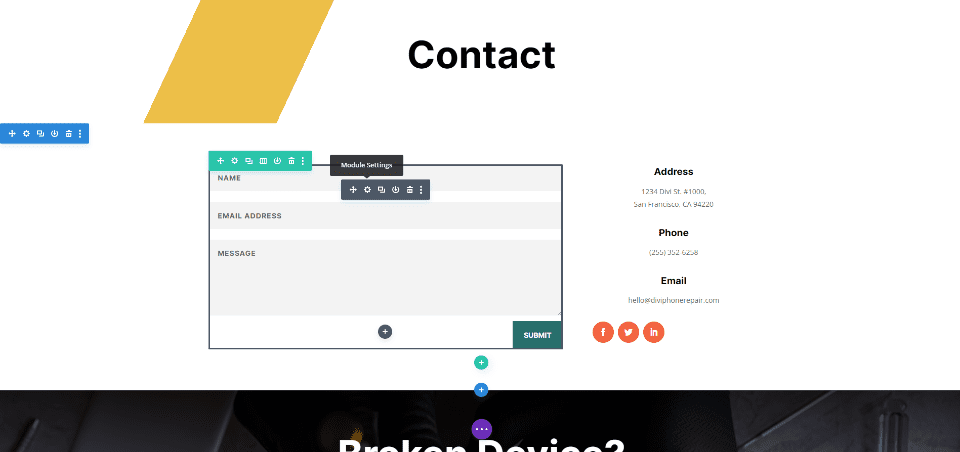
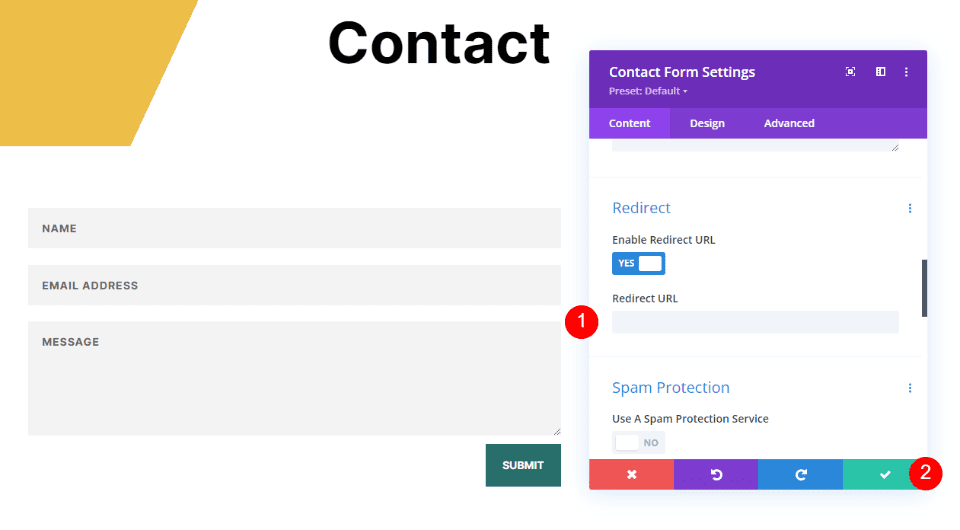
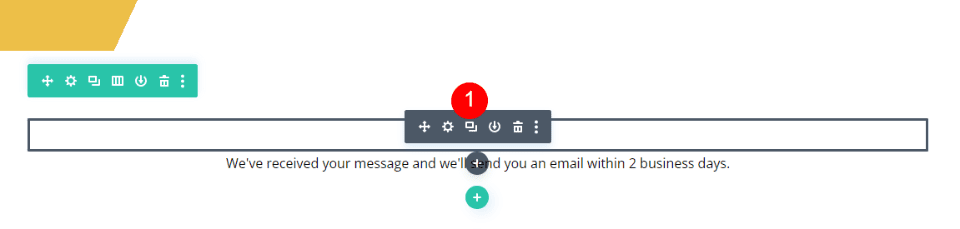
You’ll find a redirect option in the General tab of the Divi Contact form Module. For these examples, I’m using the Contact page from the free Device Repair Layout Pack that’s available within Divi.
To access the setting, open the module by clicking the dark gray icon that appears on hover.
Next, scroll down to the section called Redirect and enable the redirect option.
- Enable Redirect URL: Yes
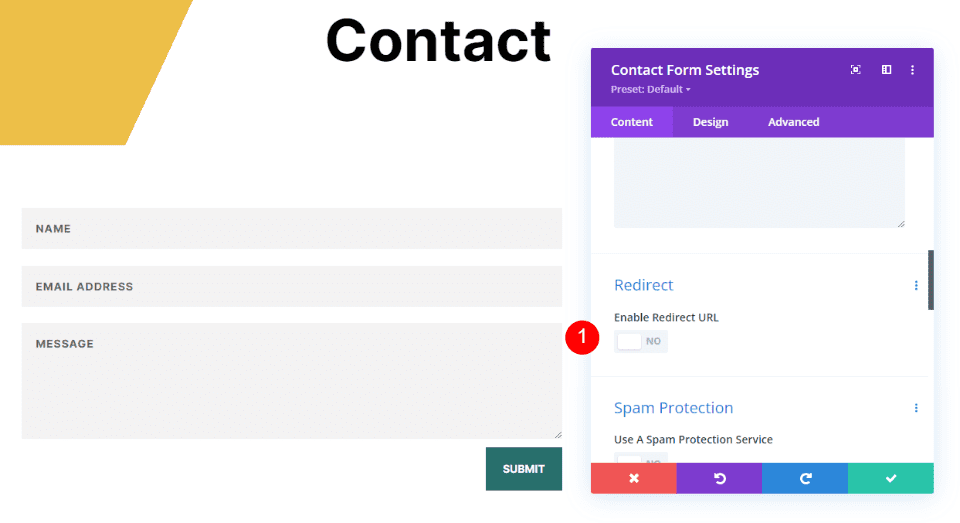
Enter the URL you want to redirect to. Close the module and save your settings. As you can see, enabling the redirect is simple. The hard part is knowing where to send them.
- Redirect URL: the URL of your redirect page
How to Choose Where to Redirect the Divi contact Form
You can enter any URL you want into the Redirect URL field, but the page you redirect them should make sense to them. It needs to be a part of the contact process and include information they’ll find useful. It should communicate to them, feel like a natural progression, and look like your website.
Rather than redirecting to the home page, blog, or similar pages, it’s best to redirect the user to a custom page with information that you received their message. You could include information on what happens next and provide a few links they can use. It could include a link to a download, FAQs, etc.
I recommend creating a custom page using the styling from your layout.
Create a Redirect Contact Form Page with a Custom Message
Let’s create a page for the custom message. I’ll use the styling cues from the Device Repair Layout Pack Contact page. This will ensure the custom message page is styled to match the layout.
First Redirect Contact Form Page Section
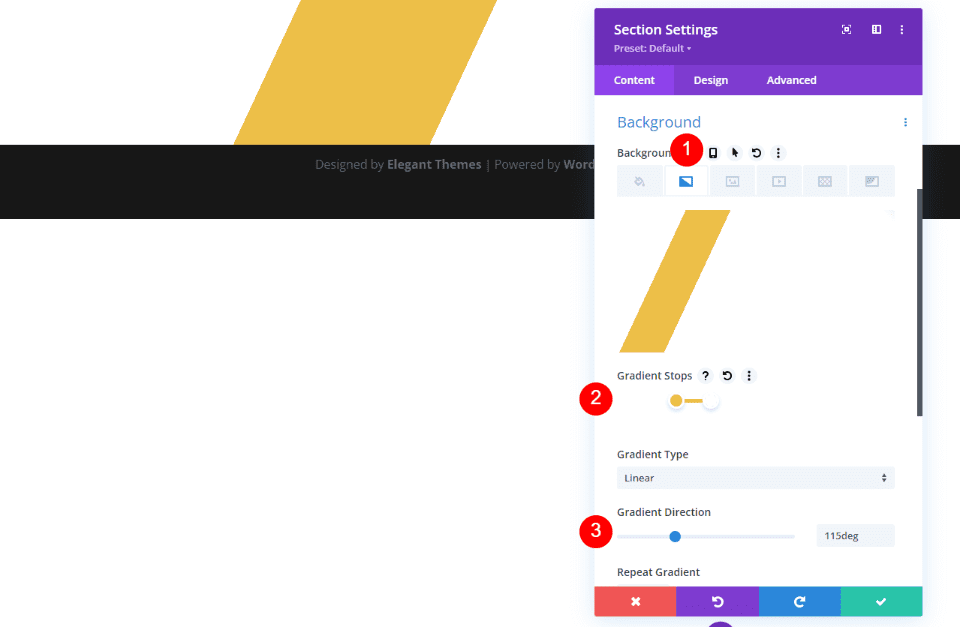
Create a page and open the Section’s settings by clicking the blue gear icon.

Next, scroll down to Background and select the Gradient tab. Create four Gradient Stops. Select white for the first and set it to 20%. Select #edbf48 for the second and set it on top of the first. Choose #edbf48 for the third and set it to 33%. Choose white for the fourth and set it on top of the third. Change the Gradient Direction to 115deg. This creates a stripe for the background. Close the settings.
- First Gradient Stop: 20%, #ffffff
- Second Gradient Stop: 20%, #edbf48
- Third Gradient Stop: 33%, #edbf48
- Fourth Gradient Stop: 33%, #ffffff
- Gradient Direction: 115deg
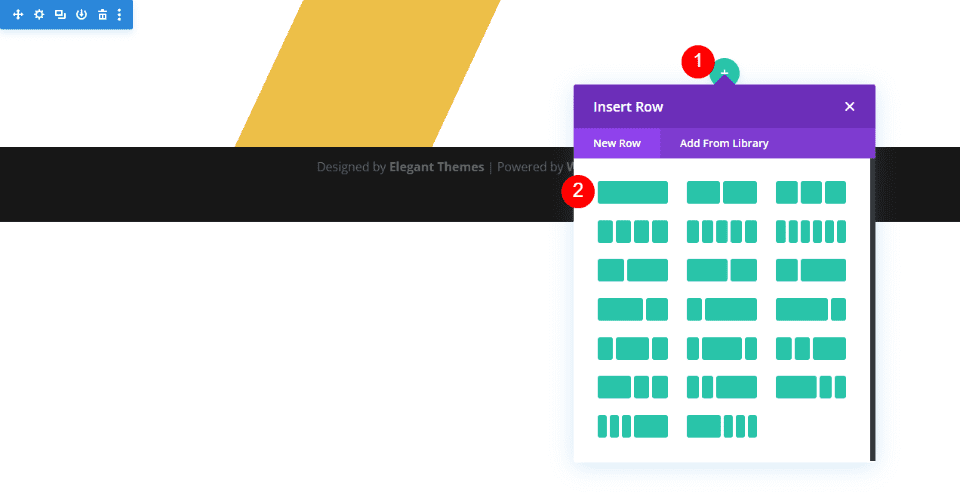
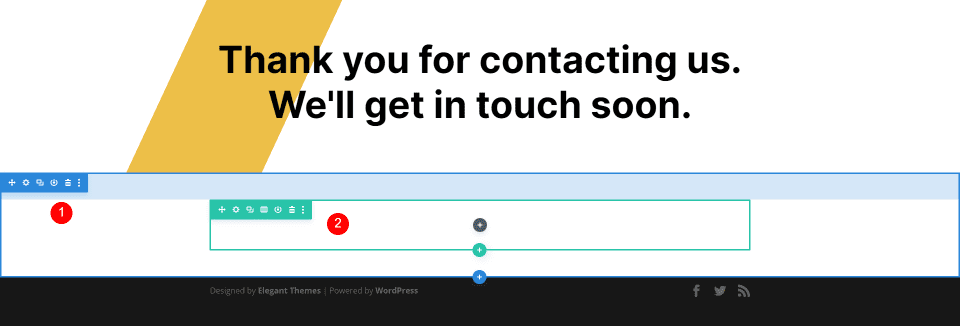
First Row
Next, add a single-column Row. We’ll use its default settings.
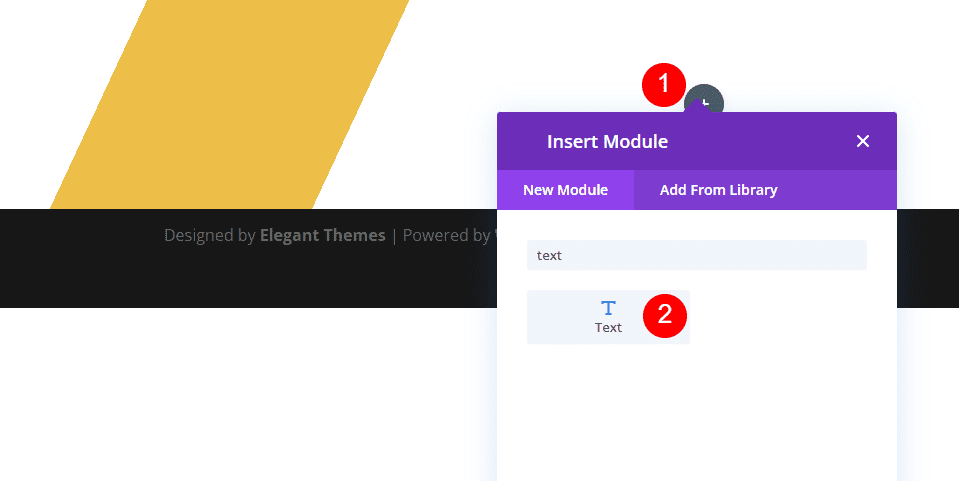
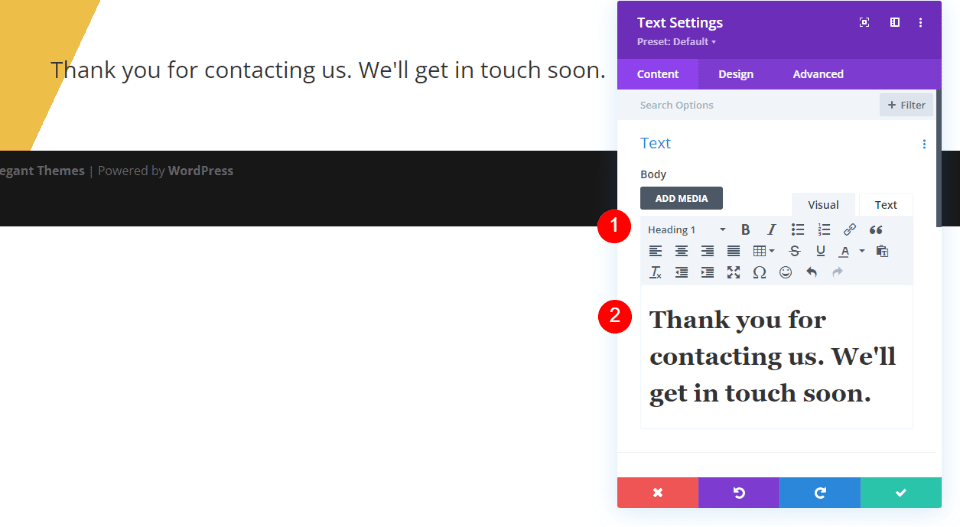
Title
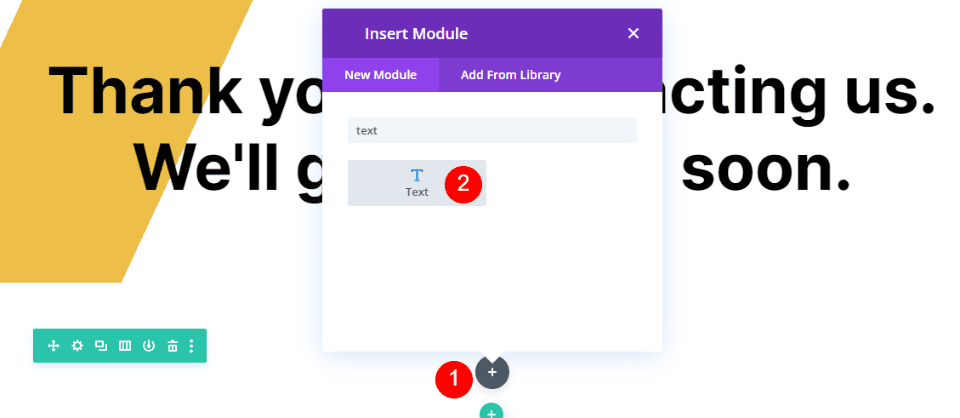
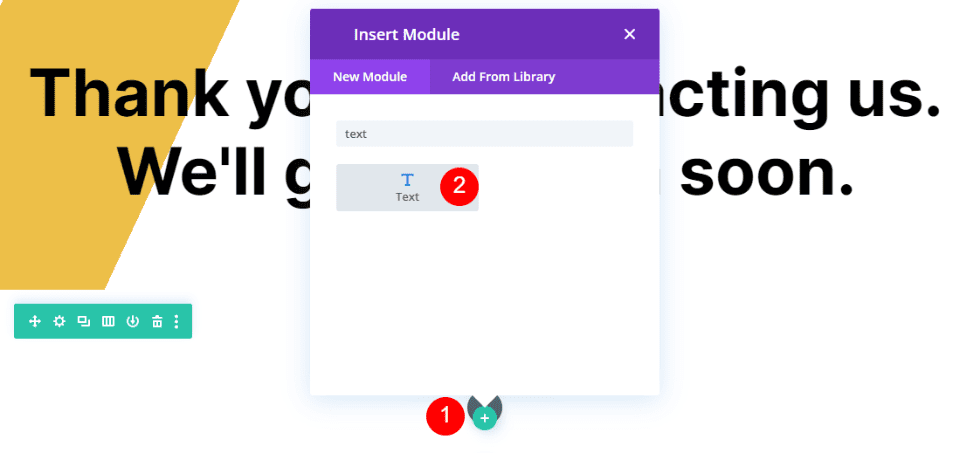
Next, add a Text Module.
Set the Content Type to Heading 1 and enter the message into the Content Editor.
- Content Type: Heading 1
- Body Text: Thank you for contacting us. We’ll get in touch soon.
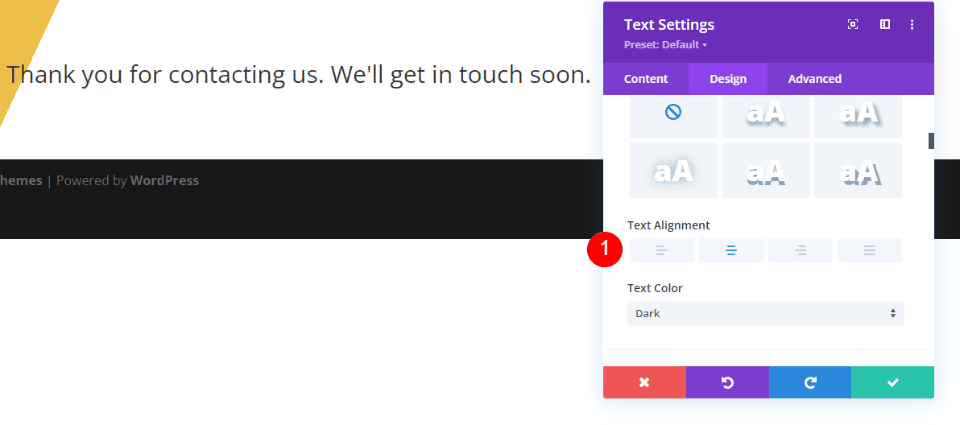
Text
Next, select the Design tab. Scroll down and change the Text Alignment to Centered.
- Text Alignment: Centered
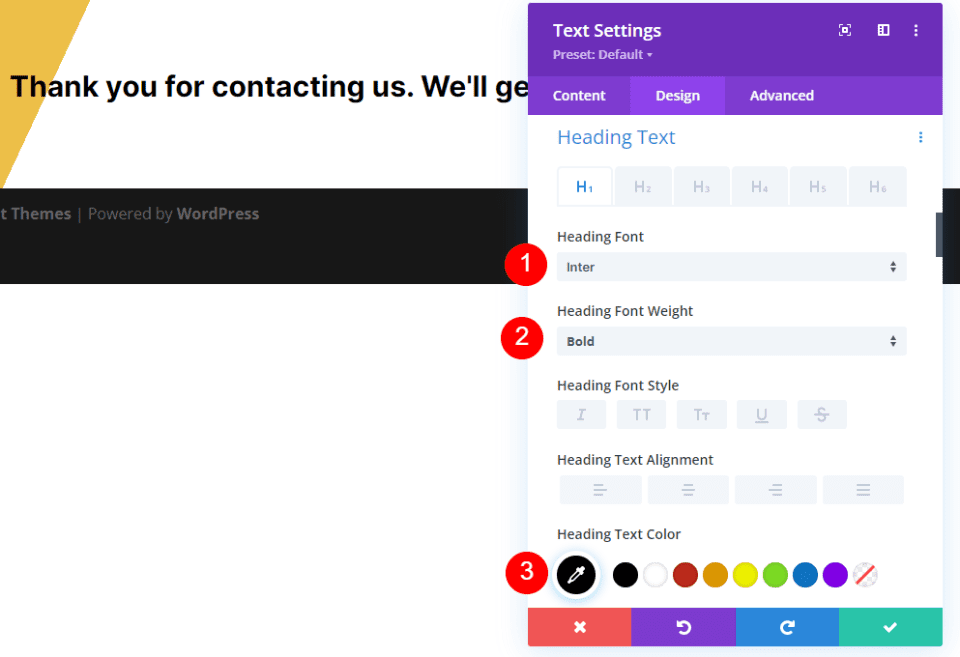
Heading Text
Scroll down to Heading Text. Choose Inter for the Font. Set the Weight to Bold and the Color to black.
- Font: Inter
- Weight: Bold
- Color: #000000
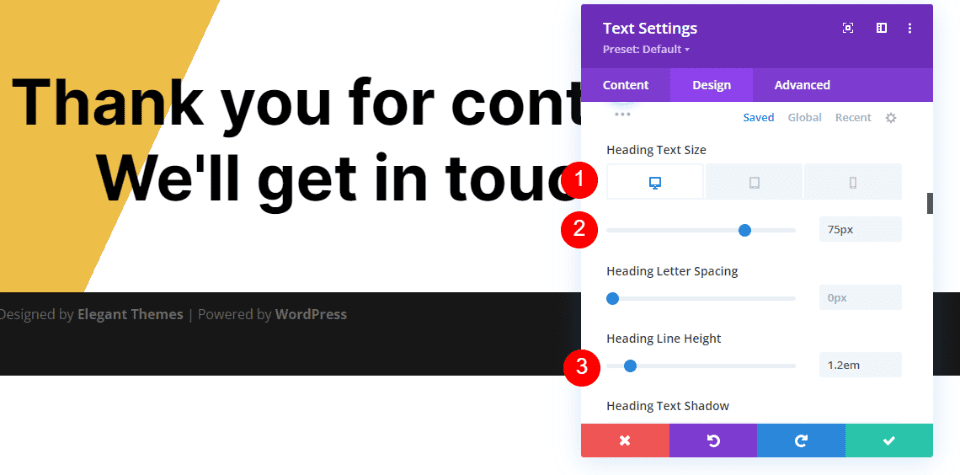
Change the Font Size to 75px for desktops, 40px for tablets, and 24px for phones. Change the Line Height to 1.2em. Close the module.
- Size: 75px desktop, 40px tablet, 24px phone
- Line Height: 1.2em
Second Redirect Contact Form Page Section and Row
Next, add a new Section under the first one and add a single-column Row. We’ll use their default settings.
Redirect Contact Form Page Description Text Title
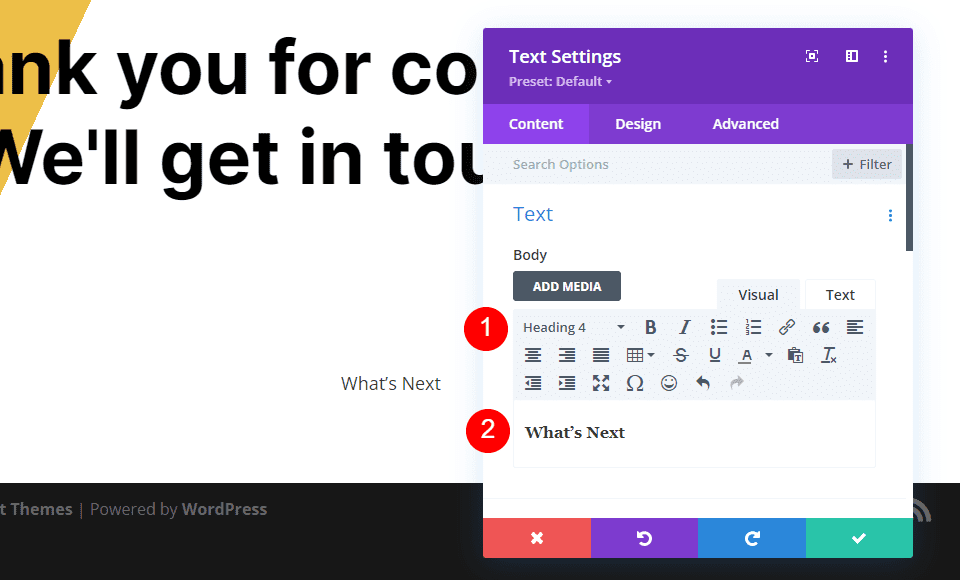
Add a Text Module in the second Row and open its settings.
Change the Content to Heading 4 and enter the title into the Content Editor. I’m using the title What’s Next, so they’ll know at a glance what this content is about.
- Content Type: Heading 4
- Content Body: What’s Next
Text
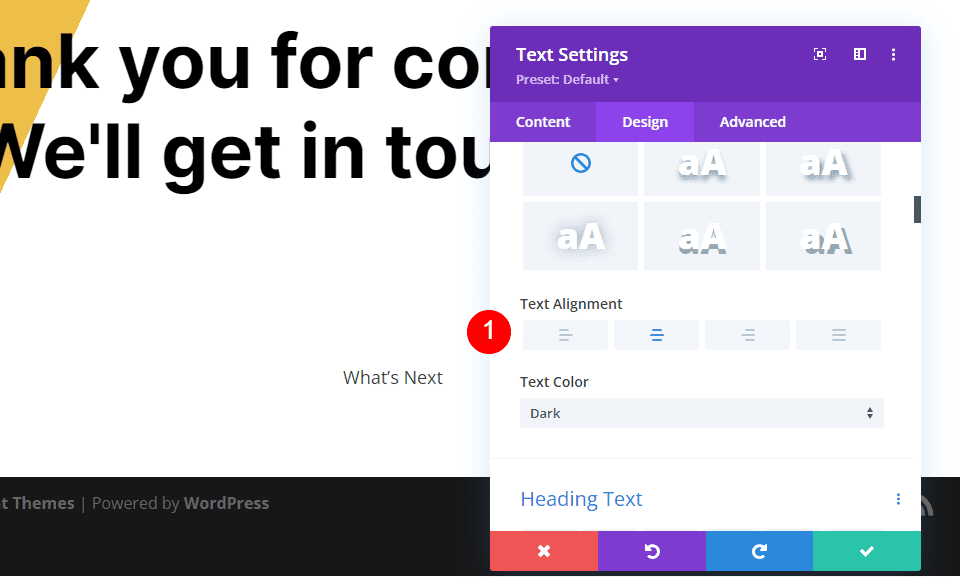
Select the Design tab and set the Text Alignment to Centered.
- Text Alignment: Centered
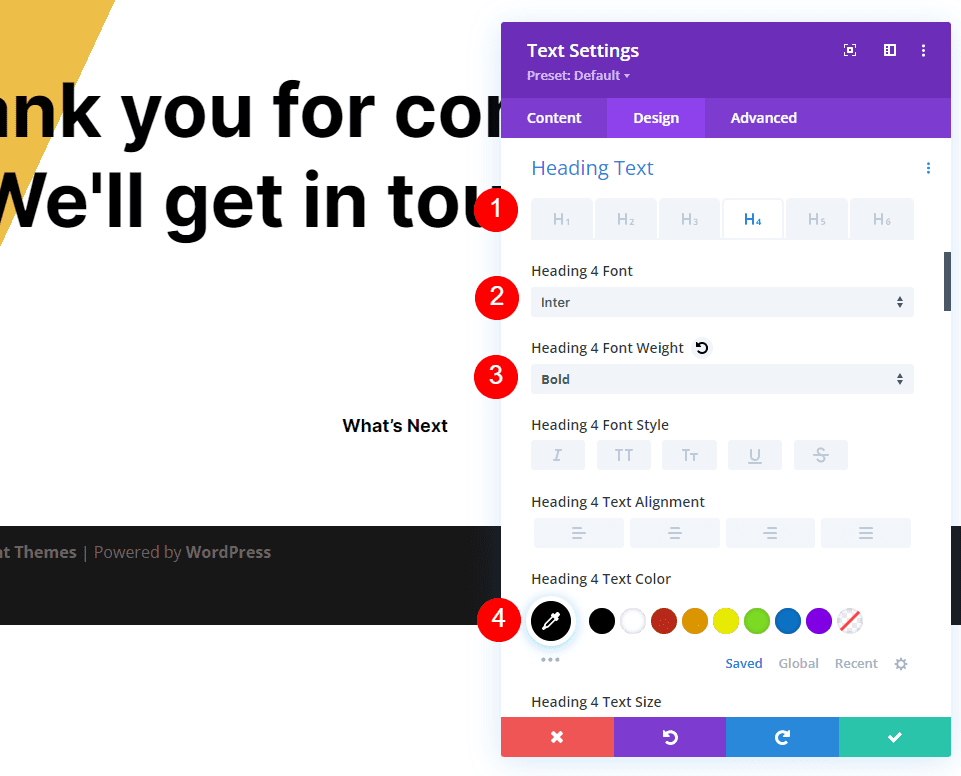
Heading Text
Scroll down to Heading Text and select the H4 tab. Choose Inter for the Font and set the Weight to Bold and the Color to black.
- Font: Inter
- Weight: Bold
- Color: #000000
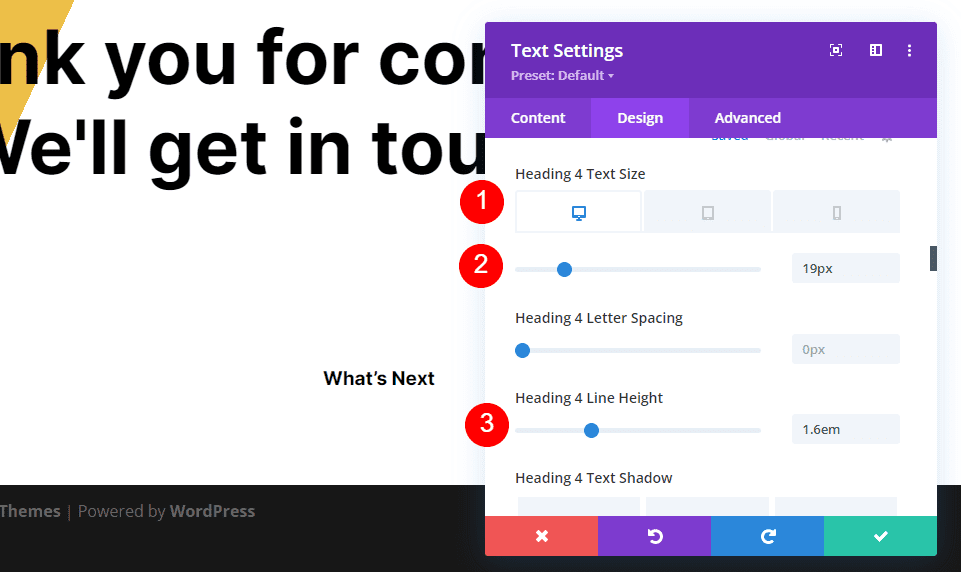
Change the Size to 19ps for desktops, 16px for tablets, and 14px for phones. Set the Line Height to 1.6em.
- Size: 19px desktop, 16px tablet, 14px phone
- Line Height: 1.6em
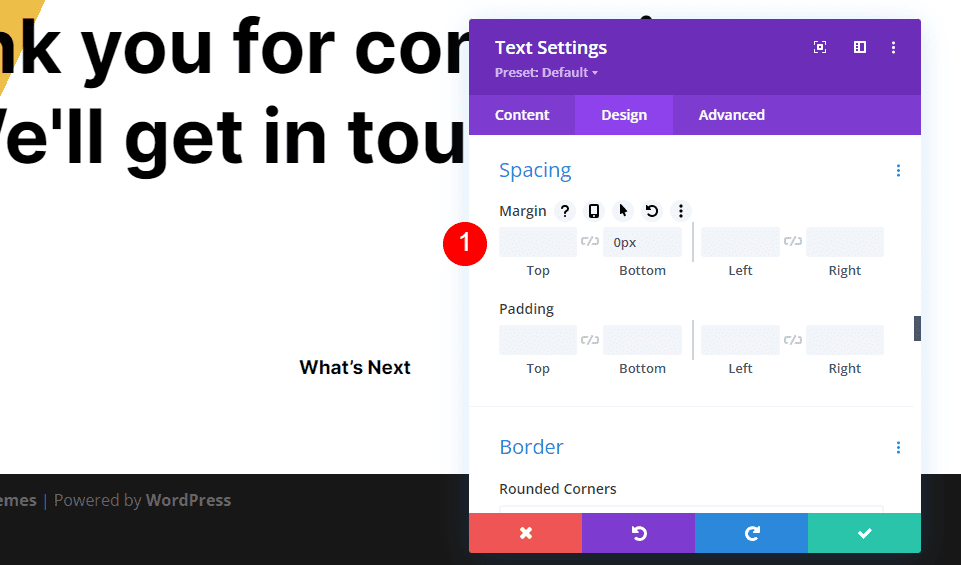
Spacing
Next, scroll down to Spacing and add 0px to the Bottom Margin. Close the module.
- Bottom Margin: 0px
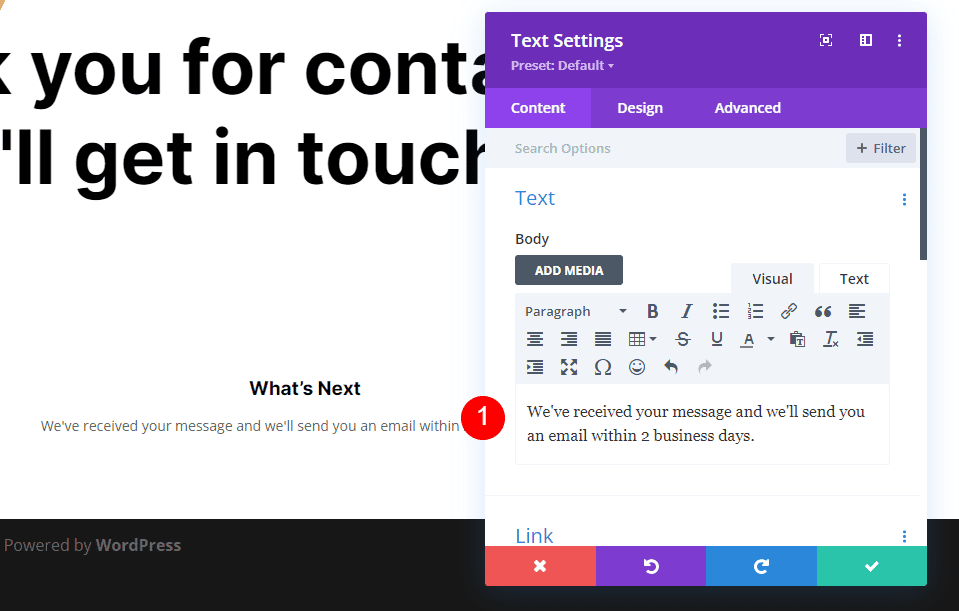
Redirect Contact Form Page Description Text Body
Next, add a Text Module under the description title.
Add the description text to the body Content Editor. This text will inform the user of when to expect a response. I’m also adding a note that I’ve received their message.
- Content Body: We’ve received your message and we’ll send you an email within 2 business days.
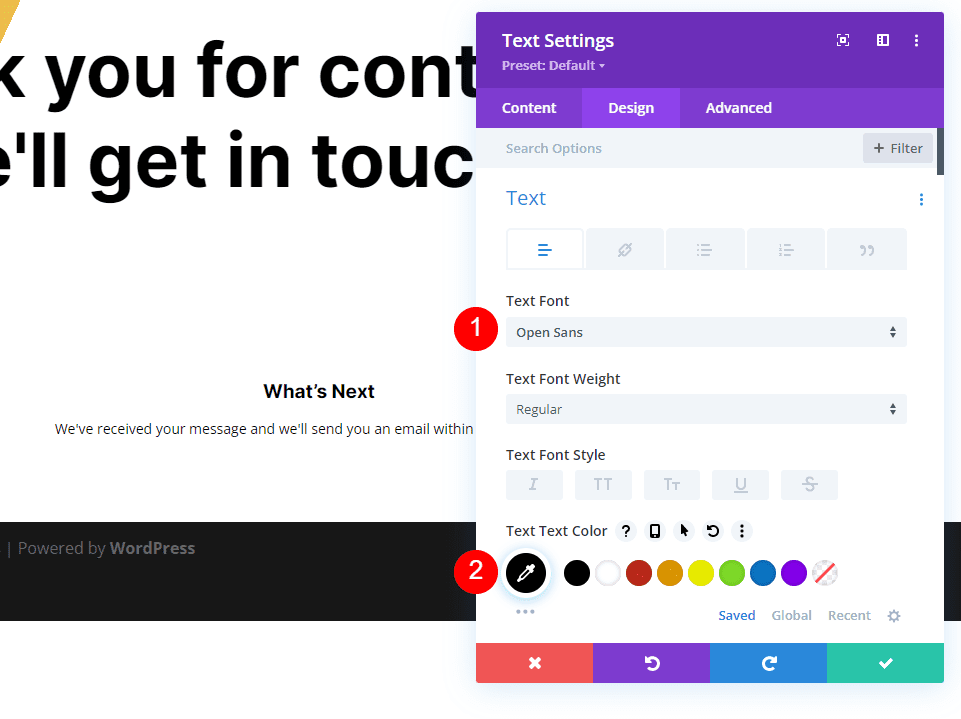
Text
Go to the Design tab and select Open Sans for the Font and change the Color to black.
- Font: Open Sans
- Color: #000000
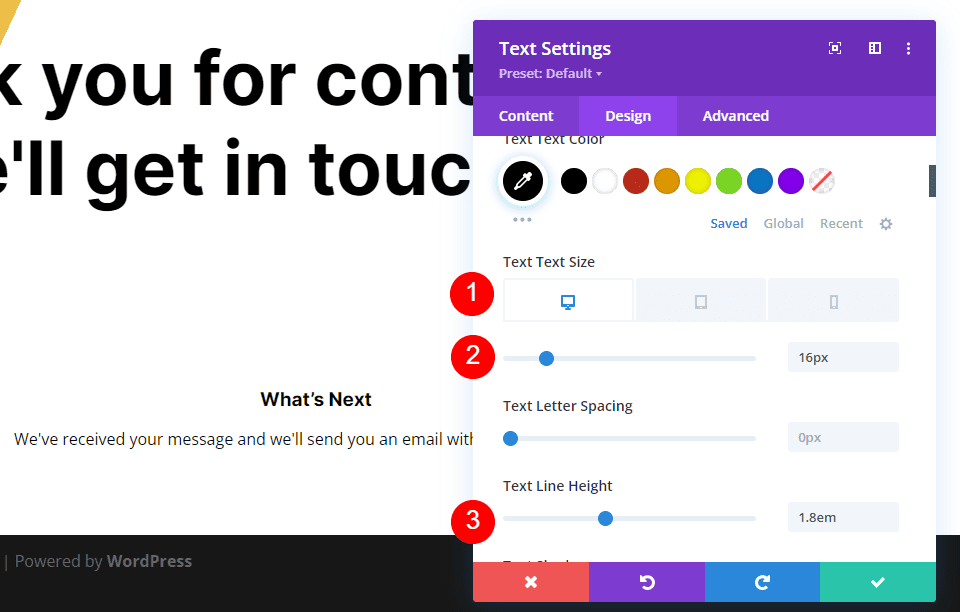
Change the Size to 16px for desktops, 15ps for tablets, and 14px for phones. Set the Line Height to 1.8em.
- Size: 16px desktop, 15px tablet, 14px phone
- Line Height: 1.8em
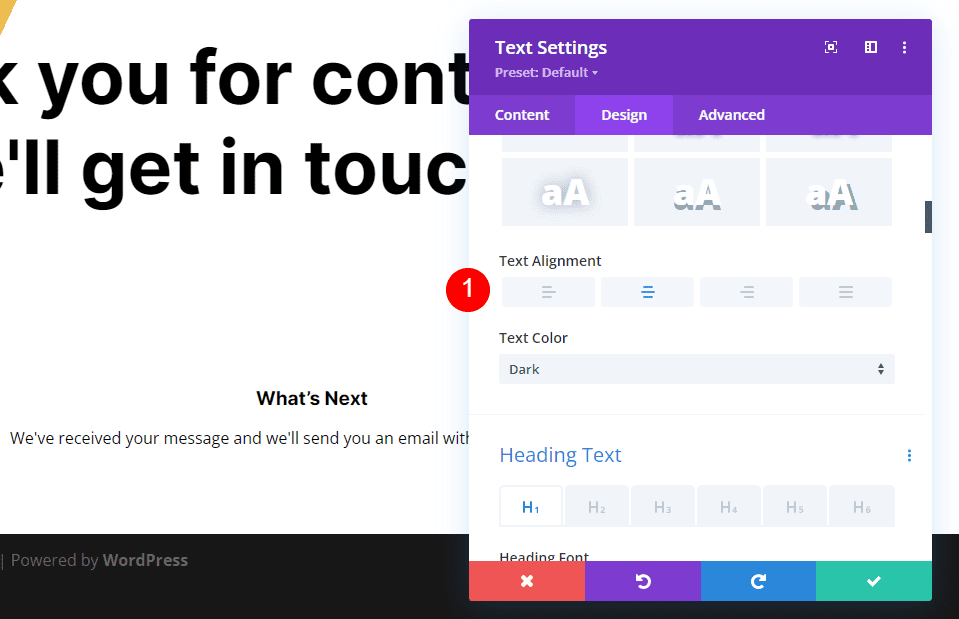
Scroll down to Text Alignment and select Centered. Close the module.
- Text Alignment: Centered
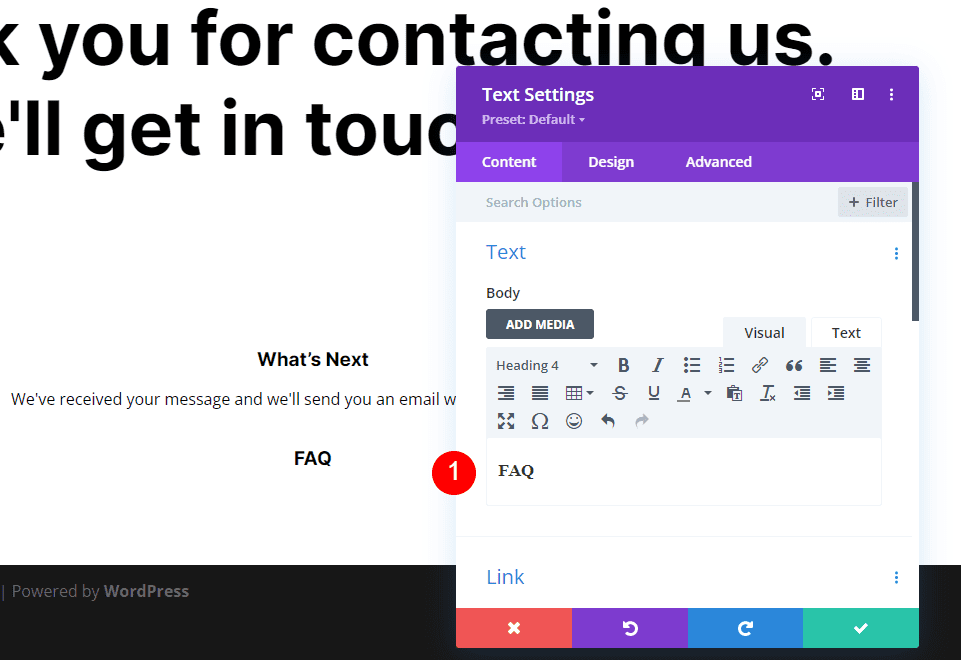
FAQ Text Title
Next, we’ll add information and a link to the FAQ page. First, copy the description’s title Text Module and drag it under the description Text Module.
Leave the Content Type at Heading 4 and change the Body Content to FAQ. All the other settings are already present, so you can close the module.
- Content Type: Heading 4
- Content Body: FAQ
FAQ Text Body
Next, copy the description’s Text Module and drag it under the FAQ title Text Module.
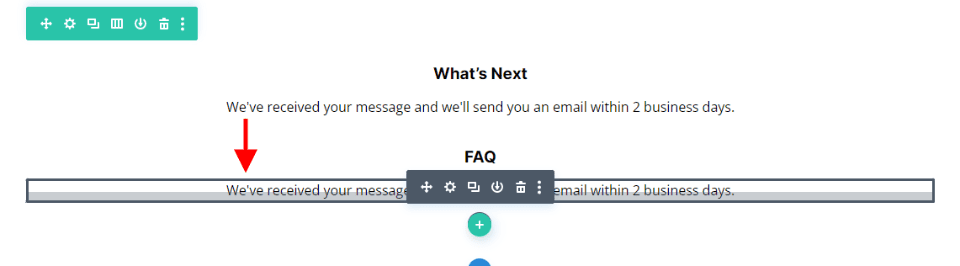
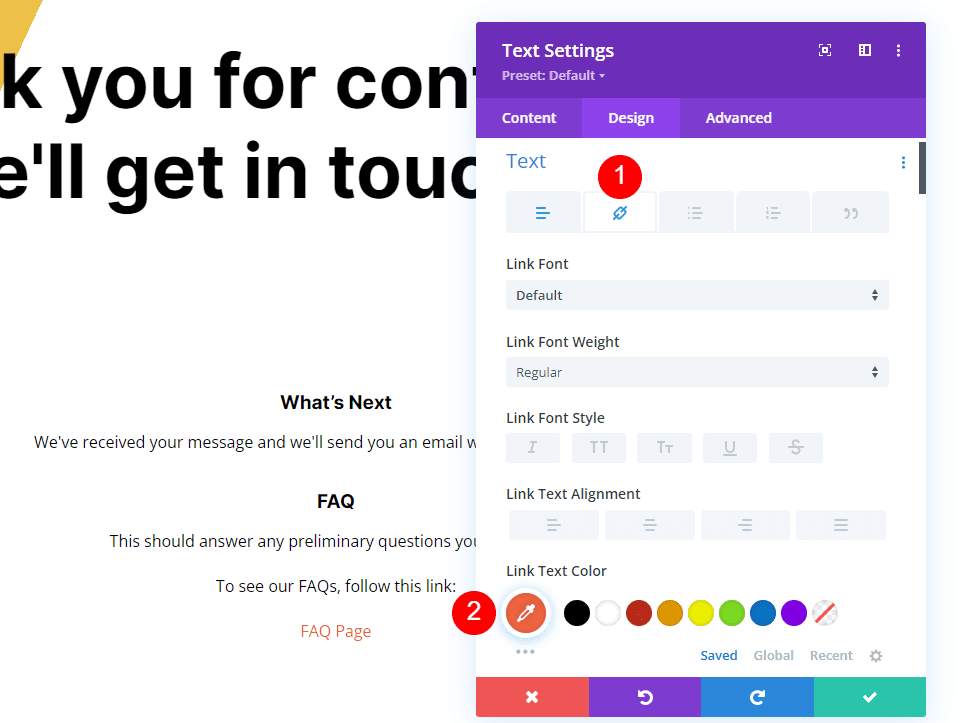
We will make one change to this module, but first, add your text. Add spaces as needed to create the layout you want. As you’ll see in the example, I’m adding spaces to place the FAQ link on its own line. I’ve added a link to the FAQ Page text, so it now links to the FAQ page. We’ll need to change its color.
- Content Body: While you wait, take a look at our frequently asked questions. This should answer any preliminary questions you may have. To see our FAQs, follow this link: FAQ Page
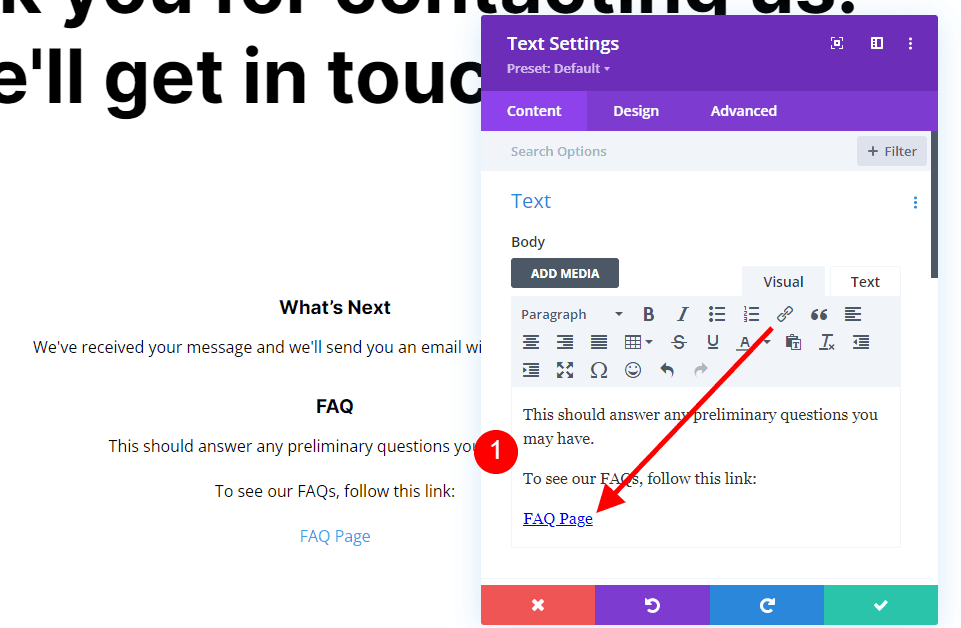
Text Link
Now, go to the Design tab to the Text section and select the Link tab and change the Color to #f26440. Leave the rest of the settings at their defaults so they’ll follow the regular Text settings. Close the module.
- Link Text Color: #f26440
Lastly, let’s add a button that leads the user back to the homepage. Add the Button Module under the last Text Module.
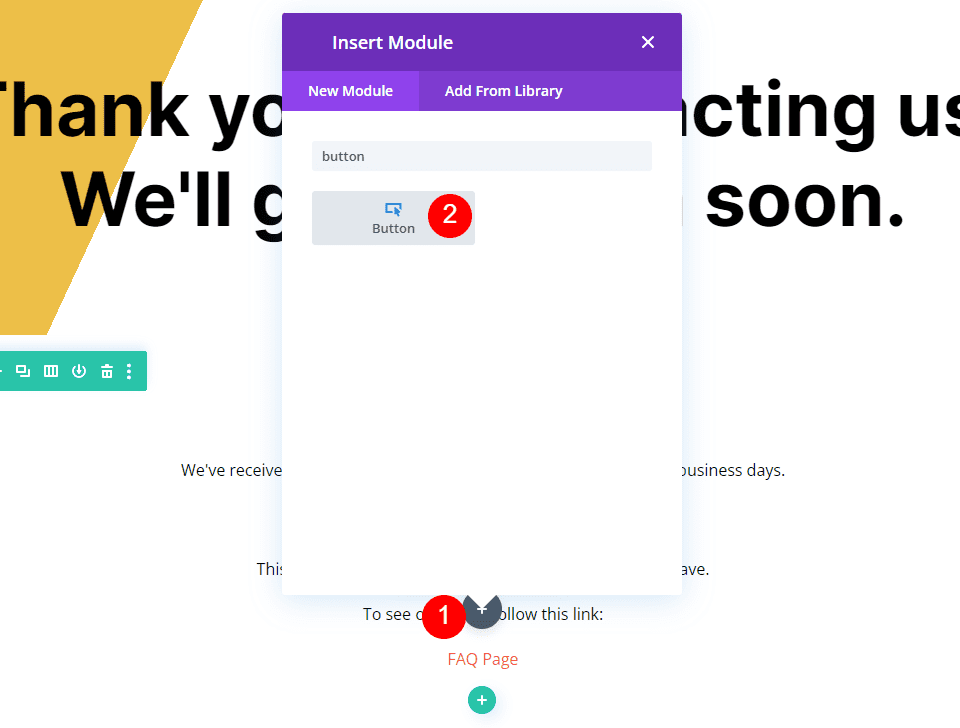
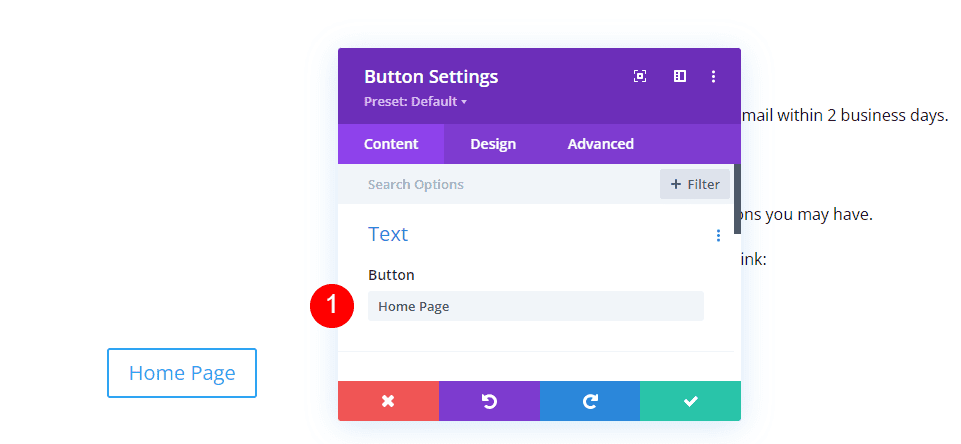
Open the Button Module’s settings and change the Button Text to Home Page.
- Text: Home Page
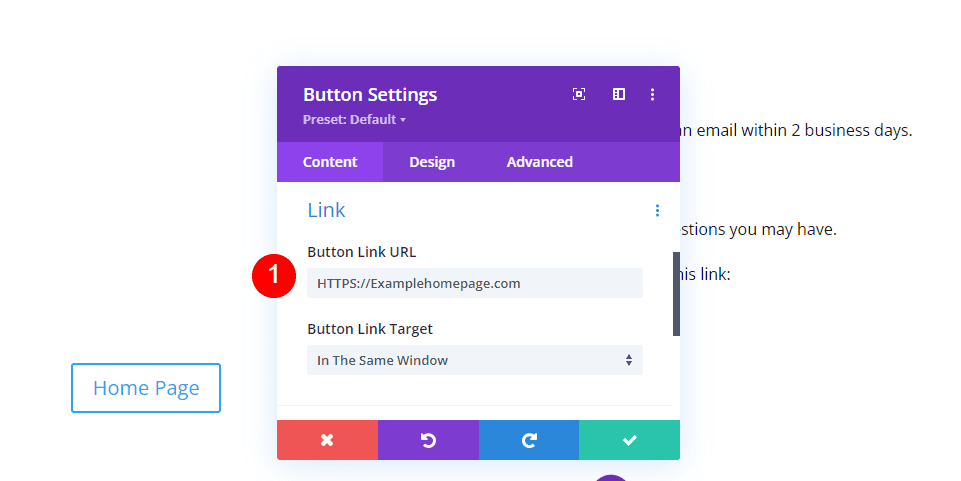
Link
Next, enter the URL for your home page into the URL field. Leave the Link Target at its default setting so the link opens in the same window.
- Button Link URL: your home page URL
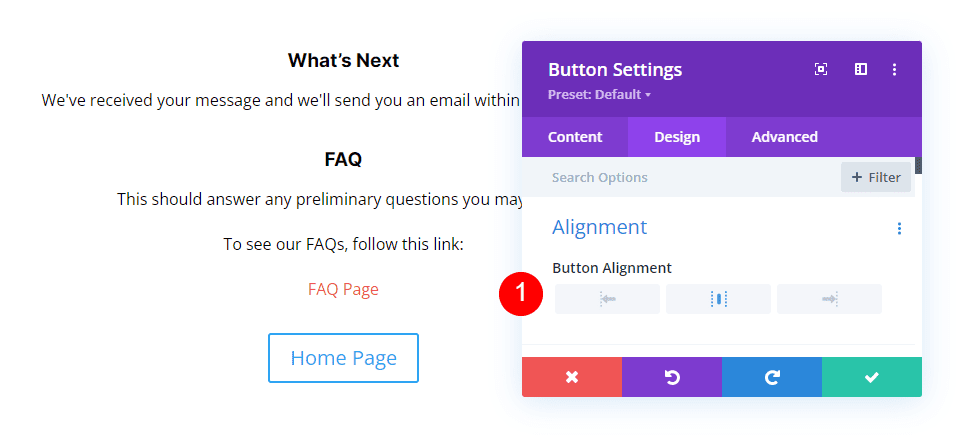
Alignment
Next, select the Design tab. Under Alignment, select Center for the Button Alignment.
- Button Alignment: Center
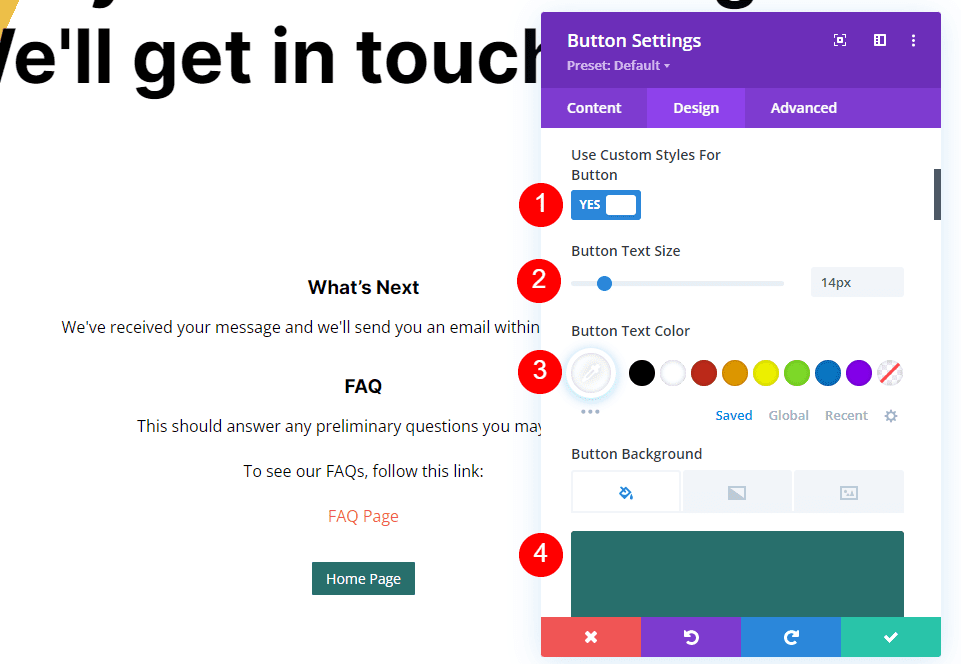
Button
Scroll down to Button and enable Use Custom Styles for Button. Change the Font Size to 14px. Set the Font Color to white and the Background Color to #286f6c.
- Use Custom Styles for Button: Yes
- Text Size: 14px
- Text Color: #ffffff
- Background Color: #286f6c
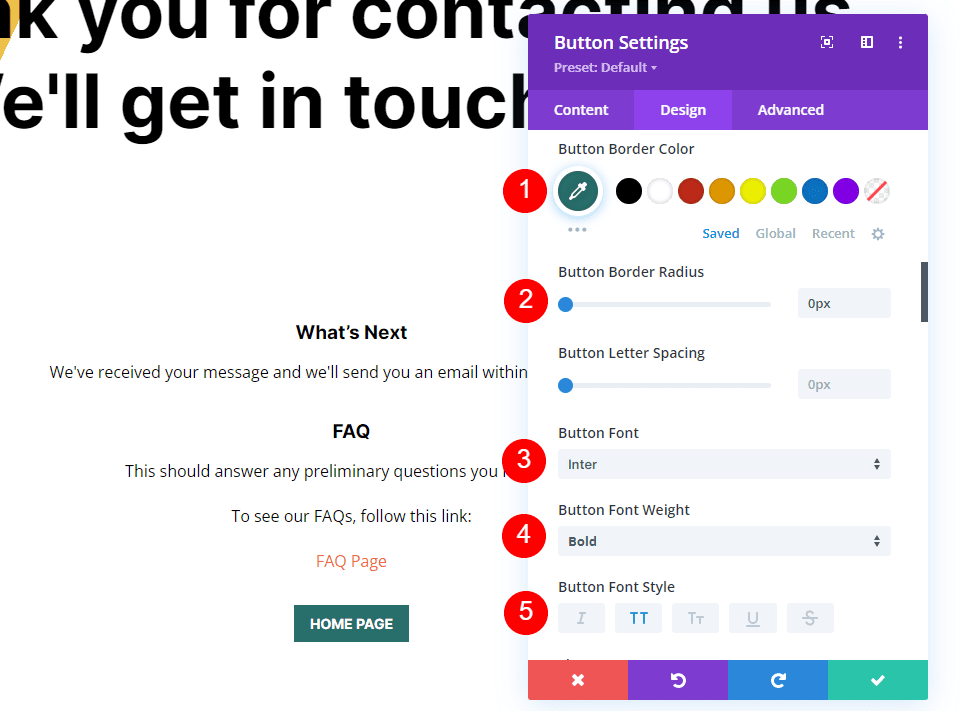
Change the Border Color to #286f6c and set the Radius to 0px. Choose Inter for the Font and set the Weight to Bold and the Style to TT.
- Border Color: #286f6c
- Border Radius: 0px
- Font: Inter
- Weight: Bold
- Style: TT
Spacing
Finally, scroll down to Spacing. Change the Top and Bottom Padding to 14ps and the Left and Right Padding to 20px. Close the module and save your settings.
- Padding: 14px Top and Bottom, 20px Left and Right

Results
Desktop Redirect Contact Form Page with a Custom Message
Phone Redirect Contact Form Page with a Custom Message
Ending Thoughts
That’s our look at how to redirect after filling out the Divi Contact Form. Setting up the redirect is easy to do in Divi’s Contact Form Module. I recommend creating a page just for the redirect and using the page to provide specific information and links. Your visitors will appreciate the extra effort, and it will make the contact process more understandable and fulfilling.
We want to hear from you. Do you use a custom page to redirect after filling out your contact form? Let us know about your experience in the comments.


Thank you for this feature. I think it’s new. I’m glad it’s there now, anyways.
I’ll try it out with my booking form I created with Divi Builder.