
Ever since the Divi sticky options update has been released, we’ve been sharing tips and tricks on how to use them throughout your website builds with Divi, and today, we’re adding another one for you to bookmark! This tutorial will be all about interaction. We’ll automatically place a custom header below each page’s hero section and turn that header sticky as soon as visitors scroll past it, which results in a beautiful scrolling experience. You’ll be able to download the JSON file for free as well!
Let’s get to it.
- 1 Preview
- 2 Download The Template for FREE
- 3 Download For Free
- 4 1. Create a New Page Using Divi’s Upholstery Layout Pack Landing Page
- 5 2. Download & Install the Free Header & Footer for Divi’s Upholstery Layout Pack
- 6 3. Place Header Section Below Hero Section
- 7 4. Apply Sticky Position & Styles to Header
- 8 Preview
- 9 Final Thoughts
Preview
Before we dive into the tutorial, let’s take a quick look at the outcome across different screen sizes.
Desktop
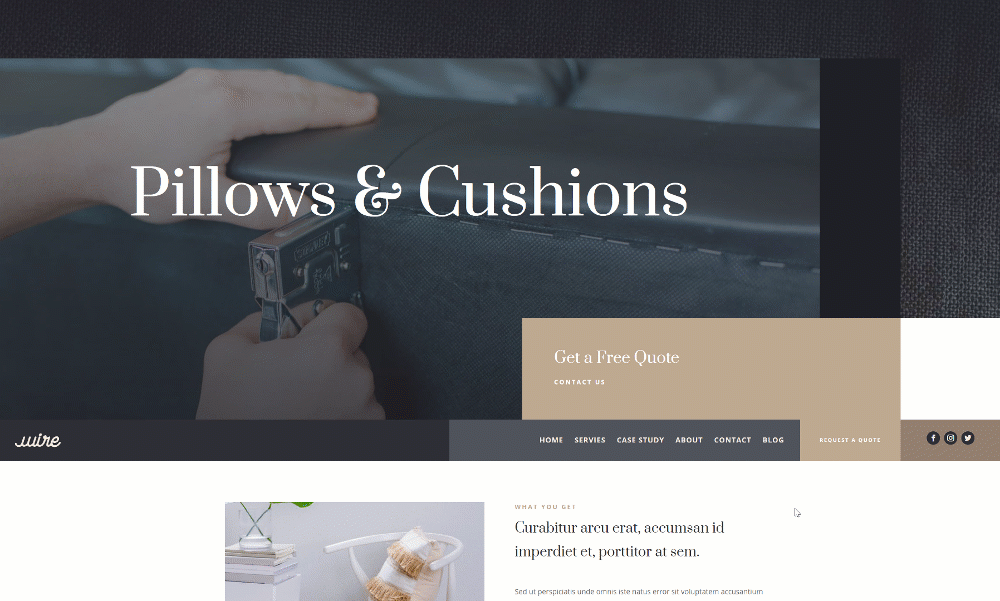
Mobile

Download The Template for FREE
To lay your hands on the free page template, you will first need to download it using the button below. To gain access to the download you will need to subscribe to our newsletter by using the form below. As a new subscriber, you will receive even more Divi goodness and a free Divi Layout pack every Monday! If you’re already on the list, simply enter your email address below and click download. You will not be “resubscribed” or receive extra emails.

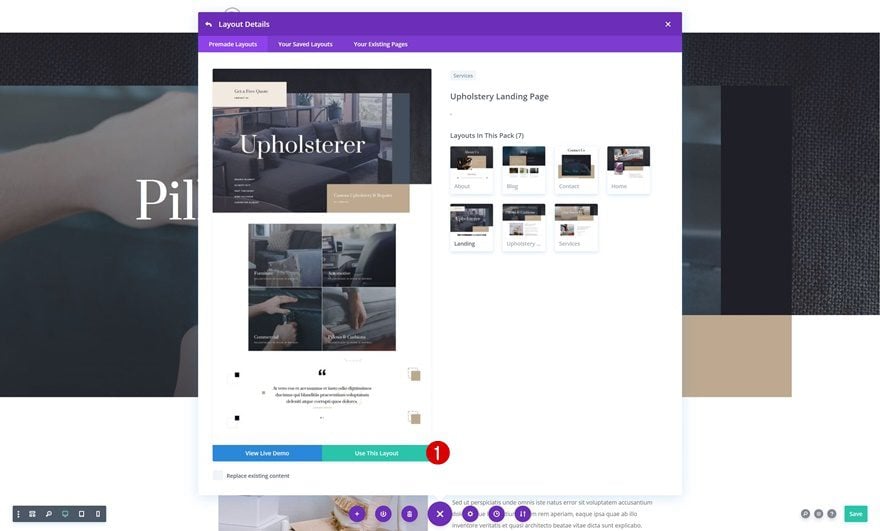
1. Create a New Page Using Divi’s Upholstery Layout Pack Landing Page
For this tutorial, we’re going to use the Upholstery Layout Pack and its free header and footer template that you can download on the blog. Although we’re using this particular layout pack, you can apply this method to any kind of website you’re building. To preview the result while going through the tutorial below, we recommend you set up a page that you keep open in a separate tab. To match the header and footer we’ll use, we’re setting up a new page using a layout of choice that comes with Divi’s Upholstery Layout Pack.
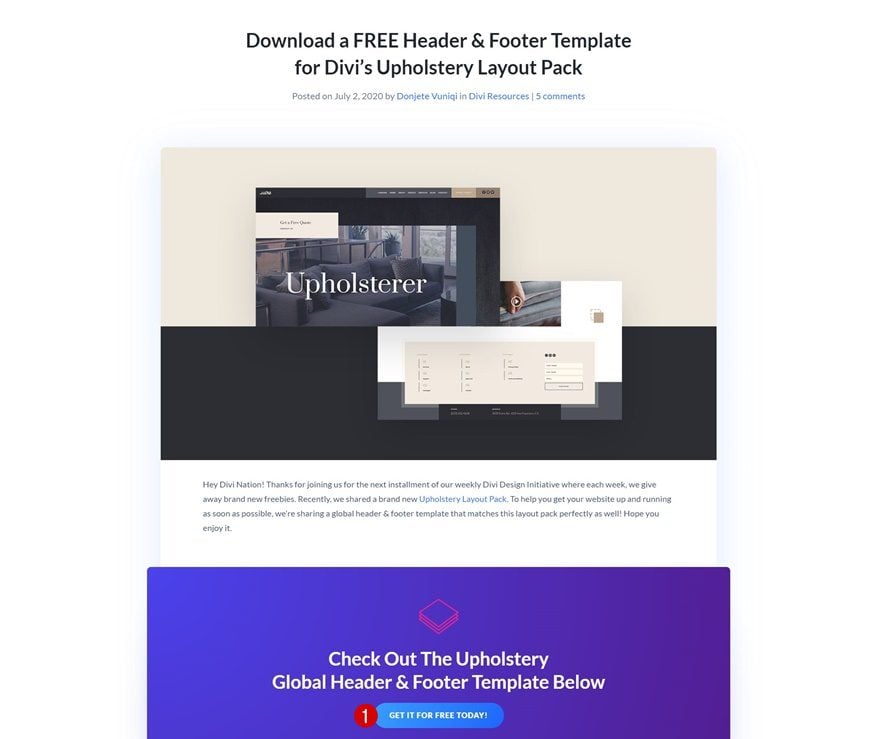
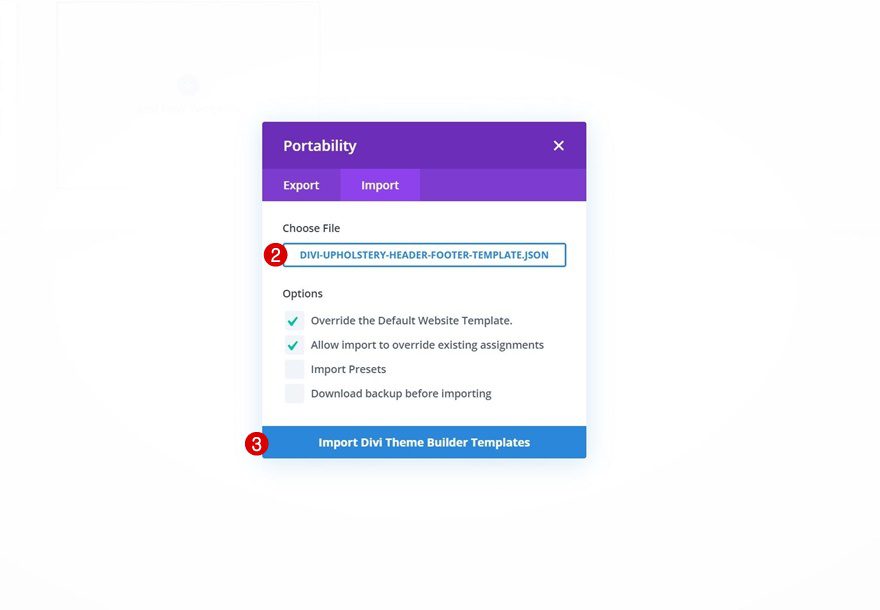
Next, we’ll download the free header and footer template for Divi’s Upholstery Layout Pack. Downloading and installing this freebie will help us focus on the important part of this tutorial, which is getting the technique right. Once you’ve gone to the blog post, navigate to the email optin form and fill in your email address. Then, a download button will appear. This download button will allow you to download a zipped folder. Once you’ve unzipped the folder, you can find a JSON file that contains a default website template with a global header and footer.
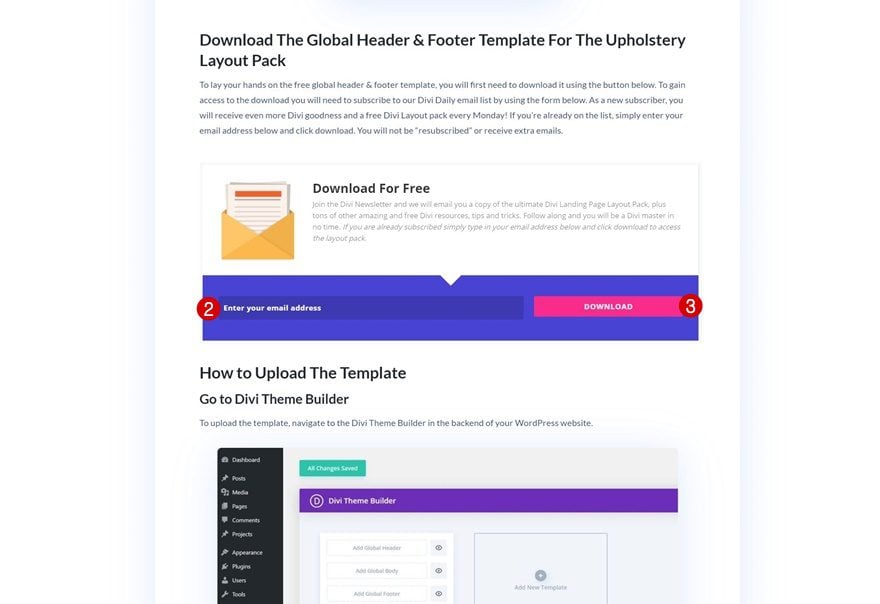
To use the JSON file you’ve just downloaded, navigate to your Divi Theme Builder.
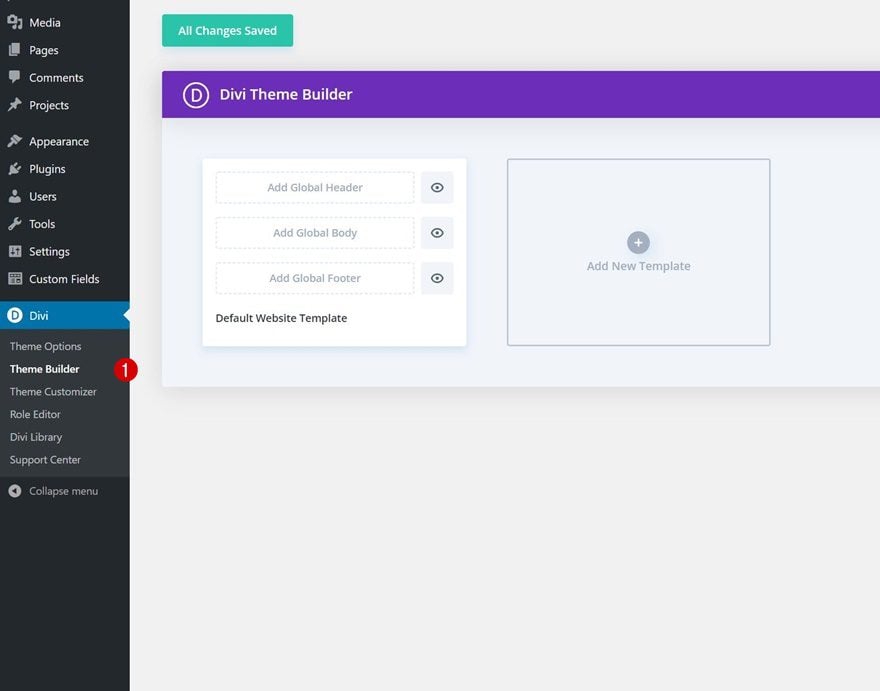
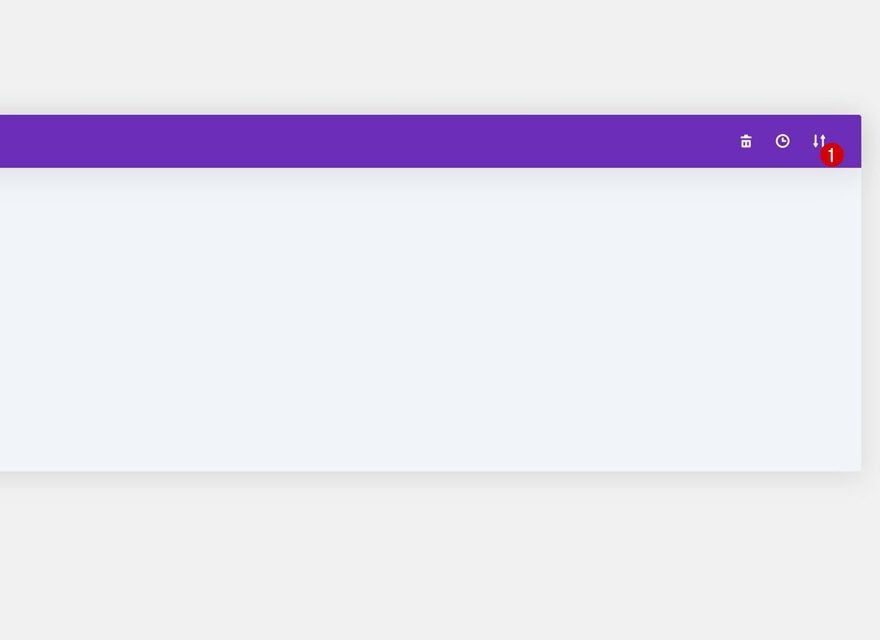
There, click on the import & export button in the top right corner and upload the JSON file you can find in your download folder.
Create New Page Template
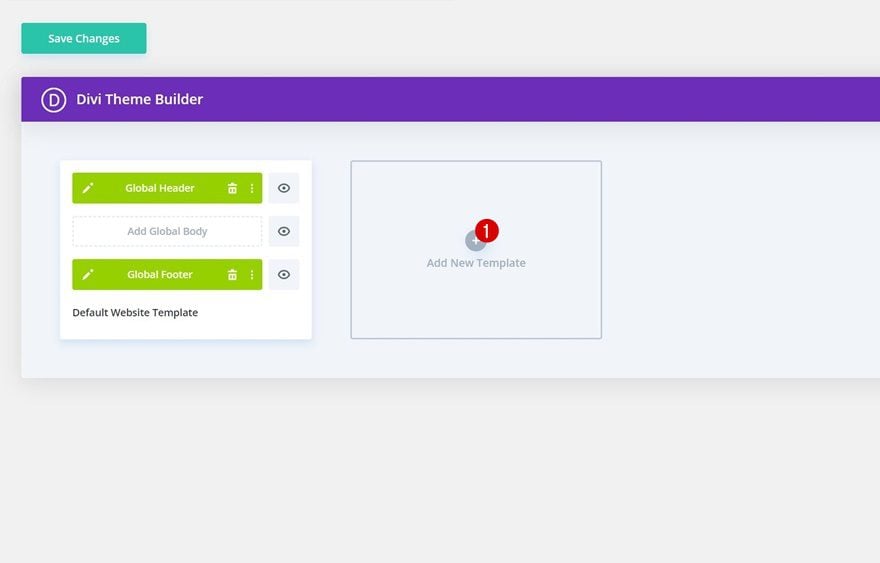
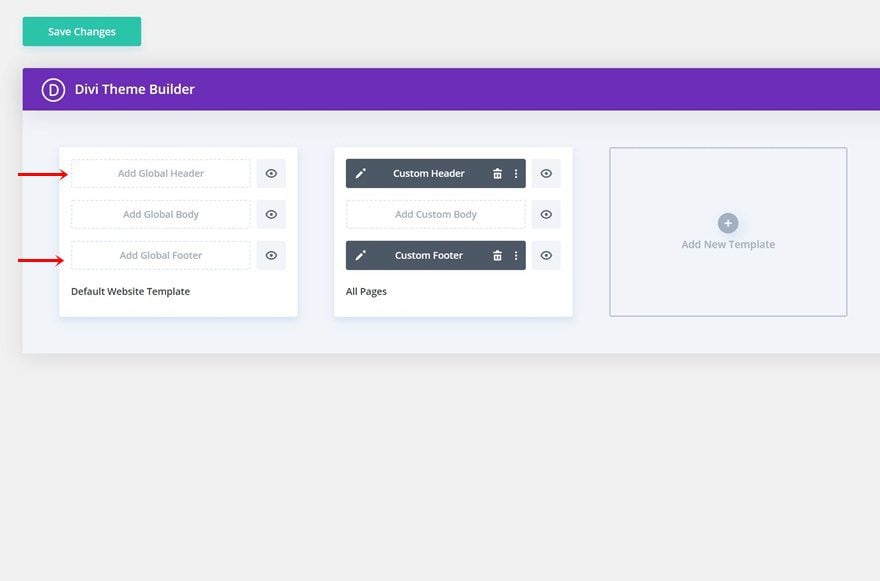
As soon as you’ve uploaded the template, you’ll see a global header and footer appear inside your default website template. To avoid weird header placements, we’ll only apply the “pick up sticky header” effect to our pages, but if you have a Divi-built hero section on other custom post types too, feel free to use the header there as well. Add a new template and use it on all pages.
- Use On: All Pages
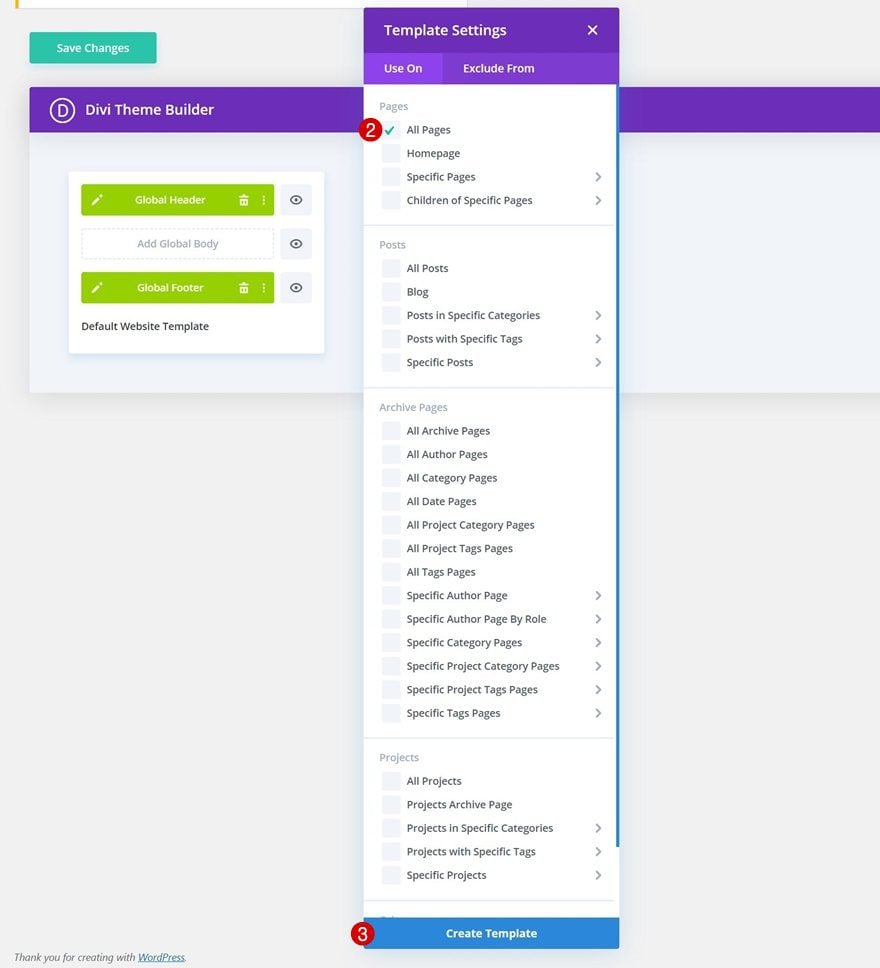
As soon as you add the page template, the global header and footer will automatically be added to that template. We’re turning this global header into a custom header by removing the global header and footer in our default website template. This way, the changes we make to our header will only apply to pages.
3. Place Header Section Below Hero Section
Open Global Header Template
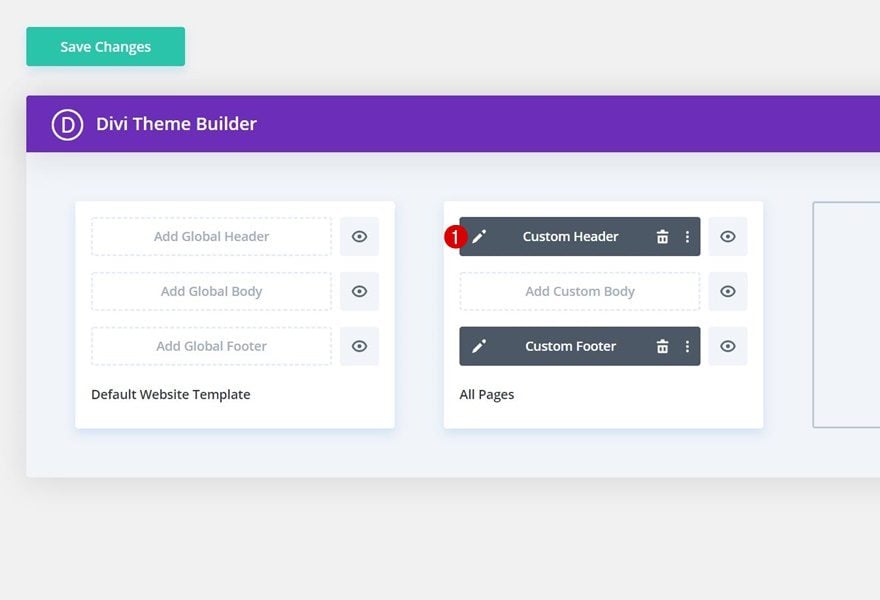
Now that we’ve set up the theme builder environment for our header, it’s time to switch over to our header template by clicking on the pencil icon.
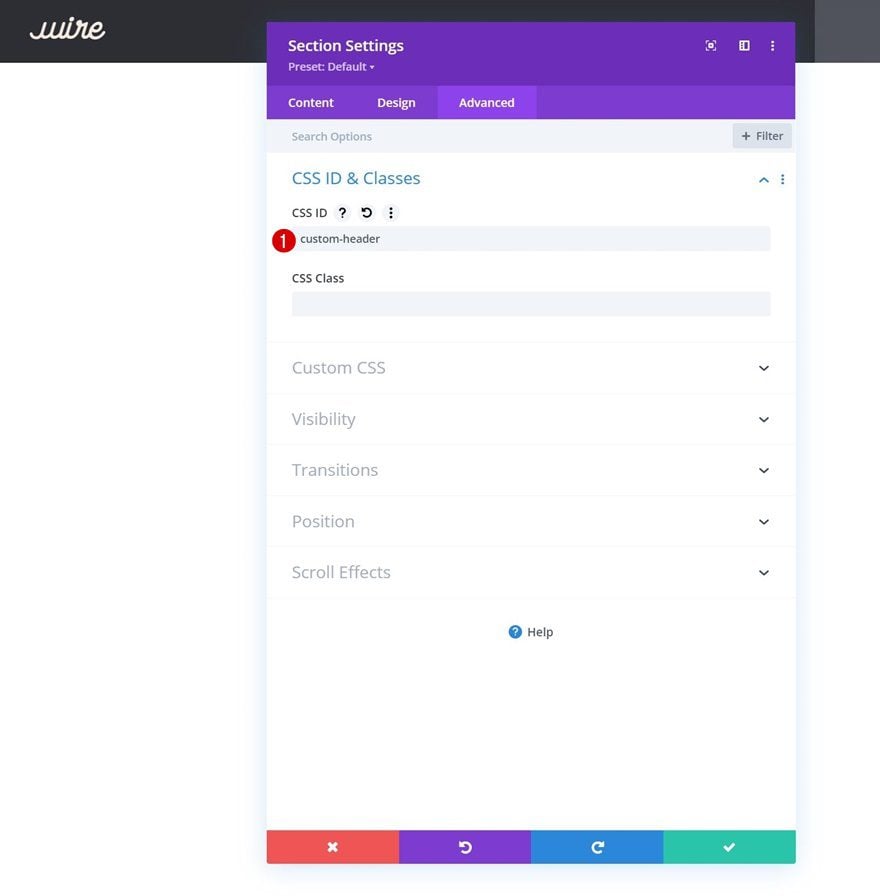
Assign a Custom CSS ID to Section Inside Global Header
Once inside the template editor, you’ll see a header design that contains a section, row and a couple of modules. To automatically place the header below each page’s first hero section, we’re going to need to assign a custom ID to our section. The technique we’re using is based on a previous tutorial. The difference between this post and the one mentioned in the previous sentence is that as soon as a visitor passes by the header, it’ll be turned sticky. When people scroll back up, it’ll take back its place below the hero section.
- CSS ID: custom-header
Continue by adding a new Code Module to the row’s first column.
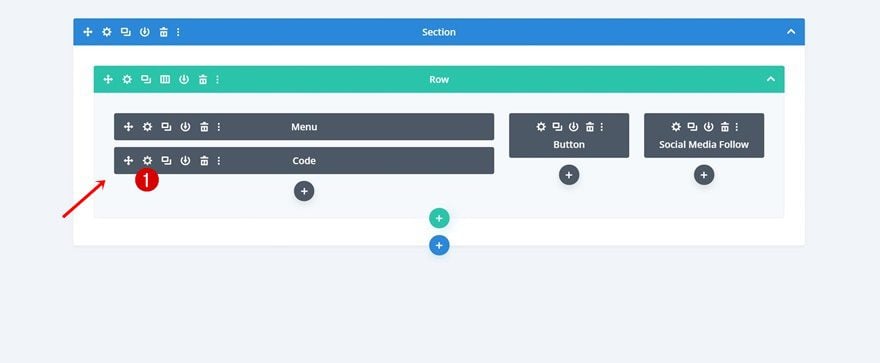
Add JQuery Code to Place Section Below Each Page’s First Section
There, we’ll insert some JQuery code that’ll automatically place the header section below each page’s first hero section.
jQuery(function($){
$(document).ready(function(){
$('#custom-header').insertAfter('.et_pb_section_0');
});
});
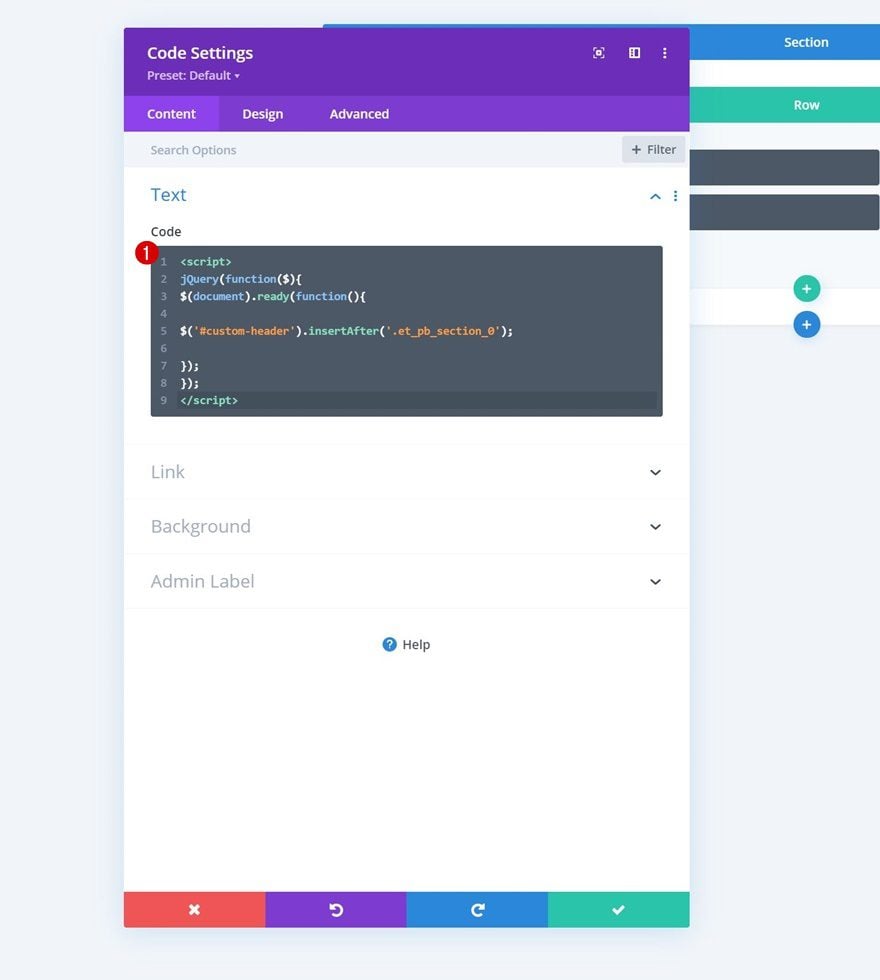
Add CSS Code to Same Code Module
We’ll include a CSS class between style tags too to prevent the header from showing up in the builder while building pages.
#et_pb_root #custom-header {
display: none;
}
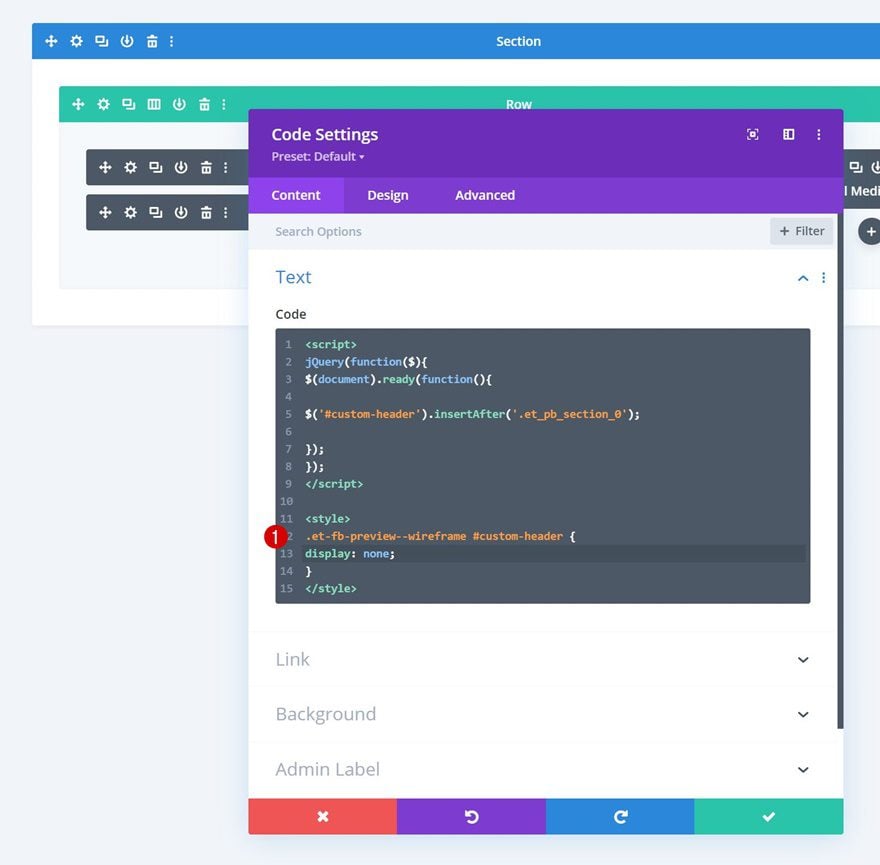
4. Apply Sticky Position & Styles to Header
Add Sticky Positioning to Section
Now that our section is placed below each page’s first hero section, it’s time to apply the sticky effect too. To do that, we’ll use Divi’s built-in sticky settings in the advanced tab.
- Sticky Position: Stick to Top
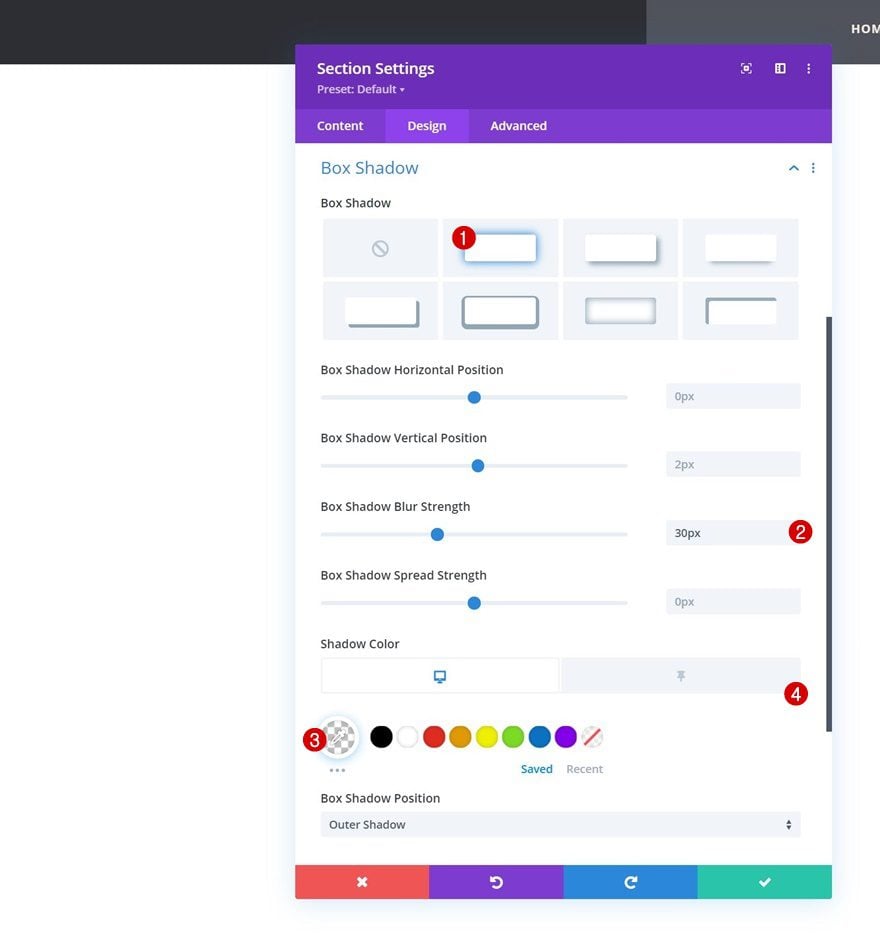
Add Sticky Box Shadow to Section
Now that the sticky position has been applied, we can start making sticky changes to our section and all child elements it contains. We’ll start by adding a sticky box shadow to our section container.
- Box Shadow Blur Strength: 30px
- Shadow Color
- Default: rgba(0,0,0,0)
- Sticky: rgba(0,0,0,0.13)
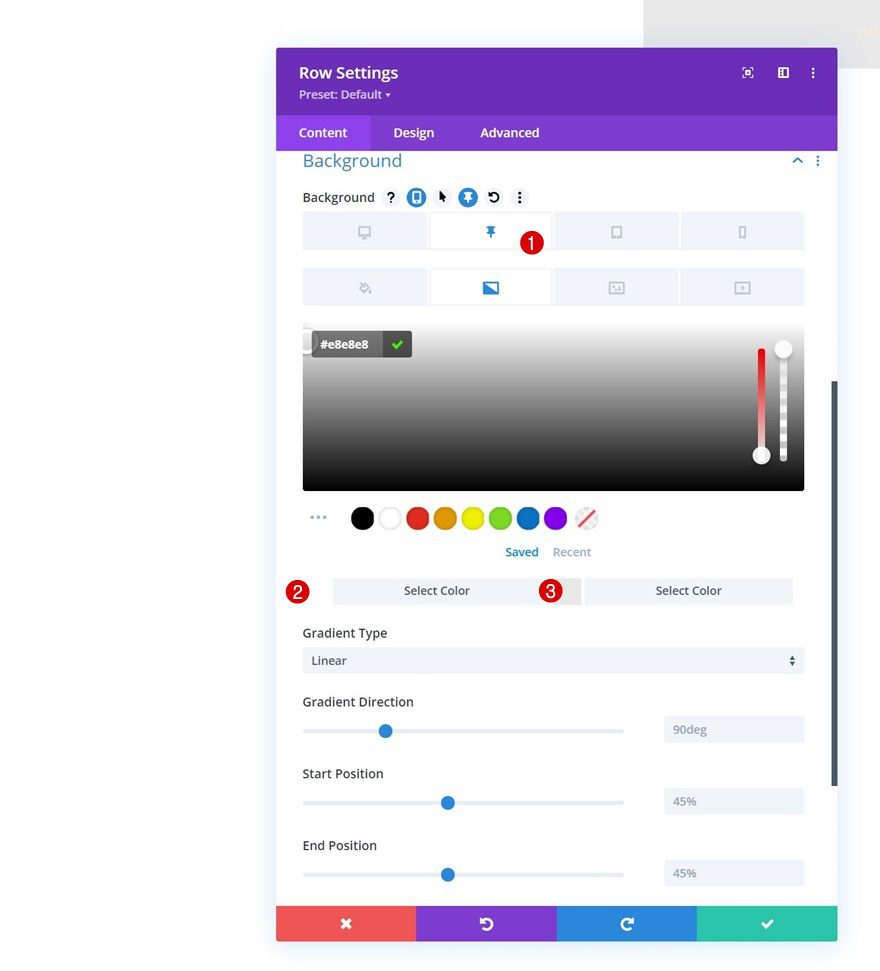
Modify Sticky Row Gradient Background
Then, we’ll apply a sticky gradient background to our row.
- Color 1: #ffffff
- Color 2: #e8e8e8
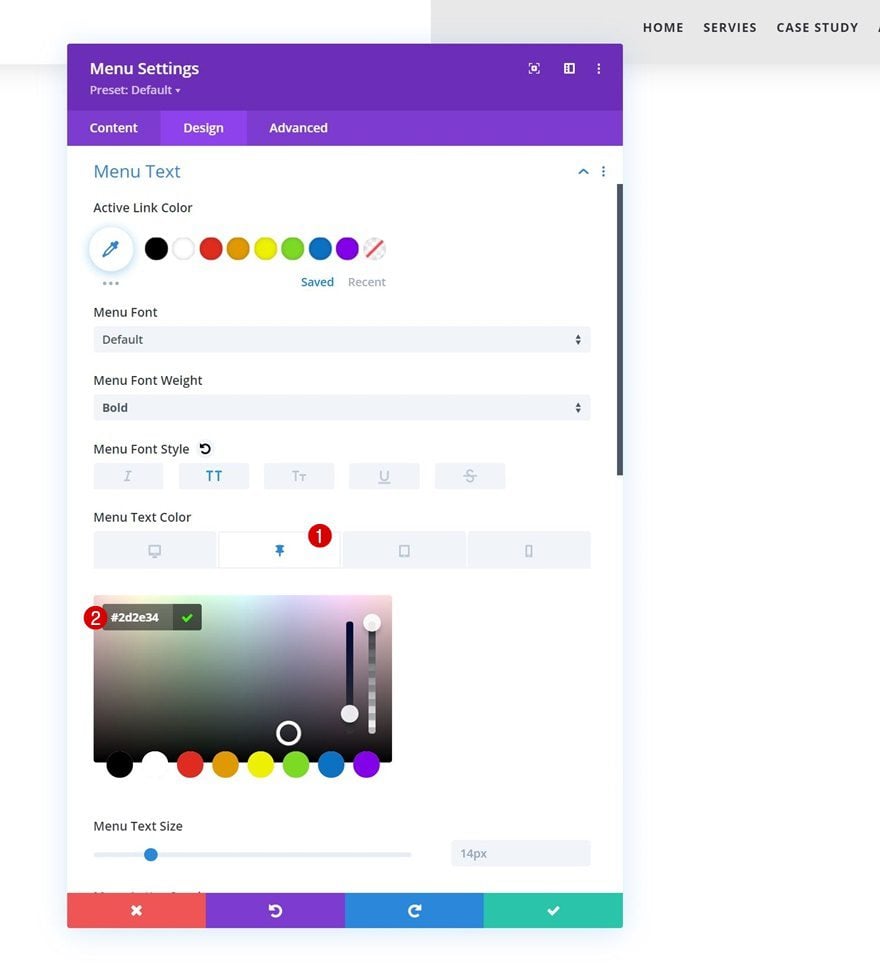
Then, we’ll open the Menu Module and change the menu text color in a sticky state.
- Menu Text Color: #2d2e34
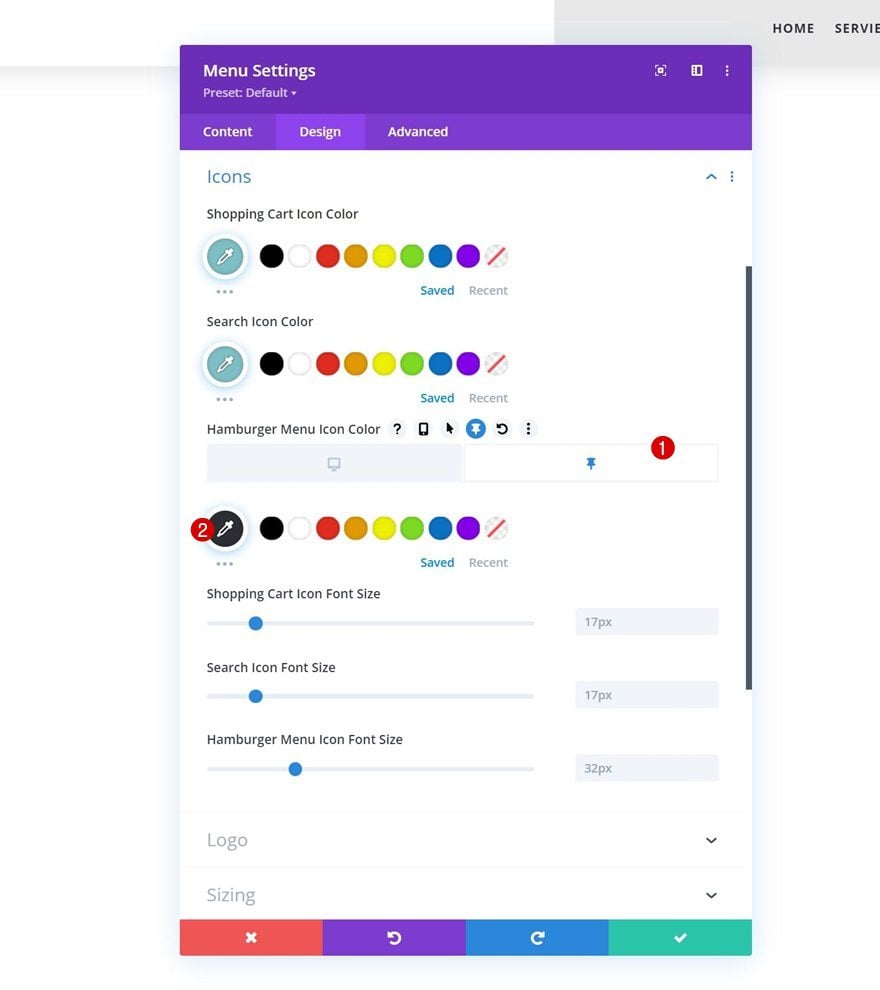
We’ll modify the sticky menu hamburger icon color too.
- Hamburger Menu Icon Color: #2d2e34
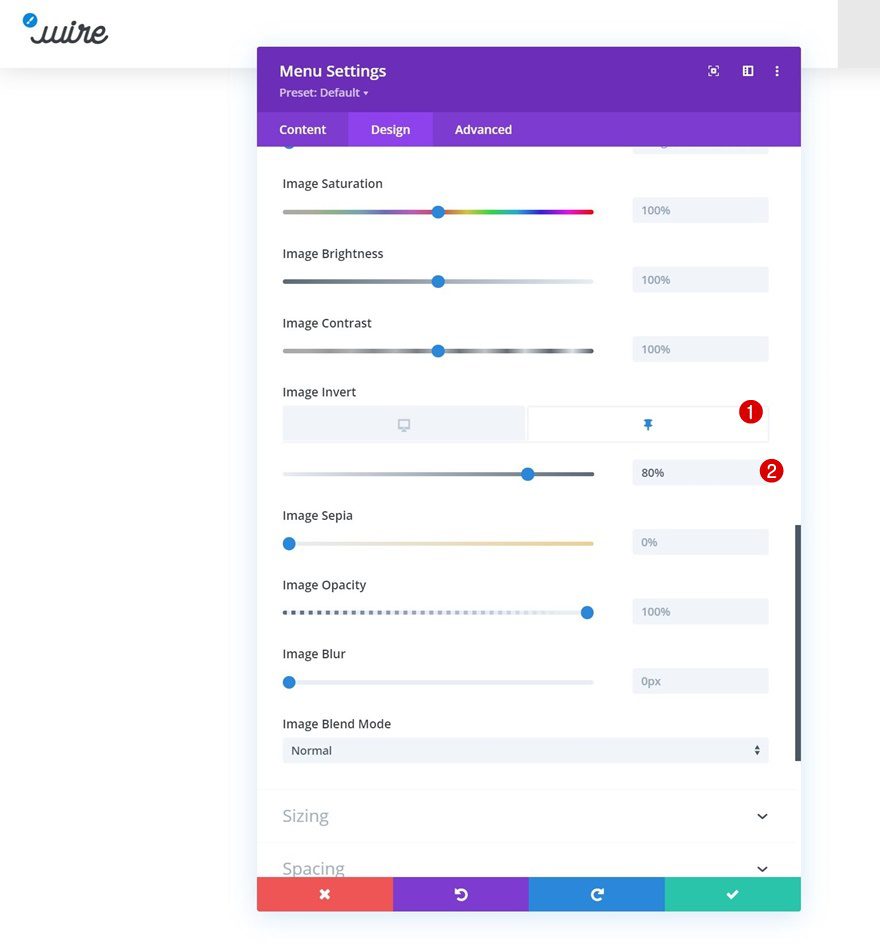
Add Sticky Logo Invert Filter
And we’ll complete the tutorial by adding an image invert filter. That’s it! Once you’ve applied all these changes to your header, make sure you save the template and Divi Theme Builder changes before viewing the outcome on the page you’ve created in the first part of the tutorial.
- Image Invert: 80%
Preview
Now that we’ve gone through all the steps, let’s take a final look at the outcome across different screen sizes.
Desktop
Mobile
Final Thoughts
In this post, we’ve shared another tip and trick you can apply with Divi’s built-in sticky options. More specifically, we’ve shown you how to “pick up” your header once you scroll past it. The header will be automatically placed below each page’s first section. If you have any questions or suggestions, feel free to leave a comment in the comment section below!
If you’re eager to learn more about Divi and get more Divi freebies, make sure you subscribe to our email newsletter and YouTube channel so you’ll always be one of the first people to know and get benefits from this free content.


How to make sticky transitions smoother?
hello divi nation,
If you include a custom body from the theme builder, you just have to change the tag in the jQuery code to hello divi nation, to .et_pb_section_0_tb_body
saludos
Thanks for this great tutorial 🙂
I tried to make all the steps as concentrated as i can, but i still have a “problem”.
What do i have to do if I want my header image to be placed before the sticky menu ? Just as it’s done on your preview.
I guess there’s a step i didn’t watch.
Otherwise, it’s all good !
I was so curious about this kind of header but was not able to make it properly! Really thankful to you so I got what I needed! Saved my money that I was going to give a freelancer to do this!
This is a great tutorial as always 🙂 I am tempted to implement it on my website. I’ve always liked this style of menu, as it draws extra attention to it in my opinion.
Thank you, Micheal 🙂 It definitely helps draw attention to it, try it!
This tutorial is quite helpful, thanks
Happy to hear that, Fem! 🙂