")
Gradient background animation can be a beautiful design technique for making background colors come to life on your website. It is a perfect solution for those who want something more lifelike than a static background color without having to resort to slow-loading video background. The basic idea behind gradient background animation is to use CSS to create enlarge and animate a gradient background to create seamless moving color transitions.
In this tutorial, we are going to show you two ways you can create gradient background animations in Divi. The first combines a custom CSS snippet that animates the gradient colors chosen in Divi’s built-in settings. The second way animates multiple modules with a radial gradient background over a row or section background. The setup is actually quite simple for such a beautiful result.
Let’s get started!
- 1 Sneak Peek
- 2 Download the Layout for FREE
- 3 Download For Free
- 4 What You Need to Get Started
- 5 Part 1: Creating a Gradient Background Animation with CSS Snippet and Divi’s Background Option
- 6 Part 2: Creating Gradient Background Animation Using Divi Modules with Radial Gradient Backgrounds
- 7 Final Thoughts
Sneak Peek
Here is a sneek peek at both ways we can create gradient background animation in Divi.
#1 Gradient Background Animation with CSS Snippet and Divi’s Background Option
#2 Gradient Background Animation Using Divi Modules with Radial Gradient Backgrounds
Download the Layout for FREE
To lay your hands on the designs from this tutorial, you will first need to download it using the button below. To gain access to the download you will need to subscribe to our newsletter by using the form below. As a new subscriber, you will receive even more Divi goodness and a free Divi Layout pack every Monday! If you’re already on the list, simply enter your email address below and click download. You will not be “resubscribed” or receive extra emails.

To import the layout to your page, simply extract the zip file and drag the JSON file into the Divi Builder.
Let’s get to the tutorial, shall we?
What You Need to Get Started

To get started, you will need to do the following:
- If you haven’t yet, install and activate the Divi Theme.
- Create a new page in WordPress and use the Divi Builder to edit the page on the front end (visual builder).
- Choose the option “Build From Scratch”.
After that, you will have a blank canvas to start designing in Divi.
Part 1: Creating a Gradient Background Animation with CSS Snippet and Divi’s Background Option
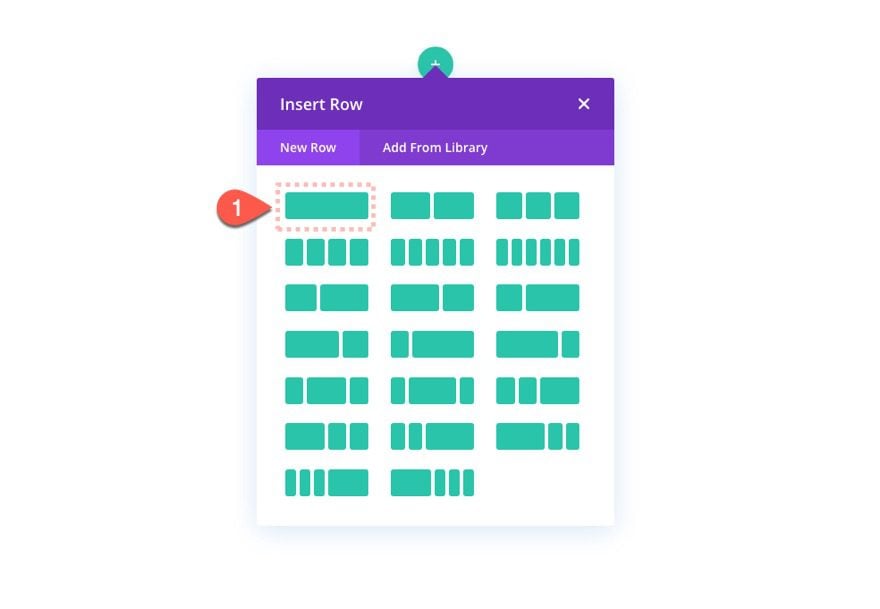
To kick things off, add a one-column row to the default section in the Divi Builder.
Section Settings
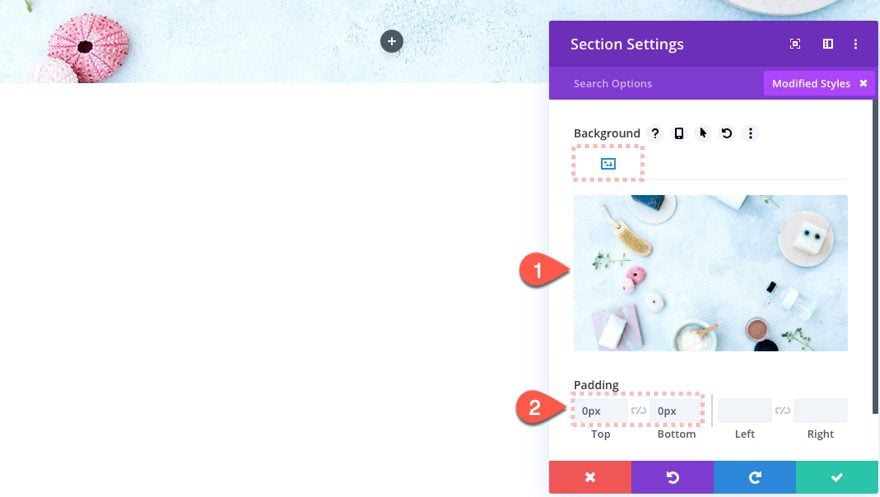
Then update the section settings with a background image. Our gradient background is going to be added to our row so it will lay on top of this image.
Then update the padding as follows:
- Padding: 0px top, 0px bottom
Row and Column Settings
Column Settings
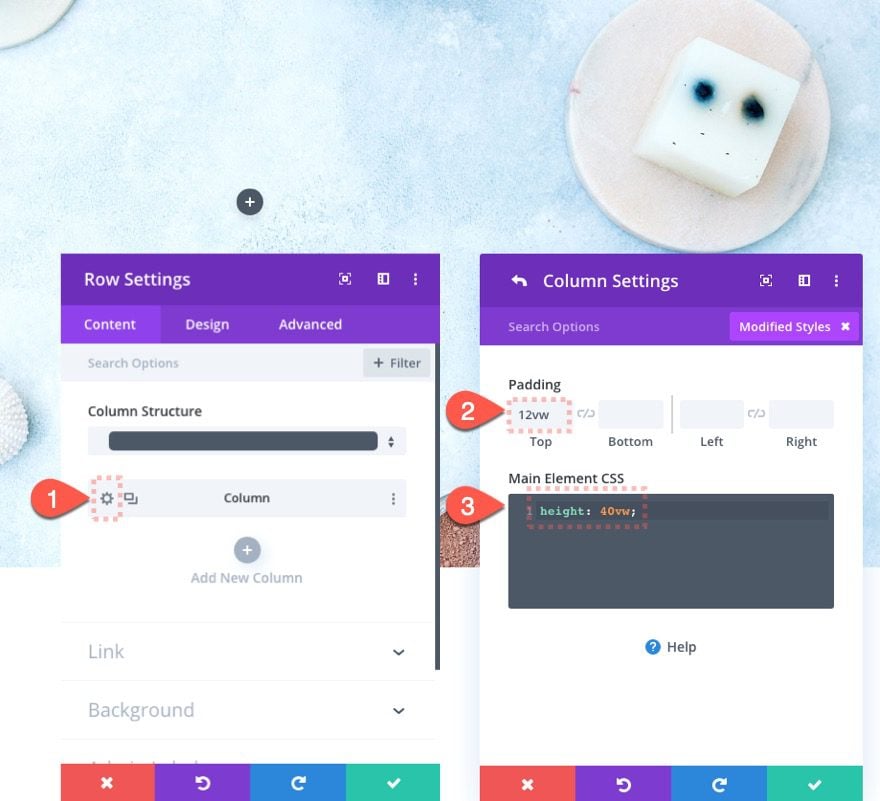
Open the row settings and then update the column padding as follows:
- Padding: 12vw top
Then add the following custom CSS to the Column Main Element:
height: 40vw;
Row Settings
Gradient Background
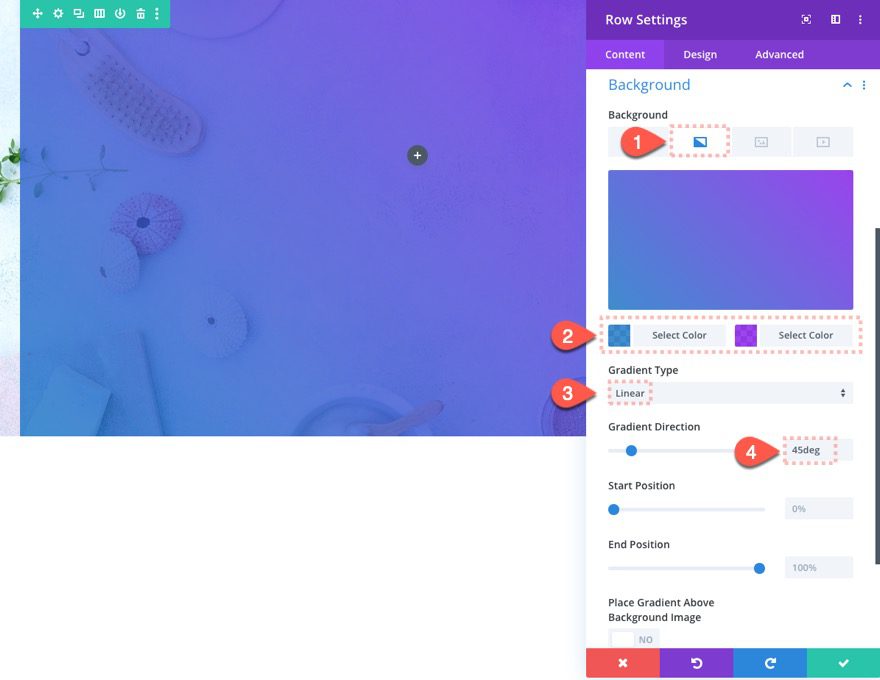
Now we can add the gradient background to the row. Make sure to make the gradient colors semi-transparent if you want to see the background image of the section.
Update the row settings as follows:
- Gradient Background Left Color: rgba(12,113,195,0.8)
- Gradient Background Right Color: rgba(131,0,233,0.8)
- Gradient Type: Linear
- Gradient Direction: 45deg
Size
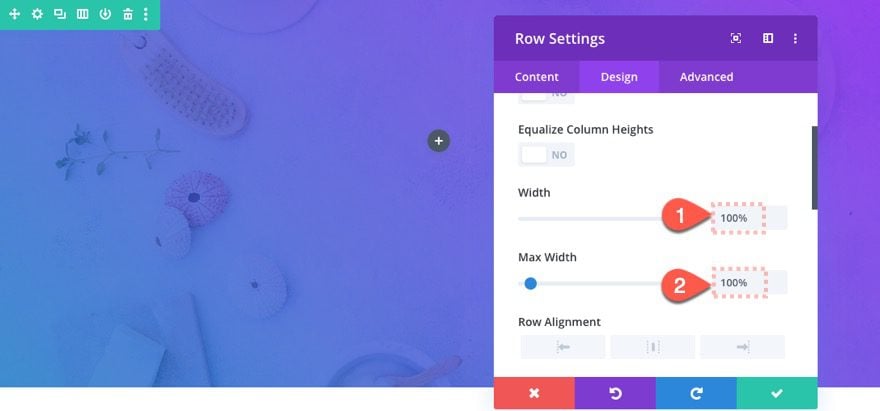
Next, update the size of the row as follows:
- Width: 100%
- Max Width: 100%
Custom CSS Class
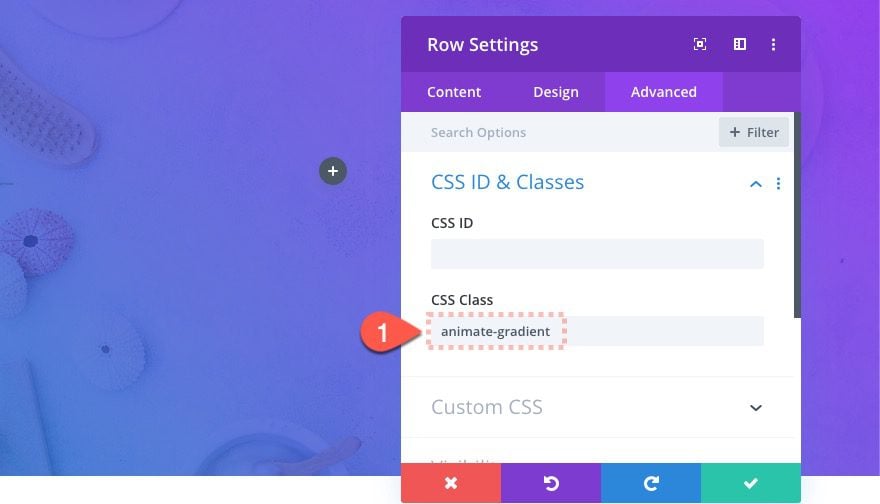
Now that our gradient background is in place, we need to add the animation via custom CSS. Before we add the CSS code, we need to add a custom CSS class to target this specific row.
Go to the advanced tab and add the following CSS Class:
- CSS Class: animate-gradient
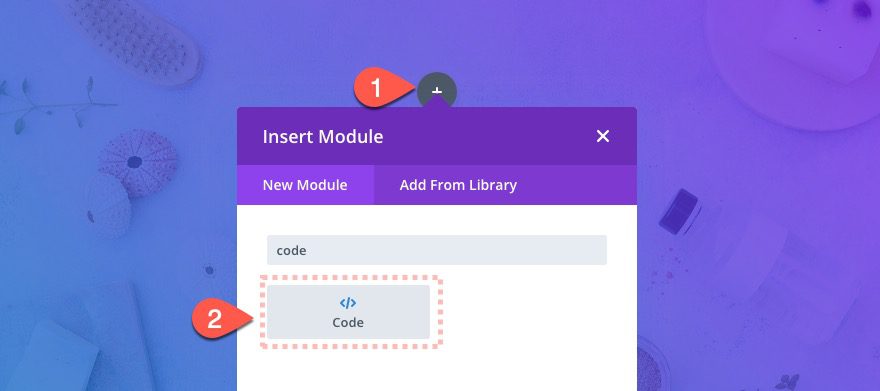
Add Code Module
Once the CSS Class has been added to the row, add a code module to the row.
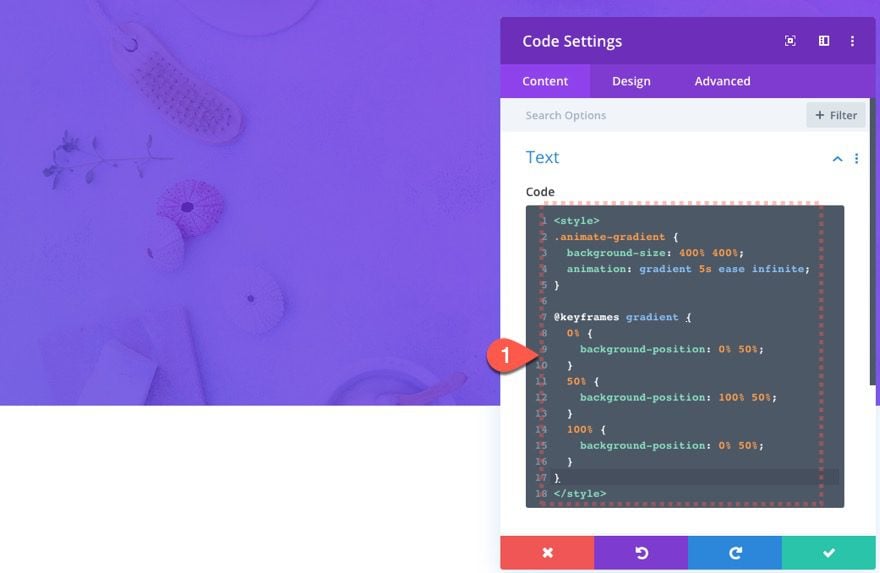
Paste CSS in Code Module
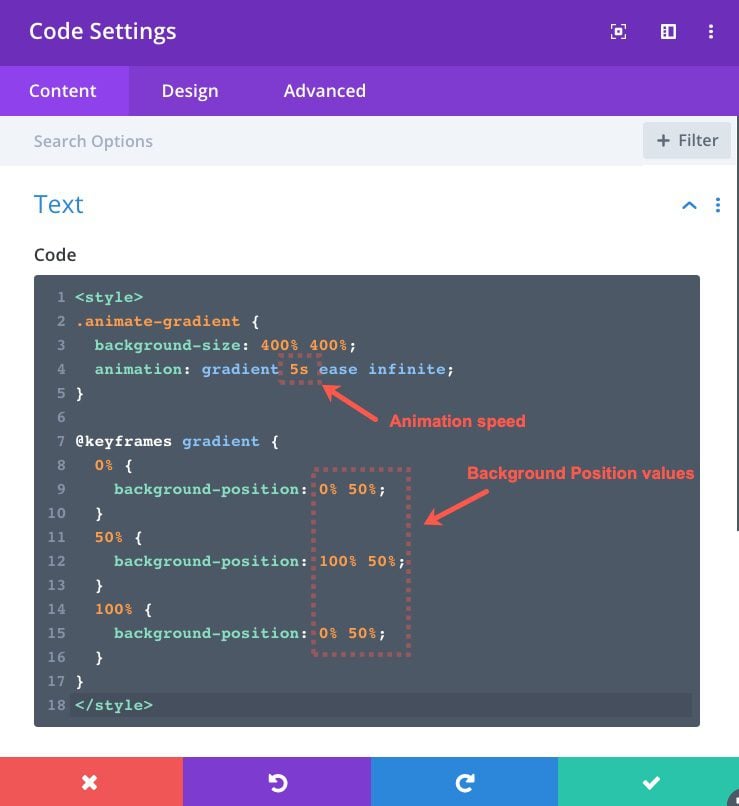
Then paste the following CSS code inside the Code Module Settings Code box:
.animate-gradient {
	background-size: 400% 400%;
	animation: gradient 5s ease infinite;
}

@keyframes gradient {
	0% {
		background-position: 0% 50%;
	}
	50% {
		background-position: 100% 50%;
	}
	100% {
		background-position: 0% 50%;
	}
}
Make sure to wrap the code in the <style></style> tags since we are adding it to the HTML of the page.
Result
Here is the result so far. The gradient background has been enlarged by 400% of the original size and is being animated by moving to the left and right.
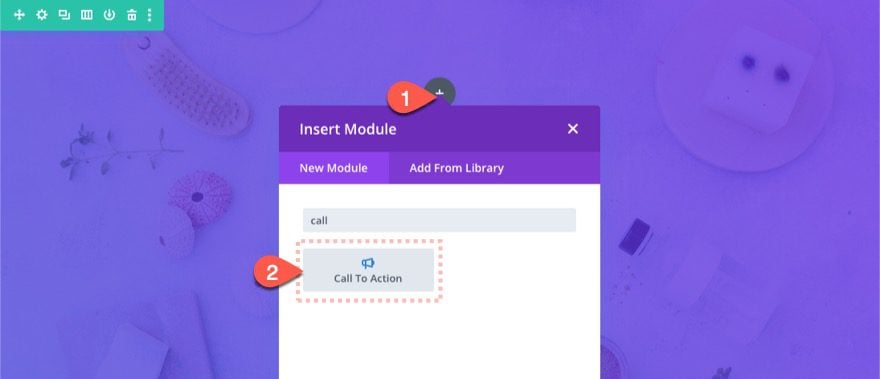
Add Call to Action
To complete the design, let’s add a call to action module to stand in as some content.
Call to Action Settings
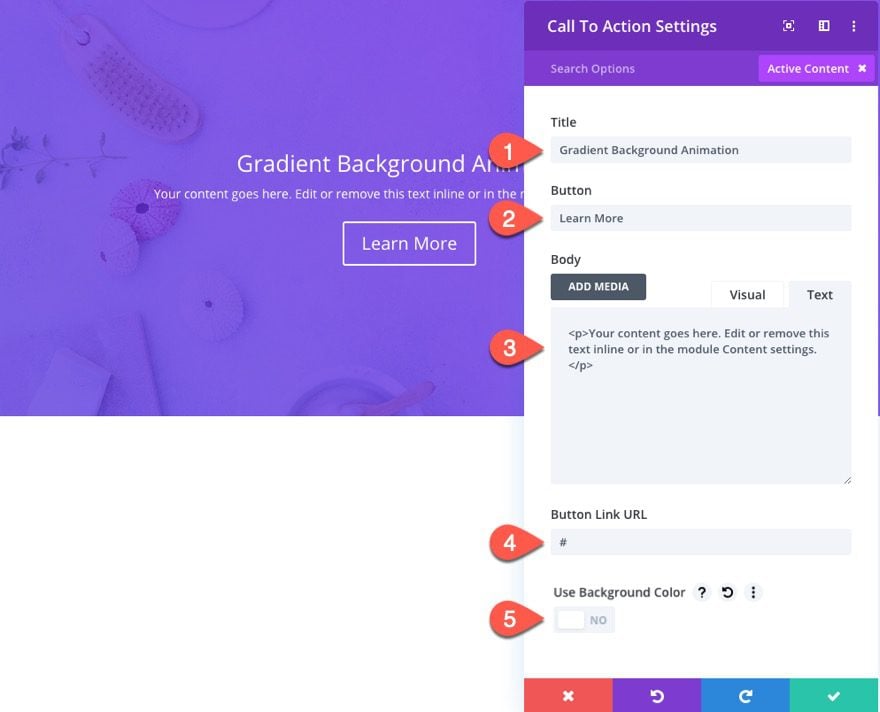
Content
Update the content as follows:
- Add Title
- Add Button Text
- Add Body Text
- Button Link URL: #
- Use Background Color: NO
Design
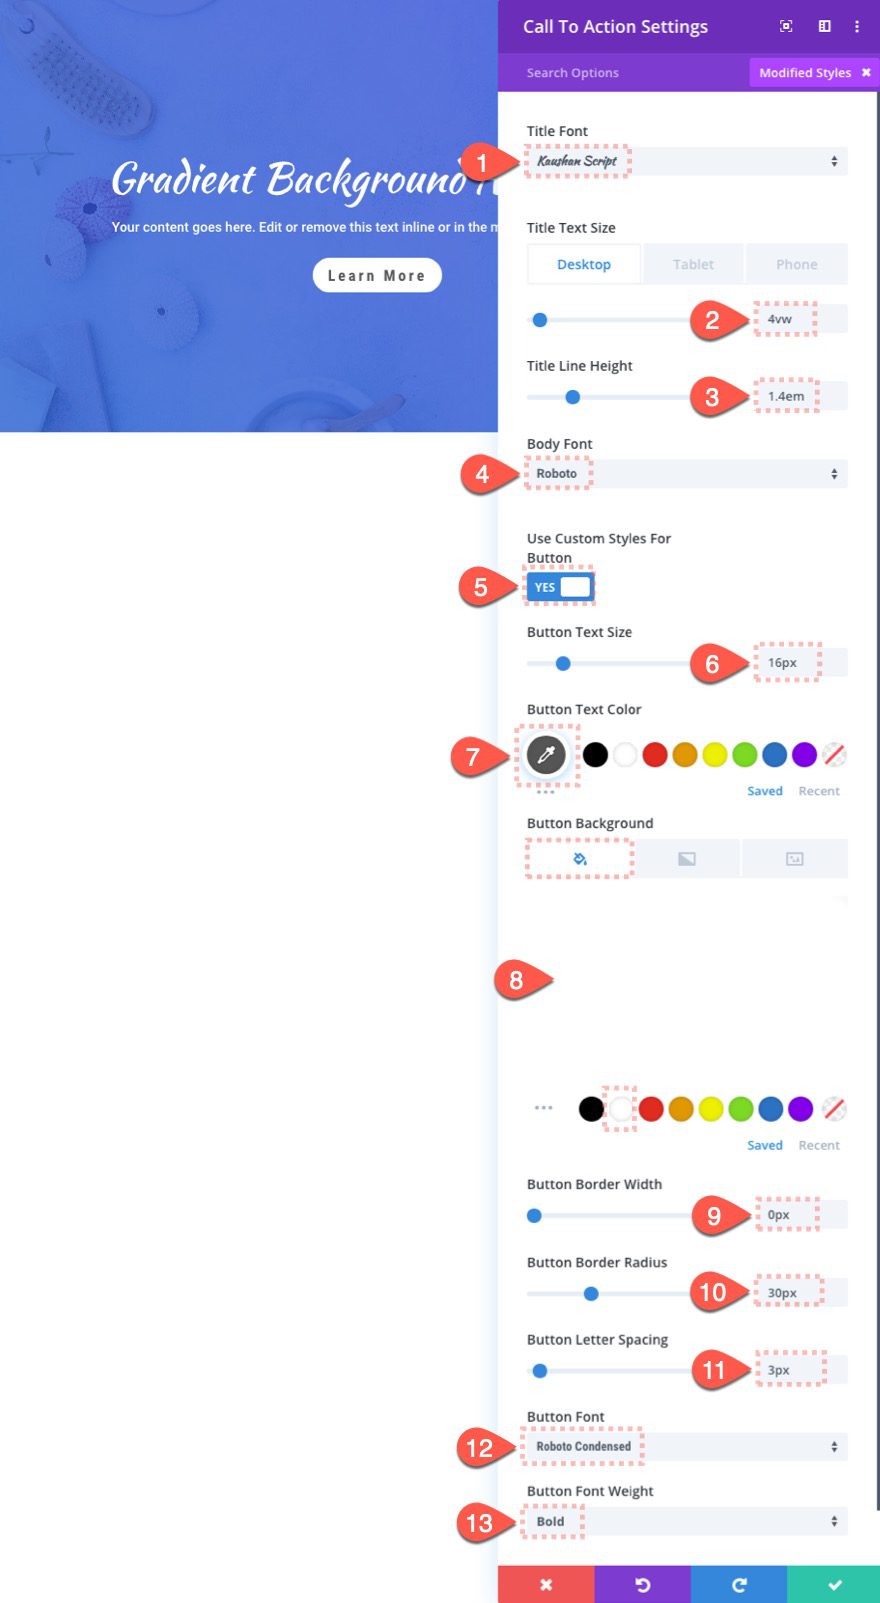
Jump over to the design tab and update the following:
- Title Font: Kaushan Script
- Title Text Size: 4vw (desktop), 30px (phone)
- Title Line Height: 1.4em
- Body Font: Roboto
- Button Text Size: 16px
- Button Text Color: #555555
- Button Background: #ffffff
- Button Border Width: 0px
- Button Border Radius:30px
- Button Letter Spacing: 3px
- Button Font: Roboto Condensed
- Button Font Weight: Bold
Result
Now check out the result on the live page with the call to action content in place. This would be a great header for your website!
Don’t forget that you can easily change the colors of your row background to whatever you want. The code will continue to work behind the scenes to animate the background for you.
If you’re familiar with CSS, you can adjust the speed and direction of the animation by changing the values for the animation properties.
Part 2: Creating Gradient Background Animation Using Divi Modules with Radial Gradient Backgrounds
The second way to create gradient background animation in Divi involves animating one (or more) modules, each with a radial gradient background. This design technique gives you full control over the animation of each module without having to rely on external custom CSS. Plus, it opens the door for limitless animation possibilities.
Here’s how to do it.
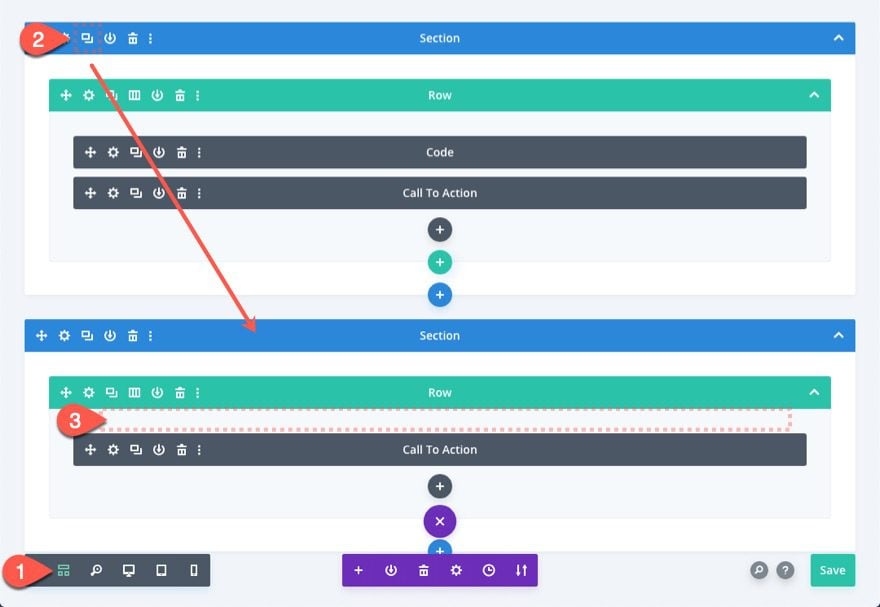
Duplicate Section
To start, let’s duplicate the section we just created to give us a jump on the next design. To make it easier, toggle the wireframe view mode. Then click the duplicate icon on the section. In the new duplicate section, make sure to delete the duplicate code module since we won’t need custom CSS for this one.
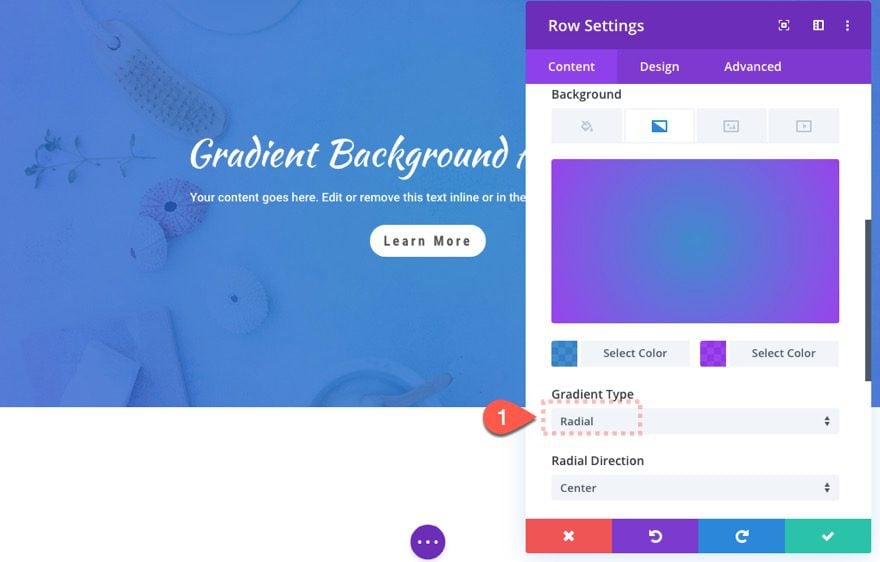
Update Row Settings
Once the section has been duplicated and the extra code module deleted, open the row settings change the background gradient type:
- Gradient Type: Radial
Then jump over to the advanced tab and delete the CSS Class. We don’t need it.

Then update the visibility options as follows:
- Horizontal Overflow: Hidden
- Vertical Overflow: Hidden
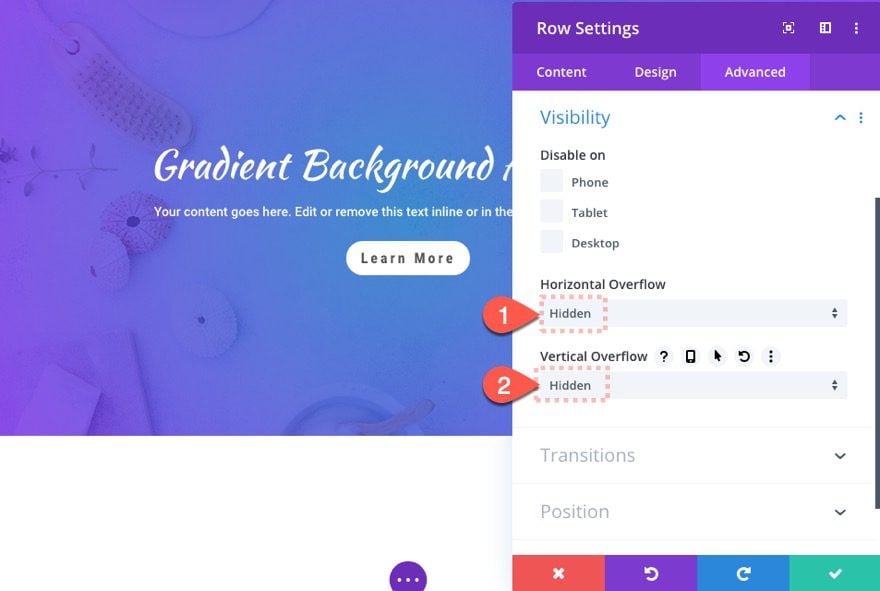
This is necessary because we will be positioning and animating divider modules outside of the row and we don’t want them to be visible there.
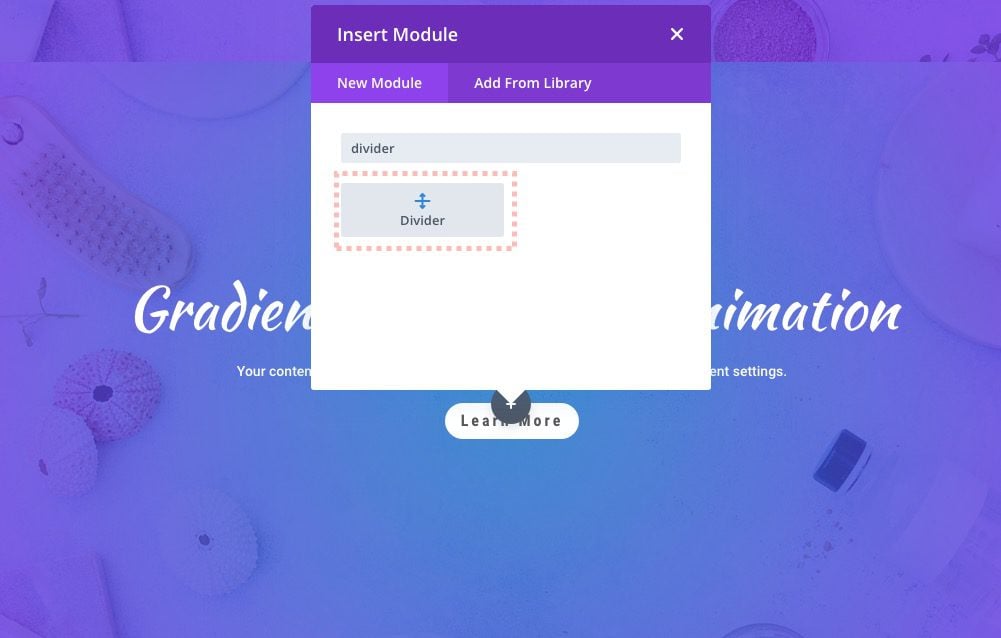
Add First Divider Module
We are ready to add our first of three divider modules which will contain a gradient background. Once the module has been sized and give a gradient background, we will position and animate the entire module.
Go ahead and add a Divider Module to the row.
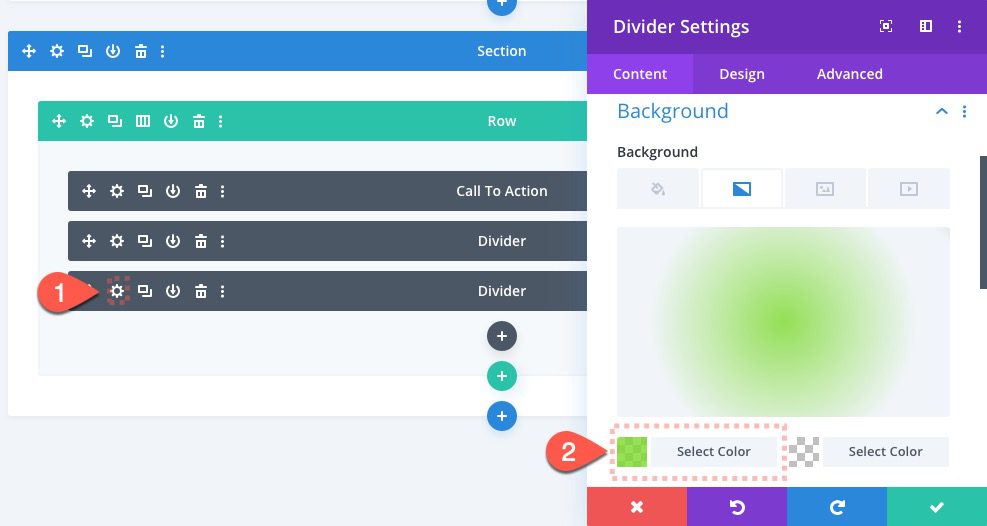
First Divider Module Settings
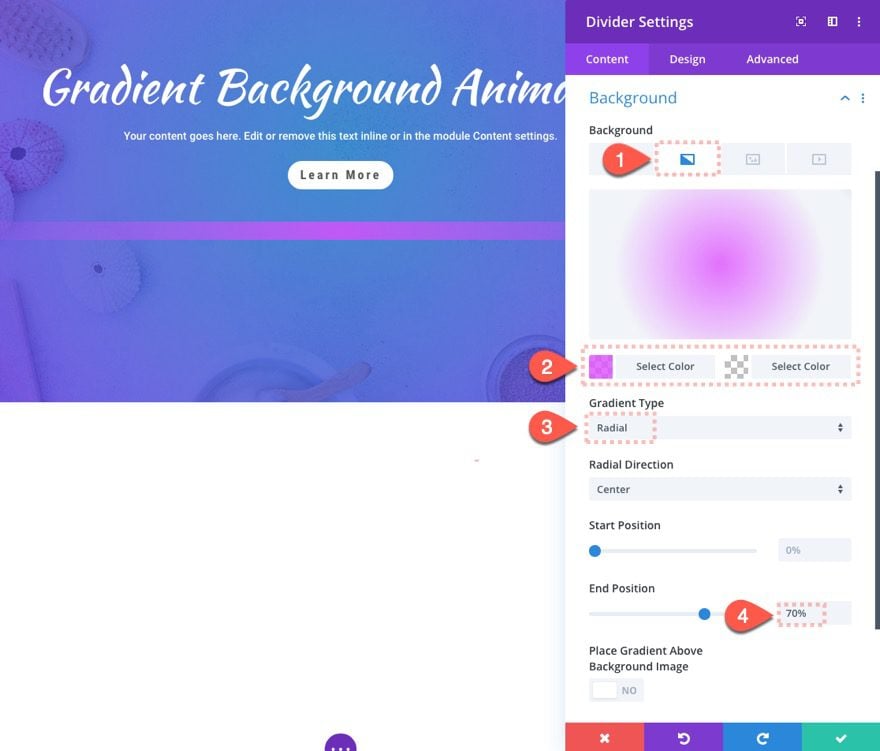
Divider Gradient Background
Update the Divider Module content as follows:
- Show Divider: NO
- Gradient Background Left Color: rgba(222,77,255,0.8)
- Gradient Type: Radial
- End Position: 70%
Divider Size
- Width: 50vw
- Height: 50vw
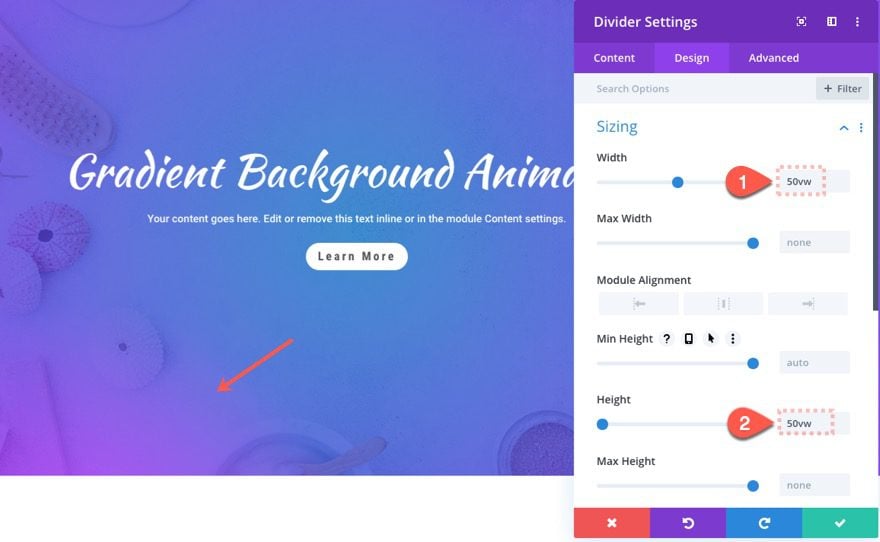
Make sure to give the height and width the same value in order to keep the perfect circle of the radial gradient intact.
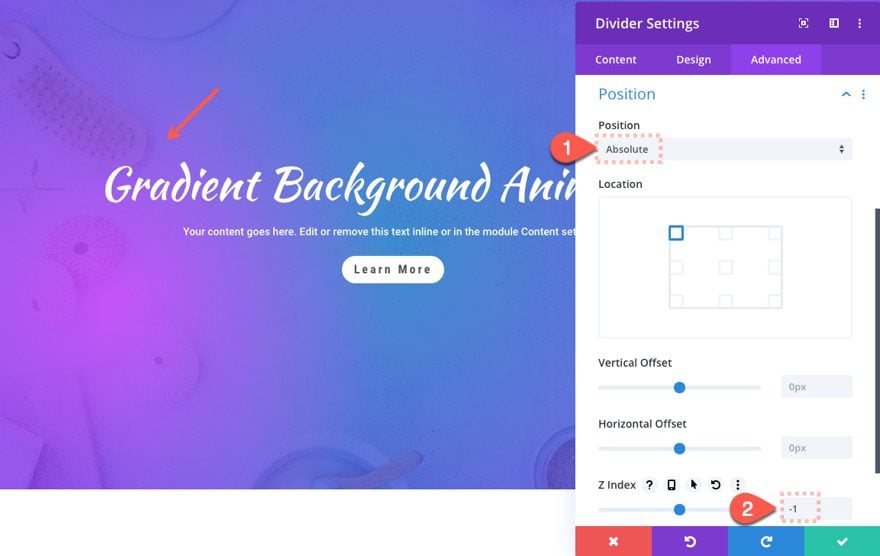
Position
Next, give the divider an absolute position. This will allow the module to be placed within the column/row without altering the spacing or design of the content you will want to display. Also, you will want to update the Z Index to make sure the module stay in the background and will not overlap (or hide) the actual content (in this case a call to action).
Update the following:
- Position: Absolute
- Z Index: -1
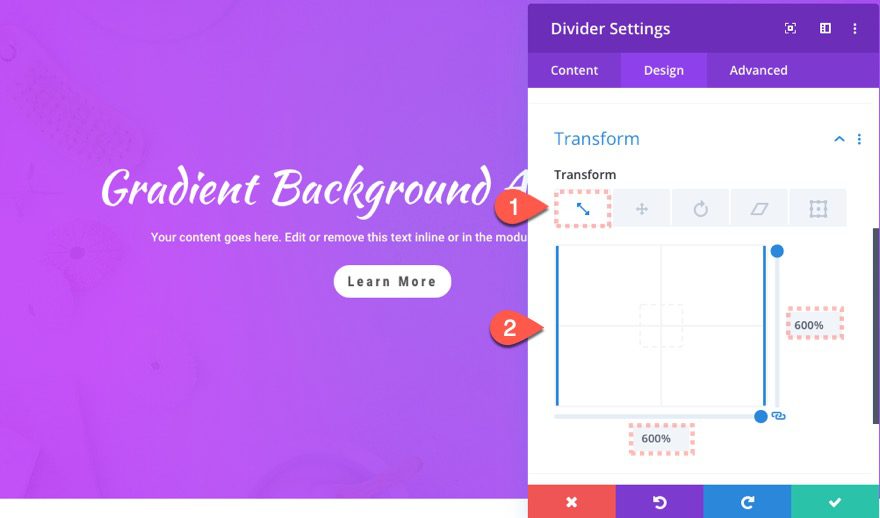
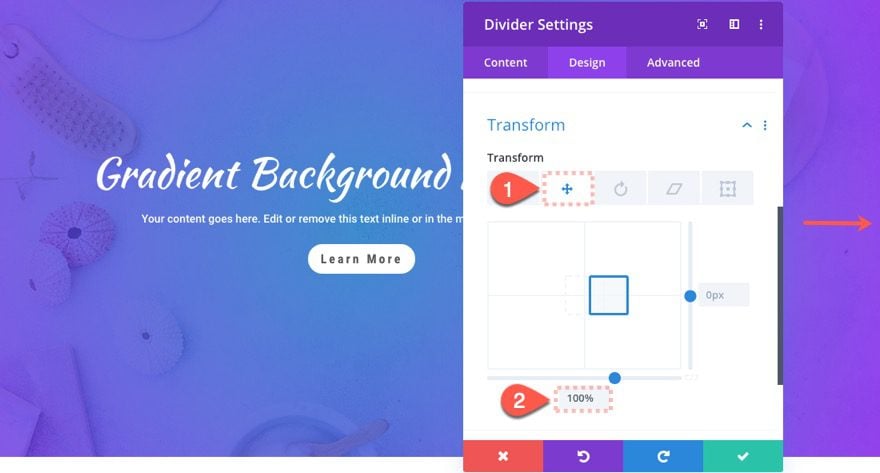
Transform Scale and Translate
Before we add the animation to the module, we must first increase the size of our module using the transform scale option as follows:
- Transform Scale (X and Y): 600%
Then we need to position our module where we want the module to be when the animation ends. Since we want the animation to be seamless (without any abrupt glitches when the animation repeats), we need to make sure the module is positioned outside of the column/row/section.
Update the following:
- Transform Translate (Y): 0px
- Transform Translate (X): 100%
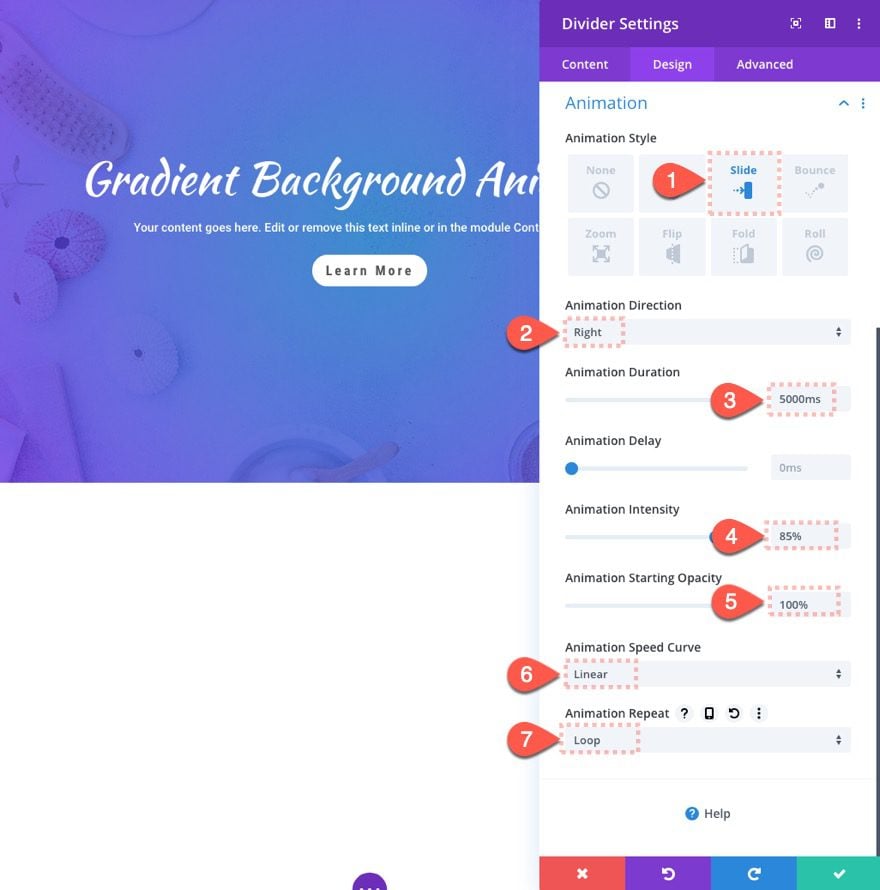
Animation
Finally, let’s add our animation. We are going to add a slide animation that begins outside the window on the left and then slides across the section all the way beyond the right side of the window. Then it will repeat this in an infinite loop. To do this update the following:
- Animation Style: Slide
- Animation Direction: 5000ms
- Animation Intensity: 85%
- Animation Starting Opacity: 100%
- Animation Speed Curve: Linear
- Animation Repeat: Loop
Result
Let’s check out the result so far.
Add Second Divider Module
To add the second Divider Module, deploy the wireframe view mode and duplicate the divider module to create a new one.
Second Divider Module Settings
Gradient Color
Then update the gradient color as follows:
- Gradient Background Left Color: rgba(124,218,36,0.8)
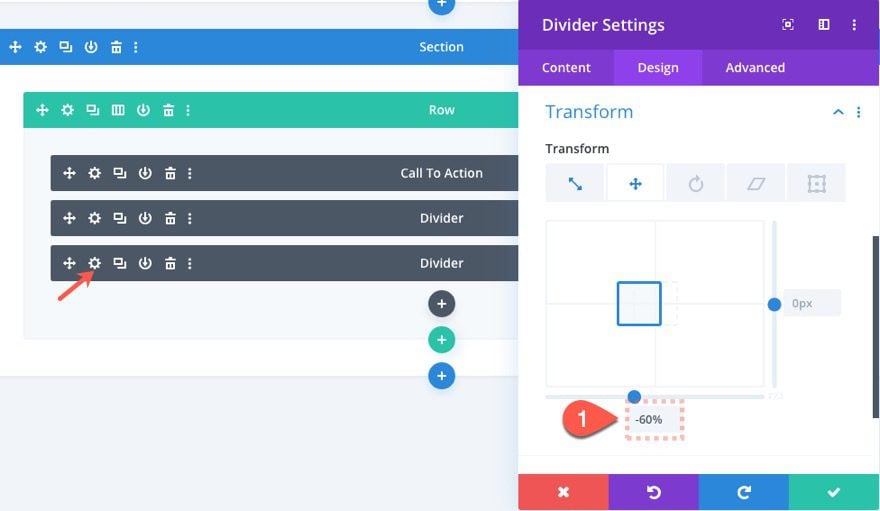
Transform Translate
After that, update the landing position of the module with the following transform translate value:
Transform Translate (X): -60%
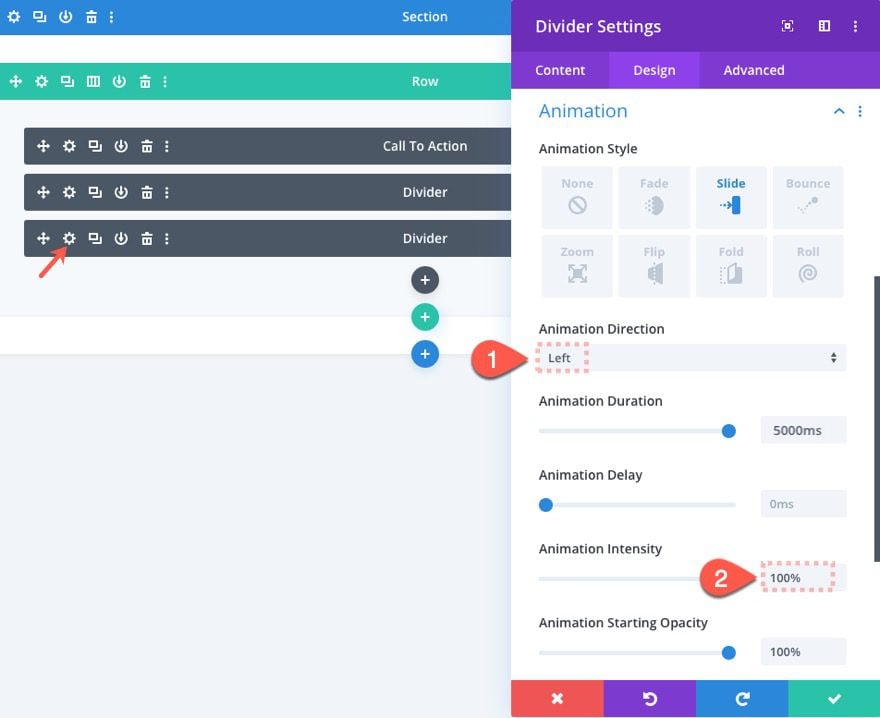
Animation
For this module, we are going to add a slide animate to left instead of to the right like before. Update the following animation settings:
- Animation Style: Slide
- Animation Direction: Left
- Animation Intensity: 100%
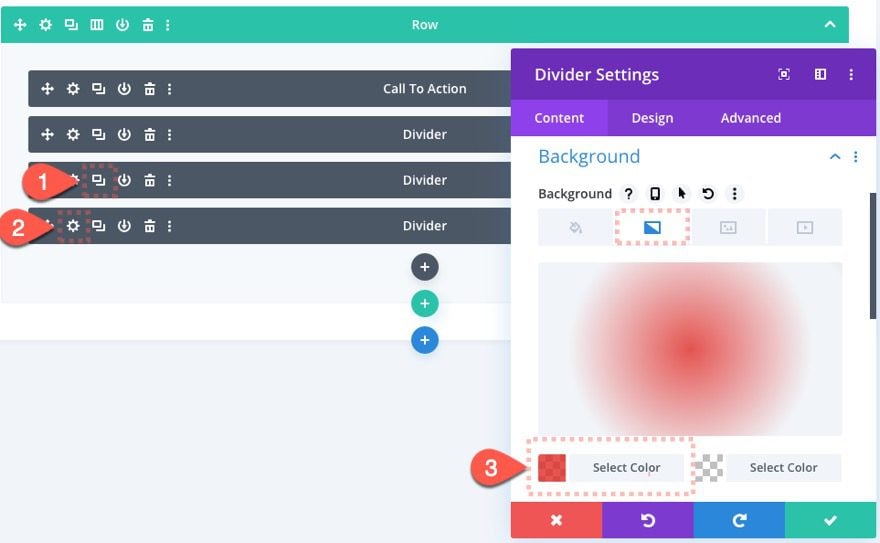
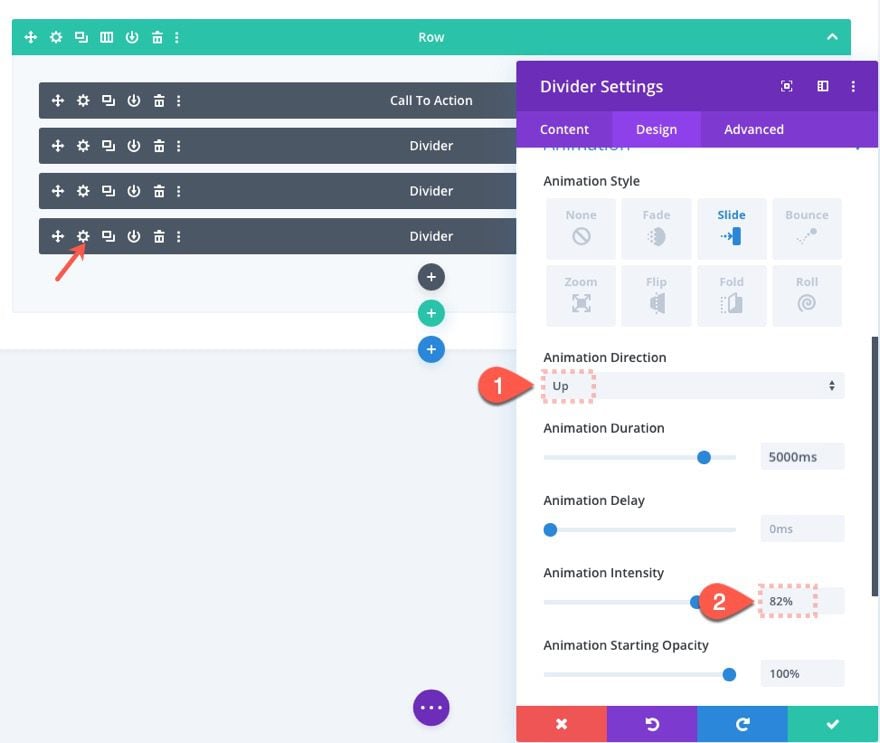
Add Third Divider Module
To create the third divider module, duplicate the second divider module and update the following:
- Gradient Background Left Color: rgba(224,43,32,0.8)
- Transform Translate (Y): -100%
- Transform Translate (X): 0%
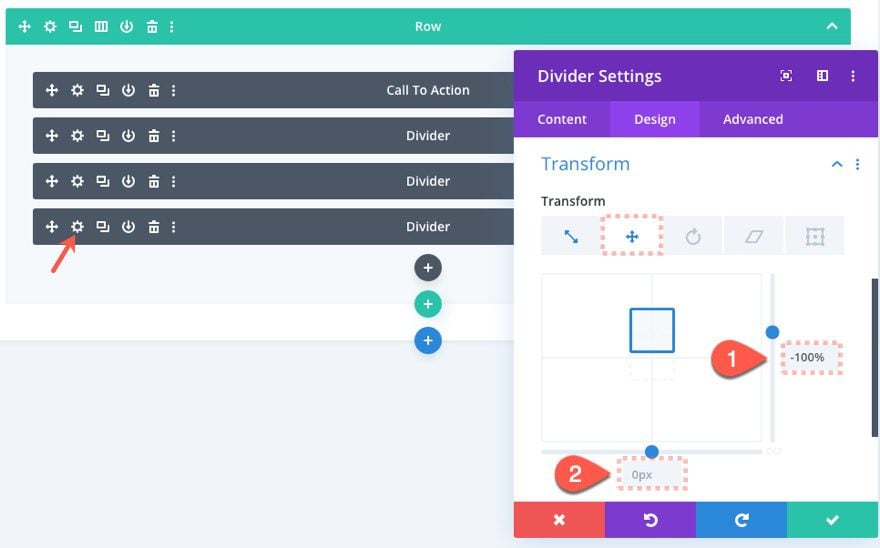
- Animation Direction: Up
- Animation Intensity: 82%
Result
Check out the result!
And you don’t have to stop there. You can use different animation styles, gradient color combinations to create something completely unique. You can even add more modules!
Final Thoughts
In this article, we showed you two ways to add gradient background animation in Divi. The first way uses a custom CSS snippet that works with your built-in Divi background gradient styling and creates a nice and clean animation effect. The second way takes advantage of Divi’s built-in options to animate entire modules in the background. Hopefully, this will give you the tools you need to get creative and add beautiful gradient backgrounds to your next project.
Which way do you like better?
I look forward to hearing from you in the comments.
Cheers!


Well, I am finding it very difficult, but thanks for making it easier. I liked your way, thanks for sharing with us.
Best animated theme for background with various features, thanks for sharing this informative blog.
You’re welcome! Thanks for the comment.
I found that this nice effect does not work when you have the “Use Parallax Effect” enabled, but a nice touch all the same.
its simply amazing and easy to work.
these effects actually make your graphic more attractive and creative
Glad you liked it, Travarsa!
Very nice and useful article.
Thanks! Glad it was useful.
I like the second one. WOW. Very nice and smooth. And like Luis said you can save it to the library.
Thanks.
Hello…
I’ve noticed on a few tutorials including this one you add the css to the code module. Is there an advantage to adding it here on the page vs. adding it to the additional css window?
Cheers
Shane,
We add the CSS to the code module in the tutorial is so that you can easily export and import the layout with the code. You can also add it to the page settings if you like.
Crazy!!! >D
Very cool but looks like a lot of work. Good thing you can save the section to the library
🙂
Nice technique and easy to implement.