

Creating interactive design comes with many advantages. One of them is the fact that you can fit more visual content inside a single section and determine how the visual content shows up while visitors are scrolling. It elevates the overall user experience visitors have on your website and takes your web design efforts to the next level. In today’s tutorial, we’ll show you how to create an image swap on scroll using Divi and its new scroll effects. We’ll see a switch between four different images. You’ll be able to download the JSON file for free as well!
Let’s get to it.
- 1 Preview
- 2 Download The Image Swap on Scroll Effect Layout for FREE
- 3 Download For Free
- 4 You have successfully subscribed. Please check your email address to confirm your subscription and get access to free weekly Divi layout packs!
- 5 1. Create Element Structure
- 6 2. Apply Scroll Effects to Images
- 7 3. Add Position Settings to First Image & Expand to All Images in Column
- 8 Preview
- 9 Final Thoughts
Preview
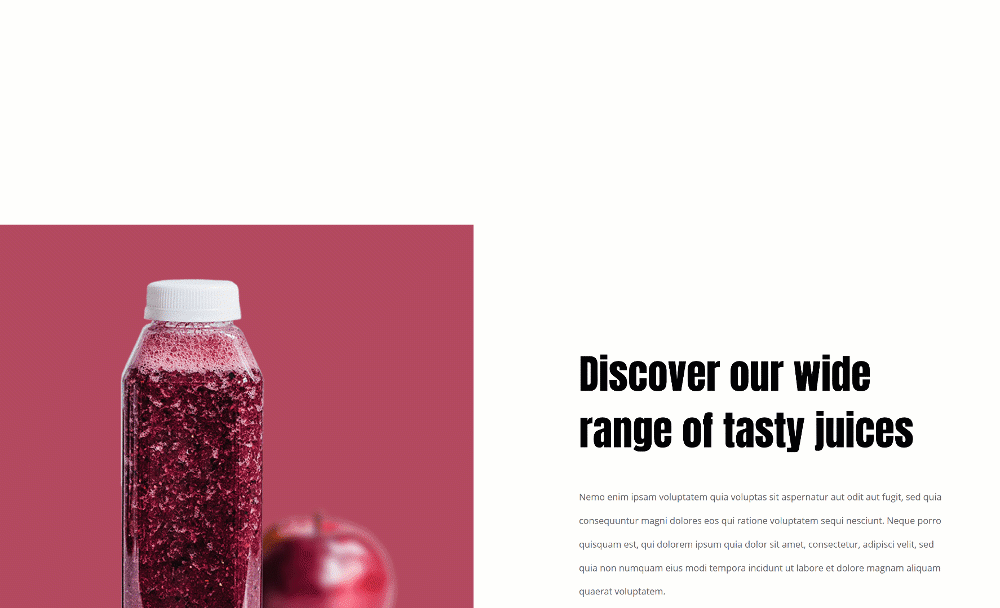
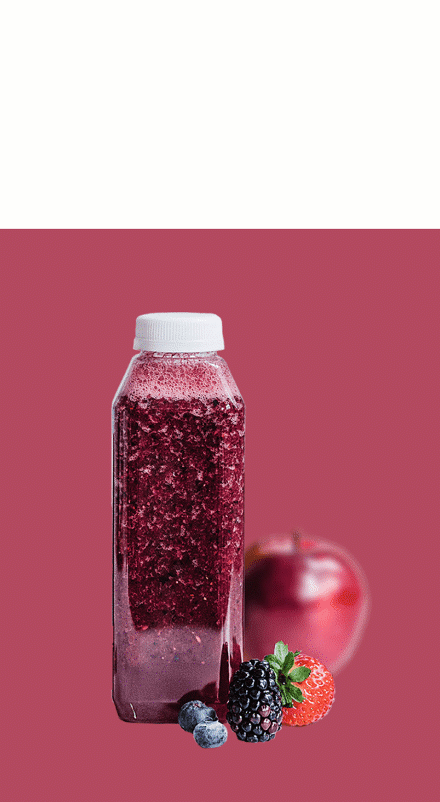
Before we dive into the tutorial, let’s take a quick look at the outcome across different screen sizes.
Desktop
Mobile
Download The Image Swap on Scroll Effect Layout for FREE
To lay your hands on the image swap on scroll effect layout, you will first need to download it using the button below. To gain access to the download you will need to subscribe to our newsletter by using the form below. As a new subscriber, you will receive even more Divi goodness and a free Divi Layout pack every Monday! If you’re already on the list, simply enter your email address below and click download. You will not be “resubscribed” or receive extra emails.

1. Create Element Structure
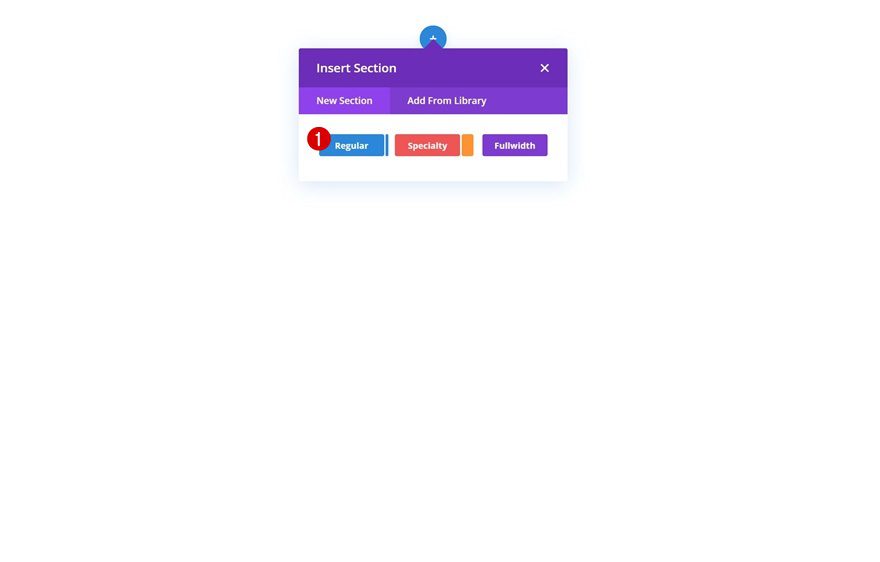
Add New Regular Section
Start by adding a new regular section to the page you’re working on.
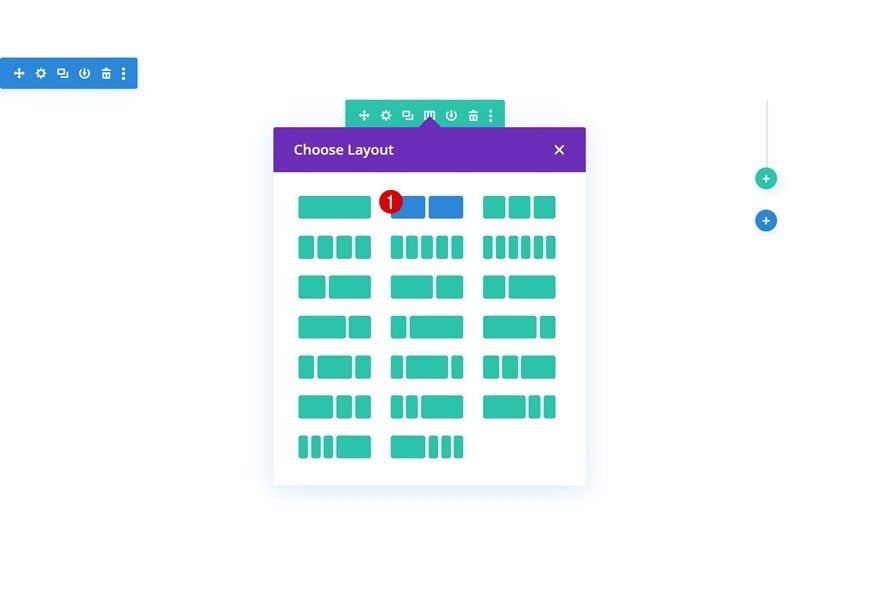
Add New Row
Column Structure
Continue by adding a new row to the section using the following column structure:
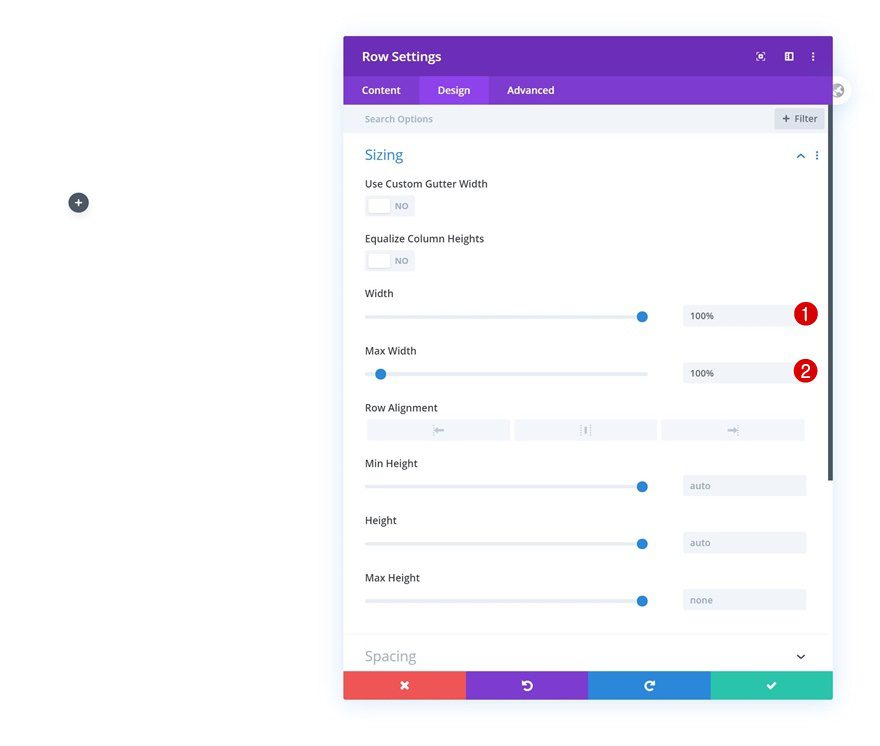
Sizing
Without adding any modules yet, open the row settings and modify the row’s sizing as follows:
- Width: 100%
- Max Width: 100%
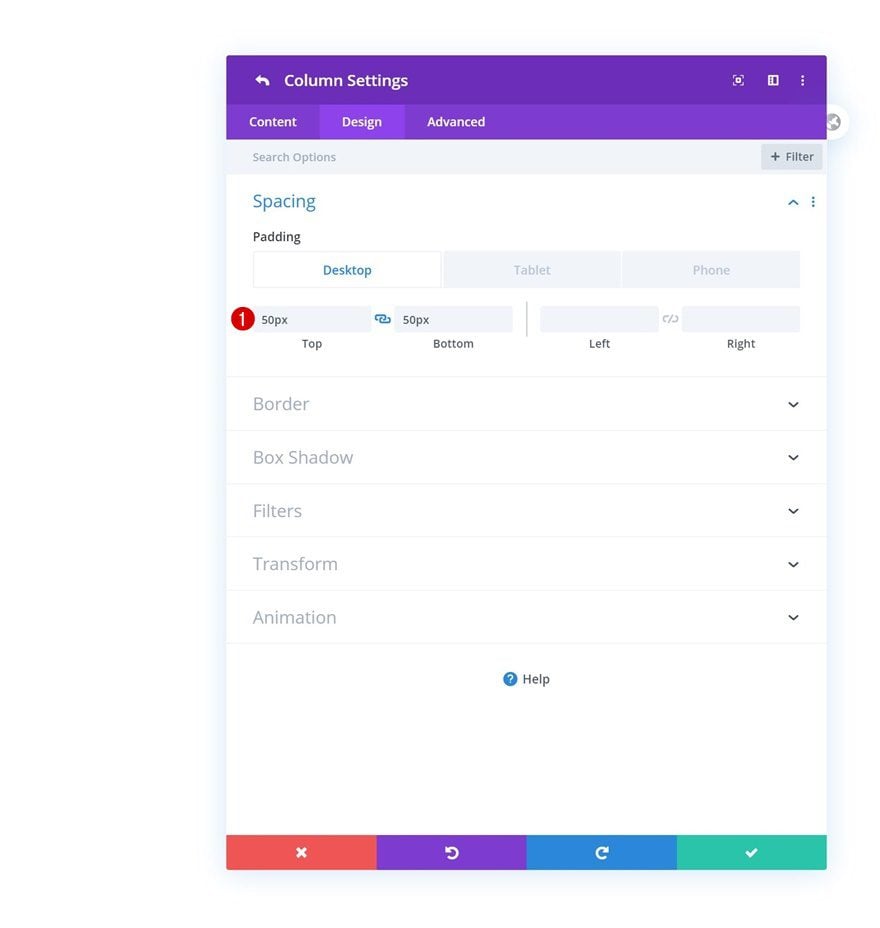
Column 1 Settings
Spacing
Then, open the column 1 settings and modify the spacing values across different screen sizes.
- Top Padding: 50px (Desktop), 0px (Tablet & Phone)
- Bottom Padding: 50px (Desktop), 120% (Tablet), 140% (Phone)
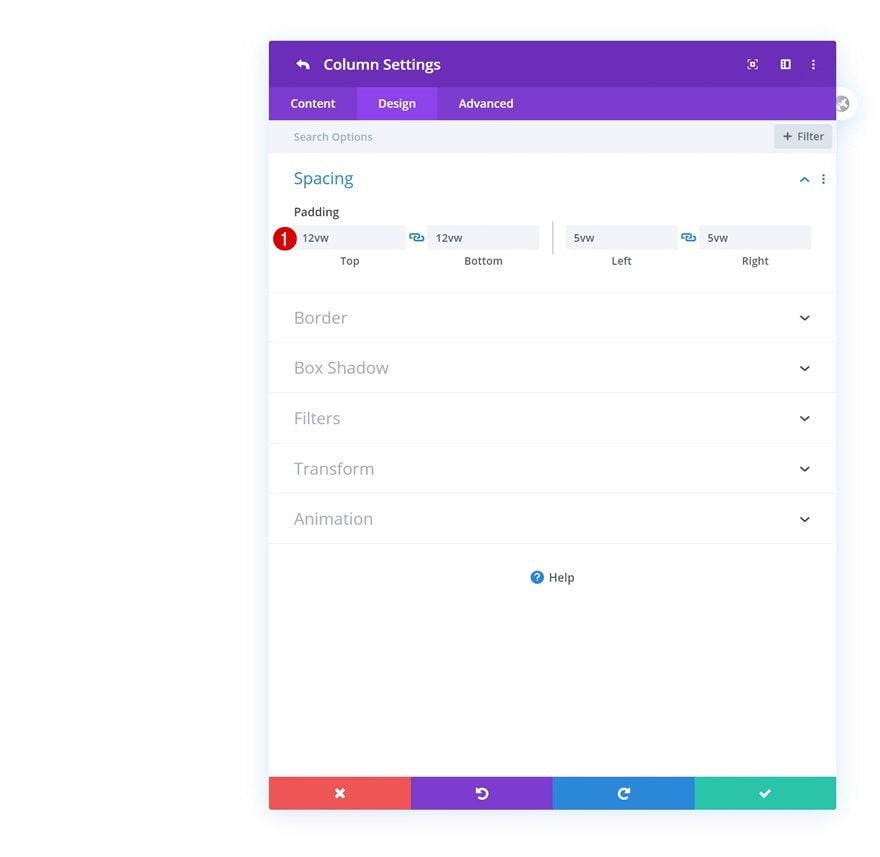
Column 2 Settings
Spacing
Add some padding to the second column as well.
- Top Padding: 12vw
- Bottom Padding: 12vw
- Left Padding: 5vw
- Right Padding: 5vw
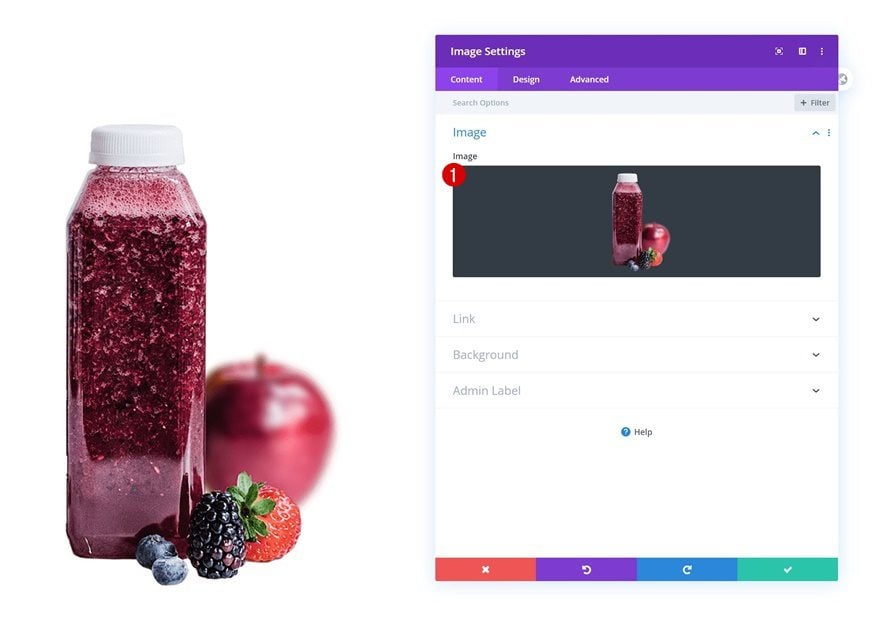
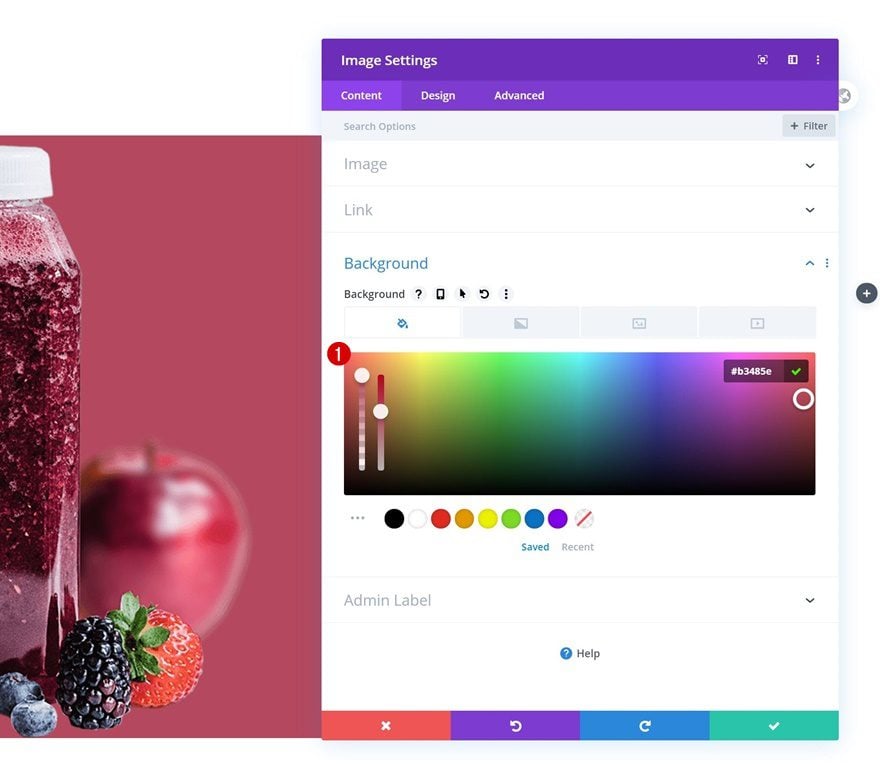
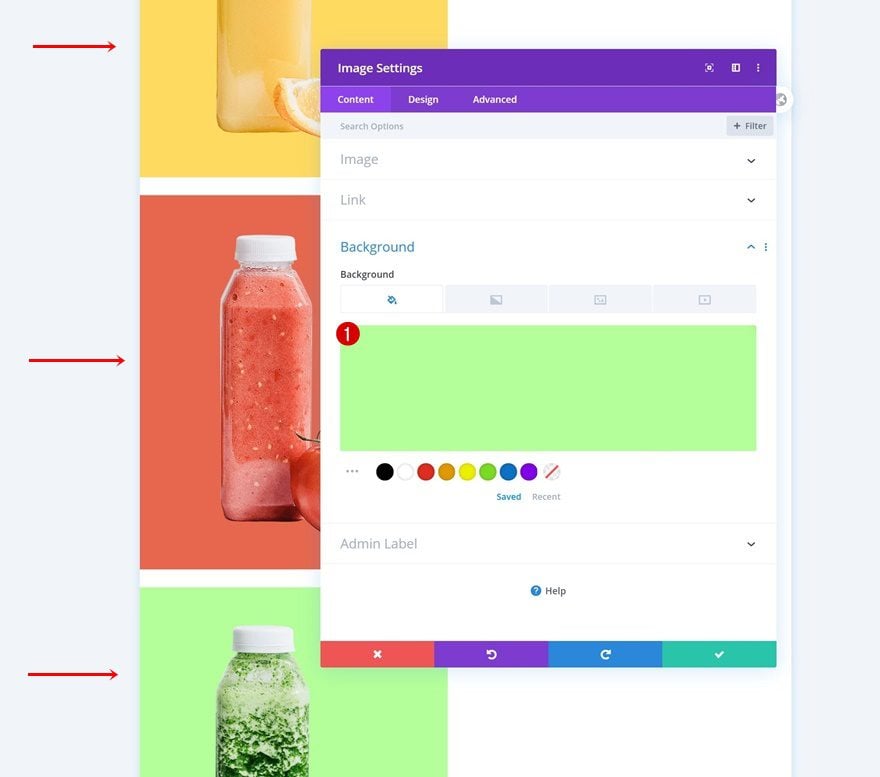
Add Image Module to Column 1
Upload Image with Transparent Background
Time to add modules, starting with a first Text Module in column 1. Upload a product image with a 1:1 ratio and a transparent background.
Background Color
Then, go to the background settings and change the background color.
- Background Color: #b3485e
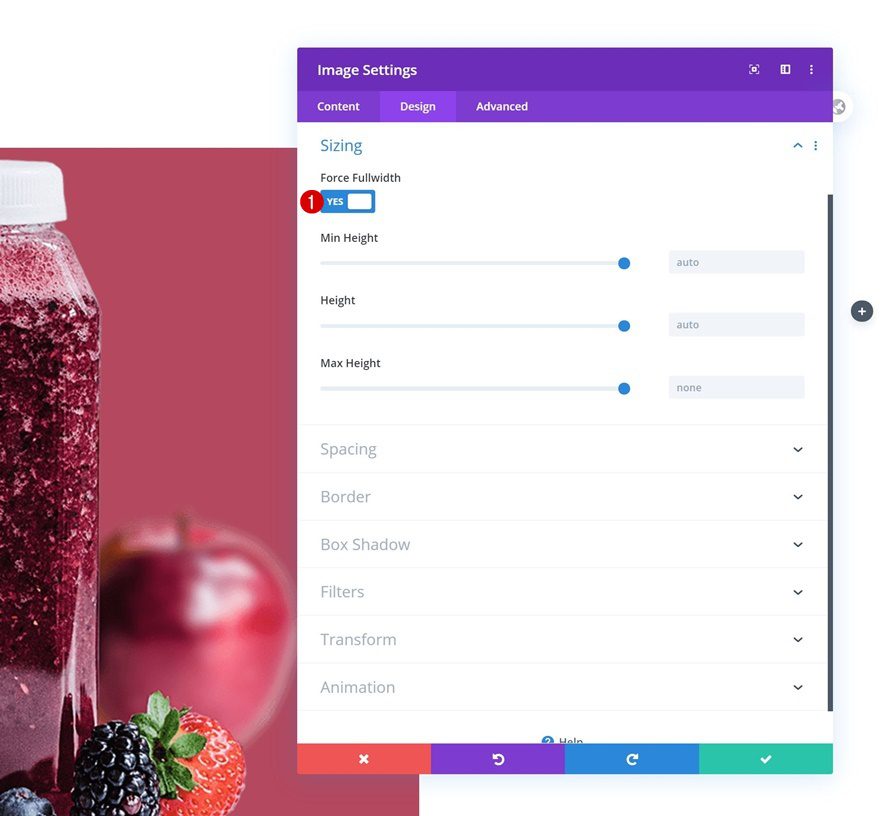
Sizing
Enable the ‘Force Fullwidth’ option in the sizing settings next.
- Force Fullwidth: Yes
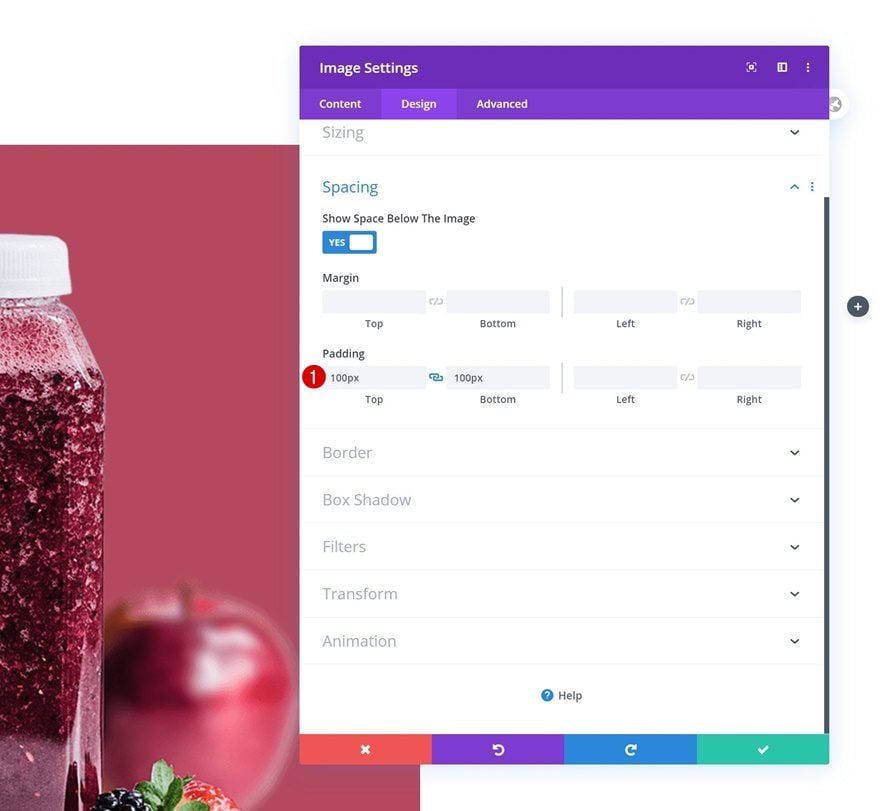
Spacing
And complete the module settings by adding some top and bottom padding.
- Top Padding: 100px
- Bottom Padding: 100px
Clone Image Module 3x
Once you’ve completed the first Image Module in column 1, you can clone the entire module three times.
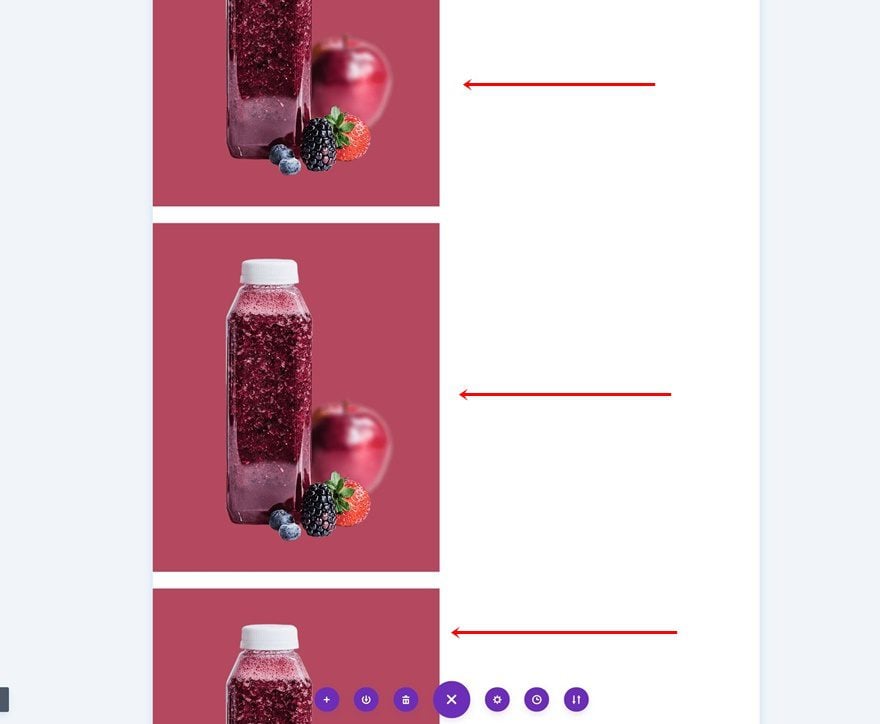
Change Images
Change the image in each duplicate Image Module.
Change Background Colors
And match the new images with background colors of your choice.
- Background Color 1: #ffda60
- Background Color 2: #e6674d
- Background Color 3: #b4ff99
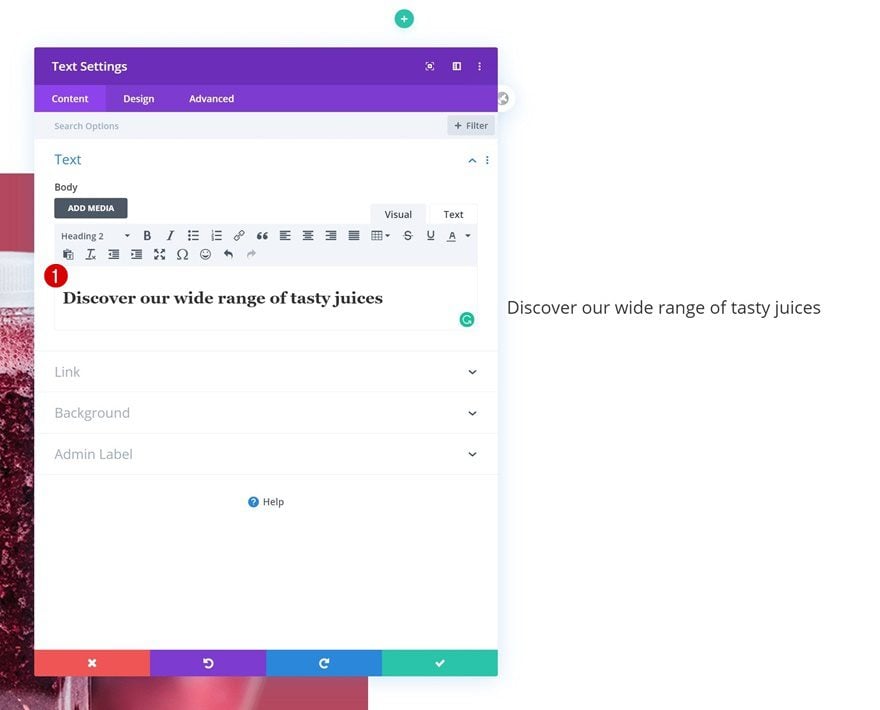
Add Text Module #1 to Column 2
Add H2 Content
On to the second column. There, the first module we need is a Text Module containing some H2 content.
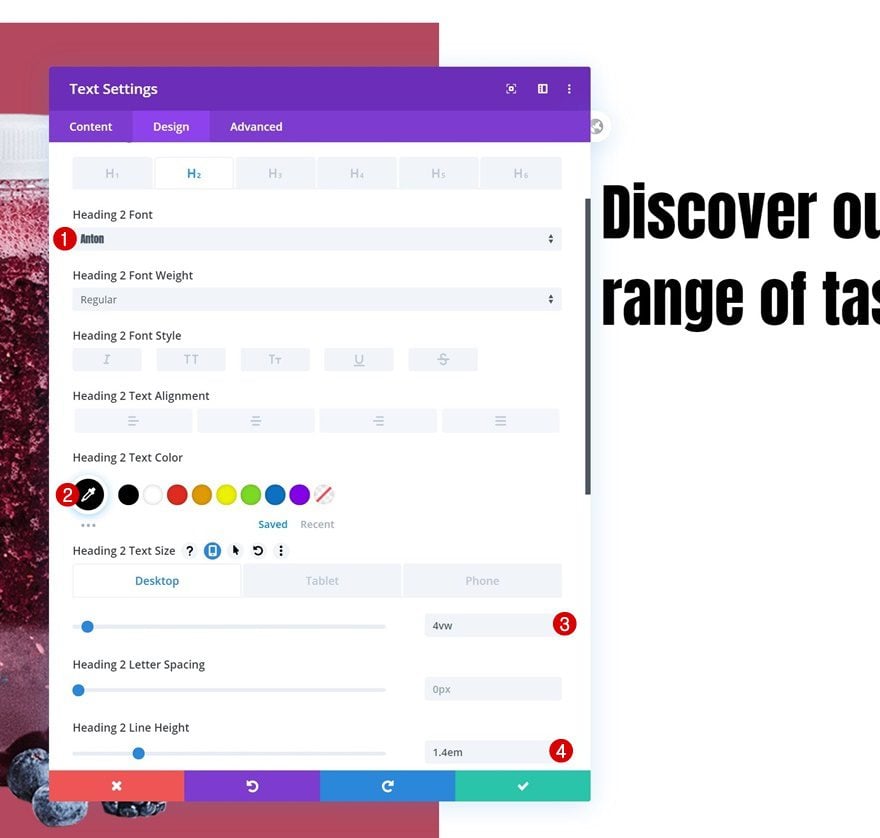
H2 Text Settings
Move on to the module’s design tab and change the H2 text settings as follows:
- Heading 2 Font: Anton
- Heading 2 Text Color: #000000
- Heading 2 Text Size: 4vw (Desktop), 8vw (Tablet), 10vw (Phone)
- Heading 2 Line Height: 1.4em
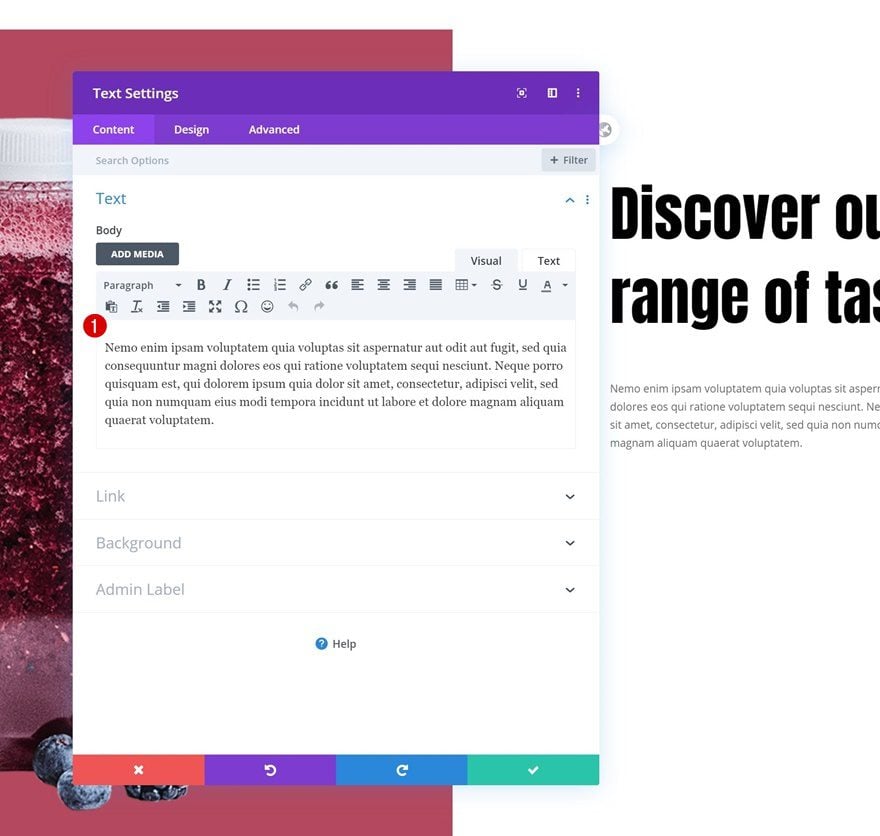
Add Text Module #2 to Column 2
Add Content
Add another Text Module right below the previous one and enter some description content of your choice.
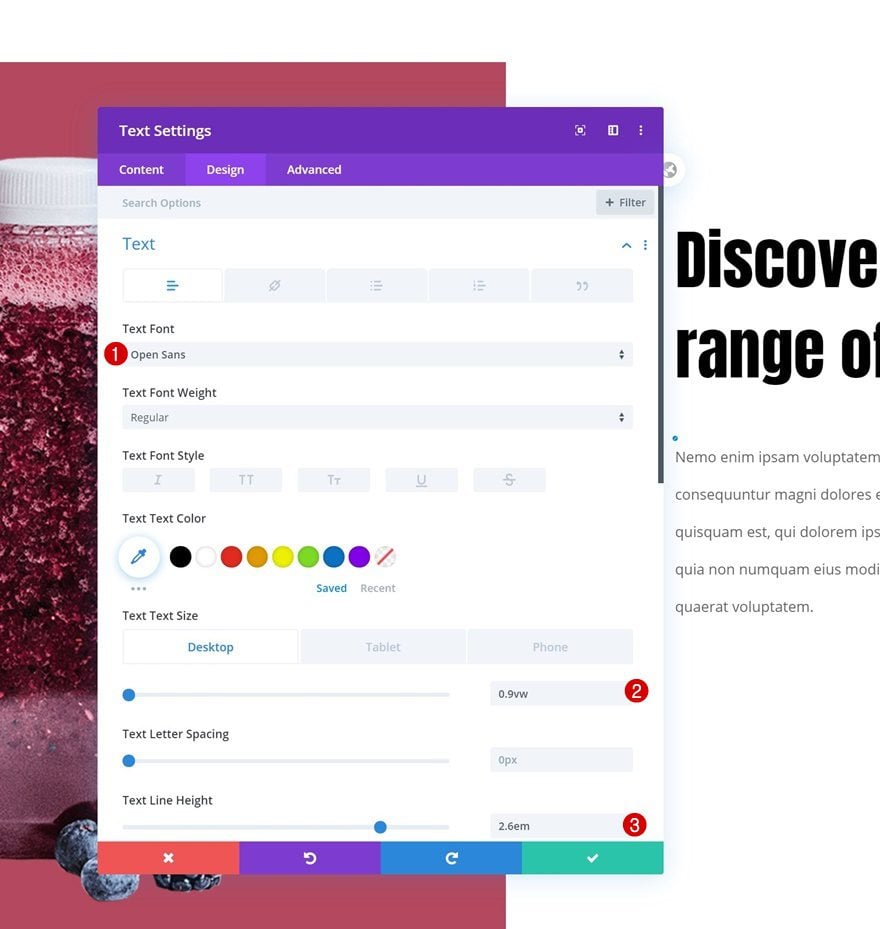
Text Settings
Move on to the design tab and make some changes to the text settings.
- Text Font: Open Sans
- Text Size: 0.9vw (Desktop), 2vw (Tablet), 2.5vw (Phone)
- Text Line Height: 2.6em
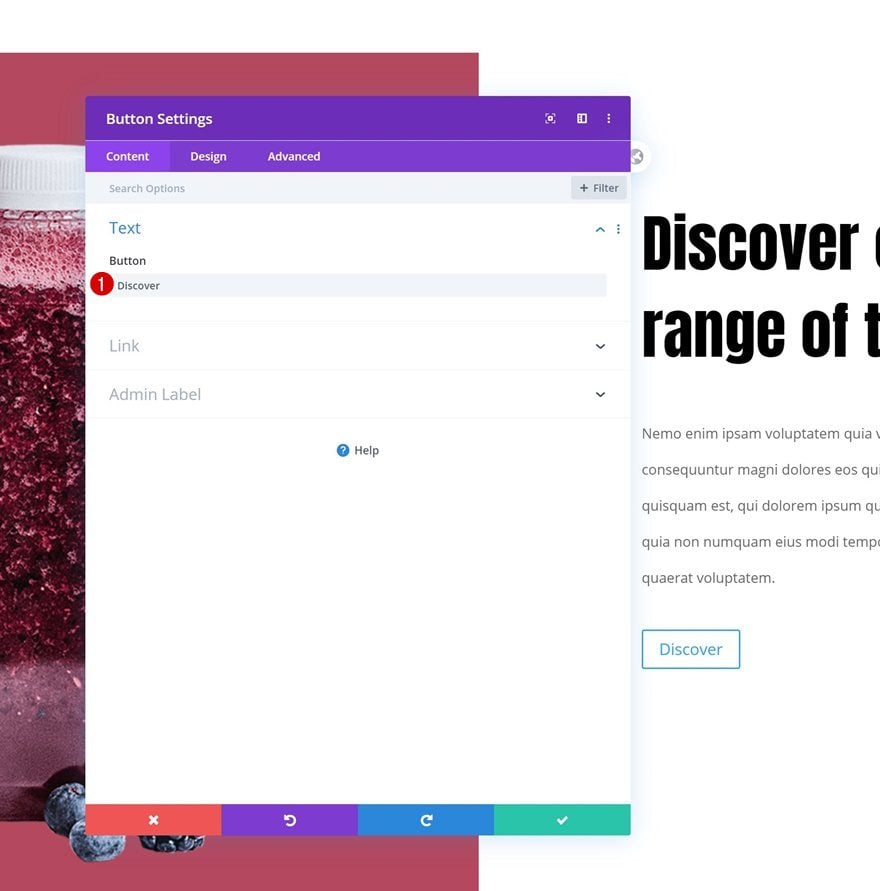
Add Copy
The next and last module we need in column 2 is a Button Module. Enter some copy of your choice.
Button Settings
Then, style the button accordingly:
- Use Custom Styles For Button: Yes
- Button Text Size: 20px
- Button Text Color: #ffffff
- Button Background Color: #000000
- Button Border Width: 0px
- Button Border Radius: 100px
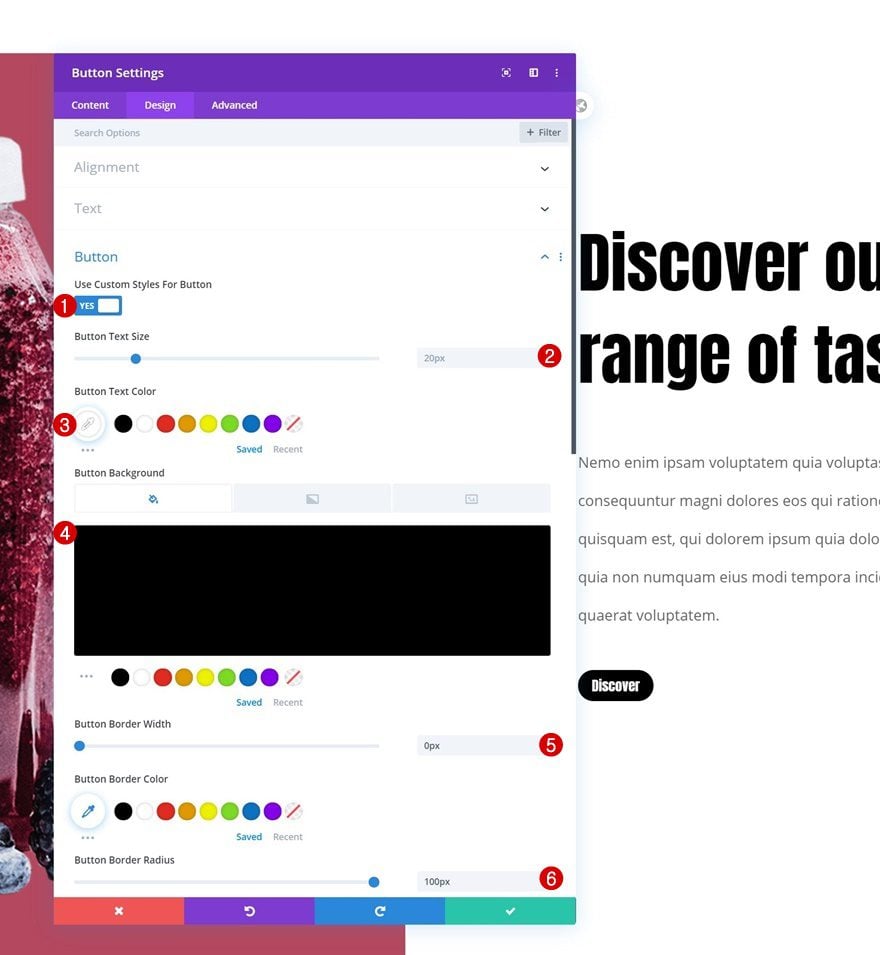
- Button Font: Anton
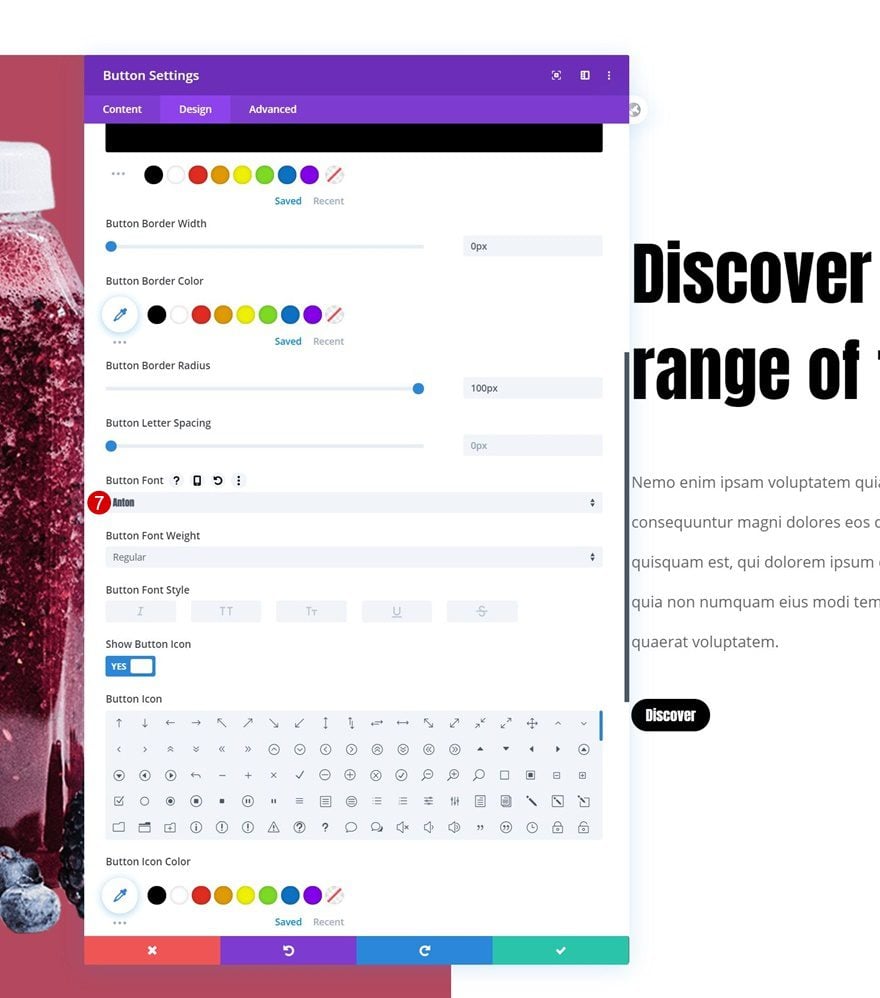
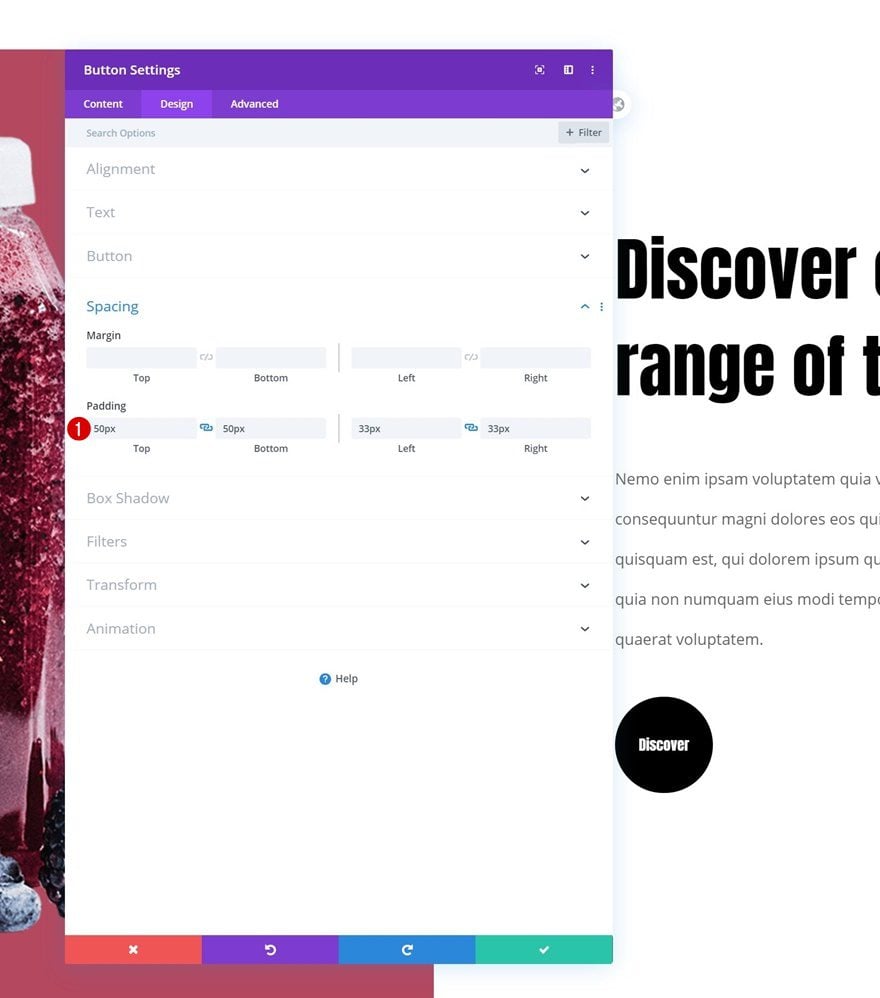
Spacing
Add some custom padding values to the spacing settings too.
- Top Padding: 50px
- Bottom Padding: 50px
- Left Padding: 33px
- Right Padding: 33px
2. Apply Scroll Effects to Images
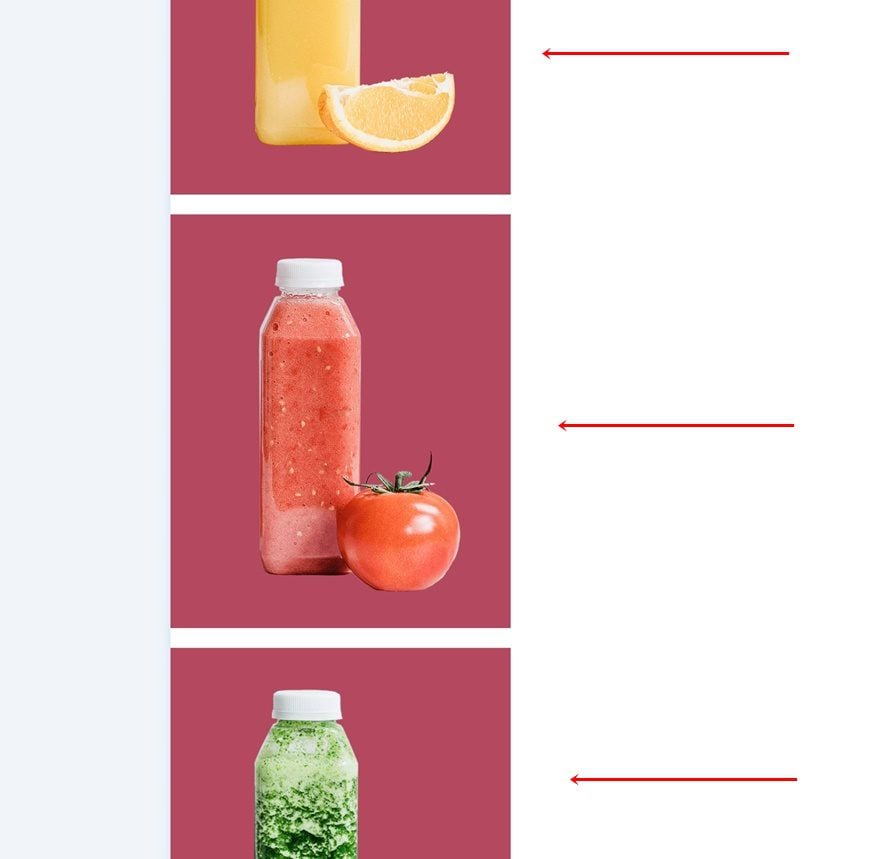
Image Module #1 Fading In and Out
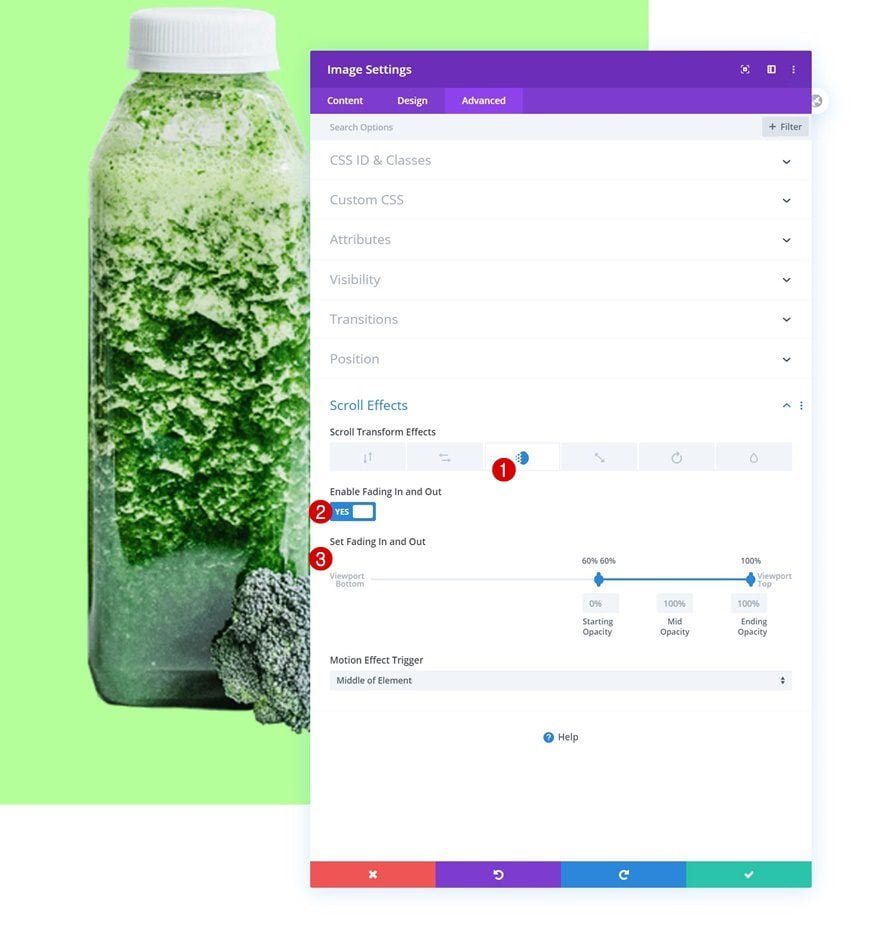
Once you’ve completed the modules in both columns, it’s time to apply the scroll effects. The scroll effects we add are different for each one of the four Image Modules in column 1. We’ve finetuned the settings to make one image appear after the other. Open the first Image Module and use the following fading in and out scroll effect for it:
- Enable Fading In and Out: Yes
- Starting Opacity: 100%
- Mid Opacity: 100% (from 0% to 39%)
- Ending Opacity: 0% (at 40%)
- Motion Effect Trigger: Middle of Element

Image Module #2 Fading In and Out
Then, open the second image and use the fading in and out settings:
- Enable Fading In and Out: Yes
- Starting Opacity: 0% (at 40%)
- Mid Opacity: 100% (from 40% to 49%)
- Ending Opacity: 0% (at 50%)
- Motion Effect Trigger: Middle of Element
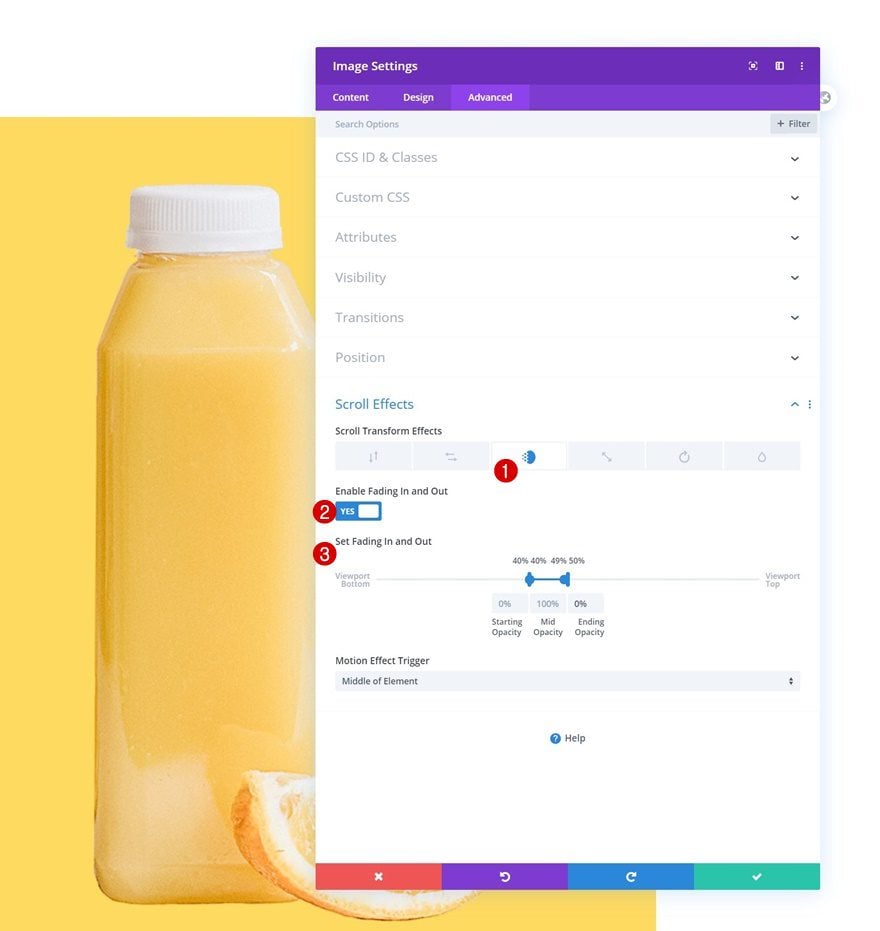
Image Module #3 Fading In and Out
Add a fading in and out scroll effect to the third Image Module too.
- Enable Fading In and Out: Yes
- Starting Opacity: 0% (at 50%)
- Mid Opacity: 100% (from 50% to 59%)
- Ending Opacity: 0% (at 60%)
- Motion Effect Trigger: Middle of Element
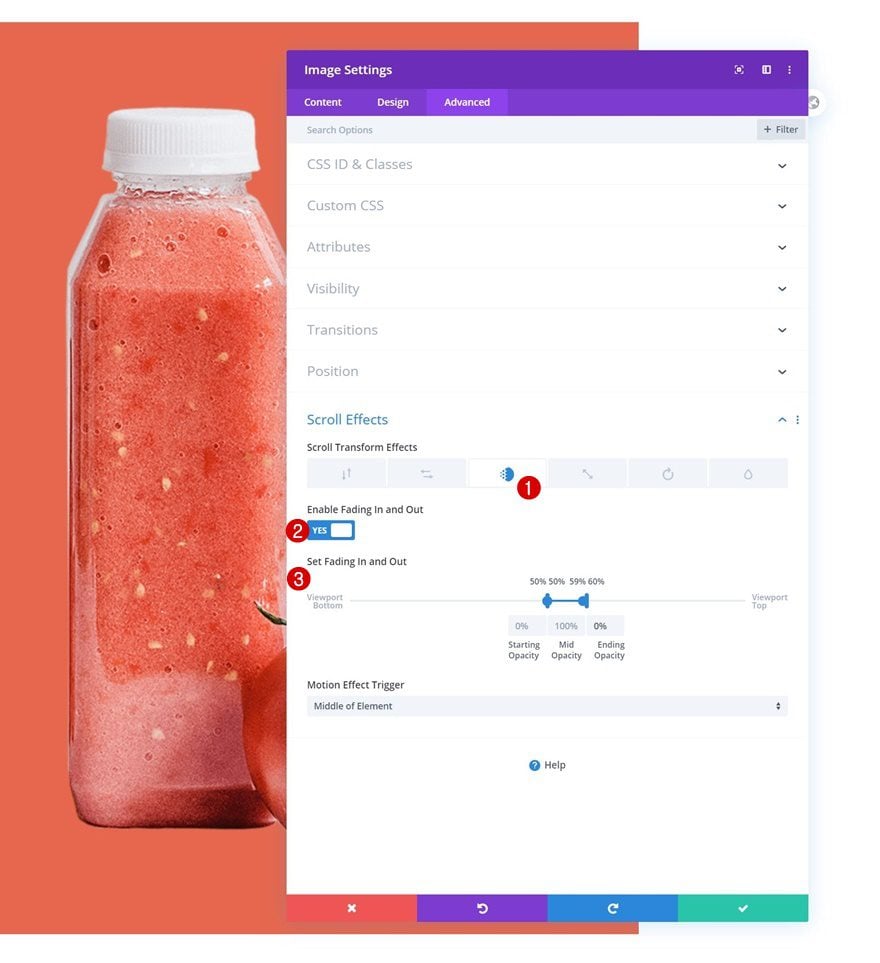
Image Module #4 Fading In and Out
And complete the scroll effects by adding the following fading in and out scroll effect to the last Image Module in your column:
- Enable Fading In and Out: Yes
- Starting Opacity: 0% (at 60%)
- Mid Opacity: 100% (from 60% to 100%)
- Ending Opacity: 100%
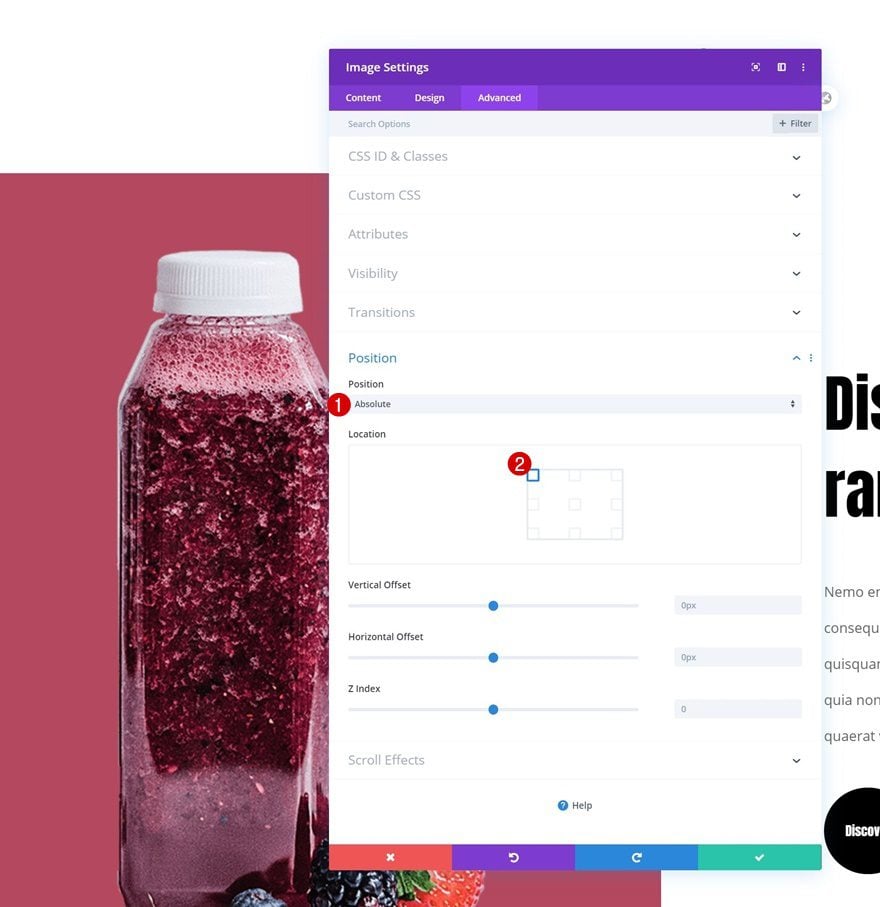
3. Add Position Settings to First Image & Expand to All Images in Column
Add Absolute Position to Image Module #1
Now, to make sure the images appear after each other while scrolling, we’ll need to place the Image Modules on top of each other using Divi’s position options. Open the first Image Module, go to the advanced tab and use an absolute position.
- Position: Absolute
- Location: Top Left
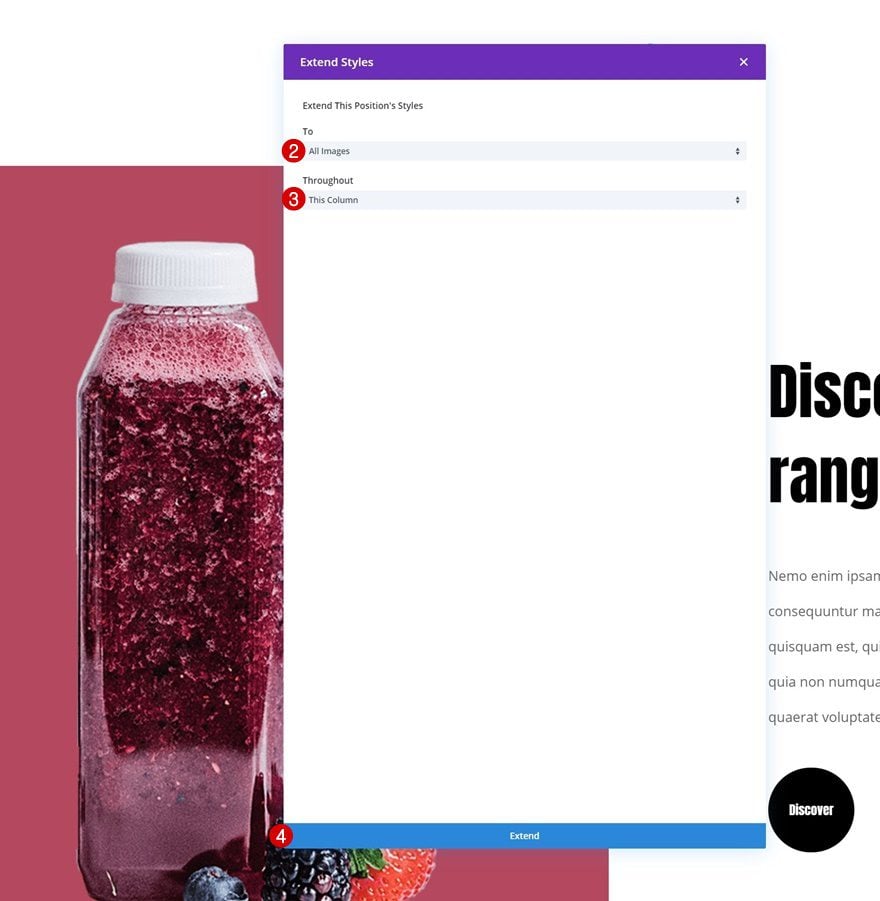
Extend Position Settings to All Images in Column
Continue by extending the position styles to each Image Module in the column and you’re done!
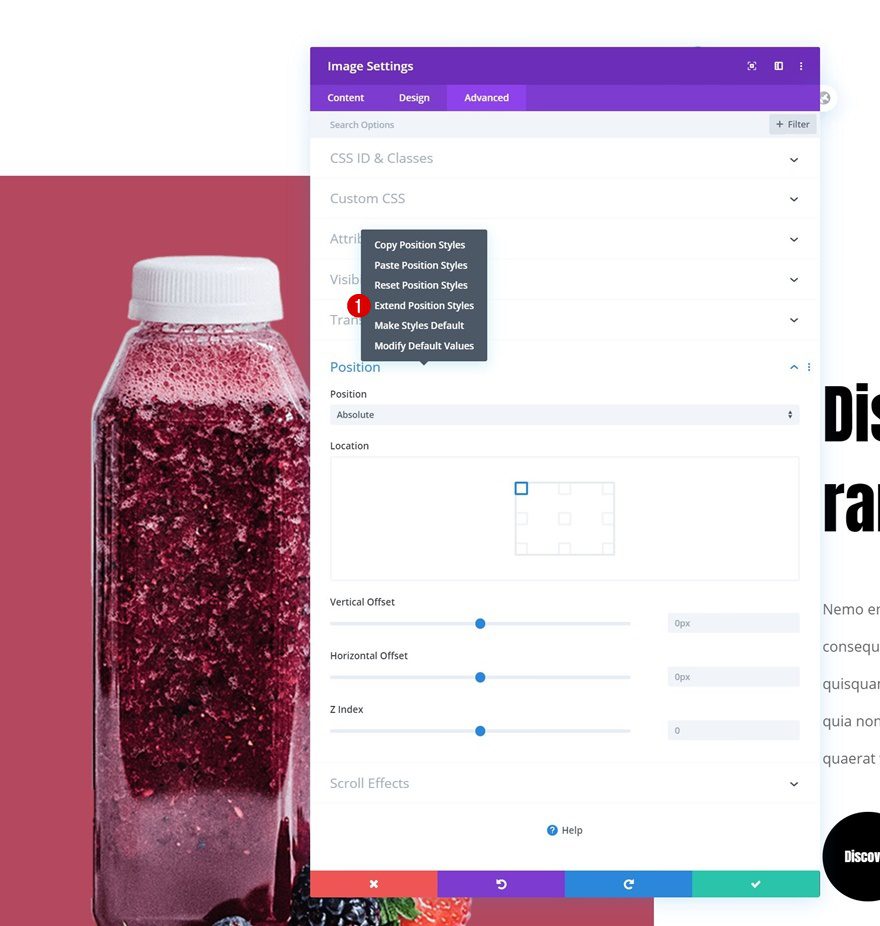
- To: All Images
- Throughout: This Column
Preview
Now that we’ve gone through all the steps, let’s take a final look at the outcome across different screen sizes.
Desktop
Mobile
Final Thoughts
In this post, we’ve shown you how to create an image swap on scroll. This technique allows you to switch between multiple images in your section while visitors are scrolling down the page. You were able to download the JSON file for free as well! If you have any questions, feel free to leave a comment in the comment section below.
If you’re eager to learn more about Divi and get more Divi freebies, make sure you subscribe to our email newsletter and YouTube channel so you’ll always be one of the first people to know and get benefits from this free content.


Hi, I have tried to upload this free json file to the divi library, but it does not work. Can you please help me? Many thanks, Kristýna
Hi Kristyna, sorry to hear that. It should import without problems, see this screenshot (https://i.imgur.com/lI5BY8z.png). Perhaps there might be a resources issue on your site. I recommend contacting our Support Team via chat on our website, https://elegantthemes.com.
Thanks Donjete,
Would I be able to apply this for images only? On 1 column with 4 images?
Thanks Donjete!!! great work
Hi – great tutorial and layout, thank you! When I try to go back and adjust the fading for the scroll effects for the 4 images, when I’m in the visual builder I can only access the last or “bottom” image to edit since I’ve placed them all top left as “absolute”… do you know within the visual builder how to go about selecting the other three images that are absolute top left to edit them individually?
Happy you like it, Aaron! I recommend switching over to Wireframe Mode (bottom left corner inside the Visual Builder) to access the absolute positioned images easily. Hope that helps!
Awesome!
Thanks, Elisandro!! 🙂
The json File dosent work. Testet import on 3 diverent sites, with only divi and no others plugins active. Its not loading
Hey Jan, sorry to hear that, are you uploading it to the Divi library by navigating to your WordPress dashboard > Divi > Divi Library and uploading it there? The JSON can’t be imported directly in the page itself.
This is a pretty cool effect; I like it a lot. 🙂
Happy to hear that, Oliver! 🙂
i love it , thanks a lot
Awesome, you’re welcome! 🙂
nice post content!
Happy you like it!