Welcome to post 1 of 5 in our miniseries How to Create a Simple and Effective Portfolio Website with Divi. In this series we’ll cover everything you need to do in order to create your own portfolio website from scratch. We’ll also go over how to use our A/B testing system Divi Leads to make sure your site is effective at attracting new clients.
In writing this series my primary goal is to show you how to create an extremely simple portfolio website in which the only two things a visitor can do is look at creative projects or contact the artist. That’s the whole point of a portfolio website after all, right? So why complicate it!
To begin this series, I’m going to show you how to create a minimal portfolio homepage. As the series progresses, we’ll branch out and add a few more options–calls to action, a filterable portfolio, project page layouts, and A/B tests–but the core concept of simplicity and effectiveness will never change.
Let’s get started!
- 1 Today’s Final Result: A Minimal Portfolio Homepage
- 2 The Concept & Inspiration
- 3 Preparing the Design Elements
- 4 Implementing the Design with Divi
- 5 Creating Your Minimal Header/Navigation
- 6 Creating Your Minimal Footer
- 7 Configuring Your Divi Portfolio Module
- 8 Tomorrow: Using Filters, Hero Sections, and CTA’s to Expand Your Minimal Portfolio Homepage
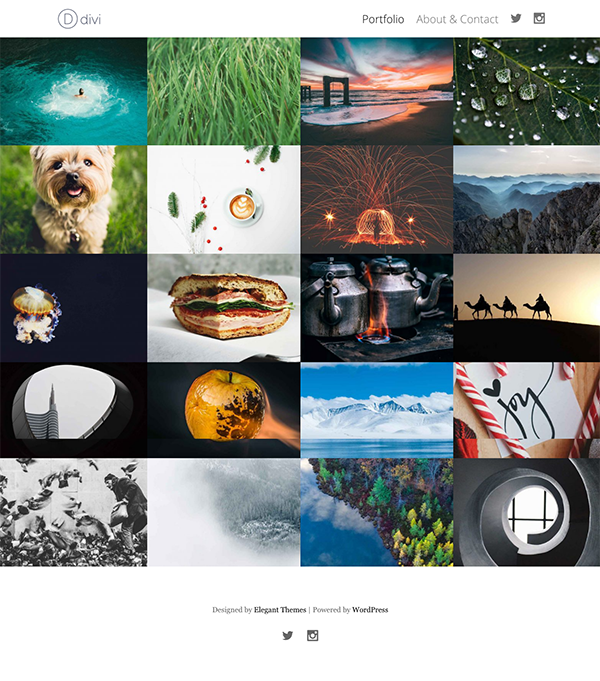
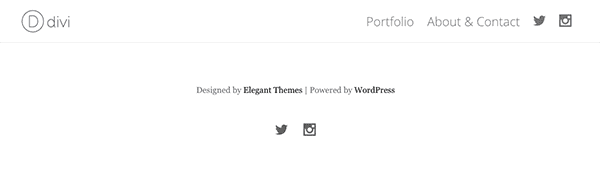
Today’s Final Result: A Minimal Portfolio Homepage
To achieve this final result on your own Divi website you’ll have to do three things: Alter your primary menu styles (as well as add social icons to it), create a custom footer, and properly configure the Divi Portfolio module. These are the three things I’ll be going over in the tutorial below.
The Concept & Inspiration
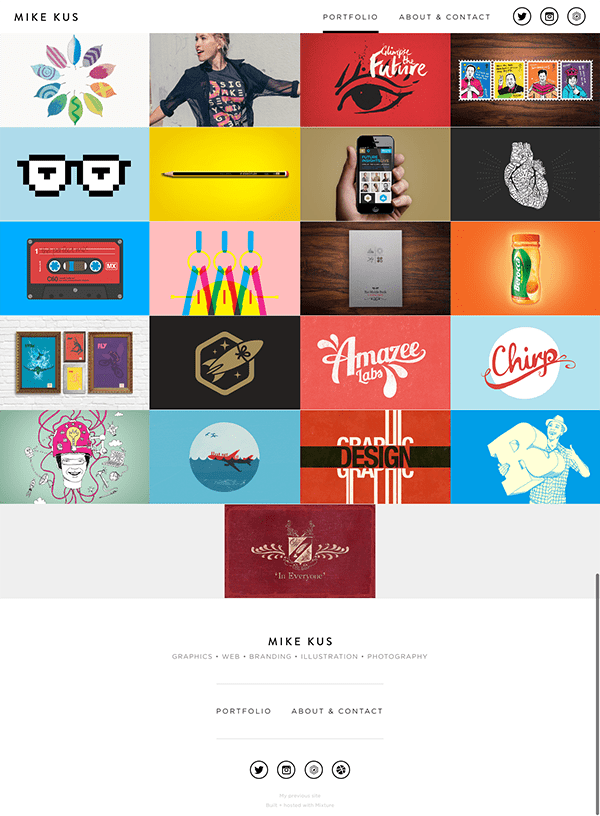
I’ve had this idea for a long time. Ever since we published this post on portfolio websites to model your own after. Specifically, I thought the portfolio website of Mike Kus was particularly good. It was only what it needed to be and nothing more. Perhaps even more importantly, its minimal approach put all of the visitor’s attention on his work–which is the whole point!
I knew right away that this was something Divi users could do as well and so I planned this miniseries to show everyone how. We’ll start by mimicking his home page and then in the following posts expand out from there (never losing sight of the simplicity of the core design) but also taking advantage of the advanced functionality Divi provides to increase effectiveness.
Preparing the Design Elements
For this tutorial you’ll want to be able to populate your home page with portfolio projects. In total I used a little over 100 images from unsplash.com to create 20 projects with at least five images each. However, for this tutorial you will only need 20 images–to use as featured images on 20 projects–which I recommend re-sizing to a width of 1920px. I’d also recommend using landscape images as your project featured images since that will look best down the line when we design our project pages using the Divi Builder.
Implementing the Design with Divi
Subscribe To Our Youtube Channel
As I mentioned above, there are three sections to this tutorial: Header/Navigation, Footer, and Portfolio Module. In the three sections below I’ll walk you step by step through each one. But before we do that, let’s take care of a few site-wide settings that need configuring.
Navigate in your WordPress Admin to Divi > Theme Customizer. Under General Settings > Background set your site background to white (#ffffff). Then, under General Settings > Typography set your Header Font Style to bold (B) and all caps (TT). Then set your Header Font to Open Sans and your Body Font to Georgia. In keeping with our minimal motif, set your body link color to black (#000000) and your body text color as well as your header text color to grey (#666666).
Click the blue “Save & Publish” button at the top of the customizer before moving on.
To get started let’s tackle the minimal header I’ve created. We’ll start with the easiest bits and progress to the social icons, which require a small amount of code.
First, go to Pages > Add New and create/publish two pages: Portfolio and About. You can leave them blank for now since we’ll be filling them in with content later. Then, navigate in your WordPress Admin to Divi > Theme Customizer.
The first thing we need to do is make sure that your menu is displaying the two pages you just created. So navigate in your Theme Customizer to Menus > Primary Menu. If the primary menu option is not available, click the blue “Add Menu” button and create a menu called “Primary Menu”.
Inside the menu called Primary Menu click the blue “Add Items” button. Select your portfolio page and about page from the Pages section. Click on your about page item in the Primary Menu and change the navigation label to say “About & Contact”.
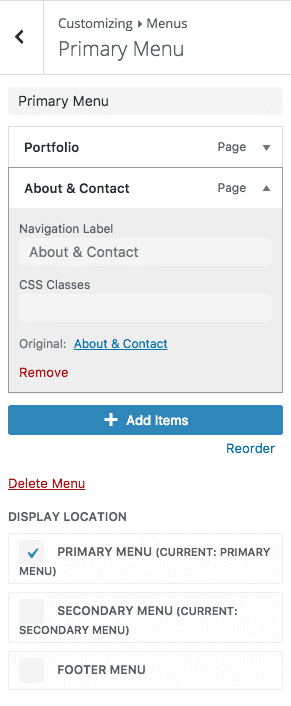
Finally, under “Display Location” make sure that the check box next to “Primary Menu” is ticked. Click the “Save & Publish” button at the top before moving on.
Now we can begin to style our new primary menu. Navigate from the main customizer menu to Header & Navigation > Primary Menu Bar.
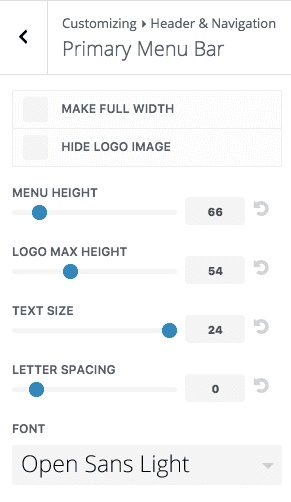
Make the following changes:
- Menu Height: 66
- Logo Max Height: 54
- Text Size: 24
- Letter Spacing: 0
- Font: Open Sans Light
- Text Color: rgba(0,0,0,0.55)
- Active Link Color: #000000
- Background Color: #ffffff
- Dropdown Menu Background Color: #ffffff
- Dropdown Menu Line Color: #000000
- Dropdown Menu Text Color: rgba(0,0,0,0.55)
When these changes are made, click the blue “Save & Publish” button before moving on.
Now we have to configuring the Fixed Menu settings to match our new Primary Menu settings so that things look the same as your site visitors scroll down the page. To do this, navigate back to your Header and Navigations submenu and select Fixed Navigation Settings.
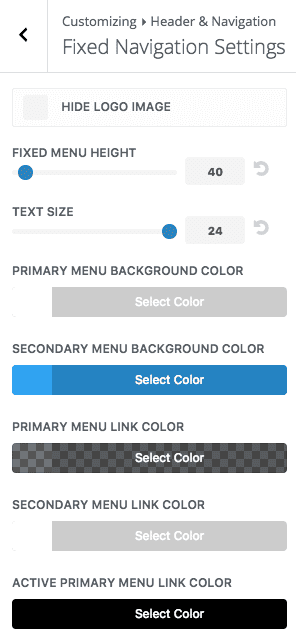
Make the following changes:
- Fixed Menu Height: 40
- Text Size: 24
- Primary Menu Background Color: #ffffff
- Primary Menu Link Color: rgba(0,0,0,0.55)
- Active Primary Menu Link Color: #000000
When these changes are made, click the blue “Save Changes” button.

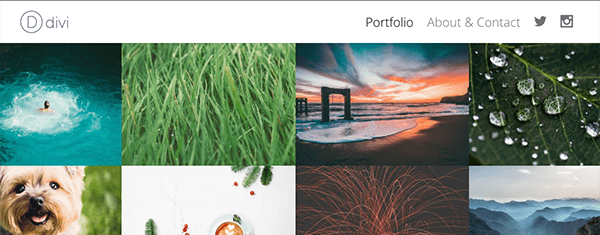
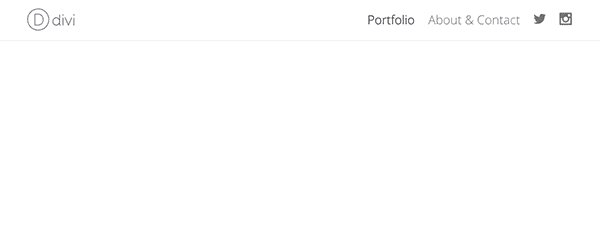
You should now have a primary menu that looks like the image above. The final touch we’re going make is adding our social icons. By default, Divi is designed to display the social icons in its secondary menu, but we want to place everything in one menu to keep things as simple and minimal as possible.
Accomplishing this is easy and requires no outside resources or images. Divi comes with an icon font family called “ETmodules” that we’re going to use to display our social icons as menu items.
To do this we’re going to have to head back to Menus > Primary Menu in the theme customizer. Click the blue “Add Items” button and click on the Custom Links option in the second pop-out menu.
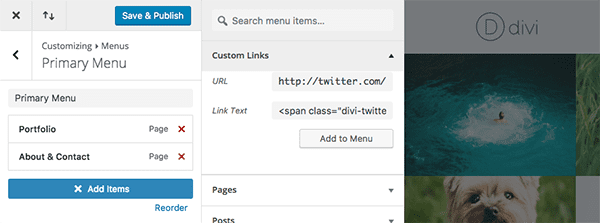
In the URL field put your twitter account’s url. In the Link Text field write the following html span:
<span class="divi-twitter"></span>
When you’re finished, click the “Add to Menu” button. Now repeat this process for Instagram using this html span in that custom link’s Link Text field:
<span class="divi-instagram"></span>
Once both of these custom links have been added to your primary menu click the blue “Save & Publish” button before exiting the theme customizer.
Now we need to add some custom css. To do this navigate to Divi > Theme Options and scroll down to the Custom CSS panel.
Add the following css:
/*Primary Menu*/
.divi-instagram:after {
    content: "\e09a";
    display: block;
    font-family: "ETmodules";
   font-weight: normal;
}

.divi-twitter:after {
    content: "\e094";
    display: block;
    font-family: "ETmodules";
   font-weight: normal;
}
When finished click the green “Save Changes” button at the bottom of the theme options page. You should now have a minimal header that looks like this.
If you’d like to use different social networks, you can simply change the css class to reflect the social icon and use one of the following content codes:
Facebook = content: “\e093”;
Google Plus = content: “\e096”;
Pinterest = content; “\e095”;
LinkedIn = content: “\e09d”;
Tumblr = content: “\e097”;
Skype = content: “\e0a2”;
Flikr = content: “\e0a6”;
Myspace = content: “\e0a1”;
Dribbble = content: “\e09b”;
YouTube = content: “\e0a3”;
Vimeo = content: “\e09c”;
RSS = content: “\e09e”;
Don’t forget to change the css class in both the custom link span and the custom css.
Now we’re going to create our minimal footer. But first, we need to get rid of the default Divi footer. To do that go to Divi > Theme Options and scroll down to the Custom CSS panel.
Place the following snippet of CSS inside:
/*Footer*/
#main-footer {
display: none;
}
When you save your changes and refresh you website it should look like the image below.
Now we’re going to replace the old footer with a new global footer section. To do this, activate the visual builder on your portfolio page.
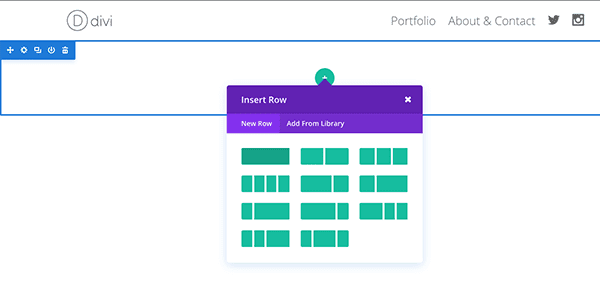
Add a single column row to your default section. Then, add a text module inside.
Change the text orientation to Center. And add your footer credits in the content area.
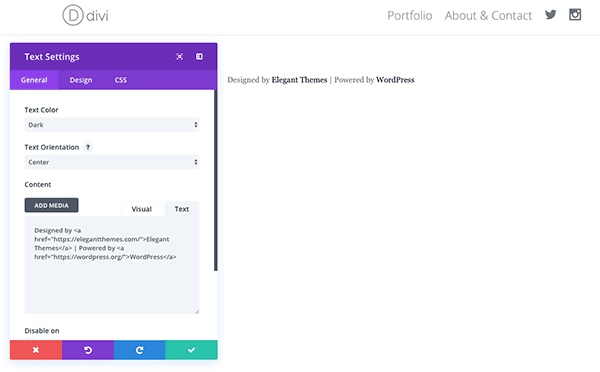
Add a second text module below the first. This is where we’re going to add our social icons in the footer using the same method we used for the primary menu.
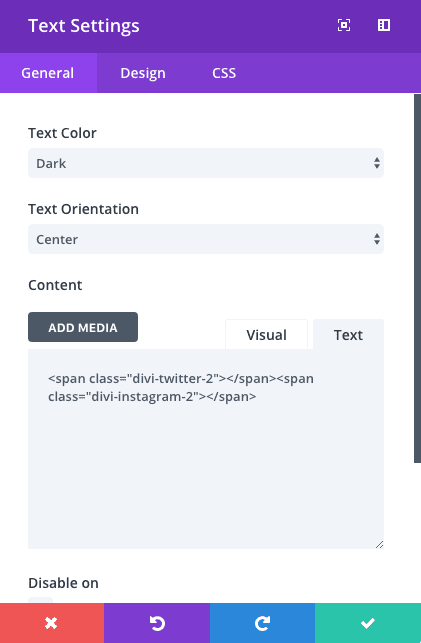
Change the text orientation to Center and write the following html in the content section:
<a style="color: #737373;" href="http://twitter.com/"><span class="divi-twitter-2"></a><a style="color: #737373;" href="http://instagram.com"></span><span class="divi-instagram-2"></span></a>
Click the green save button to close the text module settings. You’ll notice that the icons are not visible yet. This is because we’ve changed the associated class so we can add subtly different styles just to our footer icons.
To get your new icons to appear you’ll need to navigate back to Divi > Theme options and go down to the Custom CSS panel.
Place this snippet inside:
/*Builder Footer*/
.divi-instagram-2:after {
    content: "\e09a";
    display: inline;
    font-family: "ETmodules";
   font-weight: normal;
   font-size: 24px;
   padding-left: 15px;
}

.divi-twitter-2:after {
    content: "\e094";
    display: inline;
    font-family: "ETmodules";
   font-weight: normal;
   font-size: 24px;
   padding-right: 15px;
}
This uses the same content codes we used in the header but it changes the display option from block to inline. It also adds a bit of needed padding between the two icons.
When you’re done click the green “Save Changes” button. Your new minimal footer should look like the image below.
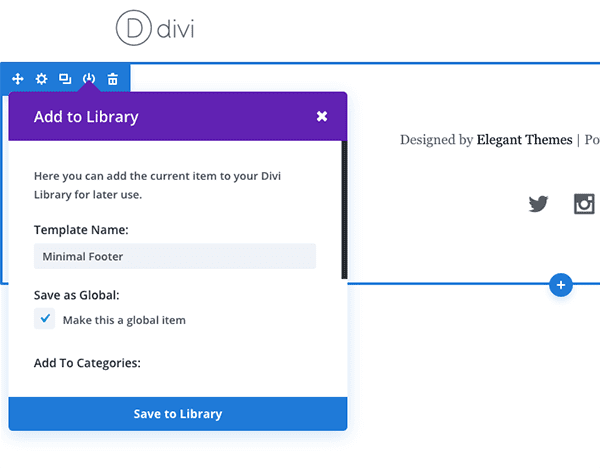
Finally, I recommend saving this section as a global item in your Divi Library. This will not only make it easy for you to add it to all of your future pages, but if you need to edit it you will only have to make the changes once instead of on every page.
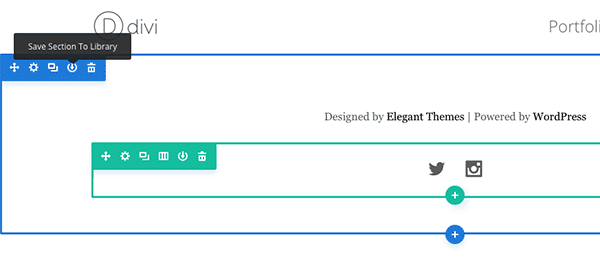
To do this click on the save to library icon for the section. Give your footer a name, tick the “Make this a global item” box, and click the blue “Save to Library” button.
Configuring Your Divi Portfolio Module
Now that we have our minimal header and footer squared away we can go about creating our portfolio. I mentioned in the “preparing design elements” section above that you will need a minimum of 20 images for this exercise–all landscape orientation and resized to have a width of 1920px. Having a uniform height is not necessary but some of you may prefer having a consistent featured image on each project page.
Obviously, if you have your own artwork to use you will simply need to choose a featured image for each project you want to feature. If you are simply following along with this tutorial as a design exercise then you can get free images from unsplash.com and resize them accordingly.
Before we can do anything meaningful with the Portfolio module, you’ll need to create some portfolio projects. Navigate in your WordPress admin to Projects > Add New and create/publish 20 new projects. You don’t have to put any content in them at this time. Simply add a featured image to each one so that we can manipulate the design elements of our Portfolio module and see the results.
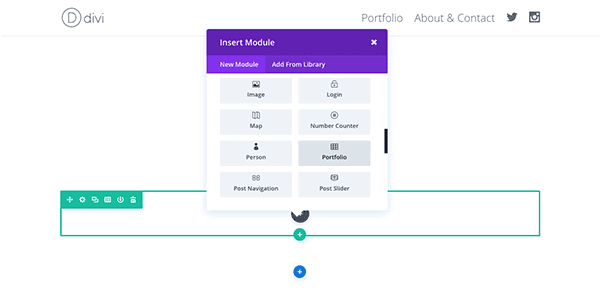
Now we can head back to our homepage and create a new section with a single column. Go ahead and add the portfolio module.
When the settings modal appears make the following changes.
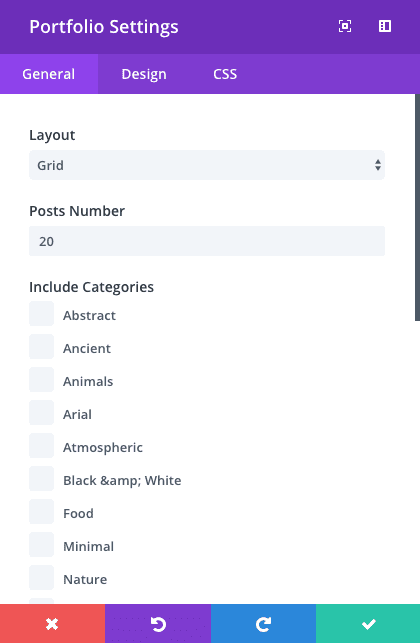
Portfolio Module General Settings:
- Layout: Grid
- Posts Number: 20
- Show Title: No
- Show Categories: No
- Show Pagination: No
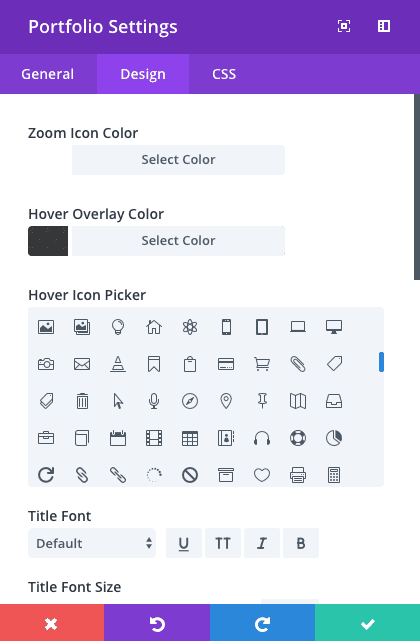
Portfolio Module Design Settings:
- Zoom Icon Color: #ffffff
- Hover Overlay Color: rgba(0,0,0,0.76)
- Hover Icon Picker: Whatever icon you prefer. I chose a camera since my portfolio is for photography.
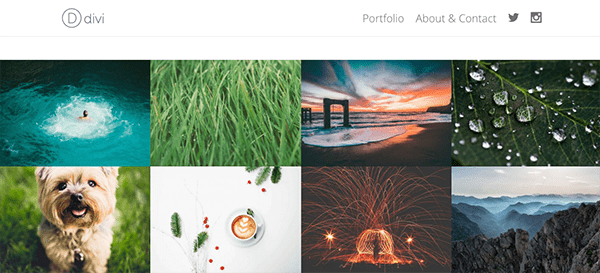
Once these changes are made click the green save button. Drag the portfolio section above the footer section. Your page should look like this now.
To achieve our desired fullwidth, closed-grid look we will need to alter the row and section settings. Let’s start with the row settings.
Row General Settings:
- Make This Row Fullwidth: Yes
- Use Custom Gutter Width: Yes
- Gutter Width: 1
- Custom Padding: 0px Top
Row Design Settings:
- Custom Margin: 0px Top
When you are finished click the green save button. You’ll notice that you still have a white space between the top of your portfolio and the menu.
To fix that we need to alter the section settings.
Section General Settings:
- Custom Padding: 0px Top
Save changes.
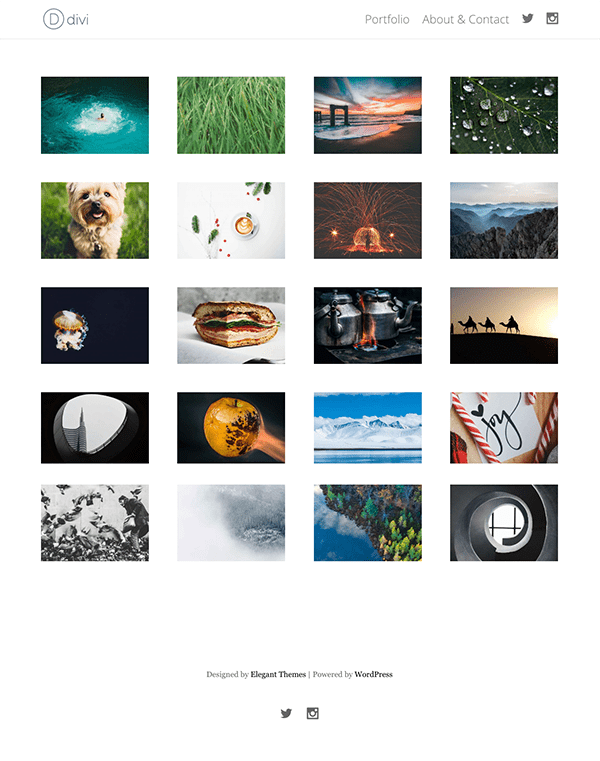
Now we have our desired final result. A beautiful, minimal, divi portfolio homepage.
Tomorrow: Using Filters, Hero Sections, and CTA’s to Expand Your Minimal Portfolio Homepage
Tomorrow we’re going to create a few alternate versions of this homepage using the filterable portfolio module, calls to action, and hero sections. Not only does this give you more options to choose from personally, but later in the series I’ll show you how to test these designs against each other using Divi Leads. Demonstrating objectively which design is most effective for achieving your goals.
Be sure to subscribe to our email newsletter and YouTube channel so that you never miss a big announcement, useful tip, or Divi freebie!


Where can I find the other 4/5 parts of this miniseries?
If you go by post date, they were all published over the next four days.
Love these tutorials!
I had to figure out a thing though, so here’s the solution for who may use it.
When entering the social media icons, there must be a “\” in front of the content number code, only then it displays correctly (thanks to a facebook divi group, they helped me out).
But I also have a question:
How do I make the footer icons go to there instagram/facebook page? I haven’t got a link in there and I wish to do that. Can someone help me out?
Hello, I love these amazing tips on how to use DIVI. Thank you very much for the dedi- cation in teaching us every day more. I’m going to use this kind of page on my new site
The portfolio looks good, These are used by projects modules. Can we use it for showing our posts in the page only images with links no excerpt.
Can you use woocommerce products instead of projects in this portfolio for a slick looking product page?
Yeah, absolutely. Just use the shop module instead 🙂
no link in the footer, for social media ?
or something like that :
and for the over color link ?
The icons in the footer are linked.
Mine also..
No link for social media in the footer.
Follow carefully all the step from the beginning.
Please advice.
Url : http://www.hairul.me
Ah I see what happened. Try this text in your text module for the icons:
You can alter the links to point to your profiles.
Which text Nathan?
Hi
Under your section:
Now we can begin to style our new primary menu. Navigate from the main customizer menu to Header & Navigation > Primary Menu Bar.
I don’t see the text options. Why?
Hello what’s wrong. I do it step by step, but social icons at top menu don’t display properly.
/*Primary Menu*/
.divi-instagram:after {
content: “e09a”;
display: block;
font-family: “ETmodules”;
font-weight: normal;
}
.divi-twitter:after {
content: “e094”;
display: block;
font-family: “ETmodules”;
font-weight: normal;
}
If it’s not working as in the post then I would recommend creating a support ticket so our support team can take a closer look.
Do you have the custom links in place with the correct span html from the post?
Social media in header doesnt work for me either and I do have the custom links in place with span html from the post.
Try adding the “\” inside your content value as Grattours stated above.
content: “\e094”;
as opposed to
content: “e094”;
Thank You.
I inserted backslash. Everything is OK.
Have a nice day Jeff! Best regards from Poland and Happy New Year!!!
it’s better with \ in the CSS content (content: “e093” is not ok on my site, but content: “\e093” yes 😉
Thanks! Now it works for me to 🙂
Thanks grattours!
Thanks for this…
thanks 🙂
thanks very useful. :X
Great work! Gives me some inspiration to create my own portfolio website! 🙂
When will divi support masonry layout out of the box, without needing plugins?!
First I love ET and I love all the work you folks put into providing all these solutions. With that said here are some thoughts.
Keep in mind this is from a photographers point of view, but some points will apply to other business types.
1 – Photographers compete on a local level and the competition is fierce. A new photographer pops up on every corner, every day. They need an updated look for their images. You can get there but it requires plugins and a lot of work. Just to do things others do by default.
1a – The new on page editing is great, but other themes have that as well. At some point, you have to stop and add the functionality needed.
2 – SEO is critical and with the entire web being image based than ever before, image SEO takes center stage.
3 – Photographers (and others) spend hours setting alt-tags and descriptions in WordPress media module. However, if you create a gallery in DIVI, it DOES NOT use any of this. Instead, it picks the file name as the alt-tag.
Example; Image is named dsc1342.jpg, the alt-tag is updated to “gilmers wedding venue with bride and groom, memphis, tn” Google uses the alt-tag to index the images. So if someone is having a wedding at “gilmers wedding venue”, they will find you. Right? Wrong! The gallery module uses the file name as your alt-tag, so your alt-tag would be set to “dsc1324.jpg”. This is even true if you have a pizza shop or sell carpet.
I’ve seen this mentioned and requested numerous times, by a number of users, over the past few YEARS. Nothing has been done.
Thank you for posting this. I was about to build a photographer’s portfolio, but will not use this module if it’s not providing proper meta for the photos.
It could be done using Portfolio in fullwidth version in different columns. There is only this annoying space between photos that has to be removed.
I’m not sure. We have so much we want to do and include that it’s impossible to say for sure when one thing will get implemented until we commit to it for our next release. Right now our next major release is the developer release. So if it happens it will most likely happen after that.
I just happy to hear that the developer version is being worked on 😀
I fully suport this question!