
Welcome to post 4 of 5 in our miniseries How to Create a Simple and Effective Portfolio Website with Divi. In this series we’ll cover everything you need to do in order to create your own portfolio website from scratch. We’ll also go over how to use our A/B testing system Divi Leads to make sure your site is effective at attracting new clients.
In today’s post we’re going to finish off our minimal portfolio website with a simple and (hopefully) effective about/contact page. Just to be safe we’re going to create two slightly different versions and test them against each other in tomorrow’s post.
But we better not get ahead of ourselves. Let’s get cracking on this design!
Today’s Final Product(s): Two About/Contact Page Design Variants
To me a page does not need to be complex, difficult to build, or flashy to be effective. In fact, in most cases, those things will likely work against you. That’s why for our joint about/contact page I wanted to keep the design extremely simple and in-line with our minimal aesthetic.
We have a blurb about the artist and a contact form for booking inquiries. And that’s it. The only difference between the two variants is the placement of those two elements. In the first variant you will have to scroll down to fill out the contact form and submit it. In the second one everything is “above the fold” and accessible as soon as you hit the page.
About/Contact Page Design Variant 1
About/Contact Page Design Variant 2
In the sections below I’ll walk you through how I created each one (and the subtle differences between them).
How to Create a Compelling About Page for Your Portfolio Website with Divi
Subscribe To Our Youtube Channel
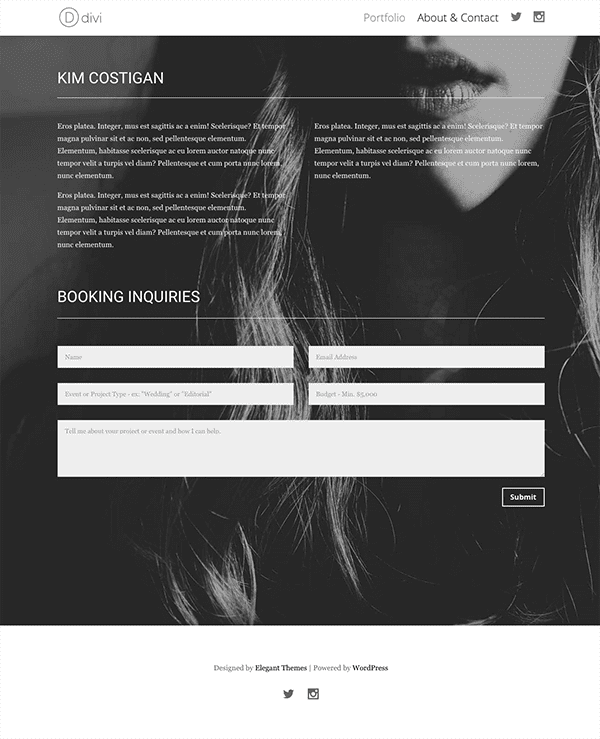
About/Contact Page Design 1
To create the first design variant of our about/contact page, navigate to the page you created for it in our first tutorial. If you have the global footer we created already in place then it will look like this.
Enable the visual builder and add a new standard section with one row and one column.
Open up your blue section settings and choose a background image. Mine is 1920px wide by 1300px high.
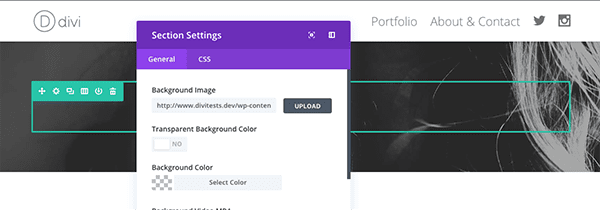
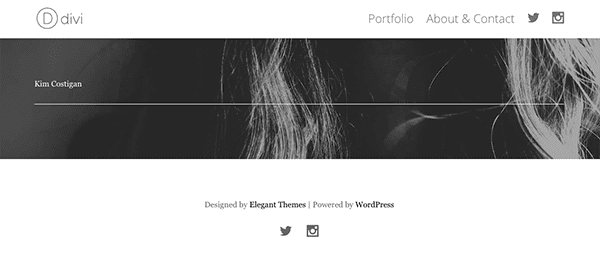
Once you’ve saved that, click the grey add module button in the middle of your row. Add a text module, set the text color to light, and put your name in the content area. Then add a divider module below it. Set the color to white, the visibility to “show divider”, and the height to 2.
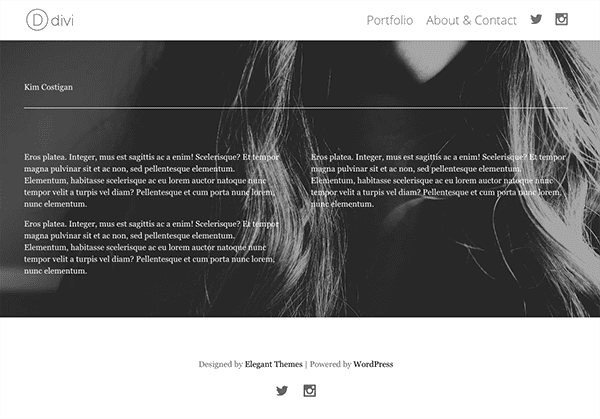
Now add another row, but this time with two columns. Add a text module and put the first bit of your about text there. Add a final text module in the second column on the right and finish your about text there.
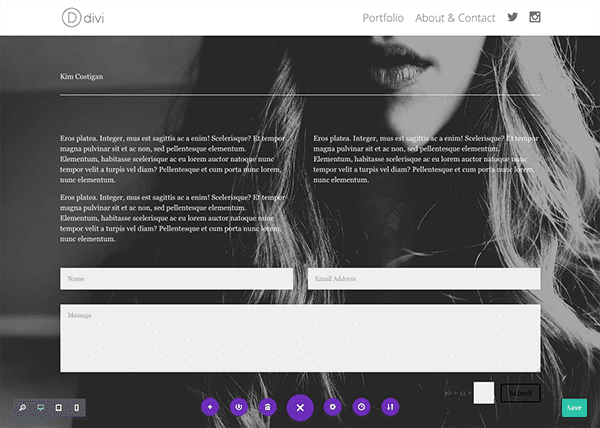
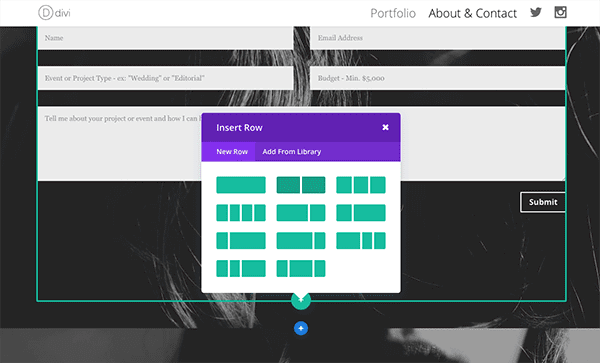
Now add a new row with a single column and add the contact form module to it. Now all of your design elements are on the page. It’s time to go back through and begin styling things.
Name Text Module Settings
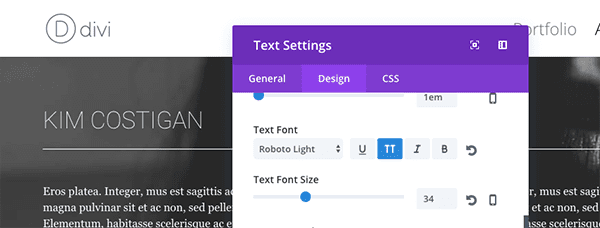
Open up the design settings for the text module your name is in and make the following adjustments.
General Settings:
- Text Color: Light
- Text Orientation: Left
Design Settings:
- Text Font: Roboto Light; All Caps (TT).
- Text Font Size: 34
Custom CSS:
Under main element past the following line of css.
font-weight: 400;
Save and exit.
Remaining Row Settings
In the middle row containing your “about text” open up the row settings and set the top custom padding value to 20px. Set all of the other custom padding values to 0px. Save and close.
In the row settings for the bottom row, set all custom padding values to 0px. Save and close.
Contact Form Module Settings
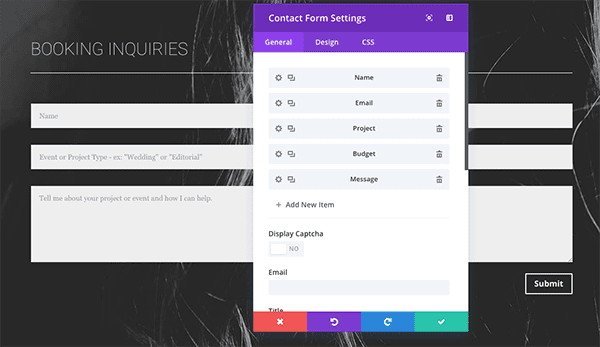
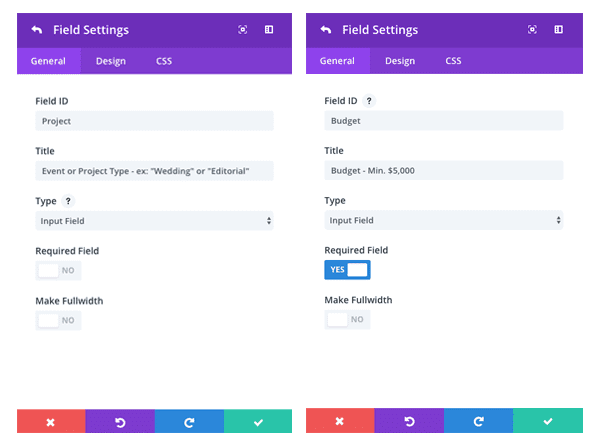
Under the general tab add two new items; both input fields. Label the first one “Project” and the second one “Budget”. You can choose to make them required fields or not depending on your preference but to match this design you will need to set the Make Fullwidth switch to “No”.
Also in the general tab, turn the Display Captcha option to “No”. And fill in the remaining fields according to your preference. I liked the phrasing “Booking Inquiries” for the title but you can choose whatever you want.
Moving on to the Design tab, make the following changes:
- Title Font: Roboto Light; All Caps (TT).
- Text Font Size: 34
- Button Text Size: 16
- Button Border Radius: 1px
- Button Font: Open Sans; Bold (B).
- Button Icon: Camera
Finally, in the custom css tab, paste the following css in the “Contact Title” box:
font-weight: 400 !important;
padding-bottom: 30px;
margin-bottom: 60px;
border-bottom: solid 1px #ffffff;
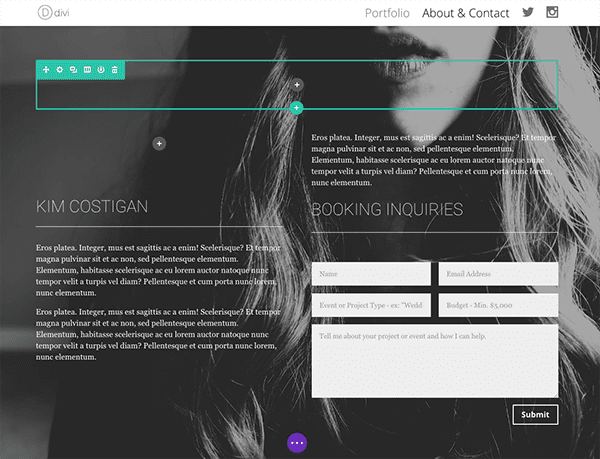
Save everything and exit the visual builder. Your final result will look like this.
Your End Result: About/Contact Page Design Variant 1
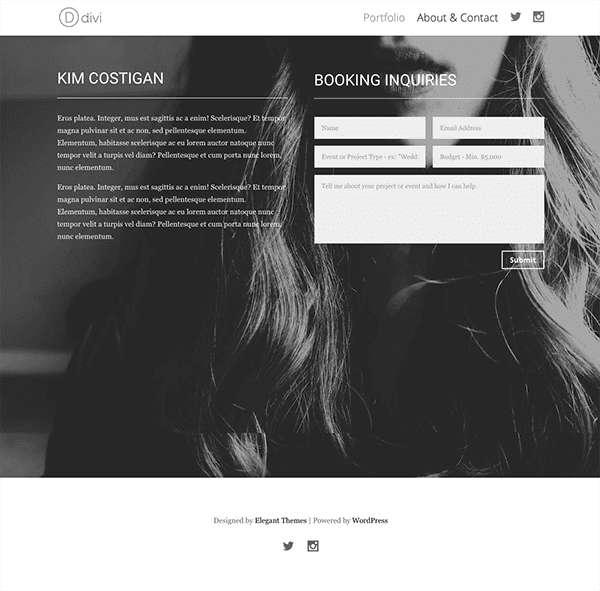
About/Contact Page Design 2
Since all of our design elements have already been created, we’re more or less just going to re-arrange things for this design variant. The first step is to enable the visual editor and duplicate the first design we just created. The duplicate will appear below it. Once that has happened, disable our first design by right-clicking on the section settings and disabling it on all devices.
Scroll to the bottom of the existing design and create a new row with two columns.
Drag the contact form module into the right hand column. Then drag the name text module, white divider, and left-hand side text module into the left column of the new row.
Next, delete the top two rows and open up the contact form module settings. In the css tab paste this adjusted code in the “Contact Title” box.
font-weight: 400 !important;
padding-bottom: 23px;
margin-bottom: 40px;
border-bottom: solid 1px #ffffff;
Save and exit the module settings. The final step is to add a new bottom row with a single column. Add an invisible divider module with 350px of height. Save everything and exit the visual builder. Your final result should look like the image below.
Your End Result: About/Contact Page Design Variant 2
Tomorrow: Testing Your Portfolio’s Effectiveness with Divi’s A/B Testing System Divi Leads
In tomorrow’s post I’ll show you how to conduct a series of A/B tests that will improve your portfolio’s performance by showing you conclusively what works and what doesn’t. Even if you haven’t followed along with this miniseries so far, tomorrow’s post will show you how to think about and set up A/B tests for whatever site you’re currently working on.
Be sure to subscribe to our email newsletter and YouTube channel so that you never miss a big announcement, useful tip, or Divi freebie!


Hola!
I asked on youtube tutorial comments, how or where should I change the text color for the captcha challenge, and I was responded that it changes with the use custom styles for button, but no, it does not change, the text color remains and I guess it’s properties are inherited from the style sheet.
Is there a custom css I can add to the contact form to change it?
thanks.
Awesome tutorial.I’d be using this right away for my page.Thanks
Hey Daisha if you want to try out another way to get extra social media icons into DIVI a free plugin called Divi Socials exists and you can find it with a simple search in the plugins area.
The plugin is around 1 week old.
The one major drawback at the moment with the plugin is that the extra social media icons only show up in the secondary menu and not in the footer as well just yet.
Hi, great look.
Does anyone know how to:
Put social icons in the menu like they did?
How to set up the footer like that?
Thank you!
Yep! We go over all that in the first post of the series here: https://www.elegantthemes.com/blog/divi-resources/how-to-create-a-minimal-portfolio-homepage-with-divi
Hello Nathan,
I see your this custom css code:
font-weight: 400 !important;
padding-bottom: 23px;
margin-bottom: 40px;
border-bottom: solid 1px #ffffff;
Where it has to be inserterd while creating portfolio about page? Is this code to be inserted in custom css section next to advanced settings when we open up the contact form or is it the page layout custom css window?
If it is contact form–> custom css ; then inside that is it to be inserted under main element or where?
Whoops! I’ve updated the post to reflect this but that css should go in the css section called “Contact Title”.