
")
Adding a Reading Progress Bar (or scroll indicator) to your blog post template is a smart way to showcase a user’s reading progress for a given article. The idea is to display a fixed progress bar at the top of the post that directly correlates with the user’s scroll position on the post content. When the user reaches the article, the progress bar begins to fill up. When the user reaches the end of the article, the progress bar is 100% full.
In this tutorial, we are going to show you how to create a reading progress bar for Divi blog posts that is smart enough to know when the user starts and finishes (by scrolling) the actual post content, not the entire page. This will give a more accurate indication the reading progress.
We’ll show you how to add this reading progress bar to Divi’s default blog post template or a custom post template using the Divi Theme Builder.
Let’s get started!
- 1 Sneak Peek
- 2 Download the Layout for FREE
- 3 Download For Free
- 4 You have successfully subscribed. Please check your email address to confirm your subscription and get access to free weekly Divi layout packs!
- 5 Part 1: Importing the Premade Templates
- 6 Designing the Reading Progress Bar
- 7 Final Result
- 8 Using the Reading Progress Bar on Divi’s default Post Template (not a custom template)
- 9 Final Thoughts
Sneak Peek
Here is a quick look at the design we’ll build in this tutorial. Notice how the progress bar is fixed at the top of the post template. The progress bar starts to fill up once the user reaches the actual post/article content and ends when the user finishes the post content.
Download the Layout for FREE
To lay your hands on the designs from this tutorial, you will first need to download it using the button below. To gain access to the download you will need to subscribe to our newsletter by using the form below. As a new subscriber, you will receive even more Divi goodness and a free Divi Layout pack every Monday! If you’re already on the list, simply enter your email address below and click download. You will not be “resubscribed” or receive extra emails.

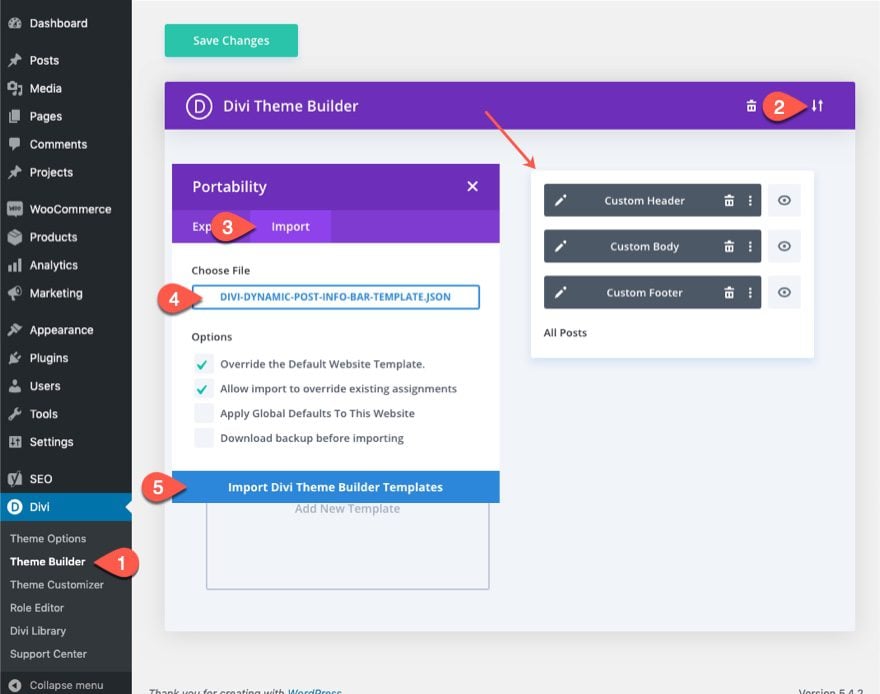
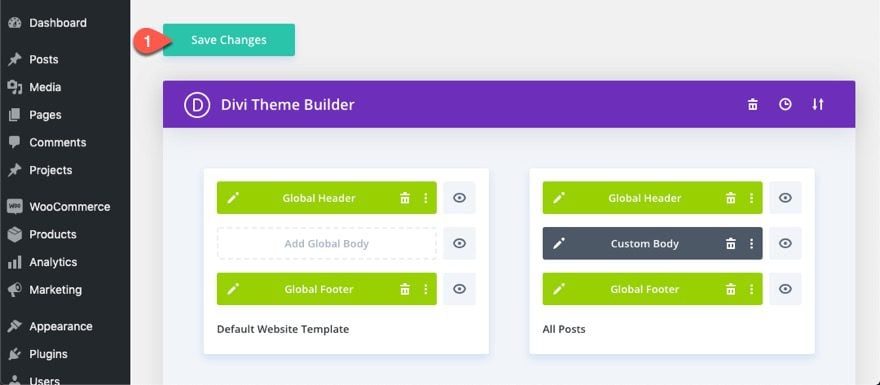
To import the section layout to your Divi Theme Builder, navigate to the Divi Theme Builder.
Click the portability icon.
In the portability popup, select the import tab and choose the download file from your computer.
Then click the import button.
Once done, the section template will appear in the Divi Theme Builder.
Let’s get to the tutorial, shall we?
Part 1: Importing the Premade Templates
For this tutorial, we are going to use a couple of premade templates from our sixth theme builder pack. We are going to import the default website template which will give us a working global header where we will add the post info bar. And we are going to import the blog post template to test out our results on a live post.
IMPORTANT: It would be best to import these templates on a test site so that you won’t mess up a live site.
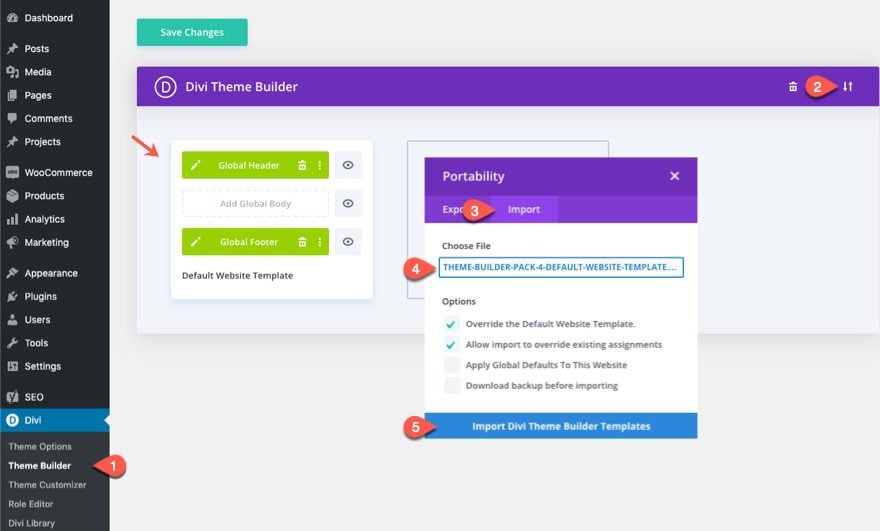
Import the Default Website Template
First, you will need to download the Fourth FREE Theme Builder Pack for Divi. Then unzip the file.
From the WordPress Dashboard, navigate to Divi > Theme Builder. Then click the portability icon at the top right. In the portability popup, select the import tab. Then choose the default website template JSON file from the downloaded folder and click the import button. This will import a new default website template with a global header and footer.
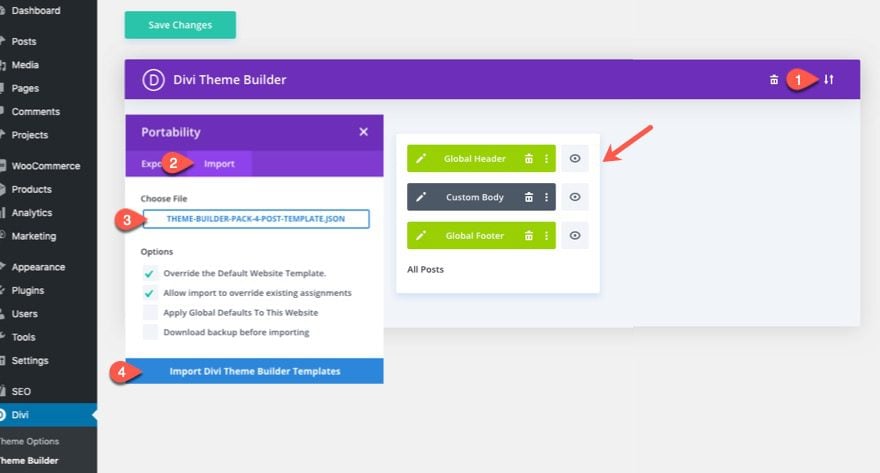
Import the Post Template
Repeat this process to import the post template from the same downloaded folder. Open the portability popup, choose the post template json file, and click the import button. This will give you a post template assigned to all posts throughout your site, along with the default header a footer.
Disable Global on the Post Template Header
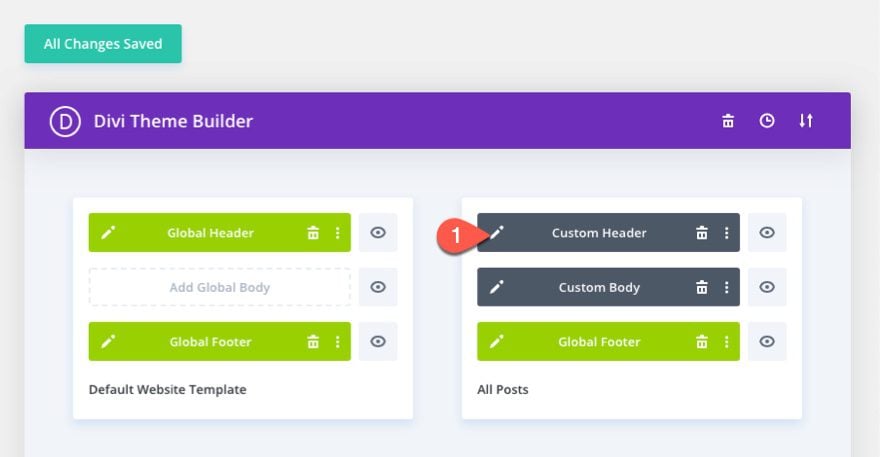
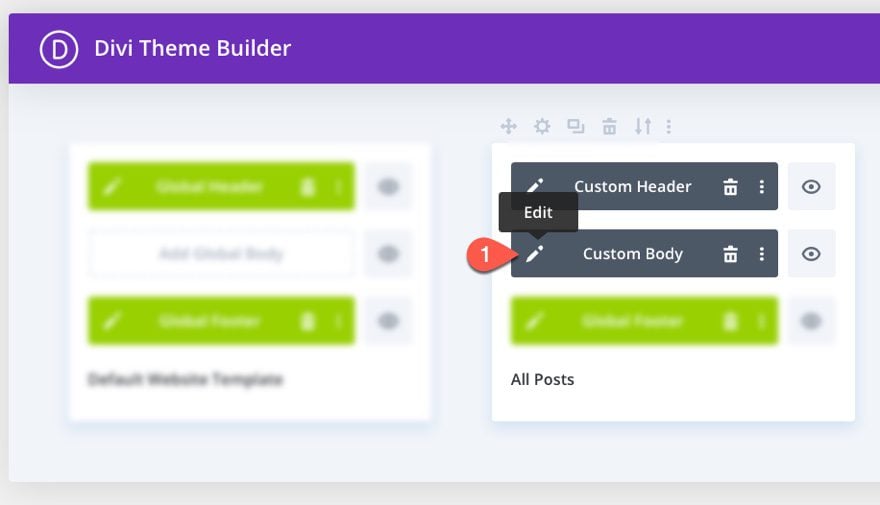
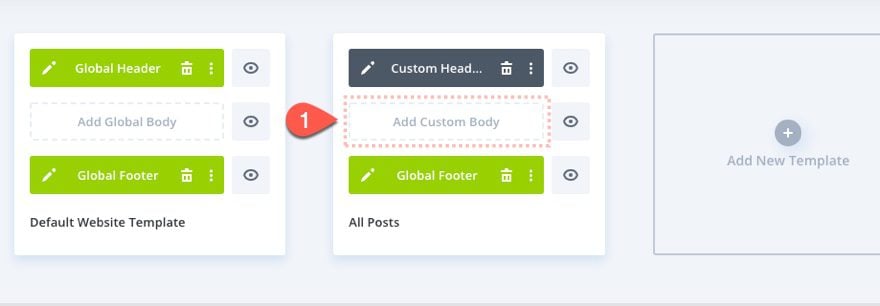
We are going to add our dynamic post info bar to the header of the post template. However, because we want the post info bar only on the post template, we need to disable global on the header so that our bar isn’t added to all headers site-wide. To disable global on the global header, open the setting menu on the global header, and select “Disable Global”.
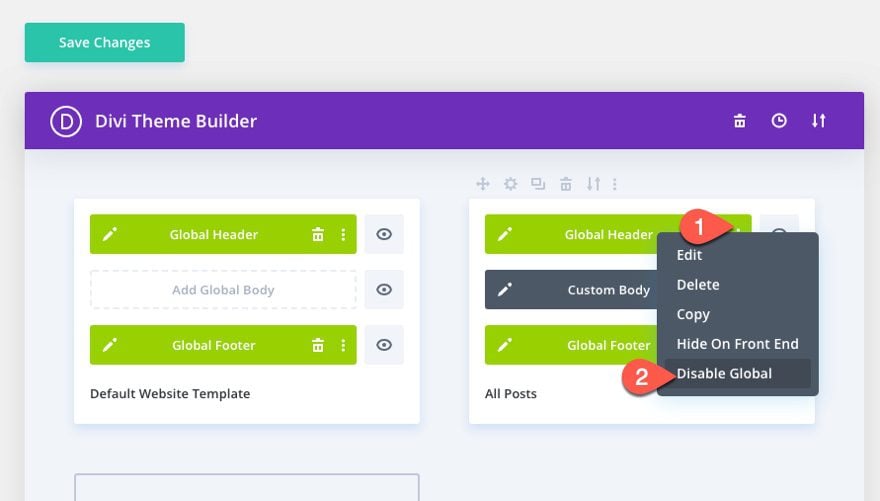
Now the header should be gray with the label “Custom Header”. Once ready, click the edit icon to edit the header layout template.
Designing the Reading Progress Bar
Adding the Section and Row
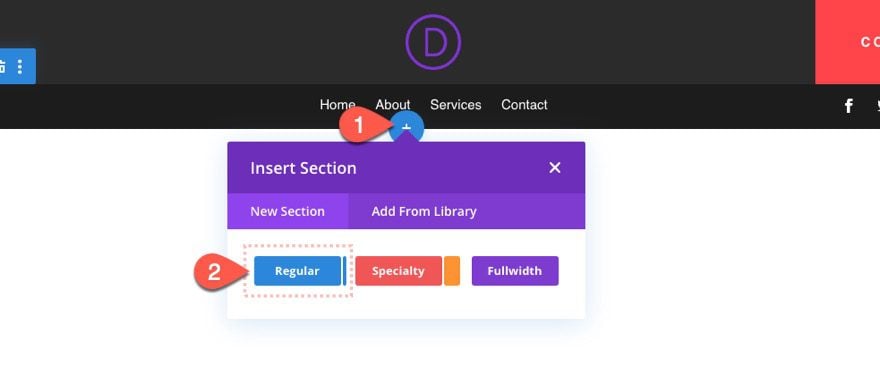
Inside the header layout editor, create a new regular section under the current section holding the header.
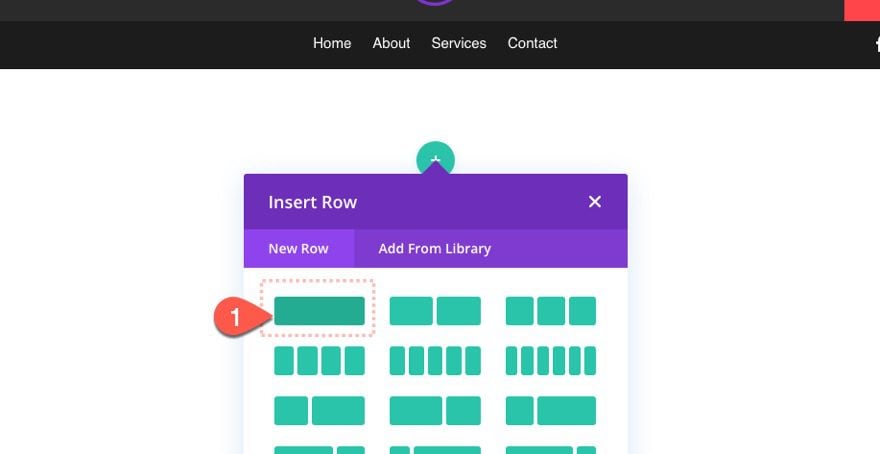
Then add a one-column to the section.
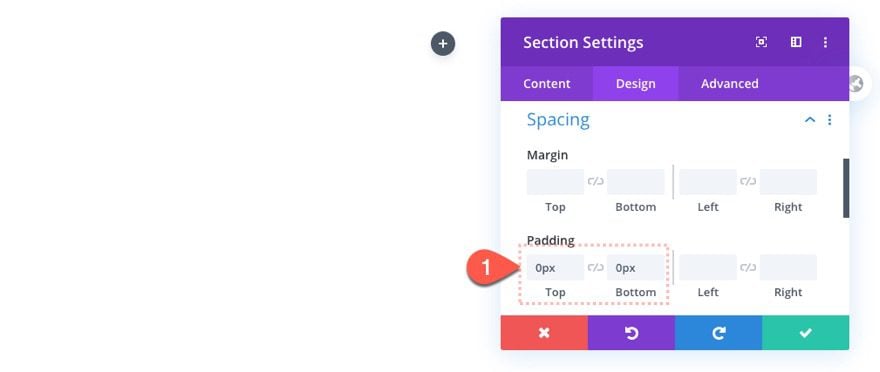
Section Settings
Open the section settings and update the following:
- Padding: 0px top, 0px bottom
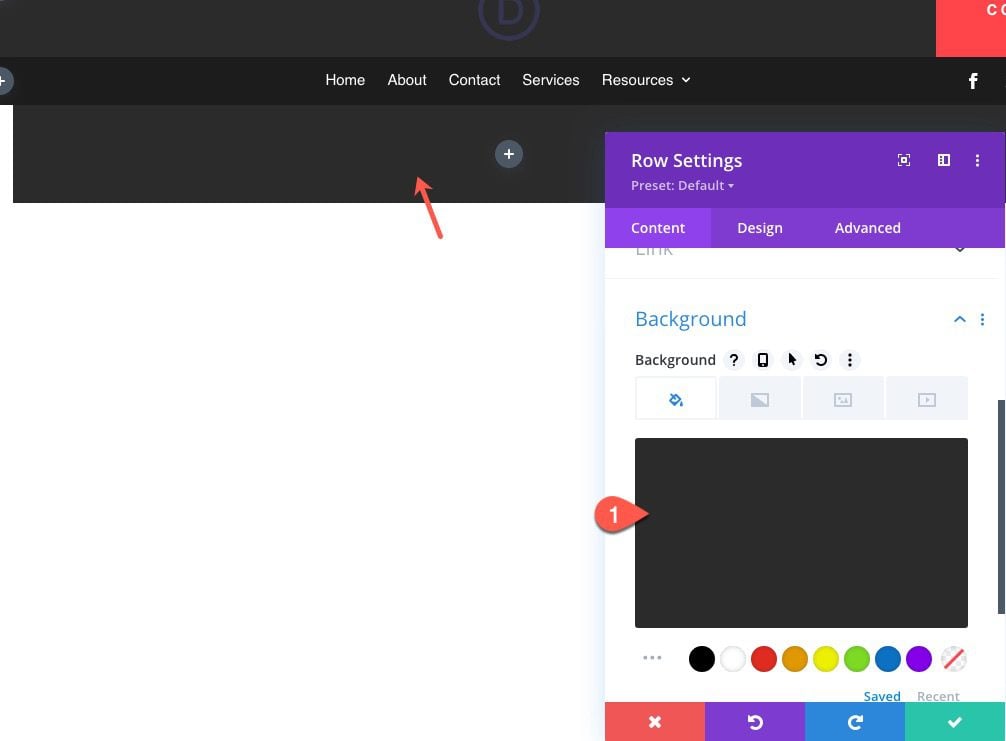
Row Settings
After the section settings are added, open the settings for the row and update the following:
- background color: #2b2b2b
Under the design tab, update the following:
- Gutter Width: 1
- Width: 100%
- Max Width: 100%
- Padding: 0px top, 0px bottom

Creating the Scroll Bar with a Divider Module
The progress bar will gradually grow in width to occupy the empty container/row. To build this, we will use a divider module with a custom background color. Once we design the divider styled how we want the progress bar to look, we will add the code necessary to make the divider increase in width at the right time while scrolling down the page.
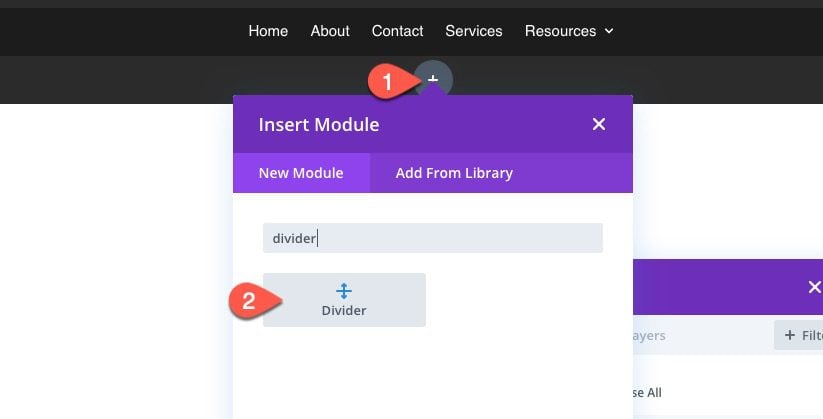
Add Divider Module
Create a new divider module inside the column.
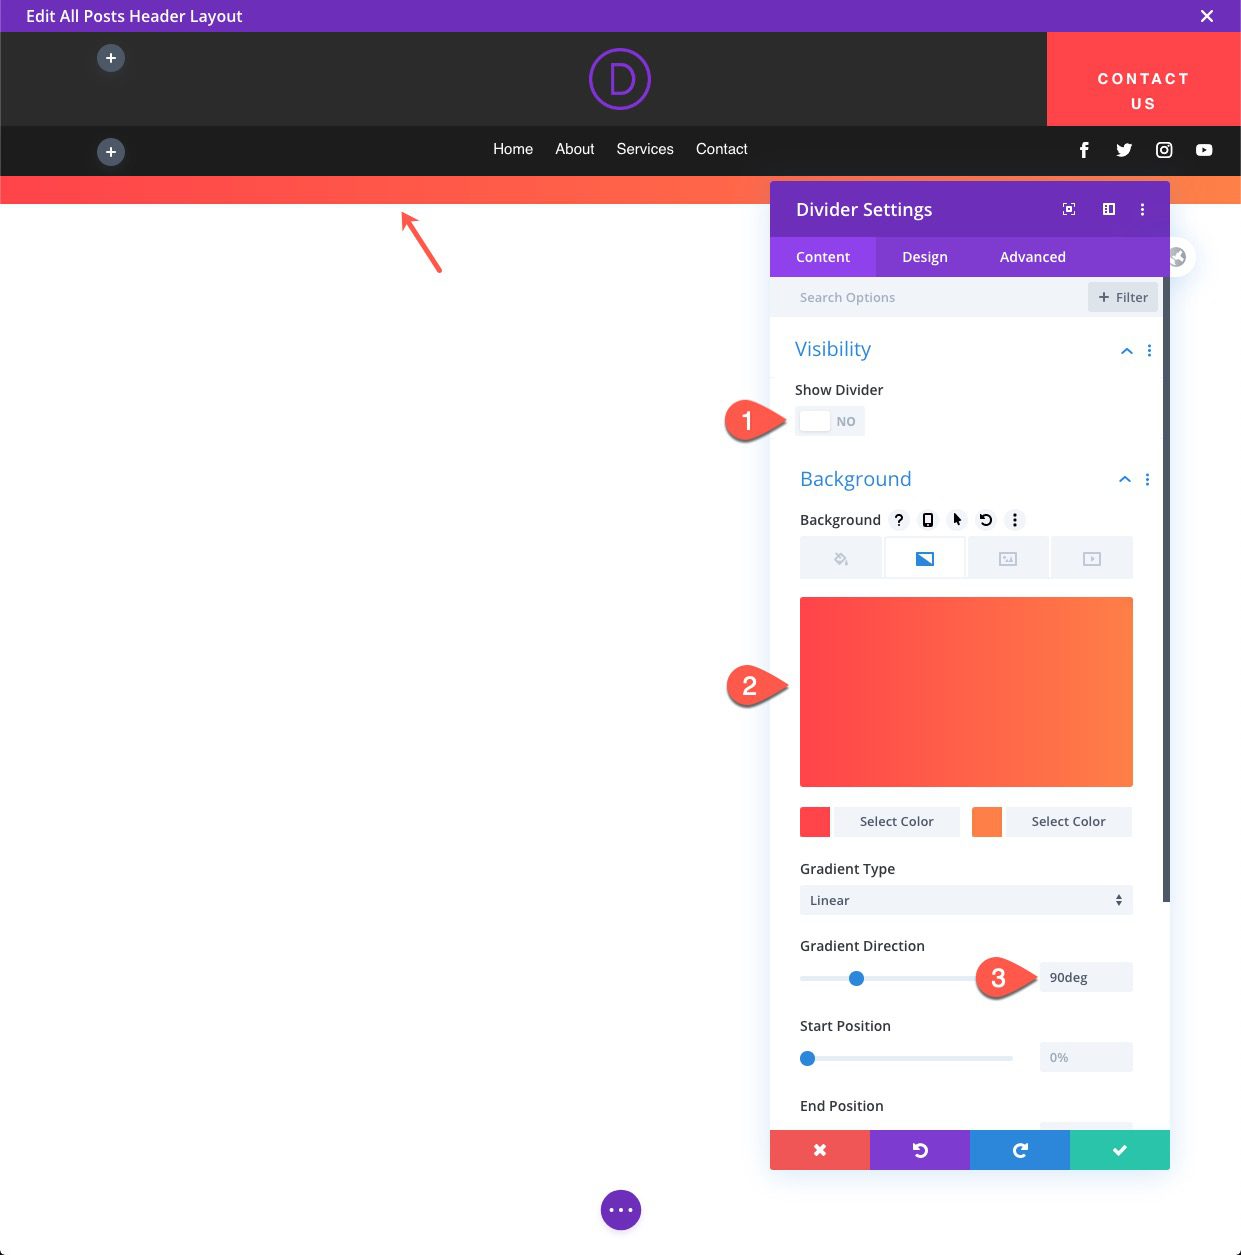
Then disable the visibility of the divider. We are going to add a background color to serves as the progress bar color instead. Update the following:
- Show Divider: NO
- Background Gradient Left Color: #ff4349
- Background Gradient Right Color: #fe7f47
- Gradient Direction: 90deg
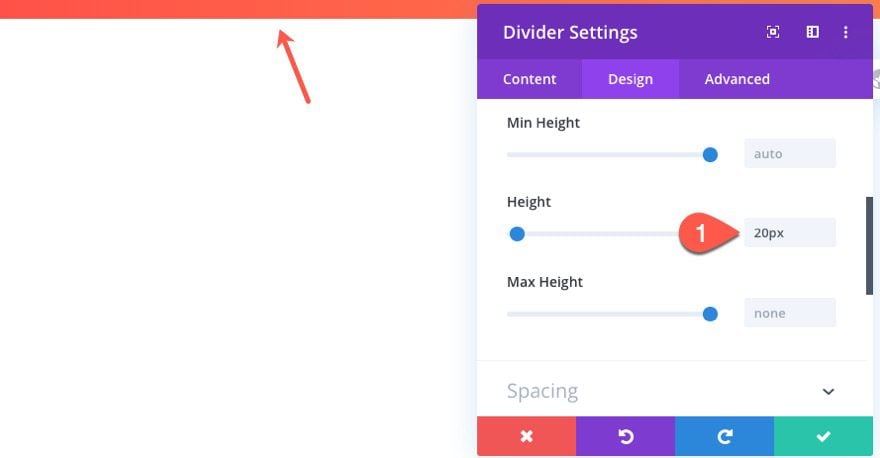
Under the design tab, update the height of the progress bar:
- height: 20px
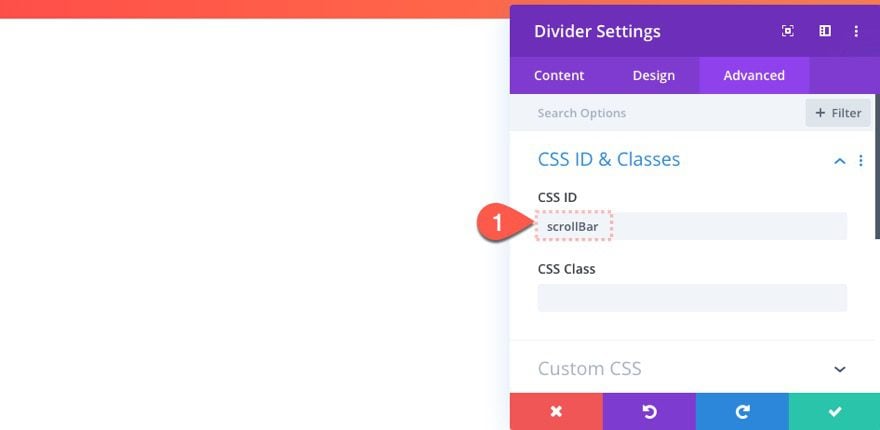
Under the advanced tab, give the divider a custom CSS ID as follows:
- CSS ID: scrollBar
We’ll need this to target the scroll bar for functionality with jQuery later on.
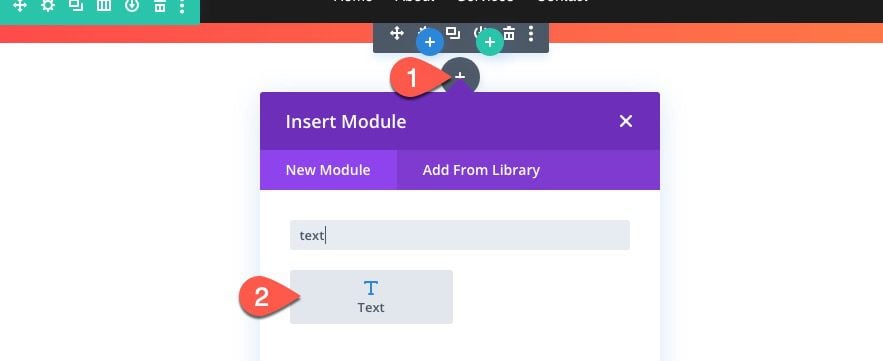
Add Progress Bar Percentage Counter Label
To add the progress bar percentage counter label, add a text module below the divider module.
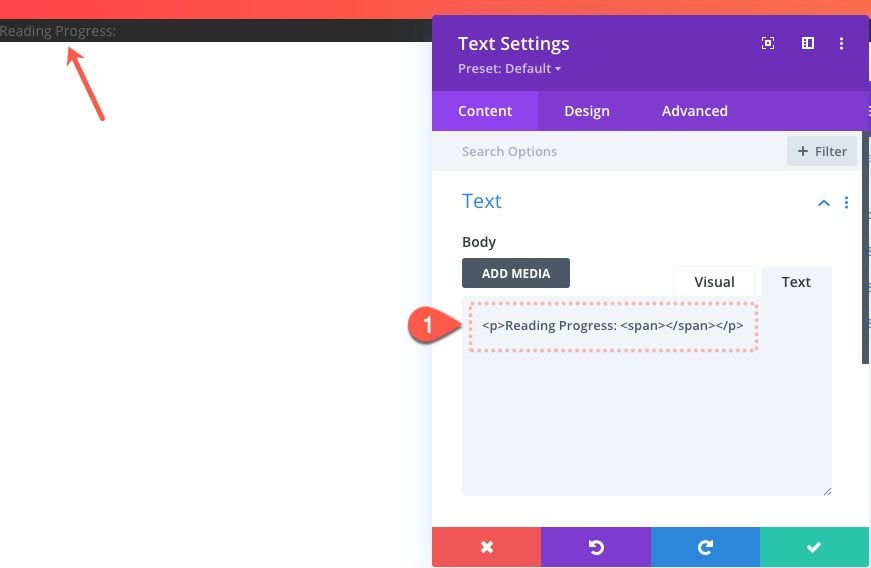
Then add the following HTML to the body content:
<p>Reading Progress: <span></span></p>
The span tags are important here because we will use jQuery to populate the span tags with the percentage counter.
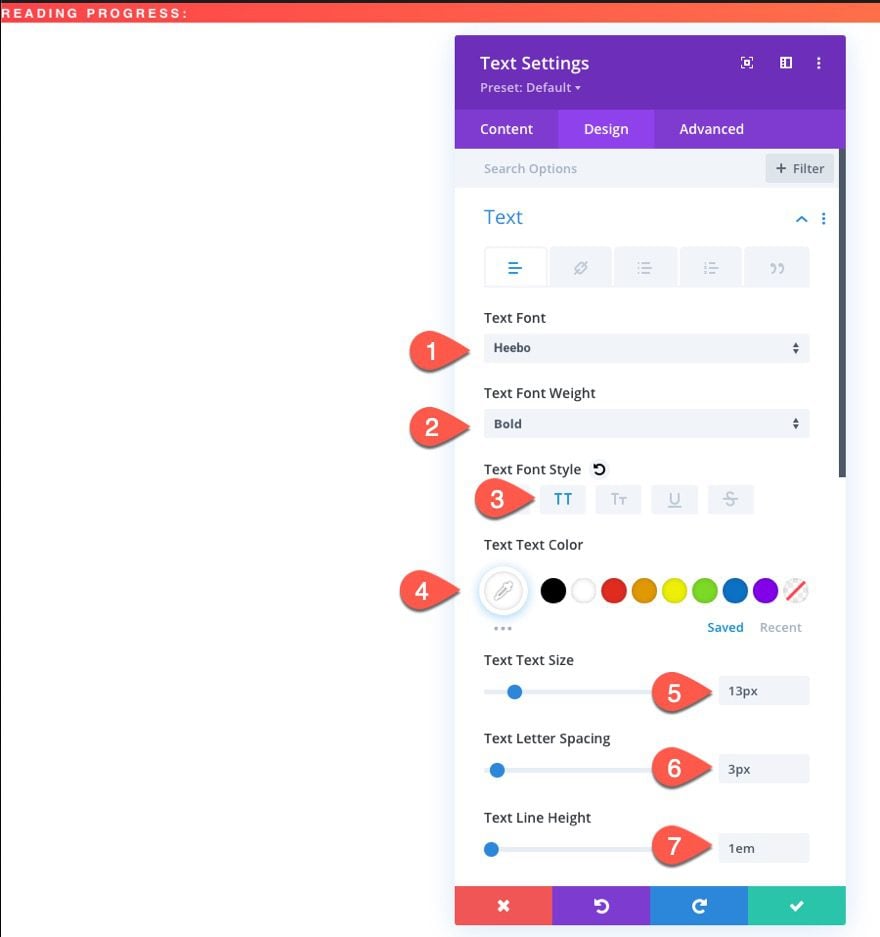
Under the design tab, update the following:
- Text Font: Heebo
- Text Font Weight: Bold
- Text Font Style: TT
- Text Text Color: #ffffff
- Text Text Size: 13px
- Text Letter Spacing: 3px
- Text Line Height: 1em
Then update the left padding a bit:
- padding: 10px left
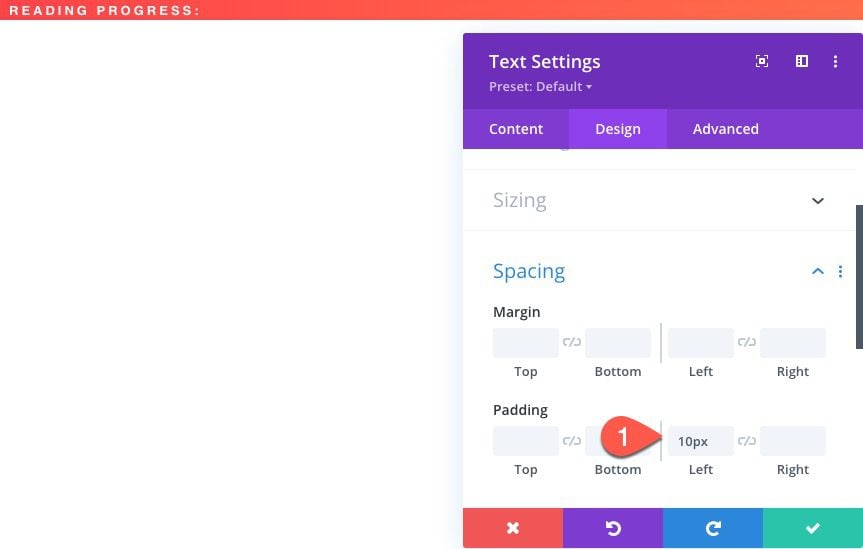
Under the advanced tab, give the text module an absolute position in the center of the column/row. This will make sure it doesn’t take up any actual space in the document and remain vertically centered within the bar.
- Position: Absolute
- Location: Left Center
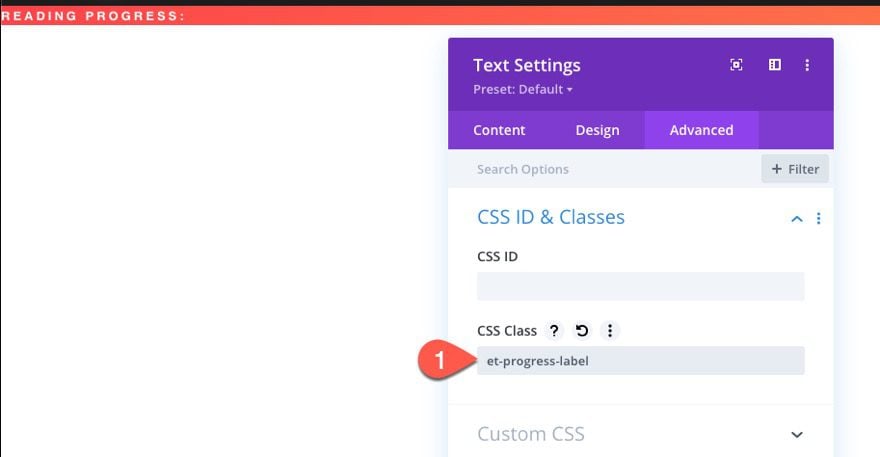
Before you leave the text module, add a CSS Class so that we can target it with our jQuery code.
- CSS Class: et-progress-label
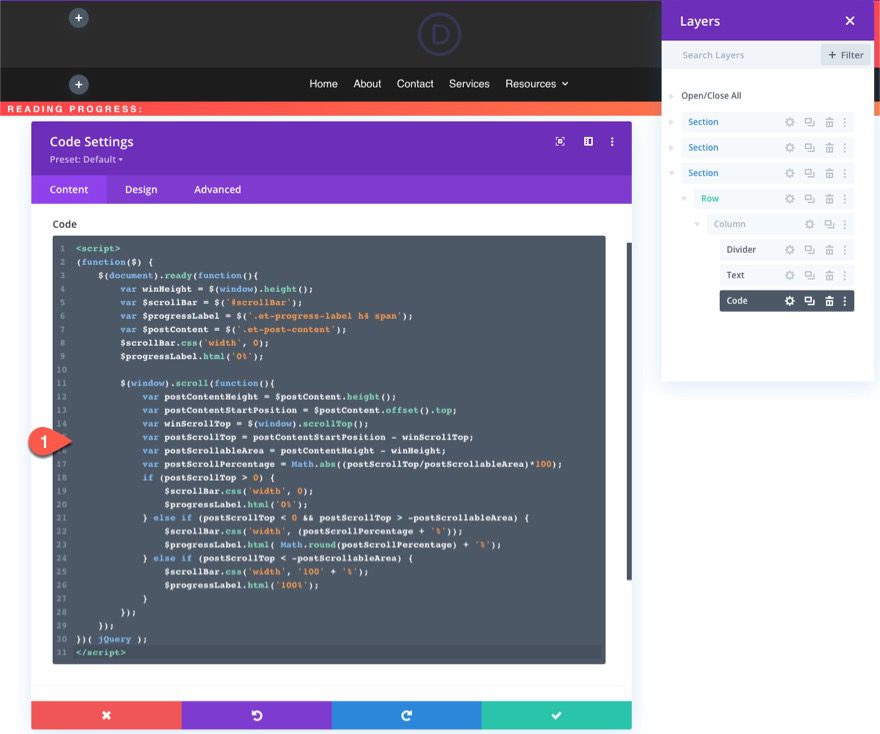
Adding the jQuery Code
To give the progress bar the magical functionality it needs, we need to add the necessary jQuery code.
To do this, add a new code module under the text module.
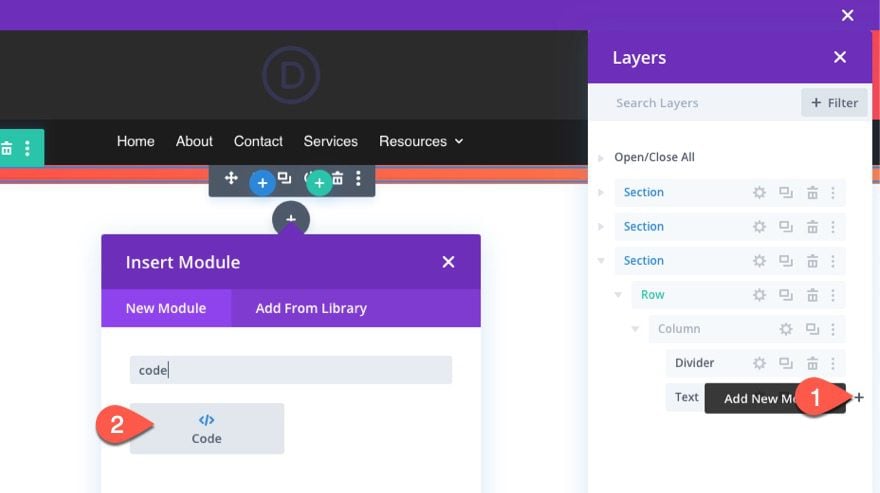
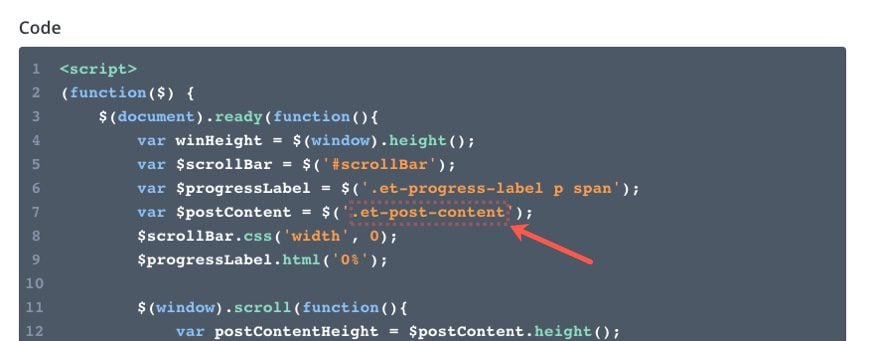
Then paste the following code:
<script>
(function($) {
    $(document).ready(function(){
        var winHeight = $(window).height();
        var $scrollBar = $('#scrollBar');
        var $progressLabel = $('.et-progress-label p span');
        var $postContent = $('.et-post-content');
        $scrollBar.css('width', 0);
        $progressLabel.html('0%');
        $(window).scroll(function(){
            var postContentHeight = $postContent.height();
            var postContentStartPosition = $postContent.offset().top;
            var winScrollTop = $(window).scrollTop();
            var postScrollTop = postContentStartPosition - winScrollTop;
            var postScrollableArea = postContentHeight - winHeight;
            var postScrollPercentage = Math.abs((postScrollTop/postScrollableArea)*100);
            if (postScrollTop > 0) {
                $scrollBar.css('width', 0);
                $progressLabel.html('0%');
            } else if (postScrollTop < 0 && postScrollTop > -postScrollableArea) {
                $scrollBar.css('width', (postScrollPercentage + '%'));
                $progressLabel.html( Math.round(postScrollPercentage) + '%');
            } else if (postScrollTop < -postScrollableArea) {
                $scrollBar.css('width', '100' + '%');
                $progressLabel.html('100%');
            }
        });
    });
})( jQuery );
</script>
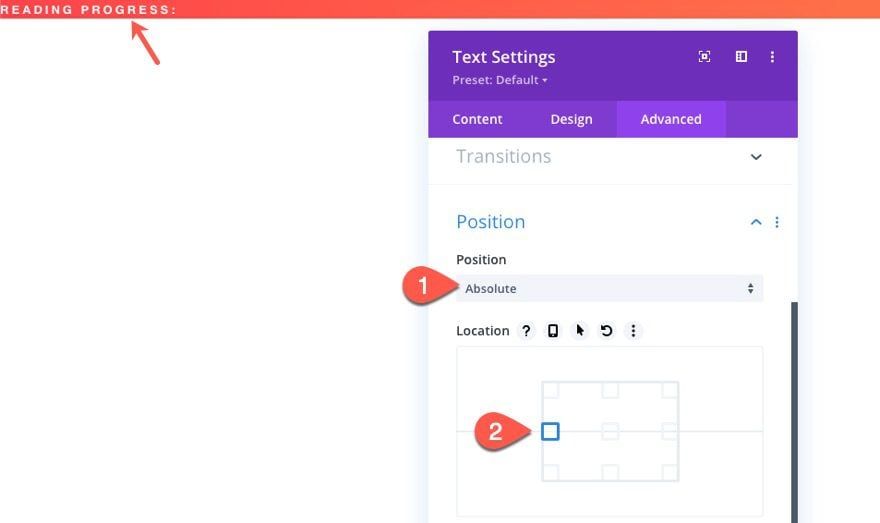
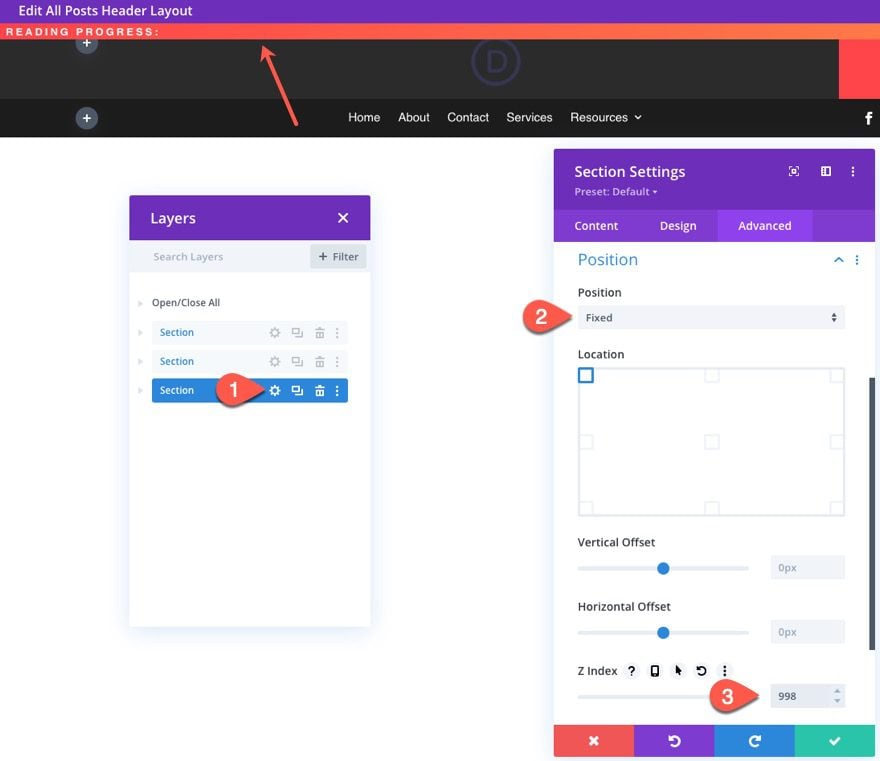
And for the last step, we need to give our section a fixed position. We saved this for last because this will hide the section behind the above sections containing the header content.
Open the section settings for the section containing the progress bar and update the following:
- Position: Fixed
- Z Index: 998
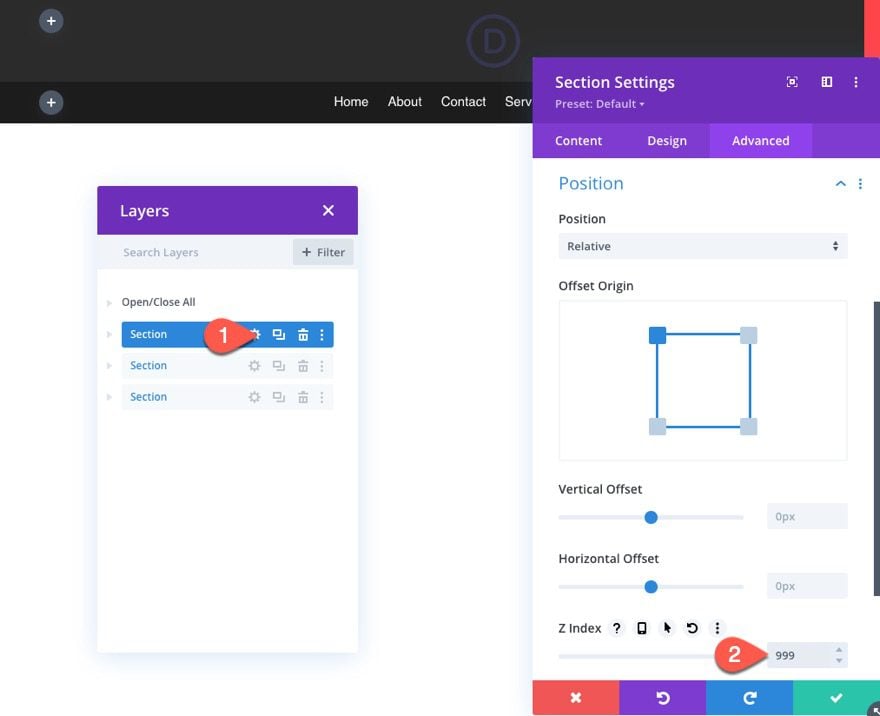
Then Open the settings of the top section containing the header content and update the Z Index as follows:
- Z Index: 999
Now the progress bar will be hidden behind the top portion of the header initially. Then when the user scrolls down the post, you will see it fixed at the top of the page.
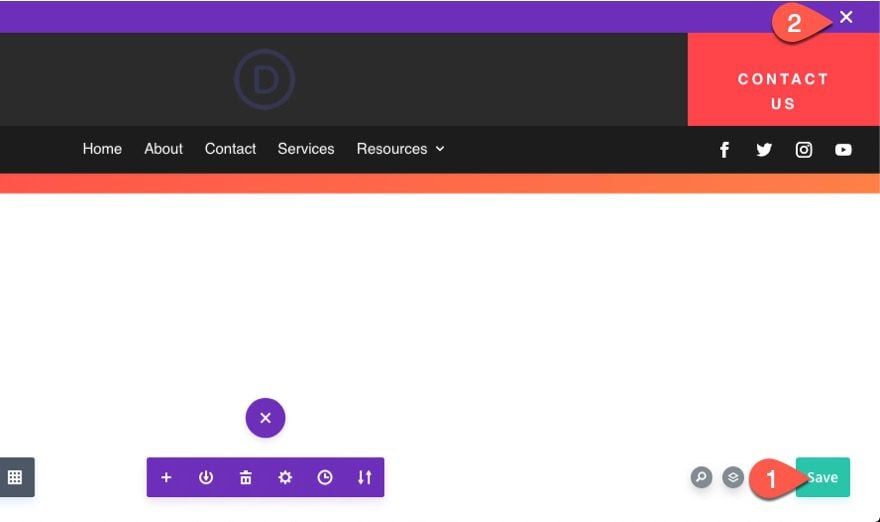
Don’t forget to save the changes.
Adding the selector (CSS Class) to the Post Content Module in the Body Area Template.
Right now the code is written to recognize an element with the class “et-post-content” as the main post content of the post.
Since we are using a custom template for the body of the post, we need to apply that CSS Class to the Post Content Module of the template so that our code can adequately calculate the reading progress as the user scrolls down the post.
To do this, open the body area template of the post template in the theme builder.
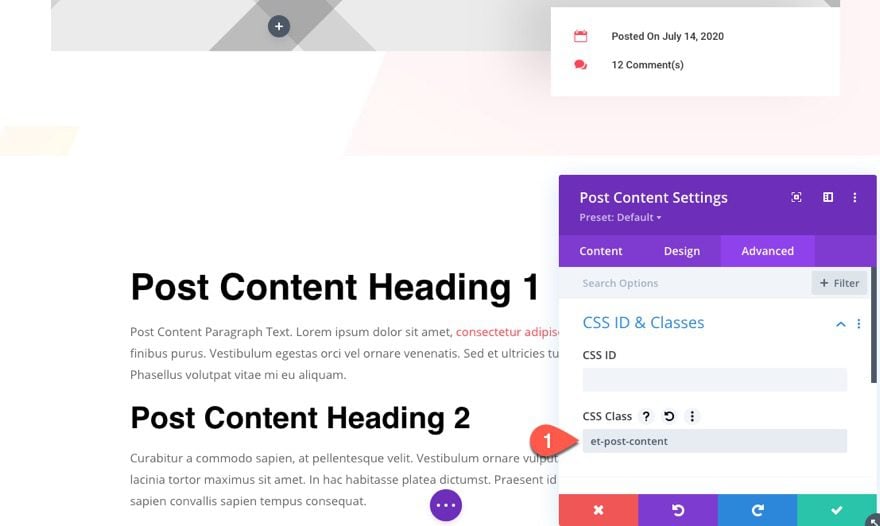
Open the Post Content Module Settings and add the following CSS Class:
- CSS Class: et-post-content
Then save changes.
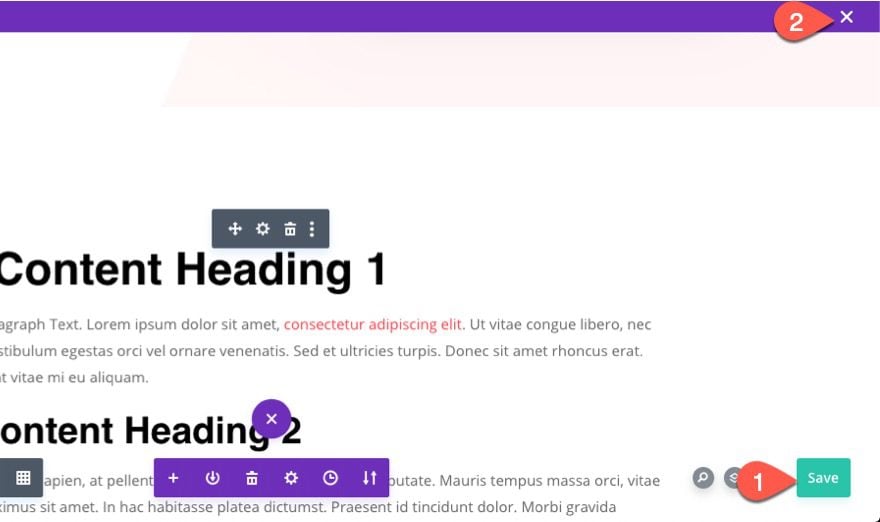
Once done save the changes to the layout and to the theme builder.
Final Result
To see the result in action, open a live post on your website. Make sure the post has enough content so that there is room to scroll down the page.
Using the Reading Progress Bar on Divi’s default Post Template (not a custom template)
If you aren’t using a custom body template for the post and want to add the reading progress bar to the default blog post template in Divi, all you have to do is update a single CSS Class in the code.
First, make sure the custom body area of the post template has been deleted.
Then open the custom header template layout and update the code module by replacing this line of code…
var $postContent = $('.et-post-content');
with this…
var $postContent = $('.entry-content');
The class “entry-content” will target the div in the default post template that contains the content of the blog post (excluding the title, featured image, metadata above and the comments below which would skew the actual length of the article).
Result
Here is the result of a post using the default post template.
Final Thoughts
This reading progress bar is a lot smarter than your typical scroll indicator that shows the progress of scroll through the entire page/document. This bar targets only the actual post content that the user will be reading, giving an accurate depiction of the reading progress. This is great for those blogs that tend to have long copy and comments. I would also work great for online courses to give those students that extra motivation to keep going!
I look forward to hearing from you in the comments.
Cheers!


HI can i use it for projects if yes please can you let me know what to modify in code?
Hey Jason,
This is an amazing feature that every blogger should use it as it improves user interaction with the reading process. Well, I also wanted to configure it with my website. But could you please let me know that is it compatible with all themes? … Thanks
Hei jason Thanks a lot for sharing.
It’s an increasingly useful feature in blogs.
I was looking forward to seeing something like this for Divi.
its simply amazing, the sort of power divi has when you start to think our side of the box and use the flexibility of divi. So many things really do not need a dedicated plugin.
I really like when you come out with such how-to posts, this opens my mind to other things I can do with my sites
Hey Jason,
This is an amazing feature that every blogger should use it as it improves user interaction with the reading process. Well, I also wanted to configure it with my website. But could you please let me know that is it compatible with Porto themes? … Thanks
Unfortunately, this design is built for the Divi theme, so you would have to rework the design and code to implement it on another theme.
I love the idea of giving readers feedback on their progress! AND….you know what would give me an awesome added value as a blogger? The ability to record somewhere–ideally in my stats, but that’s complicated, so however it can be displayed–whether or not a reader has finished the entire post or clicks away somewhere short of finishing (highest percentage of completion reached by the scroll bar). If a large number of people lose interest at or near the same place, I’m better able to edit my post to make it more interesting, or maybe just shorter.
If it takes a plugin to do that, and maybe to integrate it with Google Analytics, fine. If it can be done more easily via the module itself, maybe even better.
Thanks for considering the idea or for sharing the idea with a 3rd party developer if it’s not something that interests the ET team. It would be a useful tool for writers of all kinds.
That is a good idea. I don’t know of a plugin specifically for that. But you may find some help with a software that specializes in tracking user behavior like Hotjar or Crazyegg.
HELLO JASON:
WOULD IT BE POSSIBLE TO APPLY A SOLUTION AS GREAT AS THIS TO, FOR EXAMPLE, LIMIT THE CHARACTERS IN THE TEXT AREA OF A FORM? PUT A MAXIMUM OF 500 CHARACTERS AND BE DECREASING AS IT IS WRITING? Sorry, I don’t know if it already exists … Thank you.
Not sure how to do that, unfortunately.