
Every week, we provide you with a new and free Divi layout pack which you can use for your next project. Along with every layout pack, we also share a use case that’ll help you take your website to the next level.
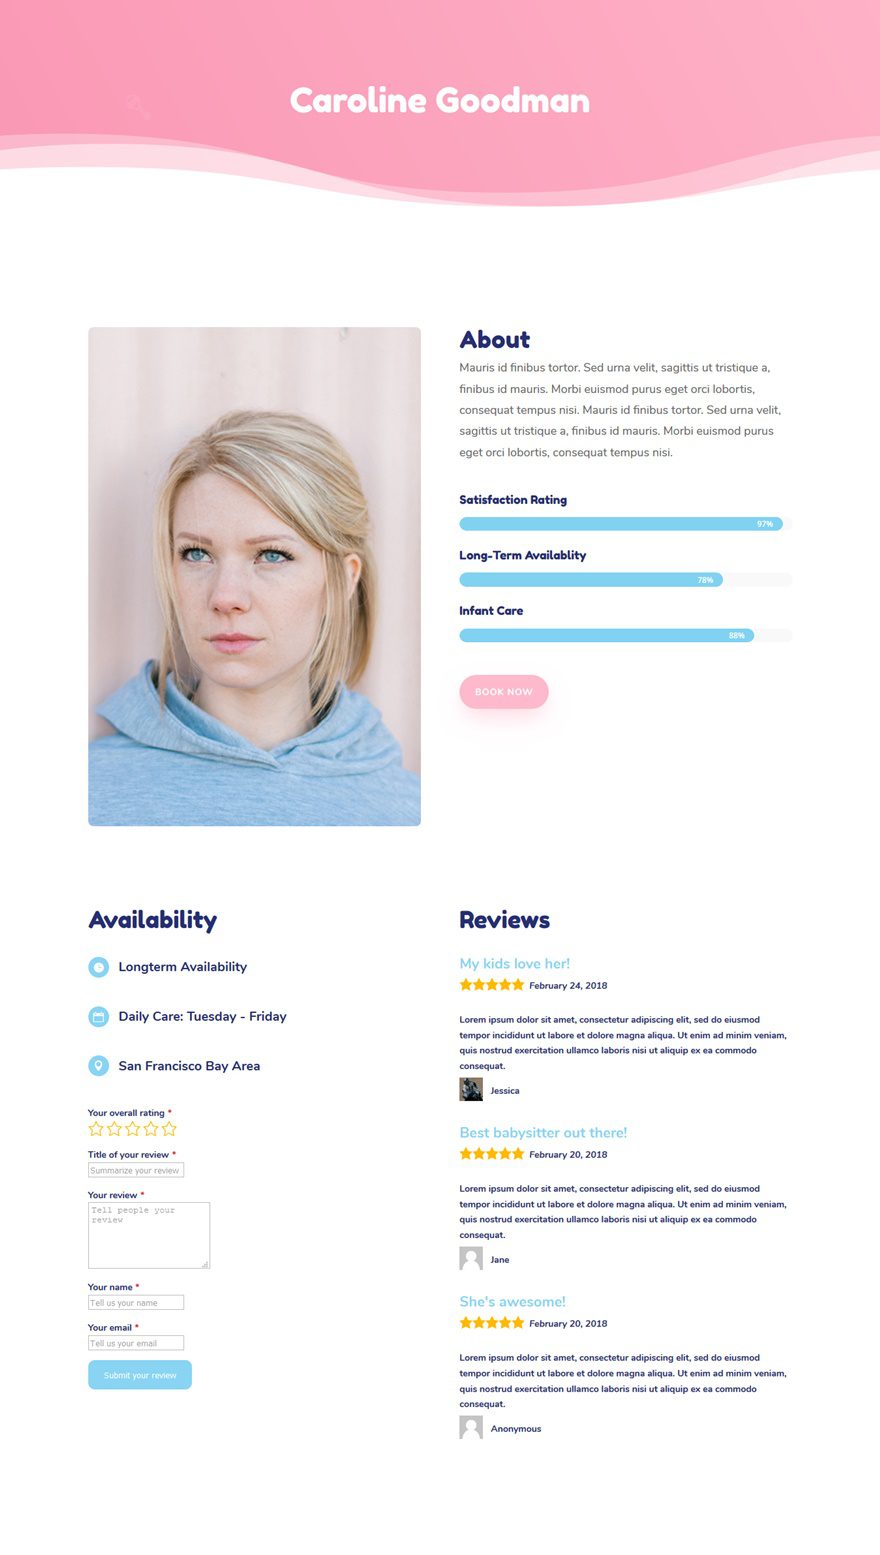
This week, as part of our ongoing Divi design initiative, we’re going to show you how to add star reviews to the profile pages with Divi’s new and free Babysitter Layout Pack. That way, whenever someone takes a look at the different babysitters at your company, they’ll also be able to see how people have responded to their presence in the past. This will likely increase the credibility of each babysitter and will help you turn leads into conversions much more quickly.
- 1 Sneak Peek
- 2 Part 1: Download the Site Reviews Plugin
- 3 Part 2: Add Profile Page as Sub Menu Items
- 4 Part 3: Modify Site Reviews Plugin Settings
- 5 Part 4: Create Blank Posts for Each Profile & Publish
-
6
Part 5: Add Site Reviews Shortcodes to Profile Page
- 6.1 Step 1: Open Profile Page with Backend Builder & Locate Reviews Section
- 6.2 Step 2: Replace Existing Text Module with Recent Reviews Shortcode (Backend Builder)
- 6.3 Step 3: Add New Text Module with Review Submit Shortcode (Backend Builder)
- 6.4 Step 4: Switch Over to Visual Builder
- 6.5 Step 5: Modify Text Settings Recent Reviews Shortcode
- 6.6 Step 6: Modify Heading Text Settings Recent Reviews Shortcode
- 6.7 Step 7: Modify Text Settings Submit Review Shortcode
- 6.8 Step 8: Add Custom CSS to Page for Submit Review Button
- 6.9 Step 9: Repeat Steps for Each Profile & Change Post ID Number
- 7 Part 6: When Completed All Profiles, Make Drafts out of Posts
- 8 Final Thoughts
Sneak Peek
Part 1: Download the Site Reviews Plugin
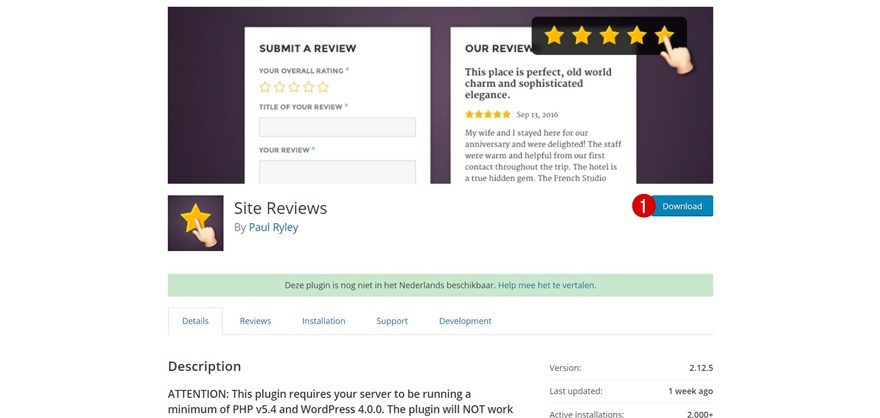
Step 1: Download Plugin
The first thing you’ll need to do is download this super cool and free plugin called Site Reviews by going to the following link and clicking on the download button. Though we don’t go into other plugins, Site Reviews is one of our top review plugins among a host of other great options.
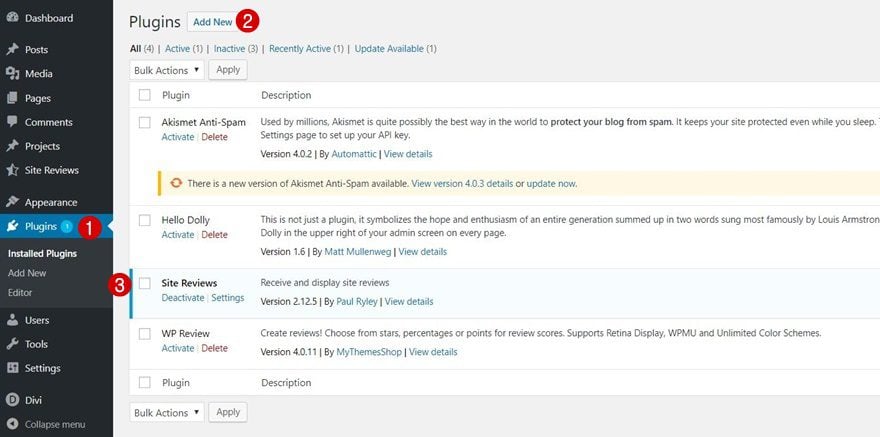
Step 2: Upload & Activate the Plugin
Then, upload the plugin and make sure you activate it as well.
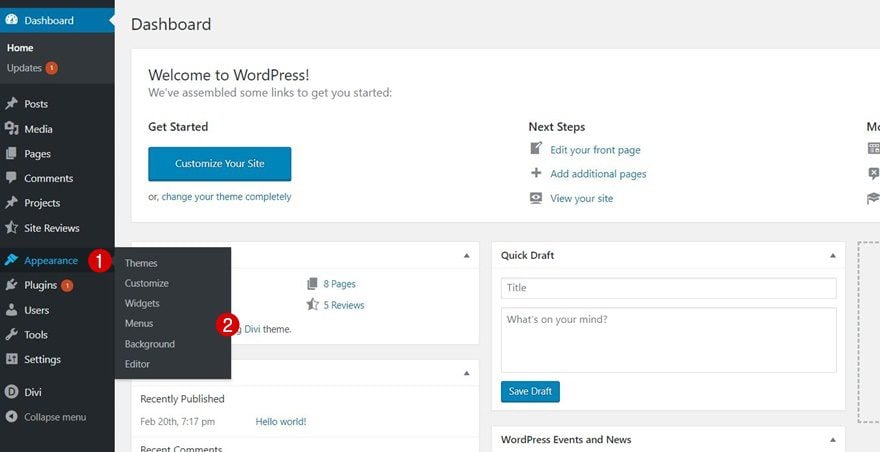
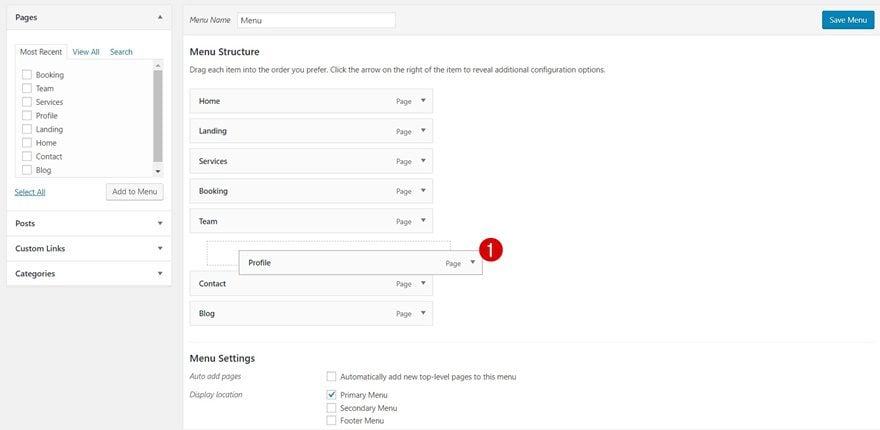
We’re assuming you have already added each layout of the Babysitter Layout Pack as a page and created a primary menu with these pages as well. We’re going to make one small change, however. To make that change, navigate to your menu by going to your WordPress Dashboard > Appearance > Menus.
Step 2: Drag Profile Pages Below Team Page
Depending on the number of profiles your babysitter website has, use them as sub menu items to your team page.
Part 3: Modify Site Reviews Plugin Settings
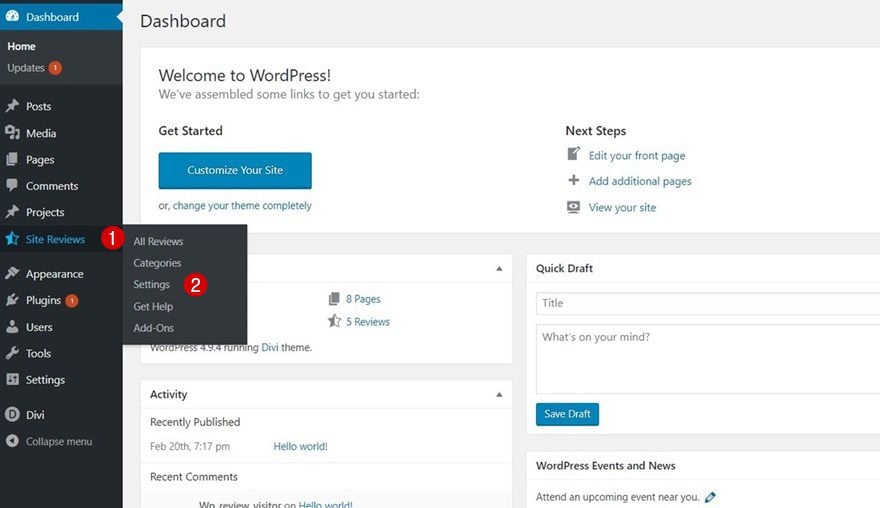
Step 1: Go to Site Reviews Plugin Settings
Next, you can make some small changes to the plugin by going to Site Reviews > Settings.
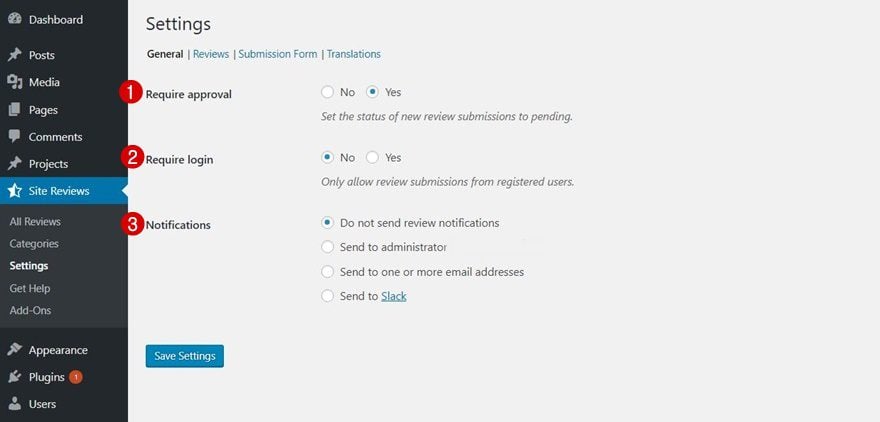
Step 2: Choose Your General Preferences
Within the general tab, choose the settings you want to apply to the reviews. One of these options allows you to enable approval for reviews. It’s best you select ‘yes’ for this option to have full control over what appears on your website and what doesn’t.
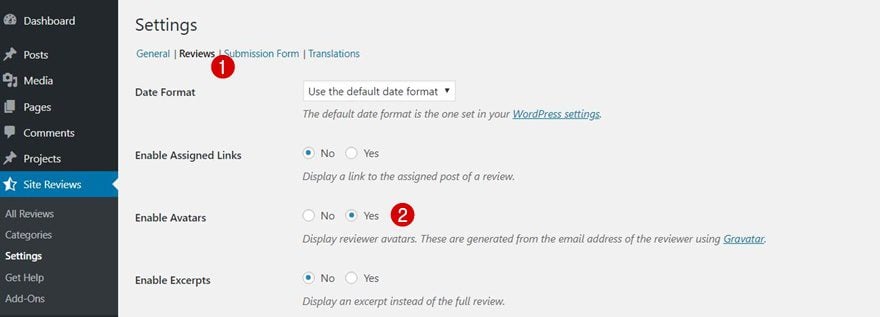
Step 3: Enable Avatars
To increase the credibility factor of your babysitters, you can also enable avatars within the reviews tab.
Part 4: Create Blank Posts for Each Profile & Publish
Step 1: Create New Post for Each Profile
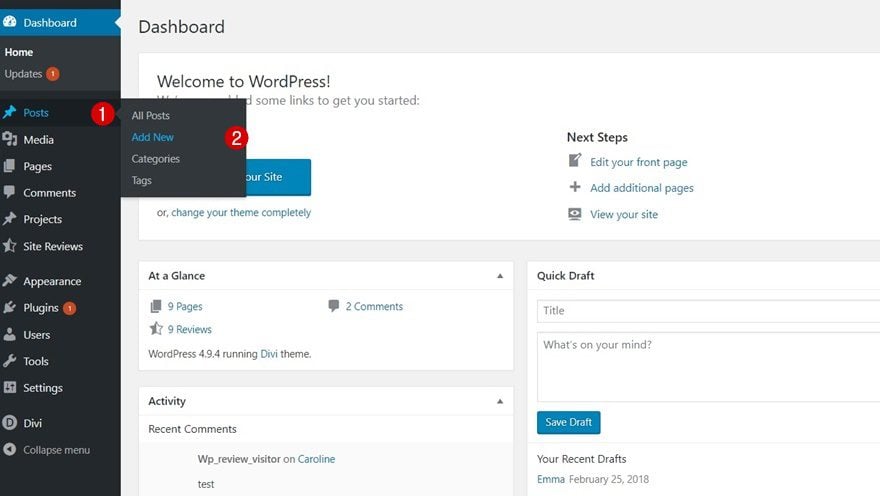
The Site Reviews plugin allows you to connect reviews to different posts. We are, however, using pages for our profile pages. That’s why you’ll need to create some blank posts that match the number of babysitter you’re showing on your website. To do that, go to Posts > Add New and repeat this step for each one of the babysitters you have.
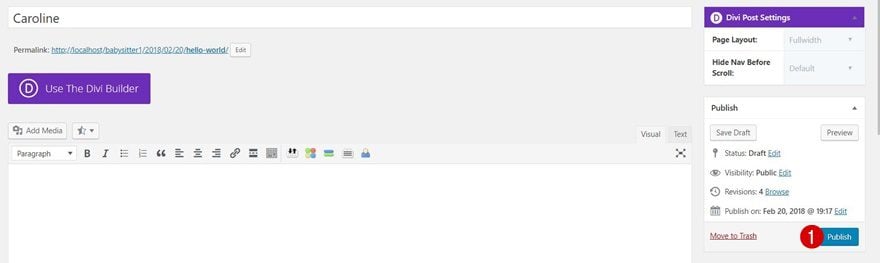
Step 2: Publish Them
Give your posts a title and publish them right after. But don’t worry, once we go through all the steps, we’ll be able to put them to draft again without losing reviews. The plugin will just need to connect to a certain blog post in order for the shortcodes to work on a page.
Part 5: Add Site Reviews Shortcodes to Profile Page
Step 1: Open Profile Page with Backend Builder & Locate Reviews Section
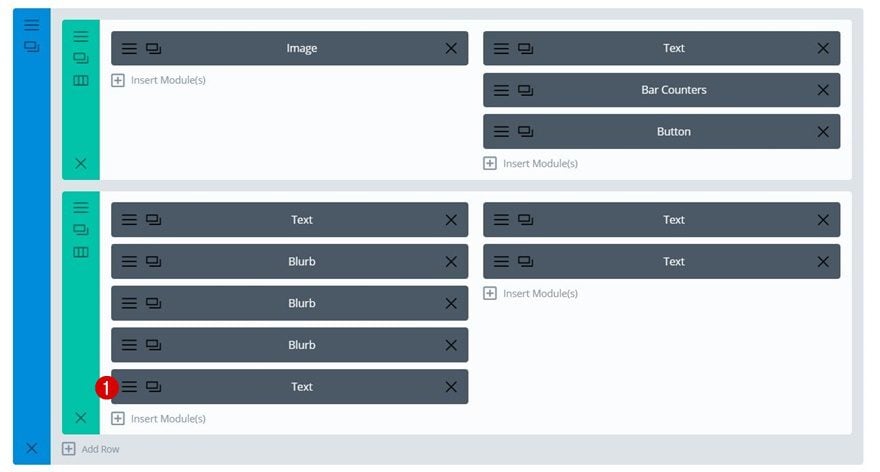
Now we can start adding the review shortcodes to our profile page. We’ll be adding two things; recent reviews and a submit review form. To add the shortcodes to our page, we will need to use the backend builder. Later on, we’ll switch to the Visual Builder to make changes to the appearance. Now, start by locating the following section on your page using the backend builder:

Step 2: Replace Existing Text Module with Recent Reviews Shortcode (Backend Builder)
Then, open the following Text Module:

Erase all the content in the content box, click on the star icon and select ‘Recent Site Reviews’. This option will make the different reviews show up on your page.
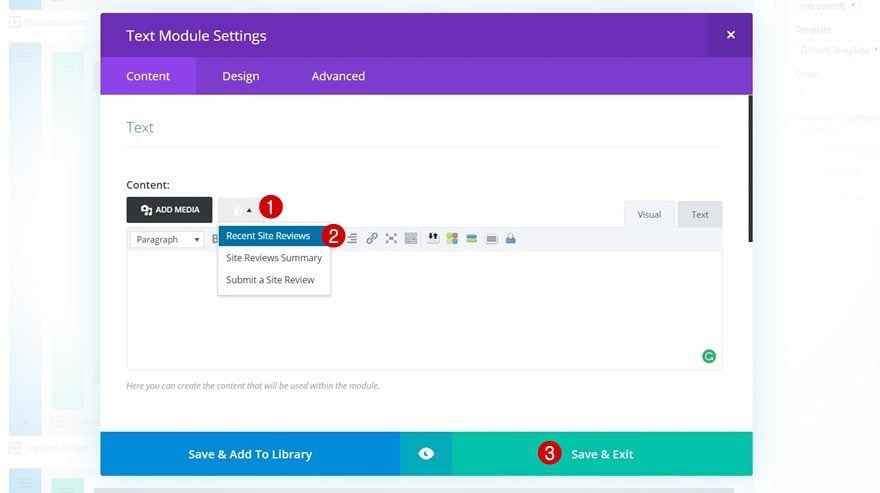
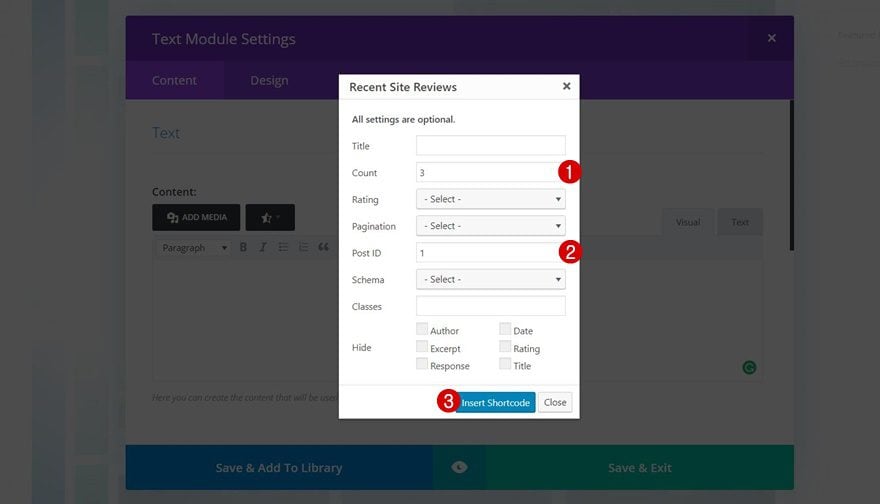
Once you click on the ‘Recent Site Reviews’ button, make use of the following settings and click on ‘Insert Shortcode’ afterwards:
- Count: 3
- Post ID: 1 (this post ID will need to change everytime you’re editing another babysitter profile pageto make sure the reviews are unique to that profile page)
Step 3: Add New Text Module with Review Submit Shortcode (Backend Builder)
Next, add a new Text Module to the first column of the second row of this section:
 Then, click on the star icon again and select ‘Submit a Site Review’. This shortcode will make a submission form show up that will allow people to submit a review they have of that babysitter in particular.
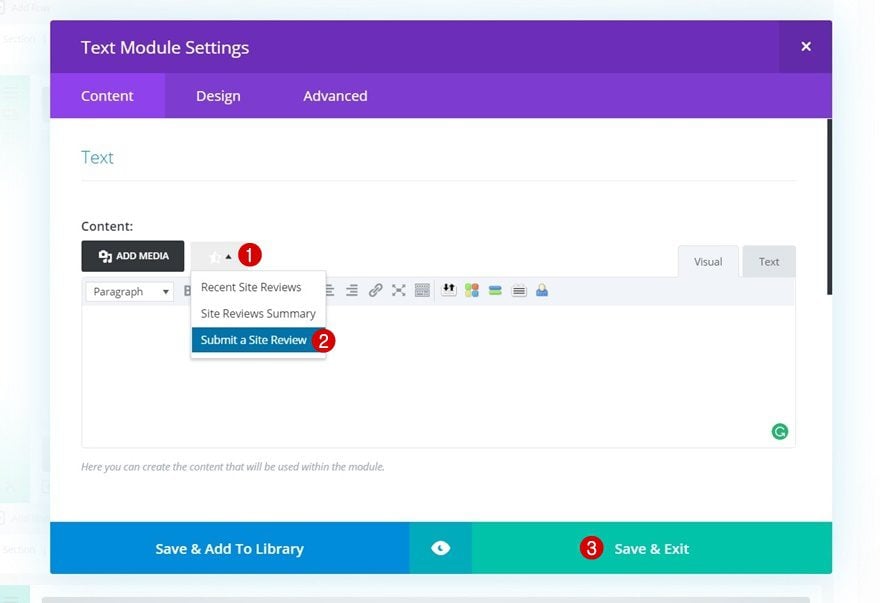
Make sure you add the same Post ID number to this shortcode as you did for the recent reviews in the previous step of this tutorial. The recent reviews and submit review form need to have the same post ID to make sure only accurate reviews show up on the page. Depending on your needs, you can also hide certain elements of the submission form.

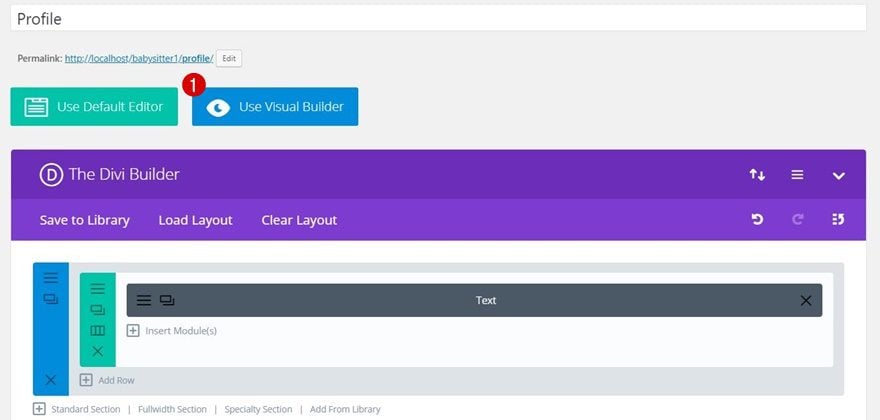
Step 4: Switch Over to Visual Builder
Now that we’ve added both necessary shortcodes, we can switch over to the Visual Builder to make some appearance changes.
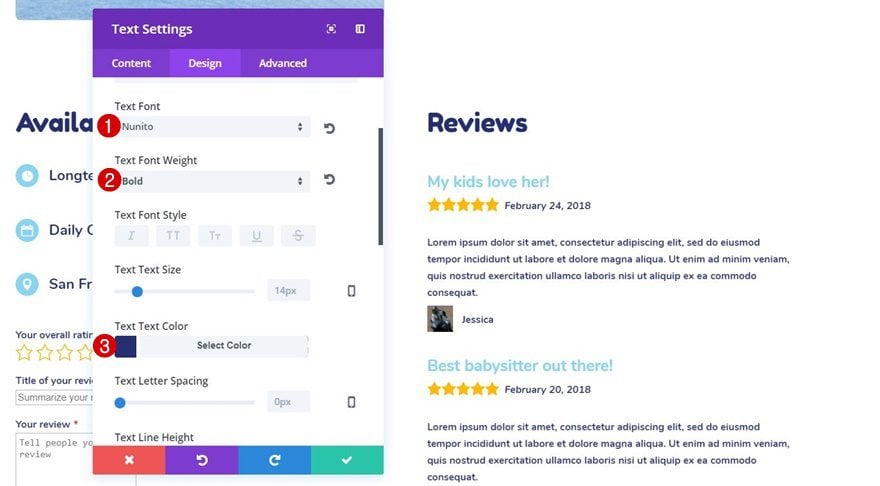
Step 5: Modify Text Settings Recent Reviews Shortcode
The first Text Module we’ll change is the one containing the recent reviews. Open the settings, go to the Text subcategory within the Design tab and apply the following changes that match the entire Babysitter Layout Pack:
- Text Font: Nunito
- Text font Weight: Bold
- Text Color: #262f71
Step 6: Modify Heading Text Settings Recent Reviews Shortcode
Scroll down the same tab, open the Heading Text subcategory, switch over to the H3 tab and apply the following settings next:
- Heading 3 Font: Nunito
- Heading 3 Font Weight: Bold
- Heading 3 Text Color: #88d4f2

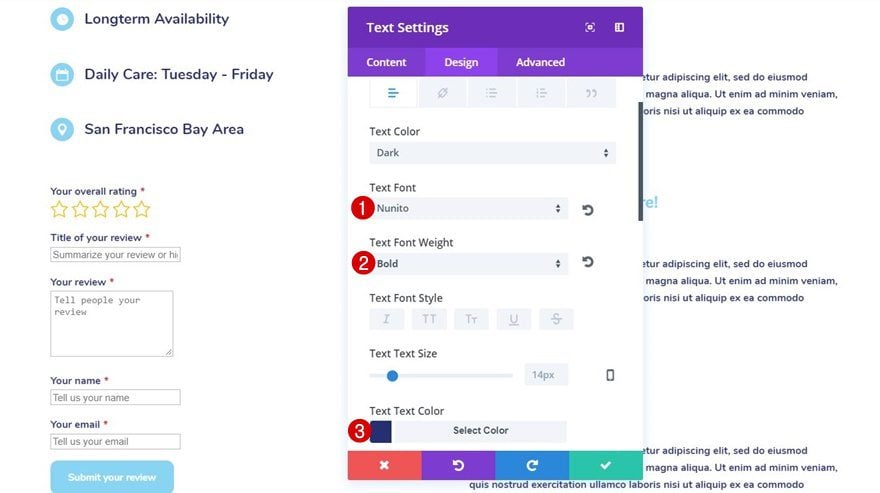
Step 7: Modify Text Settings Submit Review Shortcode
The submit review Text Module will need some modifications to its Text subcategory as well:
- Text Font: Nunito
- Text Font Weight: Bold
- Text Color: #262f71
To match the button on the submission form with the babysitter layout pack, we’ll need to apply a bit of CSS code. We’re not able to make this modification within the Divi Builder itself since we’re using a third-party plugin. To add this CSS code to your page, click on the icon at the bottom of your page and open the settings.
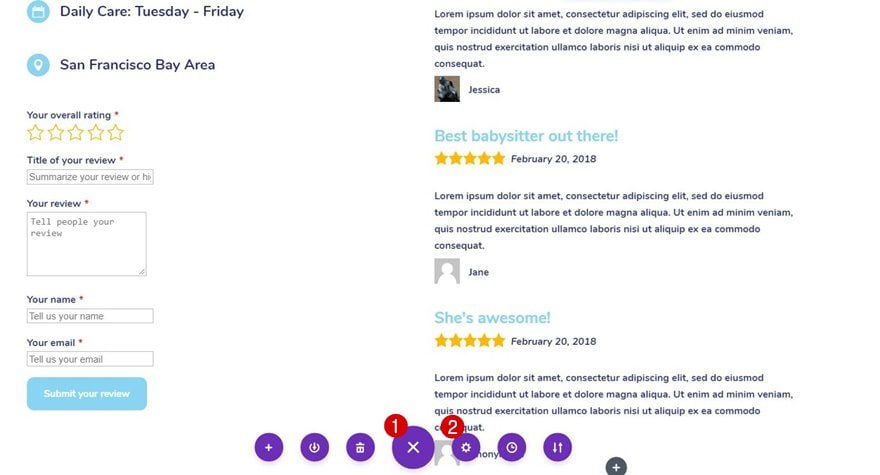
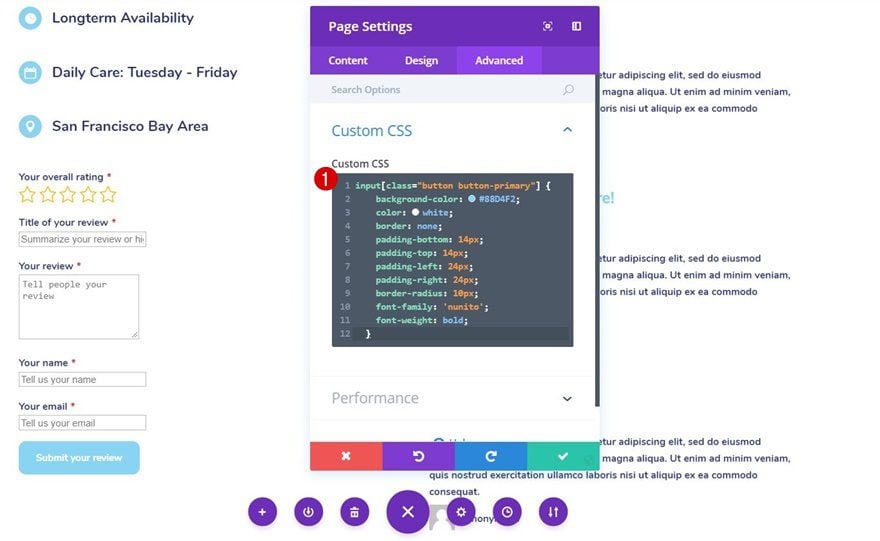
Then, move on to the Advanced tab and add the following lines of CSS code to the Custom CSS box:
input[class="button button-primary"] {
background-color: #88D4F2;
color: white;
border: none;
padding-bottom: 14px;
padding-top: 14px;
padding-left: 24px;
padding-right: 24px;
border-radius: 10px;
font-family: 'nunito';
font-weight: bold;
}
Step 9: Repeat Steps for Each Profile & Change Post ID Number
You’re done! The only thing left to do is save the profile page and exit the visual builder. If you have multiple babysitter profiles on your website, you will need to repeat this process for each one of the profile pages. And while you’re adding the shortcodes; don’t forget to:
- Change the Post ID number (go from 1 to 2 to 3, according to the number of posts you’ve published)
- Change the Post ID number for both the submit review shortcode and recent reviews shortcode
Part 6: When Completed All Profiles, Make Drafts out of Posts
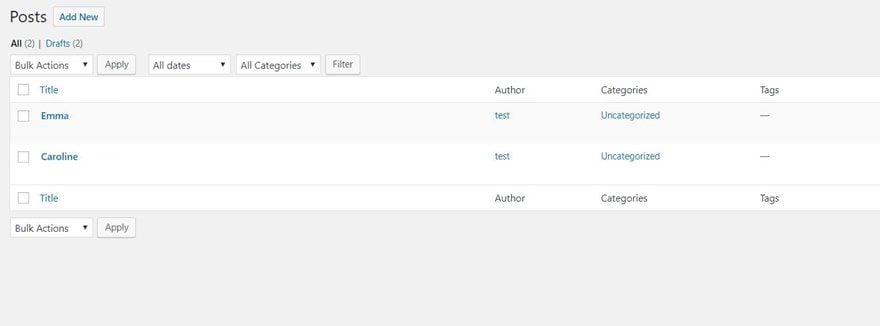
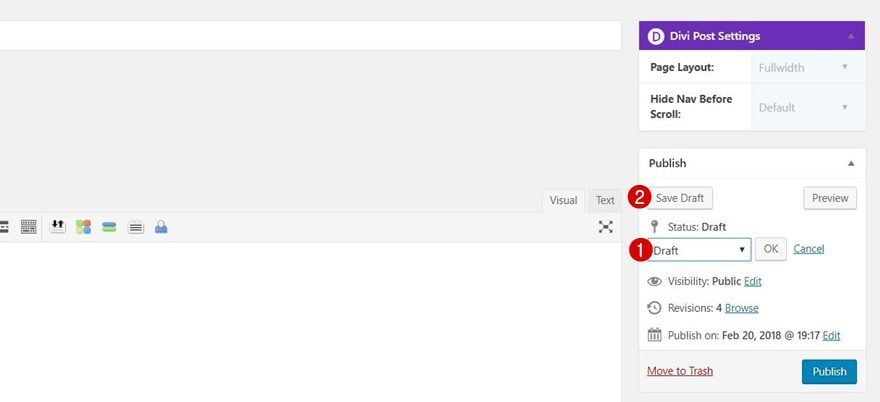
Step 1: Make Drafts out of Posts
Once you’re done creating all of your profiles, you can go ahead and put each one of the blog posts to draft. We only needed the posts to enable the reviews and make sure they’re unique to the different profiles. Removing the blog posts might cause the reviews not to work anymore so putting them to draft is a nice alternative to have.
Final Thoughts
In this post, we’ve shown you how to add star reviews to each babysitter profile page using the new Babysitter Layout Pack and the free Site Review plugin. This use case is part of our ongoing Divi initiative where our design team shares a new layout pack with you each and every week. If you have any questions; make sure you leave a comment in the comment section below!


Is this theme available for personal cv?
Does this Site Review plugin include the star ranking to the SERPs on Google as a rich snippet?
Oh thanks! that looks great! I realized an increse of my sales when I inserted reviews on my profile pag. So useful!
Hi Donjete
why did you stop half way? It crashes the overall layout. I would suggest to add the following:
1. where the Review text will appear don’t choose your settings but instead set font-size of the text to 18px and color #666 and Regular
2. In the header setting under H3 fill in
font-color #666
3. go to your submit part and here you enter a margin-top of 50px
4. last but not least enter the page CSS which actually should be entered into the customizer as you would need those settings on more than one page 😉
input[class=”button button-primary”] {
color: #ffffff!important;
border-width: 0px!important;
border-radius: 50px;
letter-spacing: 1px;
font-size: 14px;
font-family: ‘Nunito’,Helvetica,Arial,Lucida,sans-serif!important;
font-weight: 700!important;
text-transform: uppercase!important;
background-color: #ffb9cc;
padding:14px 24px;
margin-top:50px;
}
input.text, input.title, input[type=email], input[type=password], input[type=tel], input[type=text], select, textarea {
width: 100%;
line-height: 1.8em;
padding: 5px;
border-radius: 10px;
border: 2px solid #88D4F2;
}
.shortcode-reviews-form, .shortcode-reviews-form .regular-text, .shortcode-reviews-form .large-text {
font-family: Nunito;
font-size: 18px;
line-height: 1.8em;
color: #666;
}
.shortcode-reviews-form {
color: #262f71;
}
—
Now you keep the CI of the site even you have that review plugin on that page.
For future tutorials, I would recommend that the overall Design of the Layout Examples stay as is even you build examples with new plugins. It is only a very little effort for you to present nice looking pages to the outside world and it actually would show the real power of DIVI as DIVI can keep design layouts.
Thanks for the tutorial!
Unfortunately, I can’t post an image of our example here
Hi, that looks great! Does it work with Custom post types? (we use Toolset)
Probably, subject to testing.
Thank you for the tutorial!
Nice & Clean.
Love this layout.
I just have a question on how the waves divider was created on the ‘Home’ page?
I have loaded it up in the Divi builder and neither section has a wave divider selected?
Is there some CSS going on? would love to recreate this between two sections!
Have copied and pasted the CSS but get the Expected IDENT error each time after line 1
Should be fixed 🙂 try again with the updated CSS code
Thank you!!
This is my favorite review plugin. One note on step 2 and 3, you don’t need to assign a different post id to each profile. If you hove over the post id box, it says:
“Assign submitted reviews to a custom page/post ID. You can also enter ‘post_id’ to assign reviews to the ID of the current page.”
So if you just enter ‘post_id’ rather then an actual number it will work just fine.
Right on John, looks like you don’t need to back this with a standard post and in fact will probably work with custom post types. Could make a CPT for carers in Toolset Type and serve them up on the Team page in an archive view of that post type.
Nice & Clean. Thank you!