
If you are looking to sell plugins, themes, or any software product, it is a good idea to include a software license. This allows you to do a lot of things, but the main reason is to restrict user access to your product in different ways. For example, if you want to sell a plugin but want to limit the number of installs, you can offer users a software license for one install, 5 installs, or unlimited installs. You would of course charge more for each additional licensing package.
Aside from limiting the number of installs for a product, a software license can also limit the time in which they have access to updates to your software. So if you want to give users automatic updates for one year, you can set a license key to expire in one year. After that, the user will need to purchase another license to access future updates to your product.
If you are familiar with the plugin Easy Digital Downloads (EDD), you know that the plugin has been widely accepted as a go-to solution for selling digital products. And, with their Software Licensing extension, you can easily add licenses to your download products within WordPress. The Software Licensing extension was built to work with WordPress Themes and Plugins, but with EDD’s API, you can use it with almost any software.
In this tutorial, I’m going to show you how to include software licensing with your digital downloads by using EDD’s Software Licensing extension. I’ll be showing you how to create a new product download with multiple licensing options and how to showcase your product license options on your site with the Divi Builder. I won’t be walking you through all of the nuances of implementing the license within your plugin, theme, or software at the code level, but I will point you in the right direction.
Let’s get started.
What you need for this Tutorial
- Divi Installed and Activated
- Divi’s Digital Payments Layout Pack imported to your Divi Library
- Easy Digital Downloads Plugin installed and active
- The Software Licensing Extension (by Easy Digital Downloads) installed and active
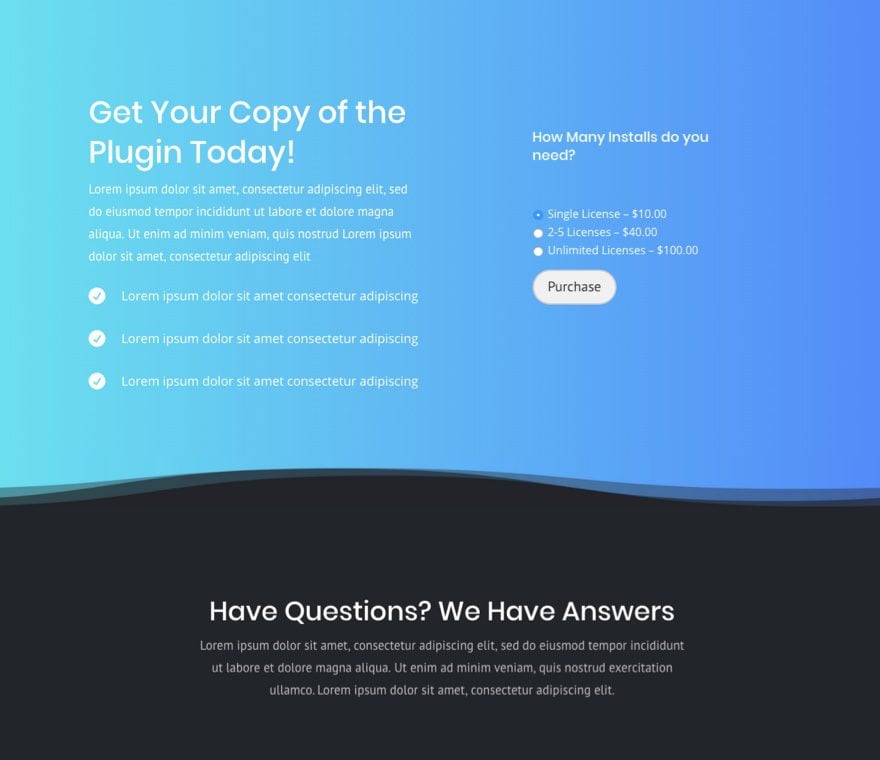
Sneak Peek
Here is an example product page that you will be able to use to sell different licenses for your software.
Update Easy Digital Downloads Settings
If you are already up and running with Easy Digital Downloads (EDD) and are just interested in the Software Licensing aspect, you may want to skip through some of these settings. But If you are starting from scratch, here are some tips for setting up your plugin.
From your WordPress Dashboard, go to Downloads > Settings. This is were we set many of the default functionality of your downloads, including licensing.
General tab settings
Here is where you set the default front-end pages EDD uses to manage your store. The following pages will be auto-created for you and will be accessible under your wordpress pages.
Checkout Page – has the title “Checkout”
Success Page – has the title “Purchase Confirmation”
Failed Transaction Page – has the title “Transaction
Purchase History Page – has the title “Purchase History”
Note: These pages all use shortcodes to deploy the information for the page. So you will be able to use the Divi Builder to customize each of these pages and insert the shortcode anywhere you want within a Divi Module. This is a great way to keep your design consistent throughout your site.
Login Redirection Page – The Login Page isn’t auto-created for you since it uses the WordPress default login. But you can create your own login page using the [edd_login] shortcode and then select what page you want users to be redirected to in the dropdown menu here.
Payment tab settings
Out of the box, EDD comes with three payment gateway options (Paypal Standard, Test Payment, and Amazon), but you can always purchase additional payment gateway extensions like Stripe.
I personally like the touch of having the Test Payment gateway option when building out my site so I can test functionality and design.
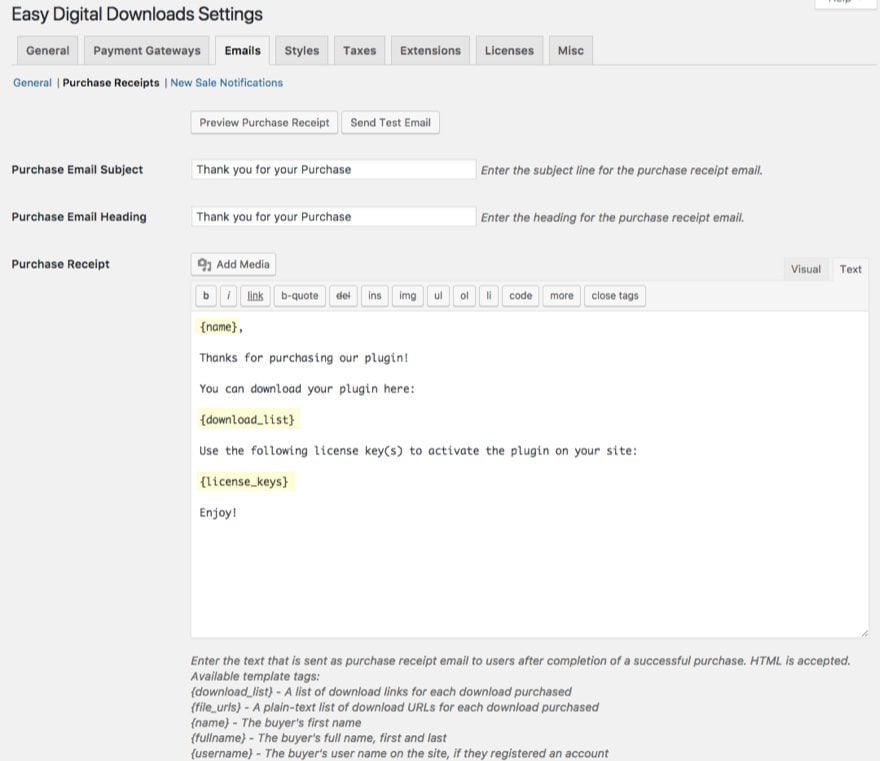
Emails tab
Here is where you customize what the purchase receipt looks like after a user purchases one of your products.
If you click on the Purchase Receipts link, you can create a completely customized template using those helpful template tags provided.
One main reason you may want to create your own template here is so you can include all purchased license keys within the email. This would be convenient for the user to activate their product after purchase.
You can also customize the admin notifcation email template you receive when a person makes a purchases.
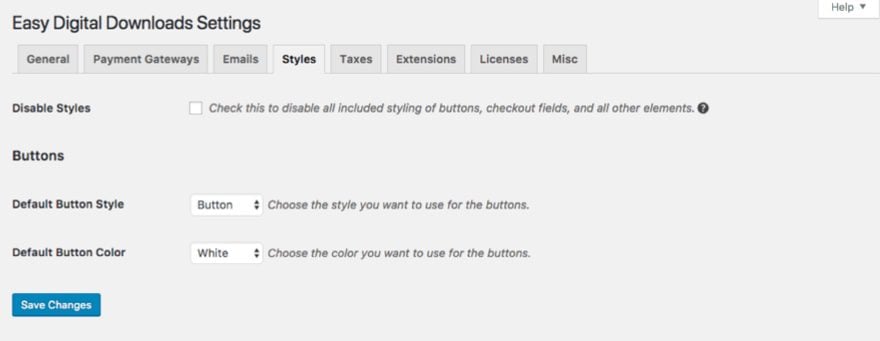
Styles tab
This is actually a useful option for those of us not wanting to include custom CSS to style the forms and buttons generated by EDD.
For the layout I’m using, a I’m going to keep the default button style as a Button. For the Default Button Color I chose white.
Taxes
Here is where you would enable taxes on purchases and choose how you want to handle taxes on purchases.
Extensions
Now that you have the Software Licensing plugin active, you will see a list of settings for this extension under this tab.
Here are a few worth mentioning, especially if you are selling a WordPress plugin.
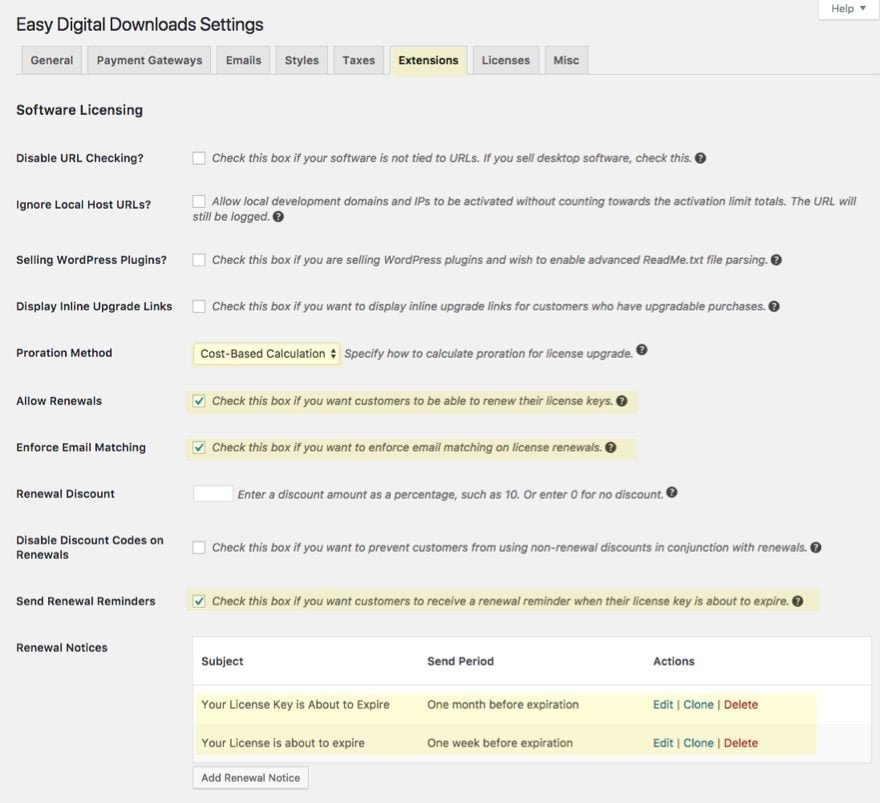
Selling WordPress Plugins? – Maybe. according to EDD, checking this box will create a meta box to each download that will insert info (like version, license, author, etc.) automatically based on the plugin’s ReadMe.txt file. This advanced functionality is optional though.
Display Inline Upgrade Links – Yes. I would check this if you are offering multiple licensing options for your download.
Proration Method – Keep Cost-Based Calculation. When the user clicks on an inline upgrade link when purchasing your product, you will need to choose how to calculate the additional cost. For the most part, leaving the option as a Cost-Based Calculation is preferred, since this will simply add the difference needed for the upgrade without charging them extra. For example, if the user initially click to purchase a single license for $10 but then decides to go for the 5 license upgrade for $40, clicking the upgrade will only add the $30 difference between the single and 5 license options.
Allow Renewals – I would suggest checking this option so that users can renew their licenses themselves. They will have the option to enter their license key upon checkout to renew their license(s). They can also click to renew their license from their account page. Another plus is that EDD will send renewal reminder emails to users and redirecting them to their account page to renew.
Enforce Email Matching – Yes. This will make sure a person with a different email cannot renew the license associated with a differnt email.
Send Renewal Reminders – Yes. This will enable a reminder email to be sent to users when their license key is about to expire. You can even add more than one renewal reminder email and set them to be sent to the user at different times.
The template tags will help you customize the message to include a link to the renewal checkout page and the license key that needs to be renewed.
Misc tab
Here you have important options to consider when selling a software license or product.
Redirect to Checkout
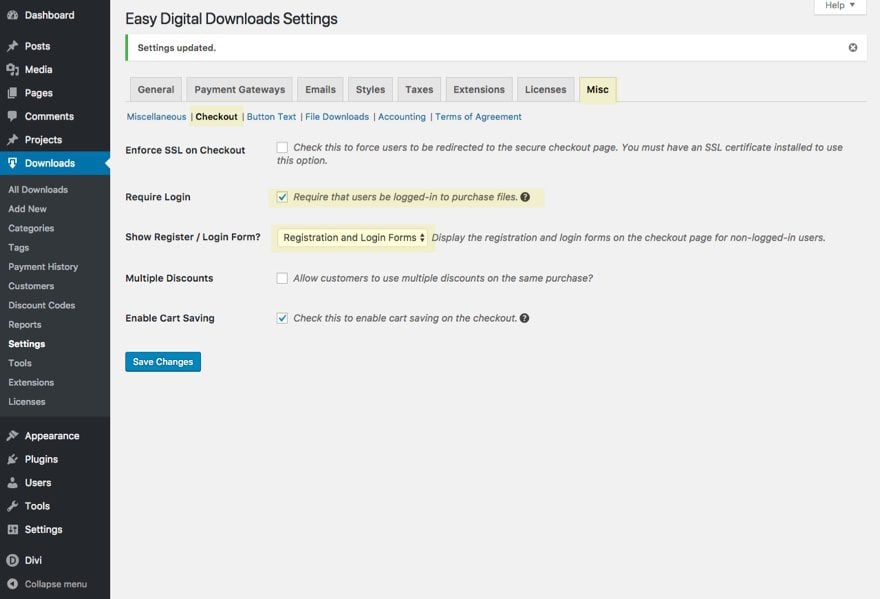
Under the Miscellaneous section I suggest checking the option to redirect to checkout. This will make sure that when the user clicks the purchase button they will go straight to checkout instead of adding the product to the cart first (the default).
Show Register / Login Form on Checkout Page
If you are offering membership access to your site (which is usually the case), it would be a good idea to require login for purchases and to show your register / login form on the checkout page. This is important for users to gain access to their membership account page later on to access their license key, renew licenses, etc.
I’m going to stop here for now, but you will definitely want to check the rest of the options available to you.
How to add Software Licensing to Your Downloads in WordPress
To add Software Licensing to your downloads, you must first create a new download (or edit an existing one).
General Download Setup
To create a new download follow these steps:
- From your WordPress dashboard, navigation to Downloads > Add New.
- Enter title
- Enter Download Price (since we are going to be offering more than one license, we will enable variable pricing. See Below)
- Enter Download File
- Enter Product Description content
- Upload Download Image
- Add any download categories or tags you may need
Software Licensing Pricing Variations
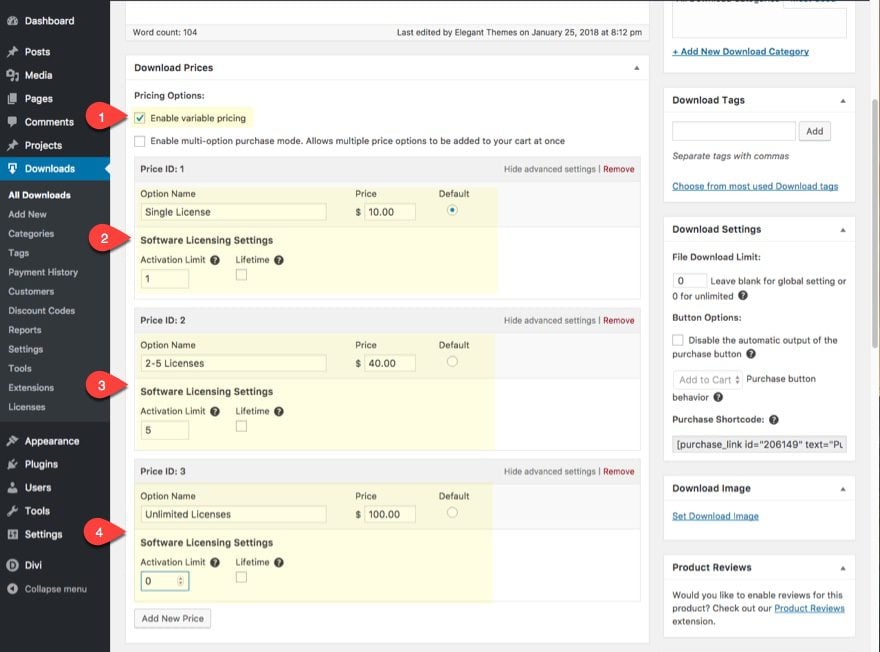
With the Software Licensing extension, you now have additional options available when setting up and new download. For this example, I’m going to add three different pricing options that each have a different number of licenses available. The first option will contain 1 license, the second will contain 2-5 licenses, and the third will contain unlimited licenses.
To do this follow these steps:
- In the Download Prices box under Pricing Options, enable variable pricing
- Enter the Option Name “Single License” for the first option and give it the price $10
- Click Show advanced settings for this option; set an activation limit of 1 (since this is a single license).
- Add New Price with the option name “2-5 Licenses” and a price of $40; in advanced settings give it an activation limit of 5
- Add a New Price with the option name “Unlimited Licenses” and a price of $100; in advanced settings set the activation limit to 0 for unlimited licenses.
Specify a Pricing Variation for your Download File(s)
If you selling only one plugin download and the only difference between your price variations is the number of licenses available, you may be better off keeping one download file and allow all price variations to have access to this file.
You can do this from within the Download Files box under Product Type Options. Give the Download file a name, upload the file you are selling, and assign the Price assignment “All”.
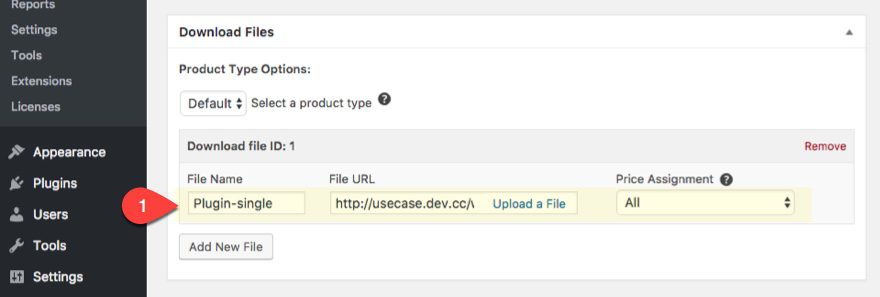
If you want to include a different file for each of your price variations, you can do that here as well by adding a new files and assigning the price assignment to each.
Enable License Creation
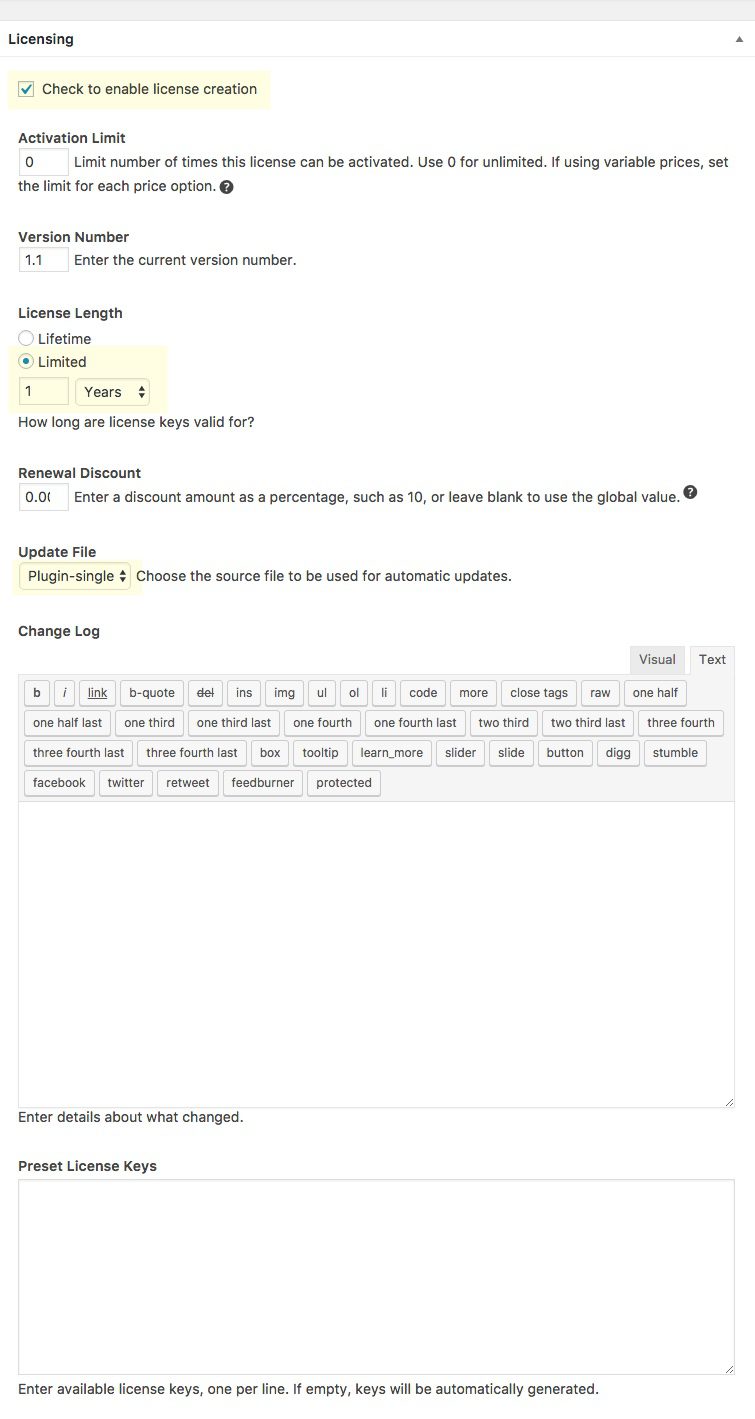
In the Licensing box you will need to check to enable license creation. This is important so don’t miss this step. More options will appear allowing you to setup your license for this download.
The activation limit is going to be overridden since we are using variable pricing for this product, but if you weren’t you would need to enter the number of times the license can be activated.
Since this is the first version, I’m going to set it to 1.0.
License keys typically seem to expire after a year, so go ahead and select your License Length to be limited to 1 year.
You will also need to choose the file you want to use for autmatic updates.
The change log box is where you would list all the details that have changed in the update file.
Also, if you don’t want license keys to be automatically generated, you can list available license keys (one per line) in the Preset License Keys input box. For my example, I’m going to let my keys be automatically generated.
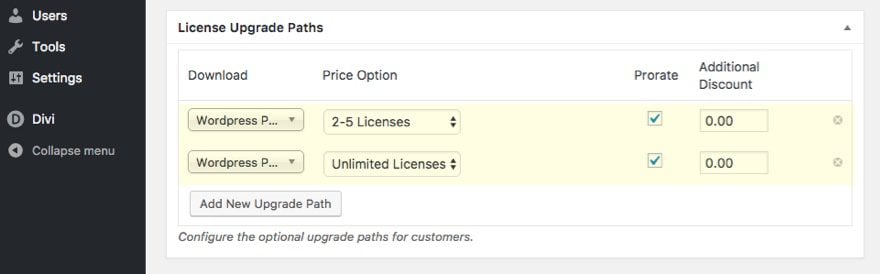
License Upgrade Paths
You can add License upgrade paths in the License Upgrade Paths box at the bottom of the page by doing the following:
Click Add New Upgrade Path.
Choose your download file from the drop down and add the 2-5 Licenses price option and select Prorate.
Add another upgrade path with the same download file and select the Unlimited Licenses price option with it also prorated.
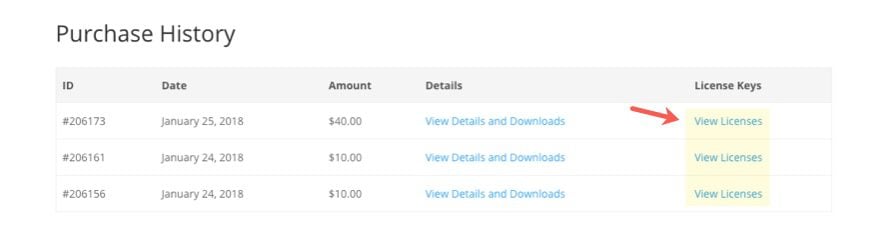
Now when a user purchases a product and visits their Purchase History. They will be able to upgrade their license by clicking view licenses and then view upgrades.
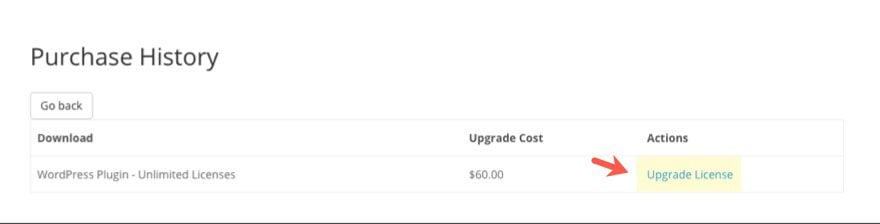
The upgrade paths you set will be shown to the user whenever they click to view upgrades. They will see the cost of the upgrade with a CTA to upgrade the license.

Now when the user click to view upgrades in their account, they will be able to select the upgrade they want to purchase at the prorated cost.
Creating a Custom Download Page
Since we can’t deploy our Divi Builder on our download page, we will want create a custom download page and include a Purchase button for our download using a shortcode.
Get the Purchase Shortcode for you Download Product
First, we need to get the shortcode. You can find the purchase shortcode for your download when editing your download. It is found in the Download Settings box.
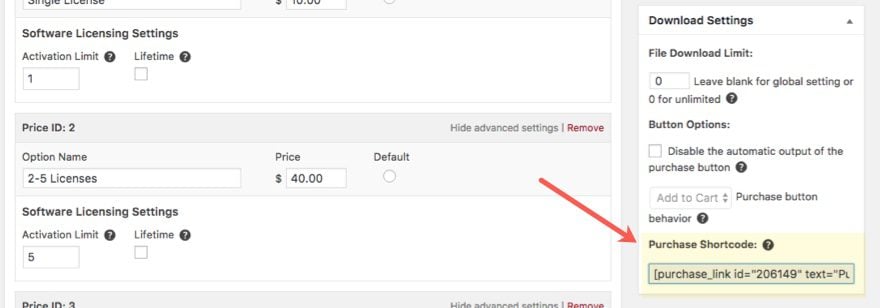
Each purchase shortcode has a different ID specific to the download so make sure you are using the right one.
Now we are ready to build our page.
Create a Product Download Page Using the Digital Pricing Home Layout
Since we have our Digital Pricing Layout Pack installed, go ahead and create a new page and use the Digital Pricing Home layout for your new product page.
First, create a new page and give it a title. Then deploy the Divi Builder and the Visual Builder. Open the settings menu, click Load From Library, select the Load from Library tab and select Digital Pricing Home from the list.
In the left column of the top section update the Title Text to include the Title of the page or name of the product along with the description of the product below. In the right column, delete the image module currently their and add a new text module to the column.
In the Text settings, enter the purchase shortcode for your download.
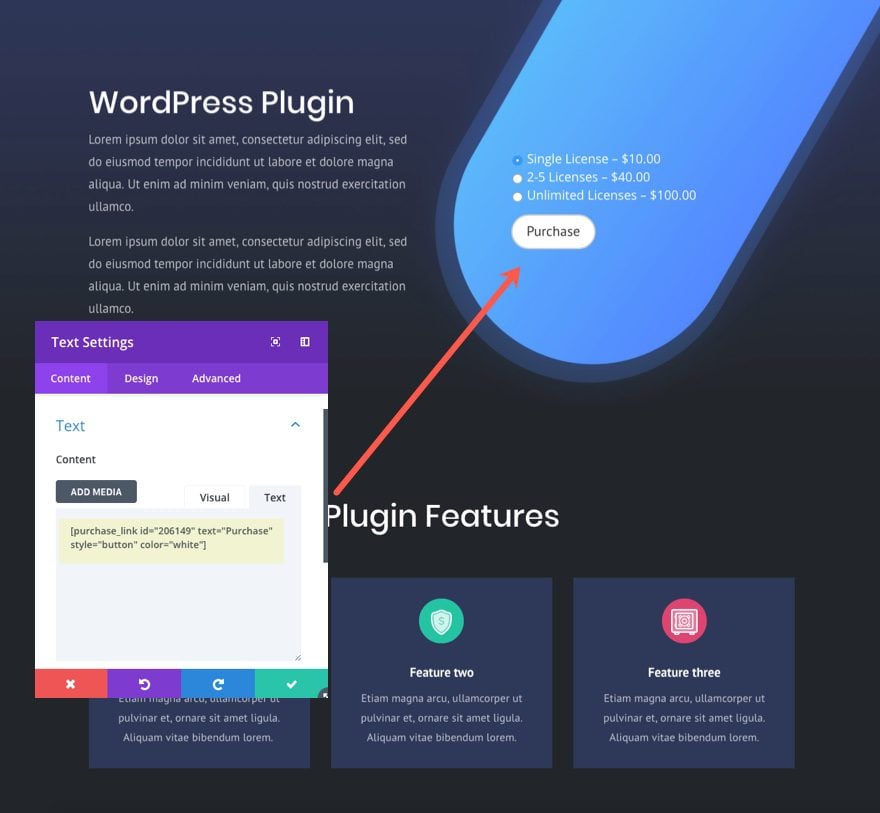
Then update the rest of the text module settings under the design tab as follows:
Text Color: Light
Text Text Size: 18px
Custom Padding: 20% Top, 10% Right, 5% Bottom, 15% Left
Now all you need to do is customize the rest of the page to include things like features and guarantees or whatever you want.
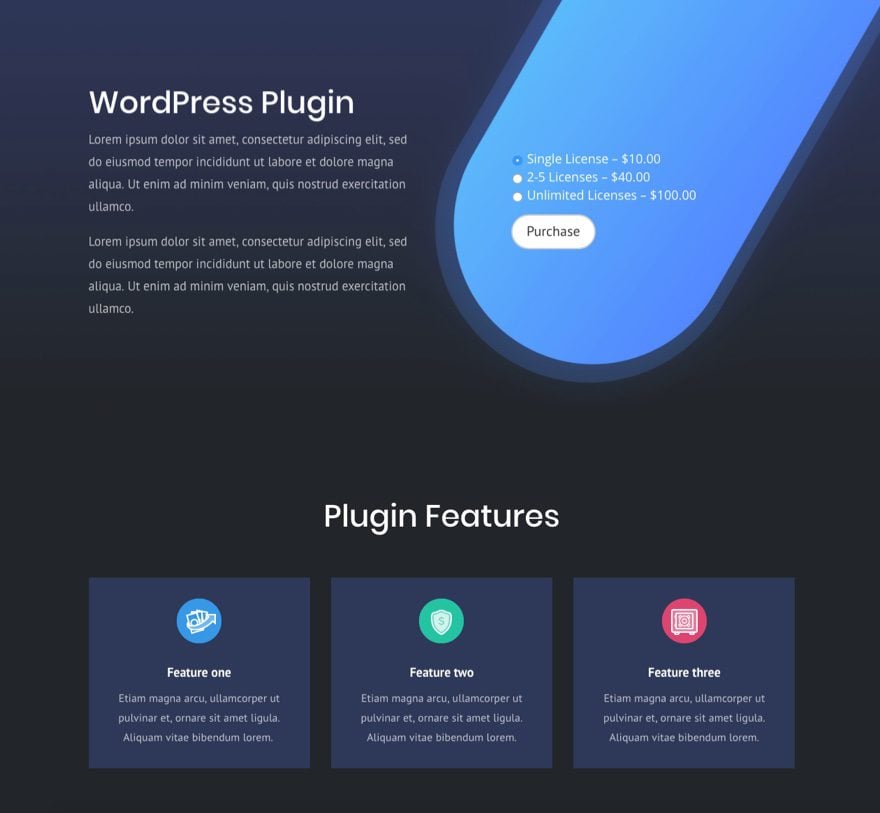
Check out the final result:
You can also do something similiar with the Digital Payments Signup layout:
Creating Custom Pages for Checkout, Purchase Confirmation, and Login Pages
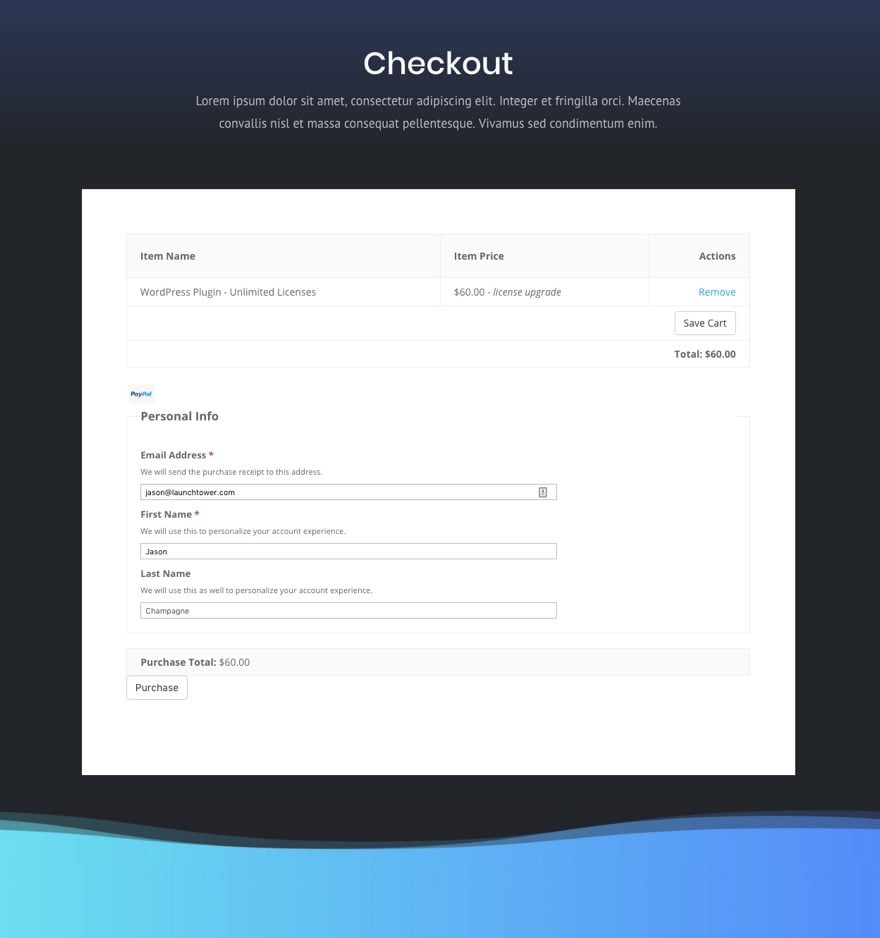
To create a custom checkout page, we are going to use the shortcode [download checkout] with the Digital Payments blog layout.
From your WordPress dashboard, go to Pages > All Pages and select to edit the Checkout page generated by EDD. The shortcode will already be entered in the text editor. Copy the shortcode to your clipboard. Then deploy the Visual Builder and load the Digital Pricing Blog Layout to your page.
Update the Title section to say “Checkout” instead of blog.
Delete the blog module in the second section row and add a new text module with the new shortcode entered in the content box.
Then update the row settings for the row containing the text module to include a white background color and a custom padding of 5% on all sides.
The result should look something like this:
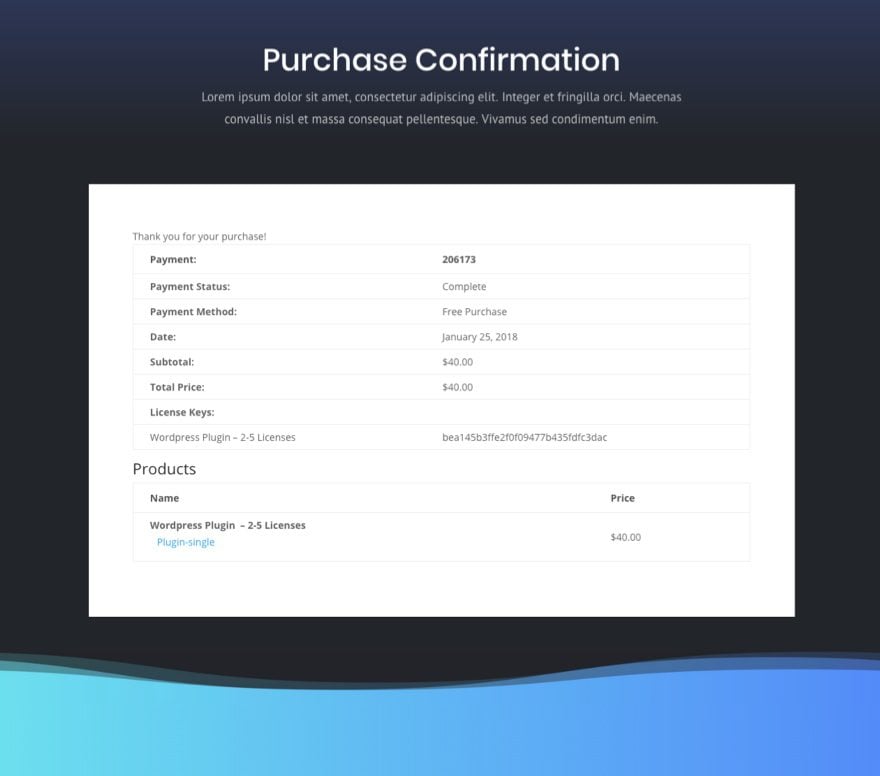
To create the Purchase Confirmation and Login Page, you can repeat the same process of adding the blog layout to the page and adding the text module with the shortcode needed in place of the blog module.
Here is what this would look like:
Final Thoughts
Adding Software Licensing for your digital downloads is definitely made a lot easier with Easy Digital Downloads and their Software Licensing extension. Plus, Divi allows you to design the pages needed to sell your licenses using the Digital Payments Layout Pack.
If you would like more info on how to implement software licensing for your own WordPress plugin, theme, or software, please check out EDD’s documentation on Software Licensing. Here you will find out how to check the validation of licenses in plugin and themes, how to use their API to use software licensing for any type of software, and much more.


Divi was my first builder and I have a lifetime membership but I’ve started using Elementor to create more quickly customizable pages. That being said, since Divi 3.0 launched and the knowledge base, tutorial, videos, free layouts, etc. marketing initiate started I have been floored at the level of value Divi has given to their customers in recent months. Just wow. And bravo to whoever spearheaded the campaign.
That was a precise and helpful guide. Thanks!
Good knowledge to have for sure.