
Every week, we provide you with a new and free Divi layout pack which you can use for your next project. Along with every layout pack, we also share a use case that’ll help you take your website to the next level.
This week, as part of our ongoing Divi design initiative, we’re going to show you how to add product wishlists to your online store using Divi’s new Cosmetics Shop Layout Pack. Adding wishlists to your online store helps your visitors keep track of their favorite products on your website and help you increase conversions on these products. In addition to the Cosmetics Shop Layout Pack, we’ll also need the free WooCommerce and WooCommerce Wishlists plugins.
- 1 Sneak Peek
- 2 Part 1: Download & Activate WooCommerce & WooCommerce Wishlists Plugin
- 3 Part 2: WooCommerce Wishlists Plugin Settings
- 4 Part 3: Include Wishlist Page in Primary Menu
- 5 Part 4: Add Products to WooCommerce
- 6 Part 5: Modify Theme Accent Color & Typography in Theme Customizer
- 7 Part 5: Modify Wishlist Page with Visual Builder
- 8 Part 6: Modify Buttons & Product Page with CSS
- 9 Final Thoughts
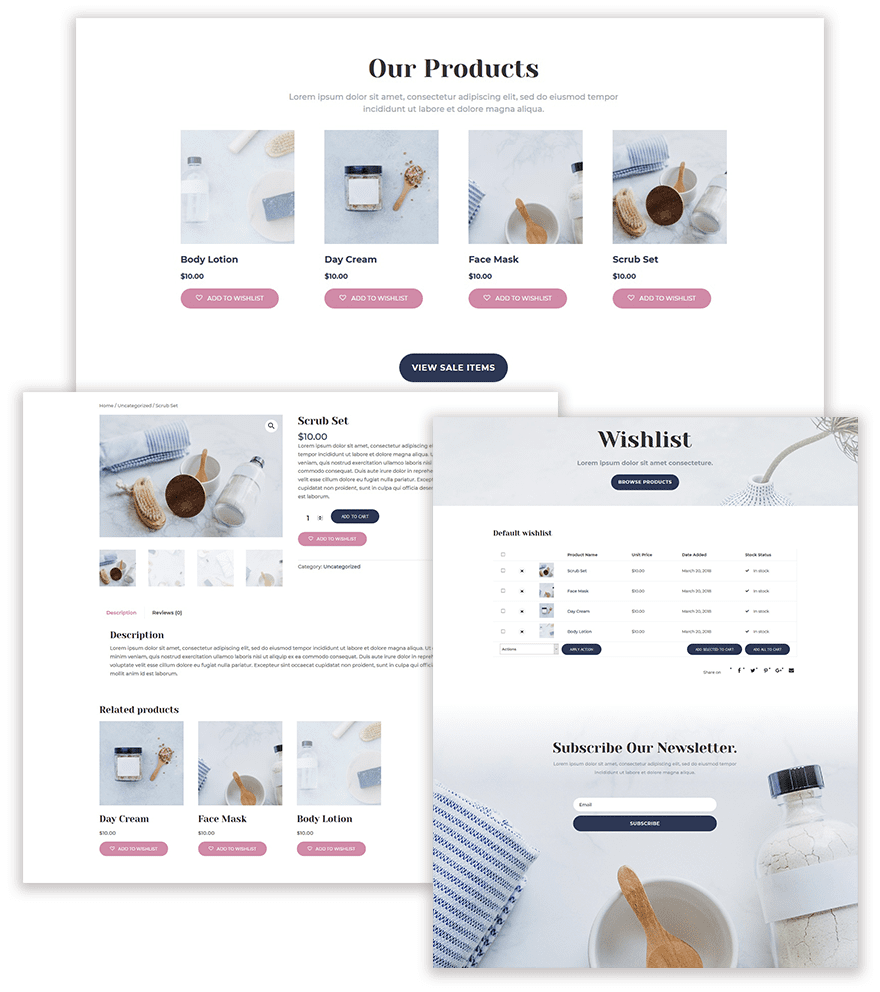
Sneak Peek
Before we dive into the different parts and steps, let’s take a quick look at three things you can expect from this tutorial:
- ‘Add to Wishlist’ buttons for each product on your shop page
- A wishlist page that is unique to each visitor, they can add products from their wishlist to their cart directly
- Product pages that match the entire layout pack and include an ‘Add to Wishlist’ button as well
Part 1: Download & Activate WooCommerce & WooCommerce Wishlists Plugin
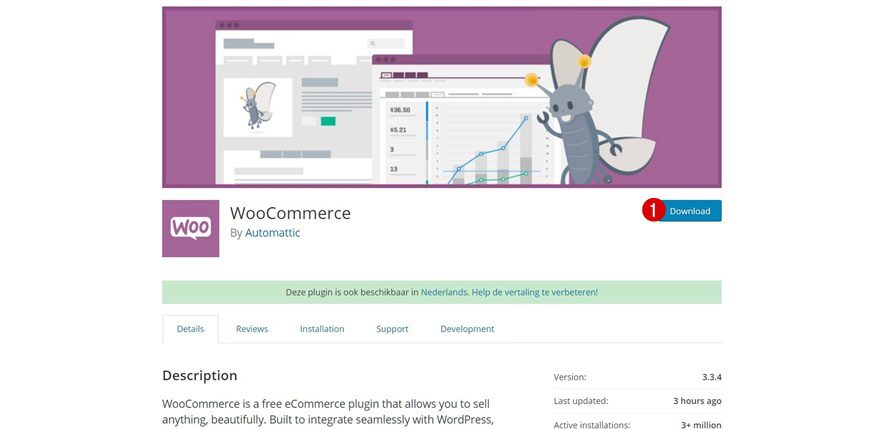
Step 1: Download & Activate WooCommerce
Start by downloading WooCommerce by going to the following page and clicking on the download button. Then, go to your WordPress Dashboard > Plugins > Add New > Upload WooCommerce and activate it.
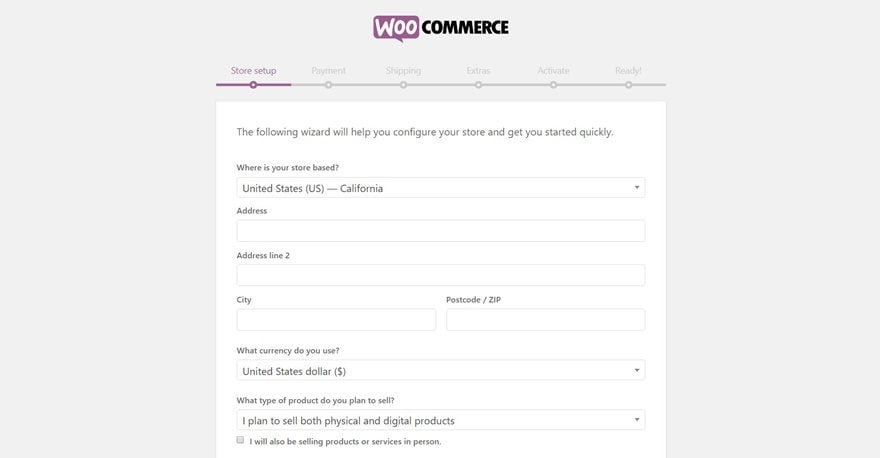
Step 2: Set up WooCommerce
When installing WooCommerce on your website for the first time, you’ll have to go through the setup (or you can skip it for now).
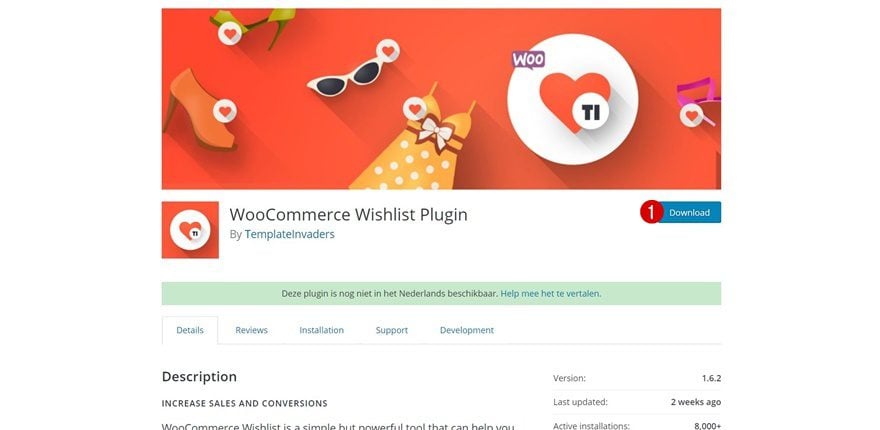
Step 3: Download & Activate WooCommerce Wishlists
We’ll also need the WooCommerce Wishlists plugin on our WordPress website. Again, go to your WordPress Dashboard > Plugins > Add New > Upload the WooCommerce Wishlists plugin and activate it.
Step 4: Set up WooCommerce Wishlists
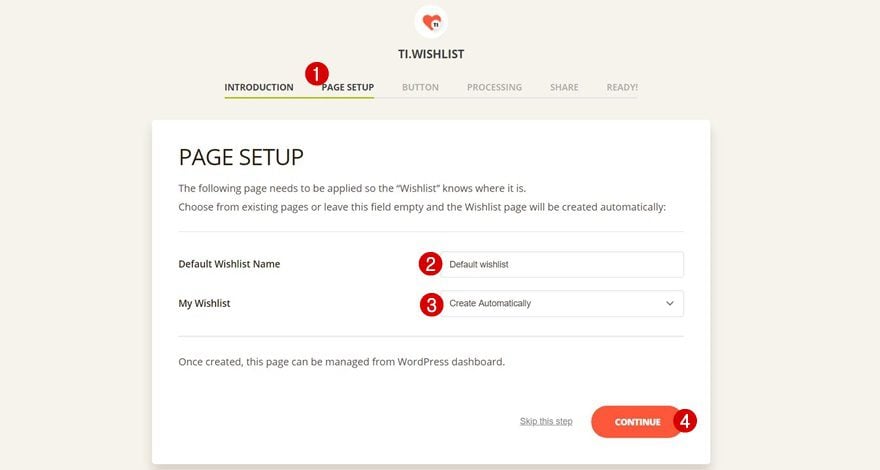
The WooCommerce Wishlists plugin has a setup as well. After skipping the introduction, apply the following settings to your Page Setup:
- Default Wishlist Name: Copy of Choice
- My Wishlist: Create Automatically
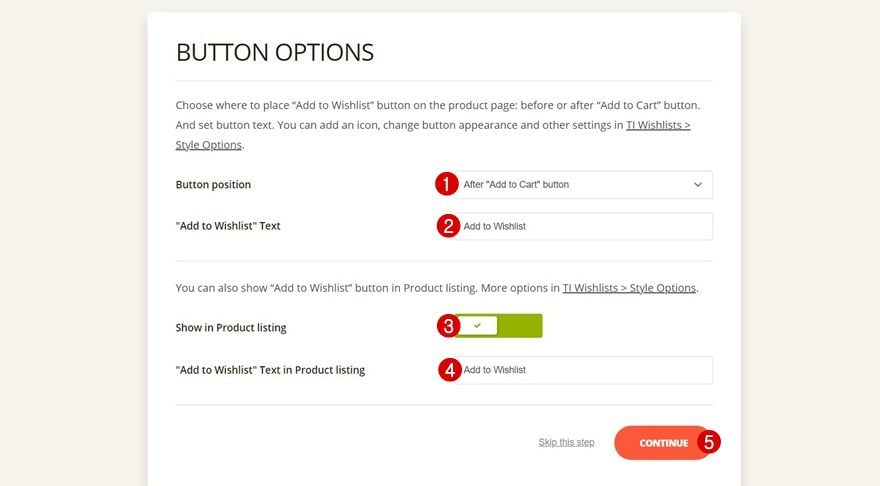
Continue to the next step, the button settings, and modify the button position and copy to your needs.
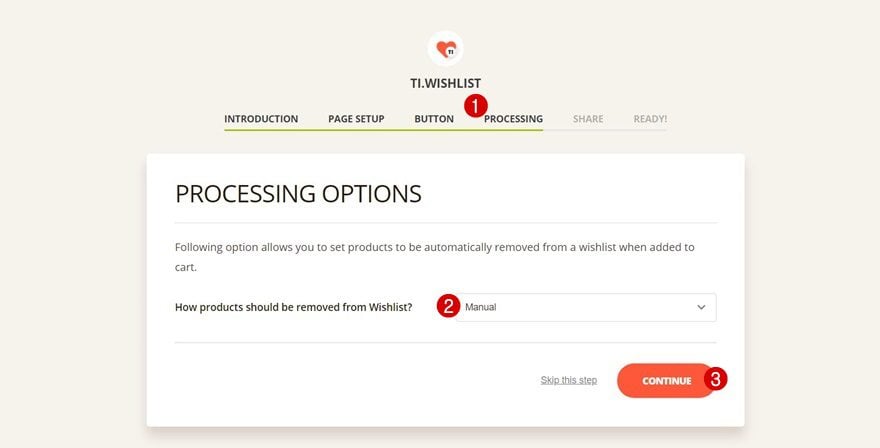
In the processing step, you can choose whether you want products to be removed automatically or manually. If you’re going to allow visitors to remove the items whenever they feel like it, pick ‘Manual’.
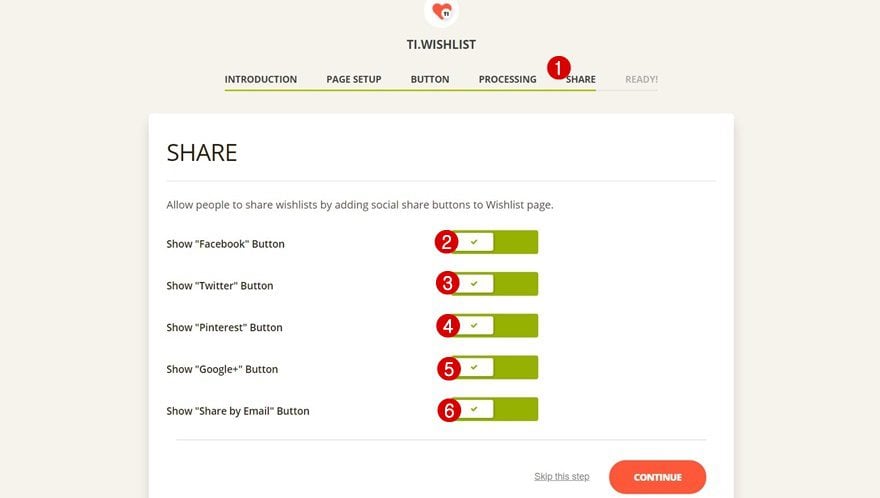
Lastly, your visitors will also be able to share their wishlist on their social networks. You can enable or disable whichever social network you want it to count for.
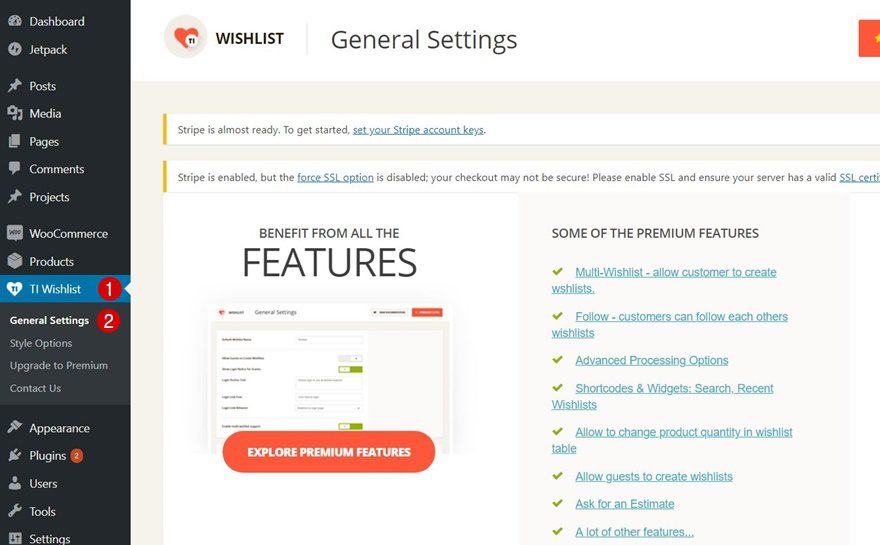
Part 2: WooCommerce Wishlists Plugin Settings
Step 1: Go to Plugin Settings
We’re going to need to make some additional setting changes to the WooCommerce Wishlists plugin by going to your WordPress Dashboard > TI Wishlist > General Settings.
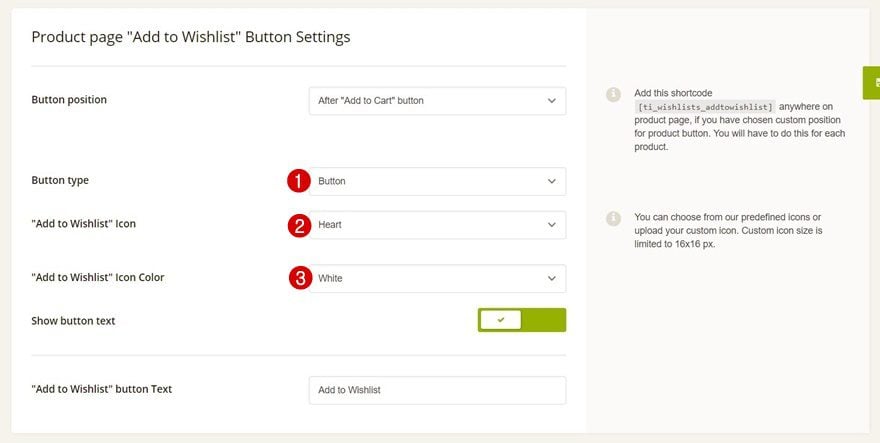
Scroll down until you come across ‘Product Page Button Settings’ and apply the following changes to it:
- Button Type: Button
- ‘Add to Wishlist’ Icon: Heart
- ‘Add to Wishlist’ Icon Color: White
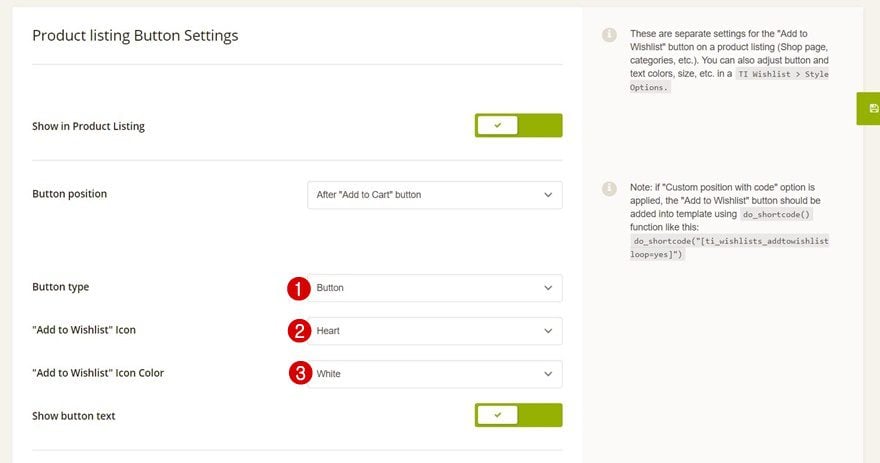
Move on to the ‘Product Listing Button Settings’ part and apply the same settings to the button as done before.
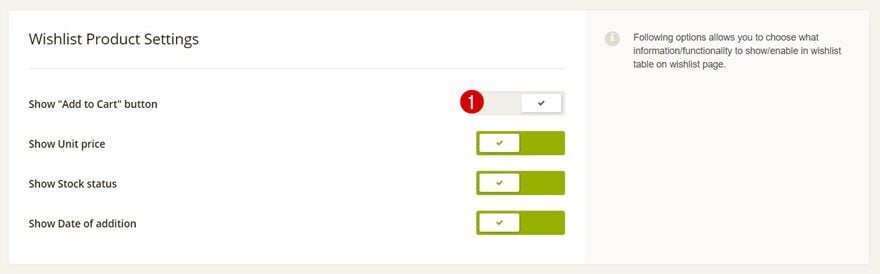
Step 4: Wishlist Product Changes
Within the Wishlist Product Settings, disable the ‘Show Add to Cart Button’ option. This button would normally appear right next to each one of the products within the wishlist. Since there’s already an alternative there to add the products to the cart (by selecting them), we’re going to disable this option.
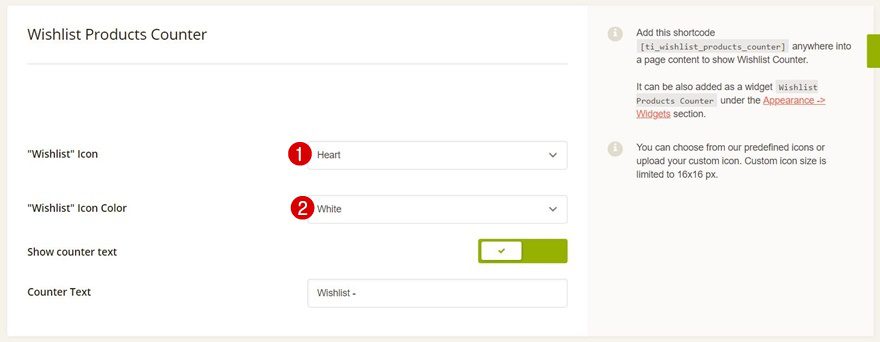
Step 5: Wishlist Products Counter Changes
Lastly, apply the following settings to the Wishlist Products Counter settings as well:
- Wishlist Icon: Heart
- Wishlist Icon Color: White
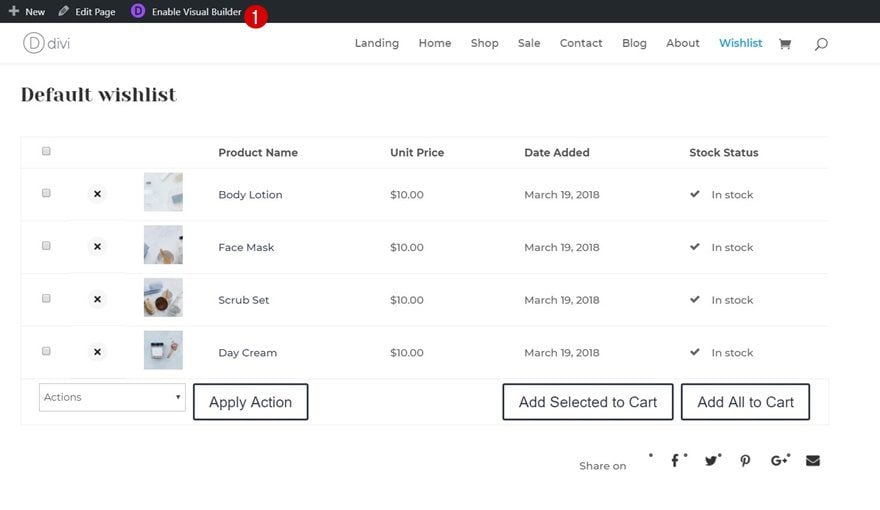
The wishlist plugin has automatically generated a wishlist page on your WordPress website. This page isn’t included in the Primary Menu yet. To add this page, navigate to Appearance > Menus.
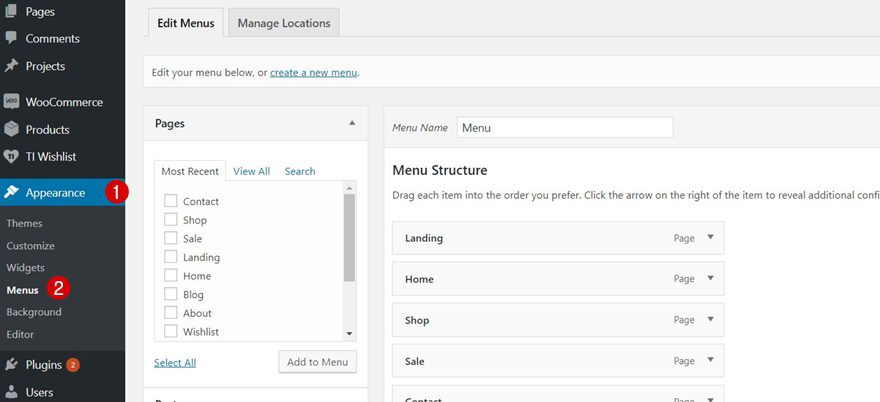
Then, select the Wishlist page within your pages and add it to your menu. Save your menu once you’ve completed this step.

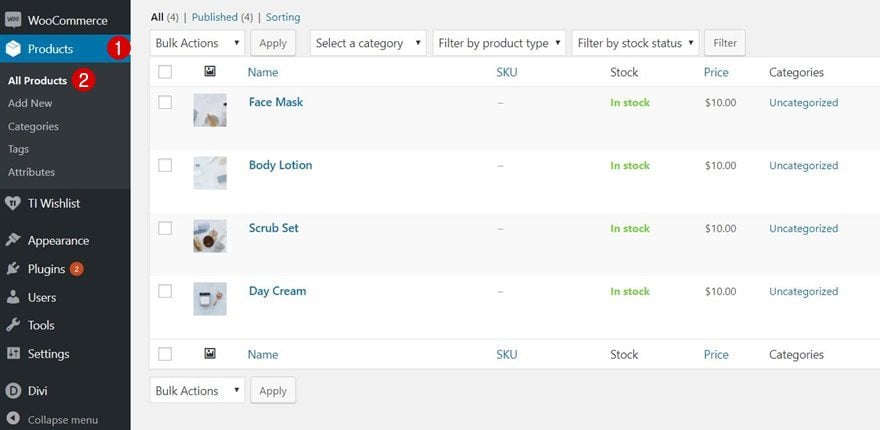
Part 4: Add Products to WooCommerce
Step 1: Add New Product
Now that we have made all the needed changes to the WooCommerce Wishlists plugin, we’re ready to add the various products to our website.
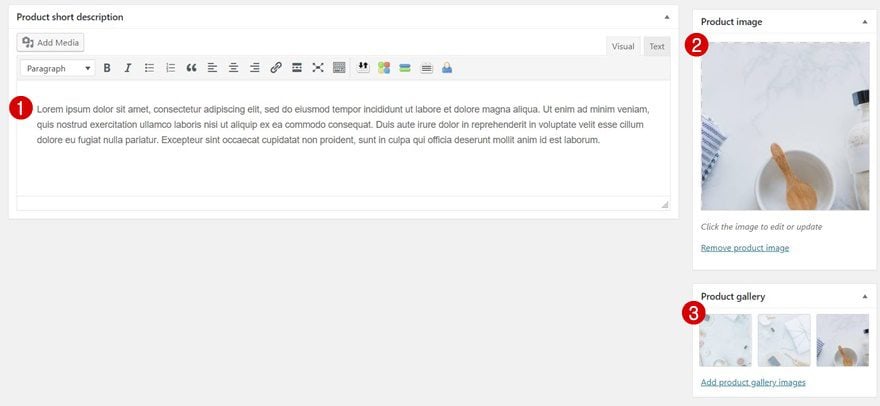
Step 2: Add Product Name, Description, Image, Gallery & Price
Each product needs a:
- Name
- Description
- Short description
- Image
- Gallery
- Price
Create as many products as you want and repeat the same step for each one of them.

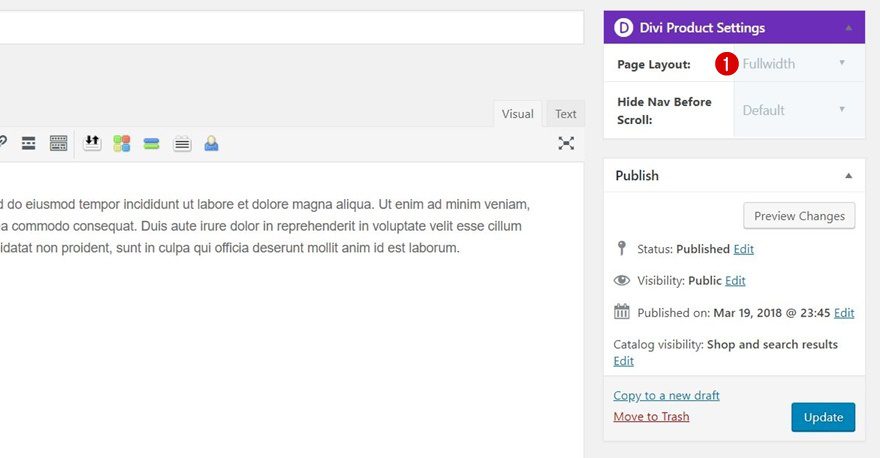
Step 3: Divi Post Settings
Each product needs a Fullwidth Page Layout in the Divi Product Settings as well.
Part 5: Modify Theme Accent Color & Typography in Theme Customizer
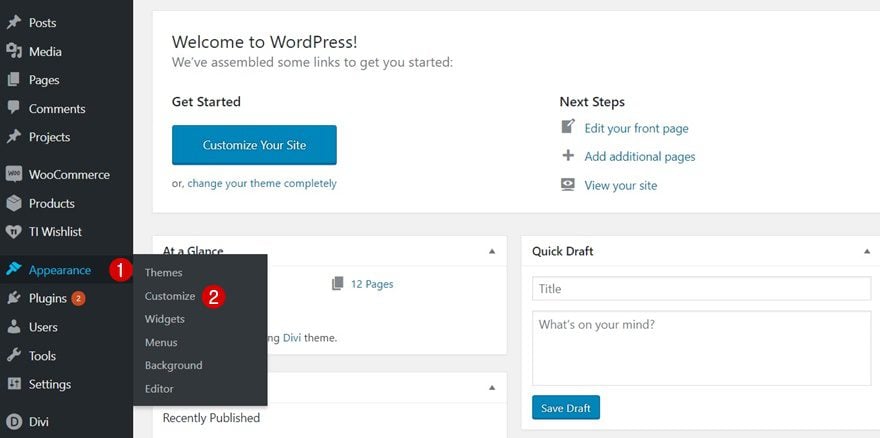
Step 1: Open Theme Customizer
If you haven’t change the Theme Accent Color and Typograhpy yet, go ahead and do that within the Theme Customizer by navigating to Appearance > Customize.
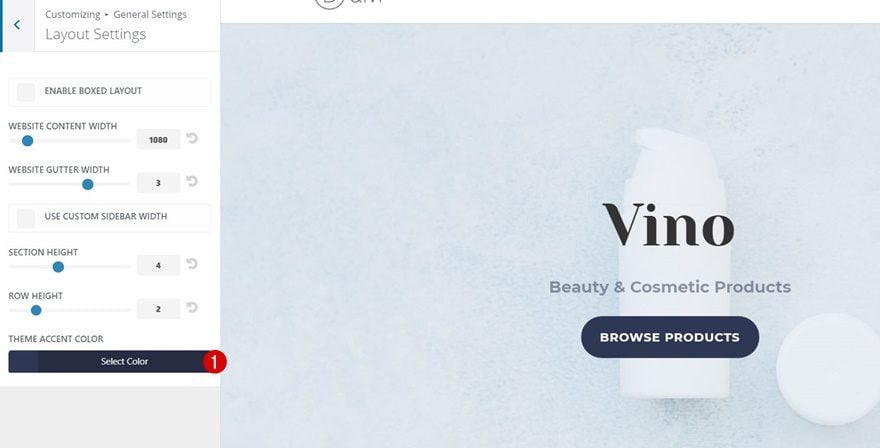
Step 2: Change Theme Accent Color
Choose ‘#2f3854’ as your Theme Accent Color by going to General Settings > Layout Settings.
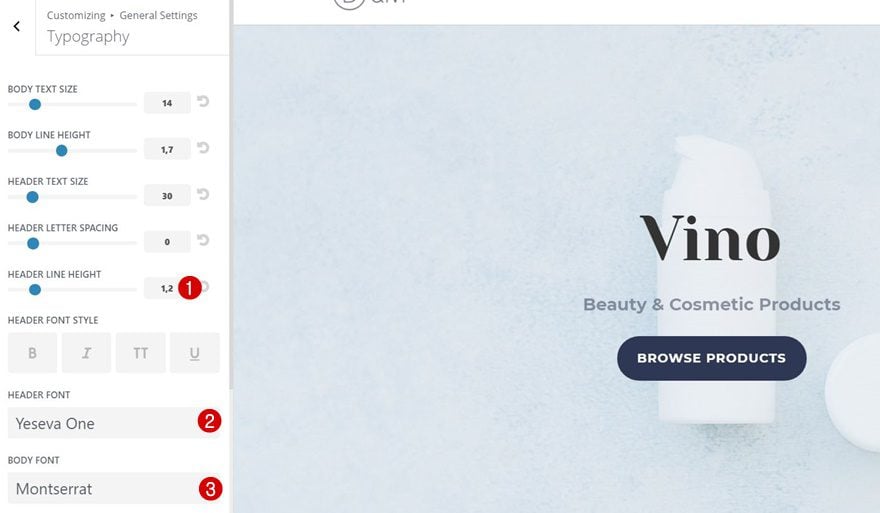
Step 3: Change Typography
Go back to the General Settings > Typography > And apply the following settings that match the Cosmetics Shop Layout Pack:
- Header Line Height: 1,2
- Header Font: Yeseva One
- Body Font: Montserrat
Part 5: Modify Wishlist Page with Visual Builder
Step 1: Open Contact Page with Visual Builder
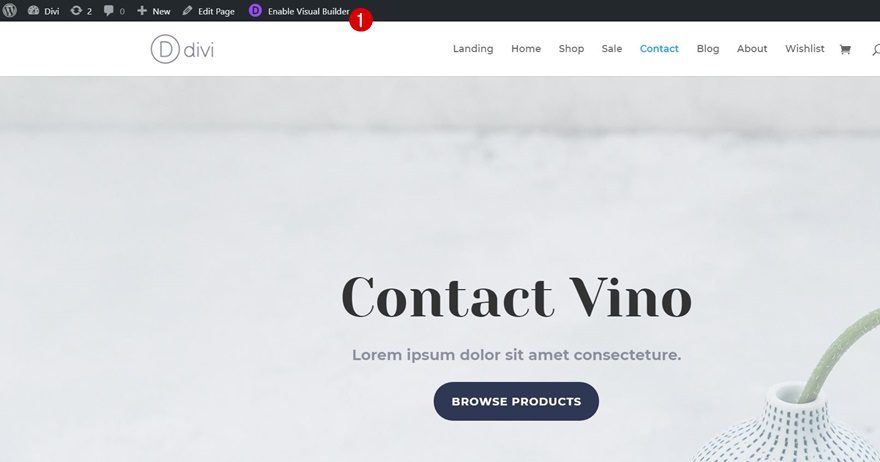
The wishlist page looks by default a bit plain. Luckily, we can modify this page using the Visual Builder. Before we open the Wishlist page with the Visual Builder, we’re going to save some sections of the Contact page to our Divi Library so we can reuse them on the Wishlist page next. Start by opening the Contact page with the Visual Builder.
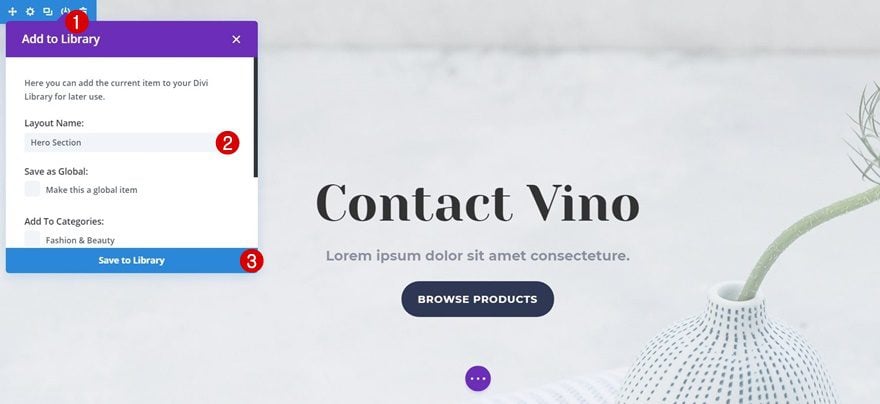
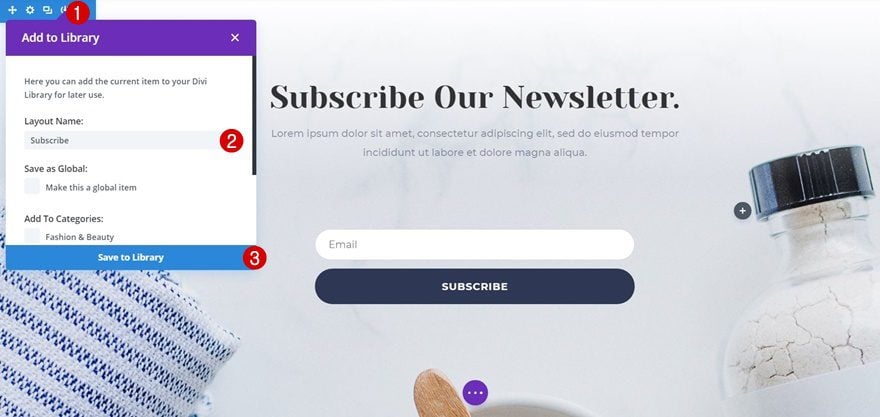
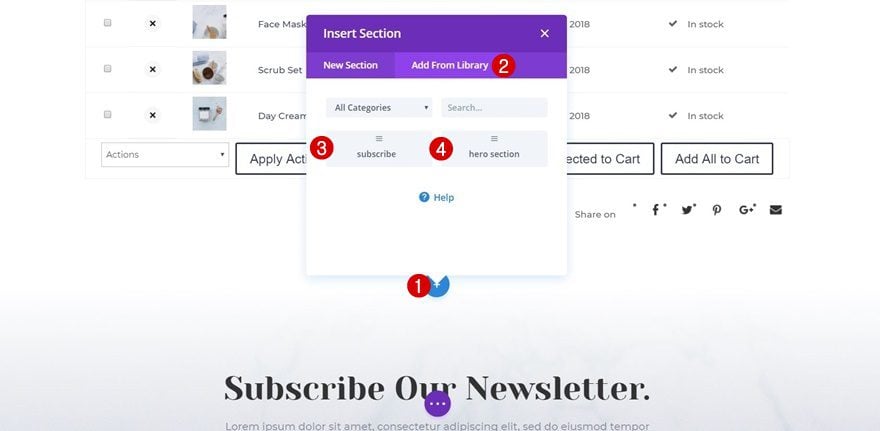
Step 2: Save Hero Section & Subscribe Section to Divi Library
Then, save both the hero section and the subscribe section to your Divi Library by clicking on the icon marked in the print screen below, giving your layout a name and clicking on the ‘Save to Library’ button.
Step 3: Open Wishlists Page with Visual Builder
Now that we have these two sections within our Divi Library, we can go ahead and open the Wishlist page with the Visual Builder.
Step 4: Add Saved Sections to Wishlists Page
Add both saved sections within your Divi library to this page and put them in the right place on your page.
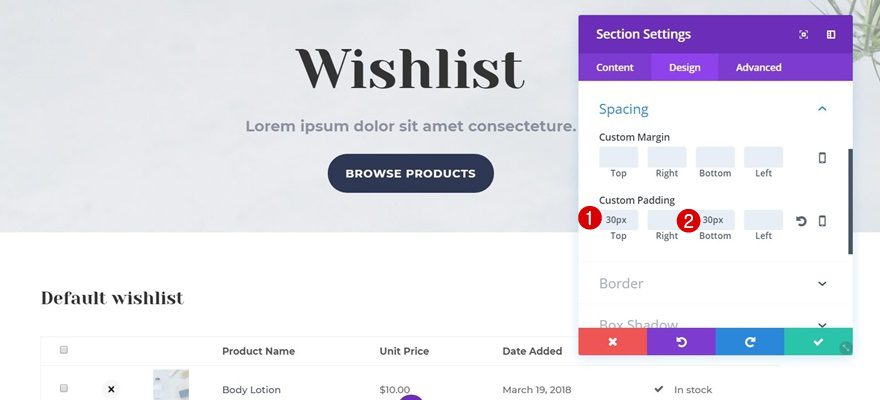
Step 5: Modify Hero Section Padding
To make the wishlist show up immediately on the page, we’re going to reduce the padding of our hero section to ’30px’ for both the top and bottom.
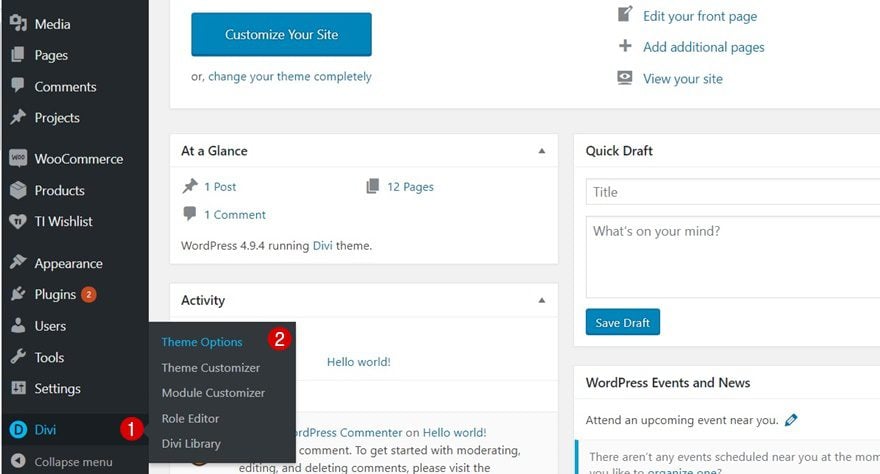
Step 1: Go to Divi Theme Options
WooCommerce and WooCommerce Wishlists are both third-party plugins. We can unfortunately not make any changes to the buttons and product pages with the Visual Builder. We’re going to use some custom CSS code lines instead to make sure the buttons and the product page match the Cosmetics Shop Layout Pack. To add these CSS code lines, go to your WordPress Dashboard > Divi > Theme Options.
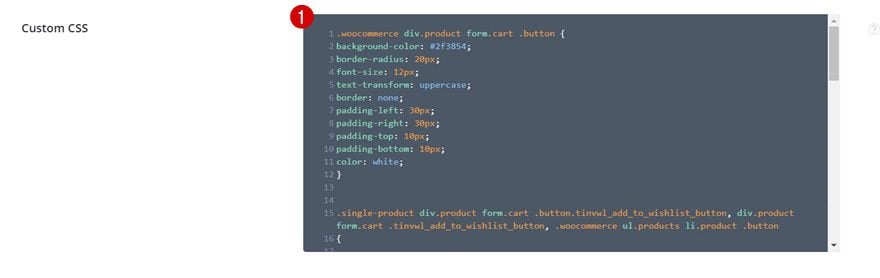
Step 2: Add CSS Code to Custom CSS Box
Scroll down the General tab until you come across the Custom CSS box and add the following CSS code to it:
.woocommerce div.product form.cart .button {
background-color: #2f3854;
border-radius: 20px;
font-size: 12px;
text-transform: uppercase;
border: none;
padding-left: 30px;
padding-right: 30px;
padding-top: 10px;
padding-bottom: 10px;
color: white;
}


.single-product div.product form.cart .button.tinvwl_add_to_wishlist_button, div.product form.cart .tinvwl_add_to_wishlist_button, .woocommerce ul.products li.product .button
{

background-color: #d18aa8;
border-radius: 20px;
font-size: 12px;
text-transform: uppercase;
border: none;
padding-left: 30px;
padding-right: 30px;
padding-top: 10px;
padding-bottom: 10px;
color: white;
}

.woocommerce.tinv-wishlist button.button.alt, .woocommerce button.button
{
background-color: #2f3854;
border-radius: 20px;
font-size: 12px;
text-transform: uppercase;
border: none;
padding-left: 30px;
padding-right: 30px;
padding-top: 10px;
padding-bottom: 10px;
color: white;

}
body.woocommerce .woocommerce-tabs {
border: none;
}
body.woocommerce #content-area div.product .woocommerce-tabs ul.tabs, body.woocommerce div.product .woocommerce-tabs ul.tabs {
background: white;
border: none;
}

body.woocommerce #content-area div.product .woocommerce-tabs ul.tabs li {
background: white;
border: none;
}

.woocommerce div.product .woocommerce-tabs ul.tabs::before {
border: none;
}

body.woocommerce #content-area div.product .woocommerce-tabs ul.tabs li.active a, body.woocommerce div.product .woocommerce-tabs ul.tabs li.active a {
color: #d18aa8 !important;
}

.woocommerce .quantity input.qty {
background-color: white !important;
color: black !important;
}
That’s it!
Final Thoughts
In this post, we’ve shown you how to add product wishlists to your website that are unique to each visitor’s favorite products. This use case is part of our ongoing Divi initiative where our design team shares a new layout pack with you each and every week. If you have any questions; make sure you leave a comment in the comment section below!


Thank you for the post. Question: How can we remove the dots from the social icons for sharing. Cosmetically the dots are not appealing.
Where is Montserrat font? it wasn’t in the pack.
It’s available inside of Divi’s font options.
why it’s not available in Theme Customizer. but i see it in text module(for ex).
Hi can you guys do a Realtor layout pack? Absolutely love Divi and elegant themes!
The issue with doing a realtor pack is that we would have to design it to work with a third party plugin. Not saying we won’t do that, but it’s probably not super high on our priority list because it would essentially require a child theme and third party plugin to go along with the layout pack.